【黑马程序员】!!!b站up,我觉得教的非常不错,很好的入门视频!种类也全!因为是从b站过来的,就标原创了,不过是跟着黑马程序员的老师做的,代码不难,老师讲的也很详细。
先上效果图:
背景图片,没有目标出现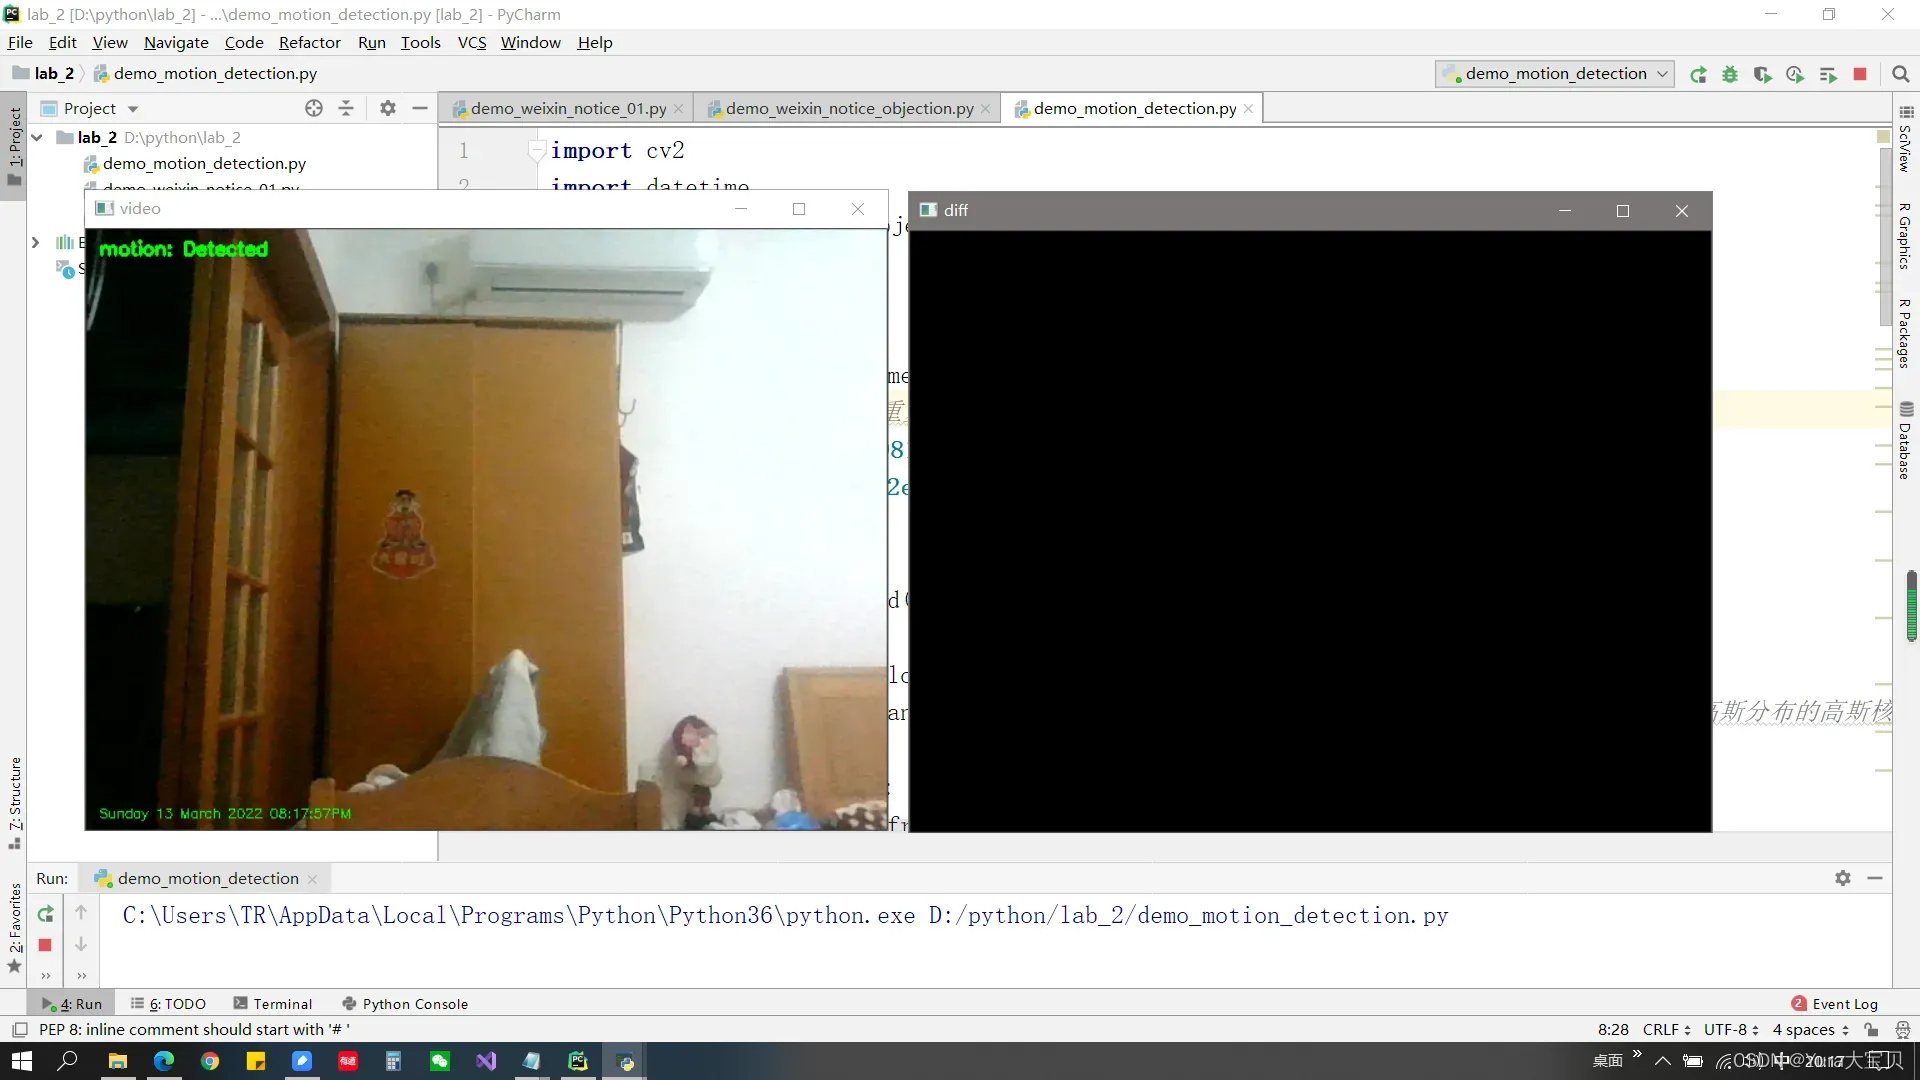
目标出现了! !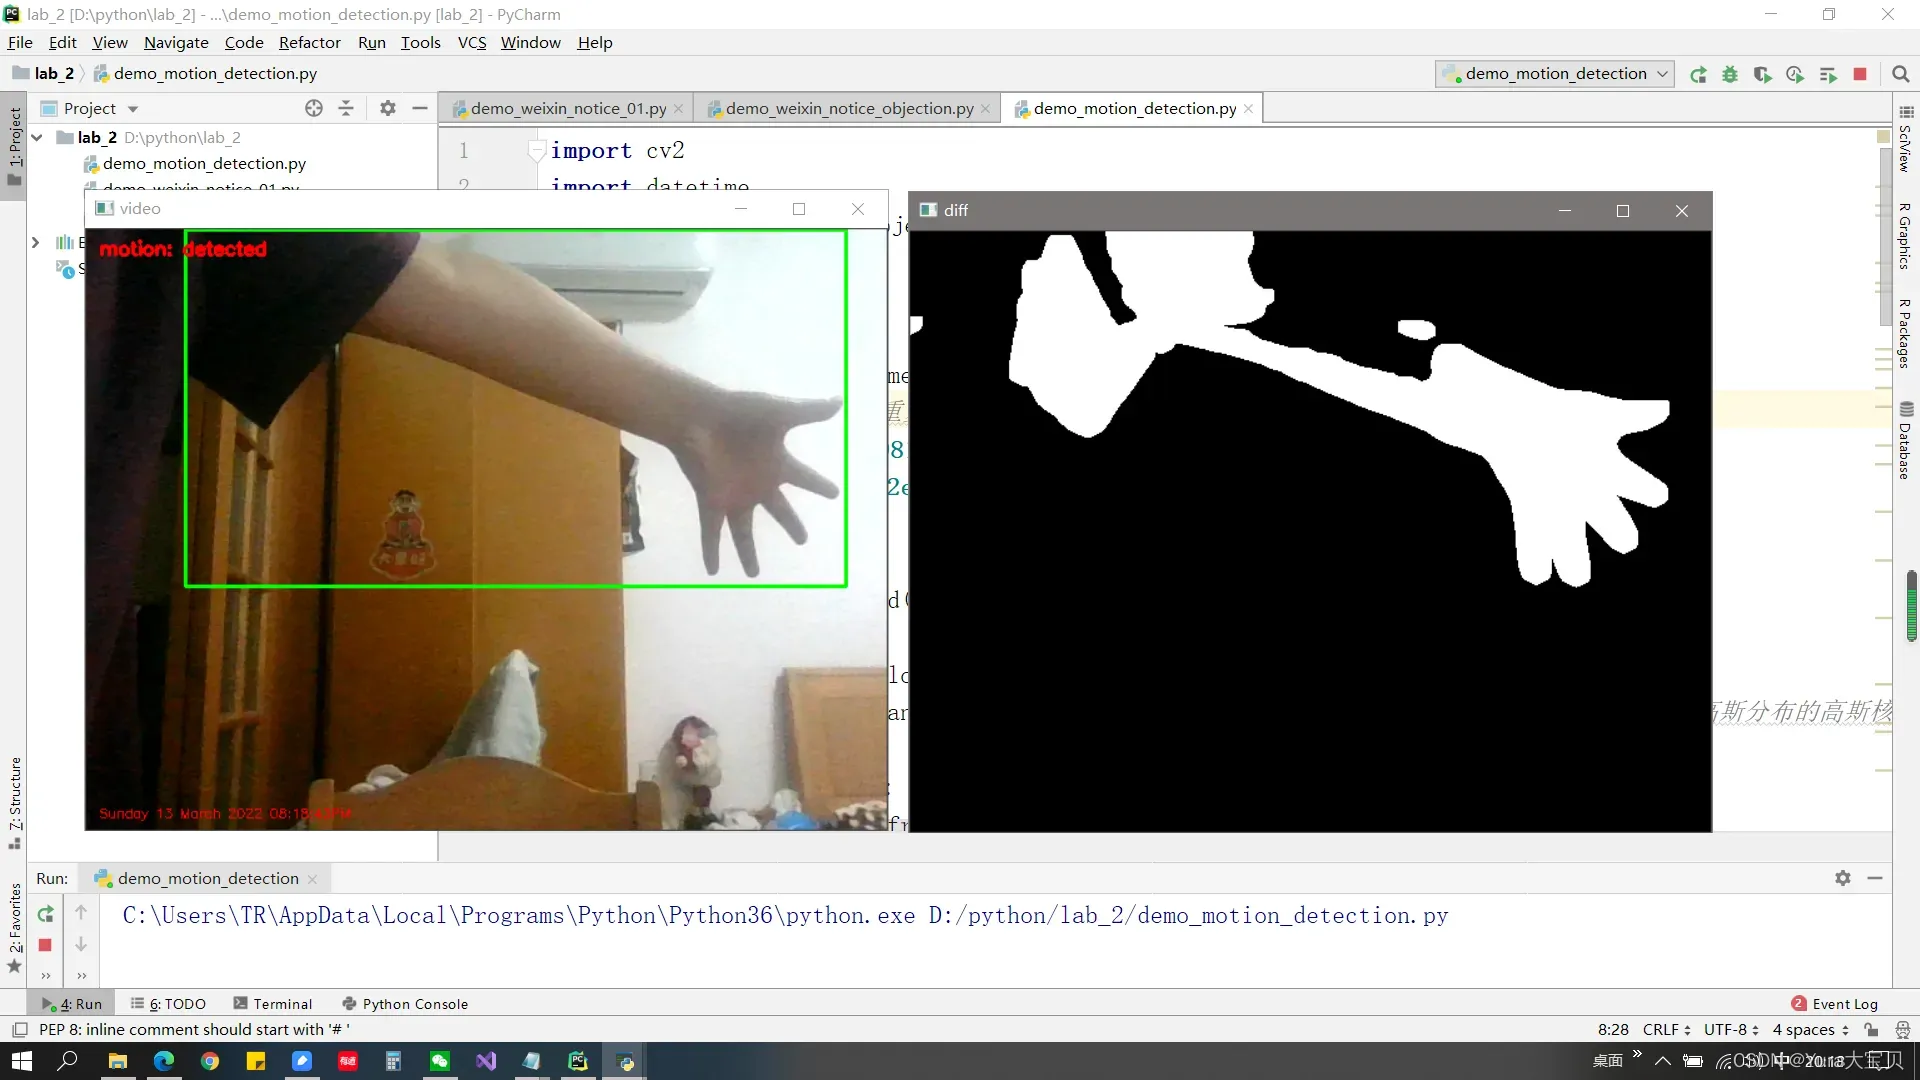
收到!收到!over!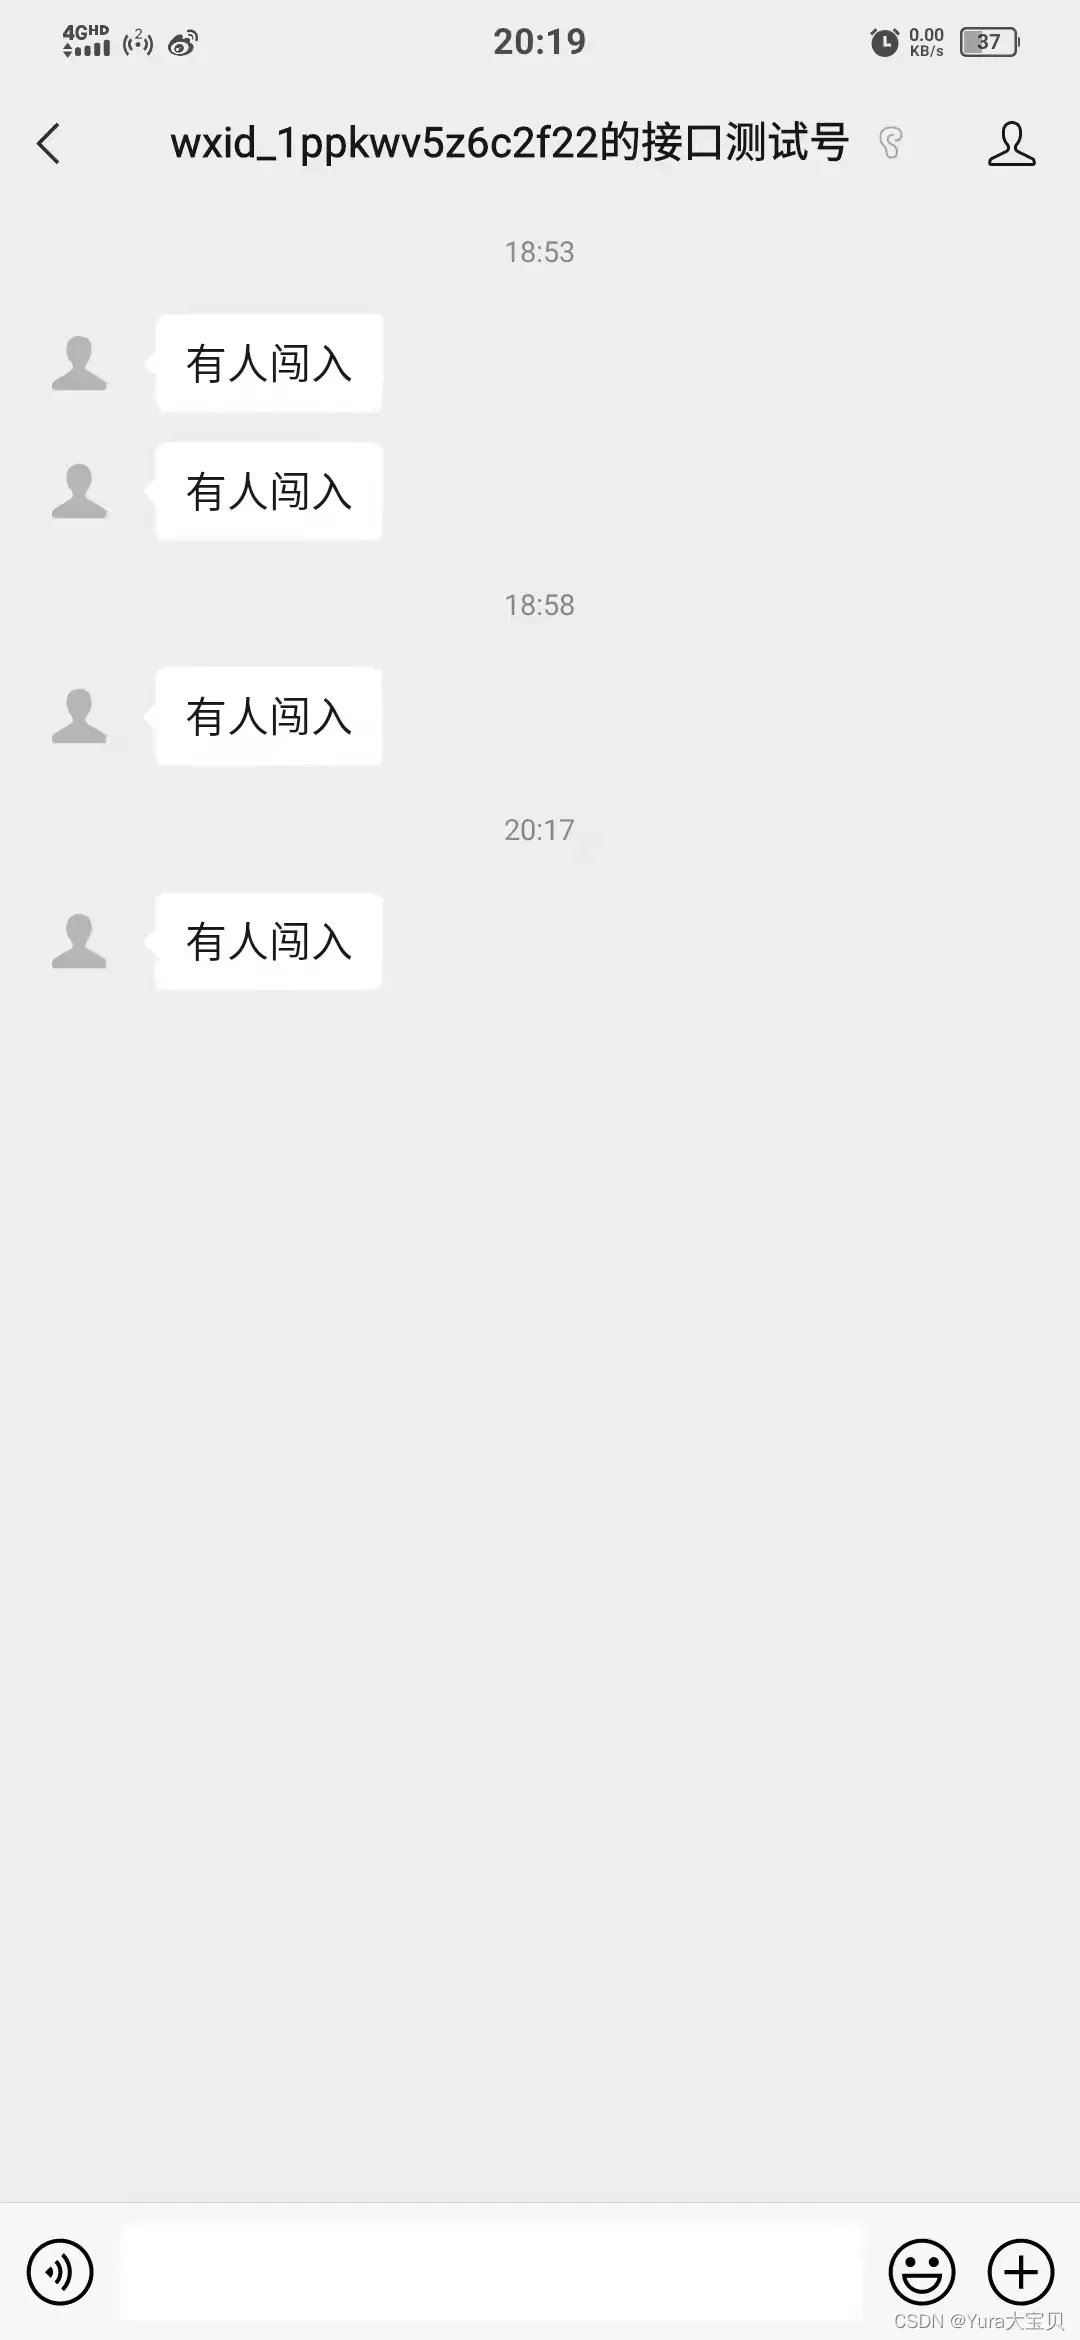
准备好工作了
1. 先获取微信公众号测试账号
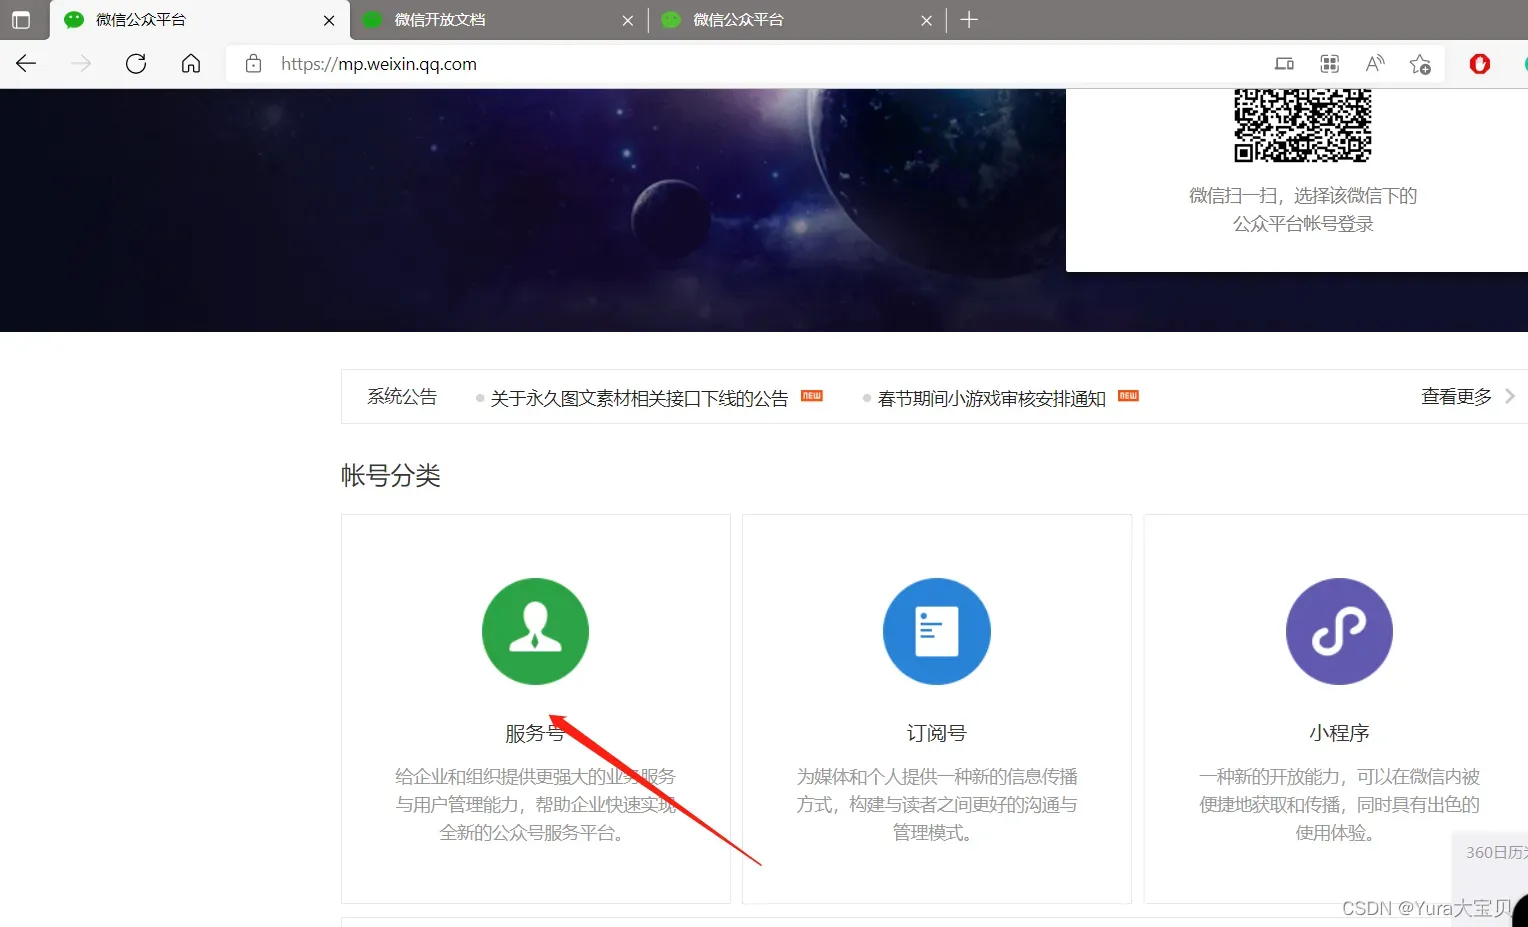
1.1 进入 https://mp.weixin.qq.com/
鼠标在这里
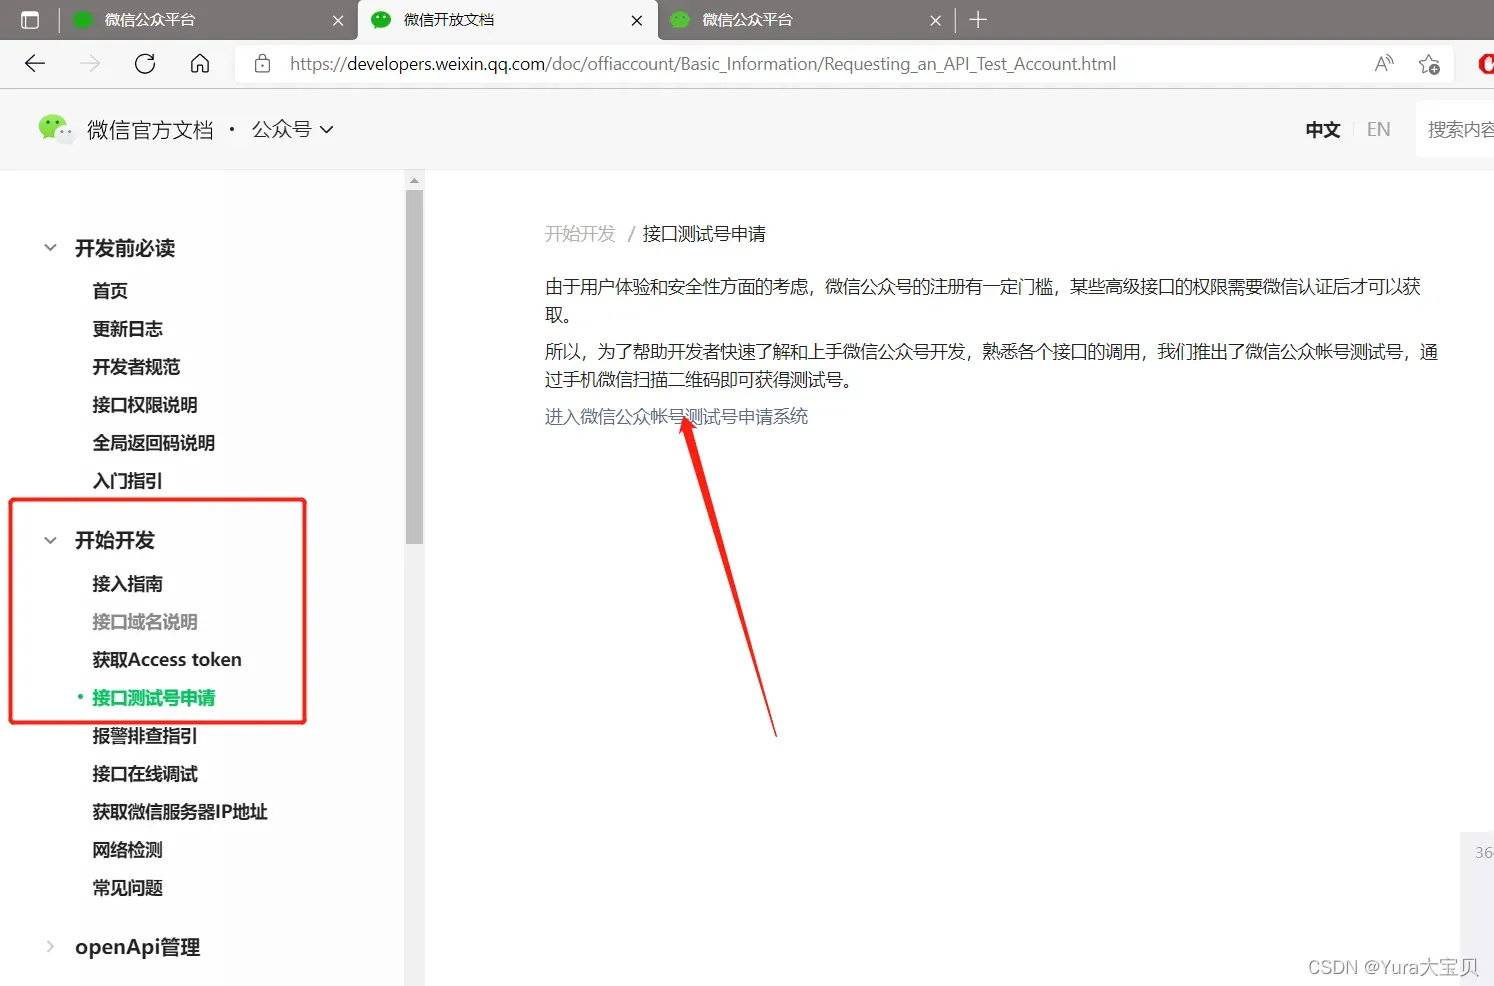
1.2 点击开发文档
1.3 接口测试账号申请
1.4
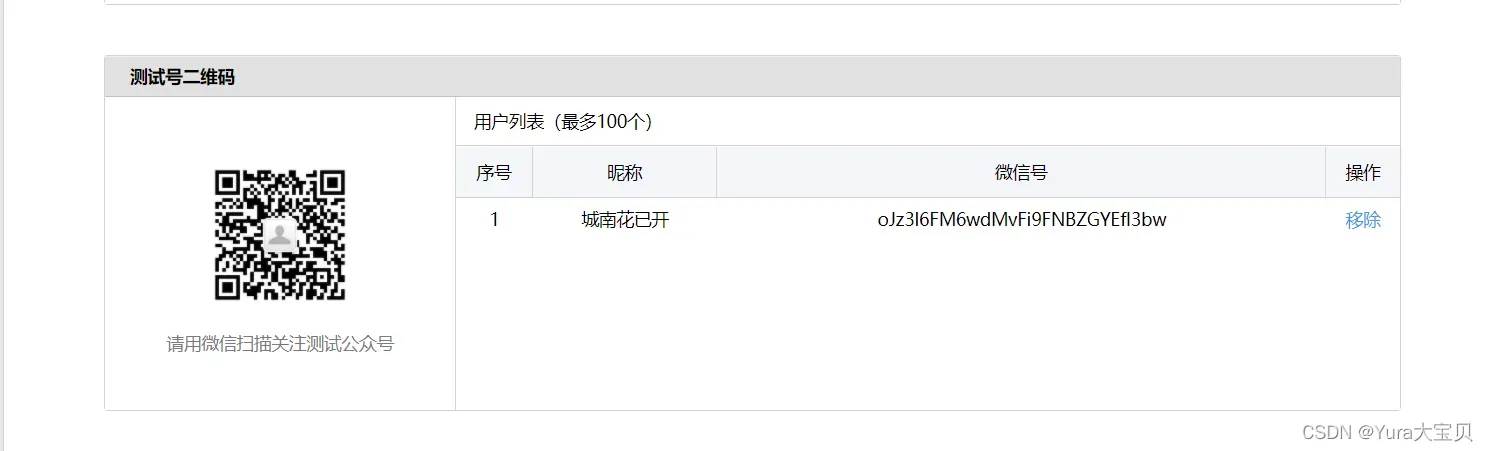
appID, appsecret很重要,后面会用到> 1.5 往下拉有一个测试号二维码,用微信扫一扫,关注这个公众号,你的微信就能接收消息了。右边的微信号也会被用到。
2. 安装第三方库
opencv-python 4.5.1.48
requests 2.27.1
PS:opencv3.x 应该是会报错,我更新了一下,错误就没了
代码
主功能
👇👇👇
demo_motion_detection.py
import cv2
import datetime
from demo_weixin_notice_objection import WxTools

camera=cv2.VideoCapture(0)
background = None
es = cv2.getStructuringElement(cv2.MORPH_ELLIPSE, (5,4))   #形态学膨胀
is_send_msg = False #防止重复发送
app_ID = 'wx8c6505f83a2b9810'
app_secret = '24b248d7c712ee034128b1fba70c9c24'

while True:
    _ , frame = camera.read()

    gray_frame = cv2.cvtColor(frame, cv2.COLOR_BGR2GRAY)   #转单通道
    gray_frame =cv2.GaussianBlur(gray_frame, (25,25), 3)    #高斯滤波 消除噪点 (灰度图,高斯分布的高斯核,sigma值)

    if background is None:
        background = gray_frame
        continue

    diff = cv2.absdiff(background, gray_frame)   #灰度图与背景的绝对值差
    diff = cv2.threshold(diff, 50, 255, cv2.THRESH_BINARY)[1]       #50:阈值   255:白色像素
    diff = cv2.dilate(diff, es, iterations=3)       #形态学膨胀

    #print(cv2.findContours(diff.copy(), cv2.RETR_EXTERNAL, cv2.CHAIN_APPROX_SIMPLE))
    contours, hierarchy = cv2.findContours(diff.copy(), cv2.RETR_EXTERNAL, cv2.CHAIN_APPROX_SIMPLE)
    #拷贝,外部轮廓,连续

    is_detected = False
    for c in contours:
        if cv2.contourArea(c) < 2000:  #太小忽略
            continue
        (x,y,w,h) = cv2.boundingRect(c)  #获取边界
        cv2.rectangle(frame, (x, y), (x + w, y + h), (0, 255, 0), 2)
        is_detected = True
        if not is_send_msg:
            is_send_msg = True
            wx_tools = WxTools(app_ID,app_secret)
            wx_tools.send_wx_customer_msg('oJz3l6FM6wdMvFi9FNBZGYEfl3bw')

    if is_detected:
        show_text = "motion: detected"
        show_color = (0,0,255)
    else:
        show_text = "motion: Detected"
        show_color = (0, 255, 0)


    cv2.putText(frame,show_text, (10,20),
                cv2.FONT_HERSHEY_SIMPLEX, 0.5, show_color, 2)
    cv2.putText(frame, datetime.datetime.now().strftime("%A %d %B %Y %I:%M:%S%p"),
                (10, frame.shape[0] - 10), cv2.FONT_HERSHEY_SIMPLEX,
                0.35, show_color, 1)

    cv2.imshow('video', frame)
    #cv2.imshow('diff', gray_frame)
    cv2.imshow('diff', diff)


    key = cv2.waitKey(1) & 0xFFf
    if key ==ord('q'):
        break

camera.release()
cv2.destroyAllWindows()
WxTools类
👇👇👇
demo_weixin_notice_objection.py
import json
import requests

class WxTools():
    def __init__(self,app_id,app_secret):
        self.app_id = app_id
        self.app_secret = app_secret

    def get_access_token(self):
        url = f'https://api.weixin.qq.com/cgi-bin/token?grant_type=client_credential&appid={self.app_id}&secret={self.app_secret}'
        resp = requests.get(url).json()
        access_token = resp.get('access_token')
        return access_token

    def send_wx_customer_msg(self, open_id, msg="有人闯入"):
        url = f'https://api.weixin.qq.com/cgi-bin/message/custom/send?access_token={self.get_access_token()}'
        # print(url)
        open_id = 'oJz3l6FM6wdMvFi9FNBZGYEfl3bw'
        req_data = {
            "touser": open_id,
            "msgtype": "text",
            "text":
                {
                    "content": msg
                }
        }
        req_str = json.dumps(req_data, ensure_ascii=False)
        req_data = req_str.encode('utf-8')
        requests.post(url, data=req_data)

#测试使用,以下可以不写
if __name__ == "__main__":
    app_ID = 'wx8c6505f83a2b9810'
    app_secret = '24b248d7c712ee034128b1fba70c9c24'
    wx_tools = WxTools('wx8c6505f83a2b9810', '24b248d7c712ee034128b1fba70c9c24')
    wx_tools.send_wx_customer_msg('oJz3l6FM6wdMvFi9FNBZGYEfl3bw')
文章出处登录后可见!
已经登录?立即刷新