1 说明
本实验所有代码均在ubuntu 18.04 + OpenVINO 2020R3.LTS installed 环境下验证通过,若需要代码移植,请务必检查环境配置是否与本实验环境相同。
2 实验目的
1、了解年龄和性别目标检测模型的基本知识。
2、掌握增加性别和年龄识别的基本方法。
3 任务内容
1、学习年龄和性别目标检测模型的基本知识。
2、获取每个所目标检测面部的小图像,并使用年龄和性别目标检测模型识别他们的年龄和性别。
4 实验原理
本实验是在实验一的基础上继续识别出他们的年龄和性别。本实验主要用到两个模型,face-detection-adas-0001,是查找人脸的主要目标检测网络。age-gender-recognition-retail-0013,它会在第一个模型的结果之上执行,并报告目标检测到的每个面孔的估计年龄和性别。查看年龄和性别识别模型,可以看到预期的输入(input)大小是1x3x62x62,BGR的面部图像都是包含62×62 像素。并且可以看到该网络有2个输出,第一个输出是age_conv3,数值为年龄除以100,第二个输出是prob层,将确定性(deterministic)别(男性还是女性),如下所示。
下面主要介绍代码是如何实现的。
1.读取模型,具体代码如下:

将面部目标检测模型加载到“face_net”,并将年龄性别模型加载到age_gender_net。
2.指定网络在CPU上运行,具体代码如下:

使这两个模型在CPU上运行,并定义标签男性和女性。
3.读取图像并进行面部目标检测,具体代码如下:

“out”是面部目标检测模型的结果。
4.在目标检测到的面部上画框,具体代码如下。
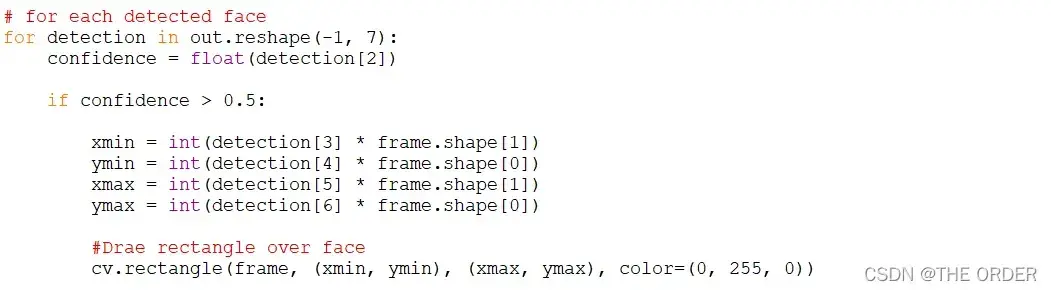
对于每个目标检测到的面部,如果自信度高于0.5,在其周围绘制一个矩形。
5.从原始帧中提取目标检测到的面部曲线,将其调整为62×62的大小,并将其用作第二个模型的输入(input)blob
具体代码如下。
6.性别和年龄识别处理
具体代码如下。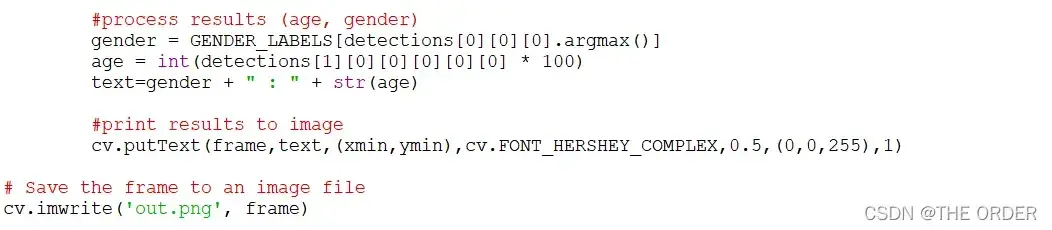
目标检测性别需使用softmax分类器(Classifier),armax目标检测性别的可能性更高,年龄参数必须乘以100。
最后将文本对齐并将其添加到正确位置的图像中。
5 操作步骤
步骤1
登录实验平台,进入实验环境,打开终端。
步骤2
执行命令su,输入(input)root用户密码root@openlab,切换到root目录。
步骤3
执行如下命令,进入exercise-3目录,并查看相应的文件,如下所示。
# cd ~/51openlab/01/exercise-3/
# ll
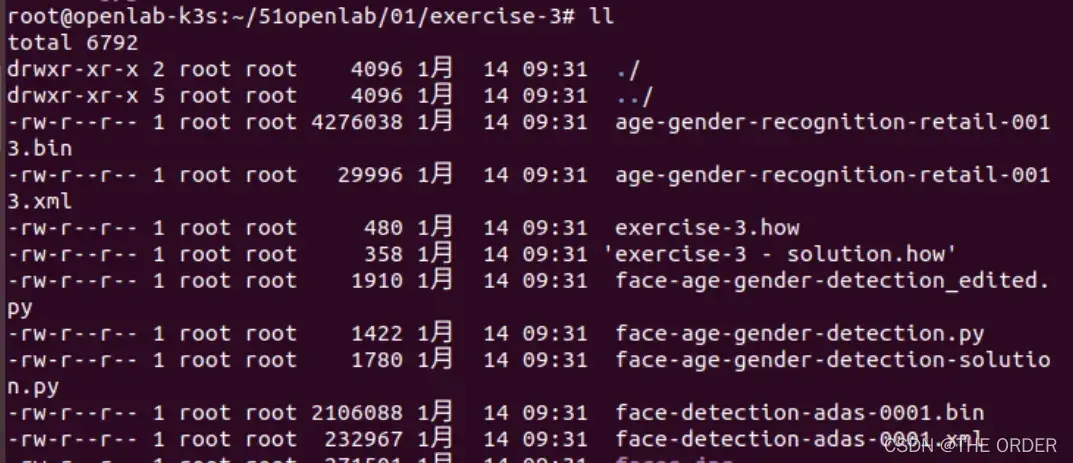
由上图可以看到,该目录下已经预置了训练模型age-gender-recognition-retail-0013和face-detection-adas-0001。
步骤4
执行如下命令,初始化OpenVINO。
# source /opt/intel/openvino/bin/setupvars.sh
步骤5
执行vi face-age-gender-detection-solution.py命令,编写python脚本,具体如下:
import cv2 as cv

# Load face-detection model
face_net = cv.dnn.readNet('face-detection-adas-0001.xml', 'face-detection-adas-0001.bin')

# load age-gender detection model
age_gender_net = cv.dnn.readNet('age-gender-recognition-retail-0013.xml','age-gender-recognition-retail-0013.bin')

# Specify target device (CPU)
face_net.setPreferableTarget(cv.dnn.DNN_TARGET_CPU)
age_gender_net.setPreferableTarget(cv.dnn.DNN_TARGET_CPU)

GENDER_LABELS = ['Female', 'Male']

# Read an image
frame = cv.imread('faces.jpg')

# Prepare input blob
blob = cv.dnn.blobFromImage(frame, size=(672, 384), ddepth=cv.CV_8U)

#perform inference (face detection)
face_net.setInput(blob)
out = face_net.forward()


# for each detected face
for detection in out.reshape(-1, 7):
    confidence = float(detection[2])

    if confidence > 0.5:

        xmin = int(detection[3] * frame.shape[1])
        ymin = int(detection[4] * frame.shape[0])
        xmax = int(detection[5] * frame.shape[1])
        ymax = int(detection[6] * frame.shape[0])

        #Draw rectangle over face
        cv.rectangle(frame, (xmin, ymin), (xmax, ymax), color=(0, 255, 0))

        #perform age-gender detection
        blob2=cv.dnn.blobFromImage(frame[ymin:ymax, xmin:xmax], size=(62,62), ddepth=cv.CV_8U)
        age_gender_net.setInput(blob2)
        detections = age_gender_net.forwardAndRetrieve(['prob','age_conv3'])

        #process results (age, gender)
        gender = GENDER_LABELS[detections[0][0][0].argmax()]
        age = int(detections[1][0][0][0][0][0] * 100)
        text=gender + " : " + str(age)

        #print results to image
        cv.putText(frame,text,(xmin,ymin),cv.FONT_HERSHEY_COMPLEX,0.5,(0,0,255),1)

# Save the frame to an image file
cv.imwrite('out.png', frame)
步骤6
执行python3 face-age-gender-detection-solution.py命令,运行脚本。
步骤7
执行eog out.png命令打开新输出的图像,如下图所示。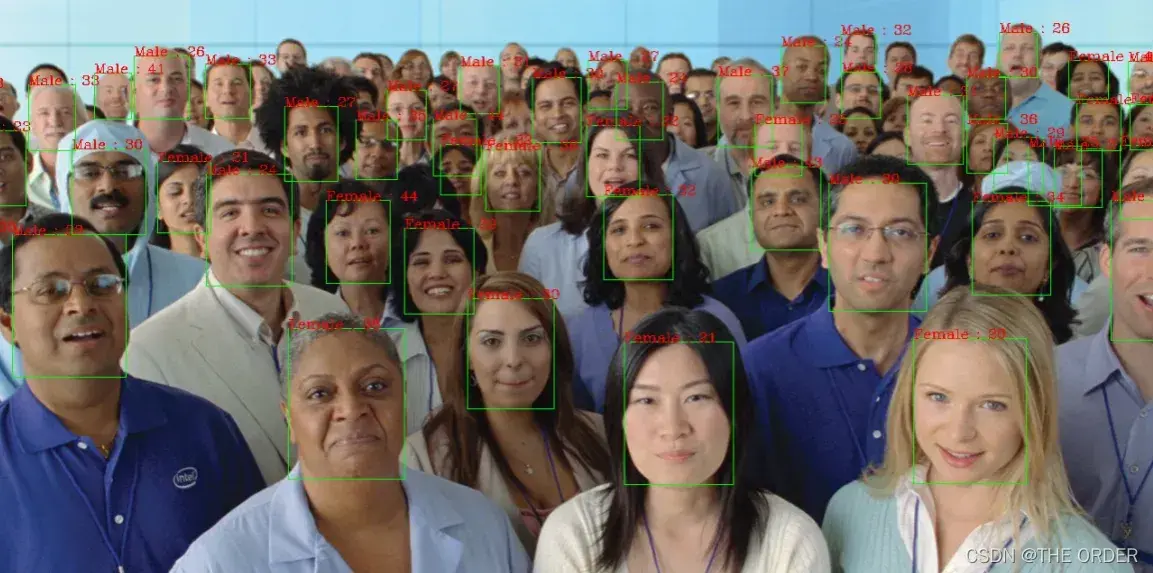
文章出处登录后可见!