LBP ( Local binary pattern) ,局部二进制模式.
LBP特征的描述
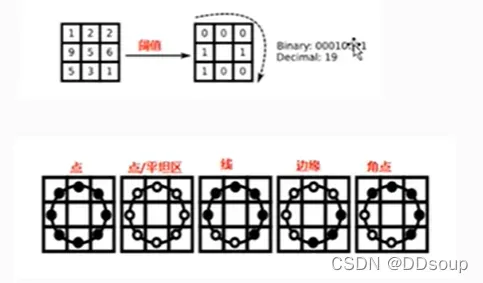
原始的LBP算子定义为在3 ∗ 3 的窗口内,以窗口中心像素为阈值,将相邻的8个像素的灰度值与其进行比较,若周围像素值大于等于中心像素值,则该点的位置被标记为1,否则为0。这样3 ∗ 3邻域内的8个点经比较可产生8位二进制数(通常转换为十进制数即LBP码,共256种),即得到该窗口中心像素点的LBP值,并用这个值来反映该区域的纹理信息。需要注意的是,LBP值是按照顺时针方向组成的二进制数。
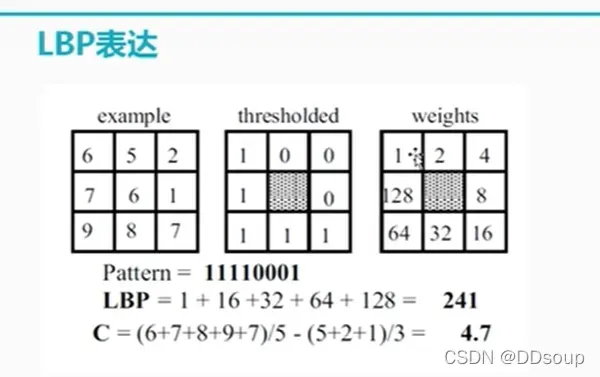
上面的 C 是对比度(contrast). weights 就是阈值表示成十进制显示出来的。
LBP特征的圆形化改进
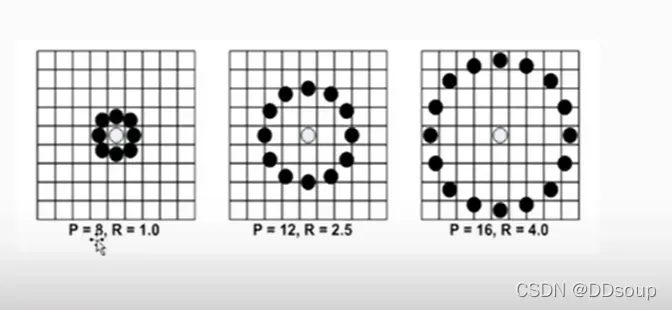
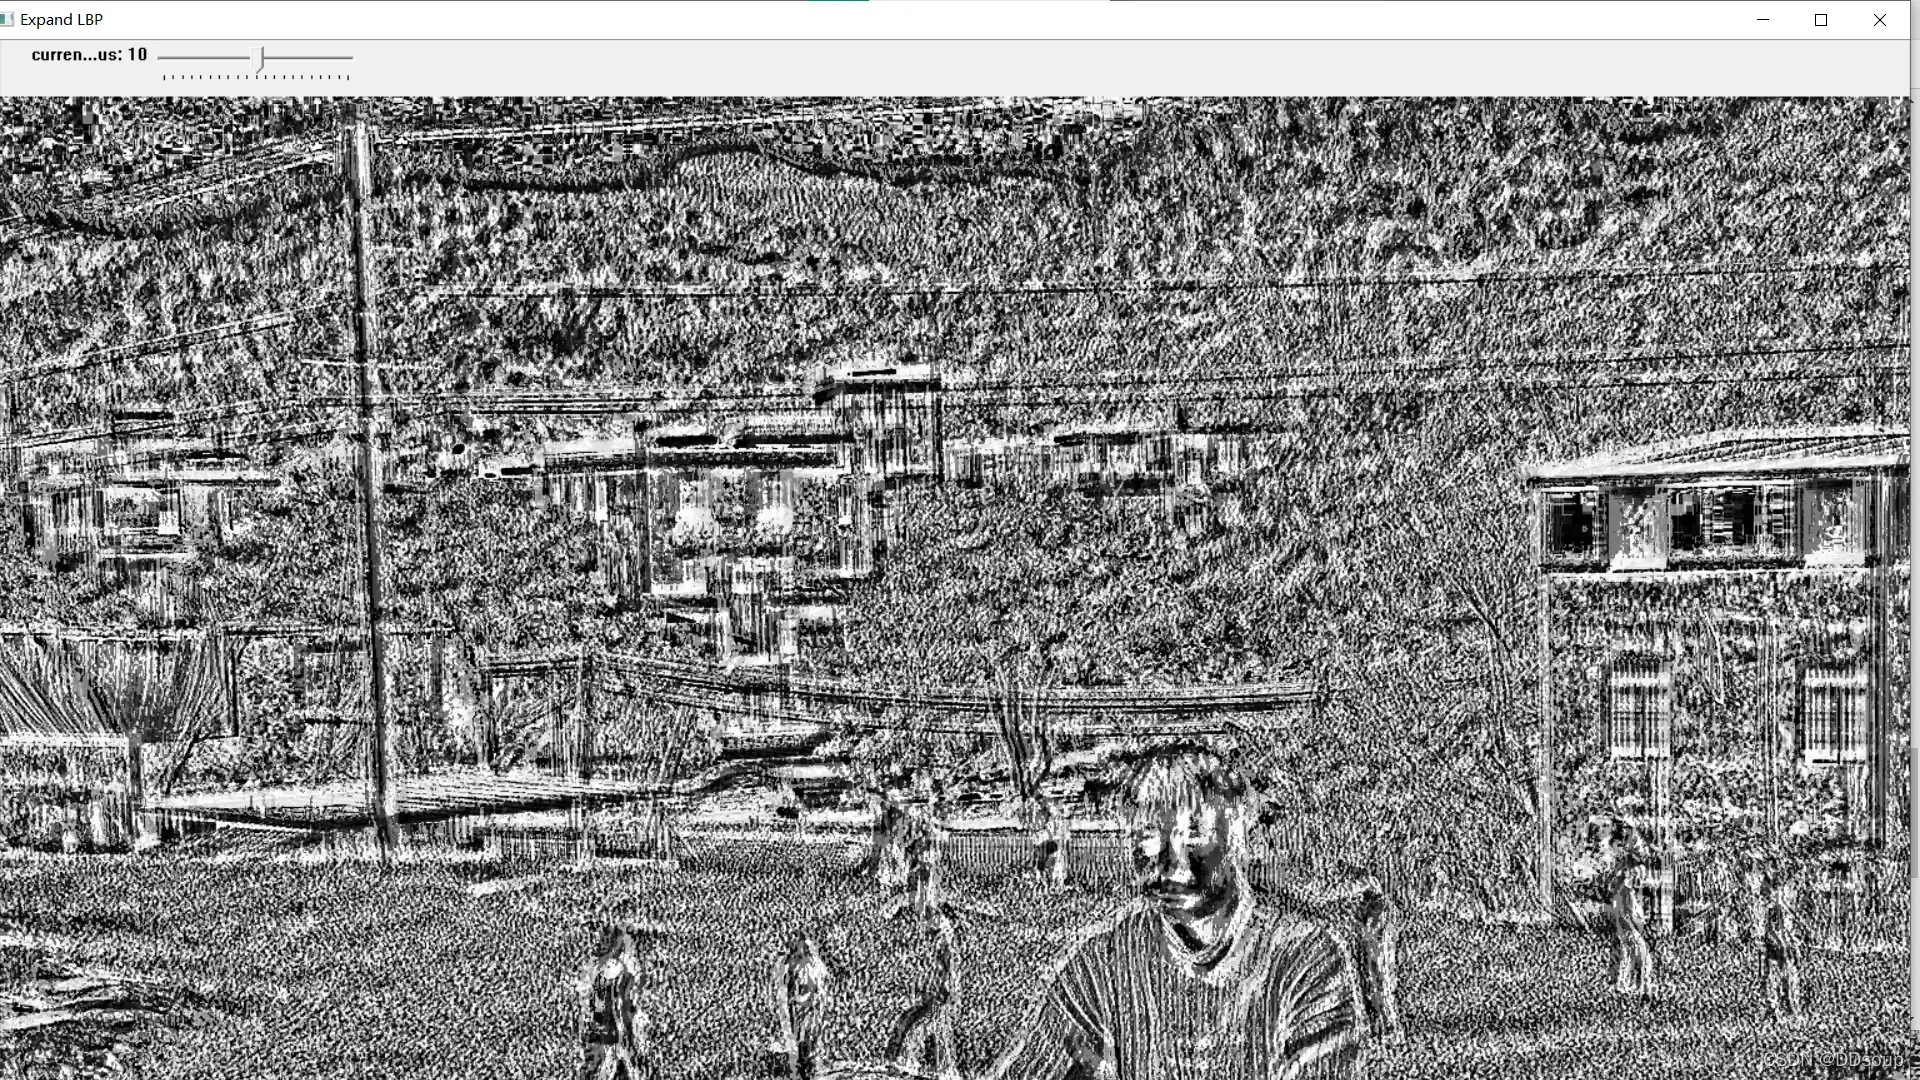
基本的 LBP算子的最大缺陷在于它只覆盖了一个固定半径范围内的小区域,这显然不能满足不同尺寸和频率纹理的需要。为了适应不同尺度的纹理特征,并达到灰度和旋转不变性的要求,Ojala等对 LBP 算子进行了改进,将 3×3邻域扩展到任意邻域,并用圆形邻域代替了正方形邻域,改进后的 LBP 算子允许在半径为 R 的圆形邻域内有任意多个像素点。从而得到了诸如半径为R的圆形区域内含有P个采样点的LBP算子,称为Extended LBP,也叫Circular LBP.
LBP旋转不变模式
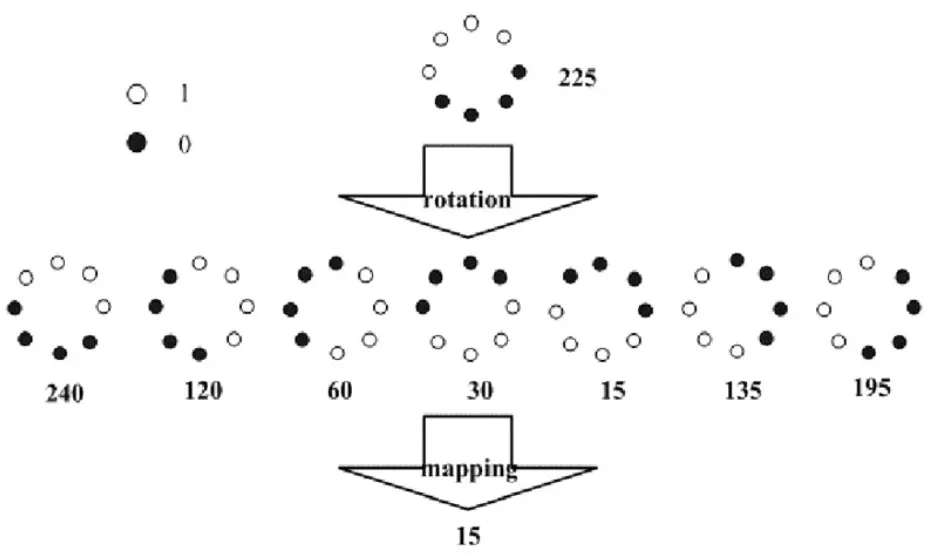
下图中的8种 LBP 模式,对应的旋转不变的 LBP模式都是00001111,即 LBP值为 15:
最为完整的LBP模式是 均匀+旋转不变模式,均匀模式就是限制一个二进制序列从0到1或从1到0的跳变次数不超过2次.
LBP特征用于检测的原理
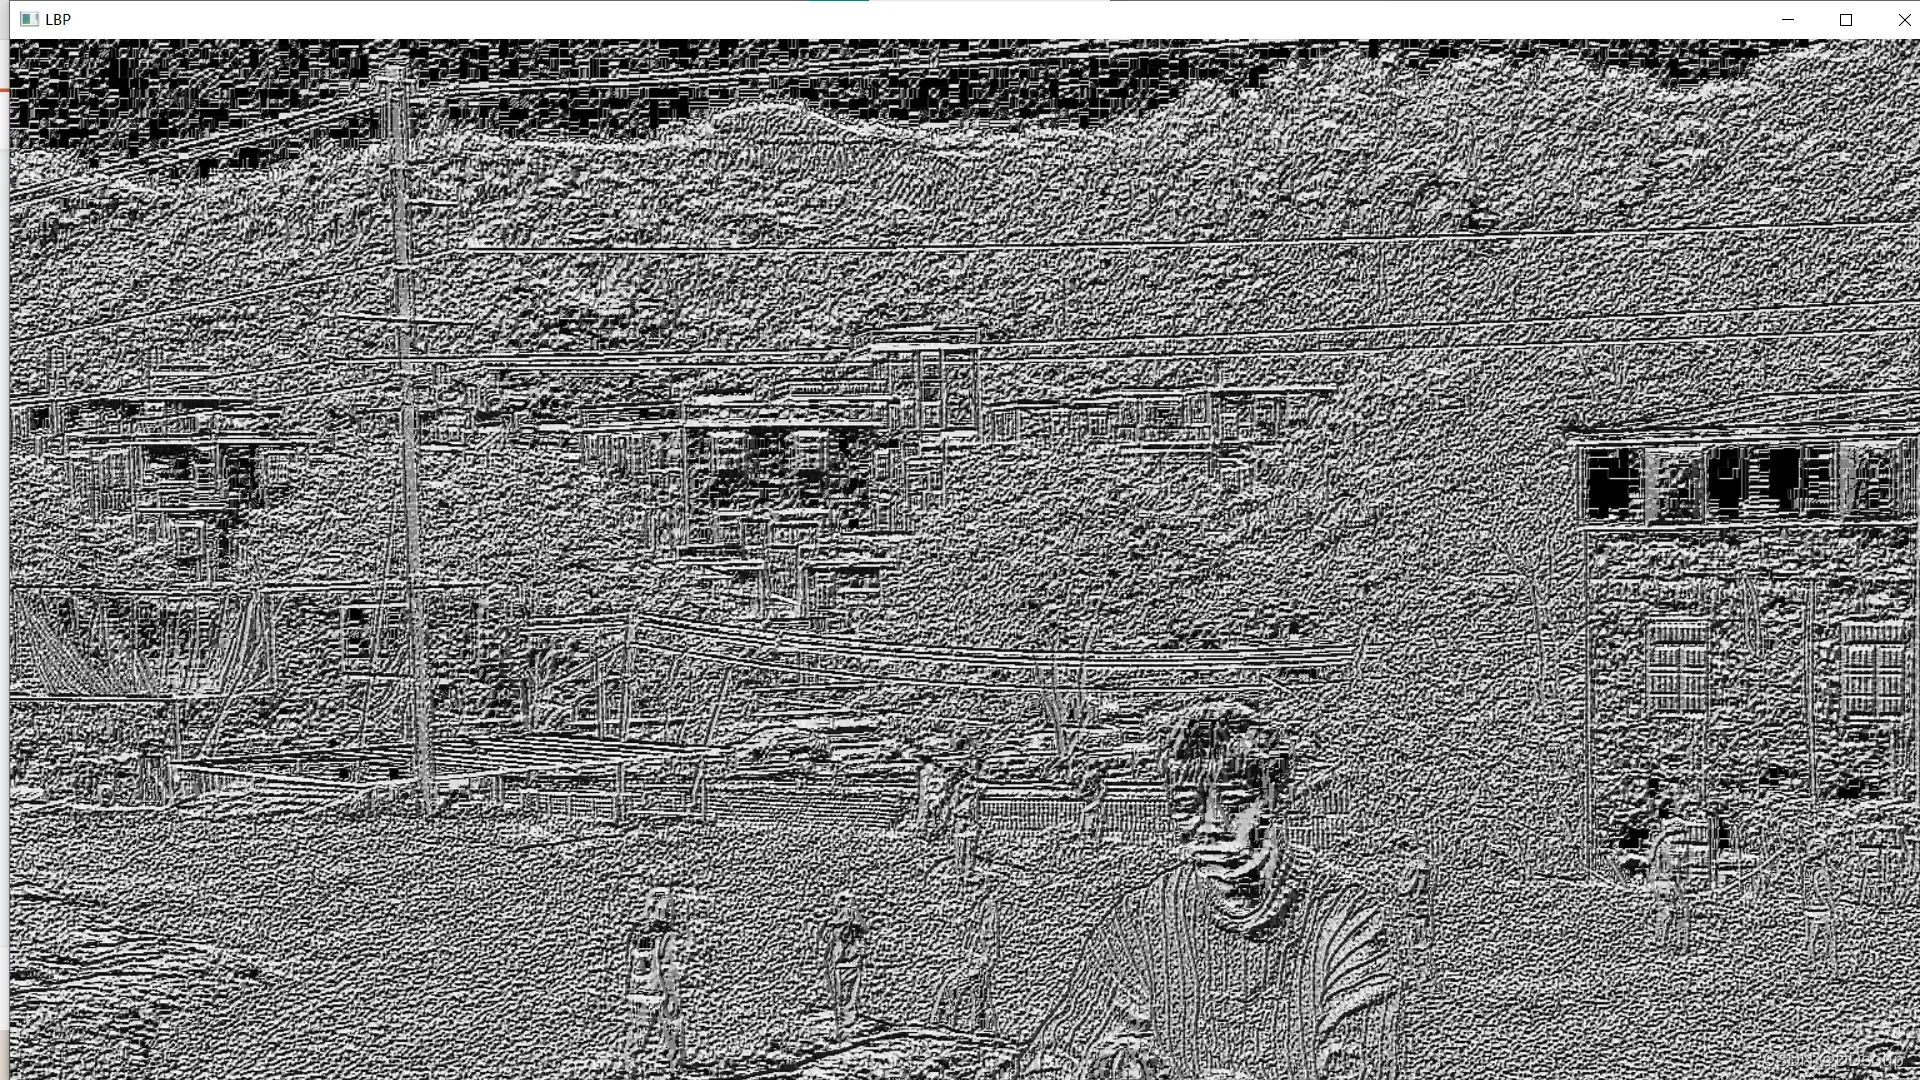
上述提取的LBP算子在每个像素点都可以得到一个LBP“编码”,那么,对一幅图像(记录的是每个像素点的灰度值)提取其原始的LBP算子之后,得到的原始LBP特征依然是“一幅图片”(记录的是每个像素点的LBP值)。
LBP的应用中,如纹理分类、人脸分析等,一般都不将LBP图谱作为特征向量用于分类识别,而是采用LBP特征谱的统计直方图作为特征向量用于分类识别。
代码
#include<opencv2/opencv.hpp>
#include<iostream>
#include<math.h>
using namespace cv;
using namespace std;
int current_radius = 3;
int max_count = 20;
void Expand_LBP_demo(int, void*);
Mat src, gray_src;
int main(int argc, char** argv)
{
src = imread("rui.jpg");
if (!src.data)
{
cout << "图片未找到" << endl;
return -1;
}
namedWindow("input title", WINDOW_AUTOSIZE);
imshow("input title", src);
cvtColor(src, gray_src, COLOR_BGR2GRAY);
int width = src.cols - 2;
int hight = src.rows - 2;
//基本LBP演示
Mat lbpImg = Mat::zeros(hight, width, CV_8UC1);
for (int row = 1; row < src.rows - 1; row++)
{
for (int col = 1; col < src.cols - 1; col++)
{
uchar c = gray_src.at<uchar>(row, col);
uchar code = 0;
code |= (gray_src.at<uchar>(row - 1, col - 1) > c) << 7;
code |= (gray_src.at<uchar>(row - 1, col) > c) << 6;
code |= (gray_src.at<uchar>(row - 1, col + 1) > c) << 5;
code |= (gray_src.at<uchar>(row, col + 1) > c) << 4;
code |= (gray_src.at<uchar>(row + 1, col + 1) > c) << 3;
code |= (gray_src.at<uchar>(row + 1, col) > c) << 2;
code |= (gray_src.at<uchar>(row + 1, col - 1) > c) << 1;
code |= (gray_src.at<uchar>(row, col) > c) << 0;
lbpImg.at<uchar>(row - 1, col - 1) = code;
}
}
imshow("LBP", lbpImg);
namedWindow("Expand LBP", WINDOW_AUTOSIZE);
createTrackbar("current_radius", "Expand LBP", ¤t_radius, max_count, Expand_LBP_demo);
Expand_LBP_demo(0, 0);
waitKey(0);
return 0;
}
//扩展LBP demo
void Expand_LBP_demo(int, void*)
{
int offset = current_radius * 2;
Mat elbpImg = Mat::zeros(gray_src.rows - offset, gray_src.cols - offset, CV_8UC1);
int numNeighbor = 8;
for (int n = 0; n < numNeighbor; n++)
{
float x = current_radius * cos((2 * CV_PI * n) / numNeighbor);
float y = current_radius * (-sin((2 * CV_PI * n) / numNeighbor));
int fx = static_cast<int>(floor(x)); //向下取整,它返回的是小于或等于函数参数,并且与之最接近的整数
int fy = static_cast<int>(floor(y));
int cx = static_cast<int>(ceil(x)); //向上取整,它返回的是大于或等于函数参数,并且与之最接近的整数
int cy = static_cast<int>(ceil(y));
float ty = y - fy;
float tx = x = fx;
float w1 = (1 - tx) * (1 - ty);
float w2 = (tx) * (1 - ty);
float w3 = (1 - tx) * (ty);
float w4 = (tx) * (ty);
for (int row = current_radius; row < (gray_src.rows - current_radius); row++)
{
for (int col = current_radius; col < (gray_src.cols - current_radius); col++)
{
float t = w1 * gray_src.at<uchar>(row + fy, col + fx) + w2 * gray_src.at<uchar>(row + fy, col + cx) +
w3 * gray_src.at<uchar>(row + cy, col + fx) + w4 * gray_src.at<uchar>(row + cy, col + cx);
elbpImg.at<uchar>(row - current_radius, col - current_radius) +=
((t > gray_src.at<uchar>(row, col)) && (abs(t - gray_src.at<uchar>(row, col)) > std::numeric_limits<float>::epsilon())) << n;
}
}
imshow("Expand LBP", elbpImg);
}
}

文章出处登录后可见!