前奏如图所示。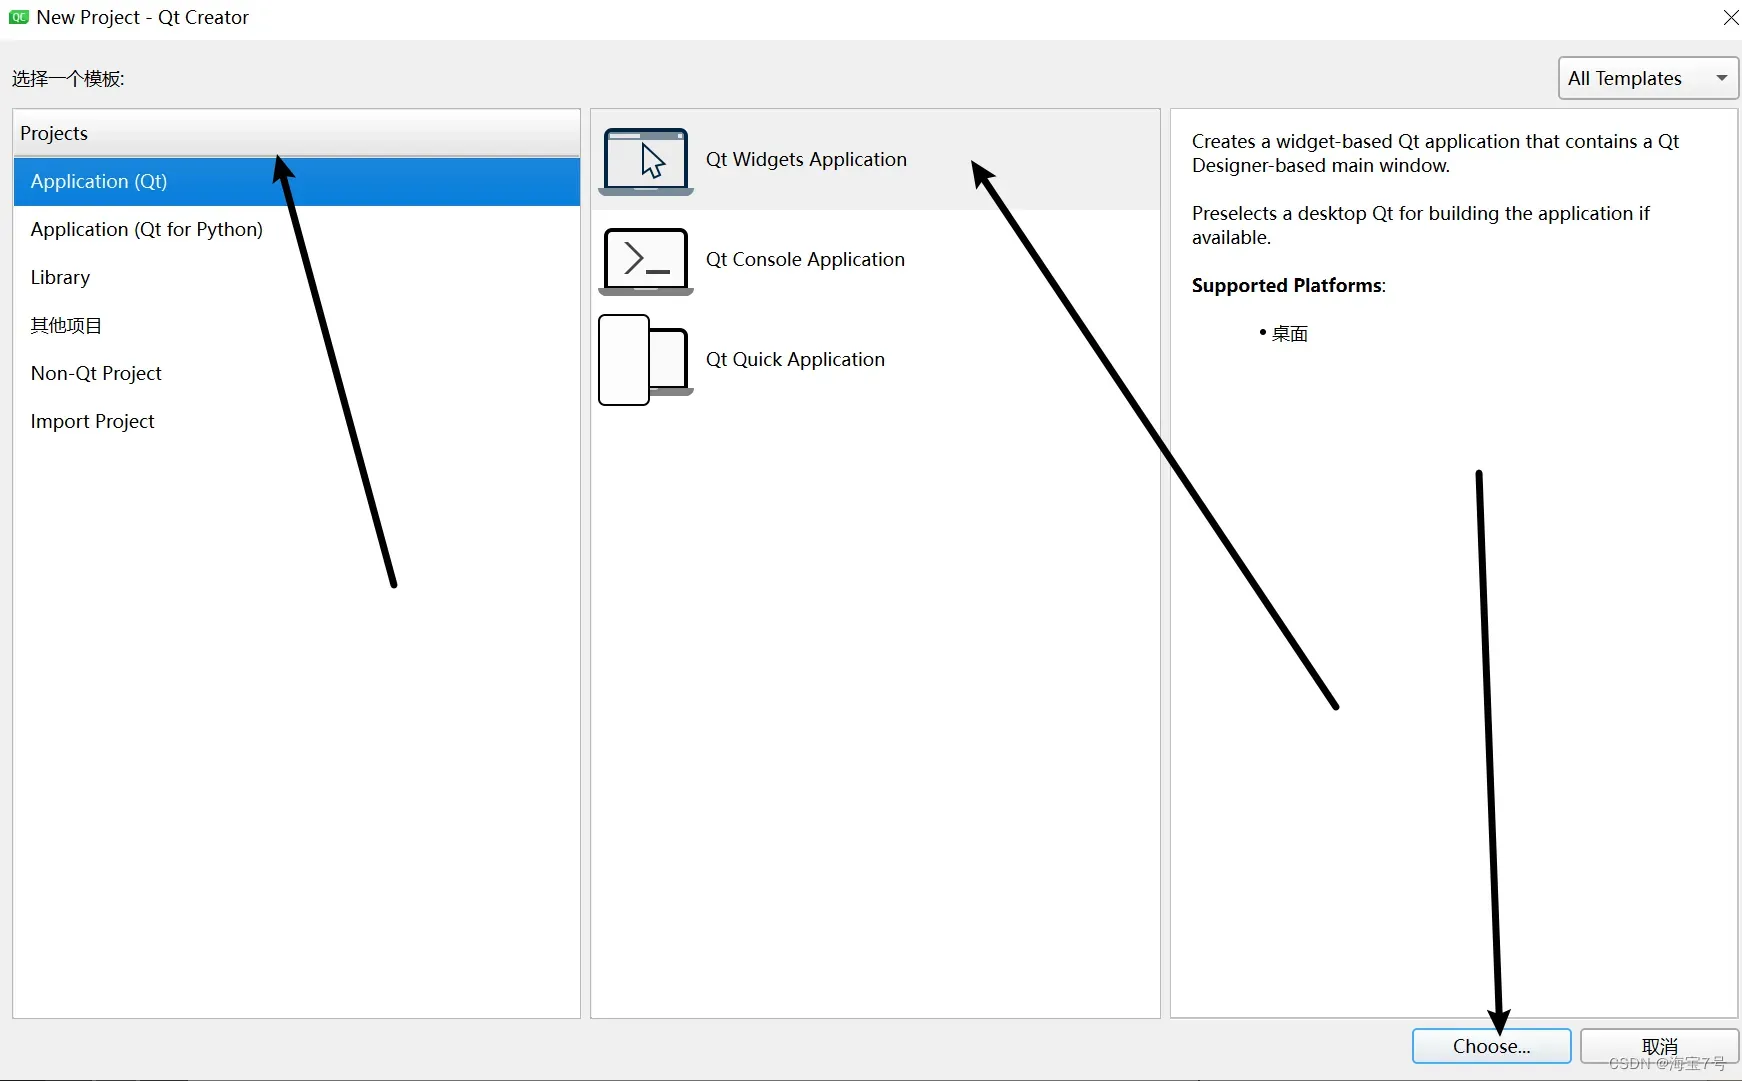 自定义
自定义
不了解环境配置的可以参考上一篇。
portal
门户门户[0]
如果你不了解环境配置,你可以。有案例
https://blog.csdn.net/dongbao520/article/details/124612542[0]
少言寡语的人。结果显示
直接打码。
对于头文件,配置如下。
头文件mainwindow.h
mainwindow.h
代码显示如下
#ifndef MAINWINDOW_H
#define MAINWINDOW_H

#include <QMainWindow>

#include <opencv2/core/core.hpp>
#include <opencv2/highgui/highgui.hpp>
#include <opencv2/imgproc/imgproc.hpp>

using namespace cv;

//ctrl+i快捷键自动对齐==声明函数
void originalpicture(Mat &image);
void grayShow(Mat &image);
void Threshold2(Mat &gray);

//原始图像
void originalpicture(Mat &image)
{
    Mat img;
    img=image;
    namedWindow( "Origin window");
    imshow("Origin window", img);
}

//处理为灰度图像
void grayShow(Mat &image)
{
    Mat gray;
    cvtColor(image, gray, COLOR_RGBA2GRAY);
    namedWindow("gray picture");
    imshow("gray picture", gray);
    //    namedWindow( "Display window", WINDOW_AUTOSIZE );
    Threshold2(gray);
    //logTransfer(gray);
    //gammaTranfer(gray);
}

//二值化变换
void Threshold2(Mat &gray)
{
    Mat result;
    threshold(gray, result, 120,255,THRESH_BINARY);
    namedWindow("binary picture");
    imshow("binary picture", result);
}

class MainWindow : public QMainWindow
{
    Q_OBJECT

public:
    MainWindow(QWidget *parent = nullptr);
    ~MainWindow();
};
#endif // MAINWINDOW_H
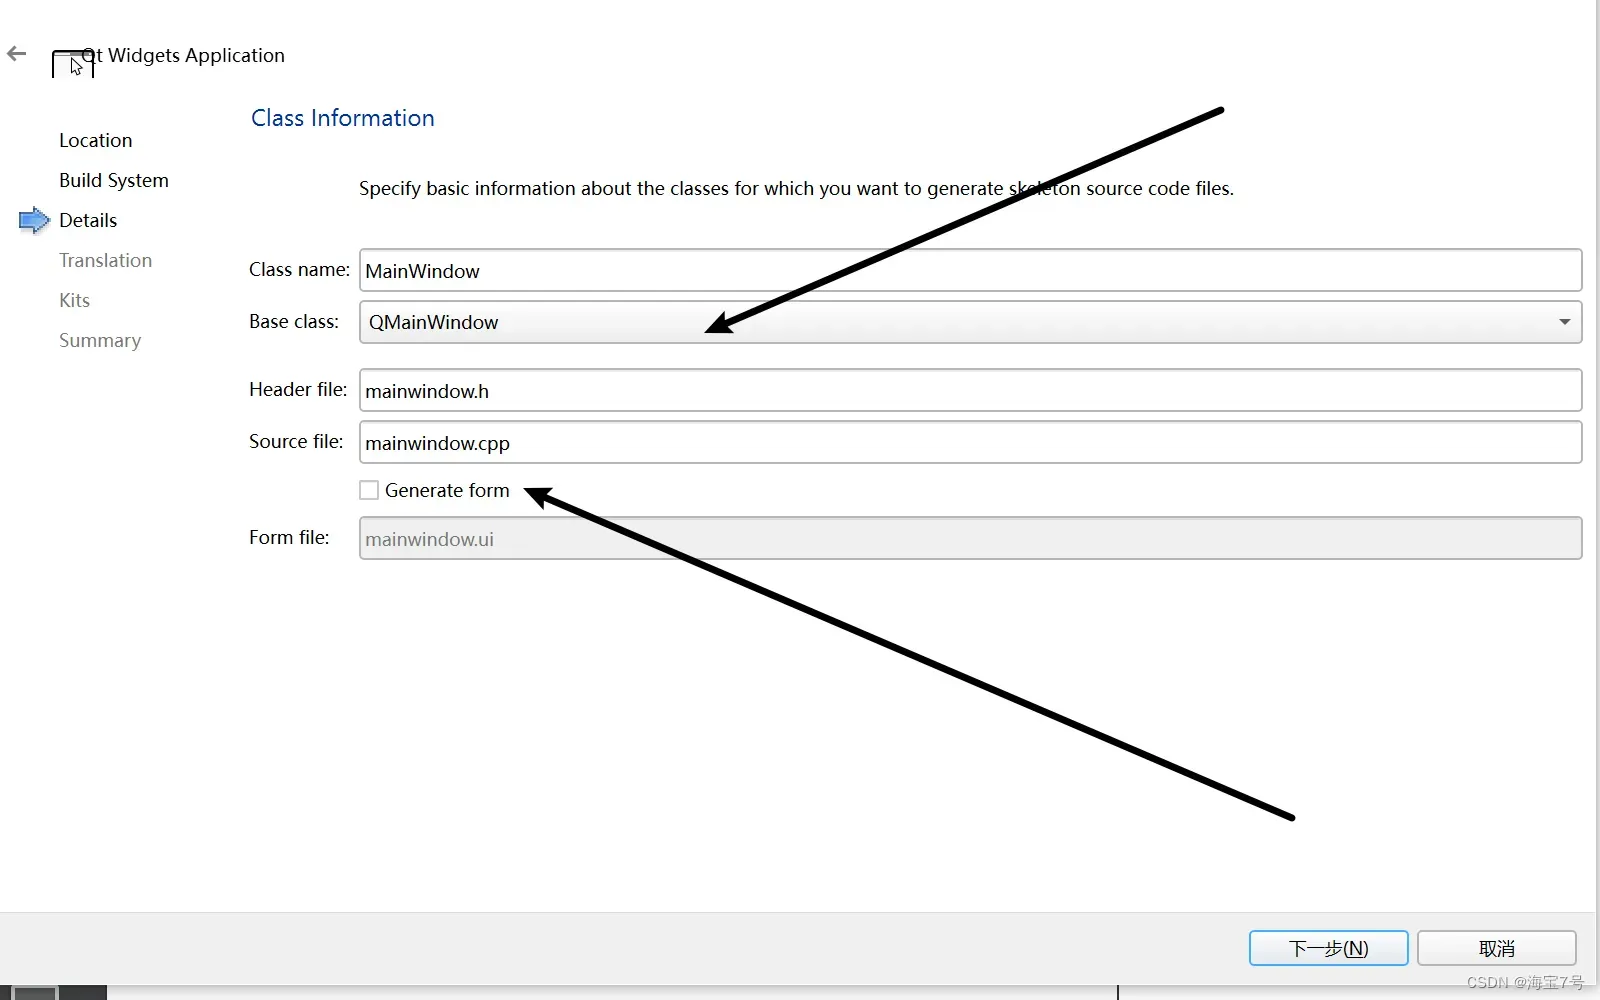
要注意的关键文件。
这里直接默认,没什么,不需要
mainwindow.cpp文件
mainwindow.cpp文件
#include "mainwindow.h"

MainWindow::MainWindow(QWidget *parent)
    : QMainWindow(parent)
{
}


MainWindow::~MainWindow()
{
}
工程pro文件
xc00256.pro文件
QT       += core gui

greaterThan(QT_MAJOR_VERSION, 4): QT += widgets

CONFIG += c++17

# You can make your code fail to compile if it uses deprecated APIs.
# In order to do so, uncomment the following line.
#DEFINES += QT_DISABLE_DEPRECATED_BEFORE=0x060000    # disables all the APIs deprecated before Qt 6.0.0

SOURCES += \
    main.cpp

HEADERS +=

# Default rules for deployment.
qnx: target.path = /tmp/$${TARGET}/bin
else: unix:!android: target.path = /opt/$${TARGET}/bin
!isEmpty(target.path): INSTALLS += target

INCLUDEPATH += D:\applearn\Opencv-VC\opencv\newbuild-me\install\include
LIBS += D:\applearn\Opencv-VC\opencv\newbuild-me\lib\libopencv_*.a
主程序main
main.cpp文件
#include "mainwindow.h"

#include <QApplication>

int main(int argc, char *argv[])
{
    QApplication a(argc, argv);

//    MainWindow w;
//    w.show();

    Mat img=imread("C:/Users/57281/Pictures/002.jpg");

//    namedWindow( "Display window", WINDOW_AUTOSIZE );
//    imshow("Display window", img);

    originalpicture(img);
    grayShow(img);

    return a.exec();
}
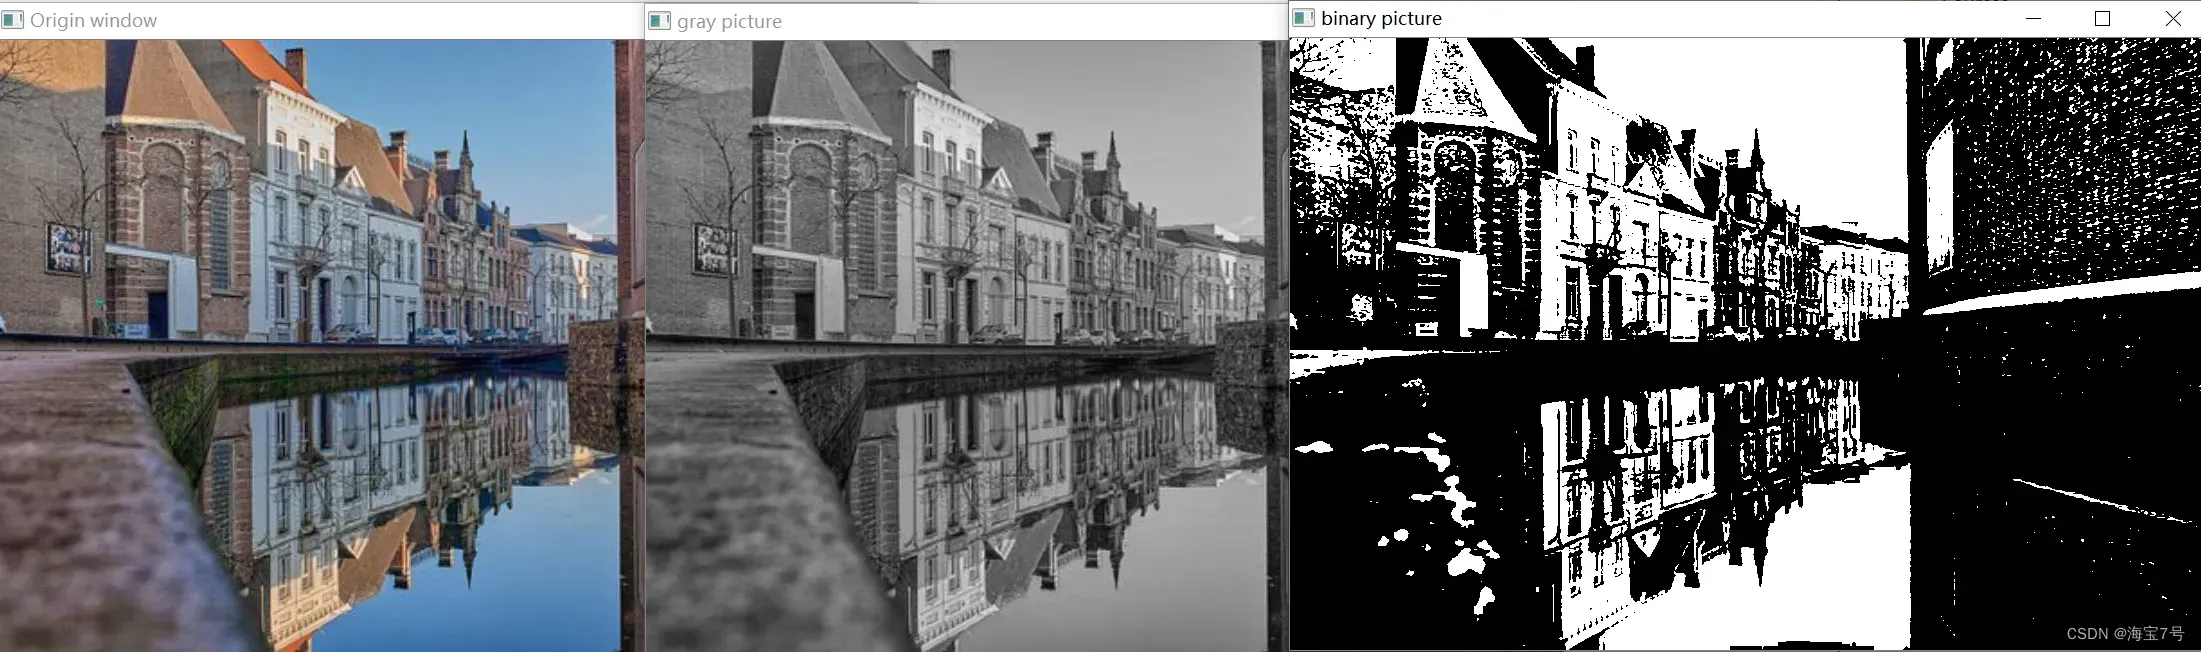
最终结果如图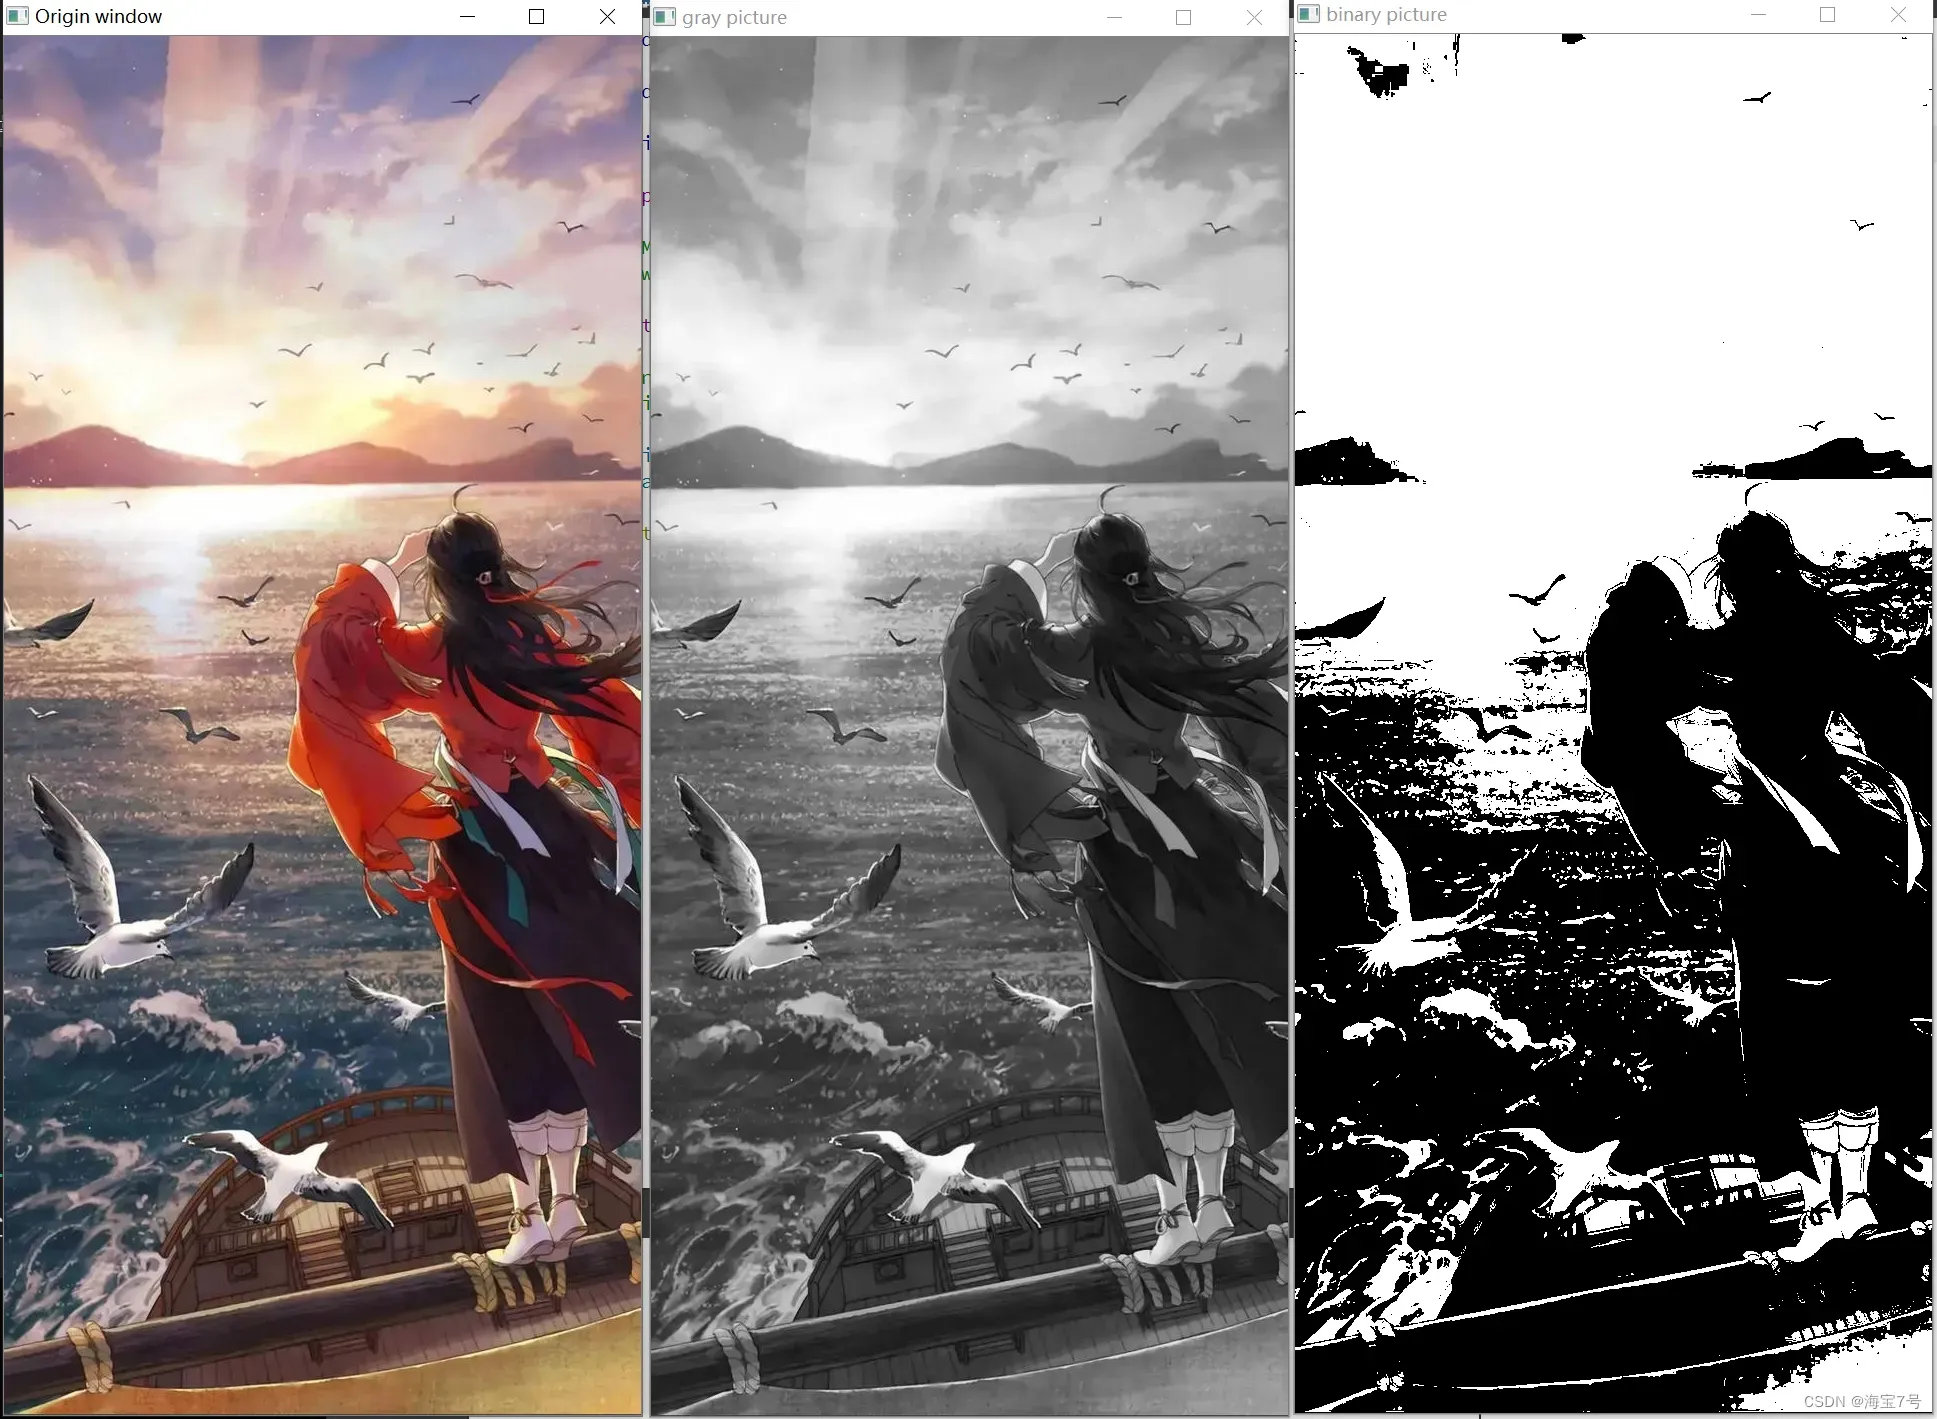

文章出处登录后可见!
已经登录?立即刷新