使用TensorFlow, ONNX和TensorRT加速深度学习推理
在这篇文章中,您将了解如何使用新的 TensorFlow-ONNX-TensorRT 工作流程部署经过 TensorFlow 训练的深度学习模型。 本教程使用 NVIDIA TensorRT 8.0.0.3 并提供两个代码示例,一个用于 TensorFlow v1,一个用于 TensorFlow v2。 TensorRT 是一个推理加速器。
首先,使用任何框架训练网络。 网络经过训练后,批大小和精度是固定的(精度为 FP32、FP16 或 INT8)。 训练后的模型被传递给 TensorRT 优化器,该优化器输出一个优化的运行时,也称为计划(plan)。 .plan 文件是 TensorRT 引擎的序列化文件格式。 计划文件必须反序列化才能使用 TensorRT 运行时运行推理。
要优化在 TensorFlow 中实现的模型,您唯一需要做的就是将模型转换为 ONNX 格式,并使用 TensorRT 中的 ONNX 解析器来解析模型并构建 TensorRT 引擎。 下图显示了高级别的 ONNX 工作流程。

在这篇文章中,我们将讨论如何使用 ONNX 工作流程创建 TensorRT 引擎,以及如何从 TensorRT 引擎运行推理。 更具体地说,我们展示了从 Keras 或 TensorFlow 中的模型到 ONNX 以及到带有 ResNet-50、语义分割和 U-Net 网络的 TensorRT 引擎的端到端推理。 最后,我们将解释如何在其他网络上使用此工作流程。
下载代码示例并解压缩。 您可以按照相应的自述文件运行 TensorFlow 1 或 TensorFlow 2 代码示例。 下载文件后,您还应该从 Cityscapes 数据集脚本存储库下载 labels.py,并将其与其他脚本放在同一文件夹中。
ONNX 概述
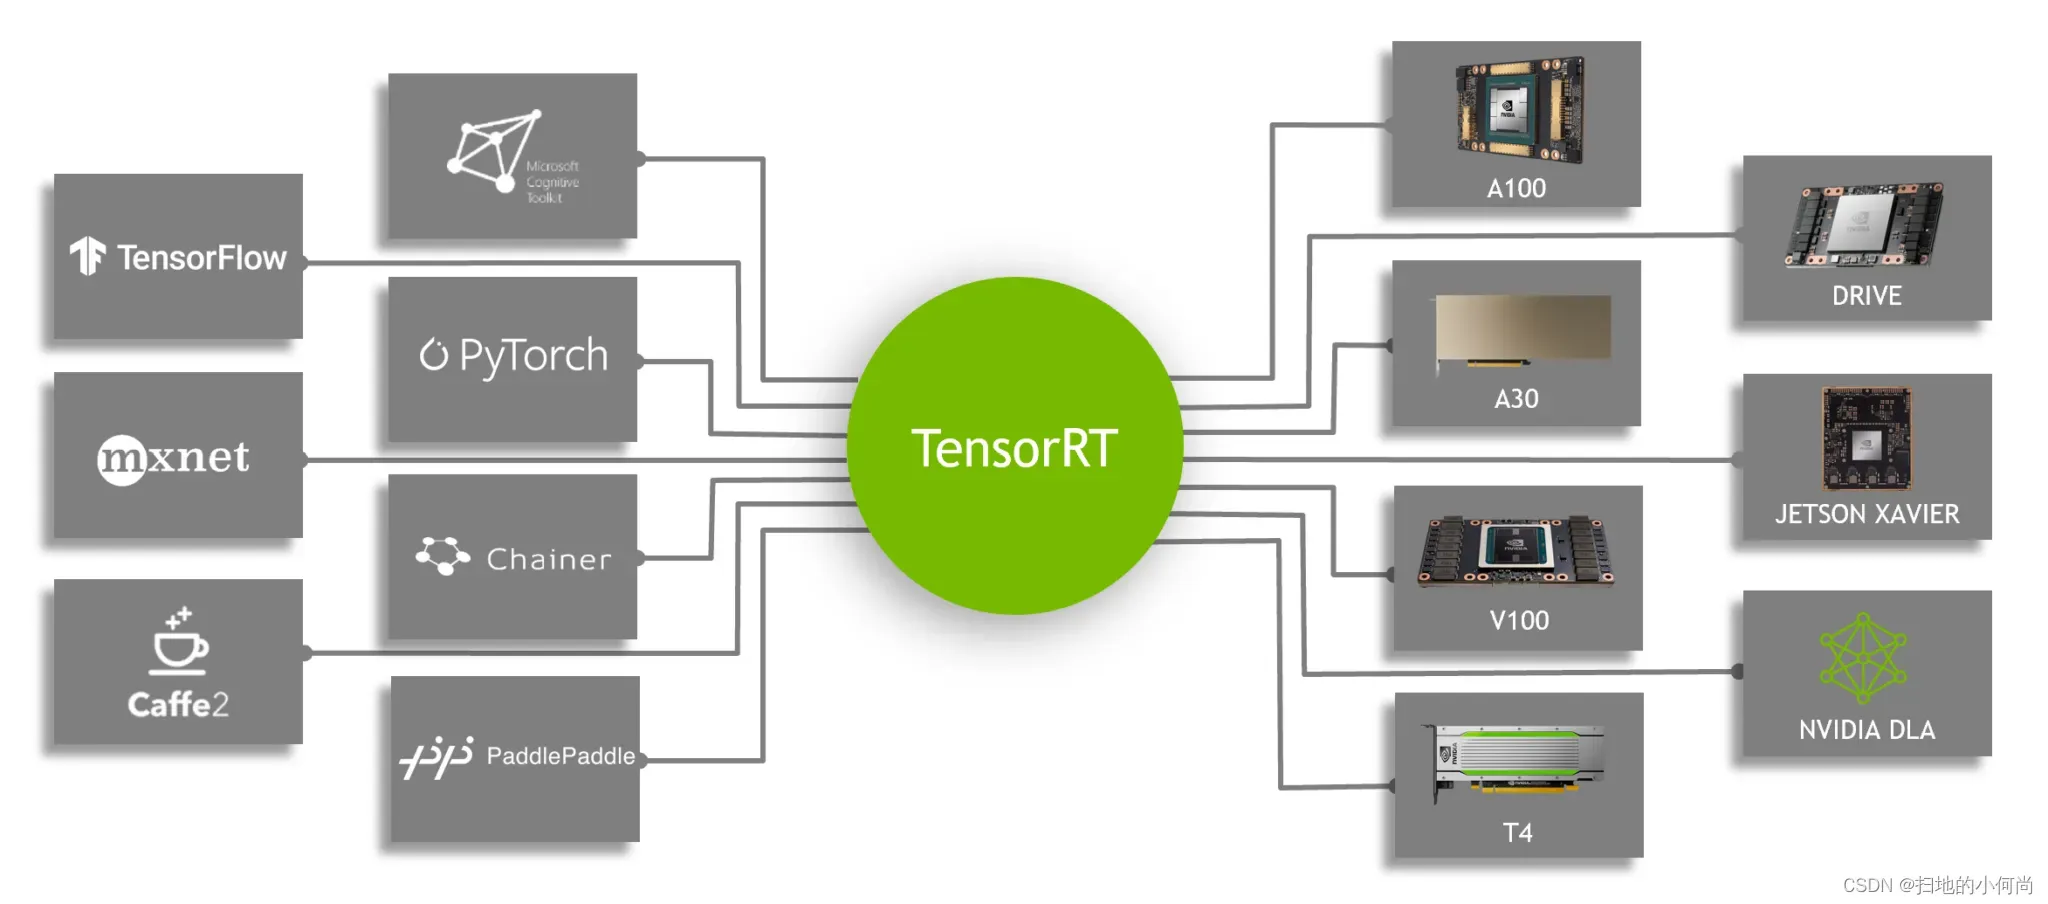
ONNX 是一种用于机器学习和深度学习模型的开放格式。 它允许您将来自不同框架(如 TensorFlow、PyTorch、MATLAB、Caffe 和 Keras)的深度学习和机器学习模型转换为单一格式。
它定义了一组通用的运算符、一组通用的深度学习构建块和一种通用的文件格式。 它提供了计算图的定义,以及内置的运算符。 可能有一个或多个输入或输出的 ONNX 节点列表形成一个无环图。
ResNet ONNX 工作流示例
在这个例子中,我们展示了如何在两个不同的网络上使用 ONNX 工作流并创建一个 TensorRT 引擎。 第一个网络是 ResNet-50。
工作流程包括以下步骤:
- 将 TensorFlow/Keras 模型转换为
.pb文件。 - 将
.pb文件转换为 ONNX 格式。 - 创建一个 TensorRT 引擎。
- 从 TensorRT 引擎运行推理。
Requirements:
#IF TensorFlow 1
pip install tensorflow-gpu==1.15.0 keras==2.3.1
#IF TensorFlow 2
pip install tensorflow-gpu==2.4.0 keras==2.4.3

#Other requirements
pip install -U keras2onnx tf2onnx==1.8.2 pillow pycuda scikit-image

#Check installation
python -c "import keras;print(keras.version)"
将模型转换为 .pb**
第一步是将模型转换为 .pb 文件。 以下代码示例将 ResNet-50 模型转换为 .pb 文件:
import tensorflow as tf
import keras
from tensorflow.keras.models import Model
import keras.backend as K
K.set_learning_phase(0)

def keras_to_pb(model, output_filename, output_node_names):

   """
   This is the function to convert the Keras model to pb.

   Args:
      model: The Keras model.
      output_filename: The output .pb file name.
      output_node_names: The output nodes of the network. If None, then
      the function gets the last layer name as the output node.
   """

   # Get the names of the input and output nodes.
   in_name = model.layers[0].get_output_at(0).name.split(':')[0]

   if output_node_names is None:
       output_node_names = [model.layers[-1].get_output_at(0).name.split(':')[0]]

   sess = keras.backend.get_session()

   # The TensorFlow freeze_graph expects a comma-separated string of output node names.
   output_node_names_tf = ','.join(output_node_names)

   frozen_graph_def = tf.graph_util.convert_variables_to_constants(
       sess,
       sess.graph_def,
       output_node_names)

   sess.close()
   wkdir = ''
   tf.train.write_graph(frozen_graph_def, wkdir, output_filename, as_text=False)

   return in_name, output_node_names

# load the ResNet-50 model pretrained on imagenet
model = keras.applications.resnet.ResNet50(include_top=True, weights='imagenet', input_tensor=None, input_shape=None, pooling=None, classes=1000)

# Convert the Keras ResNet-50 model to a .pb file
in_tensor_name, out_tensor_names = keras_to_pb(model, "models/resnet50.pb", None)
除了 Keras,您还可以从以下位置下载 ResNet-50:
- 深度学习示例 GitHub 存储库:提供最新的深度学习示例网络。 您还可以看到 ResNet-50 分支,其中包含用于训练 ResNet-50 v1.5 模型的脚本和配方。
- NVIDIA NGC 模型:它具有预训练模型的检查点列表。 例如,在 ResNet-50v1.5 上搜索 TensorFlow 并从下载页面获取最新的检查点。
将 .pb 文件转换为 ONNX
第二步是将.pb模型转换为ONNX格式。 为此,首先安装 tf2onnx。
安装 tf2onnx 后,有两种方法可以将模型从 .pb 文件转换为 ONNX 格式。 第一种方法是使用命令行,第二种方法是使用 Python API。 运行以下命令:
python -m tf2onnx.convert --input /Path/to/resnet50.pb --inputs input_1:0 --outputs probs/Softmax:0 --output resnet50.onnx
从 ONNX 创建 TensorRT 引擎
要从 ONNX 文件创建 TensorRT 引擎,请运行以下命令:
import tensorrt as trt

TRT_LOGGER = trt.Logger(trt.Logger.WARNING)
trt_runtime = trt.Runtime(TRT_LOGGER)
def build_engine(onnx_path, shape = [1,224,224,3]):

   """
   This is the function to create the TensorRT engine
   Args:
      onnx_path : Path to onnx_file.
      shape : Shape of the input of the ONNX file.
  """
   with trt.Builder(TRT_LOGGER) as builder, builder.create_network(1) as network, builder.create_builder_config() as config, trt.OnnxParser(network, TRT_LOGGER) as parser:
       config.max_workspace_size = (256 << 20)
       with open(onnx_path, 'rb') as model:
           parser.parse(model.read())
       network.get_input(0).shape = shape
       engine = builder.build_engine(network, config)
       return engine

def save_engine(engine, file_name):
   buf = engine.serialize()
   with open(file_name, 'wb') as f:
       f.write(buf)
def load_engine(trt_runtime, plan_path):
   with open(plan_path, 'rb') as f:
       engine_data = f.read()
   engine = trt_runtime.deserialize_cuda_engine(engine_data)
   return engine
此代码应保存在 engine.py 文件中,稍后在帖子中使用。
此代码示例包含以下变量:
max_workspace_size:ICudaEngine 在执行时可以使用的最大 GPU 临时内存。
构建器创建一个空网络 (builder.create_network()),并且 ONNX 解析器将 ONNX 文件解析到网络中 (parser.parse(model.read()))。 您设置网络的输入形状 (network.get_input(0).shape = shape),之后构建器创建引擎 (engine = builder.build_cuda_engine(network))。 要创建引擎,请运行以下代码示例:
import engine as eng
import argparse
from onnx import ModelProto
import tensorrt as trt

 engine_name = “resnet50.plan”
 onnx_path = "/path/to/onnx/result/file/"
 batch_size = 1

 model = ModelProto()
 with open(onnx_path, "rb") as f:
    model.ParseFromString(f.read())

 d0 = model.graph.input[0].type.tensor_type.shape.dim[1].dim_value
 d1 = model.graph.input[0].type.tensor_type.shape.dim[2].dim_value
 d2 = model.graph.input[0].type.tensor_type.shape.dim[3].dim_value
 shape = [batch_size , d0, d1 ,d2]
 engine = eng.build_engine(onnx_path, shape= shape)
 eng.save_engine(engine, engine_name)
在此代码示例中,您首先从 ONNX 模型中获取输入形状。 接下来,创建引擎,然后将引擎保存在 .plan 文件中。
从 TensorRT 引擎运行推理:
TensorRT 引擎在以下工作流程中运行推理:
- 为 GPU 中的输入和输出分配缓冲区。
- 将数据从主机复制到 GPU 中分配的输入缓冲区。
- 在 GPU 中运行推理。
- 将结果从 GPU 复制到主机。
- 根据需要重塑结果。
这些步骤在以下代码示例中进行了详细说明。 此代码应保存在 inference.py 文件中,并在本文后面使用。
import tensorrt as trt
import pycuda.driver as cuda
import numpy as np
import pycuda.autoinit

def allocate_buffers(engine, batch_size, data_type):

   """
   This is the function to allocate buffers for input and output in the device
   Args:
      engine : The path to the TensorRT engine.
      batch_size : The batch size for execution time.
      data_type: The type of the data for input and output, for example trt.float32.

   Output:
      h_input_1: Input in the host.
      d_input_1: Input in the device.
      h_output_1: Output in the host.
      d_output_1: Output in the device.
      stream: CUDA stream.

   """

   # Determine dimensions and create page-locked memory buffers (which won't be swapped to disk) to hold host inputs/outputs.
   h_input_1 = cuda.pagelocked_empty(batch_size * trt.volume(engine.get_binding_shape(0)), dtype=trt.nptype(data_type))
   h_output = cuda.pagelocked_empty(batch_size * trt.volume(engine.get_binding_shape(1)), dtype=trt.nptype(data_type))
   # Allocate device memory for inputs and outputs.
   d_input_1 = cuda.mem_alloc(h_input_1.nbytes)

   d_output = cuda.mem_alloc(h_output.nbytes)
   # Create a stream in which to copy inputs/outputs and run inference.
   stream = cuda.Stream()
   return h_input_1, d_input_1, h_output, d_output, stream

def load_images_to_buffer(pics, pagelocked_buffer):
   preprocessed = np.asarray(pics).ravel()
   np.copyto(pagelocked_buffer, preprocessed)

def do_inference(engine, pics_1, h_input_1, d_input_1, h_output, d_output, stream, batch_size, height, width):
   """
   This is the function to run the inference
   Args:
      engine : Path to the TensorRT engine
      pics_1 : Input images to the model.
      h_input_1: Input in the host
      d_input_1: Input in the device
      h_output_1: Output in the host
      d_output_1: Output in the device
      stream: CUDA stream
      batch_size : Batch size for execution time
      height: Height of the output image
      width: Width of the output image

   Output:
      The list of output images

   """

   load_images_to_buffer(pics_1, h_input_1)

   with engine.create_execution_context() as context:
       # Transfer input data to the GPU.
       cuda.memcpy_htod_async(d_input_1, h_input_1, stream)

       # Run inference.

       context.profiler = trt.Profiler()
       context.execute(batch_size=1, bindings=[int(d_input_1), int(d_output)])

       # Transfer predictions back from the GPU.
       cuda.memcpy_dtoh_async(h_output, d_output, stream)
       # Synchronize the stream
       stream.synchronize()
       # Return the host output.
       out = h_output.reshape((batch_size,-1, height, width))
       return out
前两行用于确定输入和输出的维度。 您在主机 (h_input_1, h_output) 中创建页面锁定内存缓冲区。 然后,您为输入和输出分配与主机输入和输出(d_input_1,d_output)相同大小的设备内存。 下一步是创建 CUDA 流,用于在设备和主机分配的内存之间复制数据。
在此代码示例中,在 do_inference 函数中,第一步是使用 load_images_to_buffer 函数将图像加载到主机中的缓冲区。 然后将输入数据传输到 GPU (cuda.memcpy_htod_async(d_input_1, h_input_1, stream)) 并使用 context.execute 运行推理。 最后将结果从 GPU 复制到主机 (cuda.memcpy_dtoh_async(h_output, d_output, stream))。
语义分割 ONNX 工作流示例
在这篇文章中,您将使用类似的网络来运行 ONNX 工作流程以进行语义分割。该网络由一个基于 VGG16 的编码器和三个使用反卷积层实现的上采样层组成。该网络在 Cityscapes 数据集上进行了大约 40,000 次迭代训练。
有多种方法可以将 TensorFlow 模型转换为 ONNX 文件。一种方法是 ResNet50 部分中解释的方法。 Keras 还有自己的 Keras-to-ONNX 文件转换器。有时,TensorFlow-to-ONNX 不支持某些层,但 Keras 到 ONNX 转换器支持它们。根据 Keras 框架和使用的层类型,您可能需要在转换器之间进行选择。
在以下代码示例中,您使用 Keras-to-ONNX 转换器直接将 Keras 模型转换为 ONNX。下载预训练的语义分割文件,semantic_segmentation.hdf5。
import keras
import tensorflow as tf
from keras2onnx import convert_keras

def keras_to_onnx(model, output_filename):
   onnx = convert_keras(model, output_filename)
   with open(output_filename, "wb") as f:
       f.write(onnx.SerializeToString())

semantic_model = keras.models.load_model('/path/to/semantic_segmentation.hdf5')
keras_to_onnx(semantic_model, 'semantic_segmentation.onnx')

与前面的示例一样,使用以下代码示例创建语义分割引擎。
import engine as eng
from onnx import ModelProto
import tensorrt as trt


engine_name = 'semantic.plan'
onnx_path = "semantic.onnx"
batch_size = 1

model = ModelProto()
with open(onnx_path, "rb") as f:
  model.ParseFromString(f.read())

d0 = model.graph.input[0].type.tensor_type.shape.dim[1].dim_value
d1 = model.graph.input[0].type.tensor_type.shape.dim[2].dim_value
d2 = model.graph.input[0].type.tensor_type.shape.dim[3].dim_value
shape = [batch_size , d0, d1 ,d2]
engine = eng.build_engine(onnx_path, shape= shape)
eng.save_engine(engine, engine_name)
要测试模型的输出,请使用 Cityscapes 数据集。 要使用 Cityscapes,您必须具有以下功能:sub_mean_chw 和 color_map。
在下面的代码示例中,sub_mean_chw 用于从图像中减去平均值作为预处理步骤,而 color_map 是从类 ID 到颜色的映射。 后者用于可视化。
import numpy as np
from PIL import Image
import tensorrt as trt
import labels  # from cityscapes evaluation script
import skimage.transform

TRT_LOGGER = trt.Logger(trt.Logger.WARNING)
trt_runtime = trt.Runtime(TRT_LOGGER)

MEAN = (71.60167789, 82.09696889, 72.30508881)
CLASSES = 20

HEIGHT = 512
WIDTH = 1024

def sub_mean_chw(data):
   data = data.transpose((1, 2, 0))  # CHW -> HWC
   data -= np.array(MEAN)  # Broadcast subtract
   data = data.transpose((2, 0, 1))  # HWC -> CHW
   return data

def rescale_image(image, output_shape, order=1):
   image = skimage.transform.resize(image, output_shape,
               order=order, preserve_range=True, mode='reflect')
   return image

def color_map(output):
   output = output.reshape(CLASSES, HEIGHT, WIDTH)
   out_col = np.zeros(shape=(HEIGHT, WIDTH), dtype=(np.uint8, 3))
   for x in range(WIDTH):
       for y in range(HEIGHT):

           if (np.argmax(output[:, y, x] )== 19):
               out_col[y,x] = (0, 0, 0)
           else:
               out_col[y, x] = labels.id2label[labels.trainId2label[np.argmax(output[:, y, x])].id].color
   return out_col
以下代码示例是上一个示例的其余代码。 您必须先运行前一个块,因为您需要定义的函数。 使用该示例比较 Keras 模型和 TensorRT 引擎语义 .plan 文件的输出,然后可视化这两个输出。 根据需要替换下面内容 /path/to/semantic_segmentation.hdf5 和 input_file_path。
import engine as eng
import inference as inf
import keras
import tensorrt as trt

input_file_path = ‘munster_000172_000019_leftImg8bit.png’
onnx_file = "semantic.onnx"
serialized_plan_fp32 = "semantic.plan"
HEIGHT = 512
WIDTH = 1024

image = np.asarray(Image.open(input_file_path))
img = rescale_image(image, (512, 1024),order=1)
im = np.array(img, dtype=np.float32, order='C')
im = im.transpose((2, 0, 1))
im = sub_mean_chw(im)

engine = eng.load_engine(trt_runtime, serialized_plan_fp32)
h_input, d_input, h_output, d_output, stream = inf.allocate_buffers(engine, 1, trt.float32)
out = inf.do_inference(engine, im, h_input, d_input, h_output, d_output, stream, 1, HEIGHT, WIDTH)
out = color_map(out)

colorImage_trt = Image.fromarray(out.astype(np.uint8))
colorImage_trt.save(“trt_output.png”)

semantic_model = keras.models.load_model('/path/to/semantic_segmentation.hdf5')
out_keras= semantic_model.predict(im.reshape(-1, 3, HEIGHT, WIDTH))

out_keras = color_map(out_keras)
colorImage_k = Image.fromarray(out_keras.astype(np.uint8))
colorImage_k.save(“keras_output.png”)
下图 显示了实际图像和ground truth,以及 Keras 的输出与 TensorRT 引擎的输出。 如您所见,TensorRT 引擎的输出与 Keras 的输出相似。

ground truth

TensorRT输出结果

Keras输出结果

在其他网络上试试
现在您可以在其他网络上尝试 ONNX 工作流程。
例如,我们展示了如何将 ONNX 工作流与其他网络一起使用。此示例中的网络是来自 segmentation_models 库的 U-Net。在这里,我们只加载了模型,没有训练它。您可能需要在首选数据集上训练这些模型。
关于这些网络的重要一点是,当您加载这些网络时,它们的输入层大小如下:(None, None, None, 3)。要创建 TensorRT 引擎,您需要一个已知输入大小的 ONNX 文件。在将此模型转换为 ONNX 之前,通过将大小分配给其输入来更改网络,然后将其转换为 ONNX 格式。
例如,从该库 (segmentation_models) 加载 U-Net 网络并将大小 (244, 244, 3) 分配给其输入。在为推理创建 TensorRT 引擎后,进行与语义分割类似的转换。根据应用程序和数据集,您可能需要使用不同的颜色映射。
# Requirement for TensorFlow 2
pip install tensorflow-gpu==2.1.0

# Other requirements
pip install -U segmentation-models
import segmentation_models as sm
import keras
from keras2onnx import convert_keras
from engine import *
onnx_path = 'unet.onnx'
engine_name = 'unet.plan'
batch_size = 1
CHANNEL = 3
HEIGHT = 224
WIDTH = 224

model = sm.Unet()
model._layers[0].batch_input_shape = (None, 224,224,3)
model = keras.models.clone_model(model)

onx = convert_keras(model, onnx_path)
with open(onnx_path, "wb") as f:
  f.write(onx.SerializeToString())

shape = [batch_size , HEIGHT, WIDTH, CHANNEL]
engine = build_engine(onnx_path, shape= shape)
save_engine(engine, engine_name)
正如我们在本文前面提到的,另一种下载预训练模型的方法是从 NVIDIA NGC 模型下载它们。 它有一个预训练模型的检查点列表。 例如,您可以搜索 UNet for TensorFlow,然后转到下载页面以获取最新的内容。
总结
在这篇文章中,我们通过几个示例解释了如何使用 TensorFlow-to-ONNX-to-TensorRT 工作流程部署深度学习应用程序。 第一个示例是 ResNet-50 上的 ONNX-TensorRT,第二个示例是在 Cityscapes 数据集上训练的基于 VGG16 的语义分割。 在文章的最后,我们演示了如何在其他网络上应用此工作流程。
文章出处登录后可见!