文章目录
前言
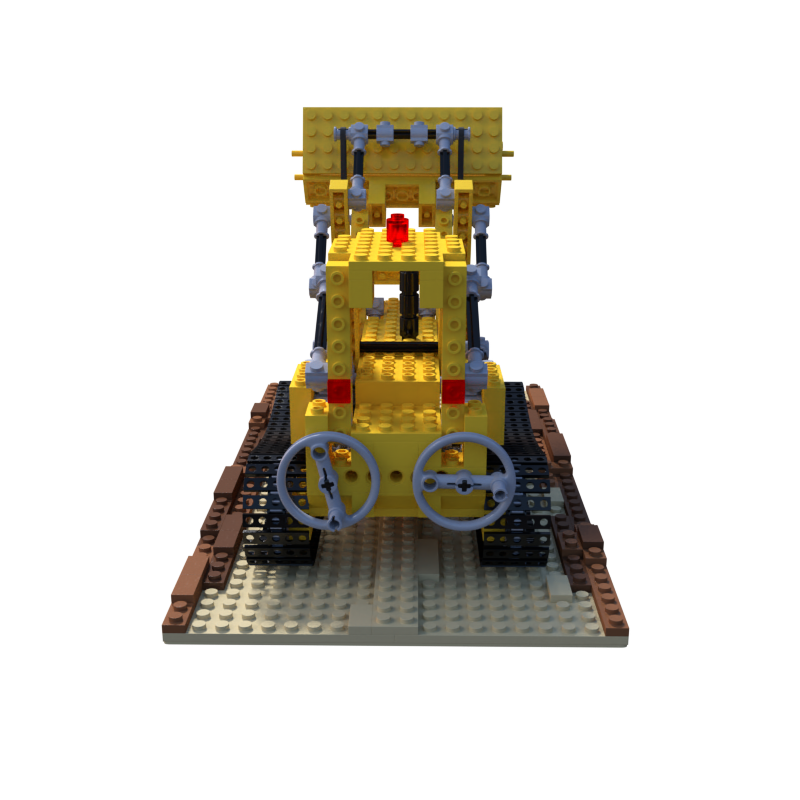
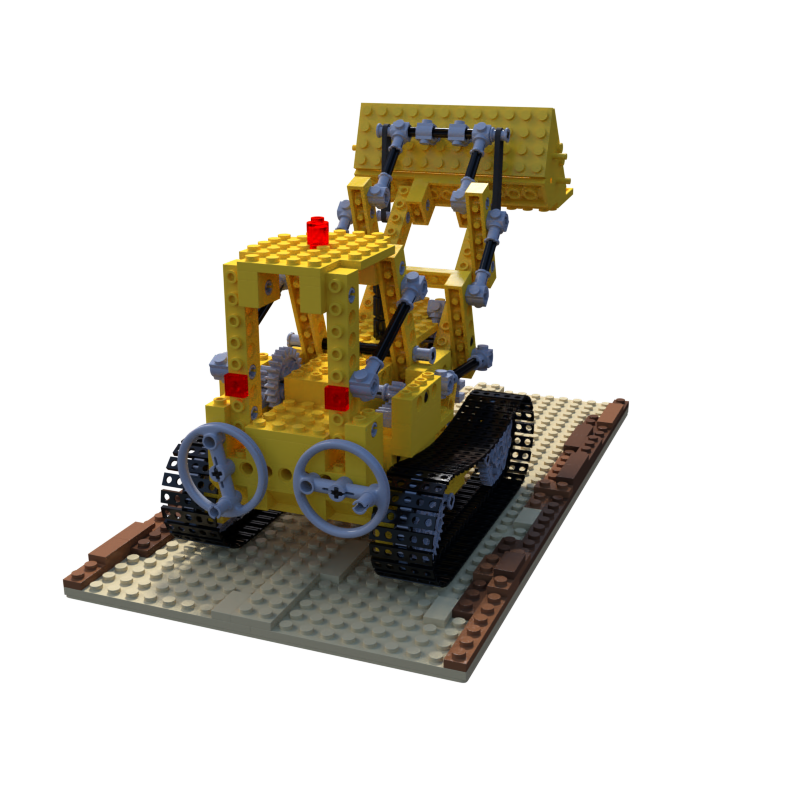
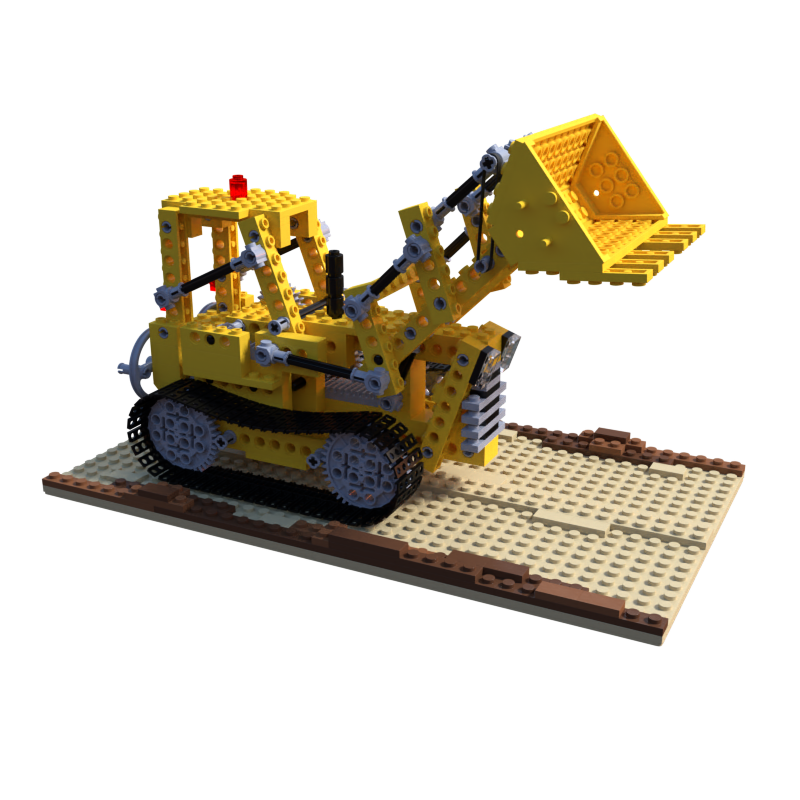
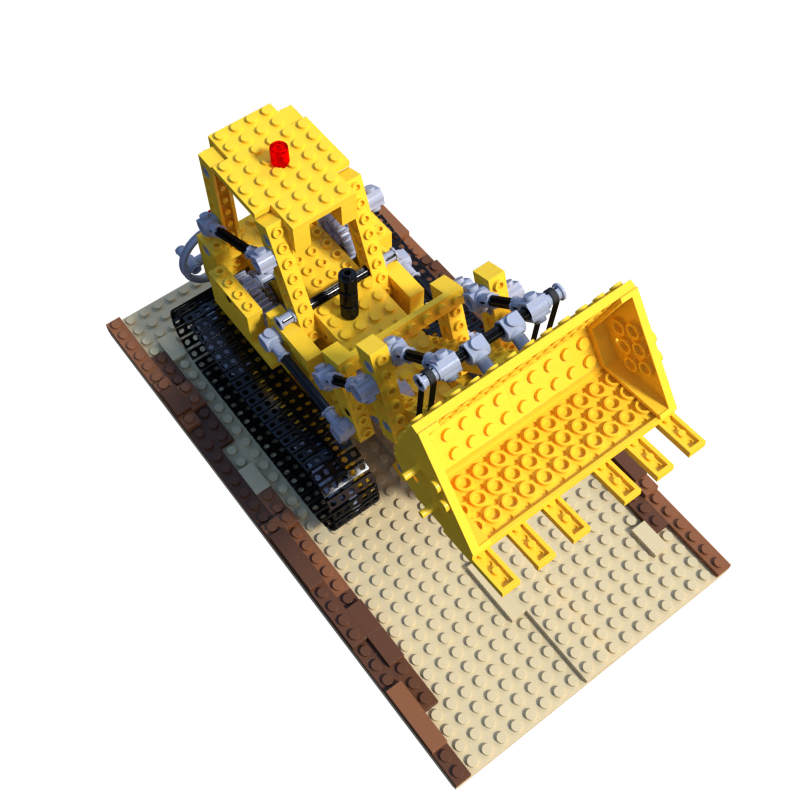
本文的目的是根据已知相机参数的blender模型,使用colmap进行稀疏重建和稠密重建。使用的blender数据是NeRF提供的synthetic数据集中的lego模型,其中的几张图片如下:
一、数据准备
文件夹应按如下层级组织:
 E:\rootpath
 ├─created
 │  └─sparse
 │   +── cameras.txt
 │   +── images.txt
 │   +── points3D.txt
 ├─dense
 ├─images
 │   +── r_0.png
 │   +── r_1.png
 │   +── ...
 ├─model
 └─triangulated
     └─sparse
 +── transforms_train.json
 +── blender_camera2colmap.py
 +── transform_colmap_camera.py
其中 created/sparse 文件夹下的 cameras.txt 对应我们指定的相机内参,images.txt 对应每张图片的相机外参信息,points3D.txt 对应稠密重建需要用到的稀疏点云。 dense 文件夹下保存colmap稠密重建结果,images 文件夹下存放输入的图片,也就是NeRF的训练视图, model 文件夹下存放colmap导出的稀疏重建结果,triangulated/sparse 文件夹下保存colmap稀疏重建结果,transforms_train.json 是NeRF blender数据集提供的真实的相机内外参数据,最后两个python文件是后面要用到的脚本。
二、从blender数据构造colmap数据集
这一步是为了读取NeRF的blender相机参数数据,转换成colmap可以使用的数据格式。blender相机参数采用右手坐标系,相机的位姿用于从相机坐标系向世界坐标系转换,以旋转矩阵 R 和平移向量 T 的格式给出;colmap相机参数采用opecv格式的坐标系,相机的位姿用于从世界坐标系向相机坐标系转换,以四元数 Quat 和平移向量 T 的格式给出,因此需要手动进行转换以获得cameras.txt ,images.txt 和 points3D.txt。三个文件各自的格式规定如下:
cameras.txt
# Camera list with one line of data per camera:
# CAMERA_ID, MODEL, WIDTH, HEIGHT, PARAMS[fx,fy,cx,cy]
# Number of cameras: 1
1 PINHOLE 800 800 1111.1110311937682 1111.1110311937682 400.0 400.0
images.txt
# Image list with two lines of data per image:
# IMAGE_ID, QW, QX, QY, QZ, TX, TY, TZ, CAMERA_ID, NAME
# POINTS2D[] as (X, Y, POINT3D_ID)
# Number of images: 100, mean observations per image: 100
1 0.0041 0.0056 -0.8064 0.5919 6.3306e-10 -5.1536e-08 4.0311 1 r_0.png
# Make sure every other line is left empty
2 0.1086 0.15132 -0.7980 0.5729 4.9764e-08 -2.7316e-08 4.0311 1 r_1.png

3 0.5450 0.6810 -0.3817 0.3055 -1.2894e-07 -2.6036e-08 4.0311 1 r_10.png
points3D.txt
# 3D point list with one line of data per point:
# POINT3D_ID, X, Y, Z, R, G, B, ERROR, TRACK[] as (IMAGE_ID, POINT2D_IDX)
# Number of points: 12888, mean track length: 4.5869025450031033
944 -0.3789 0.5152 -0.1104 58 65 88 0.0692 13 521 49 537 3 446
1054 -0.1167 -0.3606 -0.0849 180 176 187 0.2641 13 1285 49 1440 3 1307
5 -0.1028 -0.4174 0.8981 23 18 7 0.0205 65 33 1 23
完成该转换的 blender_camera2colmap.py 脚本内容如下:
# 该脚本是为了从blender数据集的tranforms_train.json构造colmap的相机参数和图片参数数据集,以便使用指定相机视角的colmap进行重建。
# 参考:https://www.cnblogs.com/li-minghao/p/11865794.html
# 运行方法:python blender_camera2colmap.py

import numpy as np
import json
import os
import imageio
import math

# TODO: change image size
H = 800
W = 800

blender2opencv = np.array([[1, 0, 0, 0], [0, -1, 0, 0], [0, 0, -1, 0], [0, 0, 0, 1]])
# 注意:最后输出的图片名字要按自然字典序排列,例:0, 1, 100, 101, 102, 2, 3...因为colmap内部是这么排序的
fnames = list(sorted(os.listdir('images')))
fname2pose = {}

with open('transforms_train.json', 'r') as f:
    meta = json.load(f)

fx = 0.5 * W / np.tan(0.5 * meta['camera_angle_x'])  # original focal length
if 'camera_angle_y' in meta:
    fy = 0.5 * H / np.tan(0.5 * meta['camera_angle_y'])  # original focal length
else:
    fy = fx
if 'cx' in meta:
    cx, cy = meta['cx'], meta['cy']
else:
    cx = 0.5 * W
    cy = 0.5 * H
with open('created/sparse/cameras.txt', 'w') as f:
    f.write(f'1 PINHOLE {W} {H} {fx} {fy} {cx} {cy}')
    idx = 1
    for frame in meta['frames']:
        fname = frame['file_path'].split('/')[-1]
        if not (fname.endswith('.png') or fname.endswith('.jpg')):
            fname += '.png'
        # blend到opencv的转换:y轴和z轴方向翻转
        pose = np.array(frame['transform_matrix']) @ blender2opencv
        fname2pose.update({fname: pose})

with open('created/sparse/images.txt', 'w') as f:
    for fname in fnames:
        pose = fname2pose[fname]
        # 参考https://blog.csdn.net/weixin_44120025/article/details/124604229:colmap中相机坐标系和世界坐标系是相反的
        # blender中:world = R * camera + T; colmap中:camera = R * world + T
        # 因此转换公式为
        # R’ = R^-1
        # t’ = -R^-1 * t
        R = np.linalg.inv(pose[:3, :3])
        T = -np.matmul(R, pose[:3, 3])
        q0 = 0.5 * math.sqrt(1 + R[0, 0] + R[1, 1] + R[2, 2])
        q1 = (R[2, 1] - R[1, 2]) / (4 * q0)
        q2 = (R[0, 2] - R[2, 0]) / (4 * q0)
        q3 = (R[1, 0] - R[0, 1]) / (4 * q0)

        f.write(f'{idx} {q0} {q1} {q2} {q3} {T[0]} {T[1]} {T[2]} 1 {fname}\n\n')
        idx += 1

with open('created/sparse/points3D.txt', 'w') as f:
   f.write('')
直接在根目录 rootpath 下运行
python blender_camera2colmap.py
即可获得 created/sparse 文件下所需的内容。
三、COLMAP重建流程
1. 抽取图像特征
colmap feature_extractor --database_path database.db --image_path images
终端输出示例如下:
==============================================================================
Feature extraction
==============================================================================

Processed file [1/100]
  Name:            r_0.png
  Dimensions:      800 x 800
  Camera:          #1 - SIMPLE_RADIAL
  Focal Length:    960.00px
  Features:        2403
Processed file [2/100]
  Name:            r_1.png
  Dimensions:      800 x 800
  Camera:          #2 - SIMPLE_RADIAL
  Focal Length:    960.00px
  Features:        2865
Processed file [3/100]
..........
..........
Elapsed time: 0.075 [minutes]
2. 导入指定相机内参
前一步colmap获得了估计的相机内参,但我们有真实的相机内参,所以将colmap估出来的相机内参提环成我们自己的,使用的 transform_colmap_camera.py 脚本内容如下:
# This script is based on an original implementation by True Price.
# 用于手动从database.db中读取相机参数并更改为cameras.txt中的相机参数
# 参考:https://www.cnblogs.com/li-minghao/p/11865794.html

import sys
import numpy as np
import sqlite3


IS_PYTHON3 = sys.version_info[0] >= 3
MAX_IMAGE_ID = 2**31 - 1

CREATE_CAMERAS_TABLE = """CREATE TABLE IF NOT EXISTS cameras (
    camera_id INTEGER PRIMARY KEY AUTOINCREMENT NOT NULL,
    model INTEGER NOT NULL,
    width INTEGER NOT NULL,
    height INTEGER NOT NULL,
    params BLOB,
    prior_focal_length INTEGER NOT NULL)"""

CREATE_DESCRIPTORS_TABLE = """CREATE TABLE IF NOT EXISTS descriptors (
    image_id INTEGER PRIMARY KEY NOT NULL,
    rows INTEGER NOT NULL,
    cols INTEGER NOT NULL,
    data BLOB,
    FOREIGN KEY(image_id) REFERENCES images(image_id) ON DELETE CASCADE)"""

CREATE_IMAGES_TABLE = """CREATE TABLE IF NOT EXISTS images (
    image_id INTEGER PRIMARY KEY AUTOINCREMENT NOT NULL,
    name TEXT NOT NULL UNIQUE,
    camera_id INTEGER NOT NULL,
    prior_qw REAL,
    prior_qx REAL,
    prior_qy REAL,
    prior_qz REAL,
    prior_tx REAL,
    prior_ty REAL,
    prior_tz REAL,
    CONSTRAINT image_id_check CHECK(image_id >= 0 and image_id < {}),
    FOREIGN KEY(camera_id) REFERENCES cameras(camera_id))
""".format(MAX_IMAGE_ID)

CREATE_TWO_VIEW_GEOMETRIES_TABLE = """
CREATE TABLE IF NOT EXISTS two_view_geometries (
    pair_id INTEGER PRIMARY KEY NOT NULL,
    rows INTEGER NOT NULL,
    cols INTEGER NOT NULL,
    data BLOB,
    config INTEGER NOT NULL,
    F BLOB,
    E BLOB,
    H BLOB,
    qvec BLOB,
    tvec BLOB)
"""

CREATE_KEYPOINTS_TABLE = """CREATE TABLE IF NOT EXISTS keypoints (
    image_id INTEGER PRIMARY KEY NOT NULL,
    rows INTEGER NOT NULL,
    cols INTEGER NOT NULL,
    data BLOB,
    FOREIGN KEY(image_id) REFERENCES images(image_id) ON DELETE CASCADE)
"""

CREATE_MATCHES_TABLE = """CREATE TABLE IF NOT EXISTS matches (
    pair_id INTEGER PRIMARY KEY NOT NULL,
    rows INTEGER NOT NULL,
    cols INTEGER NOT NULL,
    data BLOB)"""

CREATE_NAME_INDEX = \
    "CREATE UNIQUE INDEX IF NOT EXISTS index_name ON images(name)"

CREATE_ALL = "; ".join([
    CREATE_CAMERAS_TABLE,
    CREATE_IMAGES_TABLE,
    CREATE_KEYPOINTS_TABLE,
    CREATE_DESCRIPTORS_TABLE,
    CREATE_MATCHES_TABLE,
    CREATE_TWO_VIEW_GEOMETRIES_TABLE,
    CREATE_NAME_INDEX
])


def array_to_blob(array):
    if IS_PYTHON3:
        return array.tostring()
    else:
        return np.getbuffer(array)

def blob_to_array(blob, dtype, shape=(-1,)):
    if IS_PYTHON3:
        return np.fromstring(blob, dtype=dtype).reshape(*shape)
    else:
        return np.frombuffer(blob, dtype=dtype).reshape(*shape)

class COLMAPDatabase(sqlite3.Connection):

    @staticmethod
    def connect(database_path):
        return sqlite3.connect(database_path, factory=COLMAPDatabase)

    def __init__(self, *args, **kwargs):
        super(COLMAPDatabase, self).__init__(*args, **kwargs)

        self.create_tables = lambda: self.executescript(CREATE_ALL)
        self.create_cameras_table = \
            lambda: self.executescript(CREATE_CAMERAS_TABLE)
        self.create_descriptors_table = \
            lambda: self.executescript(CREATE_DESCRIPTORS_TABLE)
        self.create_images_table = \
            lambda: self.executescript(CREATE_IMAGES_TABLE)
        self.create_two_view_geometries_table = \
            lambda: self.executescript(CREATE_TWO_VIEW_GEOMETRIES_TABLE)
        self.create_keypoints_table = \
            lambda: self.executescript(CREATE_KEYPOINTS_TABLE)
        self.create_matches_table = \
            lambda: self.executescript(CREATE_MATCHES_TABLE)
        self.create_name_index = lambda: self.executescript(CREATE_NAME_INDEX)

    def update_camera(self, model, width, height, params, camera_id):
        params = np.asarray(params, np.float64)
        cursor = self.execute(
            "UPDATE cameras SET model=?, width=?, height=?, params=?, prior_focal_length=1 WHERE camera_id=?",
            (model, width, height, array_to_blob(params),camera_id))
        return cursor.lastrowid

def camTodatabase(txtfile):
    import os
    import argparse

    camModelDict = {'SIMPLE_PINHOLE': 0,
                    'PINHOLE': 1,
                    'SIMPLE_RADIAL': 2,
                    'RADIAL': 3,
                    'OPENCV': 4,
                    'FULL_OPENCV': 5,
                    'SIMPLE_RADIAL_FISHEYE': 6,
                    'RADIAL_FISHEYE': 7,
                    'OPENCV_FISHEYE': 8,
                    'FOV': 9,
                    'THIN_PRISM_FISHEYE': 10}
    parser = argparse.ArgumentParser()
    parser.add_argument("--database_path", default="database.db")
    args = parser.parse_args()
    if os.path.exists(args.database_path)==False:
        print("ERROR: database path dosen't exist -- please check database.db.")
        return
    # Open the database.
    db = COLMAPDatabase.connect(args.database_path)

    idList=list()
    modelList=list()
    widthList=list()
    heightList=list()
    paramsList=list()
    # Update real cameras from .txt
    with open(txtfile, "r") as cam:
        lines = cam.readlines()
        for i in range(0,len(lines),1):
            if lines[i][0]!='#':
                strLists = lines[i].split()
                cameraId=int(strLists[0])
                cameraModel=camModelDict[strLists[1]] #SelectCameraModel
                width=int(strLists[2])
                height=int(strLists[3])
                paramstr=np.array(strLists[4:12])
                params = paramstr.astype(np.float64)
                idList.append(cameraId)
                modelList.append(cameraModel)
                widthList.append(width)
                heightList.append(height)
                paramsList.append(params)
                camera_id = db.update_camera(cameraModel, width, height, params, cameraId)

    # Commit the data to the file.
    db.commit()
    # Read and check cameras.
    rows = db.execute("SELECT * FROM cameras")
    for i in range(0,len(idList),1):
        camera_id, model, width, height, params, prior = next(rows)
        params = blob_to_array(params, np.float64)
        assert camera_id == idList[i]
        assert model == modelList[i] and width == widthList[i] and height == heightList[i]
        assert np.allclose(params, paramsList[i])

    # Close database.db.
    db.close()

if __name__ == "__main__":
    camTodatabase("created/sparse/cameras.txt")
直接在根目录 rootpath 下运行
python transform_colmap_camera.py
即可完成database.db中相机内参的替换。
3. 特征匹配
colmap exhaustive_matcher --database_path database.db
终端输出示例如下:
==============================================================================
Exhaustive feature matching
==============================================================================

Matching block [1/2, 1/2] in 5.688s
Matching block [1/2, 2/2] in 5.234s
Matching block [2/2, 1/2] in 5.609s
Matching block [2/2, 2/2] in 5.165s
Elapsed time: 0.364 [minutes]
4. 三角测量
colmap point_triangulator --database_path database.db --image_path images --input_path created/sparse --output_path triangulated/sparse
终端输出示例如下:
==============================================================================
Loading model
==============================================================================
==============================================================================
Loading database
==============================================================================
Loading cameras... 100 in 0.000s
Loading matches... 1330 in 0.003s
Loading images... 100 in 0.012s (connected 100)
Building correspondence graph... in 0.025s (ignored 0)
Elapsed time: 0.001 [minutes]

==============================================================================
Triangulating image #1 (0)
==============================================================================
 => Image sees 0 / 465 points
 => Triangulated 284 points
..........
..........
Bundle adjustment report
------------------------
   Residuals : 118254
  Parameters : 38718
  Iterations : 3
        Time : 0.102123 [s]
Initial cost : 0.469918 [px]
  Final cost : 0.469793 [px]
 Termination : Convergence

 => Completed observations: 2
 => Merged observations: 0
 => Filtered observations: 1
 => Changed observations: 0.000051
==============================================================================
Extracting colors
==============================================================================
5. 使用指定相机参数进行稠密重建
运行
colmap gui
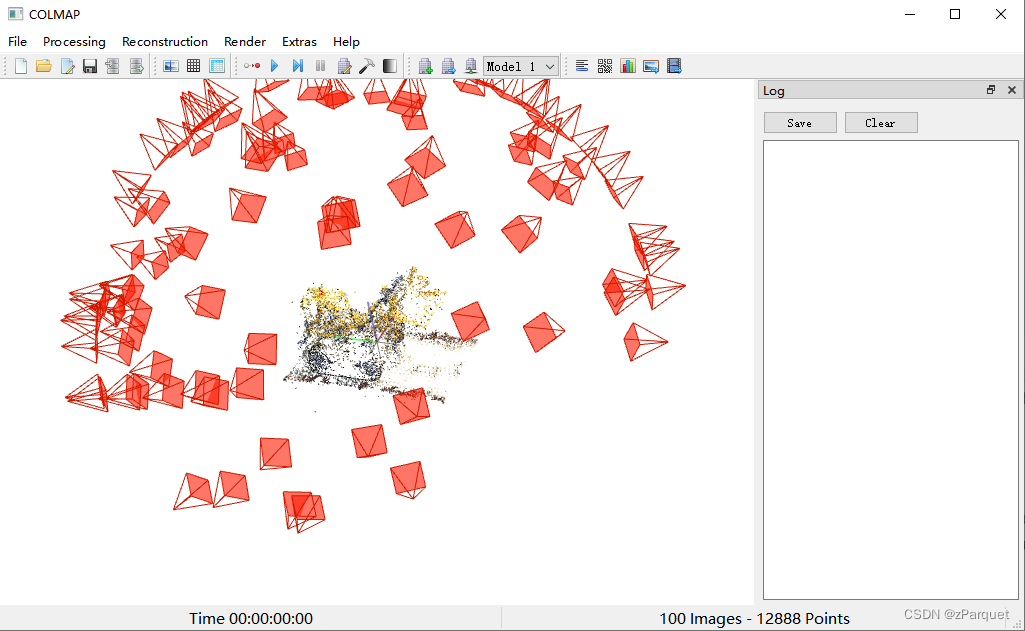
在COLMAP图形界面中选择 “File”->“Import Model” ,可以把triangulated/sparse下的内容导入进来看相机视角和稀疏点云重建的如何,以此确定前面的步骤是否执行正确。如果提示“找不到project.ini”可以忽略。我的效果如下:
【注意:接下来这一步很重要】
然后选择 “File”->“Export model as txt”,把结果保存在 model 文件夹下,这里包括了colmap稀疏重建估出来的相机内外参和稀疏点云数据。我们把 model/points3D.txt 文件复制到 created/sparse 文件夹下,覆盖掉原来空的 points3D.txt 文件,这是接下来稠密重建需要用到的稀疏点云数据。
接下来运行
colmap image_undistorter --image_path images --input_path created/sparse --output_path dense
终端输出示例如下:
==============================================================================
Reading reconstruction
==============================================================================

 => Reconstruction with 100 images and 12906 points

==============================================================================
Image undistortion
==============================================================================

Undistorted image found; copying to location: dense\images\r_0.pngUndistorted image found; copying to location: dense\images\r_10.png
Undistorting image [1/100]
Undistorted image found; copying to location: dense\images\r_13.png
Undistorted image found; copying to location: dense\images\r_14.png
..........
..........
Writing reconstruction...
Writing configuration...
Writing scripts...
Elapsed time: 0.002 [minutes]
6. 立体匹配
colmap patch_match_stereo --workspace_path dense
这一步是最耗时的,如果图片多的话,会花费长达几个小时的时间。在lego数据集上大概花费一个小时。终端输出示例如下:
Reading workspace...
Reading configuration...
Configuration has 100 problems...

==============================================================================
Processing view 1 / 100 for r_0.png
==============================================================================

Reading inputs...

PatchMatch::Problem
-------------------
ref_image_idx: 0
src_image_idxs: 20 36 80 64 37 61 1 73 58 32 47 19 3 46 57 4 77 53 28 33

PatchMatchOptions
-----------------
max_image_size: -1
gpu_index: 0
depth_min: 2.2507
depth_max: 6.0306
window_radius: 5
window_step: 1
sigma_spatial: 5
sigma_color: 0.2
num_samples: 15
ncc_sigma: 0.6
min_triangulation_angle: 1
incident_angle_sigma: 0.9
num_iterations: 5
geom_consistency: 0
geom_consistency_regularizer: 0.3
geom_consistency_max_cost: 3
filter: 0
filter_min_ncc: 0.1
filter_min_triangulation_angle: 3
filter_min_num_consistent: 2
filter_geom_consistency_max_cost: 1
write_consistency_graph: 0
allow_missing_files: 0

PatchMatch::Run
---------------
Initialization: 0.1131s
 Sweep 1: 0.4373s
 Sweep 2: 0.3998s
 Sweep 3: 0.4118s
 Sweep 4: 0.3944s
Iteration 1: 1.6447s
 Sweep 1: 0.4101s
 Sweep 2: 0.3992s
..........
..........
Writing geometric output for r_99.png
Elapsed time: 61.006 [minutes]
7. 稠密点云融合
colmap stereo_fusion --workspace_path dense --output_path dense/fused.ply
终端输出示例如下:
StereoFusion::Options
---------------------
mask_path:
max_image_size: -1
min_num_pixels: 5
max_num_pixels: 10000
max_traversal_depth: 100
max_reproj_error: 2
max_depth_error: 0.01
max_normal_error: 10
check_num_images: 50
use_cache: 0
cache_size: 32
bbox_min: -3.40282e+38 -3.40282e+38 -3.40282e+38
bbox_max: 3.40282e+38 3.40282e+38 3.40282e+38

Reading workspace...
Loading workspace data with 8 threads...
Elapsed time: 0.021 [minutes]
Reading configuration...
Starting fusion with 8 threads
Fusing image [1/100] with index 0 in 2.167s (36527 points)
Fusing image [2/100] with index 36 in 0.655s (50311 points)
Fusing image [3/100] with index 61 in 0.568s (61807 points)
..........
..........
Number of fused points: 493937
Elapsed time: 0.399 [minutes]
Writing output: dense/fused.ply
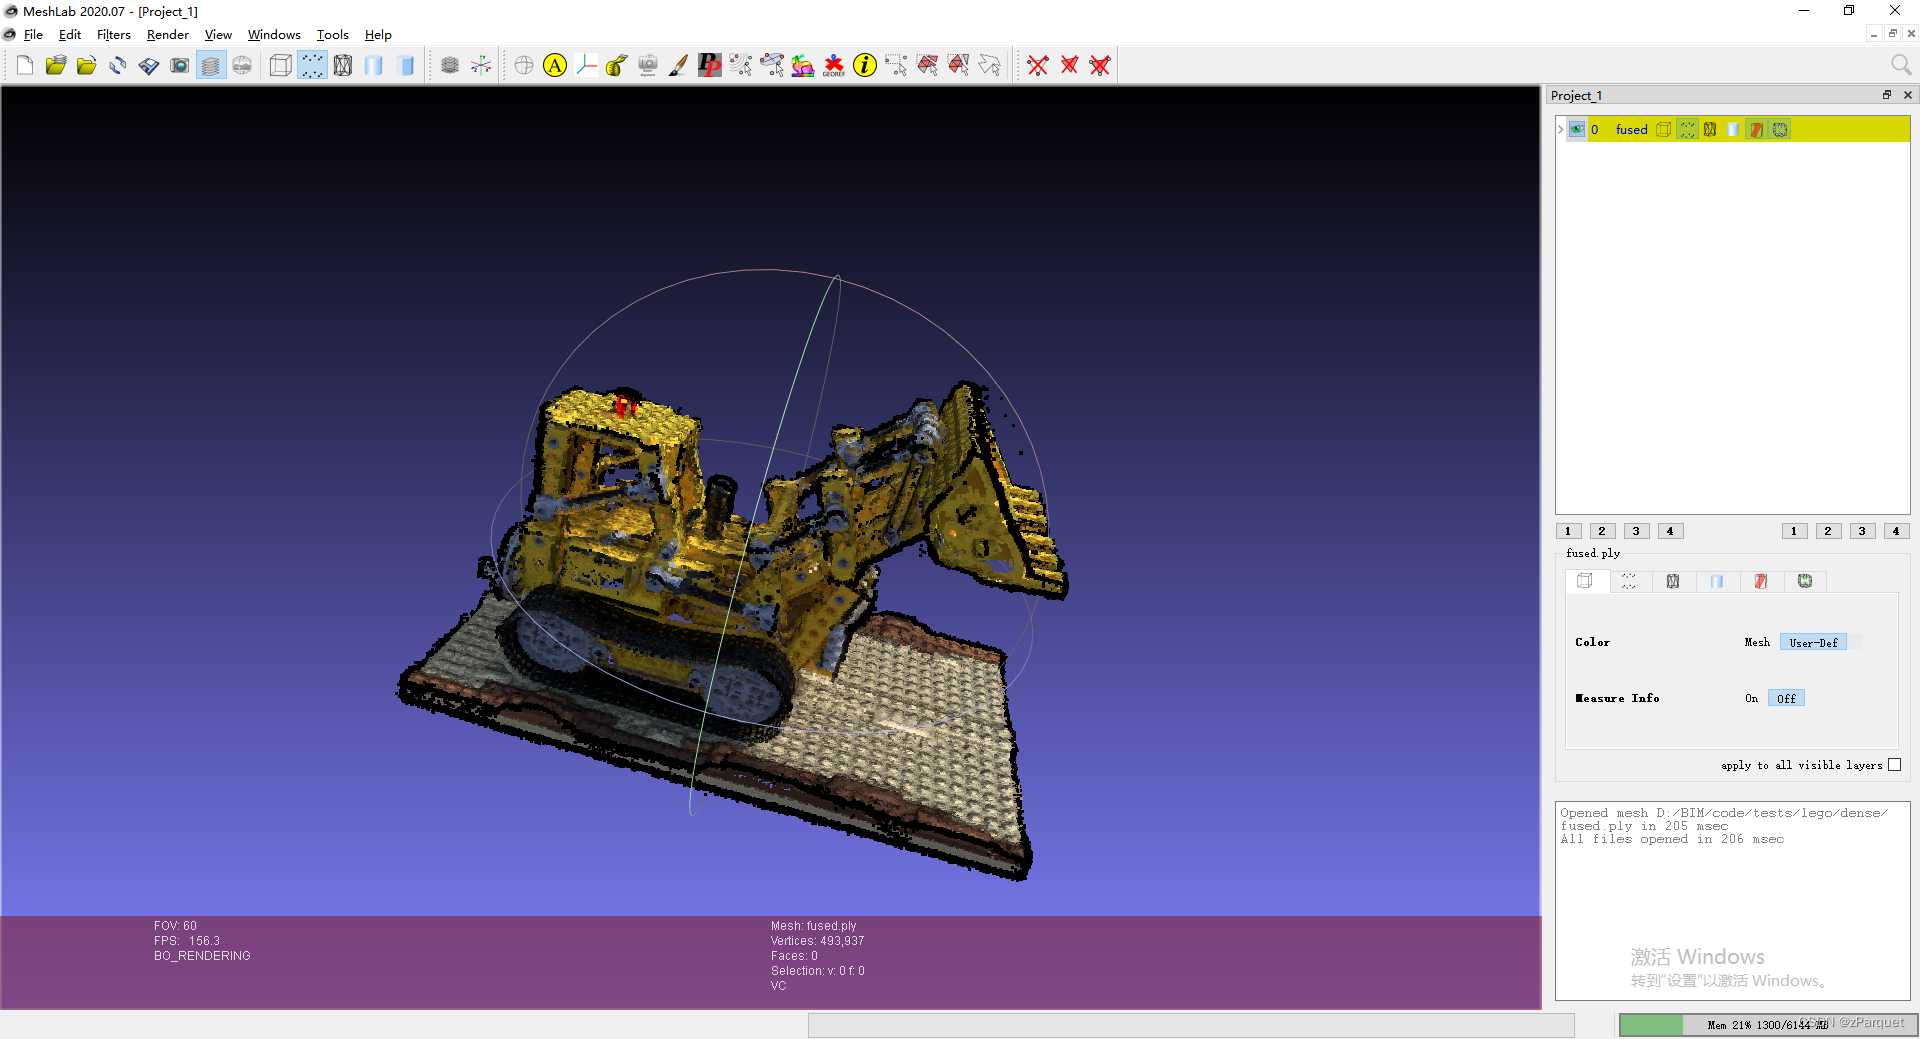
8. 网格重建
这最后一步COLMAP命令行模式下使用起来比较复杂,建议在meshlab软件中操作。首先用meshlab打开 fused.ply:
选择 “Filters”->“Remeshing, Simplification and Reconstruction”->“Surface Reconstruction: Screened Poisson”,参数可以自行调节。
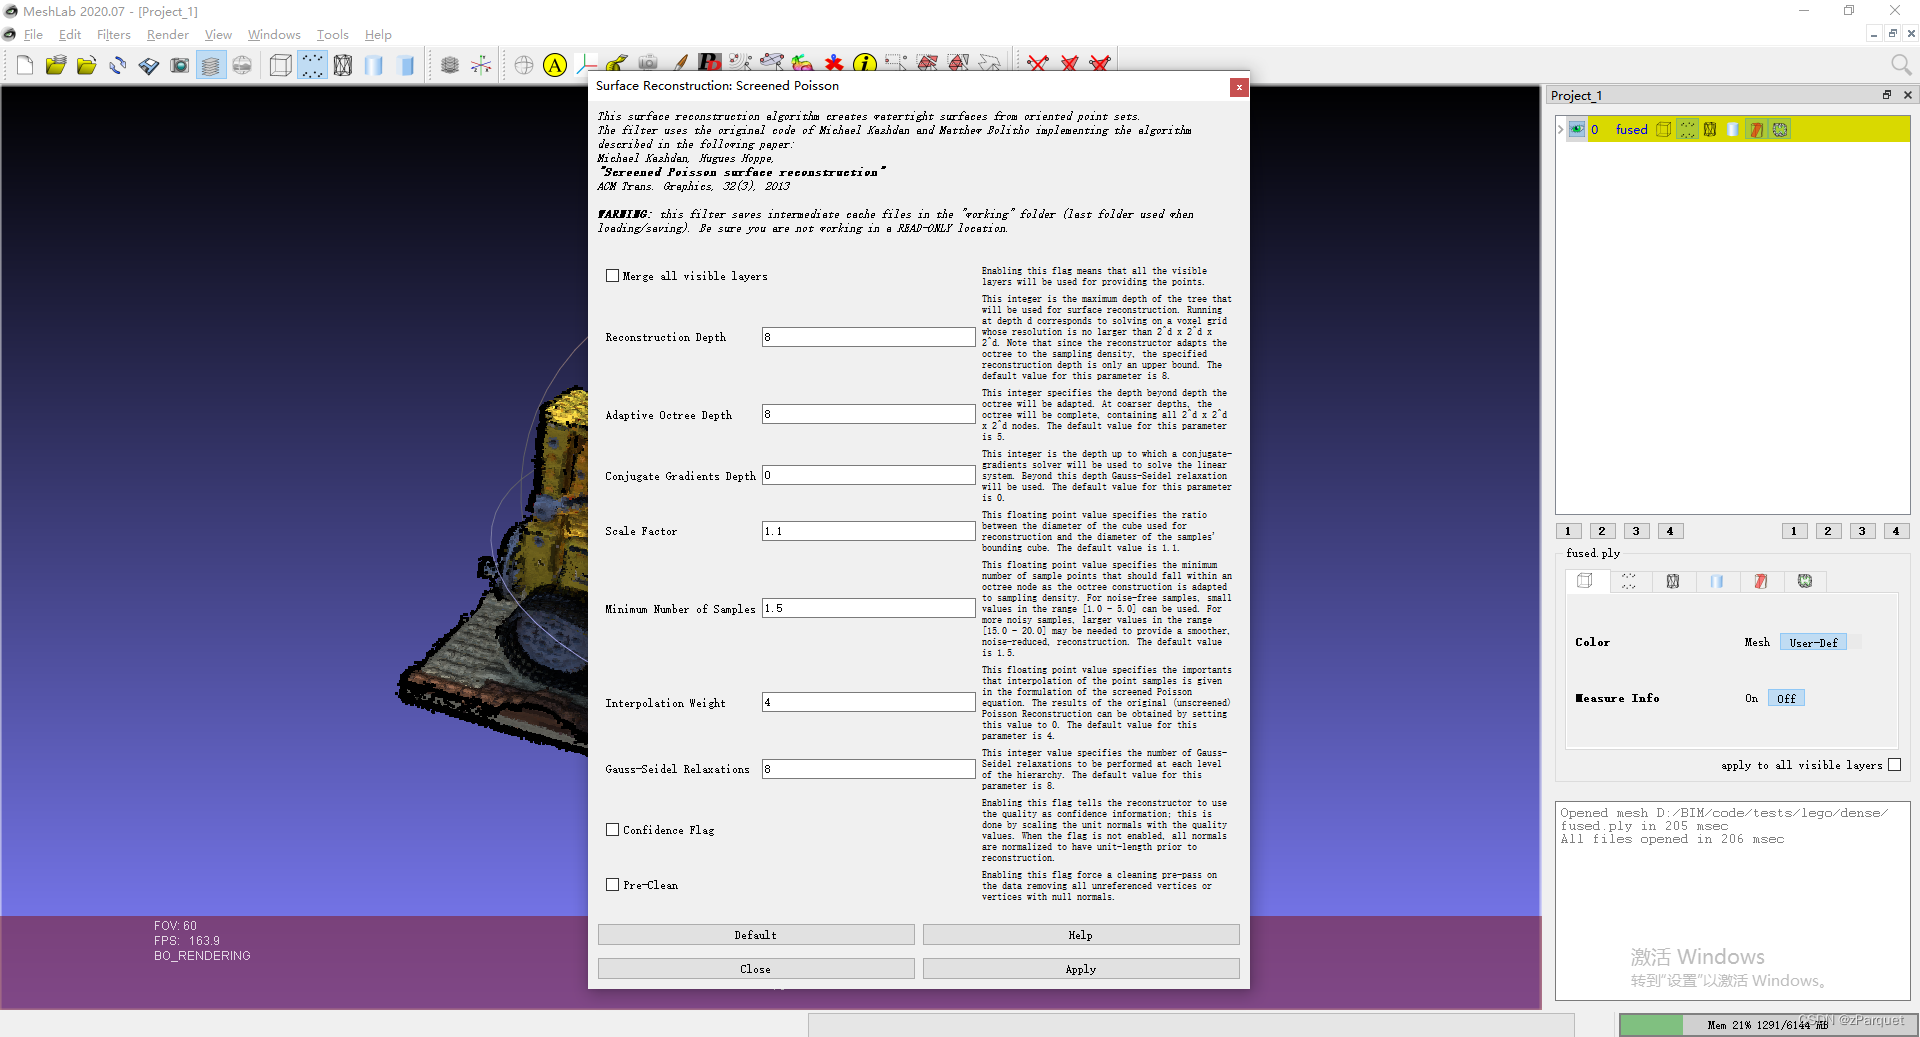
这里建议将 Adaptive Octree Depth 调为和 Reconstruction Depth 一致。该数值为重建网格的分辨率,设置为即为
的分辨率。点击 **“Apply”**开始重建,在meshlab中观察重建好的mesh效果如下:
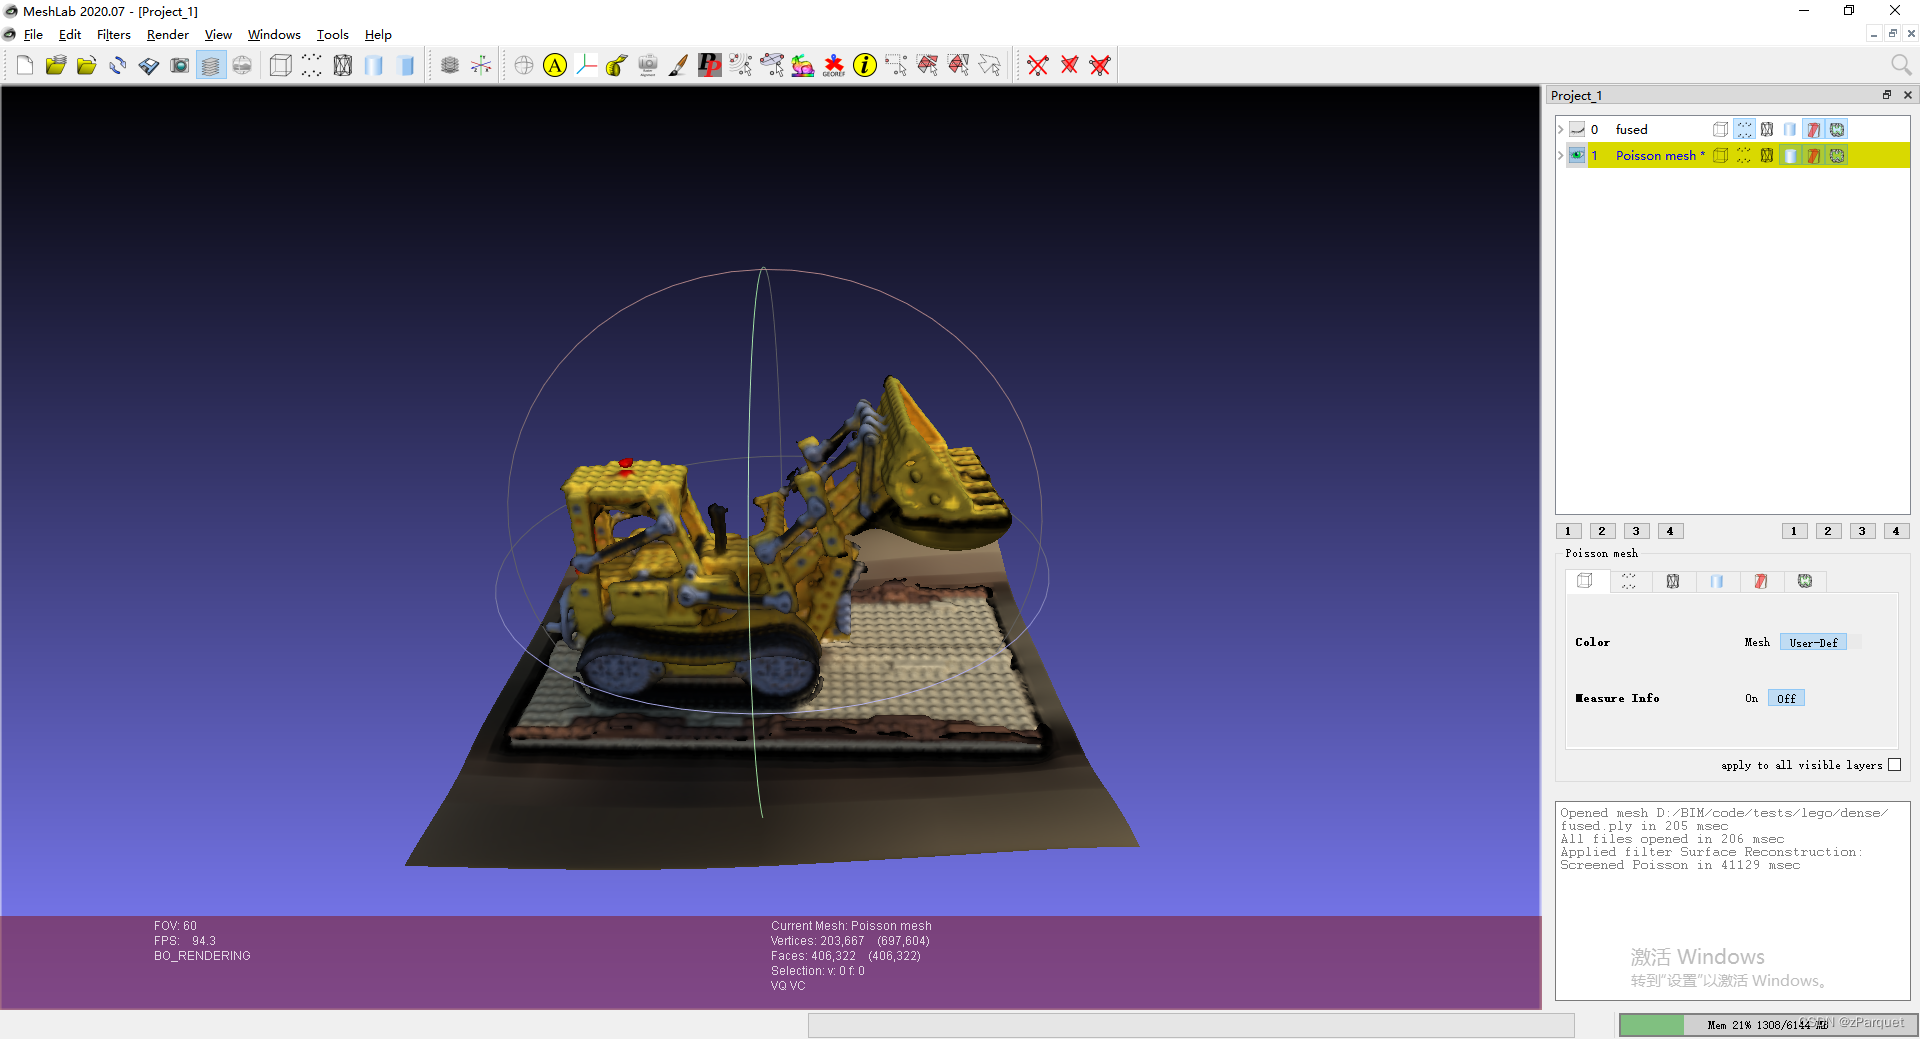
之后选择 “File”->“Export Mesh” 保存重建好的mesh即可。
总结
COLMAP的重建流程比较复杂,最后总结一下所有用到的命令:
0. 构造数据集

准备好images里的图片和对应的相机参数文件transforms_train.json,然后
python blender_camera2colmap.py

1. 抽取图像特征
colmap feature_extractor --database_path database.db --image_path images

2. 自动导入指定相机内参

python transform_colmap_camera.py

3. 特征匹配

colmap exhaustive_matcher --database_path database.db

4. 三角测量

colmap point_triangulator --database_path database.db --image_path images --input_path created/sparse --output_path triangulated/sparse

5. 使用指定相机参数进行稠密重建

先在 colmap gui 中导出points3D.txt覆盖到created/sparse里,然后
colmap image_undistorter --image_path images --input_path created/sparse --output_path dense

6. 立体匹配

colmap patch_match_stereo --workspace_path dense

7. 稠密点云融合

colmap stereo_fusion --workspace_path dense --output_path dense/fused.ply

8. 网格重建

在meshlab使用泊松重建
文章出处登录后可见!