目录
0、项目介绍
在Opencv项目实战:15 手势缩放图片中,我们搭建了HandTrackingModule模块,但在这里你还得用本节的HandTrackingModule,因为有些功能并不需要,且也是分散了一些函数的功能。
在这一节中,我的想法是通过点单个食指控制move,双指合并控制click,这样就能够实现手势控制鼠标。
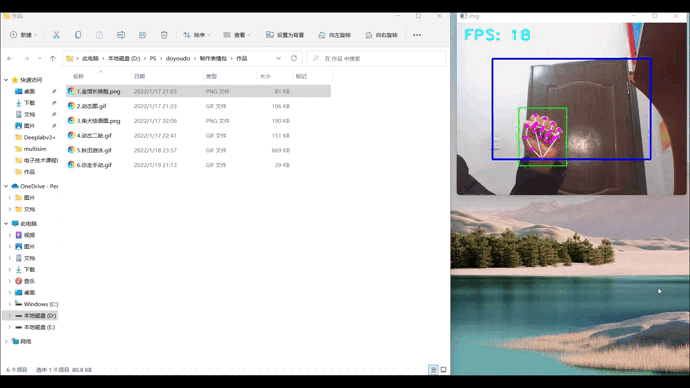
1、效果展示
2、项目搭建
简单来说,并没有上面需要添加的,只是在此之前你需要下载autopy:
pip install autopy
3、项目代码展示
HandTrackingModule.py
import cv2
import mediapipe as mp
import math
import time

class handDetector:

    def __init__(self, mode=False, maxHands=2, detectionCon=0.5, minTrackCon=0.5):
        self.mode = mode
        self.maxHands = maxHands
        self.detectionCon = detectionCon
        self.minTrackCon = minTrackCon

        self.mpHands = mp.solutions.hands
        self.hands = self.mpHands.Hands(static_image_mode=self.mode, max_num_hands=self.maxHands,
                                        min_detection_confidence=self.detectionCon,
                                        min_tracking_confidence=self.minTrackCon)
        self.mpDraw = mp.solutions.drawing_utils
        self.tipIds = [4, 8, 12, 16, 20]
        self.fingers = []
        self.lmList = []

    def findHands(self, img, draw=True):
        imgRGB = cv2.cvtColor(img, cv2.COLOR_BGR2RGB)
        self.results = self.hands.process(imgRGB)
        # print(results.multi_hand_landmarks)

        if self.results.multi_hand_landmarks:
            for handLms in self.results.multi_hand_landmarks:
                if draw:
                    self.mpDraw.draw_landmarks(img, handLms,
                                               self.mpHands.HAND_CONNECTIONS)

        return img


    def findPosition(self, img, handNo=0, draw=True):
        self.lmList=[]
        bbox = 0
        if self.results.multi_hand_landmarks:
            myHand = self.results.multi_hand_landmarks[handNo]
            xList = []
            yList = []
            for id, lm in enumerate(myHand.landmark):
                # print(id, lm)
                h, w, c = img.shape
                cx, cy = int(lm.x * w), int(lm.y * h)
                xList.append(cx)
                yList.append(cy)
                # print(id, cx, cy)
                self.lmList.append([id, cx, cy])
                if draw:
                    cv2.circle(img, (cx, cy), 5, (255, 0, 255), cv2.FILLED)

            xmin, xmax = min(xList), max(xList)
            ymin, ymax = min(yList), max(yList)
            bbox = xmin, ymin, xmax, ymax

            if draw:
                cv2.rectangle(img, (xmin - 20, ymin - 20), (xmax + 20, ymax + 20),
                                (0, 255, 0), 2)

        return self.lmList, bbox

    def fingersUp(self):
        fingers = []
        # Thumb
        if self.lmList[self.tipIds[0]][1] > self.lmList[self.tipIds[0] - 1][1]:
            fingers.append(1)
        else:
            fingers.append(0)

        # Fingers
        for id in range(1, 5):
            if self.lmList[self.tipIds[id]][2] < self.lmList[self.tipIds[id] - 2][2]:
                fingers.append(1)
            else:
                fingers.append(0)

            # totalFingers = fingers.count(1)

        return fingers

    def findDistance(self, p1, p2, img=None):
        x1, y1 = self.lmList[p1][1:]
        x2, y2 = self.lmList[p2][1:]
        cx, cy = (x1 + x2) // 2, (y1 + y2) // 2
        length = math.hypot(x2 - x1, y2 - y1)
        info = (x1, y1, x2, y2, cx, cy)
        if img is not None:
            cv2.circle(img, (x1, y1), 15, (255, 0, 255), cv2.FILLED)
            cv2.circle(img, (x2, y2), 15, (255, 0, 255), cv2.FILLED)
            cv2.line(img, (x1, y1), (x2, y2), (255, 0, 255), 3)
            cv2.circle(img, (cx, cy), 15, (255, 0, 255), cv2.FILLED)
            return length, info, img
        else:
            return length, info


def main():
    pTime = 0
    cTime = 0
    cap = cv2.VideoCapture(0)
    detector = handDetector()
    while True:
        success, img = cap.read()
        img = detector.findHands(img)
        lmList, bbox = detector.findPosition(img)
        if len(lmList) != 0:
            print(lmList[4])

        cTime = time.time()
        fps = 1 / (cTime - pTime)
        pTime = cTime

        cv2.putText(img, str(int(fps)), (10, 70), cv2.FONT_HERSHEY_PLAIN, 3,
        (255, 0, 255), 3)

        cv2.imshow("Image", img)
        k=cv2.waitKey(1)
        if k==27:
            break

if __name__ == "__main__":
    main()
VirtualMouse.py
import cv2
import numpy as np
import time
import autopy
import HandTrackingModule as htm

class fpsReader():
    def __init__(self):
        self.pTime = time.time()
    def FPS(self,img=None,pos=(20, 50), color=(255, 255, 0), scale=3, thickness=3):
        cTime = time.time()
        try:
            fps = 1 / (cTime - self.pTime)
            self.pTime = cTime
            if img is None:
                return fps
            else:
                cv2.putText(img, f'FPS: {int(fps)}', pos, cv2.FONT_HERSHEY_PLAIN,
                            scale, color, thickness)
                return fps, img
        except:
            return 0
fpsReader = fpsReader()
cap=cv2.VideoCapture(0)

smooth=6
clocx,plocx=0,0
clocy,plocy=0,0
Boundary=100
Wcam, Hcam=640,480
Wscr, Hscr=autopy.screen.size()
# print(Wscr,Hscr)
#1536.0 864.0

cap.set(3,Wcam)
cap.set(4,Hcam)
detector=htm.handDetector(maxHands=1, detectionCon=0.65)


while True:
    _, img=cap.read()

    img=detector.findHands(img, draw=True)
    lmList,bbox=detector.findPosition(img)
    if len(lmList)!=0:
        x1,y1=lmList[8][1:]
        x2,y2=lmList[12][1:]

        fingersUp=detector.fingersUp()
        # print(fingersUp)
        cv2.rectangle(img,(Boundary,Boundary),(Wcam-Boundary,Hcam-Boundary),(255,0,0),thickness=3)
        if fingersUp[1]==1 and fingersUp[2]==0:
            x3 = np.interp(x1, (0, Wcam), (0, Wscr))
            y3 = np.interp(y1, (0, Hcam), (0, Hscr))

            clocx=plocx+(x3-plocx)/smooth
            clocy = plocy + (y3 - plocy) / smooth

            autopy.mouse.move(Wscr-clocx,clocy)
            cv2.circle(img,(x1,y1),15,(255,0,255),cv2.FILLED)
            plocx,plocy=clocx,clocy


        if fingersUp[1] == 1 and fingersUp[2] == 1:
            length, info, img=detector.findDistance(8,12,img)
            # print(length) 30可能是一个不错的范围
            if length<30:
                cv2.circle(img,(info[-2],info[-1]),15,(0,0,255),cv2.FILLED)
                autopy.mouse.click()
    new_window = cv2.flip(img, 1)
    fps, img = fpsReader.FPS(new_window)
    cv2.imshow("img",img)
    k=cv2.waitKey(1)
    if k==27:
        break
几个重要的参数讲解:
- fpsReader()类,以后就不用再重新打印帧率,可以直接调用;
- Wscr, Hscr=autopy.screen.size(),用于查看自己屏幕的尺寸,设备各有不同;
- smooth,用于设置手势与鼠标之间的平滑程度;
- new_window,完成镜像翻转,使手势移动方向与鼠标移动方向一致;
- info = (x1, y1, x2, y2, cx, cy),取得-1,-2就是指中心值;
- length,为findDistance()返回的参数,需要打印出来,观察一个合适的值。
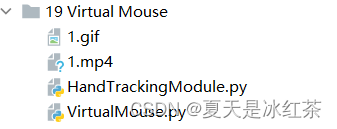
4、项目资源
GitHub:Opencv项目实战:19 Virtual Mouse
5、项目总结
本次项目通过autopy,HandTrackingModule制作了本次项目虚拟鼠标,在最后的展示当中也能看到窗口的帧率适合,手指控制鼠标比较的平滑,基本的功能很好的实现了。
文章出处登录后可见!
已经登录?立即刷新