

前言:
我是这么理解的:oauth2是在security的基础上做的一次升级,所以说要想去理解oauth2的生成token的流程,一定要先看 security 生成token的流程,地址如下
https://blog.csdn.net/m0_56356631/article/details/130249543?spm=1001.2014.3001.5501
还有,对于oauth2里面的一些概念 clientId grant_type 还是需要提前找点资料看看的
入口
在 security 生成token的流程中,最重要的就是找到入口,那么oauth2其实也是,只要找到入口,所有的难题基本上就迎刃而解
security的入口是 AuthenticationManager.authenticate()方法,然后就是缺啥补啥的操作了
oauth2 的入口是 tokenEndpoint.postAccessToken()方法,然后也就是 缺啥补啥的操作了
当然,期间涉及到如何把自己写的类放入到框架中,也就是配置操作,这个操作我认为不是那么的重要,毕竟这玩意,写完之后,基本没人动
开始
首先先创建一个项目,依赖如下
 <dependencies>

        <dependency>
            <groupId>org.springframework.boot</groupId>
            <artifactId>spring-boot-starter-data-redis</artifactId>
        </dependency>

        <dependency>
            <groupId>org.springframework.boot</groupId>
            <artifactId>spring-boot-starter</artifactId>
        </dependency>

        <dependency>
            <groupId>org.springframework.boot</groupId>
            <artifactId>spring-boot-starter-web</artifactId>
        </dependency>

        <dependency>
            <groupId>org.projectlombok</groupId>
            <artifactId>lombok</artifactId>
            <optional>true</optional>
        </dependency>

        <dependency>
            <groupId>com.baomidou</groupId>
            <artifactId>mybatis-plus-boot-starter</artifactId>
            <version>3.5.3</version>
        </dependency>

        <dependency>
            <groupId>mysql</groupId>
            <artifactId>mysql-connector-java</artifactId>
            <version>8.0.28</version>
        </dependency>

        <dependency>
            <groupId>com.alibaba.fastjson2</groupId>
            <artifactId>fastjson2</artifactId>
            <version>2.0.25</version>
        </dependency>

        <dependency>
            <groupId>org.springframework.boot</groupId>
            <artifactId>spring-boot-starter-test</artifactId>
            <scope>test</scope>
        </dependency>

        <dependency>
            <groupId>org.springframework.cloud</groupId>
            <artifactId>spring-cloud-starter-oauth2</artifactId>
            <version>2.2.4.RELEASE</version>
            <exclusions>
                <exclusion>
                    <artifactId>bcpkix-jdk15on</artifactId>
                    <groupId>org.bouncycastle</groupId>
                </exclusion>
                <exclusion>
                    <artifactId>spring-cloud-starter</artifactId>
                    <groupId>org.springframework.cloud</groupId>
                </exclusion>
            </exclusions>
        </dependency>

    </dependencies>
然后是配置文件,也很简单,说一下,数据库随便一个就好,表一会在建
spring.application.name=auth-service
server.port=8081

spring.redis.host=localhost
spring.redis.port=6379

spring.datasource.driver-class-name=com.mysql.cj.jdbc.Driver
spring.datasource.username=root
spring.datasource.password=123456
spring.datasource.url=jdbc:mysql://localhost:3306/cloud_order?useUnicode=true&characterEncoding=utf-8&useSSL=false&serverTimezone=UTC
mybatis-plus.mapper-locations=classpath:mapper/*.xml
写一个最简单的 controller (注意:这里的JiuBoDou只是为了区分我们自己写的东西和框架里面的东西)
@RequestMapping("/jiubodou")
@RestController
public class JiuBoDouController {

    @PostMapping("/login")
    public String jiubodou() {
        return "loginSuccess";
    }
}
在主启动类上面一个注解
@EnableAuthorizationServer/*代表这个服务是::授权服务器*/
我们需要配置一下,对登录接口放行
@Configuration
public class JiuBoDouSecurityConfig extends WebSecurityConfigurerAdapter {

    @Override
    public void configure(HttpSecurity http) throws Exception {
        http.csrf().disable() //csrf攻击,有兴趣的可以去了解一下
                .sessionManagement().sessionCreationPolicy(SessionCreationPolicy.STATELESS) //禁用session
                .and()
                .authorizeRequests()
                .antMatchers("/jiubodou/**").permitAll()  //jiubodou下的所有接口都放行
                .anyRequest().authenticated();	//其他的路径都需要验证
        http.cors();/*允许跨域*/
    }
}
准备工作基本完成,下面就开始正式写代码,那么刚才说到,oauth2生成token的入口是 tokenEndpoint.postAccessToken(),那么我们的目标是 ,接收 前端发过来的 账号和密码,然后生成token。
这个目标的第一步就是调用 tokenEndpoint.postAccessToken()。
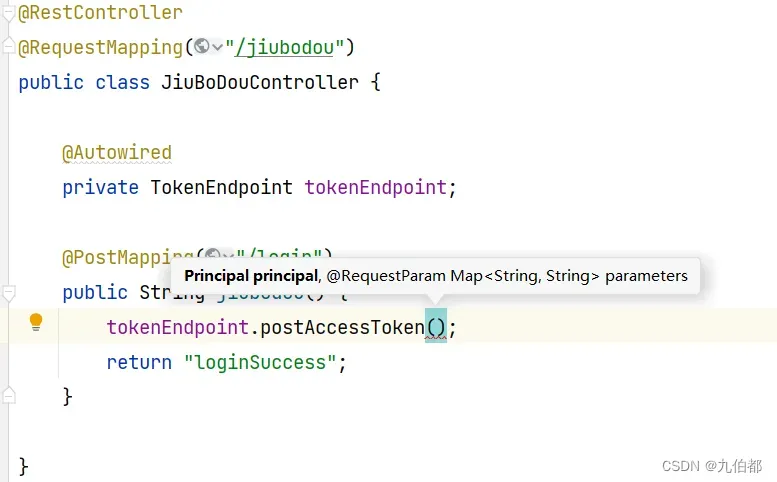
缺啥补啥:一个Principal类的对象 一个 Map
那我们先看这个 Principal。一看是一个接口
![]()
那咋办,是自己写一个类来继承还是 找到框架中现成的类,复制一份,稍微改一改呢?我是选择的第二种
而且进入到 postAccessToken 方法里面其实是可以看到,框架要的不仅仅是一个 Principal,其实是一个 Principal 的子类 Authentication
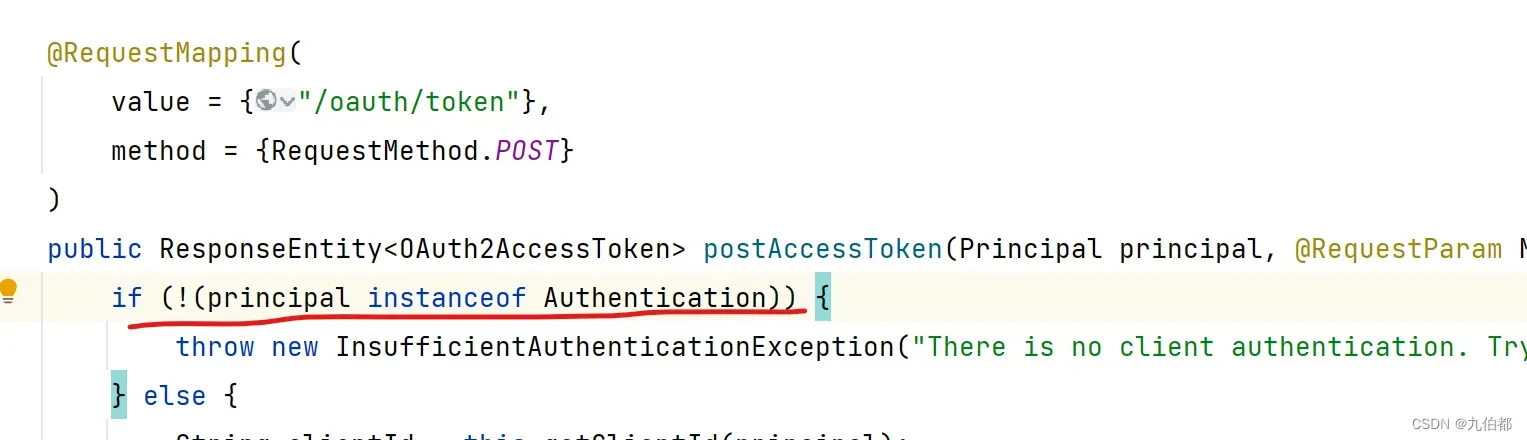
那我们看一下 Authentication 类,一看 还是个接口,那么还是那个问题,是自己写一个类来继承还是 找到框架中现成的类,复制一份,稍微改一改呢?我是选择的第二种,那我们看一下 有哪些类实现了 Authentication接口
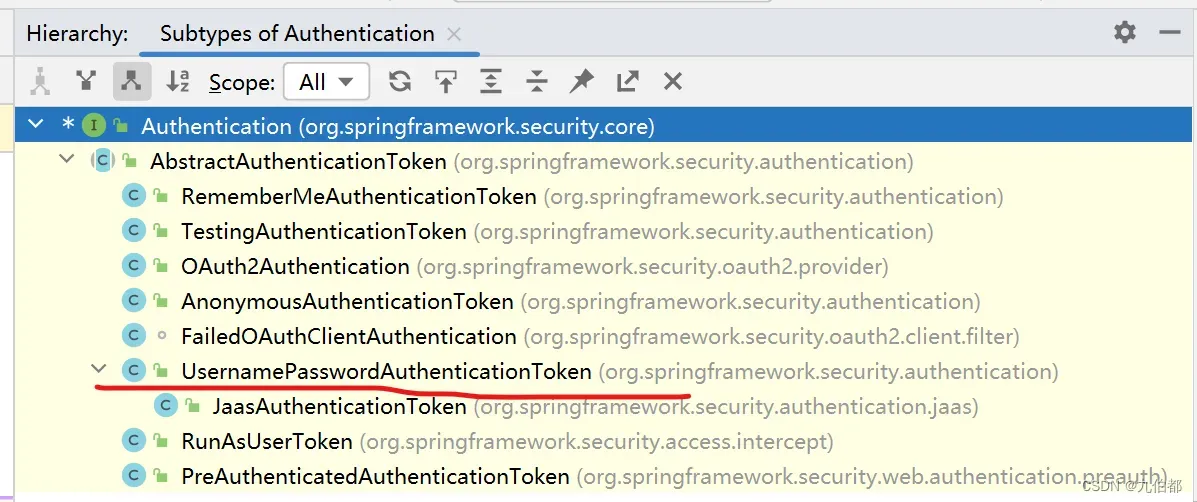
我这里选择的是 复制 UsernamePasswordAuthenticationToken 这个类。如下(说一下哈,复制过来当然是不能直接用的,类名啥的总该改一下吧,然后解决一下爆红的地方,这个地方就不细说了)


public class JiuBoDouAuthenticationToken extends AbstractAuthenticationToken {
    private static final long serialVersionUID = 570L;
    private final Object principal;
    private Object credentials;

    public JiuBoDouAuthenticationToken(Object principal, Object credentials) {
        super((Collection)null);
        this.principal = principal;
        this.credentials = credentials;
        this.setAuthenticated(false);
    }

    public JiuBoDouAuthenticationToken(Object principal, Object credentials, Collection<? extends GrantedAuthority> authorities) {
        super(authorities);
        this.principal = principal;
        this.credentials = credentials;
        super.setAuthenticated(true);
    }

    public static JiuBoDouAuthenticationToken unauthenticated(Object principal, Object credentials) {
        return new JiuBoDouAuthenticationToken(principal, credentials);
    }

    public static JiuBoDouAuthenticationToken authenticated(Object principal, Object credentials, Collection<? extends GrantedAuthority> authorities) {
        return new JiuBoDouAuthenticationToken(principal, credentials, authorities);
    }

    public Object getCredentials() {
        return this.credentials;
    }

    public Object getPrincipal() {
        return this.principal;
    }

    public void setAuthenticated(boolean isAuthenticated) throws IllegalArgumentException {
        Assert.isTrue(!isAuthenticated, "Cannot set this token to trusted - use constructor which takes a GrantedAuthority list instead");
        super.setAuthenticated(false);
    }

    public void eraseCredentials() {
        super.eraseCredentials();
        this.credentials = null;
    }
}
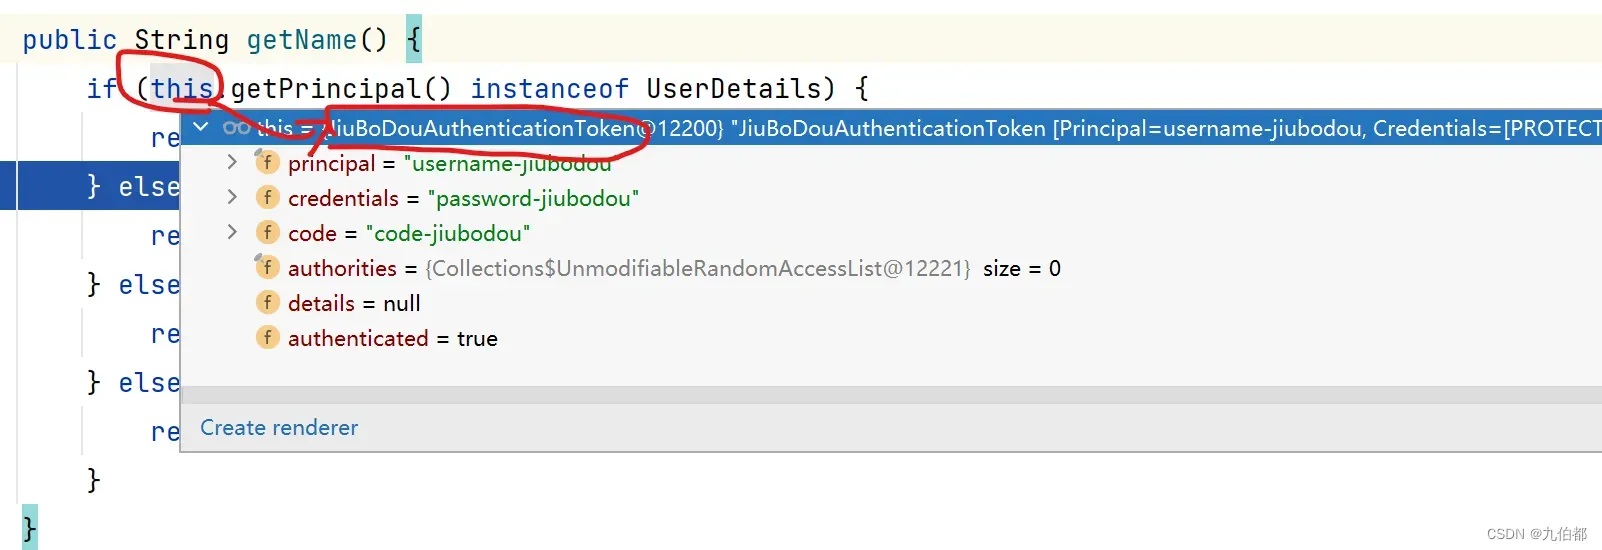
然后我们就有了一个属于我们自己的类了,看一下里面的内容

这里我们先暂且理解成 用户输入的账号和密码,就比如 principal其实存的是 手机号 credentials存的是用户输入的明文密码。如果还需要第三个参数来帮助登录,那么可以在这里加属性,例如我们再加一个 String code。如下:(这里我就不细说了,我觉得这点解决爆红代码的能力应该还是应该具备的,如果不具备,代表你现在还用不到这样的技术)

public class JiuBoDouAuthenticationToken extends AbstractAuthenticationToken {
    private static final long serialVersionUID = 570L;
    private final Object principal;
    private Object credentials;
    private String code;//这里

    public JiuBoDouAuthenticationToken(Object principal, Object credentials,String code) {//这里
        super((Collection)null);
        this.principal = principal;
        this.credentials = credentials;
        this.code=code;//这里
        this.setAuthenticated(false);
    }

    public JiuBoDouAuthenticationToken(Object principal, Object credentials,String code, Collection<? extends GrantedAuthority> authorities) {//这里
        super(authorities);
        this.principal = principal;
        this.credentials = credentials;
        this.code=code;//这里
        super.setAuthenticated(true);
    }

    public static JiuBoDouAuthenticationToken unauthenticated(Object principal, Object credentials,String code) {//这里
        return new JiuBoDouAuthenticationToken(principal, credentials,code);//这里
    }

    public static JiuBoDouAuthenticationToken authenticated(Object principal, Object credentials, String code,Collection<? extends GrantedAuthority> authorities) {//这里
        return new JiuBoDouAuthenticationToken(principal, credentials, code,authorities);//这里
    }

    public Object getCredentials() {
        return this.credentials;
    }

    public Object getPrincipal() {
        return this.principal;
    }

    public void setAuthenticated(boolean isAuthenticated) throws IllegalArgumentException {
        Assert.isTrue(!isAuthenticated, "Cannot set this token to trusted - use constructor which takes a GrantedAuthority list instead");
        super.setAuthenticated(false);
    }

    public void eraseCredentials() {
        super.eraseCredentials();
        this.credentials = null;
    }
}
好了,我们有了 tokenEndpoint.postAccessToken(); 的第一个参数了,我们将其new出来,放进去

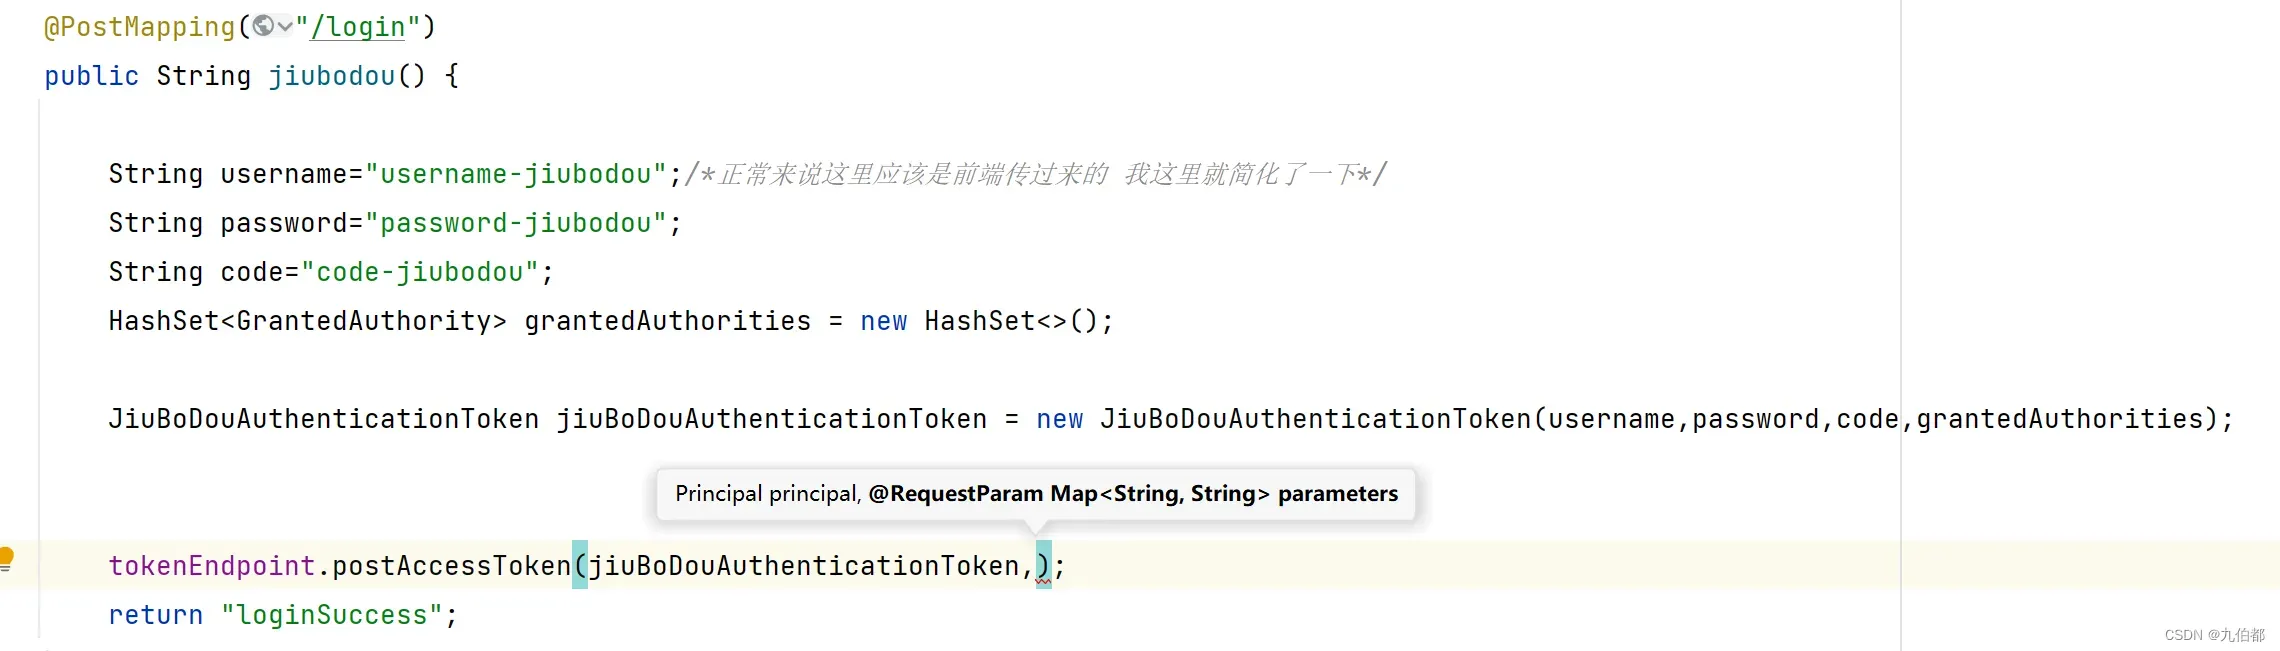
也就是这样,很简单对吧


@PostMapping("/login")
public String jiubodou() throws HttpRequestMethodNotSupportedException {
String username="username-jiubodou";/*正常来说这里应该是前端传过来的 我这里就简化了一下*/
String password="password-jiubodou";
String code="code-jiubodou";
HashSet<GrantedAuthority> grantedAuthorities = new HashSet<>();
JiuBoDouAuthenticationToken jiuBoDouAuthenticationToken = new JiuBoDouAuthenticationToken(username,password,code,grantedAuthorities);
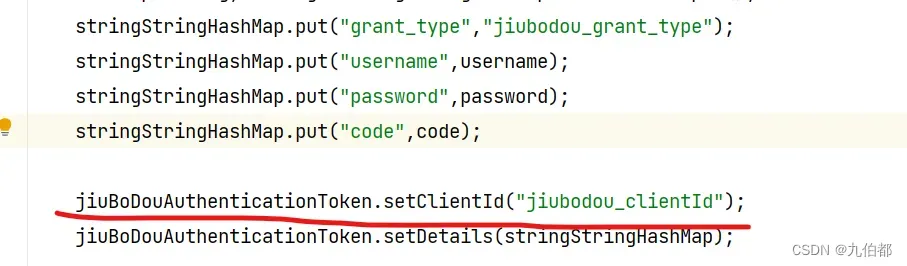
HashMap<String, String> stringStringHashMap = new HashMap<>();
stringStringHashMap.put("grant_type","jiubodou_grant_type");//这个值说的是认证模式是什么,这个概念是oauth2的一个概念,这里不细说
stringStringHashMap.put("username",username);
stringStringHashMap.put("password",password);
stringStringHashMap.put("code",code);
jiuBoDouAuthenticationToken.setDetails(stringStringHashMap);
tokenEndpoint.postAccessToken(jiuBoDouAuthenticationToken,stringStringHashMap);
return "loginSuccess";
}
很好,入口入参已经解决了。启动项目跑一下试试,在 tokenEndpoint.postAccessToken(jiuBoDouAuthenticationToken,stringStringHashMap);打个断点,来到这里,跟进去

到了这里,再跟进去 这里看到 第二行:if (!client.isAuthenticated()) { 这也就是为什么一定要使用多参数的构造,不然这里过不去

到了这里
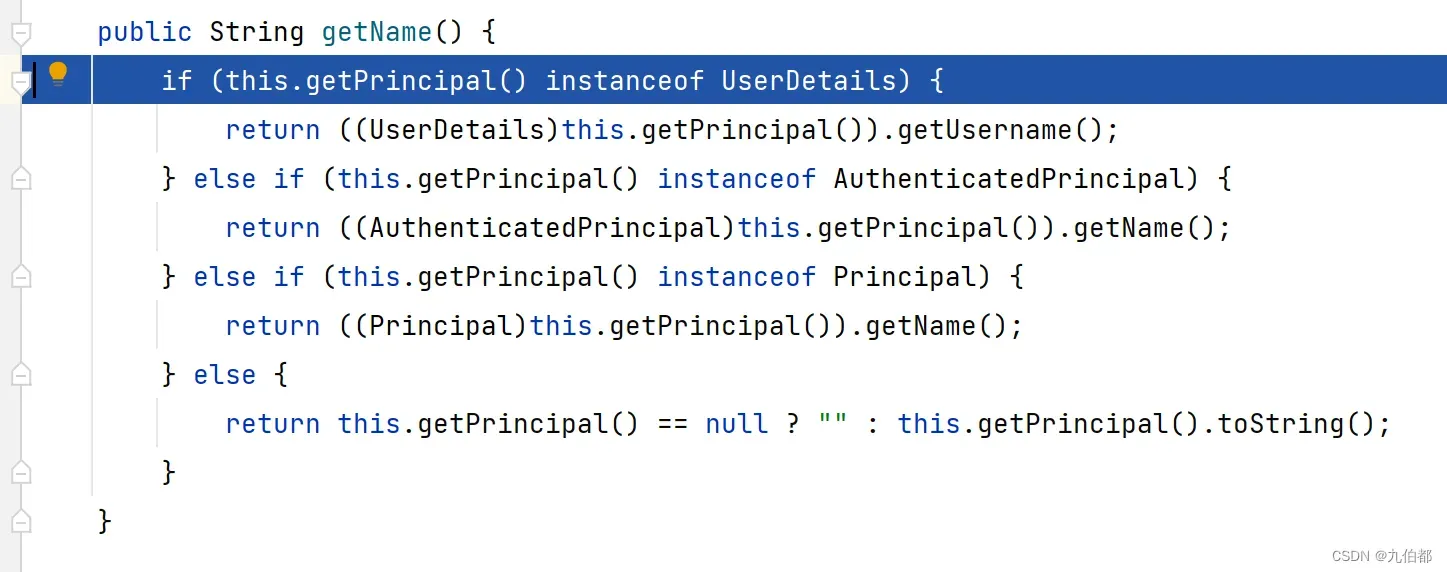
看这段代码,意思是问,你的 JiuBoDouAuthenticationToken 里面的 principal是 UserDetails类型么?是AuthenticatedPrincipal类型么,是Principal类型么?很显然,我们的 principal只是一个字符串,都不满足这三个类型,所以最后就是把 这个字符串当作了 clientid 返回去了,显然这是不对,我们的 principal是用户的账号呀,怎么又当了 clientid呢?
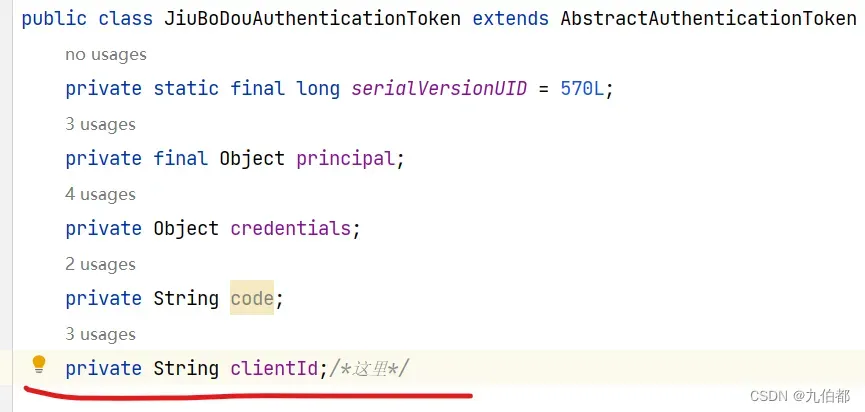
这里的解决方法很多,我是直接在 JiuBoDouAuthenticationToken 里面加了个属性 clientId (并生成get set方法)然后重写了 getName()方法,直接返回clientId这样就不走父类的方法了,就没有这些是不是这个类,是不是那个类的判断了,直接拿到clientId,如下
重写 getName方法
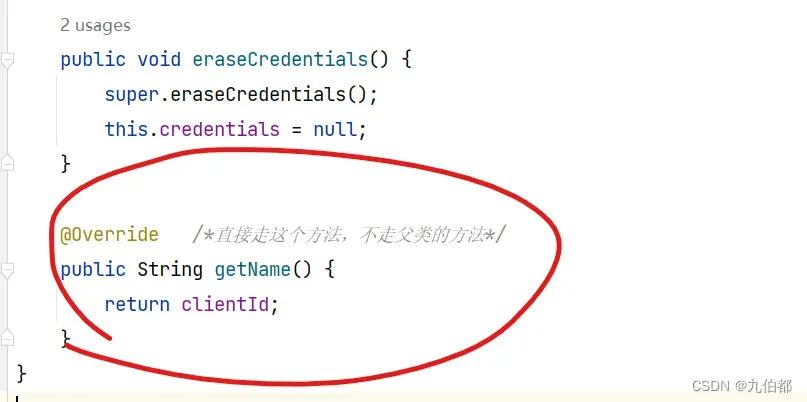
所以代码成了这样:
好了,重新启动一下,这样直接走我们的getName()方法

拿到了 clientId之后,继续往下走,到了


ClientDetails authenticatedClient = this.getClientDetailsService().loadClientByClientId(clientId);
很显然,是根据 clientId查找相关信息,先到getClientDetailsService进去看一下

这里是 inMemoryClientDetailsService 很显然,是去内存中找东西,显然这是不对的,第一,我们没在内存中存有关 client的内容,第二,这种信息最好存在数据库中。所以我们要从 数据库中查才是对的,我们到这个inMemoryClientDetailsService 中看一下

public class InMemoryClientDetailsService implements ClientDetailsService {
那再去接口中看一下
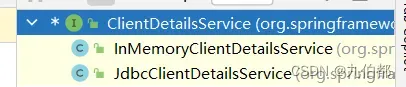
发现其实它本身就是支持从数据库中查找的,只不过默认不是jdbc,那么就需要去配置一下,很显然,这是oauth2的内容,不是 security的,如下

@Configuration
public class JiuBoDouOauth2Config extends AuthorizationServerConfigurerAdapter {

    /*发现 tokenPoint 使用的是 内存中的数据去查询 client 所以这里需要指定 jdbc 来查询 client */
    @Autowired
    private DataSource dataSource;  /*告知数据源的相关信息*/

    @Bean
    public ClientDetailsService customClientDetailsService() {
        return new JdbcClientDetailsService(dataSource);/*将这个数据源信息给JdbcClientDetailsService*/
    }

    @Override
    public void configure(ClientDetailsServiceConfigurer clients) throws Exception {
        clients.withClientDetails(customClientDetailsService());/*指定使用 JdbcClientDetailsService来查找client*/
    }
}
好了,重启再来一次

拿到了,那我们继续debug下一个方法 loadClientByClientId

这里jdbc直接使用的是 sql语句去查询,而且sql语句写死了,这就意味着如果我们想要使用框架带的这个方法,就需要去数据库建立一张符合这个sql语句的表,没办法,去建表吧


-- auto-generated definition
create table oauth_client_details
(
    client_id               varchar(128)  not null comment '客户端ID'
        primary key,
    resource_ids            varchar(256)  null comment '资源ID集合,多个资源时用英文逗号分隔',
    client_secret           varchar(256)  null comment '客户端密匙',
    scope                   varchar(256)  null comment '客户端申请的权限范围',
    authorized_grant_types  varchar(256)  null comment '客户端支持的grant_type',
    web_server_redirect_uri varchar(256)  null comment '重定向URI',
    authorities             varchar(256)  null comment '客户端所拥有的SpringSecurity的权限值,多个用英文逗号分隔',
    access_token_validity   int           null comment '访问令牌有效时间值(单位秒)',
    refresh_token_validity  int           null comment '更新令牌有效时间值(单位秒)',
    additional_information  varchar(4096) null comment '预留字段',
    autoapprove             varchar(256)  null comment '用户是否自动Approval操作'
)
    comment '客户端信息' charset = utf8mb3
                         row_format = DYNAMIC;
附上一条数据
jiubodou_clientId,,cfc428696a9bca6321b629bbcfb8ddd6,all,jiubodou_grant_type,,,3600,604800,,1
再来debug一次

查到了,继续debug到 94行
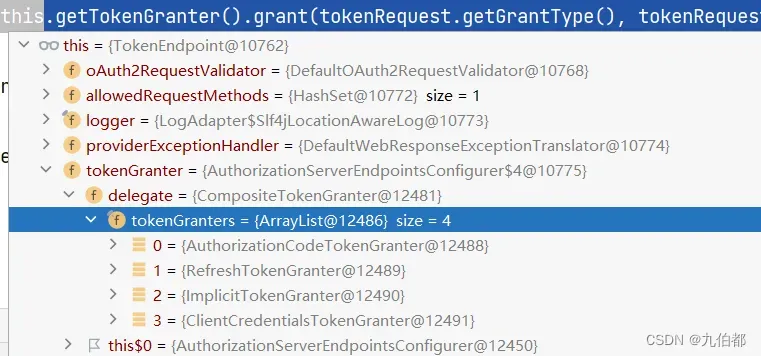
OAuth2AccessToken token = this.getTokenGranter().grant(tokenRequest.getGrantType(), tokenRequest);
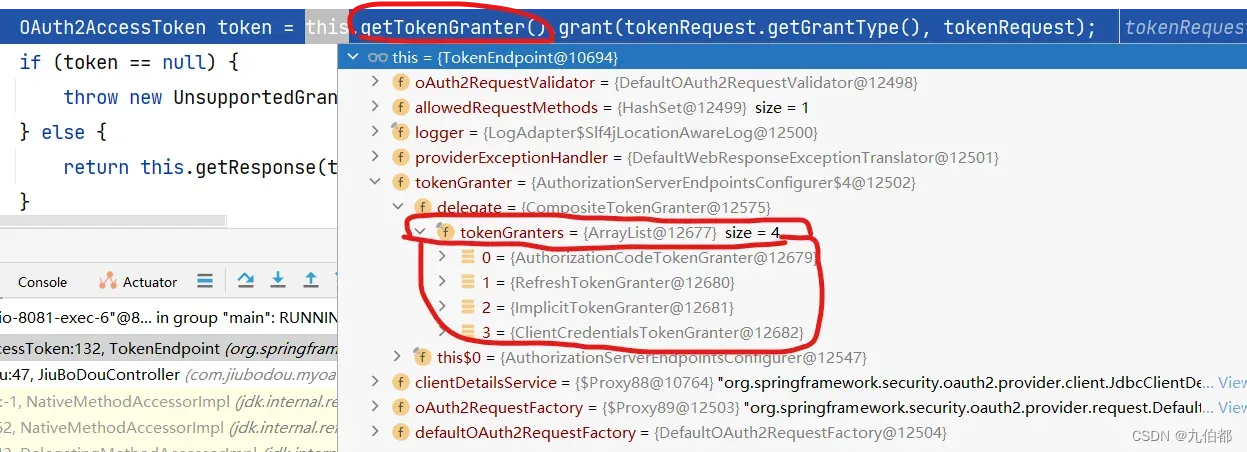
可以看到这里面有四个 granter 我们自定义个我们自己的 granter,当然这里的granter都是接口 AbstractTokenGranter的实现类,我们依旧有两种方法,自己写一个类,实现 AbstractTokenGranter 或者是复制一个框架中有的实现类,对其改动改动,我依旧选择第二种,那么复制哪一个实现类呢?毕竟框架中有那么多实现类
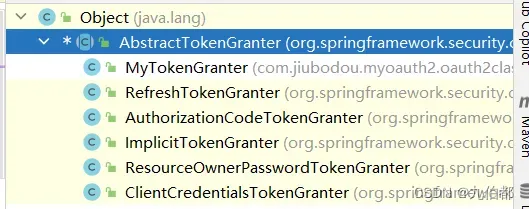
一般来说,复制 ResourceOwnerPasswordTokenGranter ,并对其稍加改动即可,如下


public class JiuBoDouTokenGranter extends AbstractTokenGranter {
    private static final String GRANT_TYPE = "jiubodou_grant_type";
    private final AuthenticationManager authenticationManager;

    public JiuBoDouTokenGranter(AuthenticationManager authenticationManager, AuthorizationServerTokenServices tokenServices, ClientDetailsService clientDetailsService, OAuth2RequestFactory requestFactory) {
        this(authenticationManager, tokenServices, clientDetailsService, requestFactory, GRANT_TYPE );
    }

    protected JiuBoDouTokenGranter(AuthenticationManager authenticationManager, AuthorizationServerTokenServices tokenServices, ClientDetailsService clientDetailsService, OAuth2RequestFactory requestFactory, String grantType) {
        super(tokenServices, clientDetailsService, requestFactory, grantType);
        this.authenticationManager = authenticationManager;
    }

    protected OAuth2Authentication getOAuth2Authentication(ClientDetails client, TokenRequest tokenRequest) {
        Map<String, String> parameters = new LinkedHashMap(tokenRequest.getRequestParameters());
        String username = (String)parameters.get("username");
        String password = (String)parameters.get("password");
        String code = parameters.get("code");
        parameters.remove("password");
        Authentication userAuth = new JiuBoDouAuthenticationToken(username, password,code);
        ((AbstractAuthenticationToken)userAuth).setDetails(parameters);

        try {
            userAuth = this.authenticationManager.authenticate(userAuth);
        } catch (AccountStatusException var8) {
            throw new InvalidGrantException(var8.getMessage());
        } catch (BadCredentialsException var9) {
            throw new InvalidGrantException(var9.getMessage());
        }

        if (userAuth != null && userAuth.isAuthenticated()) {
            OAuth2Request storedOAuth2Request = this.getRequestFactory().createOAuth2Request(client, tokenRequest);
            return new OAuth2Authentication(storedOAuth2Request, userAuth);
        } else {
            throw new InvalidGrantException("Could not authenticate user: " + username);
        }
    }
}
重启 debug
发现没有我们自己的 granter,原来还需要去配置一下,在我们的 oauth2配置类中去重写:

    @Override
    public void configure(AuthorizationServerEndpointsConfigurer endpoints) throws Exception {}
这个方法,具体如下

缺啥补啥,缺一个 TOkenGranter类型参数,一看,这个类型是个接口,那么就去看一下他的实现类
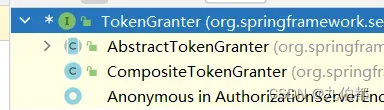
我们这里使用 第二个实现类,

CompositeTokenGranter里面是个数组,也就是说 ,如果我们有很多自己写的 granter,就都会往这个数组里面添加,那么结果如下
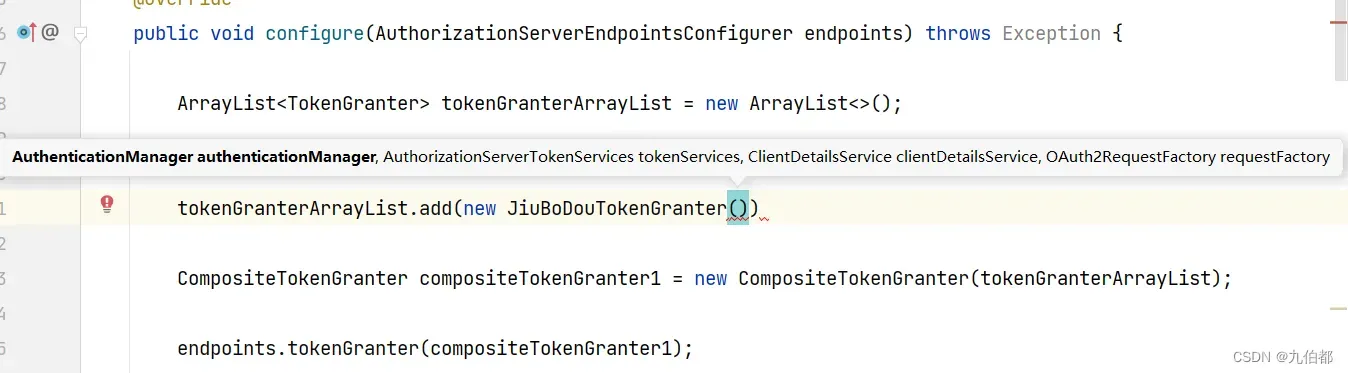
发现参数听过,没办法,既然用别人的东西,那么就需要按照别人的方法来,一个一个看,第一个参数,学过security的都知道这个参数应该如何获取的吧,这里不做赘述,第二个参数,需要的是一个AuthorizationServerTokenServices类型,一看是一个接口,那么还是和之前一样,找一个实现类,复制一下,然后稍微改一改,第三个第四个呢?我是这么写的

ok,至此为止,需要的参数都准备好了,往里放即可,然后再次启动项目。其实如果一步一步看到了这里,就多多少少能发现,需要的参数就是找个实现类,然后复制一下,稍微改一改即可。总体就是按照一个 缺啥补啥的思路一路走下来的。


这里附上我的项目的结构:
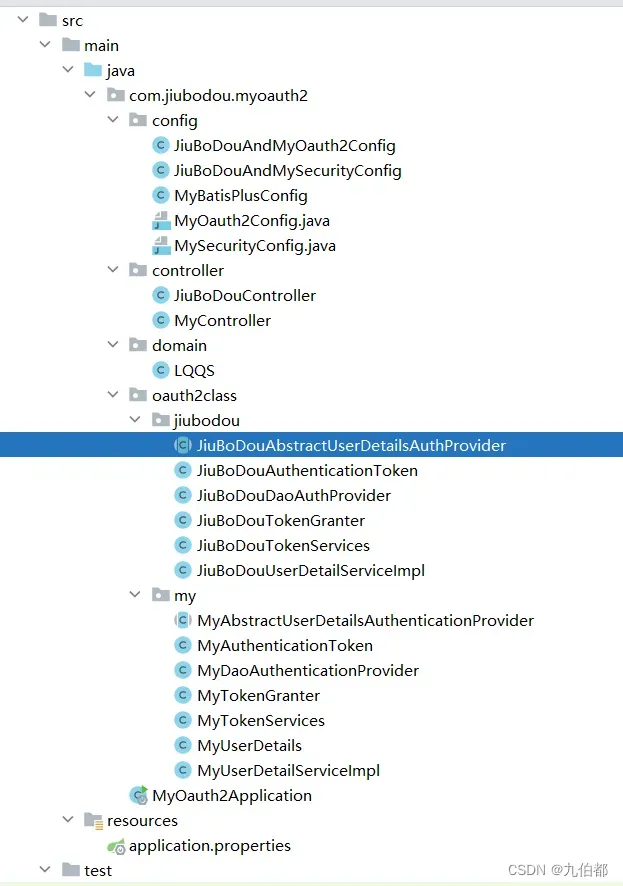
以及所有的代码:

https://gitee.com/hunterhyl/oauth2
文章出处登录后可见!