前言
nnUNet作为医学图像分割的各项SOTA实现的基础框架,基本是所有医学图像分割的研究者需要掌握的方法。作为一个集成的框架,nnUNet基本上只需将个人的数据集处理成nnUNet所需要的格式即可通过命令进行全流程操作。这里提供本人实现3D nnUNet流程处理的基本步骤及相关代码。
1 nnUNet安装
nnUNet的安装更详细的细节可见参考链接,这里默认基本的Python和cuda环境已经安装好了
- 第一步:选择一个你能找的路径位置(这很重要),在这个位置打开终端,输入
git clone https://github.com/MIC-DKFZ/nnUNet.git,将nnUNet的代码下载到这个位置 - 第二步:终端内定位到下载的nnUNet文件夹
cd nnUNet,或者直接在对应位置打开终端 - 第三步:开始安装,
pip install -e .
2 数据整理
2.1 数据存放形式
首先,nnUNet有自己的一套数据文件夹的存放格式,基本是这个形式:
DATASET,里面有三个文件夹:nnUNet_raw、nnUNet_preprocessed、nnUNet_trained_models,
nnUNet_raw里面有两个文件夹:nnUNet_raw_data和nnUNet_cropped_data
"""
创建nnuent的数据文件夹
"""
import os
path = r'*/DATASET'      # 想要存放nnUNet数据、模型的地方
os.mkdir(os.path.join(path, 'nnUNet_raw'))
os.mkdir(os.path.join(path, 'nnUNet_preprocessed'))
os.mkdir(os.path.join(path, 'nnUNet_trained_models'))
os.mkdir(os.path.join(path, 'nnUNet_raw', 'nnUNet_raw_data'))
os.mkdir(os.path.join(path, 'nnUNet_raw', 'nnUNet_cropped_data'))
确定好存放数据的位置后,修改nnUNet代码里的paths.py文件,将原始的DATASET路径换成自己的:

PS:如果不改代码的话,则默认是需要设置环境变量的,即参考链接里的方式
2.2 数据集转换
① 在nnUNet_raw_data文件夹下创建自己的任务文件夹,格式:TaskXXX_任务名,比如Task101_PC
该文件夹下创建以下文件夹:imagesTr、imagesTs、labelsTr、labelsTs、inferTs,分别是训练数据、测试数据、训练标签、测试标签、测试集推理结果存放;其中前三个是必需要有的
② 把自己的数据集按上述方式放入nnUNet文件夹,注意数据名字需要改成名字_000X的nnUNet格式,X从0开始,代表数据模态
这里提供我处理时的代码,可以依据这个修改
"""
创建nnuent需要的文件路径,并将数据复制到对应路径并改名
"""
import os
import shutil
import numpy as np

# 创建文件夹
img_tr_path = r'*/DATASET/nnUNet_raw/nnUNet_raw_data/Task101_PC/imagesTr'
img_ts_path = r'*/DATASET/nnUNet_raw/nnUNet_raw_data/Task101_PC/imagesTs'
label_tr_path = r'*/DATASET/nnUNet_raw/nnUNet_raw_data/Task101_PC/labelsTr'
label_ts_path = r'*/DATASET/nnUNet_raw/nnUNet_raw_data/Task101_PC/labelsTs'
infer_ts_path = r'*/DATASET/nnUNet_raw/nnUNet_raw_data/Task101_PC/inferTs'
if not os.path.isdir(img_tr_path):
    os.mkdir(img_tr_path)
    os.mkdir(img_ts_path)
    os.mkdir(label_tr_path)
    os.mkdir(label_ts_path)
    os.mkdir(infer_ts_path)

# 获取训练、测试集的ID,按需修改
train_id = []
test_id = []

# 复制数据文件并改成nnunet的命名形式
data_folder = r'*'		# 个人数据集的文件夹路径
for patient_id in train_id:
    # 预处理文件夹下文件名,我这里有两种数据模态PET/CT,以及一个分割标签mask
    pet_file = os.path.join(data_folder, str(patient_id)+'_pet_pre.nii.gz')
    ct_file = os.path.join(data_folder, str(patient_id)+'_ct_pre.nii.gz')
    mask_file = os.path.join(data_folder, str(patient_id)+'_mask_pre.nii.gz')
    # nnunet文件夹文件名,nnUNet通过_0000和_0001这种形式分辨多模态输入
    pet_new_file = os.path.join(img_tr_path, str(patient_id)+'_image_0000.nii.gz')
    ct_new_file = os.path.join(img_tr_path, str(patient_id) + '_image_0001.nii.gz')
    mask_new_file = os.path.join(label_tr_path, str(patient_id) + '_image.nii.gz')
	# 复制
    shutil.copyfile(pet_file, pet_new_file)
    shutil.copyfile(ct_file, ct_new_file)
    shutil.copyfile(mask_file, mask_new_file)

for patient_id in test_id:
    # 预处理文件夹下文件名
    pet_file = os.path.join(data_folder, str(patient_id) + '_pet_pre.nii.gz')
    ct_file = os.path.join(data_folder, str(patient_id) + '_ct_pre.nii.gz')
    mask_file = os.path.join(data_folder, str(patient_id)+'_mask_pre.nii.gz')
    # nnunet文件夹文件名
    pet_new_file = os.path.join(img_ts_path, str(patient_id) + '_image_0000.nii.gz')
    ct_new_file = os.path.join(img_ts_path, str(patient_id) + '_image_0001.nii.gz')
    mask_new_file = os.path.join(label_ts_path, str(patient_id) + '_image.nii.gz')
    # 复制
    shutil.copyfile(pet_file, pet_new_file)
    shutil.copyfile(ct_file, ct_new_file)
    shutil.copyfile(mask_file, mask_new_file)
③制作dataset.json,nnUNet需要提供一个json文件来描述你的数据集,通过以下代码生成,这个代码nnUNet文件夹中有提供,这里是我修改后的版本,实际需要各自修改后使用
"""
创建数据集的json
"""
import glob
import os
import re
import json
from collections import OrderedDict


def list_sort_nicely(l):
    """ Sort the given list in the way that humans expect.
    """
    def tryint(s):
        try:
            return int(s)
        except:
            return s

    def alphanum_key(s):
        """ Turn a string into a list of string and number chunks.
            "z23a" -> ["z", 23, "a"]
        """
        return [tryint(c) for c in re.split('([0-9]+)', s)]
    l.sort(key=alphanum_key)
    return l


path_originalData = "/data/nas/heyixue_group/PCa//DATASET_nfs/nnUNet_raw/nnUNet_raw_data/Task108_PCa_256/"

if not os.path.exists(path_originalData):
    os.mkdir(path_originalData+"imagesTr/")
    os.mkdir(path_originalData+"labelsTr/")
    os.mkdir(path_originalData+"imagesTs/")
    os.mkdir(path_originalData+"labelsTs/")

train_image = list_sort_nicely(glob.glob(path_originalData+"imagesTr/*"))
train_label = list_sort_nicely(glob.glob(path_originalData+"labelsTr/*"))
test_image = list_sort_nicely(glob.glob(path_originalData+"imagesTs/*"))
test_label = list_sort_nicely(glob.glob(path_originalData+"labelsTs/*"))

# 文件夹里已经带后缀了,并且有两个模态
train_image = ["{}".format(patient_no.split('/')[-1]) for patient_no in train_image]
train_label = ["{}".format(patient_no.split('/')[-1]) for patient_no in train_label]
test_image = ["{}".format(patient_no.split('/')[-1]) for patient_no in test_image]

# 去掉后缀,整合
train_real_image = []
train_real_label = []
test_real_image = []
for i in range(0, len(train_image), 2):
    train_real_image.append(train_image[i].replace('_0000', ''))
for i in range(0, len(train_label)):
    train_real_label.append(train_label[i].replace('_0000', ''))
for i in range(0, len(test_image), 2):
    test_real_image.append(test_image[i])

# 输出一下目录的情况,看是否成功
print(len(train_real_image), len(train_real_label))
print(len(test_real_image), len(test_label))
print(train_real_image[0])

# -------下面是创建json文件的内容--------------------------
# 可以根据你的数据集,修改里面的描述
json_dict = OrderedDict()
json_dict['name'] = "PC"		# 任务名
json_dict['description'] = " Segmentation"
json_dict['tensorImageSize'] = "3D"
json_dict['reference'] = "see challenge website"
json_dict['licence'] = "see challenge website"
json_dict['release'] = "0.0"
# 这里填入模态信息,0表示只有一个模态,还可以加入“1”:“MRI”之类的描述,详情请参考官方源码给出的示例
json_dict['modality'] = {"0": "PET", '1': 'CT'}

# 这里为label文件中的标签,名字可以按需要命名
json_dict['labels'] = {"0": "Background", "1": "cancer"}

# 下面部分不需要修改
json_dict['numTraining'] = len(train_real_image)
json_dict['numTest'] = len(test_real_image)

json_dict['training'] = []
for idx in range(len(train_real_image)):
    json_dict['training'].append({'image': "./imagesTr/%s" % train_real_image[idx],
                                  "label": "./labelsTr/%s" % train_real_label[idx]})

json_dict['test'] = ["./imagesTs/%s" % i for i in test_real_image]
with open(os.path.join(path_originalData, "dataset.json"), 'w') as f:
    json.dump(json_dict, f, indent=4, sort_keys=True)
3 预处理、训练、测试
将自己的NII数据集转换成nnUNet所需要的格式后,即可在命令行中直接输入命令进行流水线操作了
3.1 预处理
nnUNet_plan_and_preprocess -t 101
-t后面的数字即为任务的ID,一般直接使用这个命令进行全部预处理就行,会默认的进行2d、3d_full_res和3d_cascade_fullres三种任务的预处理,如果只想跑单独某一种的预处理的话,需要额外设置其他参数,可以输入nnUNet_plan_and_preprocess -h 查看帮助,这里不详细介绍了
预处理后,还可以自定义nnUNet的分折
nnUNet的默认是随机的五折交叉验证,如果需要用自己定好的分折方式的话,可以通过在预处理结果中创建splits_final.pkl文件进行设定,代码如下
"""
把自己设定的分折方式写成nnunet的pkl文件
"""
import numpy as np
from collections import OrderedDict
import pickle

def write_pickle(obj, file, mode='wb'):
    with open(file, mode) as f:
        pickle.dump(obj, f)

# 获取内部交叉验证训练集、验证集的id,自己修改这部分
Kfold_train_valid_test = {0: {'train': train_ids[0], 'val': train_ids[1]},
                          1: {'train': train_ids[2], 'val': train_ids[3]},
                          2: {'train': train_ids[4], 'val': train_ids[5]},
                          3: {'train': train_ids[6], 'val': train_ids[7]},
                          4: {'train': train_ids[8], 'val': train_ids[9]}}

splits = []
for i in range(5):
    # 获取想要的分折的结果
    train_id = np.sort(np.array(Kfold_train_valid_test[i]['train'], np.uint16))
    val_id = np.sort(np.array(Kfold_train_valid_test[i]['val'], np.uint16))
    train_keys = np.array([str(id)+'_image' for id in train_id])
    test_keys = np.array([str(id)+'_image' for id in val_id])
    splits.append(OrderedDict())
    splits[-1]['train'] = train_keys
    splits[-1]['val'] = test_keys

splits_file = r'*/DATASET/nnUNet_preprocessed/Task101_PC/splits_final.pkl'		# 保存在预处理结果那里
save_pickle = write_pickle
save_pickle(splits, splits_file)
3.2 训练
nnUNet_train 3d_fullres nnUNetTrainerV2 101 0
其中101是任务ID,0表示训练第一折(nnUNet的五折是0-4)
-
训练中断了想断点继续训,后面加个-c:
nnUNet_train 3d_fullres nnUNetTrainerV2 101 0 -c -
想训练全部数据,即不分折,折数改为all:
nnUNet_train 3d_fullres nnUNetTrainerV2 101 all -
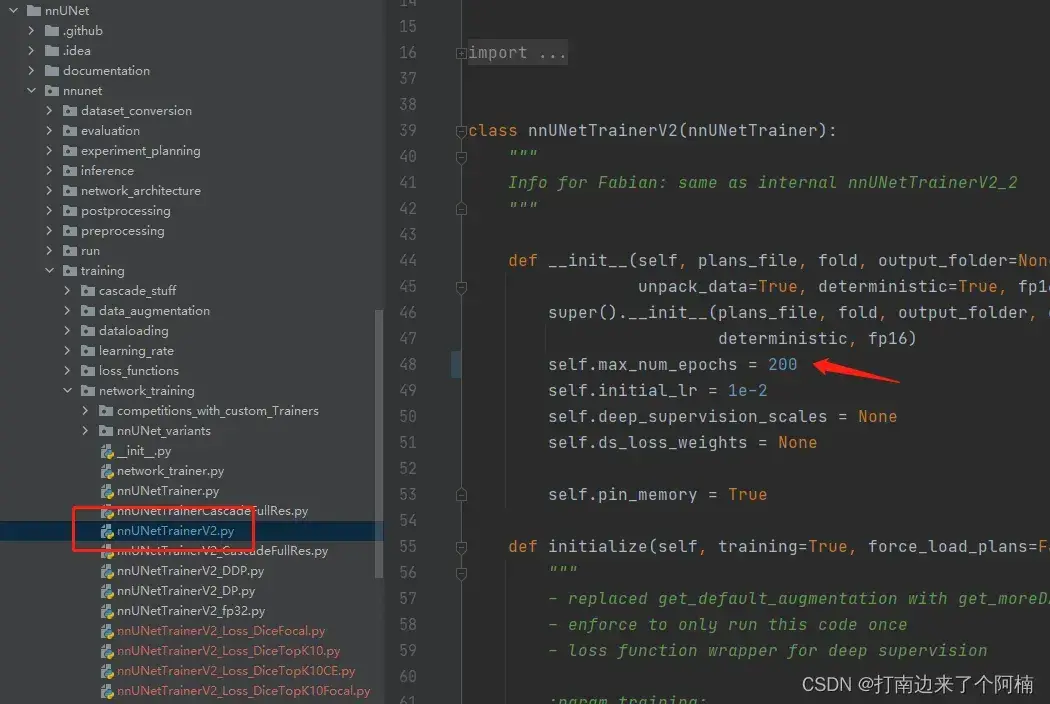
训练最少需要大概8g显存,一轮的时间很慢,一个epoch大概600s(很吃CPU,如果CPU不好的话这个时间会大大增加),默认是训练1000个epoch,时间很慢,等它跑完就好啦,如果需要修改训练的epoch数量(默认1000确实太久了),可以修改这里的代码
3.3 验证&推理&评估
- 验证
正常训练完后会自动进行验证,验证结果在这:
DATASET\nnUNet_trained_models\nnUNet\3d_fullres\Task101_PC\nnUNetTrainerV2__nnUNetPlansv2.1\fold_0 - 推理
nnUNet_predict -i 要预测数据的文件夹路径 -o 输出文件夹路径 -t 101 -m 3d_fullres -f 0
-f 表示第几折,如果不加的话会使用五折的集成(需要五折都跑了) - 评估
nnUNet_evaluate_folder -ref 金标准文件夹 -pred 预测结果文件夹 -l 1
-l 表示要计算的label的类别,正常就是背景-0肿瘤-1,所以设置1,如果有两类就是 -l 1 2,以此类推
这个是nnUNet自带的评估命令,计算分割DSC,可以不用这个,另写代码去算需要的评估指标即可
4 其他
- 本文只说明了3d_fullres的训练,完整的nnUNet流程还需要跑2d和3d级联的,然后进行三种的择优。不过从实际性能来说,一般3d级联≥3d>2d,是否跑其他两种需要自己考虑。推理最优设置是这个,会返回一个最优设置的predict命令
nnUNet_find_best_configuration -m 2d 3d_fullres 3d_lowres 3d_cascade_fullres -t 101 - nnUNet虽然号称全流程的实现方式,但是实际经验发现一些数据的预处理(比如卡阈值)还是需要自己提前做的,不然结果可能不理想
- 对nnUNet更详细的了解可以看花老师的博客,里面有nnUNet的一整套分析,包括论文分析、训练测试和常见问题解答,我也是看这些学习的 花卷汤圆的CSDN博客-医学图像分割
- 另外,由于nnUNet使用命令行进行处理,有时候一直放着等可能会有意外,可以考虑用screen等方式挂到后台 常用screen操作总结
文章出处登录后可见!