功能:读取文件夹中的所有图片,检测到图片后,保存到另一个文件夹中
先上效果图
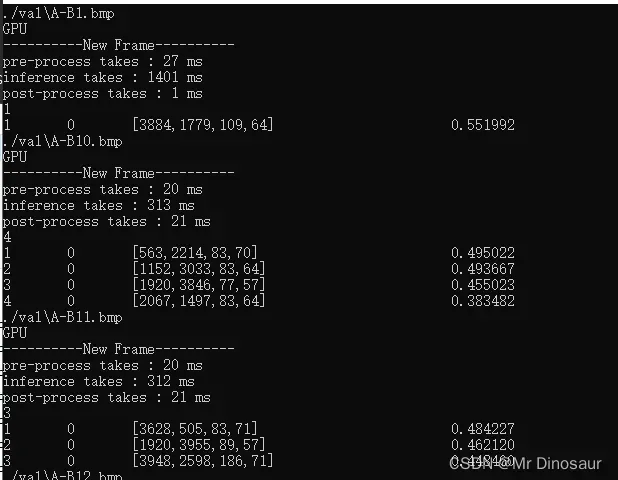
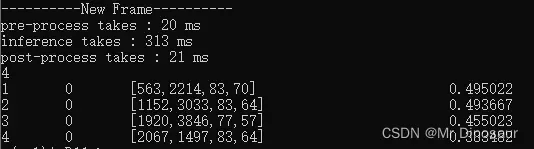
先输出上图检测所需时间
下面的4代表瑕疵数量,第一列是瑕疵ID,后面是瑕疵类别、坐标、置信度
代码
主功能
	char class_names[55] = "./defects.names";
	char weights[55] = "./best.torchscript.pt";
	//char source[55] = "./A-M255.bmp";
	string source = "./val";


	//char* class_ = class_names, * weight_ = weights, * source_ = source;
	char* class_ = class_names, * weight_ = weights;

	DETECT detect[100];
	vector<cv::String> image_files;
	glob(source, image_files, false);
	if (!image_files.size()) {
		cout << "No image found!" << endl;
		return 0;
	}
	else {
		for (auto img : image_files) {
			Mat image = imread(img);
			cout << img << endl;
			ModelDete(weight_, class_, detect, image);
		}
	}
图片路径我之前用的是char类型(也可以显示),后来感觉还是string简单一些,循环读取图片,再把图片路径打印出来。
界面
我在此做了个接口,方便后期调用DLL,参数使用char类型。
extern "C" __declspec(dllexport) int ModelDete(char*& torchscript_path, char*& classname_path, DETECT* detect_info, Mat& img_data) {
	string torch = torchscript_path, class_name = classname_path;
	//cout << torch << endl << class_name << endl << img_name << endl;//查看参数

	bool is_gpu = 1;
	torch::DeviceType device_type;
	if (torch::cuda::is_available() && is_gpu) {
		device_type = torch::kCUDA;
		cout << "GPU" << endl;
	}
	else {
		device_type = torch::kCPU;
		cout << "CPU" << endl;
	}

	// load class names from dataset for visualization
	vector<string> class_names = LoadNames(class_name);
	if (class_names.empty()) {
		cout << "Error loading classname!" << endl;
		return -1;
	}

	// load network
	string weights = torch;
	if (weights.empty()) {
		cerr << "Error loading pt!\n";
		return -1;
	}
	auto detector = Detector(weights, device_type);

	//load input image
	//Mat img = imdecode(*img_data,1);
	if (img_data.empty()) {
		cerr << "Error loading the image!\n";
		return -1;
	}
}
算法接口函数使用结构化数组:
struct DETECT {
	int type;//瑕疵类型
	int x;//瑕疵的横坐标
	int y;//瑕疵的纵坐标
	int height;//瑕疵的高度
	int width;//瑕疵的宽度
	double probability;//瑕疵的置信度
};
编写一个函数来保存以下格式:
void pirnt_detect(int num, DETECT* detect_info) {
	string info = to_string(num) + "\t"
		+ to_string(detect_info[num].type) + "\t["
		+ to_string(detect_info[num].x) + "," + to_string(detect_info[num].y) + ','
		+ to_string(detect_info[num].height) + ',' + to_string(detect_info[num].width) + "]\t\t\t"
		+ to_string(detect_info[num].probability) + '\n';
	cout << info;
}
定义另一个函数,然后检测我们的图像:
void DefectsMark(int id, int& cnt, Mat& img,
	const vector<vector<Detection>>& detections,
	const vector<string>& class_names,
	DETECT* detect_info,
	bool label = true)
if (label) {
stringstream ss;
ss << fixed << setprecision(2) << score;
string s = class_names[class_idx] + " " + ss.str();
auto font_face = FONT_HERSHEY_DUPLEX;
auto font_scale = 1.0;
int thickness = 1;
int baseline = 0;
auto s_size = getTextSize(s, font_face, font_scale, thickness, &baseline);
rectangle(img,
Point(box.tl().x, box.tl().y - s_size.height - 5),
Point(box.tl().x + s_size.width, box.tl().y),
Scalar(0, 0, 255), -1);
putText(img, s, Point(box.tl().x, box.tl().y - 5),
font_face, font_scale, Scalar(255, 255, 255), thickness);
//string str2 = "num:" + std::to_string(num);
}
//data save
if (cnt > 100) {
cout << "Detect result number is" << num << " > 100, not enough space to save it!\n";
return;
}检测到的图片保存在另一个文件夹中
imwrite("E:/DefectsIdentify/defectsdata/" + to_string(id) + ".bmp", img);最后展示检测的效果:
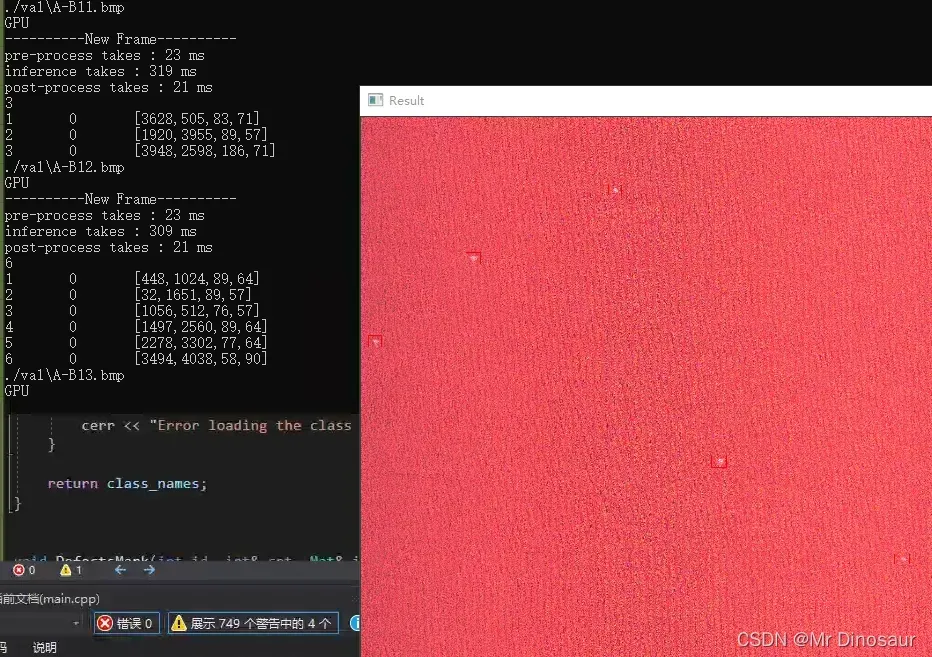
图片尺寸4096*4096,太大了就没截全
最近一直在做布检,包括缺陷数据集,也是自己做的。我通常很忙。有需要请留言。

文章出处登录后可见!
已经登录?立即刷新