OpenCV 是一个用于计算机视觉应用程序的库。在 OpenCV 的帮助下,我们可以构建大量实时运行更好的应用程序。主要用于图像和视频处理。
可以在此处获取有关 OpenCV 的更多信息 (https://opencv.org/)
除了 OpenCV,我们将使用 MediaPipe 库。
1.MediaPipe简介
MediaPipe是一个主要用于构建音频、视频或任何时间序列数据的框架。在 MediaPipe 框架的帮助下,我们可以为不同的媒体处理功能构建管道。
MediaPipe 的一些主要应用。
-
多手追踪
-
人脸检测
-
对象检测和跟踪
-
Objection:3D 对象检测和跟踪
-
AutoFlip:自动视频裁剪管道等。
MediaPipe 使用单次手掌检测模型,一旦完成,它会对检测到的手部区域中的 21 个 3D 手掌坐标执行精确的关键点定位。
MediaPipe 管道使用多个模型,例如,从完整图像返回定向手边界框的手掌检测模型。裁剪后的图像区域被馈送到由手掌检测器定义的手部标志模型,并返回高保真 3D 手部关键点。
现在让我们实现手部跟踪模型。
安装所需的模块
–> pip install opencv-python
–> pip install mediapipe
注意:这里的python版本尽量在3.8以上,不然会报各种错误!!
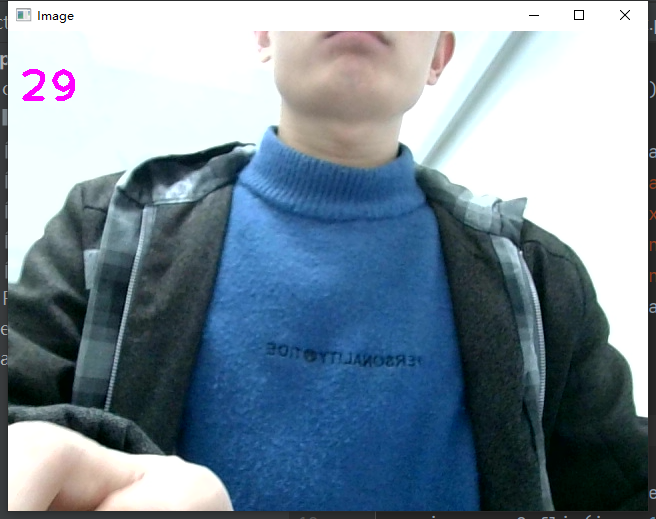
首先,让我们检查网络摄像头的工作情况。
import cv2
import mediapipe as mp
import time
cap = cv2.VideoCapture(0)
mpHands = mp.solutions.hands
hands = mpHands.Hands(static_image_mode=False,
max_num_hands=2,
min_detection_confidence=0.5,
min_tracking_confidence=0.5)
mpDraw = mp.solutions.drawing_utils
pTime = 0
cTime = 0
while True:
success, img = cap.read()
img = cv2.flip(img, 1)
imgRGB = cv2.cvtColor(img, cv2.COLOR_BGR2RGB)
results = hands.process(imgRGB)
#print(results.multi_hand_landmarks)
if results.multi_hand_landmarks:
for handLms in results.multi_hand_landmarks:
for id, lm in enumerate(handLms.landmark):
#print(id,lm)
h, w, c = img.shape
cx, cy = int(lm.x *w), int(lm.y*h)
#if id ==0:
cv2.circle(img, (cx,cy), 3, (255,0,255), cv2.FILLED)
mpDraw.draw_landmarks(img, handLms, mpHands.HAND_CONNECTIONS)
cTime = time.time()
fps = 1/(cTime-pTime)
pTime = cTime
cv2.putText(img,str(int(fps)), (10,70), cv2.FONT_HERSHEY_PLAIN, 3, (255,0,255), 3)
cv2.imshow("Image", img)
cv2.waitKey(1)结果见图示:
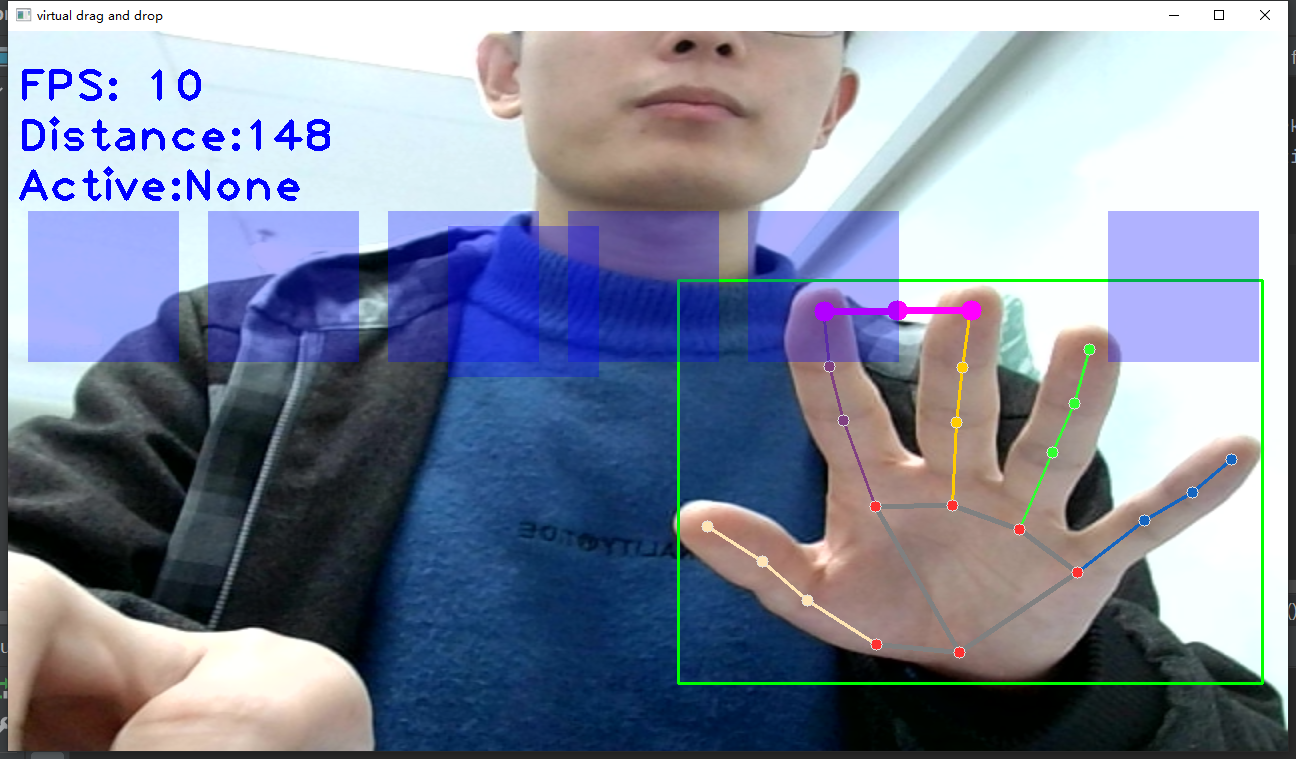
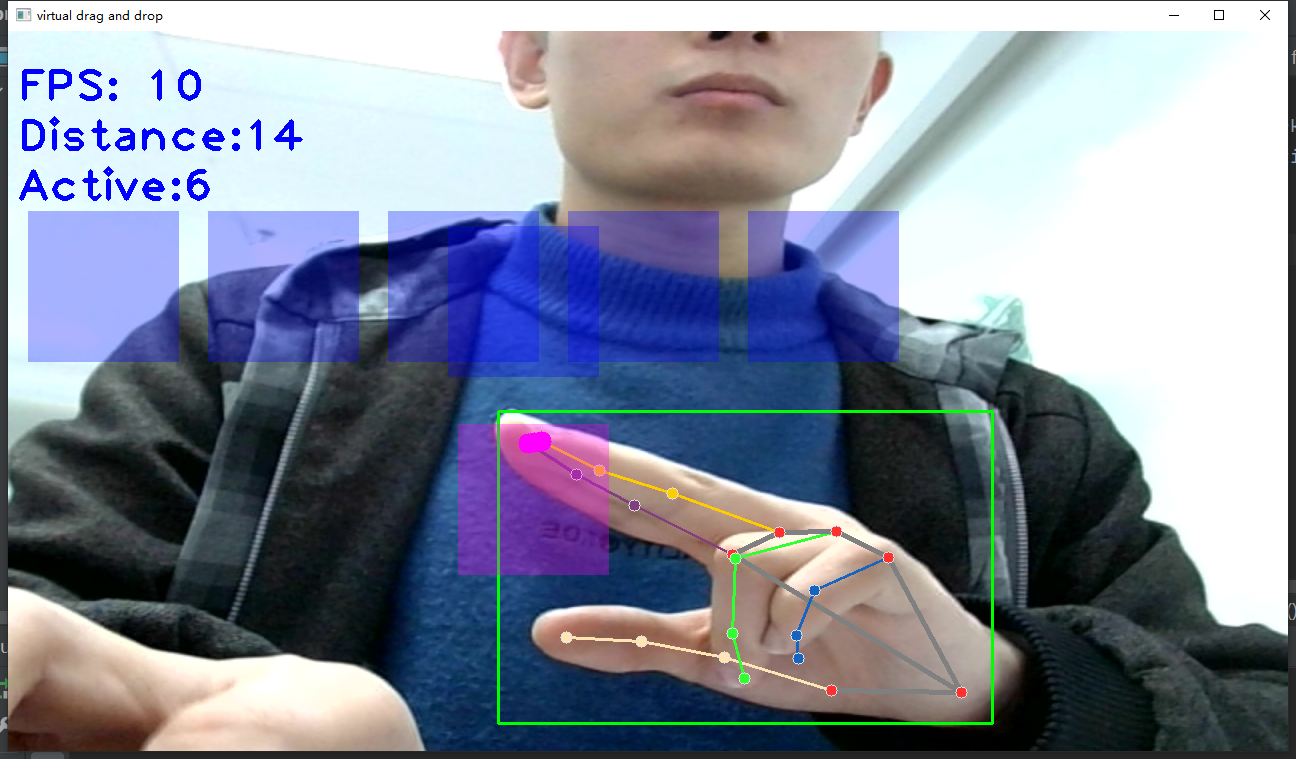
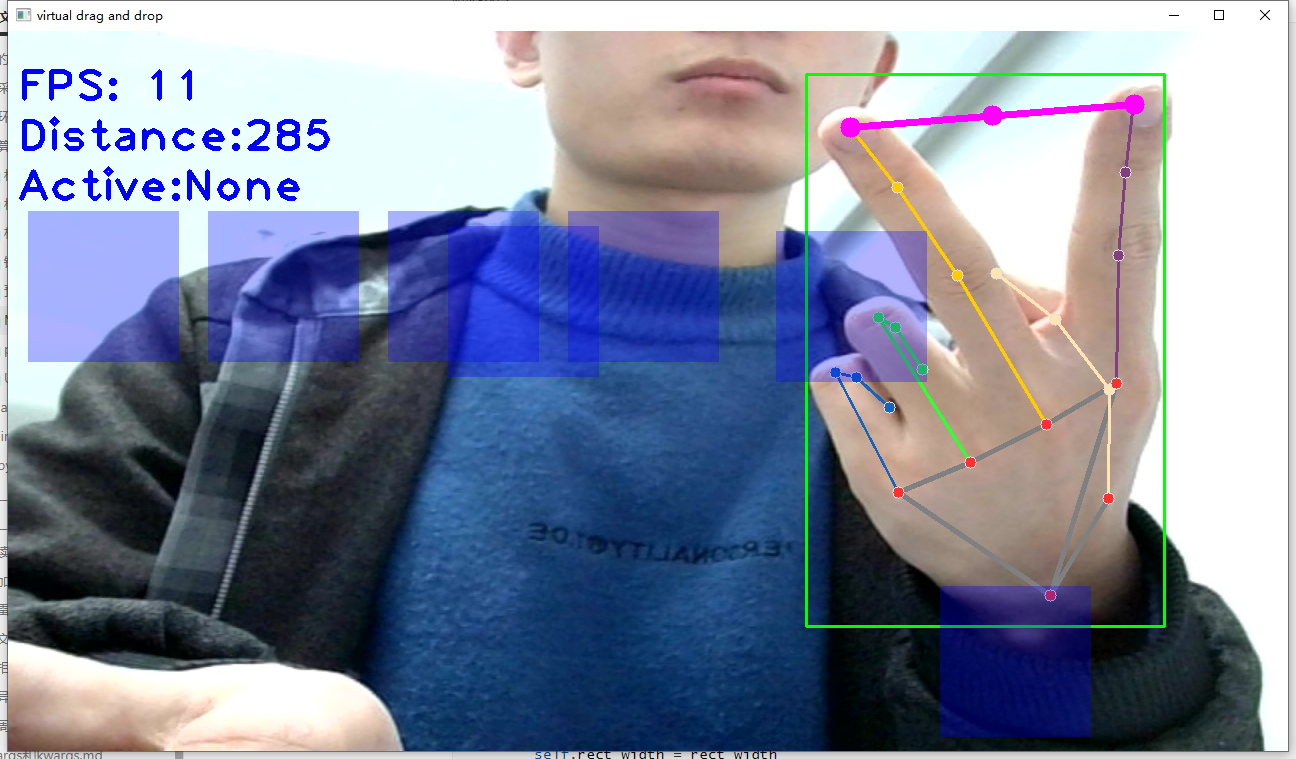
2.mediapipe实现手掌拖拽屏幕中的方块(转载于恩培大佬)
效果如示:
源码如下:
"""
功能:手势虚拟拖拽
1、使用OpenCV读取摄像头视频流;
2、识别手掌关键点像素坐标;
3、根据食指和中指指尖的坐标,利用勾股定理计算距离,当距离较小且都落在矩形内,则触发拖拽(矩形变色);
4、矩形跟着手指动;
5、两指放开,则矩形停止移动
"""
# 导入OpenCV
import cv2
# 导入mediapipe
import mediapipe as mp
# 导入其他依赖包
import time
import math
# 方块管理类
class SquareManager:
def __init__(self, rect_width):
# 方框长度
self.rect_width = rect_width
# 方块list
self.square_count = 0
self.rect_left_x_list = []
self.rect_left_y_list = []
self.alpha_list = []
# 中指与矩形左上角点的距离
self.L1 = 0
self.L2 = 0
# 激活移动模式
self.drag_active = False
# 激活的方块ID
self.active_index = -1
# 创建一个方块,但是没有显示
def create(self,rect_left_x,rect_left_y,alpha=0.4):
self.rect_left_x_list.append(rect_left_x)
self.rect_left_y_list.append(rect_left_y)
self.alpha_list.append(alpha)
self.square_count+=1
# 更新位置
def display(self,class_obj):
for i in range(0,self.square_count):
x= self.rect_left_x_list[i]
y= self.rect_left_y_list[i]
alpha = self.alpha_list[i]
overlay = class_obj.image.copy()
if(i == self.active_index):
cv2.rectangle(overlay,(x,y),(x+self.rect_width,y+self.rect_width),(255, 0, 255),-1)
else:
cv2.rectangle(overlay,(x,y),(x+self.rect_width,y+self.rect_width),(255, 0, 0),-1)
# Following line overlays transparent rectangle over the self.image
class_obj.image = cv2.addWeighted(overlay, alpha, class_obj.image, 1 - alpha, 0)
# 判断落在哪个方块上,返回方块的ID
def checkOverlay(self,check_x,check_y):
for i in range(0,self.square_count):
x= self.rect_left_x_list[i]
y= self.rect_left_y_list[i]
if (x < check_x < (x+self.rect_width) ) and ( y < check_y < (y+self.rect_width)):
# 保存被激活的方块ID
self.active_index = i
return i
return -1
# 计算与指尖的距离
def setLen(self,check_x,check_y):
# 计算距离
self.L1 = check_x - self.rect_left_x_list[self.active_index]
self.L2 = check_y - self.rect_left_y_list[self.active_index]
# 更新方块
def updateSquare(self,new_x,new_y):
# print(self.rect_left_x_list[self.active_index])
self.rect_left_x_list[self.active_index] = new_x - self.L1
self.rect_left_y_list[self.active_index] = new_y - self.L2
# 识别控制类
class HandControlVolume:
def __init__(self):
# 初始化medialpipe
self.mp_drawing = mp.solutions.drawing_utils
self.mp_drawing_styles = mp.solutions.drawing_styles
self.mp_hands = mp.solutions.hands
# 中指与矩形左上角点的距离
self.L1 = 0
self.L2 = 0
# image实例,以便另一个类调用
self.image=None
# 主函数
def recognize(self):
# 计算刷新率
fpsTime = time.time()
# OpenCV读取视频流
cap = cv2.VideoCapture(0)
# 视频分辨率
resize_w = 1280
resize_h = 720
# 画面显示初始化参数
rect_percent_text = 0
# 初始化方块管理器
squareManager = SquareManager(150)
# 创建多个方块
for i in range(0, 7):
squareManager.create(180*i+20, 180, 0.3) ##原来是0.6
with self.mp_hands.Hands(min_detection_confidence=0.7,
min_tracking_confidence=0.5,
max_num_hands=2) as hands:
while cap.isOpened():
# 初始化矩形
success, self.image = cap.read()
self.image = cv2.resize(self.image, (resize_w, resize_h))
if not success:
print("空帧.")
continue
# 提高性能
self.image.flags.writeable = False
# 转为RGB
self.image = cv2.cvtColor(self.image, cv2.COLOR_BGR2RGB)
# 镜像
self.image = cv2.flip(self.image, 1)
# mediapipe模型处理
results = hands.process(self.image)
self.image.flags.writeable = True
self.image = cv2.cvtColor(self.image, cv2.COLOR_RGB2BGR)
# 判断是否有手掌
if results.multi_hand_landmarks:
# 遍历每个手掌
for hand_landmarks in results.multi_hand_landmarks:
# 在画面标注手指
self.mp_drawing.draw_landmarks(
self.image,
hand_landmarks,
self.mp_hands.HAND_CONNECTIONS,
self.mp_drawing_styles.get_default_hand_landmarks_style(),
self.mp_drawing_styles.get_default_hand_connections_style())
# 解析手指,存入各个手指坐标
landmark_list = []
# 用来存储手掌范围的矩形坐标
paw_x_list = []
paw_y_list = []
for landmark_id, finger_axis in enumerate(
hand_landmarks.landmark):
landmark_list.append([
landmark_id, finger_axis.x, finger_axis.y,
finger_axis.z
])
paw_x_list.append(finger_axis.x)
paw_y_list.append(finger_axis.y)
if landmark_list:
# 比例缩放到像素
ratio_x_to_pixel = lambda x: math.ceil(x * resize_w)
ratio_y_to_pixel = lambda y: math.ceil(y * resize_h)
# 设计手掌左上角、右下角坐标
paw_left_top_x,paw_right_bottom_x = map(ratio_x_to_pixel,[min(paw_x_list),max(paw_x_list)])
paw_left_top_y,paw_right_bottom_y = map(ratio_y_to_pixel,[min(paw_y_list),max(paw_y_list)])
# 给手掌画框框
cv2.rectangle(self.image,(paw_left_top_x-30,paw_left_top_y-30),(paw_right_bottom_x+30,paw_right_bottom_y+30),(0, 255,0),2)
# 获取中指指尖坐标
middle_finger_tip = landmark_list[12]
middle_finger_tip_x =ratio_x_to_pixel(middle_finger_tip[1])
middle_finger_tip_y =ratio_y_to_pixel(middle_finger_tip[2])
# 获取食指指尖坐标
index_finger_tip = landmark_list[8]
index_finger_tip_x =ratio_x_to_pixel(index_finger_tip[1])
index_finger_tip_y =ratio_y_to_pixel(index_finger_tip[2])
# 中间点
between_finger_tip = (middle_finger_tip_x+index_finger_tip_x)//2, (middle_finger_tip_y+index_finger_tip_y)//2
# print(middle_finger_tip_x)
thumb_finger_point = (middle_finger_tip_x,middle_finger_tip_y)
index_finger_point = (index_finger_tip_x,index_finger_tip_y)
# 画指尖2点
circle_func = lambda point: cv2.circle(self.image,point,10,(255,0,255),-1)
self.image = circle_func(thumb_finger_point)
self.image = circle_func(index_finger_point)
self.image = circle_func(between_finger_tip)
# 画2点连线
self.image = cv2.line(self.image,thumb_finger_point,index_finger_point,(255,0,255),5)
# 勾股定理计算长度
line_len = math.hypot((index_finger_tip_x-middle_finger_tip_x),(index_finger_tip_y-middle_finger_tip_y))
# 将指尖距离映射到文字
rect_percent_text = math.ceil(line_len)
# 激活模式,需要让矩形跟随移动
if squareManager.drag_active:
# 更新方块
squareManager.updateSquare(between_finger_tip[0],between_finger_tip[1])
if(line_len>100):
# 取消激活
squareManager.drag_active =False
squareManager.active_index = -1
elif (line_len<100) and (squareManager.checkOverlay(between_finger_tip[0],between_finger_tip[1]) != -1 )and( squareManager.drag_active == False):
# 激活
squareManager.drag_active =True
# 计算距离
squareManager.setLen(between_finger_tip[0],between_finger_tip[1])
# 显示方块,传入本实例,主要为了半透明的处理
squareManager.display(self)
# 显示距离
cv2.putText(self.image, "Distance:"+str(rect_percent_text), (10, 120),cv2.FONT_HERSHEY_PLAIN, 3, (255, 0, 0), 3)
# 显示当前激活
cv2.putText(self.image, "Active:"+( "None" if squareManager.active_index == -1 else str(squareManager.active_index)), (10, 170),cv2.FONT_HERSHEY_PLAIN, 3, (255, 0, 0), 3)
# 显示刷新率FPS
cTime = time.time()
fps_text = 1/(cTime-fpsTime)
fpsTime = cTime
cv2.putText(self.image, "FPS: " + str(int(fps_text)), (10, 70),
cv2.FONT_HERSHEY_PLAIN, 3, (255, 0, 0), 3)
# 显示画面
# self.image = cv2.resize(self.image, (resize_w//2, resize_h//2))
cv2.imshow('virtual drag and drop', self.image)
if cv2.waitKey(5) & 0xFF == 27:
break
cap.release()
# 开始程序
control = HandControlVolume()
control.recognize()
3.mediapipe实现手势控制音量大小(转载于恩培大佬)
效果如示:
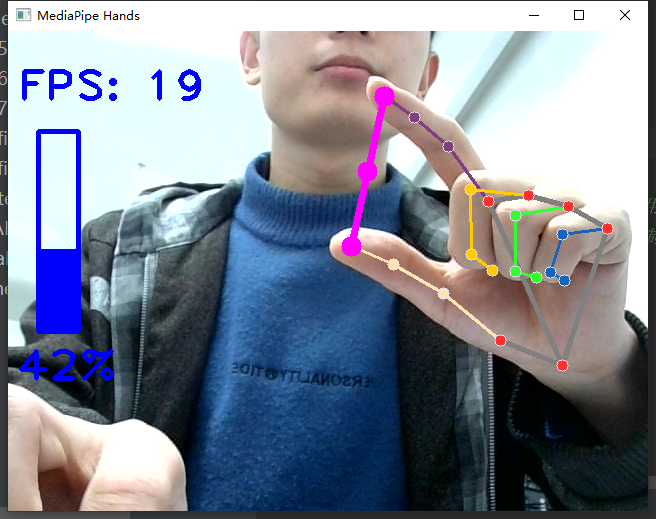
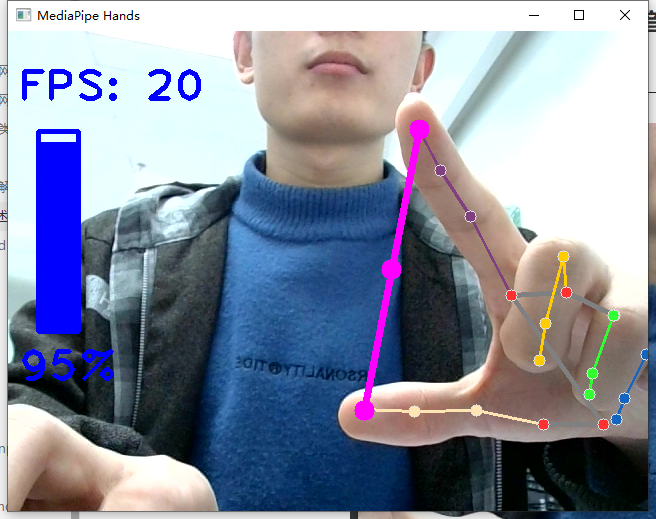
源码如下:
"""
功能:手势操作电脑音量
1、使用OpenCV读取摄像头视频流;
2、识别手掌关键点像素坐标;
3、根据拇指和食指指尖的坐标,利用勾股定理计算距离;
4、将距离等比例转为音量大小,控制电脑音量
"""
# 导入OpenCV
import cv2
# 导入mediapipe
import mediapipe as mp
# 导入电脑音量控制模块
from ctypes import cast, POINTER
from comtypes import CLSCTX_ALL
from pycaw.pycaw import AudioUtilities, IAudioEndpointVolume
# 导入其他依赖包
import time
import math
import numpy as np
class HandControlVolume:
def __init__(self):
# 初始化medialpipe
self.mp_drawing = mp.solutions.drawing_utils
self.mp_drawing_styles = mp.solutions.drawing_styles
self.mp_hands = mp.solutions.hands
# 获取电脑音量范围
devices = AudioUtilities.GetSpeakers()
interface = devices.Activate(
IAudioEndpointVolume._iid_, CLSCTX_ALL, None)
self.volume = cast(interface, POINTER(IAudioEndpointVolume))
self.volume_range = self.volume.GetVolumeRange()
# 主函数
def recognize(self):
# 计算刷新率
fpsTime = time.time()
# OpenCV读取视频流
cap = cv2.VideoCapture(0)
# 视频分辨率
resize_w = 640
resize_h = 480
# 画面显示初始化参数
rect_height = 0
rect_percent_text = 0
with self.mp_hands.Hands(min_detection_confidence=0.7,
min_tracking_confidence=0.5,
max_num_hands=2) as hands:
while cap.isOpened():
success, image = cap.read()
image = cv2.resize(image, (resize_w, resize_h))
if not success:
print("空帧.")
continue
# 提高性能
image.flags.writeable = False
# 转为RGB
image = cv2.cvtColor(image, cv2.COLOR_BGR2RGB)
# 镜像
image = cv2.flip(image, 1)
# mediapipe模型处理
results = hands.process(image)
image.flags.writeable = True
image = cv2.cvtColor(image, cv2.COLOR_RGB2BGR)
# 判断是否有手掌
if results.multi_hand_landmarks:
# 遍历每个手掌
for hand_landmarks in results.multi_hand_landmarks:
# 在画面标注手指
self.mp_drawing.draw_landmarks(
image,
hand_landmarks,
self.mp_hands.HAND_CONNECTIONS,
self.mp_drawing_styles.get_default_hand_landmarks_style(),
self.mp_drawing_styles.get_default_hand_connections_style())
# 解析手指,存入各个手指坐标
landmark_list = []
for landmark_id, finger_axis in enumerate(
hand_landmarks.landmark):
landmark_list.append([
landmark_id, finger_axis.x, finger_axis.y,
finger_axis.z
])
if landmark_list:
# 获取大拇指指尖坐标
thumb_finger_tip = landmark_list[4]
thumb_finger_tip_x = math.ceil(thumb_finger_tip[1] * resize_w)
thumb_finger_tip_y = math.ceil(thumb_finger_tip[2] * resize_h)
# 获取食指指尖坐标
index_finger_tip = landmark_list[8]
index_finger_tip_x = math.ceil(index_finger_tip[1] * resize_w)
index_finger_tip_y = math.ceil(index_finger_tip[2] * resize_h)
# 中间点
finger_middle_point = (thumb_finger_tip_x+index_finger_tip_x)//2, (thumb_finger_tip_y+index_finger_tip_y)//2
# print(thumb_finger_tip_x)
thumb_finger_point = (thumb_finger_tip_x,thumb_finger_tip_y)
index_finger_point = (index_finger_tip_x,index_finger_tip_y)
# 画指尖2点
image = cv2.circle(image,thumb_finger_point,10,(255,0,255),-1)
image = cv2.circle(image,index_finger_point,10,(255,0,255),-1)
image = cv2.circle(image,finger_middle_point,10,(255,0,255),-1)
# 画2点连线
image = cv2.line(image,thumb_finger_point,index_finger_point,(255,0,255),5)
# 勾股定理计算长度
line_len = math.hypot((index_finger_tip_x-thumb_finger_tip_x),(index_finger_tip_y-thumb_finger_tip_y))
# 获取电脑最大最小音量
min_volume = self.volume_range[0]
max_volume = self.volume_range[1]
# 将指尖长度映射到音量上
vol = np.interp(line_len,[50,300],[min_volume,max_volume])
# 将指尖长度映射到矩形显示上
rect_height = np.interp(line_len,[50,300],[0,200])
rect_percent_text = np.interp(line_len,[50,300],[0,100])
# 设置电脑音量
self.volume.SetMasterVolumeLevel(vol, None)
# 显示矩形
cv2.putText(image, str(math.ceil(rect_percent_text))+"%", (10, 350),
cv2.FONT_HERSHEY_PLAIN, 3, (255, 0, 0), 3)
image = cv2.rectangle(image,(30,100),(70,300),(255, 0, 0),3)
image = cv2.rectangle(image,(30,math.ceil(300-rect_height)),(70,300),(255, 0, 0),-1)
# 显示刷新率FPS
cTime = time.time()
fps_text = 1/(cTime-fpsTime)
fpsTime = cTime
cv2.putText(image, "FPS: " + str(int(fps_text)), (10, 70),
cv2.FONT_HERSHEY_PLAIN, 3, (255, 0, 0), 3)
# 显示画面
cv2.imshow('MediaPipe Hands', image)
if cv2.waitKey(5) & 0xFF == 27:
break
cap.release()
# 开始程序
control = HandControlVolume()
control.recognize()
reference:
使用 Python+OpenCV 构建手部跟踪系统 – 知乎 (zhihu.com)
源码来源:恩培大佬
enpeizhao/CVprojects: computer vision projects | 计算机视觉等好玩的AI项目 (github.com)
文章出处登录后可见!
已经登录?立即刷新