1、Vue下载安装步骤的详细教程(亲测有效) 1_水w的博客-CSDN博客
2、Vue下载安装步骤的详细教程(亲测有效) 2 安装与创建默认项目_水w的博客-CSDN博客
3、基于vscode开发vue项目的详细步骤教程_水w的博客-CSDN博客
4、基于vscode开发vue项目的详细步骤教程 2 第三方图标库FontAwesome_水w的博客-CSDN博客
5、基于vscode创建SpringBoot项目,连接postgresql数据库_水w的博客-CSDN博客
6、基于vscode开发vue项目,连接postgresql数据库 3_水w的博客-CSDN博客
目录
一、VueRouter
Vue路由vue-router是官方的路由插件,能够轻松的管理SPA项目中组件的切换。
- 它和vue.js是深度集成的,适合用于构建单页面应用。Vue的单页面应用是基于路由和组件的,路由用于设定访问路径,并将路径和组件映射起来
- 这里的路由并不是指我们平时所说的硬件路由器,这里的路由就是SPA(single page application单页应用)的路径管理器。再通俗的说,vue-router就是WebApp的链接路径管理系统
- 路由实际上就是可以理解为指向,就是我在页面上点击一个按钮需要跳转到对应的页面,这就是路由跳转
- vue-router 目前有3.x的版本和4.的版本,vue-router 3.x 只能结合 vue2进行使用,vue-router 4.x 只能结合 Vue3 进行使用
官方地址:入门 | Vue Router
1、VueRouter安装与使用
安装命令:
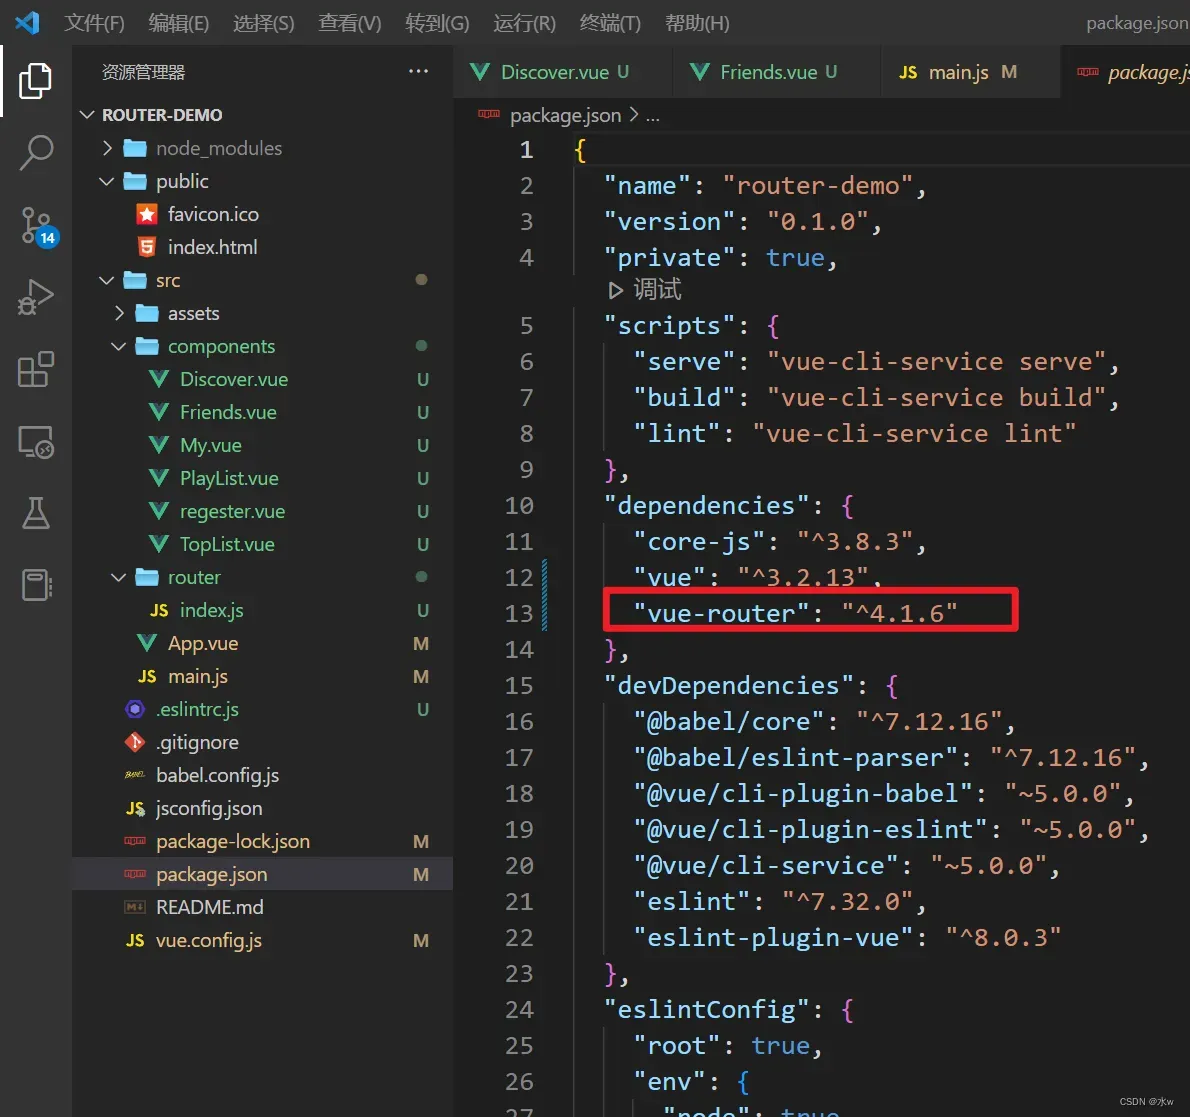
npm install vue-router@4安装成功后,前端项目中package.json会自动注册,
2、简单上手
(1)新建vue3项目
新建一个Vue3项目,请移步到Vue下载安装步骤的详细教程(亲测有效) 2 安装与创建默认项目_水w的博客-CSDN博客
下面将会以一个HTML单页面演示Vue Router的基本使用步骤。在vue项目里也是一样的原理。
(2)单页面演示
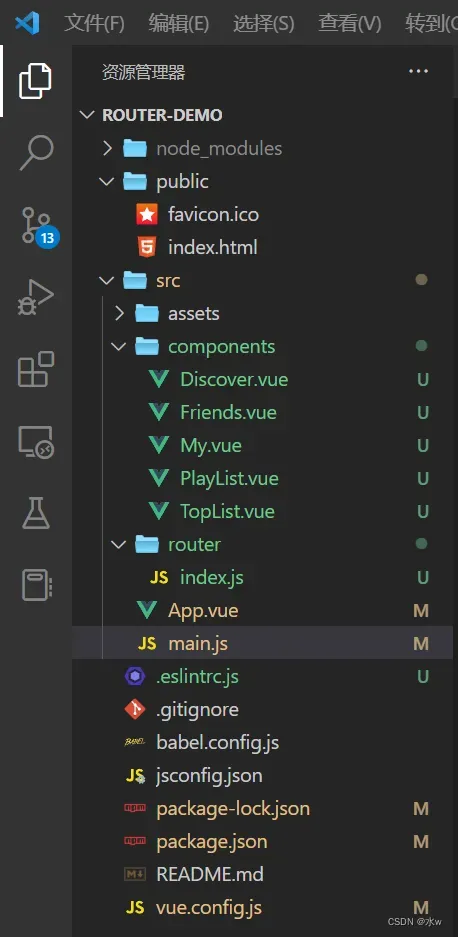
目前的目录结构,如下所示:
【1】App.vue
当前完整代码:
<template>
   <div>
      <div id="app">
        <!--声明路由链接-->
        <router-link to="/discover">发现</router-link>
        <router-link to="/friends">关注</router-link>
        <router-link to="/my">我的音乐</router-link>
        <!--声明路由占位符标签-->
        <router-view></router-view>
      </div>
   </div>
</template>

<script>
export default {
  name: 'App',
  components: {

  }
}
</script>

<style>
#app {
  font-family: Avenir, Helvetica, Arial, sans-serif;
  -webkit-font-smoothing: antialiased;
  -moz-osx-font-smoothing: grayscale;
  text-align: center;
  color: #2c3e50;
  margin-top: 60px;
}
</style>
添加路由链接和路由填充位
以下是一个vue提供的标签,默认会被渲染为a标签。
- 其中有一个to属性,这个to属性会被渲染为href属性,默认值被渲染为 # 开头的hash地址。
- 简单来说就是当用户点击不同时跳转不同内容,而这个标签就是用户要点击的东西,相当于a标签嘛。
下面这个标签叫路由填充位,就是说未来通过我们的路由规则匹配到的组件,将会被渲染到 router-view所在位置。
- 简单来说,就是用户点击路由链接,那得跳转内容吧,我们知道的是肯定不是整个页面都跳转,只是页面内相关的局部发生内容改变,这个局部就是router-view所在显示的区域。
【2】Discover.vue、Friends.vue、My.vue三个组件
(1)Discover.vue
<template>
<div>
    <h1>发现</h1>
    <!--声明子路由链接-->
    <router-link to="/toplist">推荐</router-link>
    <router-link to="/playlist">歌单</router-link>
    <hr>
    <!--声明子路由占位符标签-->
    <router-view></router-view>
</div>
</template>

<script>

</script>

<style>

</style>
(2)Friends.vue
<template>
<div>
    <h1>关注</h1>
</div>
</template>

<script>

</script>

<style>

</style>
(3)My.vue
<template>
<div>
    <h1>我的音乐</h1>
    <!--声明路由链接-->
    <router-link to="/book">书</router-link>
    <router-link to="/music">音乐</router-link>
    <!--声明路由占位符标签-->
    <router-view></router-view>
</div>
</template>

<script>

</script>

<style>

</style>
【Vue】组件命名报错 “Component name “XXX“ should always be multi-word”的解决方法
(1)第一种解决方法:修改组件名称为大驼峰,不要用系统中命令常见的名称。
(2)第二种解决方法:在根目录下,打开【.eslintrc.js】文件,如果没有就新建,添加下列内容
module.exports = {
    root: true,
    env: {
      node: true
    },
    'extends': [
      'plugin:vue/essential',
      'eslint:recommended'
    ],
    parserOptions: {
      parser: '@babel/eslint-parser'
    },
    rules: {
      'no-console': process.env.NODE_ENV === 'production' ? 'warn' : 'off',
      'no-debugger': process.env.NODE_ENV === 'production' ? 'warn' : 'off',
       //在rules中添加自定义规则
       //关闭组件命名规则
       "vue/multi-word-component-names":"off",
    },
    overrides: [
      {
        files: [
          '**/__tests__/*.{j,t}s?(x)',
          '**/tests/unit/**/*.spec.{j,t}s?(x)'
        ],
        env: {
          jest: true
        }
      }
    ]
  }
注意:修改完,如果还不行,就退出VsCode,再重新打开项目。
ok,问题解决了。

【3】Discover组件的子组件:TopList.vue、PlayList.vue
(1)TopList.vue
<template>
<div>
    <h2>推荐</h2>
</div>
</template>
<script></script>
<style></style>
(2)PlayList.vue
<template>
<div>
    <h2>歌单</h2>
</div>
</template>
<script></script>
<style></style>
【4】配置前端路由 router/index.js
接着去配置路由,router下面的index.js,
import {createRouter, createWebHistory} from 'vue-router'
import Discover from '../components/Discover.vue'
import Friends from '../components/Friends.vue'
import My from '../components/My.vue'
import TopList from '../components/TopList.vue'
import PlayList from '../components/PlayList.vue'

const routes = [
  //这里需要将根目录默认为Home,方便实现用户在保持登录 状态下再次登录时直接跳转至主页面
  {
    path:"/",
    redirect:{name:"discover"}
  },
  {
    path: "/discover",
    name: "discover",
    component:Discover,
    children: [
      {path: '/toplist',
      name: 'toplist',
      component: TopList},
      {path: '/playlist',
        name: 'playlist',
        component: PlayList}]
  },
  {
    path: "/friends",
    name: "friends",
    component:Friends,
  },
  {
    path: "/my",
    name: "my",
    component:My,
  },
]

const router = createRouter({
  history: createWebHistory(),
  // 指定hash属性与组件的对应关系
  routes
})

// 需要导出router
export default router
【5】配置main.js
import { createApp } from 'vue'
// import ElementPlus from 'element-plus'
import App from './App.vue'
import router from './router'
// import 'element-plus/dist/index.css'
// import 'font-awesome/css/font-awesome.min.css'
// import axios from 'axios'

const app = createApp(App)

// // 配置请求根路径
// axios.defaults.baseURL = 'http://localhost:8088'
// //将axios作为全局的自定义属性,每个组件可以在内部直接访问(Vue3),该部分要放在pp.mount('#app')的全面
// app.config.globalProperties.$http = axios


// app.use(ElementPlus)
app.use(router)

app.mount('#app')
(3)测试
目前的目录结构,如下所示:

在浏览器打开http://localhost:8080/进行访问,效果如下图所示:


文章出处登录后可见!