QGraphicsView 显示图片
QGraphicsView 是 PyQt6 里负责显示图形的组件,搭配 QGraphicsScene 和 QtGui.QPixmap() 就可以显示图片,这篇教学会介绍如何在 PyQt6 窗口里加入 QGraphicsView 组件并显示图片。
快速预览:
QGraphicsView 显示图片
改变图片尺寸
设定图片位置
显示多张图片
QGraphicsView 显示图片
建立 PyQt6 窗口物件后,透过 QtWidgets.QGraphicsView(widget)方法,就能在指定的组件中建立显示图形组件,QGraphicsView 建立后,需再使用 QtWidgets.QGraphicsScene()建立场景组件,再透过QtGui.QPixmap()于场景中加入图片,最后将场景加入 QGraphicsView 就可以显示图片,如果场景大小超过显示区域,会自动出现卷轴。
from PyQt6 import QtWidgets, QtGui
import sys
app = QtWidgets.QApplication(sys.argv)
Form = QtWidgets.QWidget()
Form.setWindowTitle('千牛编程思维')
Form.resize(300, 300)
grview = QtWidgets.QGraphicsView(Form) # 加入 QGraphicsView
grview.setGeometry(20, 20, 260, 200) # 设定 QGraphicsView 位置与大小
scene = QtWidgets.QGraphicsScene() # 加入 QGraphicsScene
scene.setSceneRect(0, 0, 300, 400) # 设定 QGraphicsScene 位置与大小
img = QtGui.QPixmap('mona.jpg') # 加入图片
scene.addPixmap(img) # 將图片加入 scene
grview.setScene(scene) # 设定 QGraphicsView 的场景為 scene
Form.show()
sys.exit(app.exec())class 写法:
from PyQt6 import QtWidgets, QtGui
import sys
class MyWidget(QtWidgets.QWidget):
def __init__(self):
super().__init__()
self.setWindowTitle('千牛编程思维')
self.resize(300, 300)
self.ui()
def ui(self):
self.grview = QtWidgets.QGraphicsView(self) # 加入 QGraphicsView
self.grview.setGeometry(20, 20, 260, 200) # 设定 QGraphicsView 位置与大小
scene = QtWidgets.QGraphicsScene() # 加入 QGraphicsScene
scene.setSceneRect(0, 0, 300, 400) # 设定 QGraphicsScene 位置与大小
img = QtGui.QPixmap('mona.jpg') # 加入图片
scene.addPixmap(img) # 將图片加入 scene
self.grview.setScene(scene) # 设定 QGraphicsView 的场景為 scene
if __name__ == '__main__':
app = QtWidgets.QApplication(sys.argv)
Form = MyWidget()
Form.show()
sys.exit(app.exec())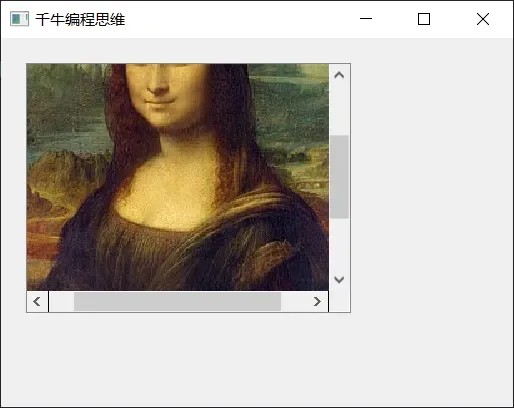
改变图片尺寸
使用 QtGui.QPixmap() 建立图片后,就能透过scaled(w, h)方法调整图片大小,下方的程序执行后,会显示缩小后的图片。
from PyQt6 import QtWidgets, QtGui
import sys
app = QtWidgets.QApplication(sys.argv)
Form = QtWidgets.QWidget()
Form.setWindowTitle('千牛编程思维')
Form.resize(300, 300) # 窗口大小
grview = QtWidgets.QGraphicsView(Form)
grview.setGeometry(20, 20, 260, 200) # QGraphicsView 位置 (20, 20) 和大小 260x200
scene = QtWidgets.QGraphicsScene()
scene.setSceneRect(0, 0, 120, 160) # QGraphicsScene 相對位置 (20, 20) 和大小 120x160
img = QtGui.QPixmap('mona.jpg')
img = img.scaled(120,160) # 调整图片大小為 120x160
scene.addPixmap(img)
grview.setScene(scene)
Form.show()
sys.exit(app.exec())class 写法:
from PyQt6 import QtWidgets, QtGui
import sys
class MyWidget(QtWidgets.QWidget):
def __init__(self):
super().__init__()
self.setWindowTitle('千牛编程思维')
self.resize(300, 300)
self.ui()
def ui(self):
self.grview = QtWidgets.QGraphicsView(self)
self.grview.setGeometry(20, 20, 260, 200) # QGraphicsView 位置 (20, 20) 和大小 260x200
scene = QtWidgets.QGraphicsScene()
scene.setSceneRect(0, 0, 120, 160) # QGraphicsScene 相對位置 (20, 20) 和大小 120x160
img = QtGui.QPixmap('mona.jpg')
img = img.scaled(120,160) # 调整图片大小為 120x160
scene.addPixmap(img)
self.grview.setScene(scene)
if __name__ == '__main__':
app = QtWidgets.QApplication(sys.argv)
Form = MyWidget()
Form.show()
sys.exit(app.exec())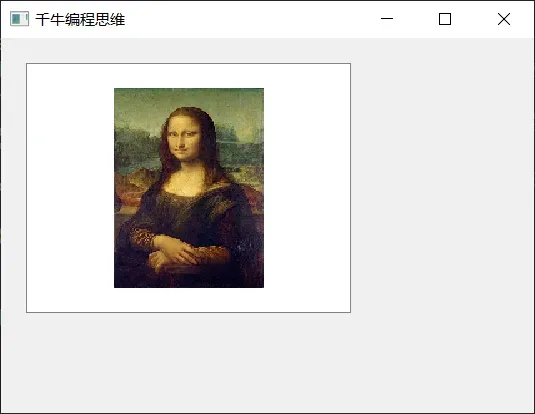
设定图片位置
因为使用 setSceneRect 时定位是以「中心点」为主,如果要改成熟悉的「左上角」定位,可透过简单的数学公式换算,下方的程序执行后,会将定位点改成左上角,修改 x 和 y 的数值,就可以控制图片左上角的坐标。
from PyQt6 import QtWidgets, QtGui
import sys
app = QtWidgets.QApplication(sys.argv)
Form = QtWidgets.QWidget()
Form.setWindowTitle('千牛编程思维')
Form.resize(300, 300)
grview = QtWidgets.QGraphicsView(Form)
gw = 260
gh = 200
grview.setGeometry(20, 20, gw, gh) # QGraphicsView 的長寬改成變數
scene = QtWidgets.QGraphicsScene()
img = QtGui.QPixmap('mona.jpg')
img_w = 120 # 顯示图片的寬度
img_h = 160 # 顯示图片的高度
img = img.scaled(img_w, img_h)
x = 20 # 左上角 x 座標
y = 20 # 左上角 y 座標
dx = int((gw - img_w) / 2) - x # 修正公式
dy = int((gh - img_h) / 2) - y
scene.setSceneRect(dx, dy, img_w, img_h)
scene.addPixmap(img)
grview.setScene(scene)
Form.show()
sys.exit(app.exec())class 写法:
from PyQt6 import QtWidgets, QtGui
import sys
class MyWidget(QtWidgets.QWidget):
def __init__(self):
super().__init__()
self.setWindowTitle('千牛编程思维')
self.resize(300, 300)
self.ui()
def ui(self):
self.grview = QtWidgets.QGraphicsView(self)
gw = 260
gh = 200
self.grview.setGeometry(20, 20, gw, gh) # QGraphicsView 的長寬改成變數
scene = QtWidgets.QGraphicsScene()
img = QtGui.QPixmap('mona.jpg')
img_w = 120 # 顯示图片的寬度
img_h = 160 # 顯示图片的高度
img = img.scaled(img_w, img_h)
x = 20 # 左上角 x 座標
y = 20 # 左上角 y 座標
dx = int((gw - img_w) / 2) - x # 修正公式
dy = int((gh - img_h) / 2) - y
scene.setSceneRect(dx, dy, img_w, img_h)
scene.addPixmap(img)
self.grview.setScene(scene)
if __name__ == '__main__':
app = QtWidgets.QApplication(sys.argv)
Form = MyWidget()
Form.show()
sys.exit(app.exec())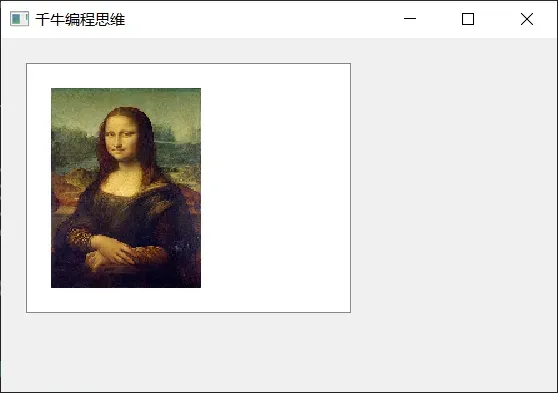
显示多张图片
如果要加入多张图片,就要使用 QItem 的做法,下方的程序执行后,会在场景里放入两个图片尺寸不同的 QItem。
from PyQt6 import QtWidgets, QtGui
import sys
app = QtWidgets.QApplication(sys.argv)
MainWindow = QtWidgets.QMainWindow()
MainWindow.setObjectName("MainWindow")
MainWindow.setWindowTitle("千牛编程思维")
MainWindow.resize(300, 300)
grview = QtWidgets.QGraphicsView(MainWindow) # 加入 QGraphicsView
grview.setGeometry(0, 0, 300, 300) # 设定 QGraphicsView 位置与大小
scene = QtWidgets.QGraphicsScene() # 加入 QGraphicsScene
scene.setSceneRect(0, 0, 200, 200) # 设定 QGraphicsScene 位置与大小
img = QtGui.QPixmap('mona.jpg') # 建立图片
img1 = img.scaled(200,50) # 建立不同尺寸图片
qitem1 = QtWidgets.QGraphicsPixmapItem(img1) # 设定 QItem,內容是 img1
img2 = img.scaled(100,150) # 建立不同尺寸图片
qitem2 = QtWidgets.QGraphicsPixmapItem(img2) # 设定 QItem,內容是 img2
scene.addItem(qitem1) # 场景中加入 QItem
scene.addItem(qitem2) # 场景中加入 QItem
grview.setScene(scene) # 设定 QGraphicsView 的场景為 scene
MainWindow.show()
sys.exit(app.exec())class 写法:
from PyQt6 import QtWidgets, QtGui
import sys
class MyWidget(QtWidgets.QWidget):
def __init__(self):
super().__init__()
self.setWindowTitle('千牛编程思维')
self.resize(300, 300)
self.ui()
def ui(self):
self.grview = QtWidgets.QGraphicsView(self) # 加入 QGraphicsView
self.grview.setGeometry(0, 0, 300, 300) # 设定 QGraphicsView 位置与大小
scene = QtWidgets.QGraphicsScene() # 加入 QGraphicsScene
scene.setSceneRect(0, 0, 200, 200) # 设定 QGraphicsScene 位置与大小
img = QtGui.QPixmap('mona.jpg') # 建立图片
img1 = img.scaled(200,50) # 建立不同尺寸图片
qitem1 = QtWidgets.QGraphicsPixmapItem(img1) # 设定 QItem,內容是 img1
img2 = img.scaled(100,150) # 建立不同尺寸图片
qitem2 = QtWidgets.QGraphicsPixmapItem(img2) # 设定 QItem,內容是 img2
scene.addItem(qitem1) # 场景中加入 QItem
scene.addItem(qitem2) # 场景中加入 QItem
self.grview.setScene(scene) # 设定 QGraphicsView 的场景為 scene
if __name__ == '__main__':
app = QtWidgets.QApplication(sys.argv)
Form = MyWidget()
Form.show()
sys.exit(app.exec())文章出处登录后可见!
已经登录?立即刷新