目录
- (一)显示图像
- (二)标记色块
- 2.1 `find_blobs`函数
- 2.2 颜色阈值
- 2.3 标记
(一)显示图像
星瞳科技openmv官方资料
嵌入式图像处理环境:
- 硬件平台:OpenMV4 Cam H7 Plus
- 语言:Micro python
- 软件:Openmv IDE
首先对摄像头进行一个初始化来显示图像。引入模块sensor。
import sensor, image, time # 引入感光元件模块sensor

sensor.reset() #初始化感光元件
sensor.set_pixformat(sensor.RGB565) # 设置像素模式
                                    # sensor.GRAYSCALE: 灰度,每个像素8bit
                                    # sensor.RGB565: 彩色,每个像素16bit
sensor.set_framesize(sensor.QVGA)   # 设置分辨率 QVGA: 320x240
sensor.skip_frames(time = 2000)    # 跳过n张照片,在更改设置后
                                   # 跳过一些帧,等待感光元件变稳定。

clock = time.clock()               # 跟踪FPS帧率

while(True):
    clock.tick()                   # 追踪两个snapshots()之间经过的毫秒数,可能就是记录运行时间吧
    img = sensor.snapshot()        # 拍摄一张照片,返回一个image对象
    print(clock.fps())             # 在终端打印出来帧率
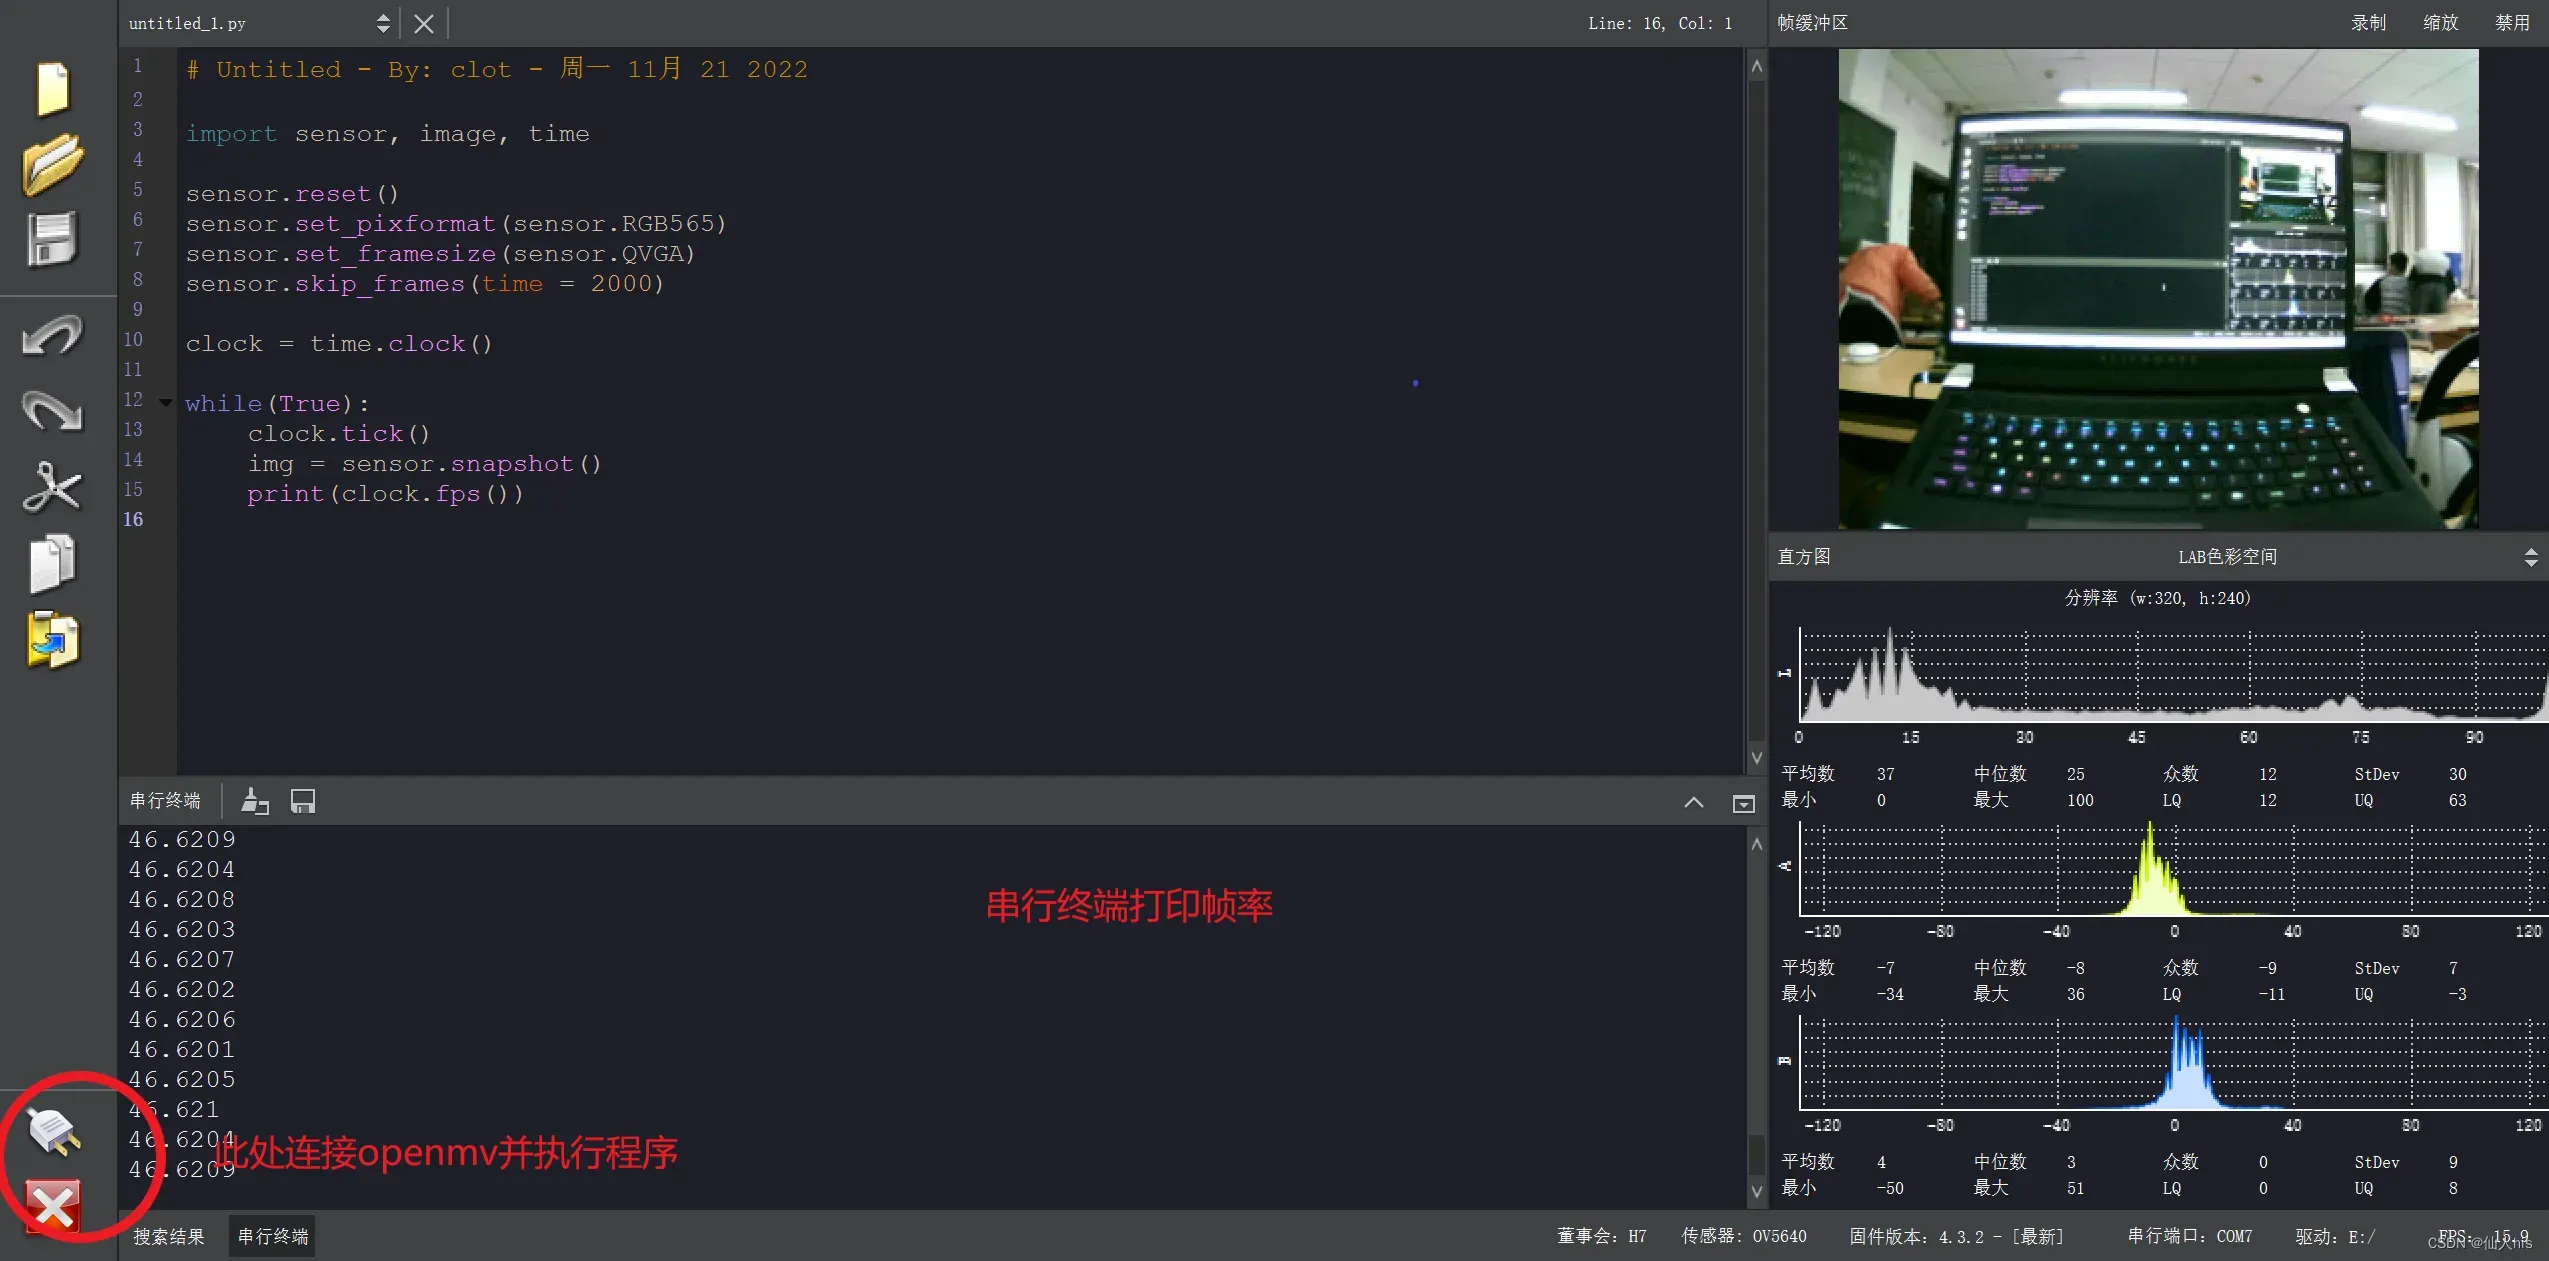
我们可以在右上角看到摄像头拍摄到并传输回来的画面。
可以在Openmv涂上导热硅胶和装上散热塔进行散热,因为用起来确实很烫。

(二)标记色块
我们需要用到颜色识别的函数find_blobs和画图函数。
2.1 find_blobs函数
这篇博客也有对这个函数进行了介绍
这个函数主要是对颜色识别的对象、范围、大小进行一个阈值的设置。
image.find_blobs(thresholds, roi=Auto, x_stride=2, y_stride=1, invert=False, area_threshold=10, pixels_threshold=10, merge=False, margin=0, threshold_cb=None, merge_cb=None)

#find_blobs参数介绍
# 第一个参数是一个thresholds列表,其用来设置颜色的阈值
# 第二个参数是设置roi感兴趣区域,既在显示的画面中,在指定坐标规划出一个指定大小的区域来查找色块
# 第三个和第四个参数是设置x方向和y方向上的色块最小像素,即只有像素块数量大于这个阈值的才会标记出来
# 第五个参数为反转阈值,把阈值以外的颜色作为阈值进行查找。False关闭、True开启
# 第六个参数为面积阈值,如果色块被框起来的面积小于这个值,会被过滤掉
# 第七个参数为像素个数阈值,如果色块像素数量小于这个值,会被过滤掉
# 第八个参数为合并。如果开启这会合并所有的blob,无论是什么颜色的。如果你想混淆多种颜色的blob,只需要分别调用不同颜色阈值的find_blobs。
# 第九个参数为边界,如果设置为1,那么两个blobs如果间距1一个像素点,也会被合并。
2.2 颜色阈值
一个颜色的阈值由六个参数构成即 LAB的最大值和最小值,通过设定这六个参数来更改颜色阈值。
LAB颜色模型介绍
thresholds = [(30, 100, 15, 127, 15, 127),  # 红色阈值
              (30, 100, -64, -8, -32, 32),  # 绿色阈值
              (0, 30, 0, 64, -128, 0)]      # 蓝色阈值
我们定义了一个thresholds元组,里面有三个元素,每个元素都是一组LAB颜色阈值的列表。
如果我们需要调用不同的颜色阈值 只需要调用这个元组中的某个阈值就行,例如:
thresholds[0] #这是调用元组中的第一个元素、这个元素是一个列表、存放着红色阈值的LAB最大值和最小值
2.3 标记
对于是否找到了自己想要的一个色块、自然需要标记出来,这样才知道自己是否成功识别到这个色块。
官方给出来了一系列绘画函数
# Single Color RGB565 Blob Tracking Example
#
# This example shows off single color RGB565 tracking using the OpenMV Cam.

import sensor, image, time, math

threshold_index = 0 # 0为红色,1为绿色,2为蓝色

# Color Tracking Thresholds (L Min, L Max, A Min, A Max, B Min, B Max)
# The below thresholds track in general red/green/blue things. You may wish to tune them...
thresholds = [(30, 100, 15, 127, 15, 127), # generic_red_thresholds
              (30, 100, -64, -8, -32, 32), # generic_green_thresholds
              (0, 30, 0, 64, -128, 0)] # generic_blue_thresholds

sensor.reset()
sensor.set_pixformat(sensor.RGB565)
sensor.set_framesize(sensor.QVGA)
sensor.skip_frames(time = 2000)
sensor.set_auto_gain(False) # must be turned off for color tracking
sensor.set_auto_whitebal(False) # must be turned off for color tracking
clock = time.clock()

# Only blobs that with more pixels than "pixel_threshold" and more area than "area_threshold" are
# returned by "find_blobs" below. Change "pixels_threshold" and "area_threshold" if you change the
# camera resolution. "merge=True" merges all overlapping blobs in the image.

while(True):
    clock.tick()
    img = sensor.snapshot()
    for blob in img.find_blobs([thresholds[threshold_index]], pixels_threshold=200, area_threshold=200, merge=True):
        # thresholds[threshold_index] 用来元组元组中的元素
        # These values depend on the blob not being circular - otherwise they will be shaky.
        if blob.elongation() > 0.5:
            img.draw_edges(blob.min_corners(), color=(255,0,0))  #color设置绘画出来的颜色
            img.draw_line(blob.major_axis_line(), color=(0,255,0))
            img.draw_line(blob.minor_axis_line(), color=(0,0,255))
        # These values are stable all the time.
        img.draw_rectangle(blob.rect()) #绘画出一个矩形框
        img.draw_cross(blob.cx(), blob.cy()) #在指定位置画十字
        # Note - the blob rotation is unique to 0-180 only.
        img.draw_keypoints([(blob.cx(), blob.cy(), int(math.degrees(blob.rotation())))], size=20)
        img.draw_string(100,100,'x='+blob.cx(),color=(255,0,0))
    print(clock.fps())
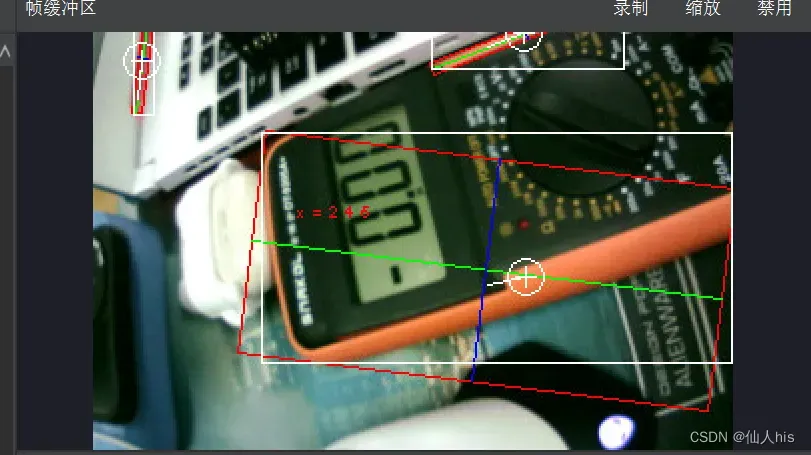
上面的代码是寻找红色色块并进行标记,绘画出方框和十字、并显示x的坐标。
最终效果如下
文章出处登录后可见!
已经登录?立即刷新