Face3D简介
face3d:用于处理 3D 人脸的 Python 工具
介绍
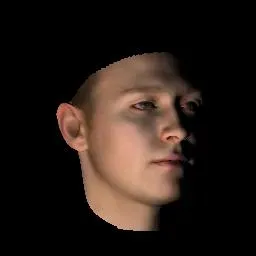
Face3D实现了一些与 3D 人脸相关的基本功能。
我们可以使用它来处理网格数据,从可变形模型生成3D面,使用单个图像和关键点作为输入重建3D面,使用不同的照明渲染面。
Face3D采用c ++编写核心部分(没有任何其他大型库,例如opencv,eigen),并使用Cython编译它们以供python使用。因此,最终版本非常轻巧,速度快。
此外,还保留了numpy版本,考虑到初学者可以在python中专注于算法本身,并且研究人员可以快速修改和验证他们的想法。
文件结构
# Since triangle mesh is the most popular representation of 3D face,
# the main part is mesh processing.
mesh/             # written in python and c++
|  cython/               # c++ files, use cython to compile
|  io.py                 # read & write obj
|  vis.py                # plot mesh
|  transform.py          # transform mesh & estimate matrix
|  light.py              # add light & estimate light(to do)
|  render.py             # obj to image using rasterization render

mesh_numpy/      # the same with mesh/, with each part written in numpy
                 # slow but easy to learn and modify

# 3DMM is one of the most popular methods to generate & reconstruct 3D face.
morphable_model/
|  morphable_model.py    # morphable model class: generate & fit
|  fit.py                # estimate shape&expression parameters. 3dmm fitting.
|  load.py               # load 3dmm data
开发环境设置
0.开发环境
Ubuntu 18.04.6 LTS
Python 3.6.9
1.安装依赖库
所需的库是:
numpy
skimage (对应的库为scikit-image)
scipy
matplotlib
Cython
这边因为要用python3运行所以用pip3下载(没有pip的自行下载)
可以直接复制以下命令,省事
pip3 install numpy -i  https://pypi.tuna.tsinghua.edu.cn/simple
pip3 install scikit-image -i  https://pypi.tuna.tsinghua.edu.cn/simple
pip3 install scipy -i  https://pypi.tuna.tsinghua.edu.cn/simple
pip3 install matplotlib -i  https://pypi.tuna.tsinghua.edu.cn/simple
pip3 install Cython -i  https://pypi.tuna.tsinghua.edu.cn/simple
2.下载Face3D
可以直接在github克隆过来
git clone https://github.com/YadiraF/face3d
cd face3d
下载好了进入face3d目录去执行下面的操作
3.编译Face3D
在face3d目录下执行以下命令:
cd face3d/mesh/cython
sudo python3 setup.py build_ext -i
这边注意我是python3环境所以使用python3运行setup.py,如果你是python2请自行更改一下。而且这一步是需要root权限的,不然会报错。
4.运行示例
如果没有报错,则环境基本没有问题。
这时候可以运行示例程序(我还是使用python3)
cd examples
python3 1_pipeline.py
得到以下输出
而且在example/results/pipeline目录下面生成了这样一个图片

此时整个开发环境搭建并验证完毕,就可以进行下面的学习了。
后面的部分我将用jupyter拆解学习Face3D的代码,资源将在系列完结后放出。
本系列会持续更新,欢迎大家关注
文章出处登录后可见!
已经登录?立即刷新
