先说句题外话。前两天刷到一个做银行系统 40 多岁的 C 语言工程师,因为公司技术转型被裁,失业半年,家里都快揭不开锅了!他现在焦虑得不行,问大家现在学 Java 编程晚不晚?我也不知道晚不晚,就是他那个状态搞得别人也焦虑了。
都说软件行业是青春饭,我觉得对。要想做得长久,就要想办法让青春永驻、容颜不老 —- 这是误解!我的理解是这个行业不太容易 “混” 到退休,无论你是做管理还是做研发,都需要保持对新技术的敏感和热情,心态要年轻。软件产业相对其他行业卷得比较厉害,如果没点热情,还是不要转什么 Java了,继续做下去其实挺煎熬的,转行也许能远离痛苦。
下面切到正题。计算机视觉领域的应用一般都会以OpenCV为基础。产品里我们使用OpenCV来做图像的读写、色彩变化、图像截取和拼接、图像畸变矫正、轮廓分析,另外还有图像矩阵的均值、标准差的计算和图像矩阵加减乘除运算等。
OpenCV在Java项目中的配置
服务端用的SpringBoot,所以需要在SpringBoot项目里使用OpenCV。OpenCV没有Java版本的实现,但提供了JNI来调用 C 编译出的动态库。缺点是引入麻烦,优点是 C语言对于包含大量矩阵计算的图形操作执行速度很快。
Windows
开发环境用的windows10,首先下载安装windows版本的OpenCV,然后在安装目录 opencv\build\java 下找到opencv-xxx.jar 和 opencv_javaxxx.dll (xxx是版本号)两个文件。
jar文件可copy到项目的resource目录中,我放到 src\main\resources\lib.opencv目录下。这个jar里面封装了对底层 C 方法调用接口,在Windows和Linux环境下通用。
另外的 opencv_javaxxx.dll 文件需要复制到 C:\Windows\System32 目录下。要将jar添加到项目依赖的库中,还需要在pom.xml中增加 dependency 配置:
  <dependencies>
    ...
    <!-- opencv -->
    <dependency>
        <groupId>org</groupId>
        <artifactId>opencv</artifactId>
        <version>4.5.3</version>
        <scope>system</scope>
        <systemPath>${pom.basedir}/src/main/resources/lib.opencv/opencv-453.jar</systemPath>
    </dependency>
    ...
  </dependencies>
  ...
Docker(Linux)
部署用的Docker,因为没有找到版本合适的Java+OpenCV的Docker Image,所以只能用一个Java Docker Image作为基础,在基础 Image 上再安装OpenCV。
Linux下安装OpenCV需要用cmake对OpenCV的源码做编译,稍微麻烦一些。索性我绕过这个环节找了一个 sh脚本 搞定(这个脚本里可以设置安装版本等参数)。
另外,将SpringBoot项目打包为Docker Image时, 需要在SpringBoot项目的pom.xml配置文件中增加如下设置,让批处理将指定的 jar 文件打包到的项目依赖的 lib 目录下。
  ...
  <build>
     ...
        <resources>
            <resource>
                <directory>src/main/resources</directory>
                <targetPath>.</targetPath>
                <includes>
                    <include>**/*</include>
                </includes>
            </resource>
            <resource>
                <directory>src/main/resources/lib.opencv</directory>
                <targetPath>BOOT-INF/lib/</targetPath>
                <includes>
                    <include>**/*.jar</include>
                </includes>
            </resource>
            <resource>
                <directory>src/main/resources</directory>
                <targetPath>BOOT-INF/classes/</targetPath>
                <includes>
                    <include>**/*.properties</include>
                </includes>
            </resource>
        </resources>
      ...
  </build>
加载动态库
OpenCV在Java中是通过JNI调用,在调用之前还要加载对应的动态库(Windows下是dll文件,Linux下是so文件)。 可以在CvService中以静态代码块的方式在初始化类时做JNI加载。
import org.opencv.core.Core;

public class CvService {
  static {
      System.loadLibrary(
        Core.NATIVE_LIBRARY_NAME
      );
  }
  ...
}
OpenCV的常用 Java API
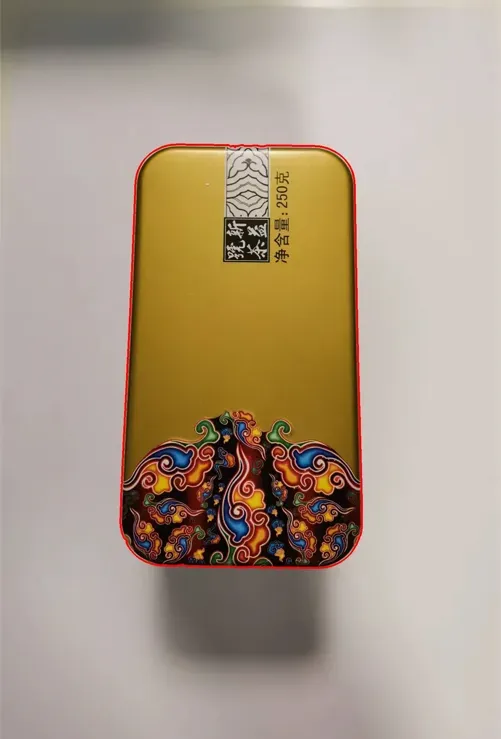
下面简要介绍Java中OpenCV的调用方式。 首先随手拍张照片作为演示图片。
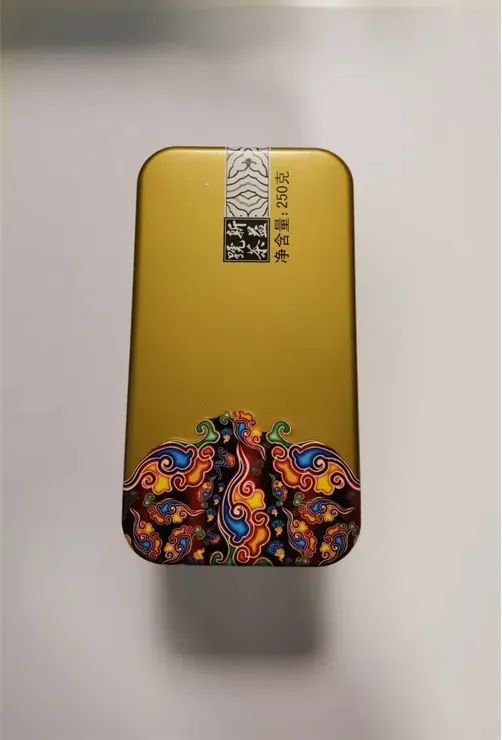
Mat
首先在OpenCV中,图像数据是通过Mat矩阵类来包装的。
用 Imgcodecs 读写图像
import org.opencv.imgproc.Imgcodecs;

/**
从文件路径读图像
*/
String path = "D:\\demo.jpg";
Mat img = Imgcodecs.imread(path);

/**
图像写到指定路径
*/
String savePath = "D:\\demo_bak.jpg";
Imgcodecs.imwrite(savePath, img);
用 Imgproc 进行简单图像处理
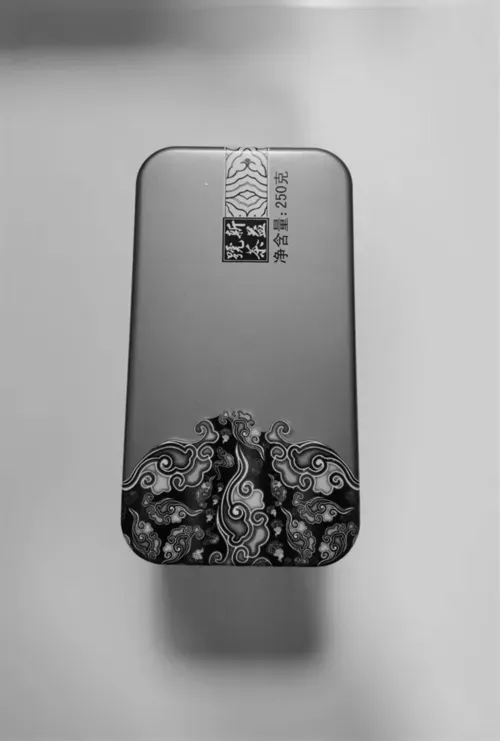
图形灰度化
import org.opencv.imgproc.Imgproc;

/**
 * 创建一个空的Mat对象,用来存储图片处理中间结果
 */
Mat grayImg = new Mat();

/**
 * 将图像img由BGR转为灰度图,结果保存到tempImg
 */
Imgproc.cvtColor(
  img, grayImg, Imgproc.COLOR_BGR2GRAY
);

Imgcodecs.imwrite(
  "D:\\card_test\\process\\gray.jpg",
  grayImg);
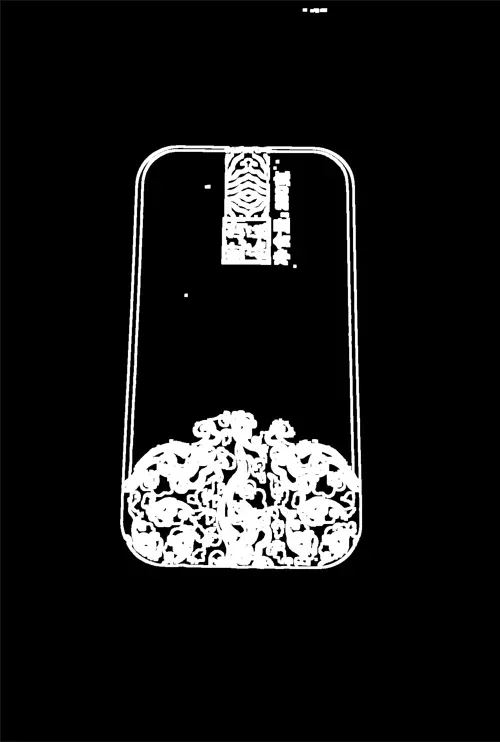
图形二值化
/**
 * 高斯滤波降噪
 */
Mat blurImg = new Mat();

Imgproc.GaussianBlur(
  grayImg,
  blurImg,
  new Size(3,3), 2, 2
);

/**
 * 使用自适应移动平均阈值法
 * 继续对图像进行黑白二值化处理
 */
Mat binaryImg = new Mat();

Imgproc.adaptiveThreshold(
  blurImg,
  binaryImg,
  255,
  Imgproc.ADAPTIVE_THRESH_MEAN_C,
  Imgproc.THRESH_BINARY,
  45,
  11
);

Imgcodecs.imwrite(
  "D:\\card_test\\process\\binary.jpg",
  binaryImg);
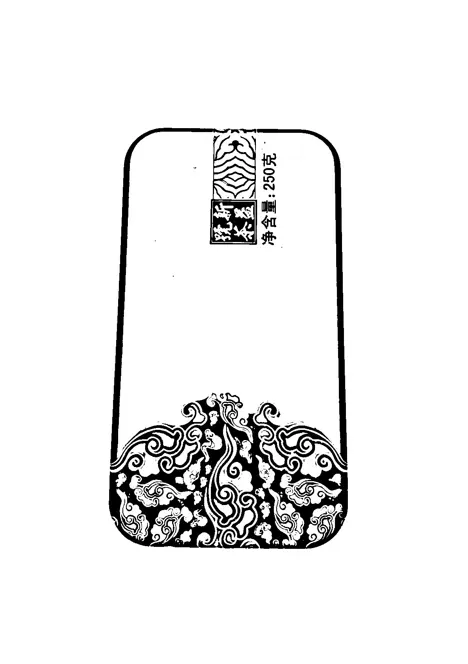
Canny边缘检测
Mat cannyImg = new Mat();
Imgproc.Canny(
 binaryImg,
 cannyImg,
 20,
 60,
 3,
 false);

Imgcodecs.imwrite(
  "D:\\card_test\\process\\Canny.jpg",
  cannyImg);
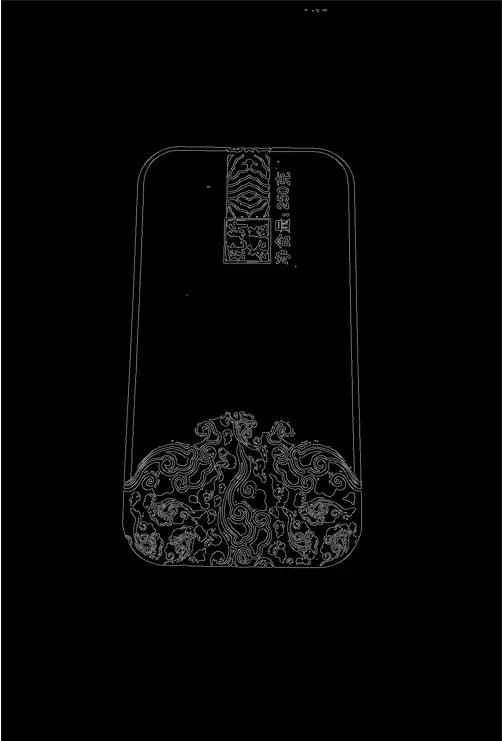
膨胀增强边缘
Mat dilateImg = new Mat();
Imgproc.dilate(
  cannyImg,
  dilateImg,
  new Mat(),
  new Point(-1,-1),
  3, 1,
  new Scalar(1));

Imgcodecs.imwrite(
  "D:\\card_test\\process\\dilateImg.jpg",
  dilateImg);
轮廓查找
/**
 * 从图片中搜索所有轮廓
 */
List<MatOfPoint> contours = new ArrayList();
Mat hierarchy = new Mat();

Imgproc.findContours(
  binaryImg,
  contours,
  hierarchy,
  Imgproc.RETR_EXTERNAL,
  Imgproc.CHAIN_APPROX_SIMPLE
);

/**
 * 从所有轮廓中找到最大的轮廓
 */
int maxIdx = 0;
double maxSize = 0;
for (int i = 0; i < contours.size(); i++) {
    double size = Imgproc.contourArea(
      contours.get(i)
    );
    if(maxSize < size) {
        maxIdx = i;
        maxSize = size;
    }
}

MatOfPoint maxContour = contours.get(maxIdx);

/**
 * 将最大的轮廓绘制在原始图片上
 */
Mat imgCopy = img.clone();
Imgproc.drawContours(
  imgCopy,
  contours,
  maxIdx,
  new Scalar(0, 0, 255),
  4,
  LINE_8
);


Imgcodecs.imwrite(
  "D:\\card_test\\process\\contour.jpg",
  imgCopy);
外接矩形
/**
 * 找到轮廓的外接矩形
 */
Rect rect = Imgproc.boundingRect(maxContour);

/**
 * 在原图上绘制出外接矩形
 */
Mat rectImg = img.clone();
Imgproc.rectangle(
        rectImg,
        rect,
        new Scalar(0, 0, 255),
        2,
        Imgproc.LINE_8
);

Imgcodecs.imwrite(
        "D:\\card_test\\process\\rect.jpg",
        rectImg);

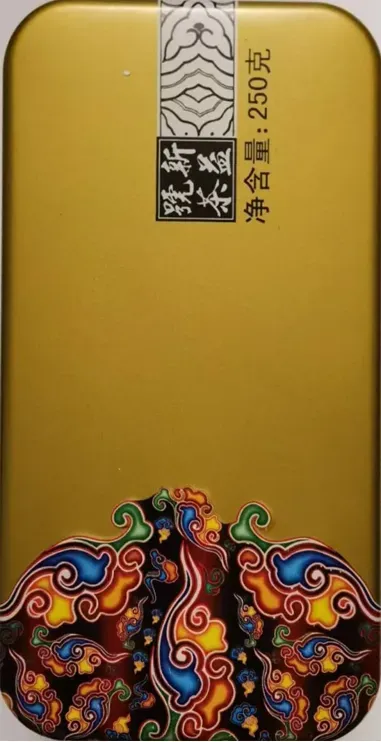
综合应用(切取图中的轮廓并矫正为矩形)
切图效果
/**
 * 计算边框的凸包
 */
MatOfInt hull = new MatOfInt();
Imgproc.convexHull(maxContour, hull);

/**
 * 得到凸包对应的轮廓点
 */
Point[] contourPoints = maxContour.toArray();
int[] indices = hull.toArray();
List<Point> newPoints = new ArrayList();
for (int index : indices) {
    newPoints.add(contourPoints[index]);
}
MatOfPoint2f contourHull = new MatOfPoint2f();
contourHull.fromList(newPoints);

/**
 * 使用轮廓周长的1%作为阈值
 */
double thresholdL = Imgproc.arcLength(contourHull, true) * 0.01;

/**
 * 用多边形拟合凸包边框,取得拟合多边形的所有顶点
 */
MatOfPoint2f approx = new MatOfPoint2f();
approx.convertTo(approx, CvType.CV_32F);
Imgproc.approxPolyDP(contourHull, approx, thresholdL, true);
List<Point> points = approx.toList();

/**
 * 找到所有顶点连线中,边长大于 4 * thresholdL的四条边作为四边形物体的四条边
 */
List<double[]> lines = new ArrayList();
for (int i = 0; i < points.size(); i++) {
    Point p1 = points.get(i);
    Point p2 = points.get((i + 1) % points.size());
    if (getSpacePointToPoint(p1, p2) > 4 * thresholdL) {
        lines.add(new double[]{p1.x, p1.y, p2.x, p2.y});
    }
}

/**
 * 计算出这四条边中 相邻两条边的交点,即物体的四个顶点
 */
List<Point> corners = new ArrayList();
for (int i = 0; i < lines.size(); i++) {
    Point corner = computeIntersect(
            lines.get(i),
            lines.get((i + 1) % lines.size()));
    corners.add(corner);
}

/**
 * 对顶点顺时针排序
 */
sortCorners(corners);

/**
 * 使用第1、2点距离作为宽,第1、4点间距离作为高
 */
Point p0 = corners.get(0);
Point p1 = corners.get(1);
Point p2 = corners.get(2);
Point p3 = corners.get(3);
double imgWidth = getSpacePointToPoint(p0, p1);
double imgHeight = getSpacePointToPoint(p3, p0);

/**
 * 定义存放切图的矩阵
 */
Mat dstMat = Mat.zeros(
        (int) imgHeight,
        (int) imgWidth,
        CvType.CV_8UC3);

/**
 * 定义图形矫正源的四个顶点
 */
MatOfPoint2f src = new MatOfPoint2f(p0, p1, p2, p3);

/**
 * 定义图形矫正目标的四个顶点
 */
MatOfPoint2f dst = new MatOfPoint2f(
        new Point(0, 0),
        new Point(imgWidth, 0),
        new Point(imgWidth, imgHeight),
        new Point(0, imgHeight));

/**
 * 定义透视变换矩阵并进行变换操作
 */
Mat trans = Imgproc.getPerspectiveTransform(src, dst);
Imgproc.warpPerspective(img, dstMat, trans, dstMat.size());

Imgcodecs.imwrite(
        "D:\\card_test\\process\\cutMat.jpg",
        dstMat);
上述过程中用到得一些方法实现
计算点到点的距离
/**
 * 点到点的距离
 *
 * @param p1
 * @param p2
 * @return
 */
public double getSpacePointToPoint(Point p1,
        Point p2) {
    if (p1 == null || p2 == null) {
        return 0;
    }
    double a = p1.x - p2.x;
    double b = p1.y - p2.y;
    return Math.sqrt(a * a + b * b);
}
计算两直线的交点
/**
 * 计算两直线的交点
 *
 * @param a
 * @param b
 * @return
 */
public Point computeIntersect(double[] a, double[] b) {
    if (a.length != 4 || b.length != 4)
        throw new ClassFormatError();
    double x1 = a[0], y1 = a[1], x2 = a[2], y2 = a[3], x3 = b[0], y3 = b[1], x4 = b[2], y4 = b[3];
    double d = ((x1 - x2) * (y3 - y4)) - ((y1 - y2) * (x3 - x4));
    if (d != 0) {
        Point pt = new Point();
        pt.x = ((x1 * y2 - y1 * x2) * (x3 - x4) - (x1 - x2) * (x3 * y4 - y3 * x4)) / d;
        pt.y = ((x1 * y2 - y1 * x2) * (y3 - y4) - (y1 - y2) * (x3 * y4 - y3 * x4)) / d;
        return pt;
    } else {
        return new Point(-1, -1);
    }
}
对多个点按顺时针排序(右上、左上、左下、右下)
/**
 * 对多个点按顺时针排序(右上、左上、左下、右下)
 *
 * @param corners
 */
public void sortCorners(List<Point> corners) {
    if (corners.size() == 0) return;
    // 首先取得矩形中心点的 x,y值
    int centerX = 0, centerY = 0;
    for (Point point : corners) {
        centerX += point.x;
        centerY += point.y;
    }
    centerX = centerX / 4;
    centerY = centerY / 4;

    /* 如果位于中心点右上,则index = 0
     * 如果位于中心点左上,则index = 1
     * 如果位于中心点左下,则index = 2
     * 如果位于中心点右下,则index = 3
     */
    Point[] result = new Point[4];
    for (Point point : corners) {
        if (point.x < centerX && point.y < centerY) {
            result[3] = point;
        } else if (point.x > centerX && point.y < centerY) {
            result[2] = point;
        } else if (point.x > centerX && point.y > centerY) {
            result[1] = point;
        } else if (point.x < centerX && point.y > centerY) {
            result[0] = point;
        }
    }
    corners.clear();
    for (Point point : result) {
        corners.add(0, point);
    }
}
本期到此为止。《基于AI的计算机视觉识别在Java项目中的使用》专题将按下列章节展开,欢迎关注我的个人公众号和CSDN。
一、《基于AI的计算机视觉识别在Java项目中的使用 —— 背景》
二、《基于AI的计算机视觉识别在Java项目中的使用 —— OpenCV的使用》
三、《基于AI的计算机视觉识别在Java项目中的使用 —— 搭建基于Docker的深度学习训练环境》
四、《基于AI的计算机视觉识别在Java项目中的使用 —— 准备深度学习训练数据》
五、《基于AI的计算机视觉识别在Java项目中的使用 —— 深度模型的训练调优》
六、《基于AI的计算机视觉识别在Java项目中的使用 —— 深度模型在Java环境中的部署》
文章出处登录后可见!