学习参考来自:
- PyTorch实现Deep Dream
- https://github.com/duc0/deep-dream-in-pytorch
文章目录
- 1 原理
- 2 VGG 模型结构
- 3 完整代码
- 4 输出结果
- 5 消融实验
- 6 torch.norm()
1 原理
其实 Deep Dream大致的原理和【Pytorch】Visualization of Feature Maps(1)—— Maximize Filter 是有些相似的,前者希望整个 layer 的激活值都很大,而后者是希望某个 layer 中的某个 filter 的激活值最大。
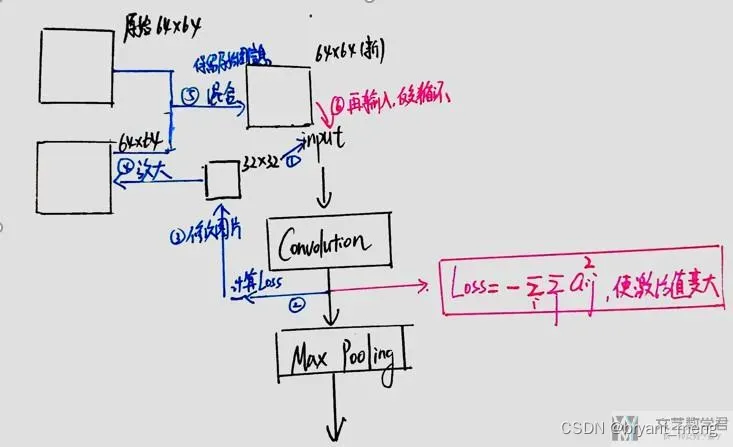
这个图画的很好,递归只画了一层,下面来个三层的例子
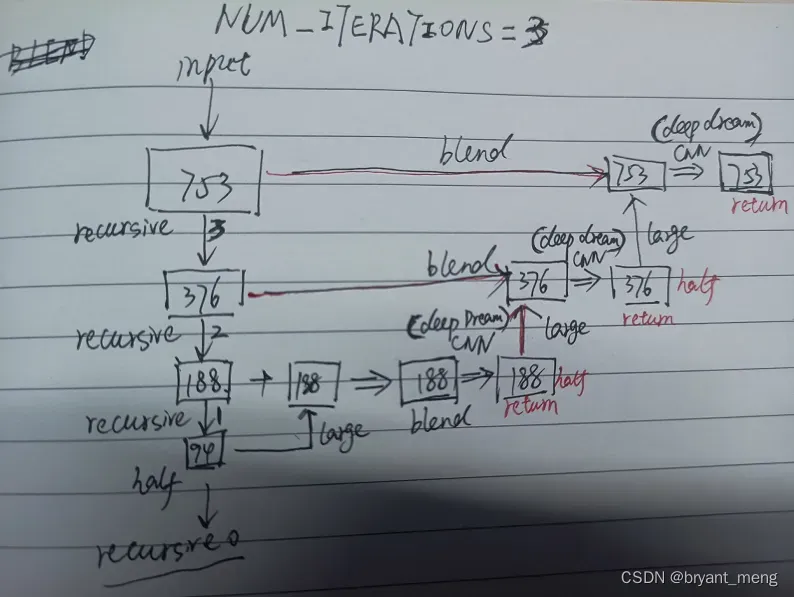
CNN 处(def deepDream),指定网络的某一层,固定网络权重,开启输入图片的梯度,迭代指定层输出的负l2范数(相当于最大化该层激活),以改变输入图片。
loss = -out.norm() # 让负的变小, 正的变大
核心代码,loss 为指定特征图输出的二范数的负值,相当于放大了响应,负数负的更多,正数正的更多,二范数才越大,损失才越小
2 VGG 模型结构
VGG(
  (features): Sequential(
    (0): Conv2d(3, 64, kernel_size=(3, 3), stride=(1, 1), padding=(1, 1))
    (1): ReLU(inplace=True)
    (2): Conv2d(64, 64, kernel_size=(3, 3), stride=(1, 1), padding=(1, 1))
    (3): ReLU(inplace=True)
    (4): MaxPool2d(kernel_size=2, stride=2, padding=0, dilation=1, ceil_mode=False)
    (5): Conv2d(64, 128, kernel_size=(3, 3), stride=(1, 1), padding=(1, 1))
    (6): ReLU(inplace=True)
    (7): Conv2d(128, 128, kernel_size=(3, 3), stride=(1, 1), padding=(1, 1))
    (8): ReLU(inplace=True)
    (9): MaxPool2d(kernel_size=2, stride=2, padding=0, dilation=1, ceil_mode=False)
    (10): Conv2d(128, 256, kernel_size=(3, 3), stride=(1, 1), padding=(1, 1))
    (11): ReLU(inplace=True)
    (12): Conv2d(256, 256, kernel_size=(3, 3), stride=(1, 1), padding=(1, 1))
    (13): ReLU(inplace=True)
    (14): Conv2d(256, 256, kernel_size=(3, 3), stride=(1, 1), padding=(1, 1))
    (15): ReLU(inplace=True)
    (16): MaxPool2d(kernel_size=2, stride=2, padding=0, dilation=1, ceil_mode=False)
    (17): Conv2d(256, 512, kernel_size=(3, 3), stride=(1, 1), padding=(1, 1))
    (18): ReLU(inplace=True)
    (19): Conv2d(512, 512, kernel_size=(3, 3), stride=(1, 1), padding=(1, 1))
    (20): ReLU(inplace=True)
    (21): Conv2d(512, 512, kernel_size=(3, 3), stride=(1, 1), padding=(1, 1))
    (22): ReLU(inplace=True)
    (23): MaxPool2d(kernel_size=2, stride=2, padding=0, dilation=1, ceil_mode=False)
    (24): Conv2d(512, 512, kernel_size=(3, 3), stride=(1, 1), padding=(1, 1))
    (25): ReLU(inplace=True)
    (26): Conv2d(512, 512, kernel_size=(3, 3), stride=(1, 1), padding=(1, 1))
    (27): ReLU(inplace=True)  # LAYER_ID 28
    (28): Conv2d(512, 512, kernel_size=(3, 3), stride=(1, 1), padding=(1, 1))
    (29): ReLU(inplace=True)  # LAYER_ID 30
    (30): MaxPool2d(kernel_size=2, stride=2, padding=0, dilation=1, ceil_mode=False)
  )
  (avgpool): AdaptiveAvgPool2d(output_size=(7, 7))
  (classifier): Sequential(
    (0): Linear(in_features=25088, out_features=4096, bias=True)
    (1): ReLU(inplace=True)
    (2): Dropout(p=0.5, inplace=False)
    (3): Linear(in_features=4096, out_features=4096, bias=True)
    (4): ReLU(inplace=True)
    (5): Dropout(p=0.5, inplace=False)
    (6): Linear(in_features=4096, out_features=1000, bias=True)
  )
)
(27): ReLU(inplace=True) # LAYER_ID 28
(29): ReLU(inplace=True) # LAYER_ID 30
3 完整代码
完整代码如下
# 导入使用的库
import torch
from torchvision import models, transforms
import torch.optim as optim
import numpy as np
from matplotlib import pyplot
from PIL import Image, ImageFilter, ImageChops

# 定义超参数
CUDA_ENABLED = True
LAYER_ID = 28  # the layer to maximize the activations through
NUM_ITERATIONS = 5  # number of iterations to update the input image with the layer's gradient
LR = 0.2

"we downscale the image recursively, apply the deep dream computation, scale up, and then" \
"blend with the original image"

NUM_DOWNSCALES = 20
BLEND_ALPHA = 0.5


# 定义好一些变量和图像的转换
class DeepDream:
    def __init__(self, image):
        self.image = image
        self.model = models.vgg16(pretrained=True)
        # print(self.model)
        if CUDA_ENABLED:
            self.model = self.model.cuda()
        self.modules = list(self.model.features.modules())

        # vgg16 use 224x224 images
        imgsize = 224
        self.mean = [0.485, 0.456, 0.406]
        self.std = [0.229, 0.224, 0.225]
        self.normalise = transforms.Normalize(
            mean=self.mean,
            std=self.std
        )

        self.transformPreprocess = transforms.Compose([
            transforms.Resize((imgsize, imgsize)),
            transforms.ToTensor(),
            self.normalise
        ])

        self.tensorMean = torch.Tensor(self.mean)
        if CUDA_ENABLED:
            self.tensorMean = self.tensorMean.cuda()

        self.tensorStd = torch.Tensor(self.std)
        if CUDA_ENABLED:
            self.tensorStd = self.tensorStd.cuda()

    def toimage(self, img):
        return img * self.tensorStd + self.tensorMean

    def deepDream(self, image, layer, iterations, lr):
        """核心代码
        :param image:
        :param layer:
        :param iterations:
        :param lr:
        :return:
        """
        transformed = self.transformPreprocess(image).unsqueeze(0)  # 前处理输入都会 resize 至 224x224
        if CUDA_ENABLED:
            transformed = transformed.cuda()
        input_img = torch.autograd.Variable(transformed, requires_grad=True)
        self.model.zero_grad()
        optimizer = optim.Adam([input_img.requires_grad_()], lr=lr)

        for _ in range(iterations):
            optimizer.zero_grad()
            out = input_img
            for layerid in range(layer):  # 28
                out = self.modules[layerid+1](out)  # self.modules[28] ReLU(inplace=True)
            # out, torch.Size([1, 512, 14, 14])
            loss = -out.norm()  # 负的变小,正的变大 -l2
            loss.backward()
            optimizer.step()
            # input_img.data = input_img.data + lr*input_img.grad.data
        # remove batchsize, torch.Size([1, 3, 224, 224]) ->torch.Size([3, 224, 224])
        input_img = input_img.data.squeeze()
        # c,h,w 转为 h,w,c 以便于可视化
        input_img.transpose_(0, 1)  # torch.Size([224, 3, 224])
        input_img.transpose_(1, 2)  # torch.Size([224, 224, 3])
        input_img = self.toimage(input_img)  # torch.Size([224, 224, 3])
        if CUDA_ENABLED:
            input_img = input_img.cpu()
        input_img = np.clip(input_img, 0, 1)
        return Image.fromarray(np.uint8(input_img*255))

    # 可视化中间迭代的过程
    def deepDreamRecursive(self, image, layer, iterations, lr, num_downscales):
        """
        :param image:
        :param layer:
        :param iterations:
        :param lr:
        :param num_downscales:
        :return:
        """
        if num_downscales > 0:
            # scale down the image
            image_gauss = image.filter(ImageFilter.GaussianBlur(2))  # 高斯模糊
            half_size = (int(image.size[0]/2), int(image.size[1]/2))  # 长宽缩放 1/2
            if (half_size[0]==0 or half_size[1]==0):
                half_size = image.size
            image_half = image_gauss.resize(half_size, Image.ANTIALIAS)

            # return deepDreamRecursive on the scaled down image
            image_half = self.deepDreamRecursive(image_half, layer, iterations, lr, num_downscales-1)

            print("Num Downscales: {}".format(num_downscales))
            print("====Half Image====", np.shape(image_half))
            # pyplot.imshow(image_half)
            # pyplot.show()

            # scale up the result image to the original size
            image_large = image_half.resize(image.size, Image.ANTIALIAS)
            print("====Large Image====", np.shape(image_large))
            # pyplot.imshow(image_large)
            # pyplot.show()

            # Blend the two image
            image = ImageChops.blend(image, image_large, BLEND_ALPHA)
            print("====Blend Image====", np.shape(image))
            # pyplot.imshow(image)
            # pyplot.show()

        img_result = self.deepDream(image, layer, iterations, lr)  # 迭代改变输入图片,max activation
        print(np.shape(img_result))
        img_result = img_result.resize(image.size)
        print(np.shape(img_result))
        # pyplot.imshow(img_result)
        # pyplot.show()
        return img_result

    def deepDreamProcess(self):
        return self.deepDreamRecursive(self.image, LAYER_ID, NUM_ITERATIONS, LR, NUM_DOWNSCALES)


if __name__ == "__main__":
    img = Image.open("cat.png").convert('RGB')
    # 生成
    img_deep_dream = DeepDream(img).deepDreamProcess()
    pyplot.title("Deep dream images")
    pyplot.imshow(img_deep_dream)
    pyplot.show()
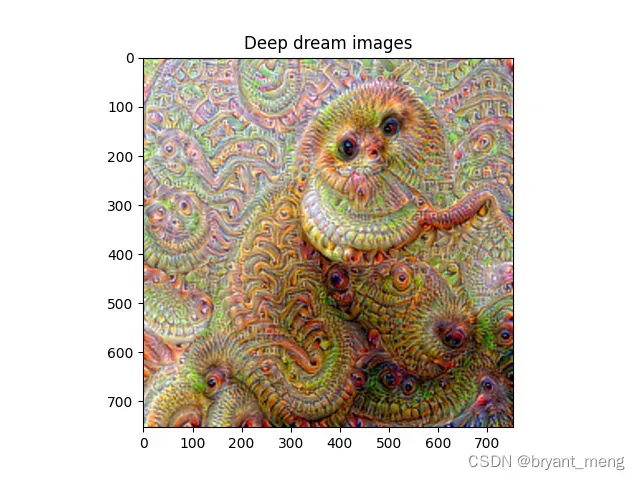
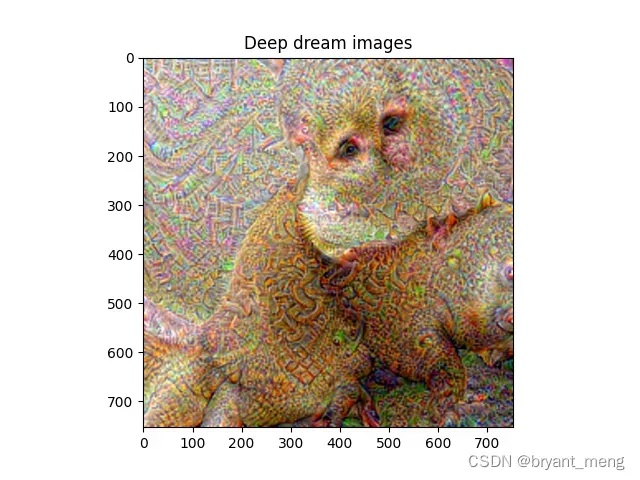
4 输出结果
output
    """
    (224, 224, 3)
    (1, 1, 3)
    Num Downscales: 1
    ====half Image==== (1, 1, 3)
    ====Large Image==== (1, 1, 3)
    ====Blend Image==== (1, 1, 3)
    (224, 224, 3)
    (1, 1, 3)
    Num Downscales: 2
    ====half Image==== (1, 1, 3)
    ====Large Image==== (1, 1, 3)
    ====Blend Image==== (1, 1, 3)
    (224, 224, 3)
    (1, 1, 3)
    Num Downscales: 3
    ====half Image==== (1, 1, 3)
    ====Large Image==== (1, 1, 3)
    ====Blend Image==== (1, 1, 3)
    (224, 224, 3)
    (1, 1, 3)
    Num Downscales: 4
    ====half Image==== (1, 1, 3)
    ====Large Image==== (1, 1, 3)
    ====Blend Image==== (1, 1, 3)
    (224, 224, 3)
    (1, 1, 3)
    Num Downscales: 5
    ====half Image==== (1, 1, 3)
    ====Large Image==== (1, 1, 3)
    ====Blend Image==== (1, 1, 3)
    (224, 224, 3)
    (1, 1, 3)
    Num Downscales: 6
    ====half Image==== (1, 1, 3)
    ====Large Image==== (1, 1, 3)
    ====Blend Image==== (1, 1, 3)
    (224, 224, 3)
    (1, 1, 3)
    Num Downscales: 7
    ====half Image==== (1, 1, 3)
    ====Large Image==== (1, 1, 3)
    ====Blend Image==== (1, 1, 3)
    (224, 224, 3)
    (1, 1, 3)
    Num Downscales: 8
    ====half Image==== (1, 1, 3)
    ====Large Image==== (1, 1, 3)
    ====Blend Image==== (1, 1, 3)
    (224, 224, 3)
    (1, 1, 3)
    Num Downscales: 9
    ====half Image==== (1, 1, 3)
    ====Large Image==== (1, 1, 3)
    ====Blend Image==== (1, 1, 3)
    (224, 224, 3)
    (1, 1, 3)
    Num Downscales: 10
    ====half Image==== (1, 1, 3)
    ====Large Image==== (1, 1, 3)
    ====Blend Image==== (1, 1, 3)
    (224, 224, 3)
    (1, 1, 3)
    Num Downscales: 11
    ====half Image==== (1, 1, 3)
    ====Large Image==== (1, 1, 3)
    ====Blend Image==== (1, 1, 3)
    (224, 224, 3)
    (1, 1, 3)
    Num Downscales: 12
    ====half Image==== (1, 1, 3)
    ====Large Image==== (2, 2, 3)
    ====Blend Image==== (2, 2, 3)
    (224, 224, 3)
    (2, 2, 3)
    Num Downscales: 13
    ====half Image==== (2, 2, 3)
    ====Large Image==== (5, 5, 3)
    ====Blend Image==== (5, 5, 3)
    (224, 224, 3)
    (5, 5, 3)
    Num Downscales: 14
    ====half Image==== (5, 5, 3)
    ====Large Image==== (11, 11, 3)
    ====Blend Image==== (11, 11, 3)
    (224, 224, 3)
    (11, 11, 3)
    Num Downscales: 15
    ====half Image==== (11, 11, 3)
    ====Large Image==== (23, 23, 3)
    ====Blend Image==== (23, 23, 3)
    (224, 224, 3)
    (23, 23, 3)
    Num Downscales: 16
    ====half Image==== (23, 23, 3)
    ====Large Image==== (47, 47, 3)
    ====Blend Image==== (47, 47, 3)
    (224, 224, 3)
    (47, 47, 3)
    Num Downscales: 17
    ====half Image==== (47, 47, 3)
    ====Large Image==== (94, 94, 3)
    ====Blend Image==== (94, 94, 3)
    (224, 224, 3)
    (94, 94, 3)
    Num Downscales: 18
    ====half Image==== (94, 94, 3)
    ====Large Image==== (188, 188, 3)
    ====Blend Image==== (188, 188, 3)
    (224, 224, 3)
    (188, 188, 3)
    Num Downscales: 19
    ====half Image==== (188, 188, 3)
    ====Large Image==== (376, 376, 3)
    ====Blend Image==== (376, 376, 3)
    (224, 224, 3)
    (376, 376, 3)
    Num Downscales: 20
    ====half Image==== (376, 376, 3)
    ====Large Image==== (753, 753, 3)
    ====Blend Image==== (753, 753, 3)
    (224, 224, 3)
    (753, 753, 3)
    """

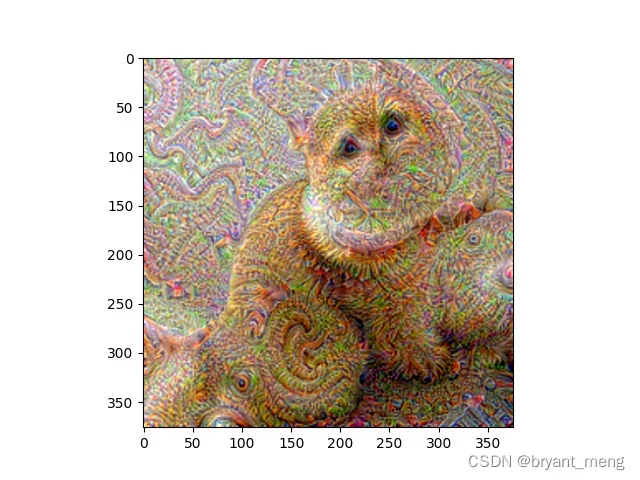
部分结果展示
Num Downscales: 15

Num Downscales: 16
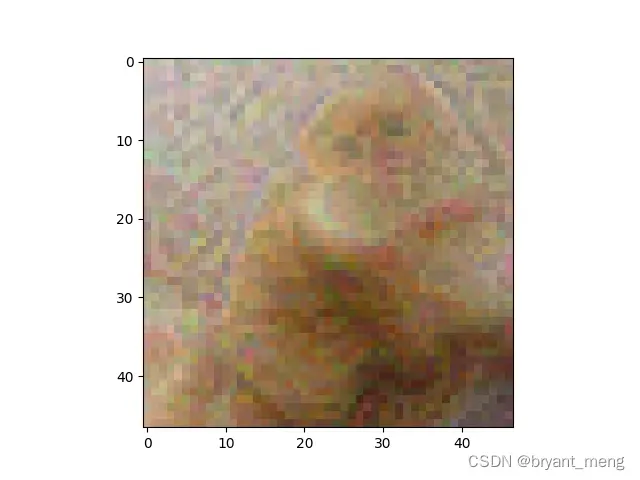
Num Downscales: 17
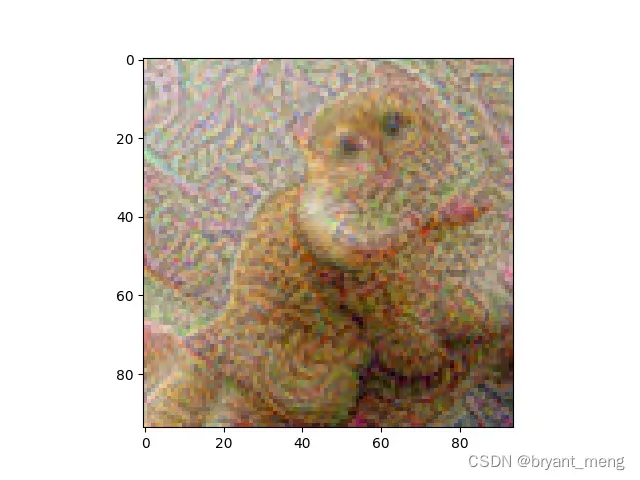
Num Downscales: 18

Num Downscales: 19
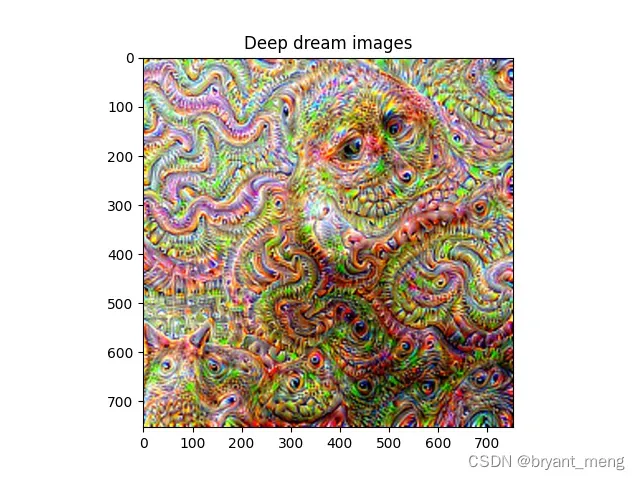
5 消融实验
NUM_DOWNSCALES = 50
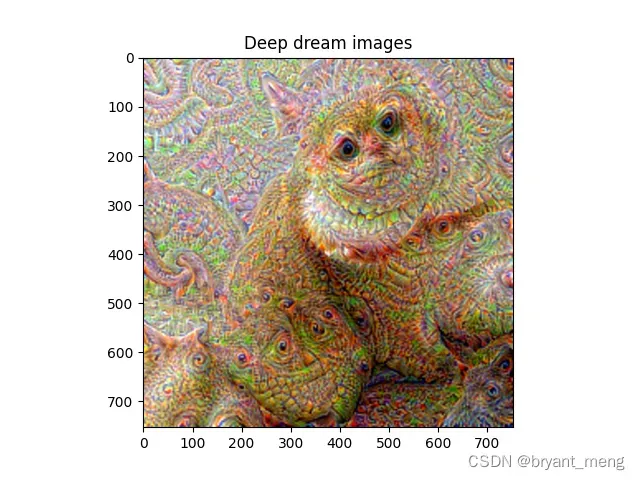
NUM_ITERATIONS = 10
LAYER_ID = 23
LAYER_ID = 30
6 torch.norm()
torch.norm() 是 PyTorch 中的一个函数,用于计算输入张量沿指定维度的范数。具体而言,当给定一个输入张量 x 和一个整数 p 时,torch.norm(x, p) 将返回输入张量 x 沿着最后一个维度(默认为所有维度)上所有元素的 p 范数,p 默认为 2。
除了使用标量 p 之外,torch.norm() 还接受以下参数:
- dim:指定沿哪个轴计算范数,默认对所有维度计算。
- keepdim:如果设置为 True,则输出张量维度与输入张量相同,其中指定轴尺寸为 1;否则,将从输出张量中删除指定轴。
- out:可选输出张量结果。
PyTorch中torch.norm函数详解
import torch

x = torch.tensor([[1, 2, 3, 4],
                 [5, 6, 7, 8],
                 [9, 10, 11, 12]], dtype=torch.float32)
print(x.norm())
print(x.norm(1))
print(x.norm(2))
output
tensor(25.4951)
tensor(78.)
tensor(25.4951)
文章出处登录后可见!