基本思想:参考官网教程就行,这里只为实现自己的功能,做一下尝试和记录
链接:https://pan.baidu.com/s/1vF7zbdyqpsfwmAV8Xmo9MQ
提取码:th5e
(前提)安装anconda环境,构建tensorflow-1.15.0环境,以备转换模型使用 31、TensorFlow训练模型转成tfilte,进行Android端进行车辆检测、跟踪、部署_sxj731533730的博客-CSDN博客_android车辆检测
(前提)安装openVINO环境,以备转换模型使用
30、OAK摄像头使用官方的yolox进行初训练和测试_sxj731533730的博客-CSDN博客
ubuntu@ubuntu-Super-Server:~/sxj731533730$ git clone https://github.com/AlexeyAB/darknet.git1) 修改配置文件 ,Makefile文件
GPU=1 #使用GPU设置为1,不使用GPU设置为0
CUDNN=1 # 不使用设置为0
CUDNN_HALF=0
OPENCV=0 #如果要配置OpenCV则设置为1
LIBSO=1
然后make一下
obj/activation_kernels.o obj/im2col_kernels.o obj/col2im_kernels.o obj/blas_kernels.o obj/crop_layer_kernels.o obj/dropout_layer_kernels.o obj/maxpool_layer_kernels.o obj/network_kernels.o obj/avgpool_layer_kernels.o -o darknet -lm -pthread `pkg-config --libs opencv4 2> /dev/null || pkg-config --libs opencv` -L/usr/local/cuda/lib64 -lcuda -lcudart -lcublas -lcurand -L/usr/local/cudnn/lib64 -lcudnn -lstdc++
ubuntu@ubuntu-Super-Server:~/sxj731533730/darknet$
2)准备数据集
处理数据集, 做了点修改 Darknet框架下如何利用自己的数据集训练YOLOv4模型_乐观的lishan的博客-CSDN博客_darknet yolov4
#!/usr/bin/env python
# -*- coding: utf-8 -*-
# file: gen_files.py
# 生成训练所需txt文件
import os
import random
root_path = '/home/ubuntu/sxj731533730/darknet/datasets'
xmlfilepath = root_path + '/Annotations'
txtsavepath = root_path + '/ImageSets/Main'
imgfilepath=root_path+'/JPEGImages'
if not os.path.exists(root_path):
    print("cannot find such directory: " + root_path)
    exit()
if not os.path.exists(txtsavepath):
    os.makedirs(txtsavepath)
trainval_percent = 0.9   # 训练验证集占比
train_percent = 0.8      # 训练集占比
total_xml = os.listdir(xmlfilepath)
num = len(total_xml)
tv = int(num * trainval_percent)
tr = int(tv * train_percent)
trainval = random.sample(range(num), tv)
train = random.sample(trainval, tr)
print("train and val size:", tv)
print("train size:", tr)
ftrainval = open(txtsavepath + '/trainval.txt', 'w')
ftest = open(txtsavepath + '/test.txt', 'w')
ftrain = open(txtsavepath + '/train.txt', 'w')
fval = open(txtsavepath + '/val.txt', 'w')
for i in range(num):
    name = total_xml[i][:-4]
    if not name.endswith(".jpg"):
       name=name+".jpg" + '\n'
    else:
       name=name + '\n'
    name=imgfilepath+'/'+name
    if i in trainval:
        ftrainval.write(name)
        if i in train:
            ftrain.write(name)
        else:
            fval.write(name)
    else:
        ftest.write(name)
ftrainval.close()
ftrain.close()
fval.close()
ftest.close()
生成标签文件
#!/usr/bin/env python
# -*- coding: utf-8 -*-
# file: voc_label.py
# 生成最终的txt文件和label文件夹
import xml.etree.ElementTree as ET
import pickle
import os
from os import listdir, getcwd
from os.path import join
import platform


root_path = '/home/ubuntu/sxj731533730/darknet/datasets'
xmlfilepath = root_path + '/Annotations'
jpgfilepath = root_path + '/JPEGImages'
txtsavepath = root_path + '/ImageSets/Main'
labelsfilepath = root_path +'/labels'
sets = ['train',  'val', 'test']

classes = ['Y0','Y1','Y2','Y3',
           'R0','R1','R2','R3','R4','R5','R6','R7','R8','R9',
        'G0','G1','G2','G3','G4','G5','G6','G7','G8','G9']   # 修改为自己数据集的类别名称


def convert(size, box):
    dw = 1. / (size[0])
    dh = 1. / (size[1])
    x = (box[0] + box[1]) / 2.0 - 1
    y = (box[2] + box[3]) / 2.0 - 1
    w = box[1] - box[0]
    h = box[3] - box[2]
    x = x * dw
    w = w * dw
    y = y * dh
    h = h * dh
    return x, y, w, h


def convert_annotation(image_id):

    filepath, tempfilename = os.path.split(image_id)
    image_id, extension = os.path.splitext(tempfilename)
    in_file = open(xmlfilepath +'/%s.xml' % (image_id))
    out_file = open(labelsfilepath +'/%s.txt' % ( image_id), 'w')
    tree = ET.parse(in_file)
    root = tree.getroot()
    size = root.find('size')
    w = int(size.find('width').text)
    h = int(size.find('height').text)

    for obj in root.iter('object'):
        # difficult = obj.find('difficult').text
        cls = obj.find('name').text
        # if cls not in classes or int(difficult) == 1:
        #     continue
        cls_id = classes.index(cls)
        xmlbox = obj.find('bndbox')
        b = (float(xmlbox.find('xmin').text), float(xmlbox.find('xmax').text), float(xmlbox.find('ymin').text),
             float(xmlbox.find('ymax').text))
        bb = convert((w, h), b)
        out_file.write(str(cls_id) + " " + " ".join([str(a) for a in bb]) + '\n')


for image_set in sets:
    if not os.path.exists(labelsfilepath ):
       os.makedirs(labelsfilepath)
    image_ids = open(txtsavepath +'/%s.txt' % ( image_set)).read().strip().split()
    list_file = open('%s.txt' % (image_set), 'w')
    for image_id in image_ids:
       list_file.write(jpgfilepath +'/%s.jpg\n' % (image_id))
       print("Processing image:  %s" % image_id)
       convert_annotation(image_id)
    list_file.close()


print("done")
3)修改yolov4-tiny_self.cfg
ubuntu@ubuntu-Super-Server:~/sxj731533730/darknet/cfg$ cp yolov4-tiny.cfg yolov4-tiny_self.cfg
将 batch 修改为 batch=64
将 subdivisions 修改为 subdivisions=16
将 max_batches 修改为 你要训练的类的数量的2000倍,如果有3个类则 max_batches=6000。但注意 max_batches 值不能小于图片总数并且不能小于6000
将 steps 改为 max_batches 的 80%-90%,如 steps=4800,5000
设置网络尺寸,都要设成 32 的倍数, 如 width=416 height=416
在每个 [yolo] 标签后,将 classes 值设为自己要训练的类的数量,如 classes=24
在每个 [convolutional] 标签前的 [yolo] 标签后的 filters=255 中的 255 改成 (classes + 5)x3 ,如果有24个类的话,此处应为 filters=87
4)创建/home/ubuntu/sxj731533730/darknet/data/self.names
Y0
Y1
Y2
Y3
R0
R1
R2
R3
R4
R5
R6
R7
R8
R9
G0
G1
G2
G3
G4
G5
G6
G7
G8
G9
创建/home/ubuntu/sxj731533730/darknet/data/self.data
classes=24
train = /home/ubuntu/sxj731533730/darknet/datasets/ImageSets/Main/train.txt
valid = /home/ubuntu/sxj731533730/darknet/datasets/ImageSets/Main/val.txt
names = /home/ubuntu/sxj731533730/darknet/data/self.names
backup = /home/ubuntu/sxj731533730/darknet/backup/
5)训练起来
ubuntu@ubuntu-Super-Server:~/sxj731533730/darknet$ ubuntu@ubuntu-Super-Server:~/sxj731533730/darknet$ ./darknet detector train data/self.data cfg/yolov4-tiny_self.cfg yolov4-tiny.weights -dont_show -gpus 0,1,2
 CUDA-version: 11010 (11060), cuDNN: 8.1.0, GPU count: 3
 OpenCV version: 4.2.0
yolov4-tiny_self
 0 : compute_capability = 750, cudnn_half = 0, GPU: NVIDIA GeForce RTX 2080 Ti
net.optimized_memory = 0
mini_batch = 64, batch = 64, time_steps = 1, train = 1
   layer   filters  size/strd(dil)      input                output
   0 Create CUDA-stream - 0
 Create cudnn-handle 0
conv     32       3 x 3/ 2    416 x 416 x   3 ->  208 x 208 x  32 0.075 BF
   1 conv     64       3 x 3/ 2    208 x 208 x  32 ->  104 x 104 x  64 0.399 BF
   2 conv     64       3 x 3/ 1    104 x 104 x  64 ->  104 x 104 x  64 0.797 BF
   3 route  2                                  1/2 ->  104 x 104 x  32
   4 conv     32       3 x 3/ 1    104 x 104 x  32 ->  104 x 104 x  32 0.199 BF
   5 conv     32       3 x 3/ 1    104 x 104 x  32 ->  104 x 104 x  32 0.199 BF
   6 route  5 4                                    ->  104 x 104 x  64
   7 conv     64       1 x 1/ 1    104 x 104 x  64 ->  104 x 104 x  64 0.089 BF
   8 route  2 7                                    ->  104 x 104 x 128
   9 max                2x 2/ 2    104 x 104 x 128 ->   52 x  52 x 128 0.001 BF
  10 conv    128       3 x 3/ 1     52 x  52 x 128 ->   52 x  52 x 128 0.797 BF
  11 route  10                                 1/2 ->   52 x  52 x  64
6)测试图片
测试命令
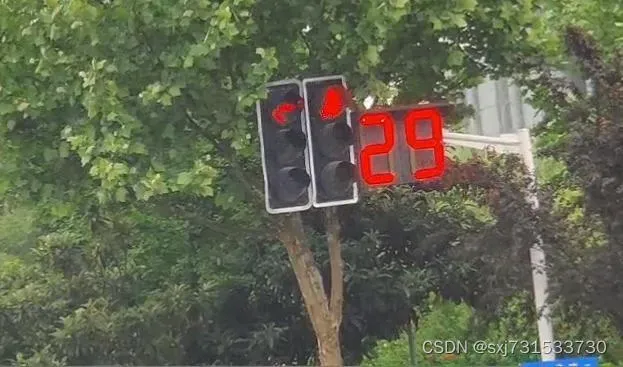
ubuntu@ubuntu-Super-Server:~/sxj731533730/darknet$ ./darknet detector test data/self.data cfg/yolov4-tiny_self.cfg backup/yolov4-tiny_self_last.weights 2510crop.jpg -thresh 0.6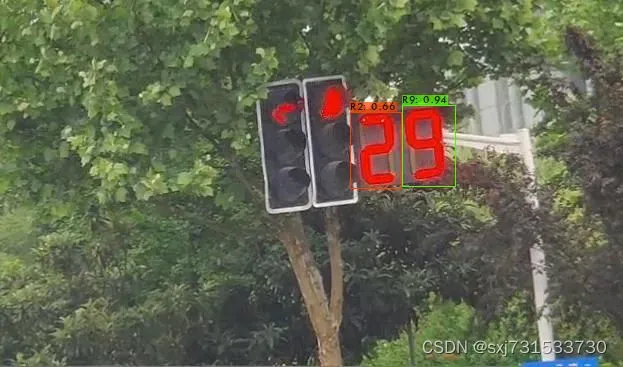
第二步:转换模型到OAK摄像头上
ubuntu@ubuntu:~/OpenVINO-YOLOV4$ source activate tensorflow
(tensorflow) ubuntu@ubuntu:~/OpenVINO-YOLOV4$
(tensorflow) ubuntu@ubuntu:~/OpenVINO-YOLOV4$ git clone https://github.com/TNTWEN/OpenVINO-YOLOV4
(tensorflow) ubuntu@ubuntu:~/OpenVINO-YOLOV4$ (tensorflow) ubuntu@ubuntu:~/A/OpenVINO-YOLOV4$ python convert_weights_pb.py --class_names self.names --weights_file yolov4-tiny_self_last.weights --data_format NHWC --tiny True

#修改yolo_v4_tiny.json      classes 24
(tensorflow) ubuntu@ubuntu:~/OpenVINO-YOLOV4$ python /opt/intel/openvino_2021/deployment_tools/model_optimizer/mo.py --input_model frozen_darknet_yolov4_model.pb --transformations_config yolo_v4_tiny.json --batch 1 --reverse_input_channels

(tensorflow) ubuntu@ubuntu:/opt/intel/openvino_2021/deployment_tools/tools/compile_tool$ chmod 777 /home/ubuntu/A/OpenVINO-YOLOV4/*

ubuntu@ubuntu:/opt/intel/openvino_2021/deployment_tools/tools/compile_tool$ ./compile_tool -m ~/OpenVINO-YOLOV4/frozen_darknet_yolov4_model.xml -ip U8 -d MYRIAD -VPU_NUMBER_OF_SHAVES 4 -VPU_NUMBER_OF_CMX_SLICES 4
Inference Engine:
        IE version ......... 2021.4.1
        Build ........... 2021.4.1-3926-14e67d86634-releases/2021/4

Network inputs:
    inputs : U8 / NCHW
Network outputs:
    detector/yolo-v4-tiny/Conv_17/BiasAdd/YoloRegion : FP16 / NCHW
    detector/yolo-v4-tiny/Conv_20/BiasAdd/YoloRegion : FP16 / NCHW
[Warning][VPU][Config] Deprecated option was used : VPU_MYRIAD_PLATFORM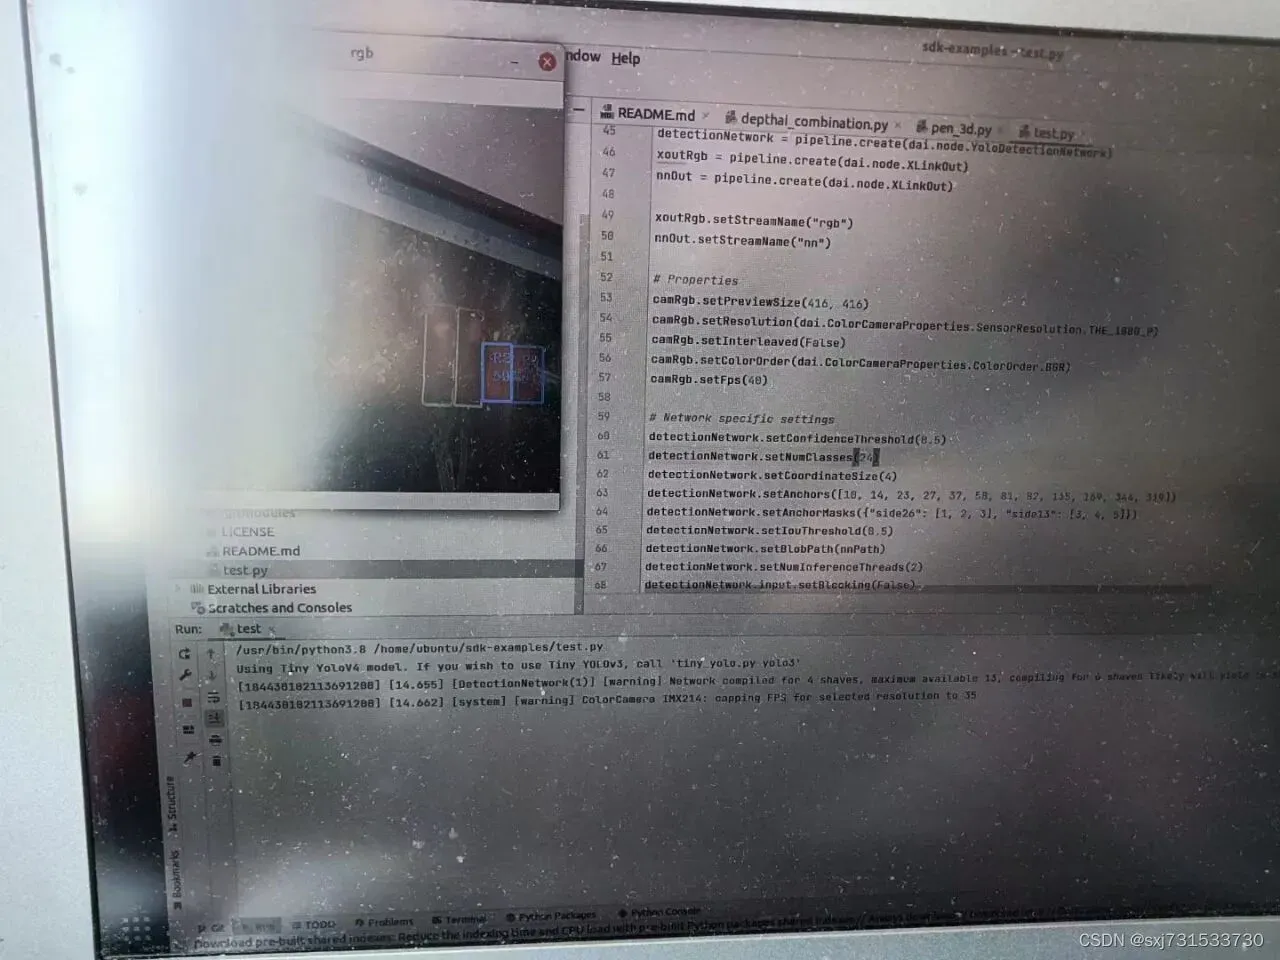
Done. LoadNetwork time elapsed: 5158 ms第三步、测试https://docs.luxonis.com/projects/api/en/latest/samples/Yolo/tiny_yolo/
"""
The code is the same as for Tiny Yolo V3 and V4, the only difference is the blob file
- Tiny YOLOv3: https://github.com/david8862/keras-YOLOv3-model-set
- Tiny YOLOv4: https://github.com/TNTWEN/OpenVINO-YOLOV4
"""

from pathlib import Path
import sys
import cv2
import depthai as dai
import numpy as np
import time

# Get argument first
nnPath = str((Path(__file__).parent / Path('/home/ubuntu/frozen_darknet_yolov4_model.blob')).resolve().absolute())
if 1 < len(sys.argv):
    arg = sys.argv[1]
    if arg == "yolo3":
        nnPath = str((Path(__file__).parent / Path('../models/yolo-v3-tiny-tf_openvino_2021.4_6shave.blob')).resolve().absolute())
    elif arg == "yolo4":
        nnPath = str((Path(__file__).parent / Path('../models/yolo-v4-tiny-tf_openvino_2021.4_6shave.blob')).resolve().absolute())
    else:
        nnPath = arg
else:
    print("Using Tiny YoloV4 model. If you wish to use Tiny YOLOv3, call 'tiny_yolo.py yolo3'")

if not Path(nnPath).exists():
    import sys
    raise FileNotFoundError(f'Required file/s not found, please run "{sys.executable} install_requirements.py"')

# tiny yolo v4 label texts
labelMap = [
    'Y0', 'Y1', 'Y2', 'Y3',
    'R0', 'R1', 'R2', 'R3', 'R4', 'R5', 'R6', 'R7', 'R8', 'R9',
    'G0', 'G1', 'G2', 'G3', 'G4', 'G5', 'G6', 'G7', 'G8', 'G9'
]

syncNN = True

# Create pipeline
pipeline = dai.Pipeline()

# Define sources and outputs
camRgb = pipeline.create(dai.node.ColorCamera)
detectionNetwork = pipeline.create(dai.node.YoloDetectionNetwork)
xoutRgb = pipeline.create(dai.node.XLinkOut)
nnOut = pipeline.create(dai.node.XLinkOut)

xoutRgb.setStreamName("rgb")
nnOut.setStreamName("nn")

# Properties
camRgb.setPreviewSize(416, 416)
camRgb.setResolution(dai.ColorCameraProperties.SensorResolution.THE_1080_P)
camRgb.setInterleaved(False)
camRgb.setColorOrder(dai.ColorCameraProperties.ColorOrder.BGR)
camRgb.setFps(40)

# Network specific settings
detectionNetwork.setConfidenceThreshold(0.5)
detectionNetwork.setNumClasses(24)
detectionNetwork.setCoordinateSize(4)
detectionNetwork.setAnchors([10, 14, 23, 27, 37, 58, 81, 82, 135, 169, 344, 319])
detectionNetwork.setAnchorMasks({"side26": [1, 2, 3], "side13": [3, 4, 5]})
detectionNetwork.setIouThreshold(0.5)
detectionNetwork.setBlobPath(nnPath)
detectionNetwork.setNumInferenceThreads(2)
detectionNetwork.input.setBlocking(False)

# Linking
camRgb.preview.link(detectionNetwork.input)
if syncNN:
    detectionNetwork.passthrough.link(xoutRgb.input)
else:
    camRgb.preview.link(xoutRgb.input)

detectionNetwork.out.link(nnOut.input)

# Connect to device and start pipeline
with dai.Device(pipeline) as device:

    # Output queues will be used to get the rgb frames and nn data from the outputs defined above
    qRgb = device.getOutputQueue(name="rgb", maxSize=4, blocking=False)
    qDet = device.getOutputQueue(name="nn", maxSize=4, blocking=False)

    frame = None
    detections = []
    startTime = time.monotonic()
    counter = 0
    color2 = (255, 255, 255)

    # nn data, being the bounding box locations, are in <0..1> range - they need to be normalized with frame width/height
    def frameNorm(frame, bbox):
        normVals = np.full(len(bbox), frame.shape[0])
        normVals[::2] = frame.shape[1]
        return (np.clip(np.array(bbox), 0, 1) * normVals).astype(int)

    def displayFrame(name, frame):
        color = (255, 0, 0)
        for detection in detections:
            bbox = frameNorm(frame, (detection.xmin, detection.ymin, detection.xmax, detection.ymax))
            cv2.putText(frame, labelMap[detection.label], (bbox[0] + 10, bbox[1] + 20), cv2.FONT_HERSHEY_TRIPLEX, 0.5, 255)
            cv2.putText(frame, f"{int(detection.confidence * 100)}%", (bbox[0] + 10, bbox[1] + 40), cv2.FONT_HERSHEY_TRIPLEX, 0.5, 255)
            cv2.rectangle(frame, (bbox[0], bbox[1]), (bbox[2], bbox[3]), color, 2)
        # Show the frame
        cv2.imshow(name, frame)

    while True:
        if syncNN:
            inRgb = qRgb.get()
            inDet = qDet.get()
        else:
            inRgb = qRgb.tryGet()
            inDet = qDet.tryGet()

        if inRgb is not None:
            frame = inRgb.getCvFrame()
            cv2.putText(frame, "NN fps: {:.2f}".format(counter / (time.monotonic() - startTime)),
                        (2, frame.shape[0] - 4), cv2.FONT_HERSHEY_TRIPLEX, 0.4, color2)

        if inDet is not None:
            detections = inDet.detections
            counter += 1

        if frame is not None:
            displayFrame("rgb", frame)

        if cv2.waitKey(1) == ord('q'):
            break
测试结果
第四步:测距和识别代码
代码 git clone https://github.com/SpectacularAI/sdk-examples.git
代码需要修改,适应usb2.0接口 如果你有usb3.0接口 请使用官方代码
"""
Spatial AI demo combining Spectacular AI VIO with Tiny YOLO object detection
accelerated on the OAK-D.
Requirements:
pip install opencv-python matplotlib
To download the pre-trained NN model run following shell script (Git Bash recommended on Windows to run it):
./depthai_combination_install.sh
Plug in the OAK-D and run:
python examples/depthai_combination.py
"""
import depthai as dai
import time
import cv2
import matplotlib.pyplot as plt
import spectacularAI
import threading
from pathlib import Path
import sys
import numpy as np
def make_pipelines(nnBlobPath, showRgb):
syncNN = True
# Create pipeline
pipeline = dai.Pipeline()
config = spectacularAI.depthai.Configuration() # 需要设置usb2.0
config.ensureSufficientUsbSpeed=0 # 需要设置usb2.0
vio_pipeline = spectacularAI.depthai.Pipeline(pipeline, config) # 需要设置usb2.0
#vio_pipeline = spectacularAI.depthai.Pipeline(pipeline) # 注释掉
# Define sources and outputs
camRgb = pipeline.createColorCamera()
spatialDetectionNetwork = pipeline.createYoloSpatialDetectionNetwork()
if showRgb:
xoutRgb = pipeline.createXLinkOut()
xoutNN = pipeline.createXLinkOut()
xoutBoundingBoxDepthMapping = pipeline.createXLinkOut()
if showRgb:
xoutRgb.setStreamName("rgb")
xoutNN.setStreamName("detections")
xoutBoundingBoxDepthMapping.setStreamName("boundingBoxDepthMapping")
# Properties
camRgb.setPreviewSize(416, 416)
camRgb.setResolution(dai.ColorCameraProperties.SensorResolution.THE_1080_P)
camRgb.setInterleaved(False)
camRgb.setColorOrder(dai.ColorCameraProperties.ColorOrder.BGR)
spatialDetectionNetwork.setBlobPath(nnBlobPath)
spatialDetectionNetwork.setConfidenceThreshold(0.5)
spatialDetectionNetwork.input.setBlocking(False)
spatialDetectionNetwork.setBoundingBoxScaleFactor(0.5)
spatialDetectionNetwork.setDepthLowerThreshold(100)
spatialDetectionNetwork.setDepthUpperThreshold(5000)
# Yolo specific parameters
spatialDetectionNetwork.setNumClasses(24)
spatialDetectionNetwork.setCoordinateSize(4)
spatialDetectionNetwork.setAnchors(np.array([10,14, 23,27, 37,58, 81,82, 135,169, 344,319]))
spatialDetectionNetwork.setAnchorMasks({ "side26": np.array([1,2,3]), "side13": np.array([3,4,5]) })
spatialDetectionNetwork.setIouThreshold(0.5)
camRgb.preview.link(spatialDetectionNetwork.input)
if showRgb:
if syncNN:
spatialDetectionNetwork.passthrough.link(xoutRgb.input)
else:
camRgb.preview.link(xoutRgb.input)
spatialDetectionNetwork.out.link(xoutNN.input)
spatialDetectionNetwork.boundingBoxMapping.link(xoutBoundingBoxDepthMapping.input)
vio_pipeline.stereo.depth.link(spatialDetectionNetwork.inputDepth)
return pipeline, vio_pipeline
def make_tracker():
"""
Simple tracker/smoother/clustring for the YOLO-detected objects.
(The raw YOLO results look quite, well, raw, especially in 3D)
"""
tracked_objects = []
next_id = 1
class TrackedObject:
def __init__(self, t, p, l):
self.position = p
self.label = l
self.last_seen = t
self.n_detections = 1
nonlocal next_id
self.id = next_id
next_id += 1
def update(self, other):
UPDATE_ALPHA = 0.2
self.last_seen = other.last_seen
self.position = UPDATE_ALPHA * other.position + (1.0 - UPDATE_ALPHA) * self.position
self.n_detections += 1
def __repr__(self):
return '%s %d' % (self.label, self.id)
CLUSTERING_DISTANCE_AT_1M = 0.3
def find_best_match(new_obj, w_to_c_mat):
best = None
best_dist = CLUSTERING_DISTANCE_AT_1M
MIN_DEPTH = 0.5
local_pos = lambda p: (w_to_c_mat @ np.array(list(p) + [1]))[:3]
for old in tracked_objects:
if old.label != new_obj.label: continue
# ignore depth difference in clustering
loc_old = local_pos(old.position)
loc_new = local_pos(new_obj.position)
z = max([MIN_DEPTH, loc_old[2], loc_new[2]])
dist = np.linalg.norm((loc_old - loc_new)[:2]) / z
if dist < best_dist:
best_dist = dist
best = old
# if best: print(f'matched with {best} (seen {best.n_detections} time(s))')
return best
def track(t, detections, view_mat):
SCALE = 0.001 # output is millimeters
MIN_DETECTIONS = 8
DETECTION_WINDOW = 1.0
MAX_UNSEEN_AGE = 8.0
w_to_c_mat = np.linalg.inv(view_mat)
for d in detections:
p_local = np.array([
d.spatialCoordinates.x * SCALE,
-d.spatialCoordinates.y * SCALE, # note: flipped y
d.spatialCoordinates.z * SCALE,
1
])
p_world = (view_mat @ p_local)[:3]
try:
label = LABEL_MAP[d.label]
except:
label = d.label
# simple O(n^2)
for o in tracked_objects:
if o.label != label: continue
dist = np.linalg.norm(o.position - p_world)
if label in SELECTED_LABELS:
new_obj = TrackedObject(t, p_world, label)
existing = find_best_match(new_obj, w_to_c_mat)
if existing:
existing.update(new_obj)
else:
tracked_objects.append(new_obj)
def should_remove(o):
if o.n_detections < MIN_DETECTIONS and o.last_seen < t - DETECTION_WINDOW: return True
if o.last_seen < t - MAX_UNSEEN_AGE: return True
return False
# remove cruft
i = 0
while i < len(tracked_objects):
if should_remove(tracked_objects[i]):
# print(f'removing ${o}')
del tracked_objects[i]
else:
i += 1
# print(tracked_objects)
return [o for o in tracked_objects if o.n_detections >= MIN_DETECTIONS]
return track
# Tiny yolo v3/4 label texts
LABEL_MAP = [
'Y0', 'Y1', 'Y2', 'Y3',
'R0', 'R1', 'R2', 'R3', 'R4', 'R5', 'R6', 'R7', 'R8', 'R9',
'G0', 'G1', 'G2', 'G3', 'G4', 'G5', 'G6', 'G7', 'G8', 'G9'
]
SELECTED_LABELS = [ 'Y0', 'Y1', 'Y2', 'Y3',
'R0', 'R1', 'R2', 'R3', 'R4', 'R5', 'R6', 'R7', 'R8', 'R9',
'G0', 'G1', 'G2', 'G3', 'G4', 'G5', 'G6', 'G7', 'G8', 'G9']
def make_camera_wireframe(aspect=640/400., scale=0.05):
# camera "frustum"
corners = [[-1, -1], [1, -1], [1, 1], [-1, 1], [-1, -1]]
cam_wire = []
for x, y in corners:
cam_wire.append([x*aspect, y, 1])
for x, y in corners:
cam_wire.append([x*aspect, y, 1])
cam_wire.append([0, 0, 0])
return (scale * np.array(cam_wire)).tolist()
class MatplotlibVisualization:
"""
Interactive / real-time 3D line & point visualization using Matplotlib.
This is quite far from the comfort zone of MPL and not very extensible.
"""
def __init__(self):
from mpl_toolkits.mplot3d import Axes3D
from matplotlib.animation import FuncAnimation
fig = plt.figure()
ax = Axes3D(fig, auto_add_to_figure=False)
fig.add_axes(ax)
ax_bounds = (-0.5, 0.5) # meters
ax.set(xlim=ax_bounds, ylim=ax_bounds, zlim=ax_bounds)
ax.view_init(azim=-140) # initial plot orientation
empty_xyz = lambda: { c: [] for c in 'xyz' }
vio_data = empty_xyz()
vio_data['plot'] = ax.plot(
xs=[], ys=[], zs=[],
linestyle="-",
marker="",
label='VIO trajectory'
)
vio_cam_data = empty_xyz()
vio_cam_data['plot'] = ax.plot(
xs=[], ys=[], zs=[],
linestyle="-",
marker="",
label='current cam pose'
)
detection_data = empty_xyz()
detection_data['labels'] = []
detection_data['plot'] = ax.plot(
xs=[], ys=[], zs=[],
linestyle="",
marker="o",
label=' or '.join(SELECTED_LABELS)
)
ax.legend()
ax.set_xlabel("x (m)")
ax.set_ylabel("y (m)")
ax.set_zlabel("z (m)")
#title = ax.set_title("Spatial AI demo")
def on_close(*args):
self.should_close = True
fig.canvas.mpl_connect('close_event', on_close)
self.cam_wire = make_camera_wireframe()
self.vio_data = vio_data
self.vio_cam_data = vio_cam_data
self.detection_data = detection_data
self.should_close = False
def update_graph(*args):
r = []
for graph in [self.vio_data, self.vio_cam_data, self.detection_data]:
p = graph['plot'][0]
x, y, z = [np.array(graph[c]) for c in 'xyz']
p.set_data(x, y)
p.set_3d_properties(z)
r.append(p)
return tuple(r)
self._anim = FuncAnimation(fig, update_graph, interval=15, blit=True)
def update_vio(self, vio_out):
if self.should_close: return False
view_mat = vio_out.pose.asMatrix()
for c in 'xyz': self.vio_cam_data[c] = []
for vertex in self.cam_wire:
p_local = np.array(vertex + [1])
p_world = (view_mat @ p_local)[:3]
for i, c in enumerate('xyz'):
self.vio_cam_data[c].append(p_world[i])
for c in 'xyz':
self.vio_data[c].append(getattr(vio_out.pose.position, c))
return True
def update_detected_objects(self, tracked_objects):
if self.should_close: return False
for i in range(3):
self.detection_data['xyz'[i]] = np.array([o.position[i] for o in tracked_objects])
self.detection_data['labels'] = [o.label for o in tracked_objects]
return True
def start_in_parallel_with(self, parallel_thing):
thread = threading.Thread(target = parallel_thing)
thread.start()
plt.show()
thread.join()
def draw_detections_on_rgb_frame(frame, detections, fps):
# If the frame is available, draw bounding boxes on it and show the frame
height = frame.shape[0]
width = frame.shape[1]
for detection in detections:
# Denormalize bounding box
x1 = int(detection.xmin * width)
x2 = int(detection.xmax * width)
y1 = int(detection.ymin * height)
y2 = int(detection.ymax * height)
try:
label = LABEL_MAP[detection.label]
except:
label = detection.label
if label in SELECTED_LABELS:
color = (0, 255, 0)
cv2.putText(frame, str(label), (x1 + 10, y1 + 20), cv2.FONT_HERSHEY_TRIPLEX, 0.5, 255)
cv2.putText(frame, "{:.2f}".format(detection.confidence*100), (x1 + 10, y1 + 35), cv2.FONT_HERSHEY_TRIPLEX, 0.5, 255)
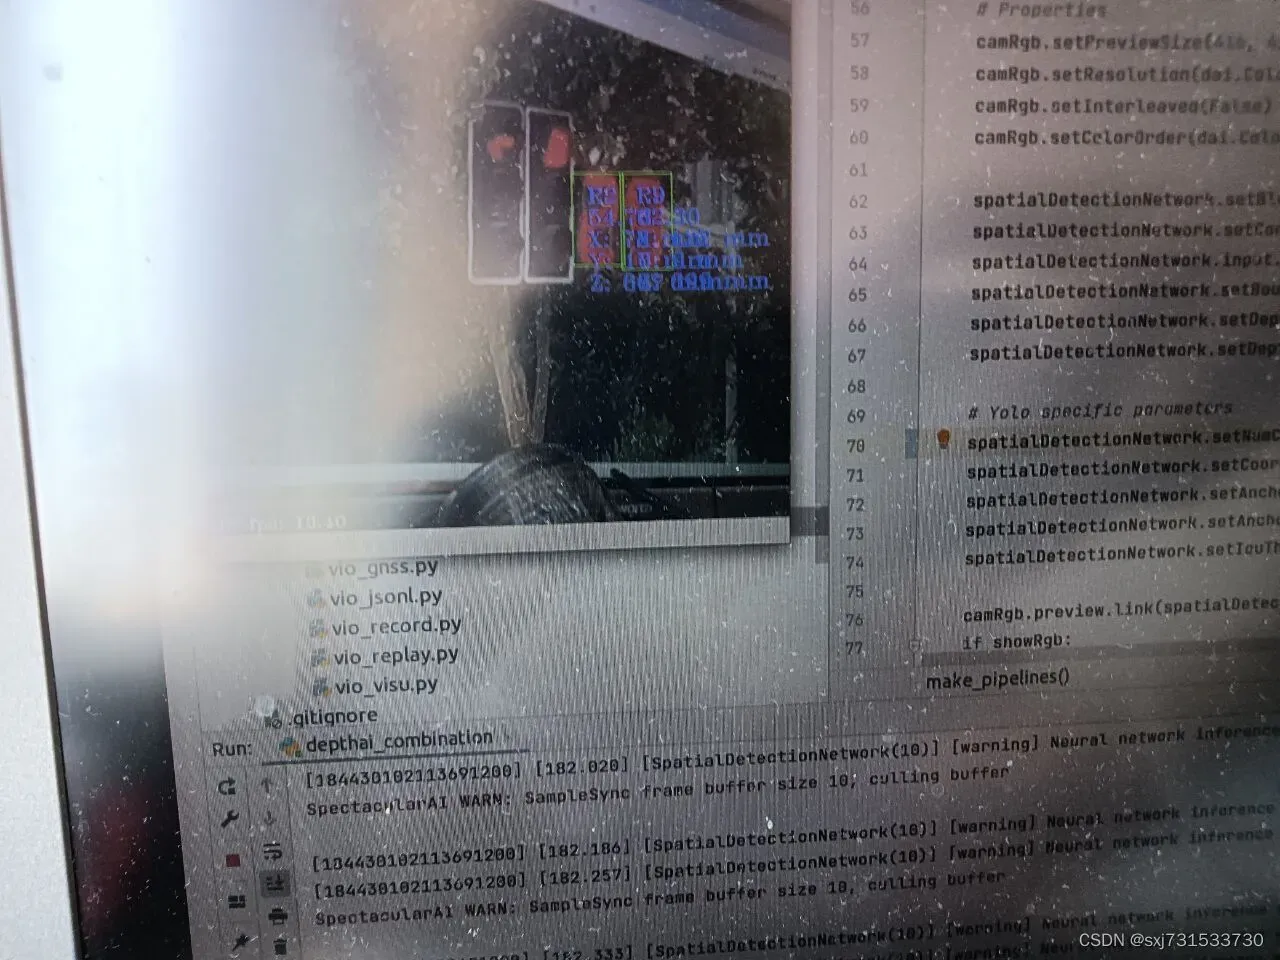
cv2.putText(frame, f"X: {int(detection.spatialCoordinates.x)} mm", (x1 + 10, y1 + 50), cv2.FONT_HERSHEY_TRIPLEX, 0.5, 255)
cv2.putText(frame, f"Y: {int(detection.spatialCoordinates.y)} mm", (x1 + 10, y1 + 65), cv2.FONT_HERSHEY_TRIPLEX, 0.5, 255)
cv2.putText(frame, f"Z: {int(detection.spatialCoordinates.z)} mm", (x1 + 10, y1 + 80), cv2.FONT_HERSHEY_TRIPLEX, 0.5, 255)
else:
color = (255, 0, 0)
cv2.rectangle(frame, (x1, y1), (x2, y2), color, cv2.FONT_HERSHEY_SIMPLEX)
color = (255, 255, 255)
cv2.putText(frame, "NN fps: {:.2f}".format(fps), (2, frame.shape[0] - 4), cv2.FONT_HERSHEY_TRIPLEX, 0.4, color)
if __name__ == '__main__':
nnBlobPath = '/home/ubuntu/frozen_darknet_yolov4_model.blob'
if not Path(nnBlobPath).exists():
raise FileNotFoundError(f'Could not find {nnBlobPath}"')
showRgb = True
pipeline, vio_pipeline = make_pipelines(nnBlobPath, showRgb)
with dai.Device(pipeline) as device:
visu_3d = MatplotlibVisualization()
def main_loop():
startTime = time.monotonic()
counter = 0
fps = 0
color = (255, 255, 255)
vio_session = vio_pipeline.startSession(device)
tracker = make_tracker()
if showRgb: previewQueue = device.getOutputQueue(name="rgb", maxSize=4, blocking=False)
detectionNNQueue = device.getOutputQueue(name="detections", maxSize=4, blocking=False)
xoutBoundingBoxDepthMappingQueue = device.getOutputQueue(name="boundingBoxDepthMapping", maxSize=4, blocking=False)
vio_matrix = None
while True:
if vio_session.hasOutput():
vio_out = vio_session.getOutput()
vio_matrix = vio_out.pose.asMatrix()
if not visu_3d.update_vio(vio_out): break
elif detectionNNQueue.has():
if showRgb:
inPreview = previewQueue.get()
frame = inPreview.getCvFrame()
inDet = detectionNNQueue.get()
# TODO: depth hook
#depthFrame = depth.getFrame()
#depthFrameColor = cv2.normalize(depthFrame, None, 255, 0, cv2.NORM_INF, cv2.CV_8UC1)
#depthFrameColor = cv2.equalizeHist(depthFrameColor)
#depthFrameColor = cv2.applyColorMap(depthFrameColor, cv2.COLORMAP_HOT)
counter+=1
current_time = time.monotonic()
if (current_time - startTime) > 1 :
fps = counter / (current_time - startTime)
counter = 0
startTime = current_time
detections = inDet.detections
if len(detections) != 0:
boundingBoxMapping = xoutBoundingBoxDepthMappingQueue.get()
roiDatas = boundingBoxMapping.getConfigData()
if vio_matrix is not None:
detections_world = tracker(current_time, detections, vio_matrix)
visu_3d.update_detected_objects(detections_world)
if showRgb:
draw_detections_on_rgb_frame(frame, detections, fps)
cv2.imshow("rgb", frame)
if cv2.waitKey(1) == ord('q'):
break
else:
time.sleep(0.005)
vio_session.close()
visu_3d.start_in_parallel_with(main_loop)
参考:
Darknet框架下如何利用自己的数据集训练YOLOv4模型_乐观的lishan的博客-CSDN博客_darknet yolov4
31、TensorFlow训练模型转成tfilte,进行Android端进行车辆检测、跟踪、部署_sxj731533730的博客-CSDN博客_android车辆检测
文章出处登录后可见!