一.有一个已经安装完成系统的Raspbarry Pi
二.将默认中的python2改为python3
1.先删除python2的连接
sudo rm /usr/bin/python2.链接上python3
sudo ln -s /usr/bin/python3.7 /usr/bin/python三.正式安装
1.安装numpy
pip install numpy2.把根目录扩大到整个SD卡
sudo raspi-config选中Advanced Options这一行,点击键盘Enter键,进入,下面的界面。在这个界面选中Expand Filesystem,确认并重启树莓派。
3.安装所需要的库
sudo apt-get install build-essential git cmake pkg-config -y
sudo apt-get install libjpeg8-dev -y
sudo apt-get install libtiff5-dev -y
sudo apt-get install libjasper-dev -y
sudo apt-get install libpng12-dev -y
sudo apt-get install libavcodec-dev libavformat-dev libswscale-dev libv4l-dev -y
sudo apt-get install libgtk2.0-dev -y
sudo apt-get install libatlas-base-dev gfortran -y
4.下载opencv4.2 和opencv_contrib-4.2.0
链接:https://pan.baidu.com/s/1O9hAts_s635esRt8nSHDdg
提取码:yrhx
链接:https://pan.baidu.com/s/1SRNBXMKU3GDesQWjdiEuZg
提取码:7g25
5.解压 编译
cd /home/pi/Downloads
unzip opencv-4.2.0.zip
unzip opencv_contrib-4.2.0.zip
cd /home/pi/Downloads/opencv-4.2.0
mkdir build
cd build
设置CMAKE参数
cmake -D CMAKE_BUILD_TYPE=RELEASE -D CMAKE_INSTALL_PREFIX=/usr/local -D INSTALL_C_EXAMPLES=ON -D INSTALL_PYTHON_EXAMPLES=ON -D OPENCV_EXTRA_MODULES_PATH=/home/pi/Downloads/opencv_contrib-4.2.0/modules -D BUILD_EXAMPLES=ON -D WITH_LIBV4L=ON PYTHON3_EXECUTABLE=/usr/bin/python3.7 PYTHON_INCLUDE_DIR=/usr/include/python3.7PYTHON_LIBRARY=/usr/lib/arm-linux-gnueabihf/libpython3.7m.so PYTHON3_NUMPY_INCLUDE_DIRS=/home/pi/.local/lib/python3.7/site-packages/numpy/core/include ..注意路径
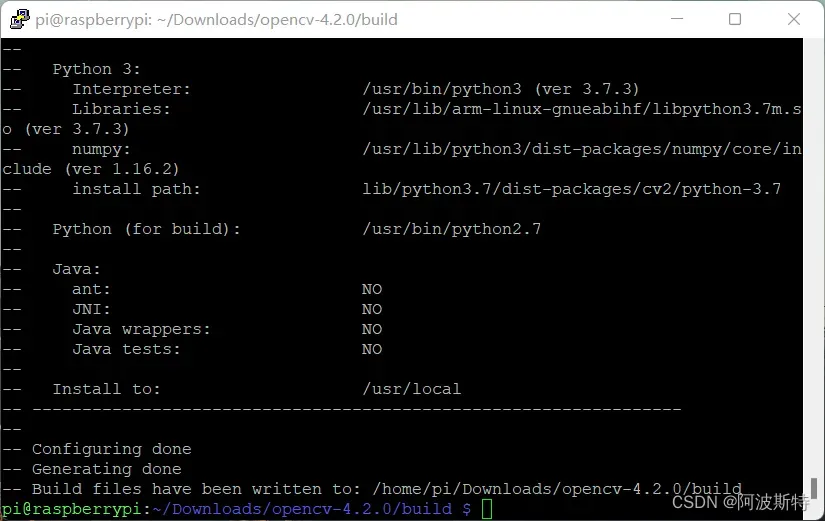
成功界面
编译
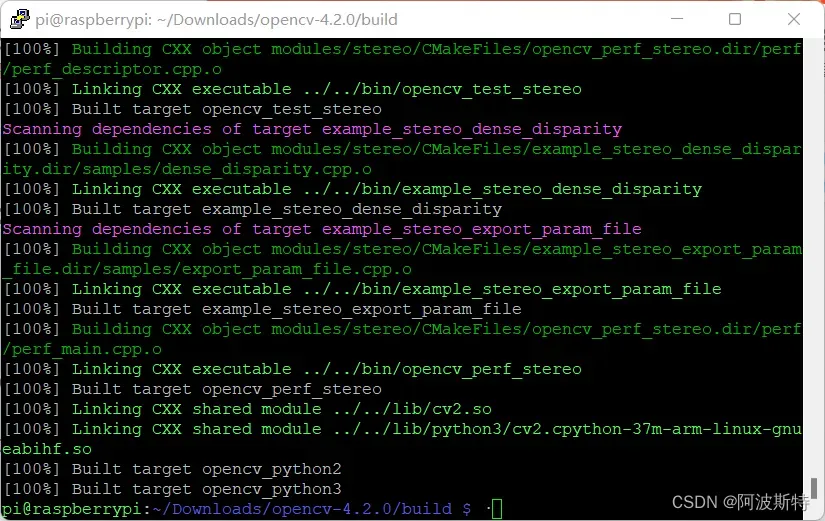
cd /home/pi/Downloads/opencv-4.2.0/build
make -j 4
可能出现的错误
1.(缺少文件)
链接:https://pan.baidu.com/s/1dh3K9hv29B_K11Kz5Ti_Uw
提取码:ife8
2.第二个问题是:头文件不对
解决方法:将/home/pi/Downloads/opencv-4.2.0/modules/features2d/test文件下的
test_descriptors_invariance.impl.hpp
test_descriptors_regression.impl.hpp
test_detectors_invariance.impl.hpp
test_detectors_regression.impl.hpp
test_invariance_utils.hpp
这几个文件复制粘贴到/home/pi/Downloads/opencv_contrib-4.2.0/modules/xfeatures2d/test这个目录下。
接着:
将/home/pi/Downloads/opencv_contrib-4.2.0/modules/xfeatures2d/test/test_features2d.cpp
文件中的大约51行的位置去掉featuresd/test,修改成下面的样子。
#include "test_detectors_regression.impl.hpp"
#include "test_descriptors_regression.impl.hpp"
将/home/pi/Downloads/opencv_contrib-4.2.0/modules/xfeatures2d/test/test_rotation_and_scale_invariance.cpp
文件中大约7-8行的位置去掉featuresd/test,修改成下面的样子。
#include "test_detectors_invariance.impl.hpp" // main OpenCV repo
#include "test_descriptors_invariance.impl.hpp" // main OpenCV repo
最后编译成功如下:
最后
cd /home/pi/Downloads/opencv-4.2.0/build
sudo make install
测试
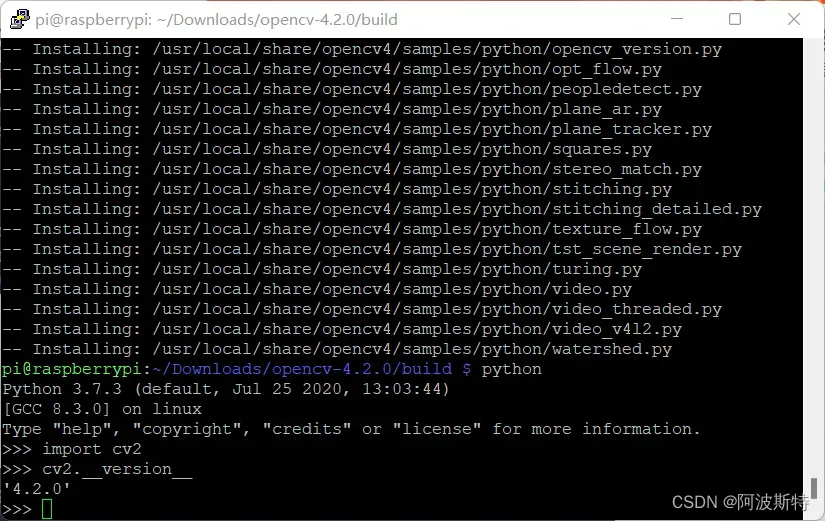
文章出处登录后可见!