文章尾部有demo
江湖惯例:先来一波感谢,感谢laf,让我们可以不使用魔法、免费接入Midjourney,不了解laf的请猛戳 Laf介绍
一、写这篇博客的背景
laf官方最近发布了一个活动,活动链接,新手也可以接入哦!废话不多说,赶紧点击链接报名赢取丰厚奖品吧。
二、接入准备
在laf.dev(注意一定要用laf.dev,不要使用laf.run)注册账号,新用户可以免费一个月体验,老用户略过
三、开始写接口
- 先在左下角NPM依赖添加依赖

- 新建一个云函数,随便取个名字

- 编辑云函数代码,复制以下代码全部粘贴进去,这段示例代码由laf提供,有能力的可以自行修改
import cloud from '@lafjs/cloud'
import { Midjourney, MidjourneyMessage } from 'midjourney'
const SERVER_ID = '' // Midjourney 服务 ID
const CHANNEL_ID = '' // Midjourney 频道 ID
const SALAI_TOKEN = '' // Midjourney 服务 Token

const Limit = 100
const MaxWait = 3

// 初始化Midjourney
const client = new Midjourney({
  ServerId: SERVER_ID,
  ChannelId: CHANNEL_ID,
  SalaiToken: SALAI_TOKEN,
  Debug: true,
  SessionId: SALAI_TOKEN,
  Limit: Limit,
  MaxWait: MaxWait
});

// 云函数主入口代码
export default async function (ctx: FunctionContext) {
  const { type, param } = ctx.body
  switch (type) {
    case 'RetrieveMessages': // 查询生图结果
      return await RetrieveMessages(param)
    case 'imagine': // 生成图片
      return await imagine(param)
    case 'upscale': // 放大图片
      return await upscale(param)
    case 'variation': // 变换图片
      return await variation(param)
  }

}

// 查询最近消息
async function RetrieveMessages(param) {
  console.log("RetrieveMessages")
  const client = new MidjourneyMessage({
    ChannelId: CHANNEL_ID,
    SalaiToken: SALAI_TOKEN,
  });
  const msg = await client.RetrieveMessages();
  console.log("RetrieveMessages success ", msg)
  return msg
}

// 创建生图任务
async function imagine(param) {
  console.log("imagine", param)
  const { question, msg_Id } = param
  const msg = await client.Imagine(
    `[${msg_Id}] ${question}`,
    (uri: string, progress: string) => {
      console.log("loading", uri, "progress", progress);
    }
  );
  console.log("imagine success ", msg)
  return true
}

// upscale 放大图片
async function upscale(param) {
  console.log("upscale", param)
  const { question, index, id, url } = param
  const hash = url.split("_").pop()?.split(".")[0] ?? ""
  console.log(hash)
  const msg = await client.Upscale(
    question,
    index,
    id,
    hash,
    (uri: string, progress: string) => {
      console.log("loading", uri, "progress", progress);
    }
  );
  console.log("upscale success ", msg)
  return msg
}

// variation 变换图片
async function variation(param) {
  console.log("variation", param)
  const client = new Midjourney({
    ServerId: SERVER_ID,
    ChannelId: CHANNEL_ID,
    SalaiToken: SALAI_TOKEN,
    Debug: true,
    SessionId: SALAI_TOKEN,
    Limit: Limit,
    MaxWait: 100
  });
  const { question, index, id, url } = param
  const hash = url.split("_").pop()?.split(".")[0] ?? ""
  const msg = await client.Variation(
    question,
    index,
    id,
    hash,
    (uri: string, progress: string) => {
      console.log("loading", uri, "progress", progress);
    }
  );
  console.log("variation success ", msg)
  return msg
}
你可能已经注意到初始化时有三个参数没有值,请仔细阅读活动链接获取
点击右上角发布,你的应用就上线了。怎么样?标题没有骗你吧,是不是三分钟。
四、调试接口
-
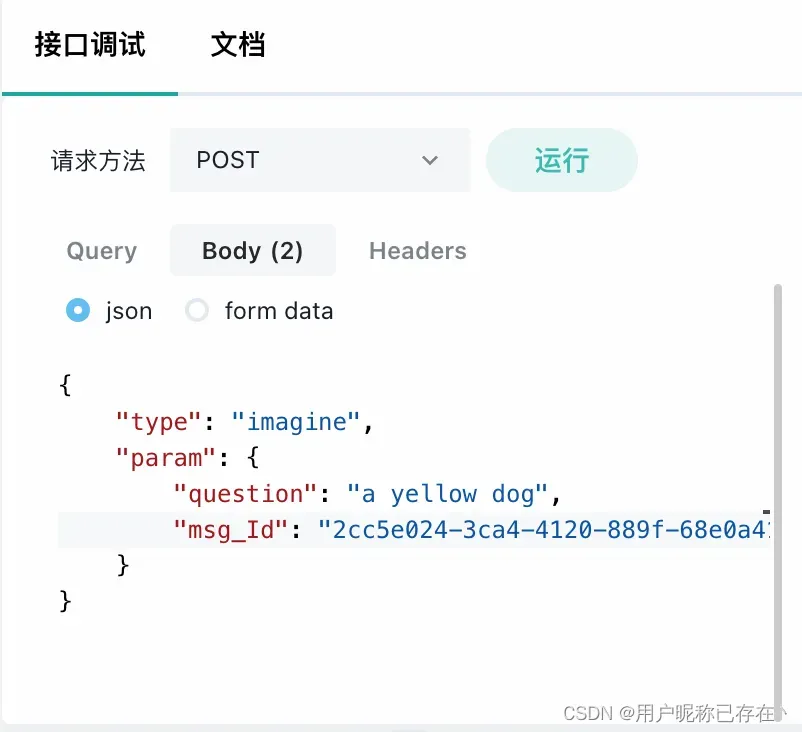
生成图片

msg_Id可以随便填写,但最好不要太简单,避免与频道内其他用户重复 -
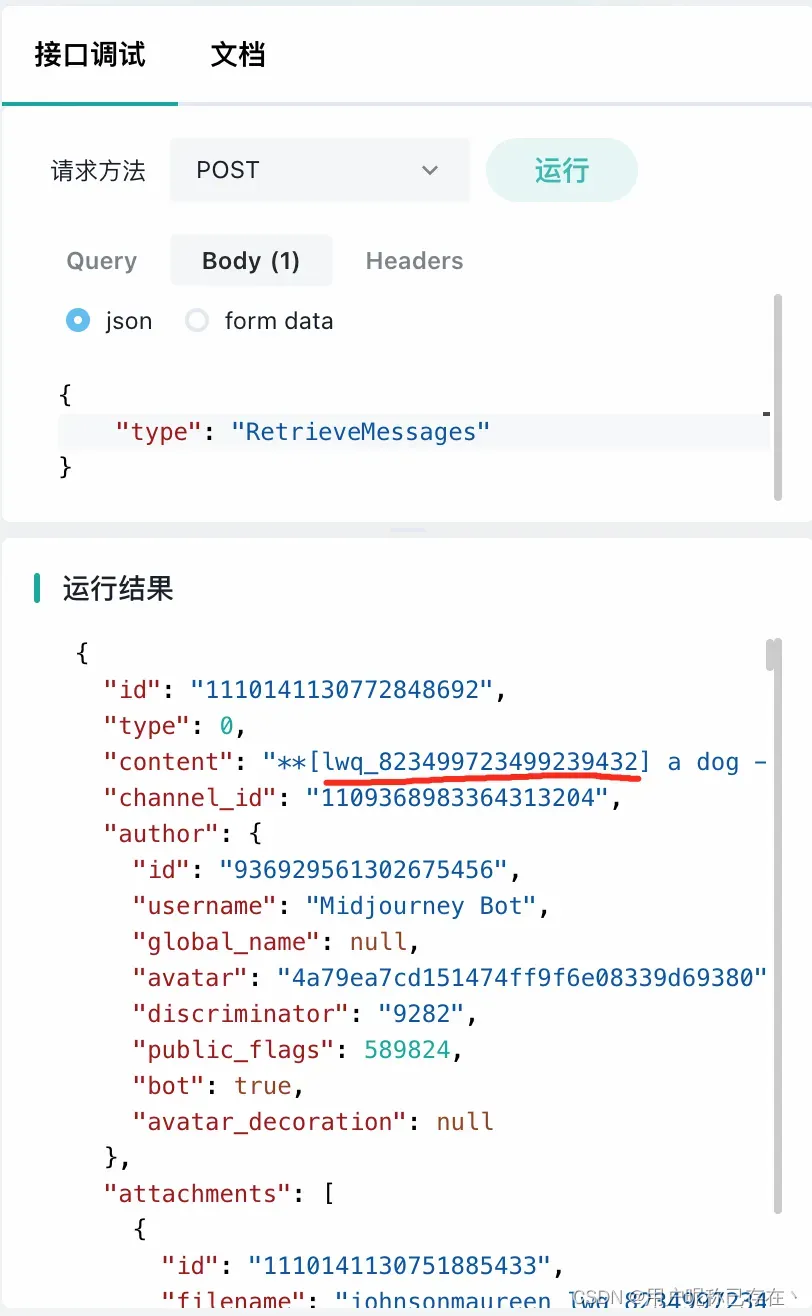
获取结果

RetrieveMessages获取到的是当前频道内所有用户生成的最近50个结果,
请注意图中红线部分,这就是上面那个msg_Id,通过这个id可以筛选出你自己的结果,对应的attachments内有个url就是你要的图片链接 -
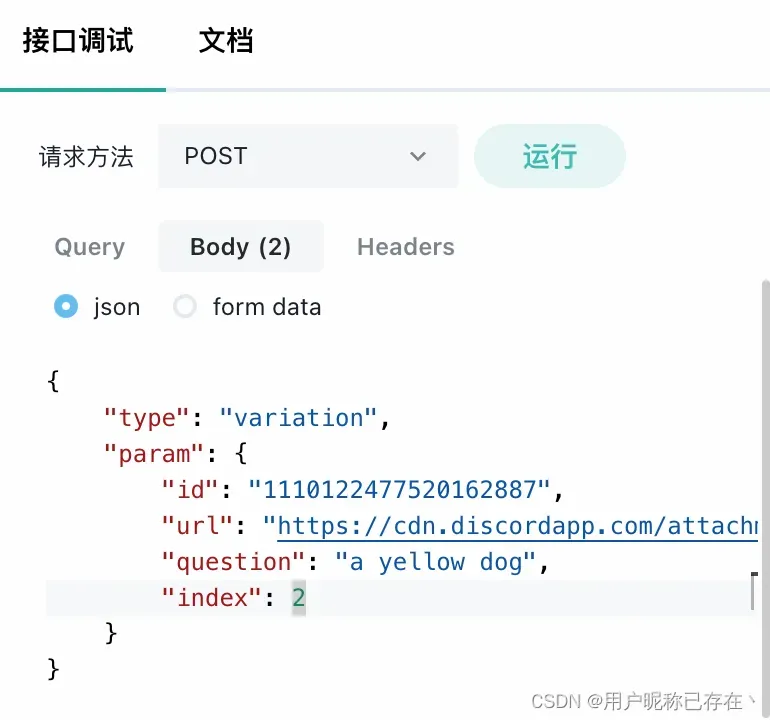
变换图片(选取一张你喜欢的做调整)

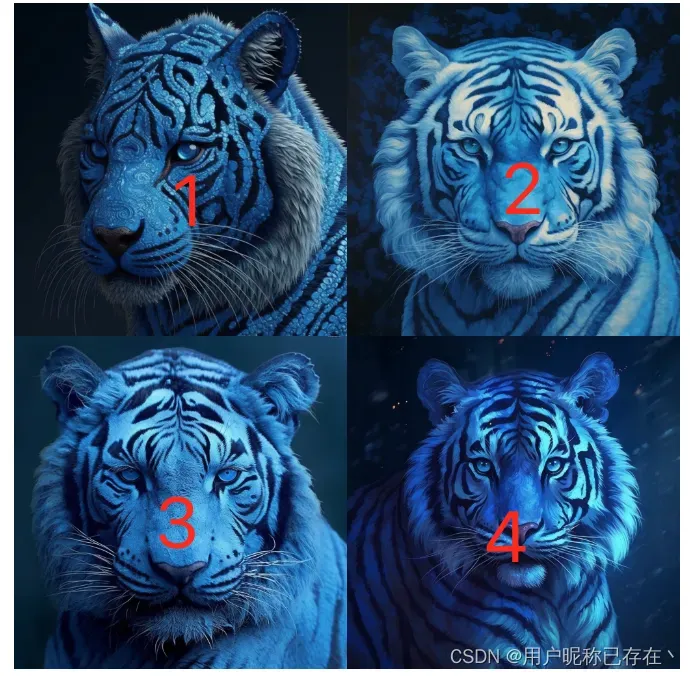
type固定传variationid是第二步中通过msg_Id筛选获取到的那条数据的idurl是对应的attachments内的urlquestion是你自己的提问内容index是图片的序号,图片序号见下图

- 放大图片
跟调整图片参数差不多,只需要把type改为upscale
五、如何调用接口
复制右上角发布按钮旁的链接,即可在postman或前端页面中调用。前端界面随你发挥,欢迎入群交流想法和作品
六、end
到这里就接入结束了,再次感谢laf官方,demo在此
文章出处登录后可见!
已经登录?立即刷新
