文章目录
- Stable Diffusion介绍
- 环境及资源准备过程
-
- 交互式建模(PAI-DSW)的试用
- 在创建的工作空间中创建实例
- Stable Diffusion的Web-UI部署
-
- 下载stable-diffusion-webui开源库及其它依赖
- 安装常用插件
- 下载模型
- 在DSW中启动WebUI
- Stable Diffusion的微调及Web-UI部署
-
- 安装 Diffusers
- 微调Stable Diffusion模型
- 准备WebUI所需模型文件
- 在DSW中启动WebUI
Stable Diffusion介绍
Stable Diffusion 是一种文本到图像的潜在扩散模型,由 Runway 和慕尼黑大学合作构建,第一个版本于 2021 年发布。目前主流版本包含 v1.5、v2和v2.1。它主要用于生成以文本描述为条件的详细图像,也应用于其他任务,如修复图像、生成受文本提示引导的图像到图像的转换等。
体验地址:https://stablediffusionweb.com/#demo
Stable Diffusion原理解读:
https://blog.csdn.net/v_JULY_v/article/details/131205615?spm=1001.2014.3001.5501
本文主要介绍如何免费在 阿里云交互式建模(PAI-DSW) 中对Stable Diffusion的Web-UI部署,以及基于LoRA对Stable Diffusion进行微调。
部署效果如下图所示:
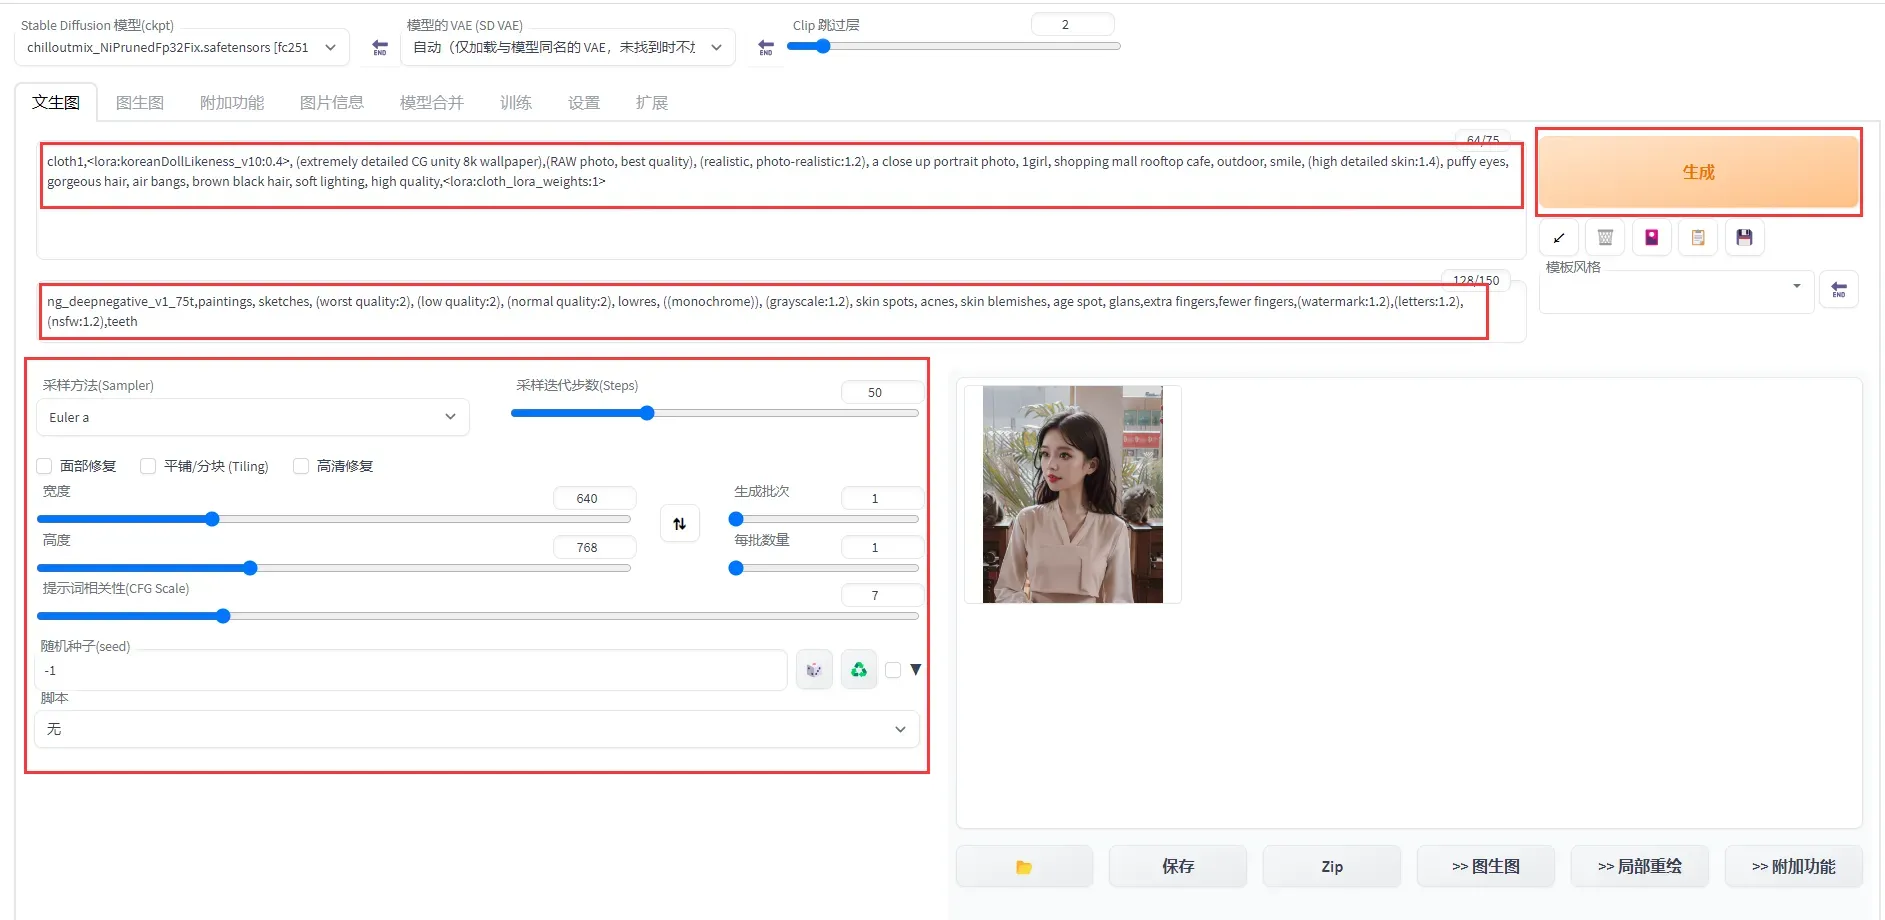
图中的VAE叫做变分自编码器,VAE模型有2种功能,一种是滤镜(就像是PS、抖音、美图秀秀等)用到的滤镜一样,让出图的画面看上去不会灰蒙蒙的,让整体的色彩饱和度更高。另一种是微调,部分VAE会对出图的细节进行细微的调整。
环境及资源准备过程
交互式建模(PAI-DSW)的试用
在使用前,需要先在阿里云上注册并登录自己的账号:https://free.aliyun.com/,
登录完成后,左侧产品类别中选中机器学习平台API

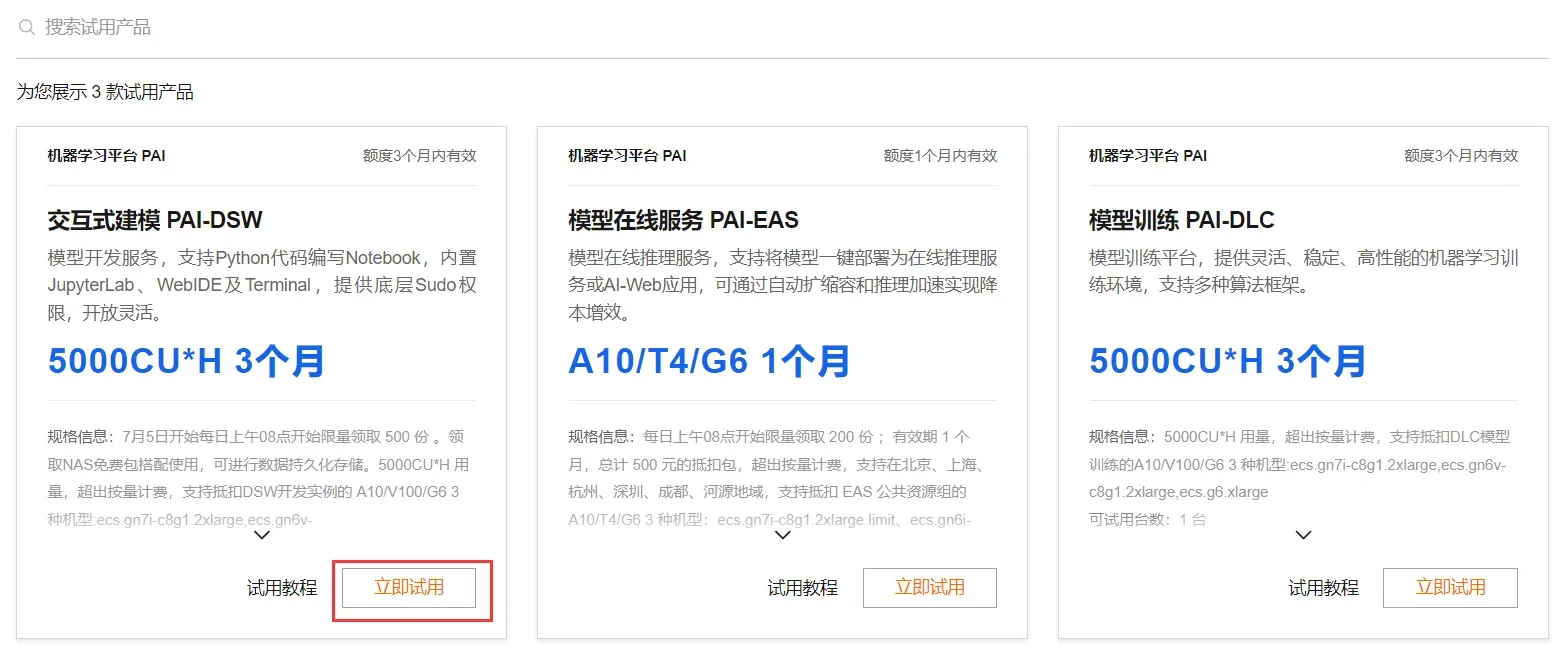
或者可以直接点击 链接,可以看到阿里云在机器学习平台PAI中提供的 3 款试用产品。

选择交互式建模-PAI-DSW,点击立即试用。
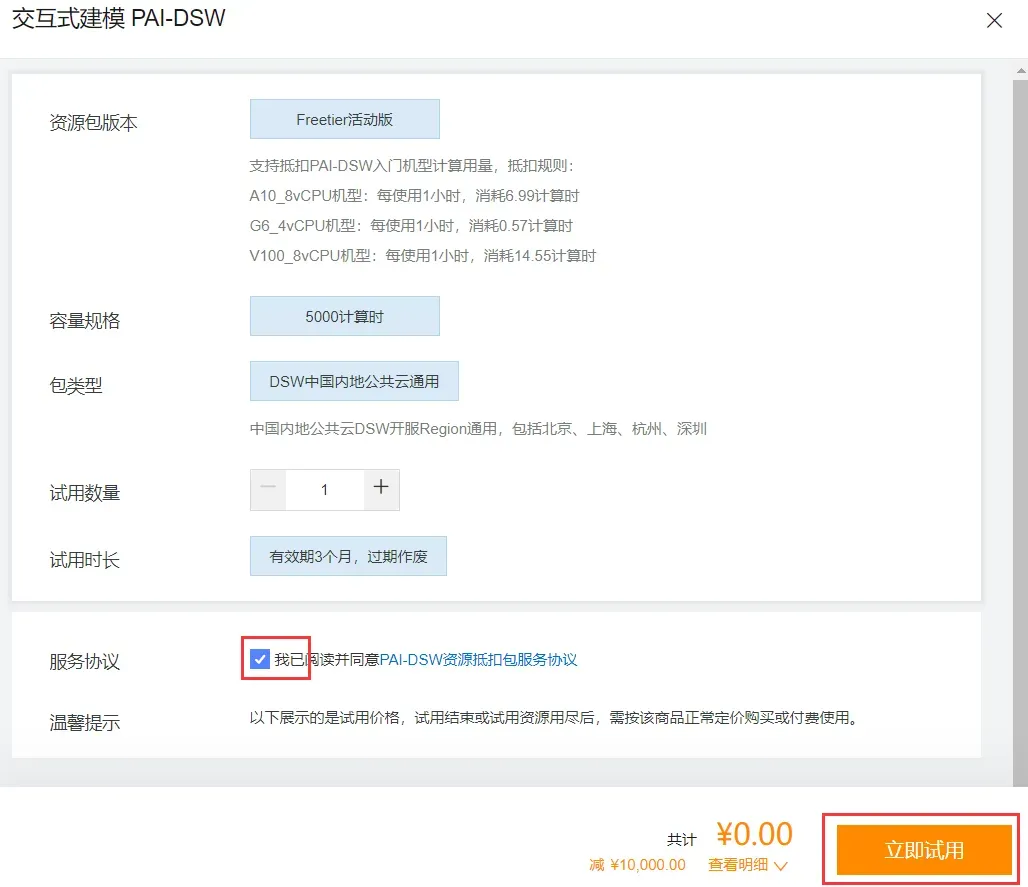
选择同意服务协议,并点击立即试用。
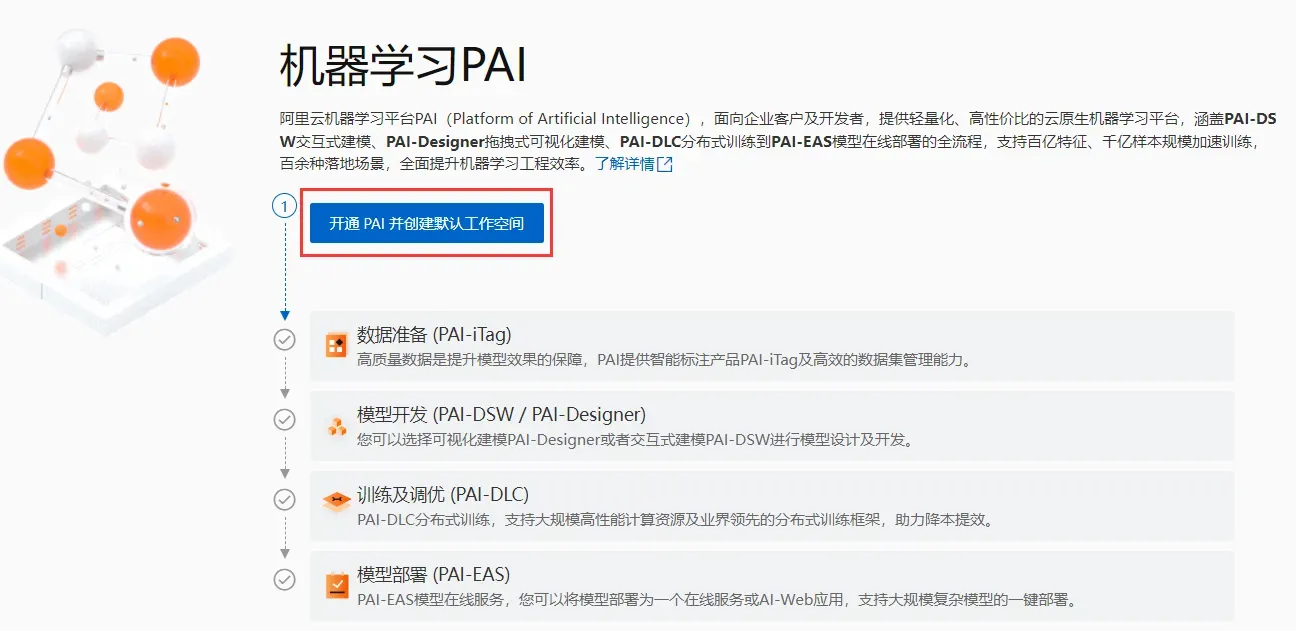
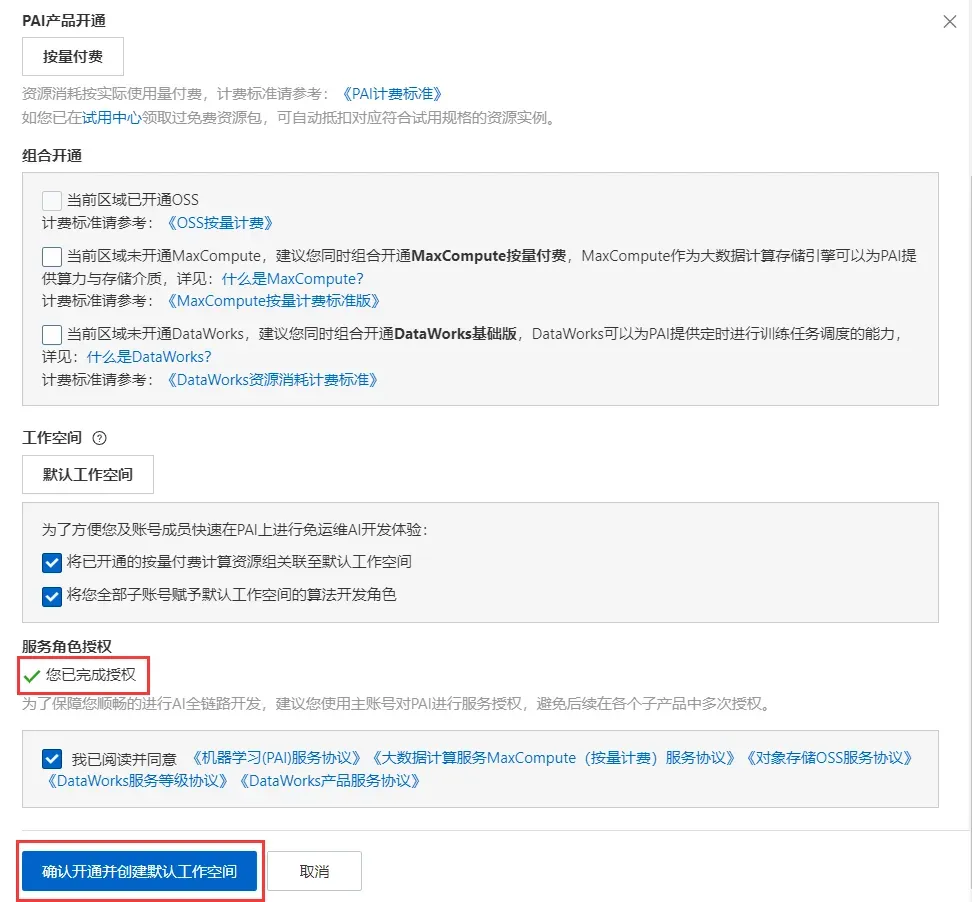
点击开通PAI并创建默认工作空间。
点击完成授权(我这里已授权),并点击确认开同并创建默认工作空间。注意:这里没有选择开通OSS,如果需要长期储存,那你需要开通OSS(可能会有费用)。
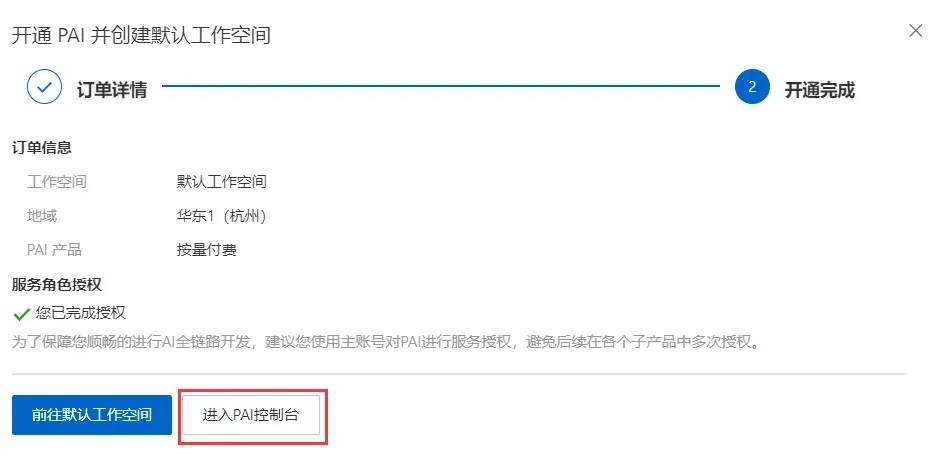
会显示开通完成,点击进入PAI控制台。
在创建的工作空间中创建实例
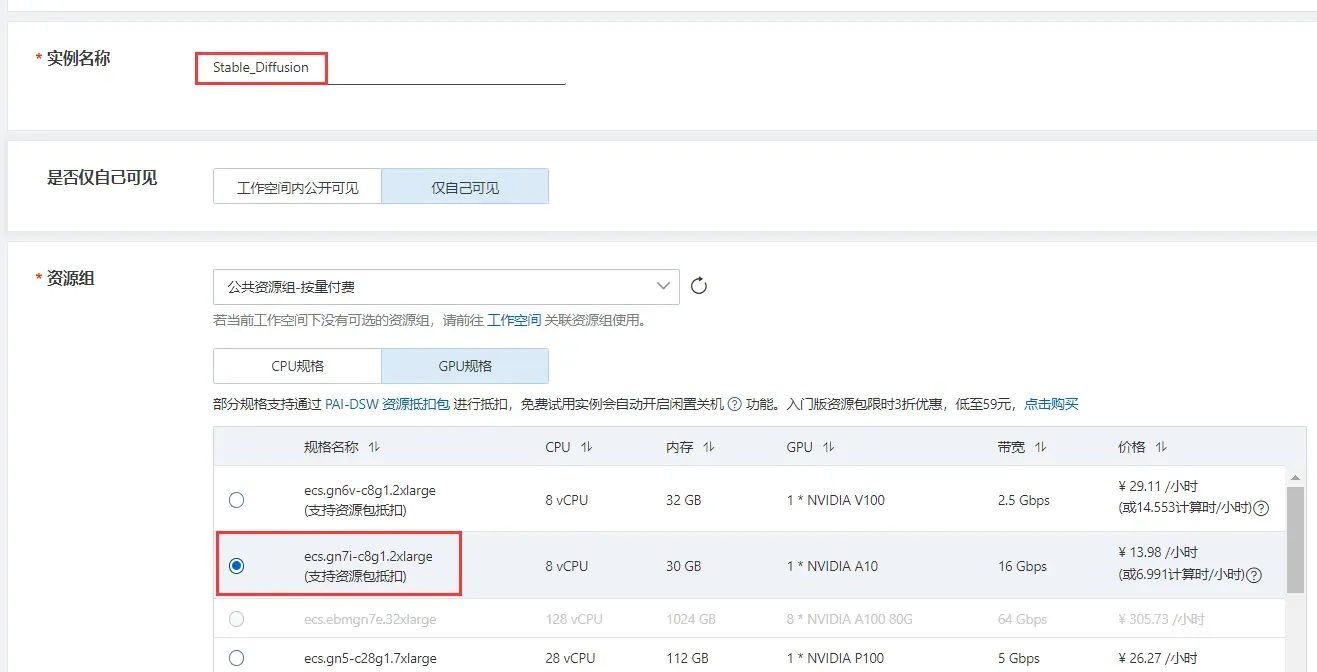
填写实例名称,并选择GPU规格,规格名称为ecs.gn7i-c8g1.2xlarge。
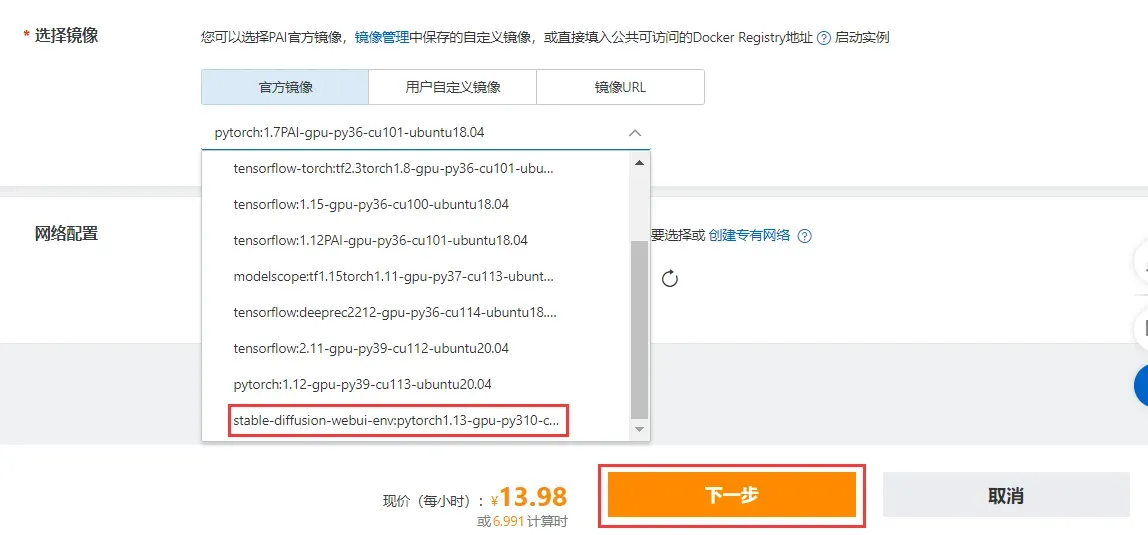
选择官方镜像中的stable-diffusion-webui-env:pytorch1.13-gpu-py310-cu117-ubuntu22.04,点击下一步后,再点击创建实例即可。
注意:创建DSW实例需要一定时间,通常大约需要2到15分钟。
创建成功后点击打开,进入PAI-DSW开发环境。

Stable Diffusion的Web-UI部署
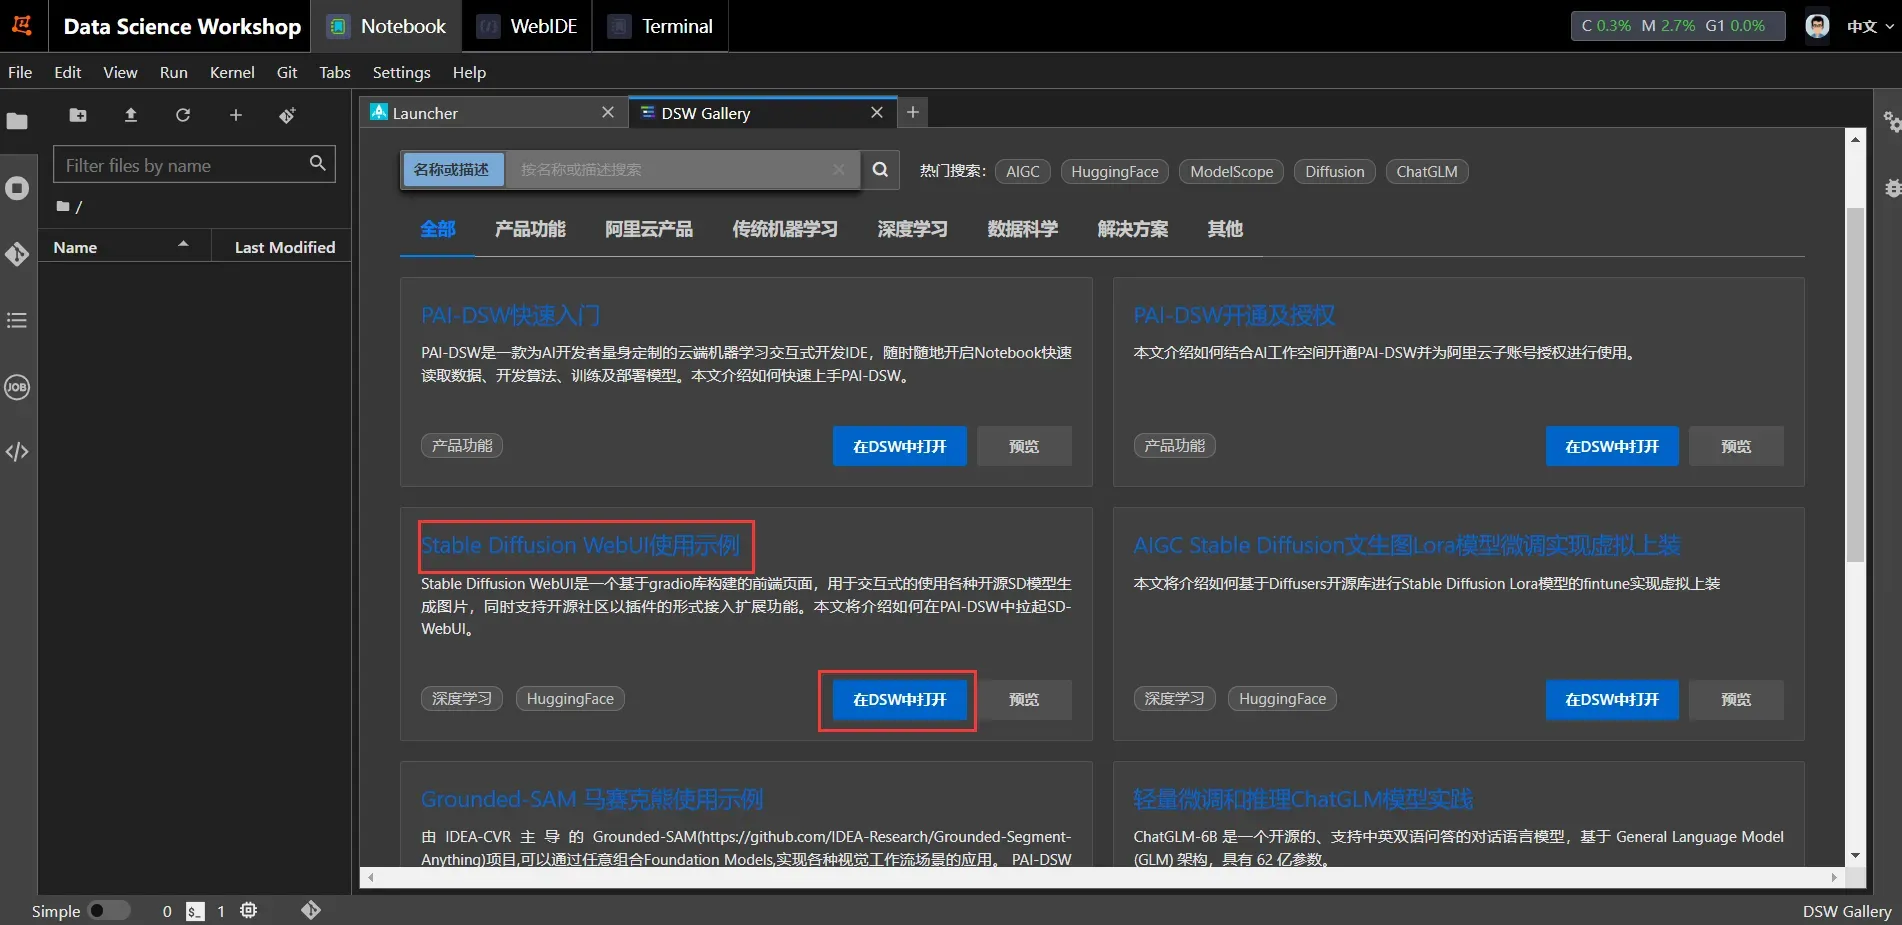
在AI-DSW开发环境的launcher中,选择Tool下的DSW Gallery

查找或搜索Stable Diffusion WebUI使用示例 ,并点击在DSW中打开。
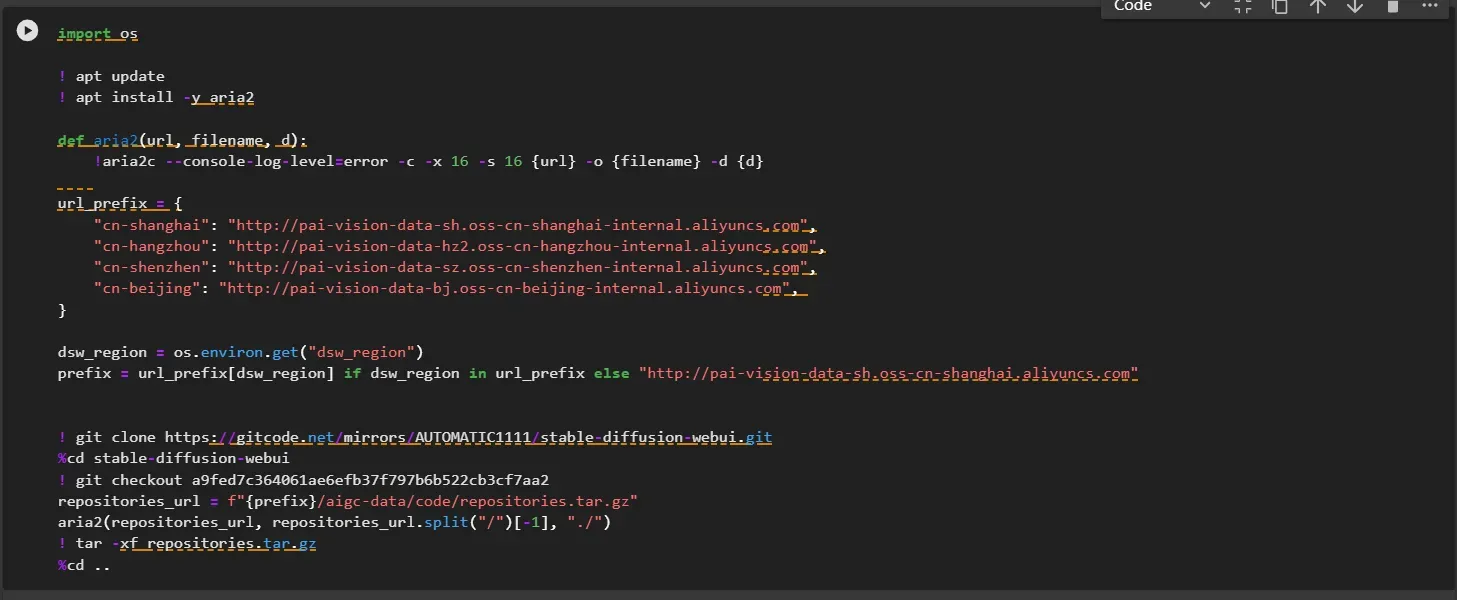
下载stable-diffusion-webui开源库及其它依赖
运行Notebook中的对应命令,下载stable-diffusion-webui开源库及其他依赖。
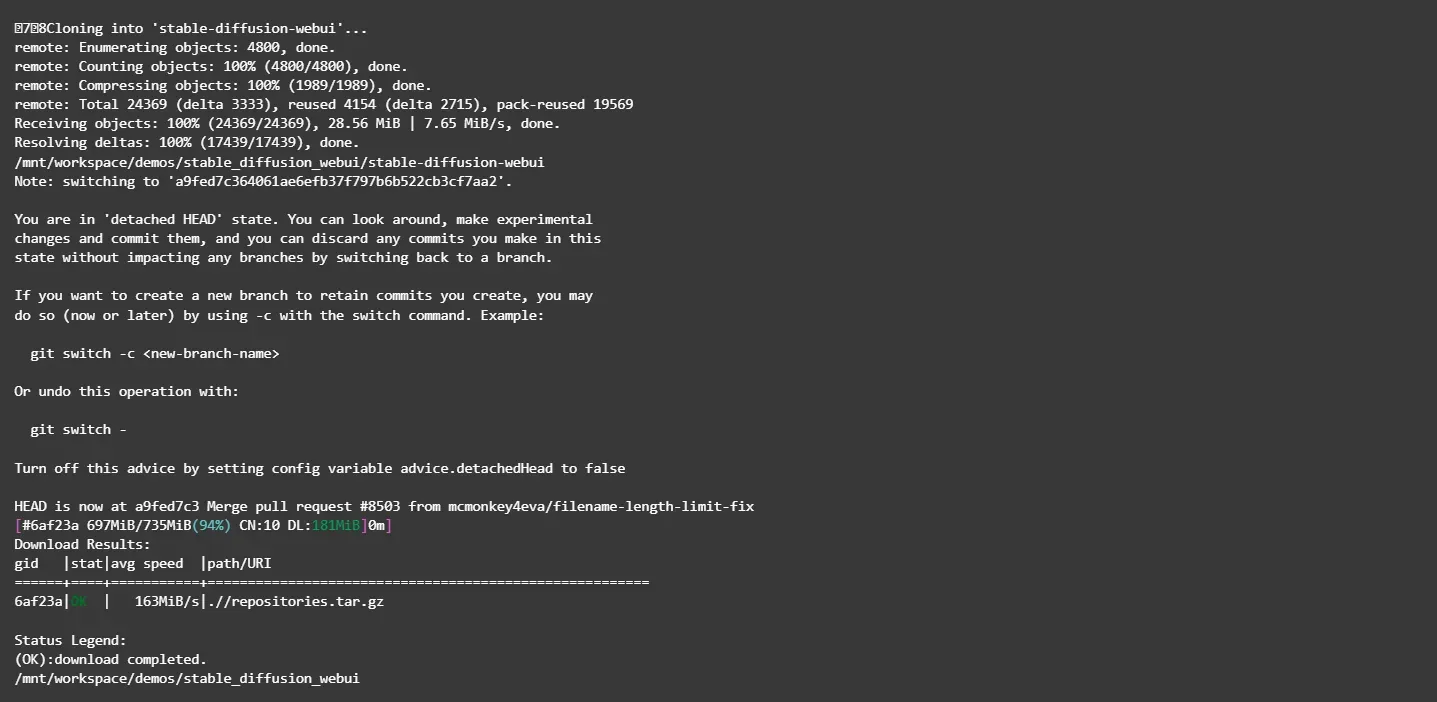
运行命令后,如下图所示,表示已下载完成。
安装常用插件
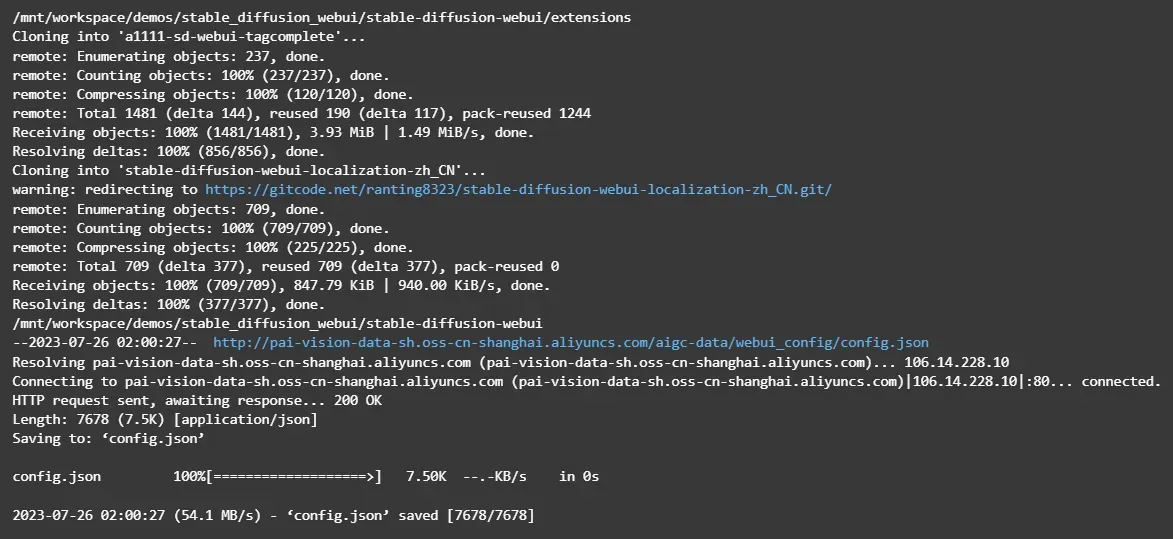
运行Notebook中的对应命令,安装tagcomplete和汉化插件。

运行命令后,如下图所示,表示已安装完成。
下载模型
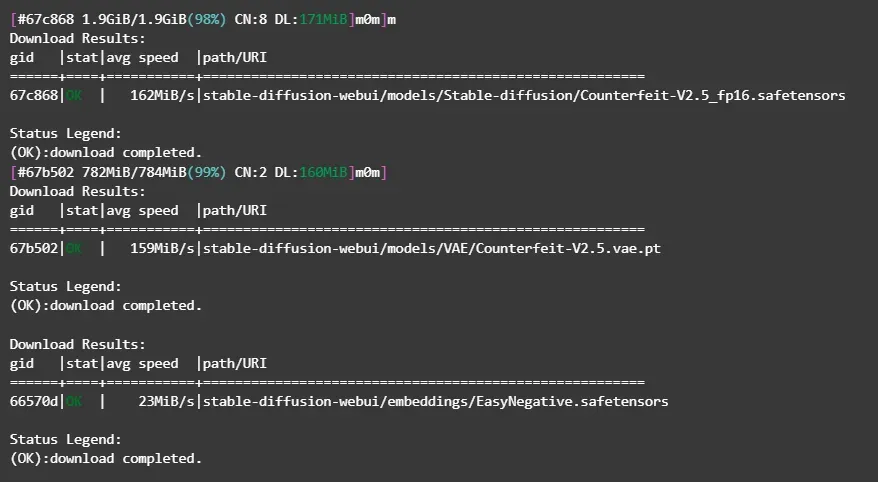
使用开源SD模型 Counterfeit-v2.5作为 base 模型。
运行Notebook中的对应命令,下载模型。

在DSW中启动WebUI
运行Notebook中的对应命令,启动WebUI服务。


在返回结果中,单击URL链接(http://127.0.0.1:7860),进入WebUI页面,可以在WebUI页面进行推理。
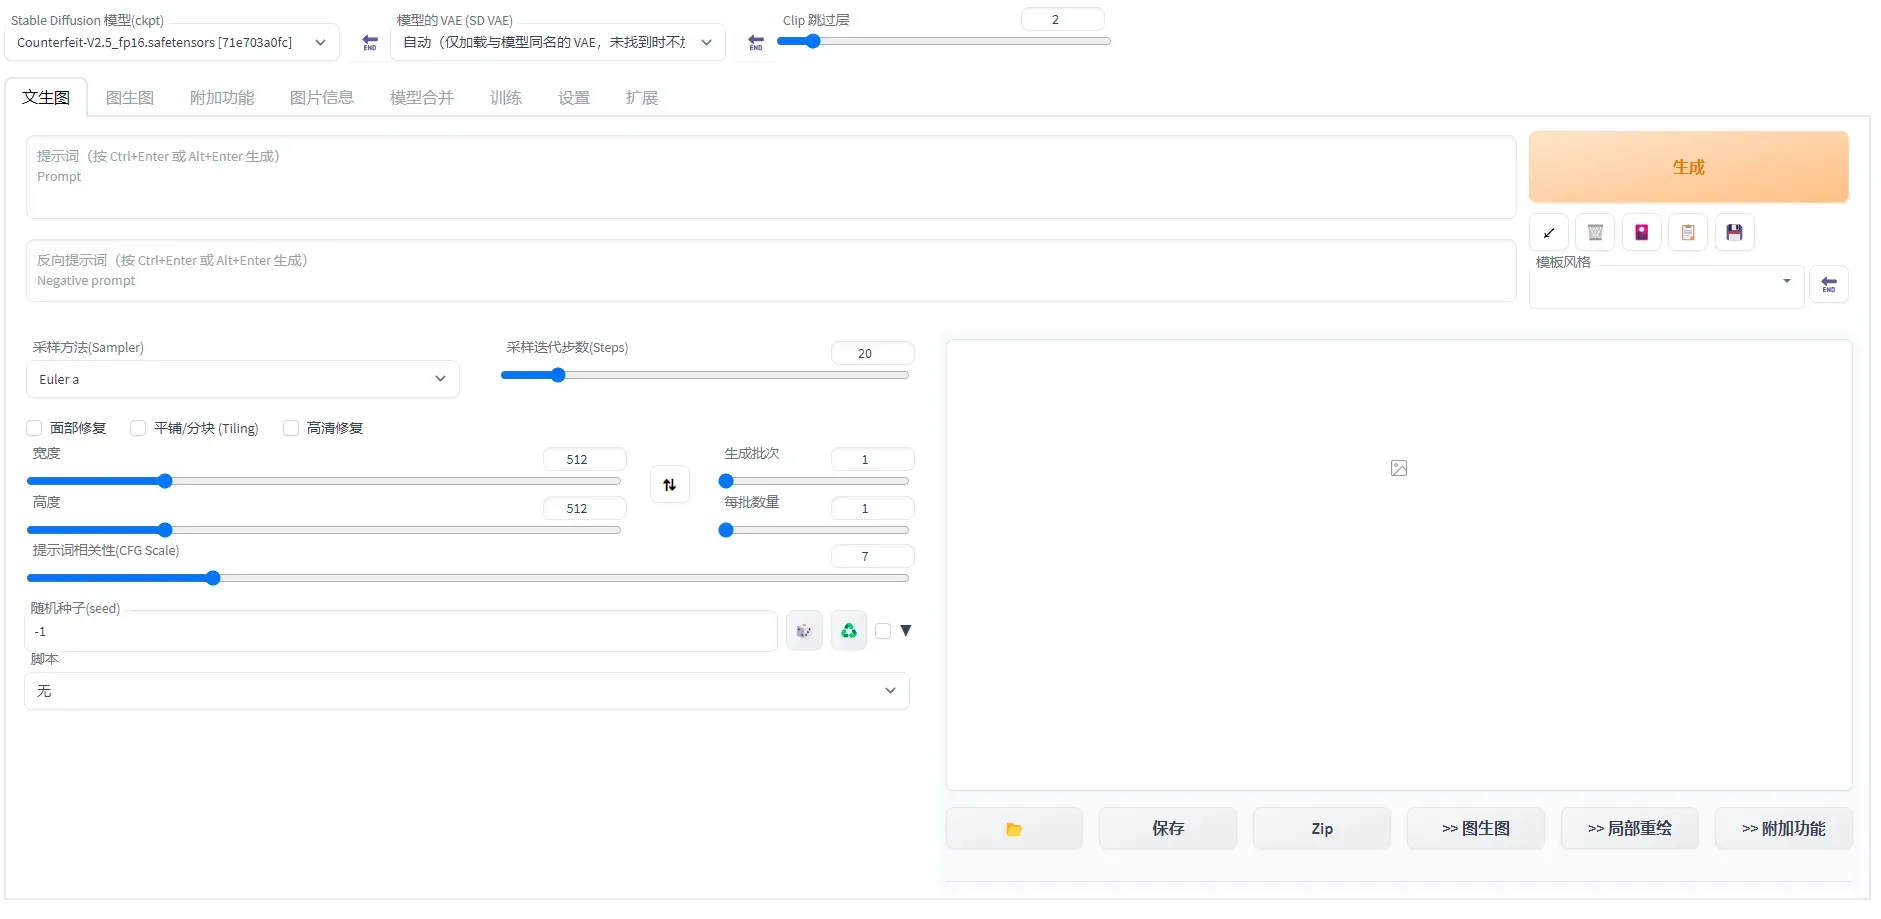
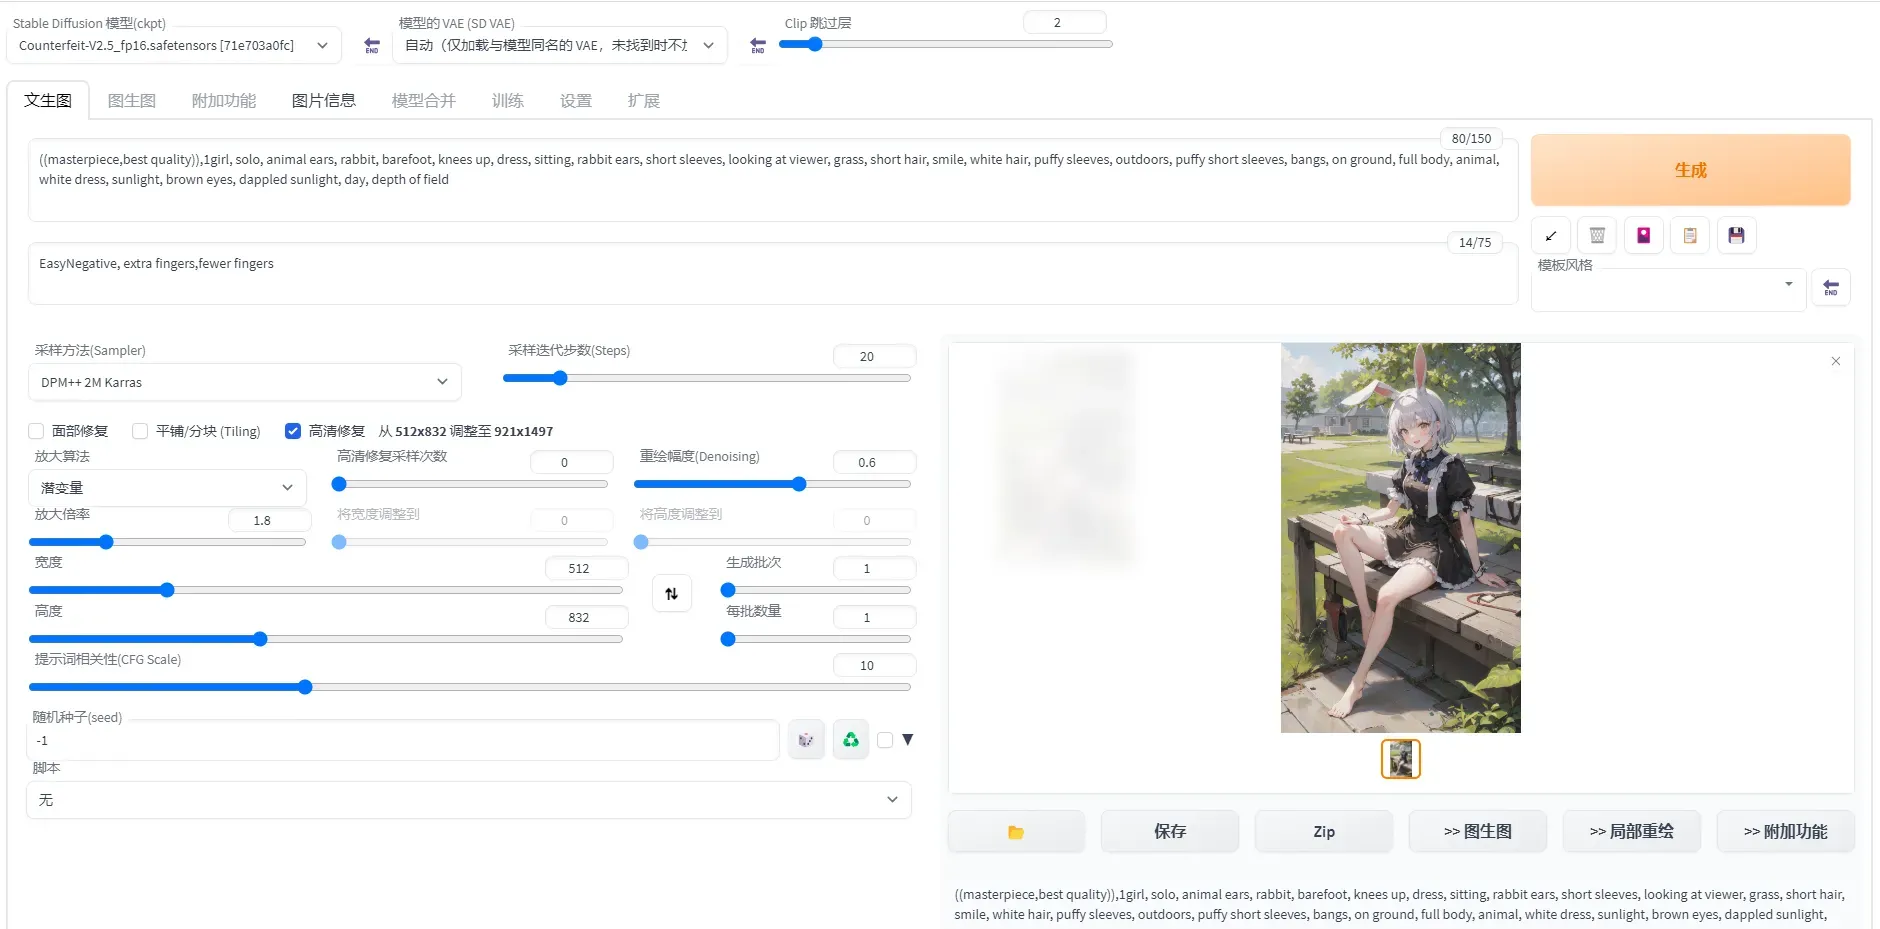
在文生图页配置以下参数:
- 正向prompt:
((masterpiece,best quality)),1girl, solo, animal ears, rabbit, barefoot, knees up, dress, sitting, rabbit ears, short sleeves, looking at viewer, grass, short hair, smile, white hair, puffy sleeves, outdoors, puffy short sleeves, bangs, on ground, full body, animal, white dress, sunlight, brown eyes, dappled sunlight, day, depth of field - 负向prompt:
EasyNegative, extra fingers,fewer fingers - 采样方法 : DPM++2M Karras
- 高清修复: 勾选
- 重绘幅度: 0.6
- 放大倍率: 1.8
- 高度: 832
- 提示词相关性(CFG Scale): 10
也可以根据需要设置其他相关参数。
单击生成,输出如图推理结果,且支持图片的保存。
Stable Diffusion的微调及Web-UI部署
安装 Diffusers
在Notebook中新建单元格,下载所要使用的 Diffuers 仓库
! git clone https://github.com/huggingface/diffusers
! cd diffusers && git checkout e126a82cc5d9afbeb9b476455de24dd3e7dd358a
! cd diffusers && pip install .

验证是否安装成功
import diffusers

配置accelerate。
! mkdir -p /root/.cache/huggingface/accelerate/
! wget -c http://pai-vision-data-sh.oss-cn-shanghai.aliyuncs.com/aigc-data/accelerate/default_config.yaml -O /root/.cache/huggingface/accelerate/default_config.yaml
accelerate配置成功。

安装相关依赖库
! cd diffusers/examples/text_to_image && pip install -r requirements.txt
微调Stable Diffusion模型
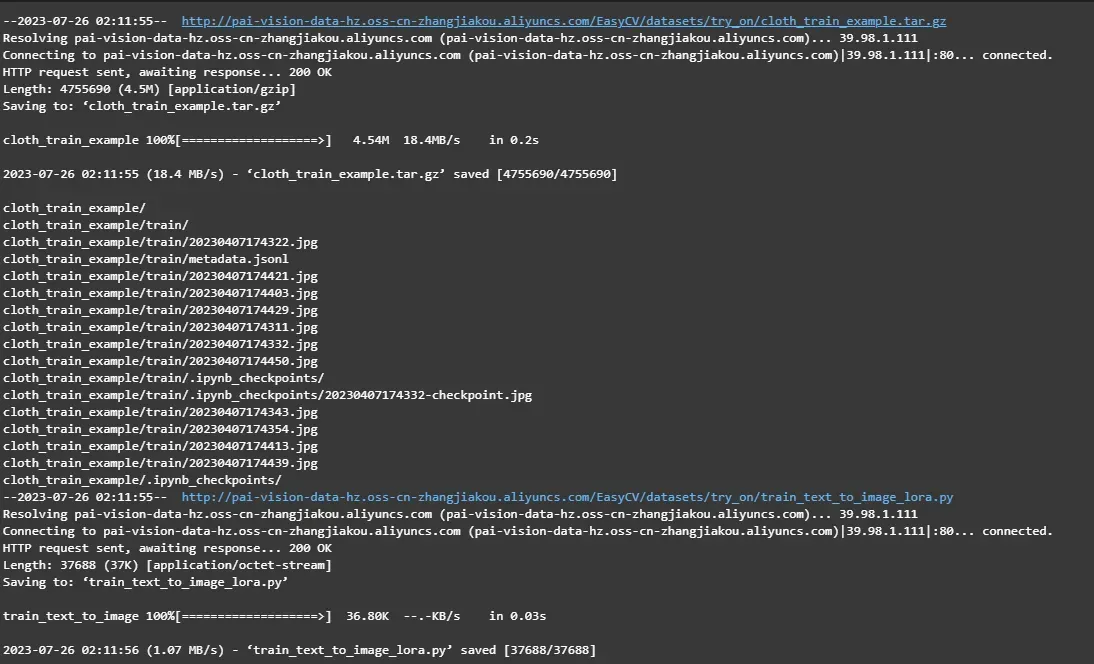
在Notebook中执行下面代码,下载服装数据集和基于LoRA微调的代码。
! wget http://pai-vision-data-hz.oss-cn-zhangjiakou.aliyuncs.com/EasyCV/datasets/try_on/cloth_train_example.tar.gz && tar -xvf cloth_train_example.tar.gz
! wget http://pai-vision-data-hz.oss-cn-zhangjiakou.aliyuncs.com/EasyCV/datasets/try_on/train_text_to_image_lora.py
运行命令后,如下图所示,表示已下载完成。
在Notebook中执行下面代码,查看示例图片
from PIL import Image
display(Image.open("cloth_train_example/train/20230407174421.jpg"))

在Notebook中执行下面代码,下载预训练模型并转换成diffusers格式。
safety_checker_url = f"{prefix}/aigc-data/hug_model/models--CompVis--stable-diffusion-safety-checker.tar.gz"
aria2(safety_checker_url, safety_checker_url.split("/")[-1], "./")
! tar -xf models--CompVis--stable-diffusion-safety-checker.tar.gz -C /root/.cache/huggingface/hub/

clip_url = f"{prefix}/aigc-data/hug_model/models--openai--clip-vit-large-patch14.tar.gz"
aria2(clip_url, clip_url.split("/")[-1], "./")
! tar -xf models--openai--clip-vit-large-patch14.tar.gz -C /root/.cache/huggingface/hub/

model_url = f"{prefix}/aigc-data/sd_models/chilloutmix_NiPrunedFp32Fix.safetensors"
aria2(model_url, model_url.split("/")[-1], "stable-diffusion-webui/models/Stable-diffusion/")

! python diffusers/scripts/convert_original_stable_diffusion_to_diffusers.py \
--checkpoint_path=stable-diffusion-webui/models/Stable-diffusion/chilloutmix_NiPrunedFp32Fix.safetensors \
--dump_path=chilloutmix-ni --from_safetensors
运行命令后,如下图所示,表示已下载并转换完成。

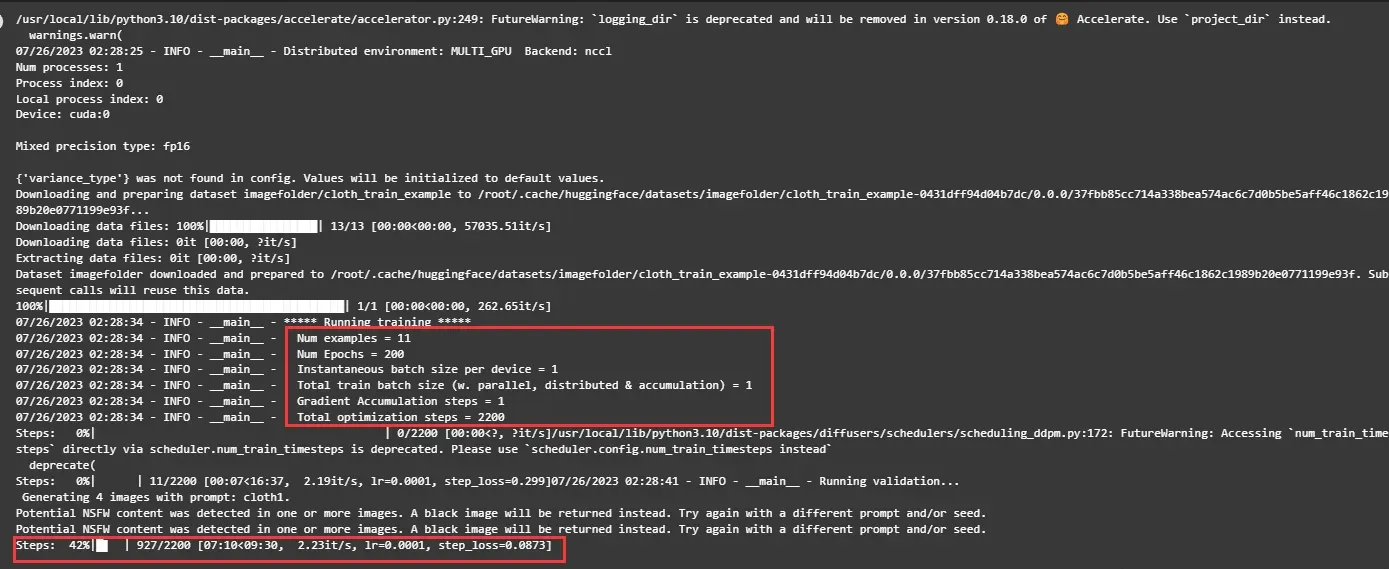
模型微调。设置num_train_epochs为200,运行下面代码进行基于LoRA的微调训练。微调完成后会在cloth-model-lora目录中生成模型文件
! export MODEL_NAME="chilloutmix-ni" && \
export DATASET_NAME="cloth_train_example" && \
accelerate launch --mixed_precision="fp16" train_text_to_image_lora.py \
  --pretrained_model_name_or_path=$MODEL_NAME \
  --dataset_name=$DATASET_NAME --caption_column="text" \
  --width=640 --height=768 --random_flip \
  --train_batch_size=1 \
  --num_train_epochs=200 --checkpointing_steps=5000 \
  --learning_rate=1e-04 --lr_scheduler="constant" --lr_warmup_steps=0 \
  --seed=42 \
  --output_dir="cloth-model-lora" \
  --validation_prompt="cloth1" --validation_epochs=100
可以直接看到微调相关信息,如epochs,batch_size等,由于样本量较少,只有11个,微调过程大约16分钟。
训练过程中可以打开Terminal,并输入 nvidia-smi命令查看显存占用情况。

可以看到显存占用约14G。
准备WebUI所需模型文件
将lora模型文件转化成WebUI支持格式并拷贝到WebUI所在目录。
! wget -c http://pai-vision-data-hz.oss-cn-zhangjiakou.aliyuncs.com/EasyCV/datasets/convert-to-safetensors.py
! python convert-to-safetensors.py --file='cloth-model-lora/pytorch_lora_weights.bin'
! mkdir stable-diffusion-webui/models/Lora
! cp cloth-model-lora/pytorch_lora_weights_converted.safetensors stable-diffusion-webui/models/Lora/cloth_lora_weights.safetensors

准备额外模型文件,为了加速下载,可以运行如下命令直接下载额外模型文件。
detection_url = f"{prefix}/aigc-data/codeformer/detection_Resnet50_Final.pth"
aria2(detection_url, detection_url.split("/")[-1], "stable-diffusion-webui/repositories/CodeFormer/weights/facelib/")
parse_url = f"{prefix}/aigc-data/codeformer/parsing_parsenet.pth"
aria2(parse_url, parse_url.split("/")[-1], "stable-diffusion-webui/repositories/CodeFormer/weights/facelib/")
codeformer_url = f"{prefix}/aigc-data/codeformer/codeformer-v0.1.0.pth"
aria2(codeformer_url, codeformer_url.split("/")[-1], "stable-diffusion-webui/models/Codeformer/")

embedding_url = f"{prefix}/aigc-data/embedding/ng_deepnegative_v1_75t.pt"
aria2(embedding_url, embedding_url.split("/")[-1], "stable-diffusion-webui/embeddings/")

model_lora_url = f"{prefix}/aigc-data/lora/koreanDollLikeness_v10.safetensors"
aria2(model_lora_url, model_lora_url.split("/")[-1], "stable-diffusion-webui/models/Lora/")

在DSW中启动WebUI
在Notebook中执行下面命令,启动WebUI。
! cd stable-diffusion-webui && python -m venv --system-site-packages --symlinks venv
! cd stable-diffusion-webui && \
  sed -i 's/can_run_as_root=0/can_run_as_root=1/g' webui.sh && \
  ./webui.sh --no-download-sd-model --xformers
在返回结果中,单击URL链接(http://127.0.0.1:7860),进入WebUI页面。
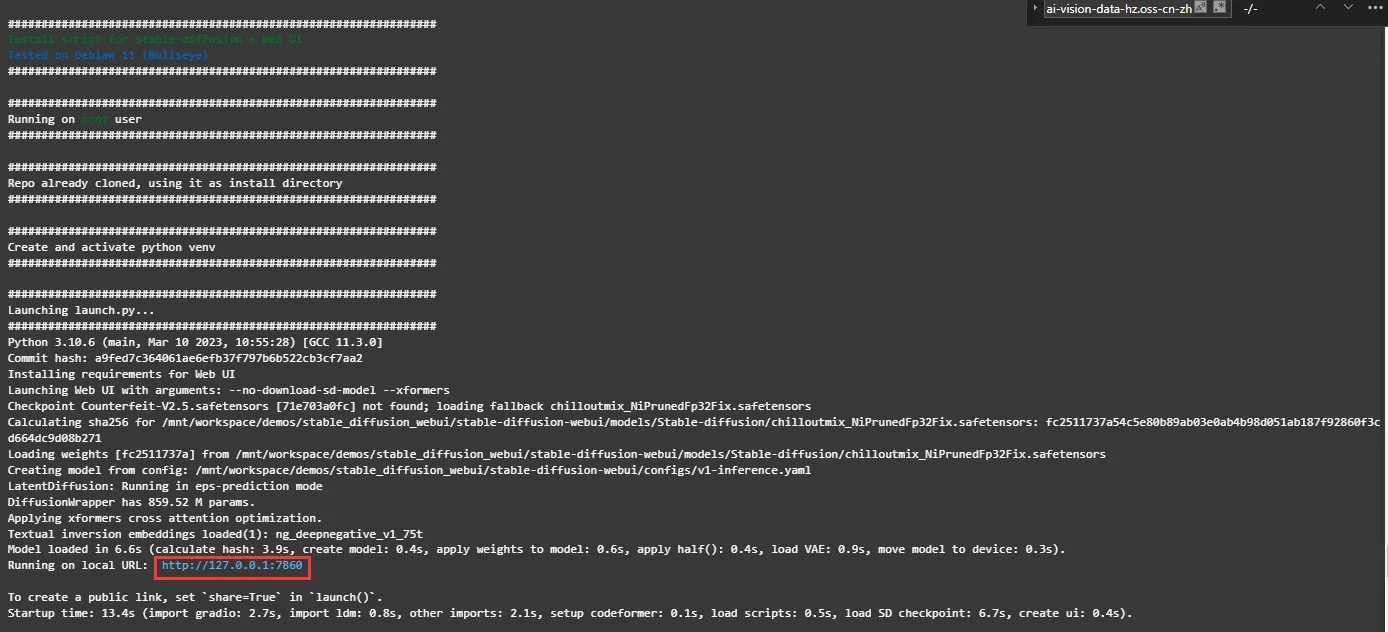
点击链接后,可以在WebUI页面进行推理。
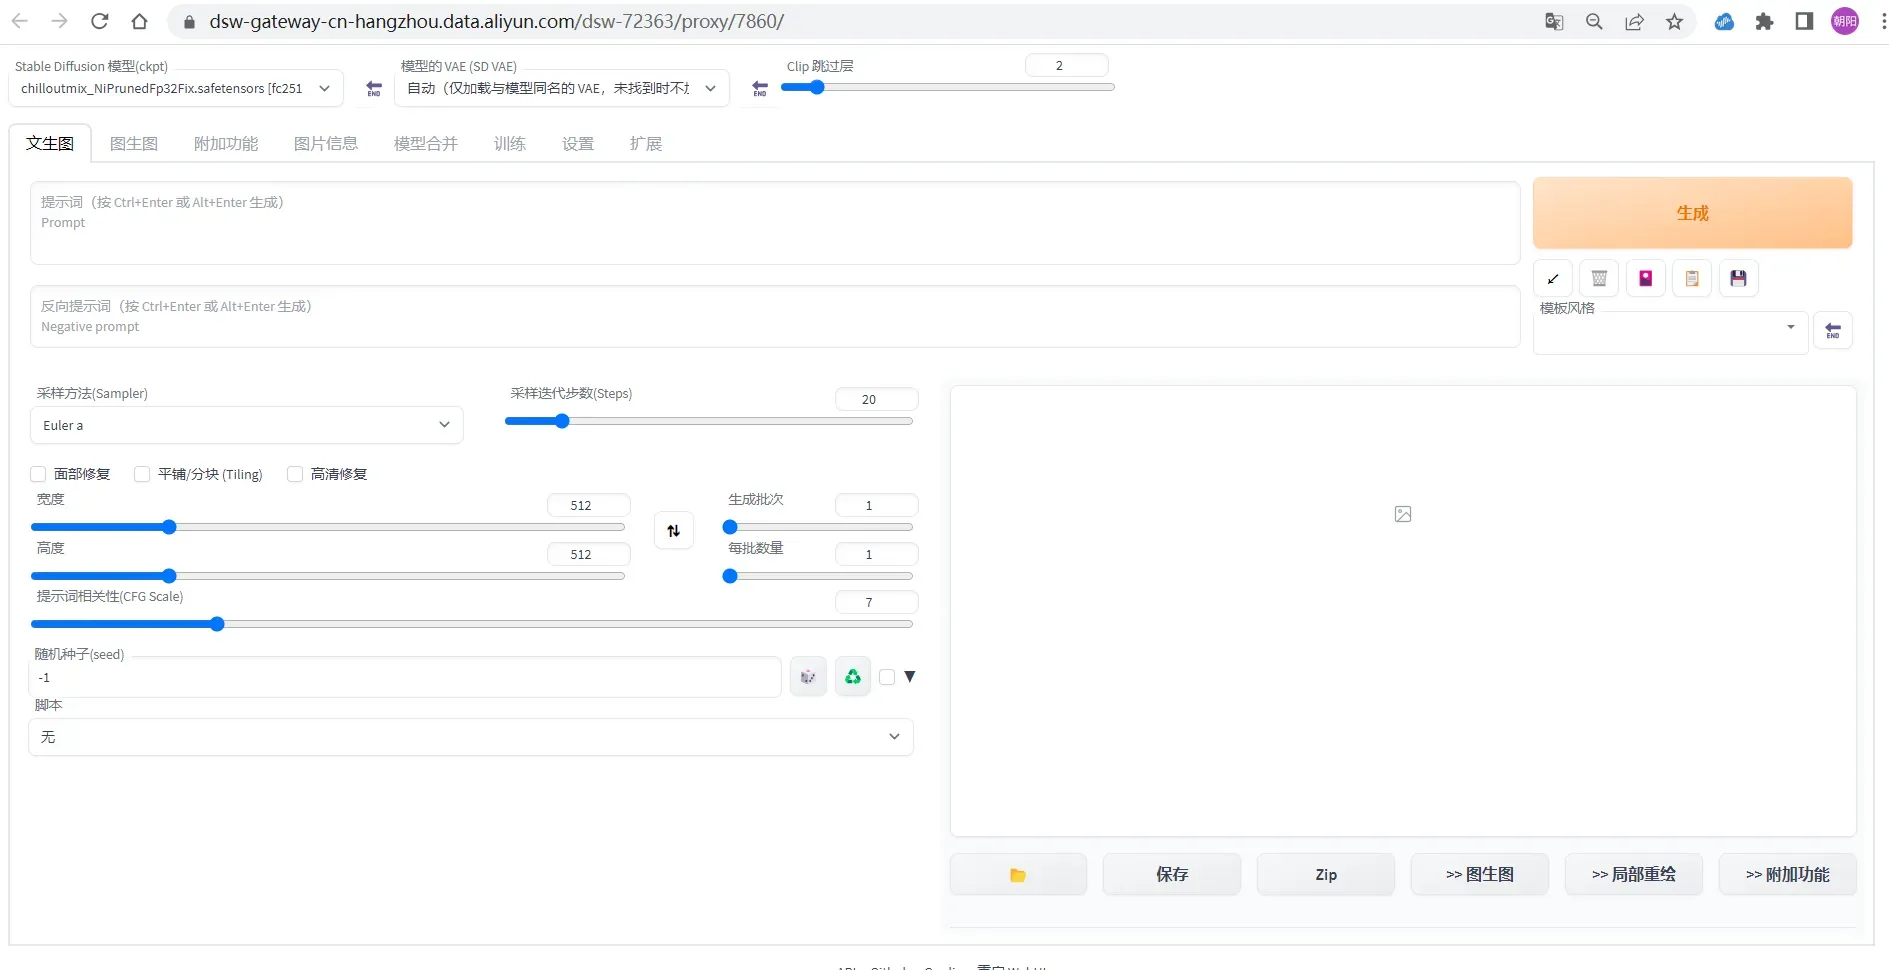
在文生图页配置以下参数:
-
Prompt:cloth1,lora:koreanDollLikeness_v10:0.4, (extremely detailed CG unity 8k wallpaper),(RAW photo, best quality), (realistic, photo-realistic:1.2), a close up portrait photo, 1girl, shopping mall rooftop cafe, outdoor, smile, (high detailed skin:1.4), puffy eyes, gorgeous hair, air bangs, brown black hair, soft lighting, high quality,lora:cloth_lora_weights:1
-
Negative prompt:ng_deepnegative_v1_75t,paintings, sketches, (worst quality:2), (low quality:2), (normal quality:2), lowres, ((monochrome)), (grayscale:1.2), skin spots, acnes, skin blemishes, age spot, glans,extra fingers,fewer fingers,(watermark:1.2),(letters:1.2),(nsfw:1.2),teeth
采样方法(Sampler): Euler a
采样迭代步数(Steps): 50
宽度和高度: 640,768
也可以根据需要设置其他相关参数。
单击生成,输出如图推理结果,且支持图片的保存。

注意
领取免费资源包后,请在免费额度和有效试用期内使用。如果免费额度用尽或试用期结束后,继续使用计算资源,会产生后付费账单。
资源包使用情况可以前往资源实例管理页面查看。
如果无需继续使用DSW实例,可以按照以下操作步骤停止DSW实例。
-
登录PAI控制台。
-
在左侧导航栏单击工作空间列表,在工作空间列表页面中单击默认工作空间名称,进入对应工作空间内。
-
在工作空间页面的左侧导航栏选择模型开发与训练>交互式建模(DSW),进入交互式建模(DSW)页面。
-
单击目标实例操作列下的停止,成功停止后即停止资源消耗。
版权声明:本文为博主作者:dzysunshine原创文章,版权归属原作者,如果侵权,请联系我们删除!
原文链接:https://blog.csdn.net/dzysunshine/article/details/131919361
