说起来语音转换文字,openai旗下的whisper很是好用,推理也很快,同时支持cpu和GPU。
GitHub:GitHub – openai/whisper: Robust Speech Recognition via Large-Scale Weak Supervision
相关的参数和内存使用如下:
| Size | Parameters | English-only model | Multilingual model | Required VRAM | Relative speed |
|---|---|---|---|---|---|
| tiny | 39 M | tiny.en |
tiny |
~1 GB | ~32x |
| base | 74 M | base.en |
base |
~1 GB | ~16x |
| small | 244 M | small.en |
small |
~2 GB | ~6x |
| medium | 769 M | medium.en |
medium |
~5 GB | ~2x |
| large | 1550 M | N/A | large |
~10 GB | 1x |
CPU推理会慢一些,一般机器使用small模型即可,该模型内存占用不是很高
1.安装
a.直接通过pip安装
pip install -U openai-whisper
pip install setuptools-rust
b.通过git仓库安装
pip install git+https://github.com/openai/whisper.git c.将安装包升级到仓库最新版
pip install --upgrade --no-deps --force-reinstall git+https://github.com/openai/whisper.gitd.安装 ffmpeg,本次系统是centos8stream,可以通过下面命令安装
dnf install -y https://download1.rpmfusion.org/free/el/rpmfusion-free-release-8.noarch.rpm
dnf install -y install http://rpmfind.net/linux/epel/7/x86_64/Packages/s/SDL2-2.0.14-2.el7.x86_64.rpm
dnf install ffmpeg -y
其他系统可参考如下:
# on Ubuntu or Debian
sudo apt update && sudo apt install ffmpeg

# on Arch Linux
sudo pacman -S ffmpeg

# on MacOS using Homebrew (https://brew.sh/)
brew install ffmpeg

# on Windows using Chocolatey (https://chocolatey.org/)
choco install ffmpeg

# on Windows using Scoop (https://scoop.sh/)
scoop install ffmpeg
2.使用
可以通过Python进行下面操作
import whisper

model = whisper.load_model("small") # 如果模型不存在,会自动下载,默认下载路径 "~/.cache/whisper"
result = model.transcribe("temp.wav")
print(result["text"]) 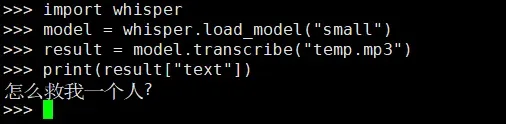
版权声明:本文为博主作者:第九系艾文原创文章,版权归属原作者,如果侵权,请联系我们删除!
原文链接:https://blog.csdn.net/ly1358152944/article/details/130027416