vmware安装银河麒麟V10高级服务器操作系统
- 1、下载银河麒麟V10镜像
- 2、VMware安装银河麒麟V10高级服务器操作系统
-
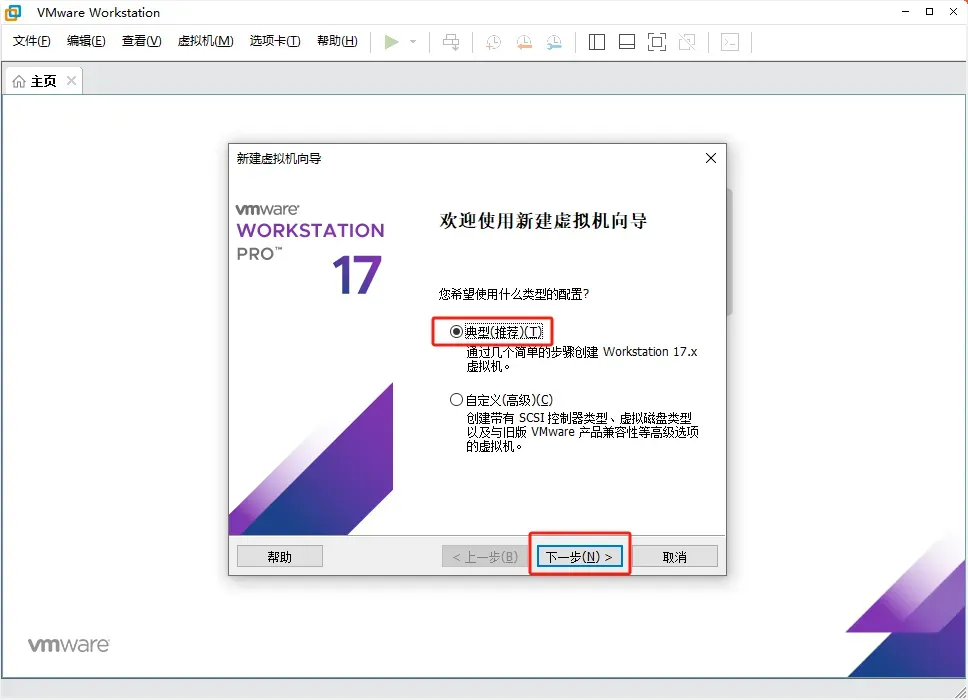
- 2.1、新建虚拟机
- 2.2、安装虚拟机
- 3、配置银河麒麟V10高级服务器操作系统
-
- 3.1、安装vmware tools
- 3.2、配置静态IP地址 和 dns
- 3.3、查看磁盘分区
- 3.4、查看系统版本
1、下载银河麒麟V10镜像
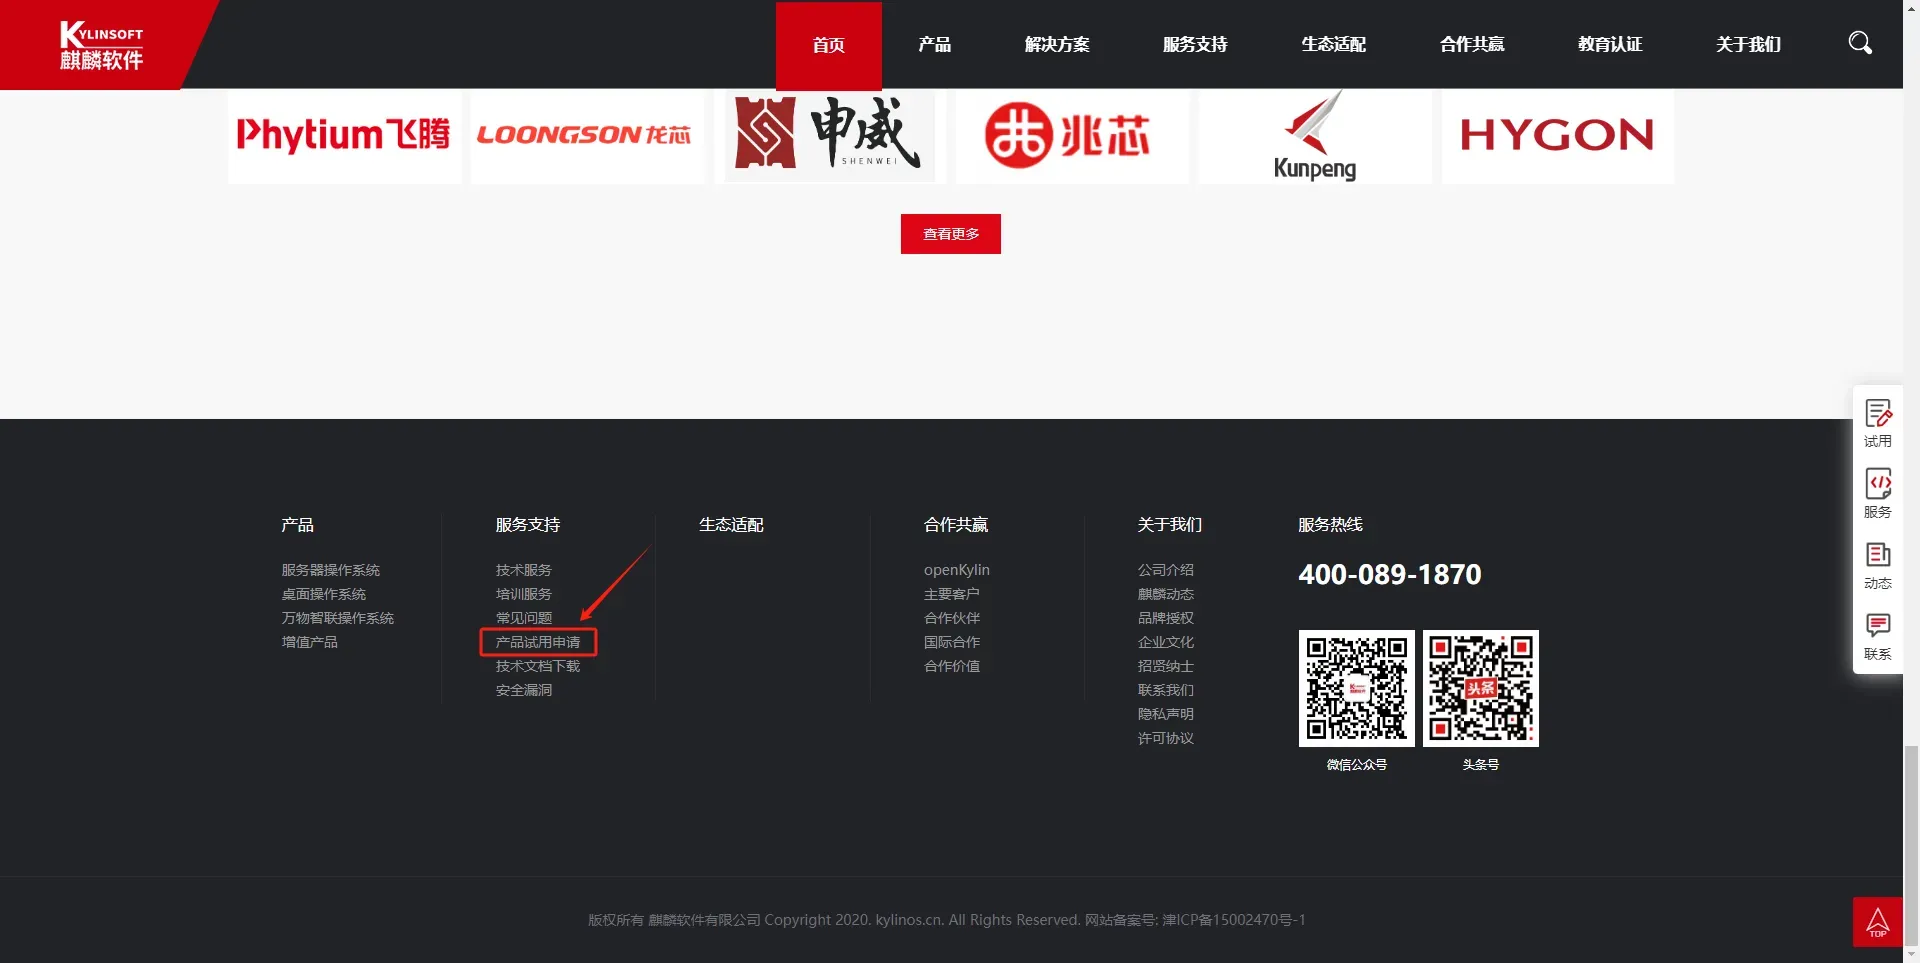
官方提供使用通道 访问官网 链接: https://www.kylinos.cn/
下拉到页面最底部 点击产品试用申请 输入申请信息 根据用户类型选择 个人用户试用选个人就行
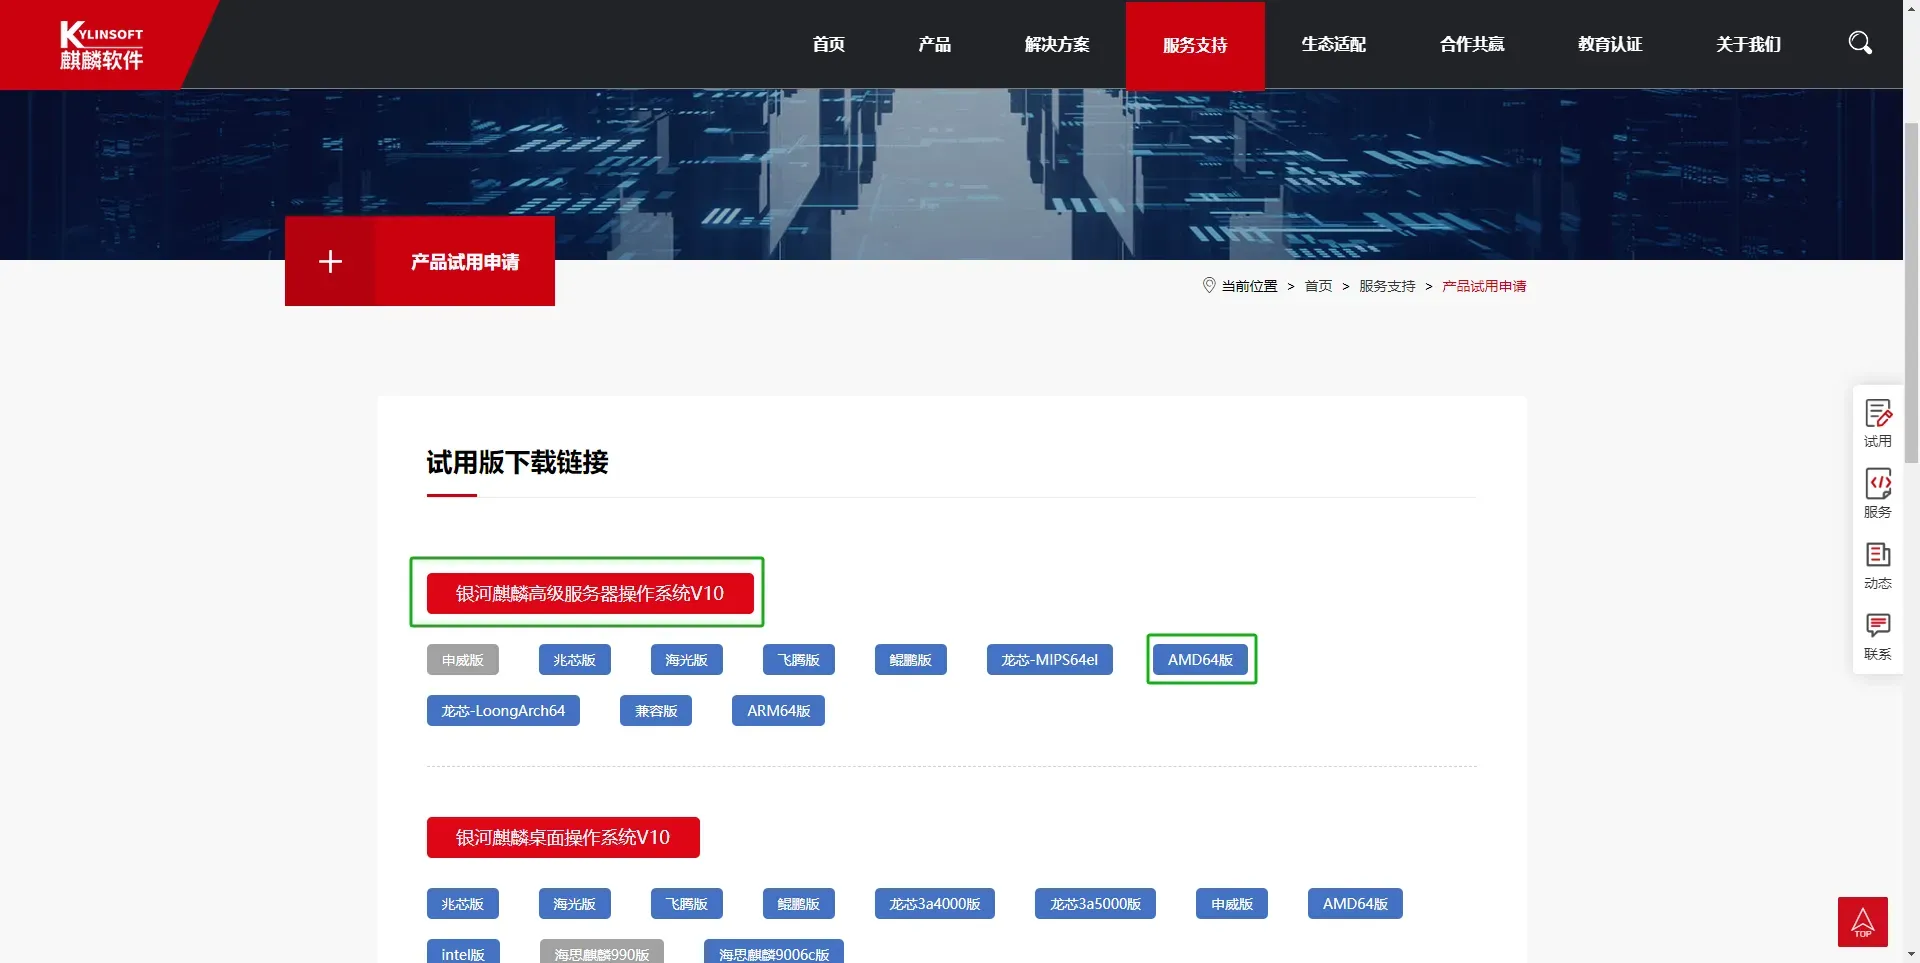
输入手机号 获取验证码 输入验证码后 会跳转到镜像下载界面
跳转到镜像下载界面 如下 选择银河麒麟高级服务器操作系统V10 选择对应的CPU架构
点击下载链接

推荐使用BitTorrent下载,迅雷就可以
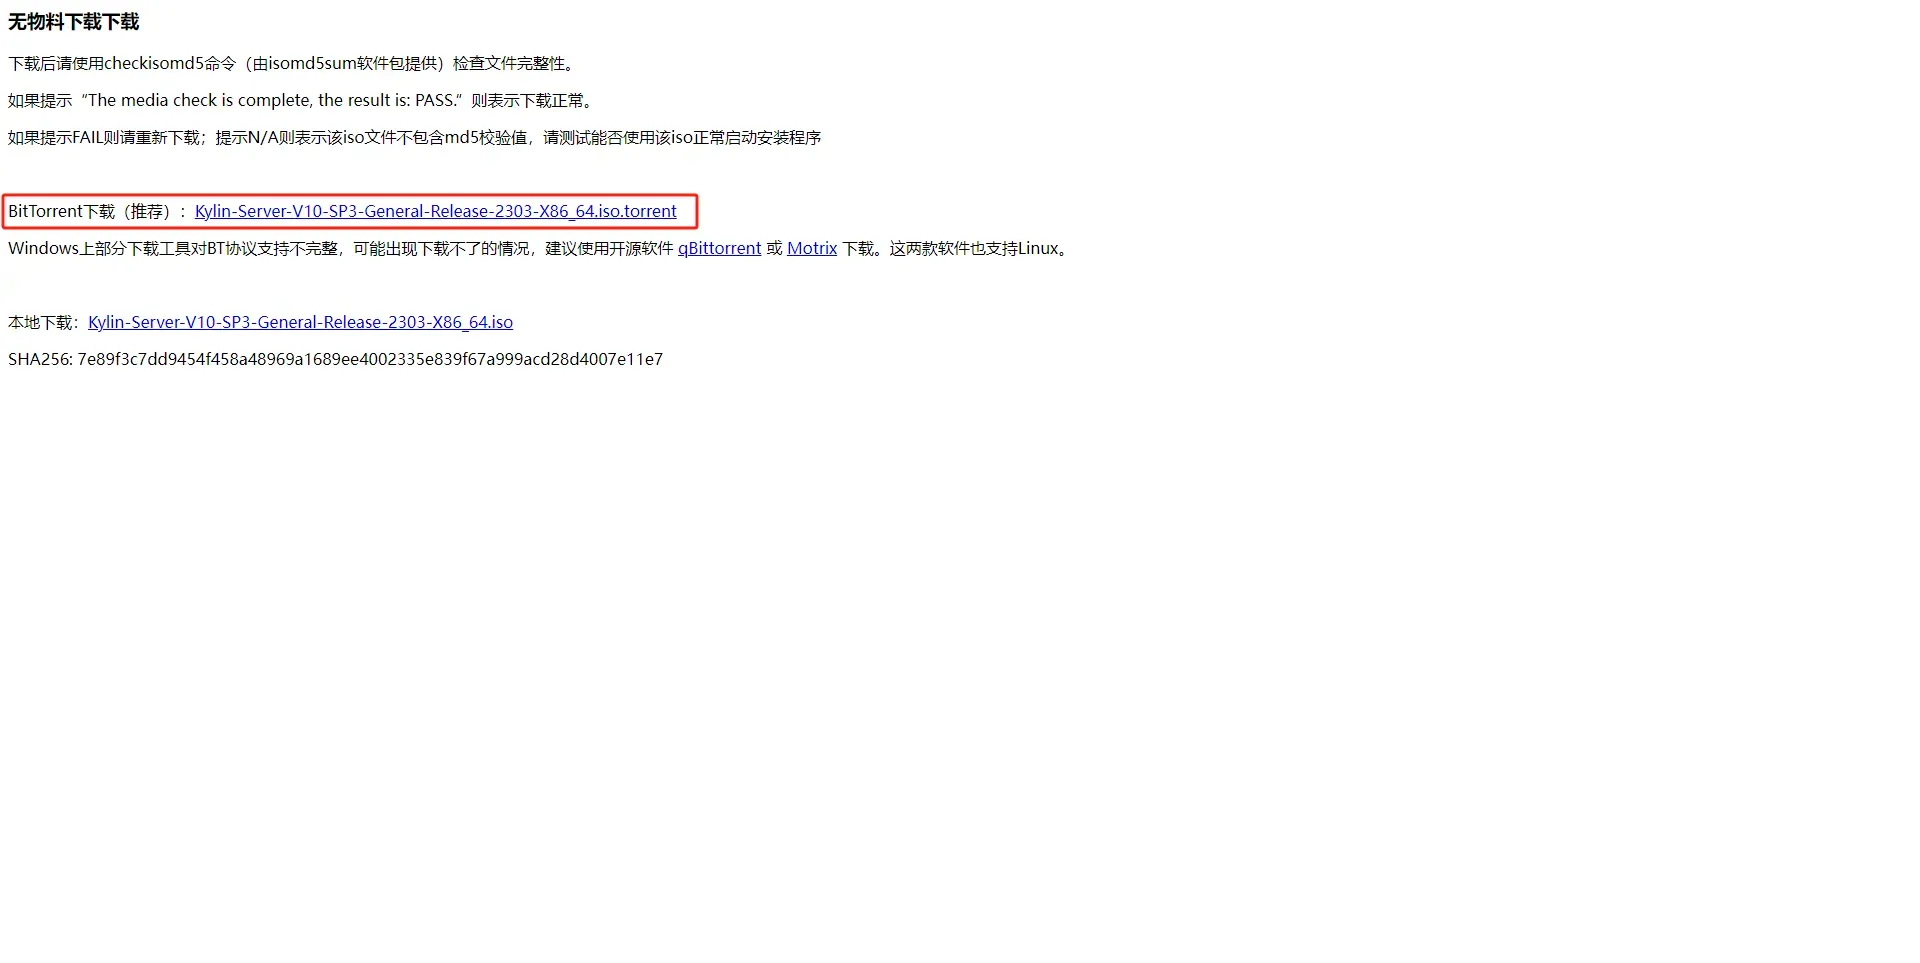
下载完成后
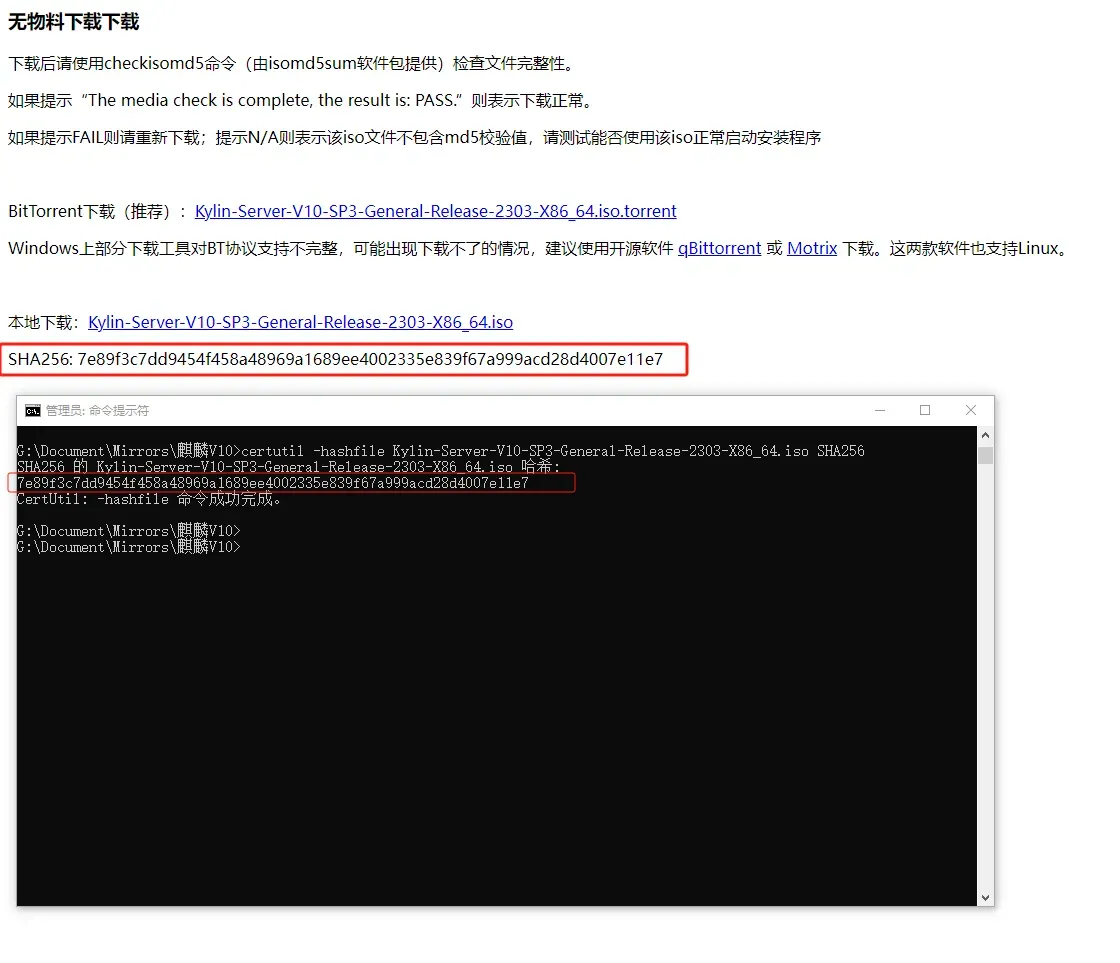
校验文件完整性 对比sha256哈希值 应该是一样的 不一样的说明文件有损坏 需要重新下载
2、VMware安装银河麒麟V10高级服务器操作系统
2.1、新建虚拟机

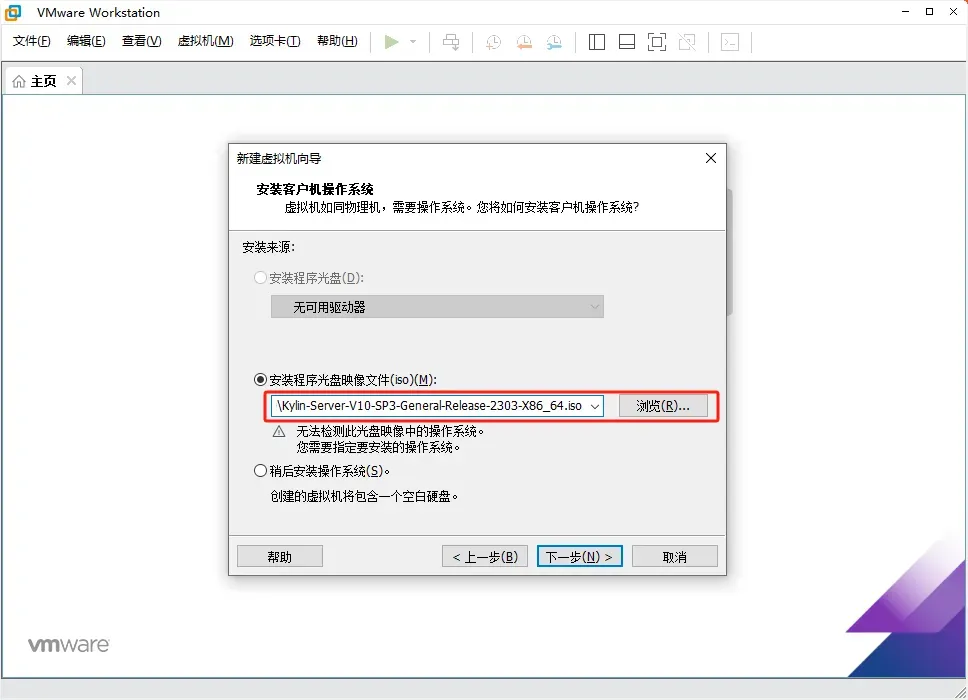
镜像文件选择下载的镜像文件
Kylin-Server-V10-SP3-General-Release-2303-X86_64.iso 点击下一步
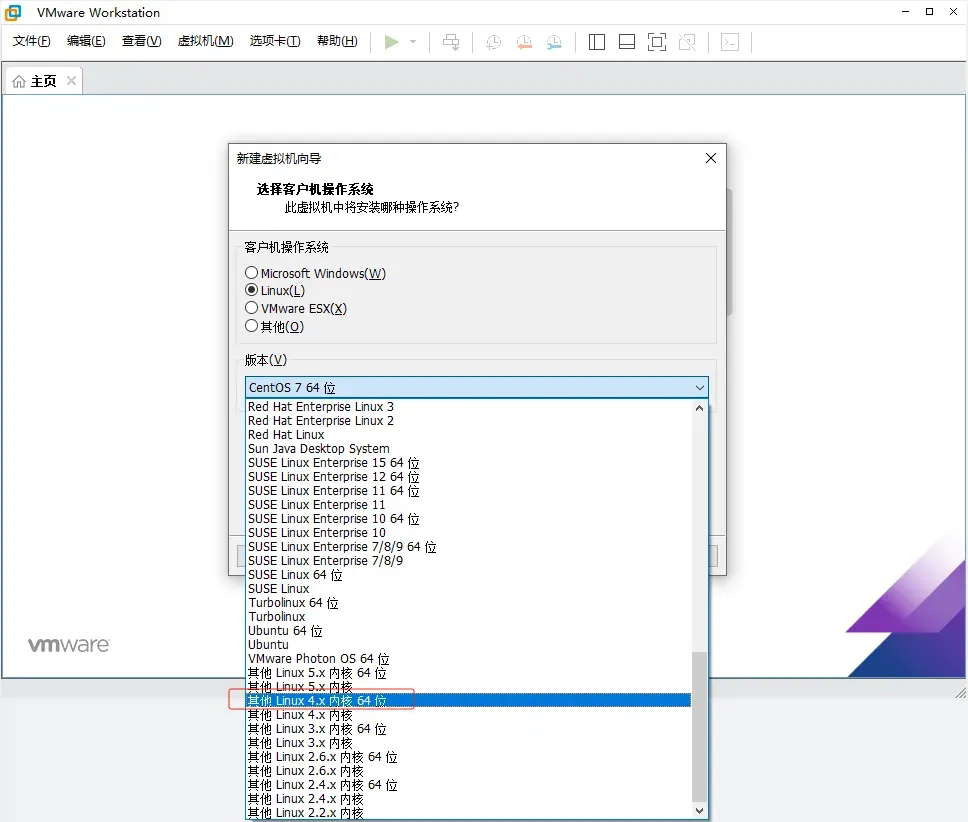
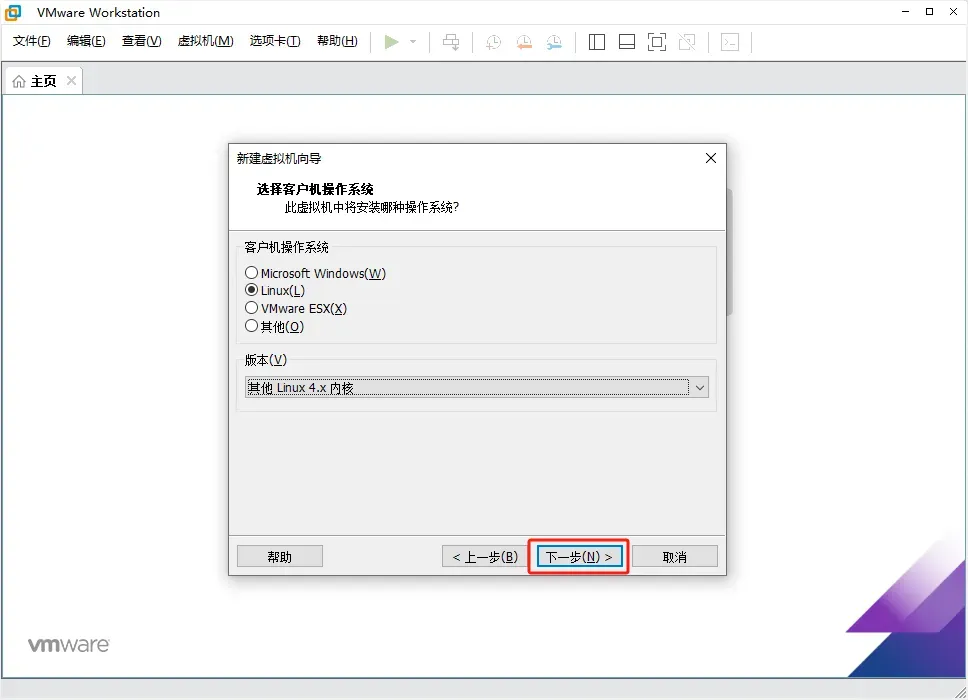
选择 其他 Linux 4.x 内核
然后 下一步
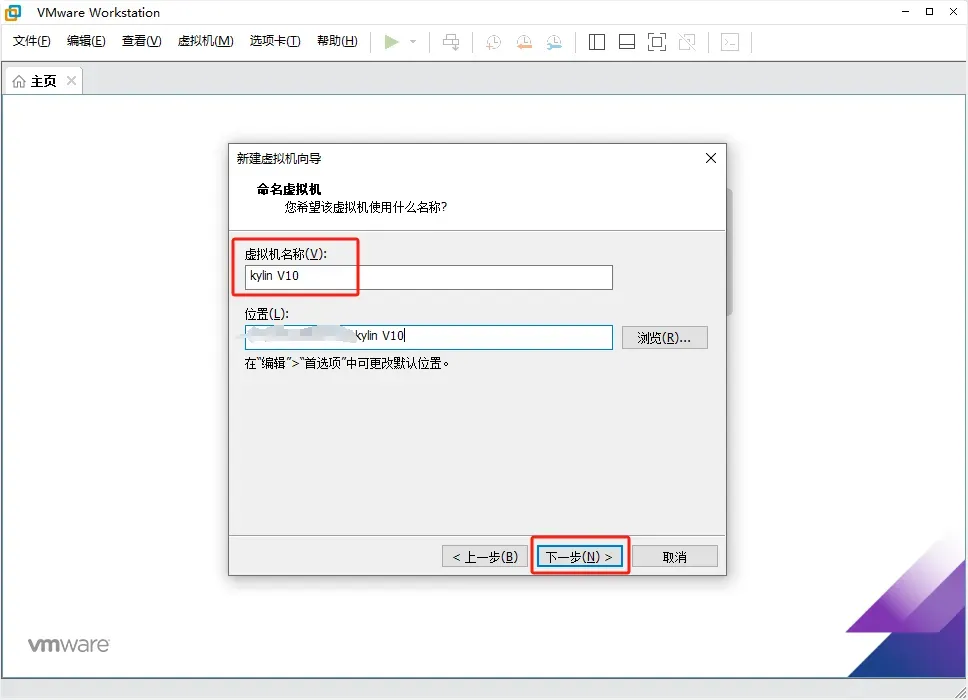
填写虚拟机的名称 然后下一步
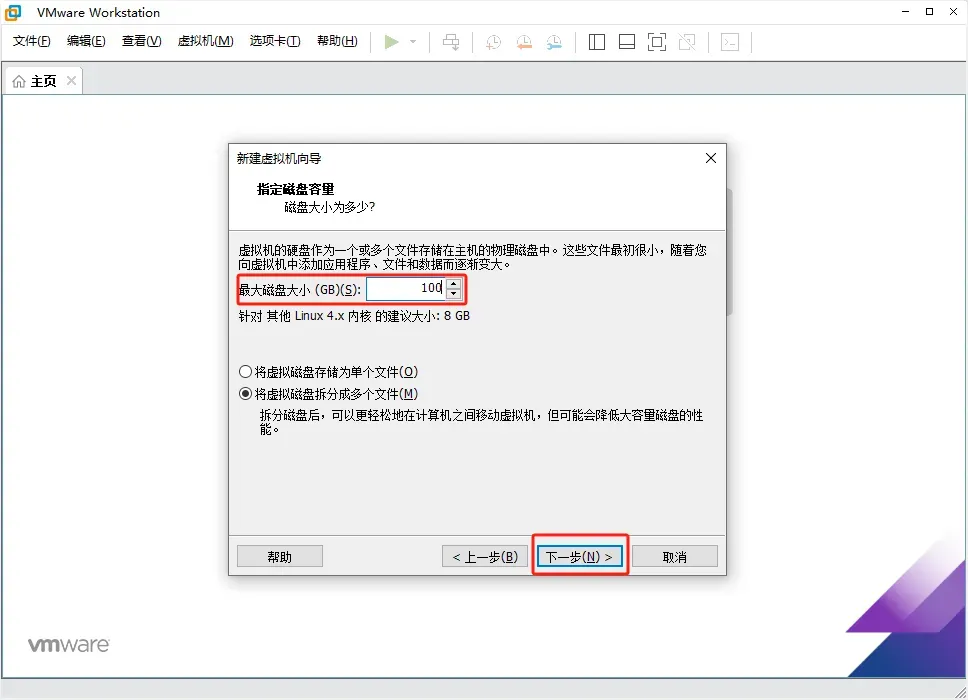
填写磁盘大小 然后下一步
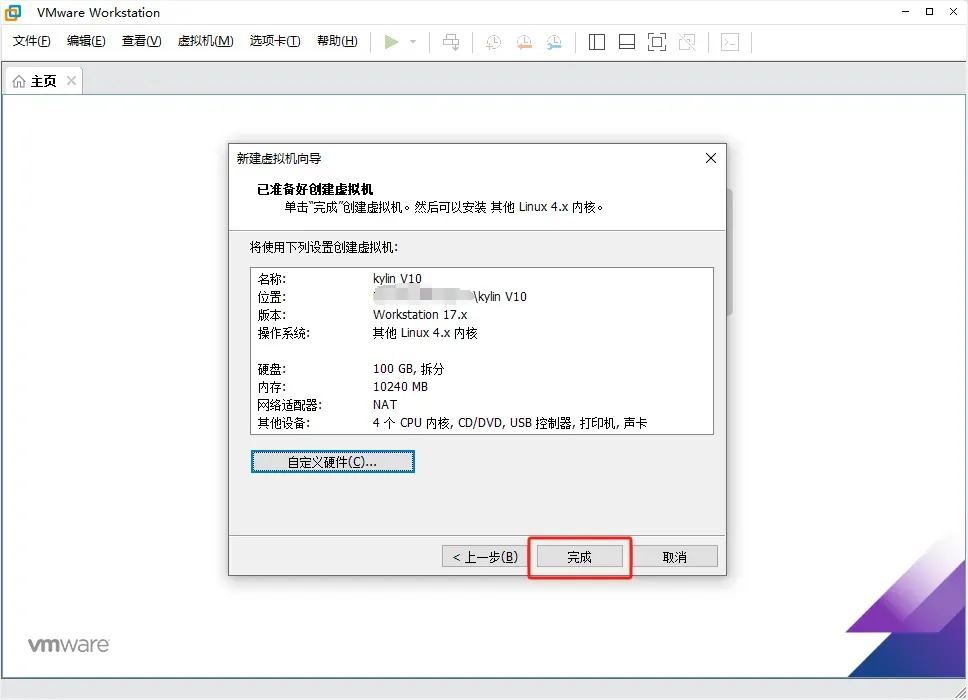
点自定义硬件
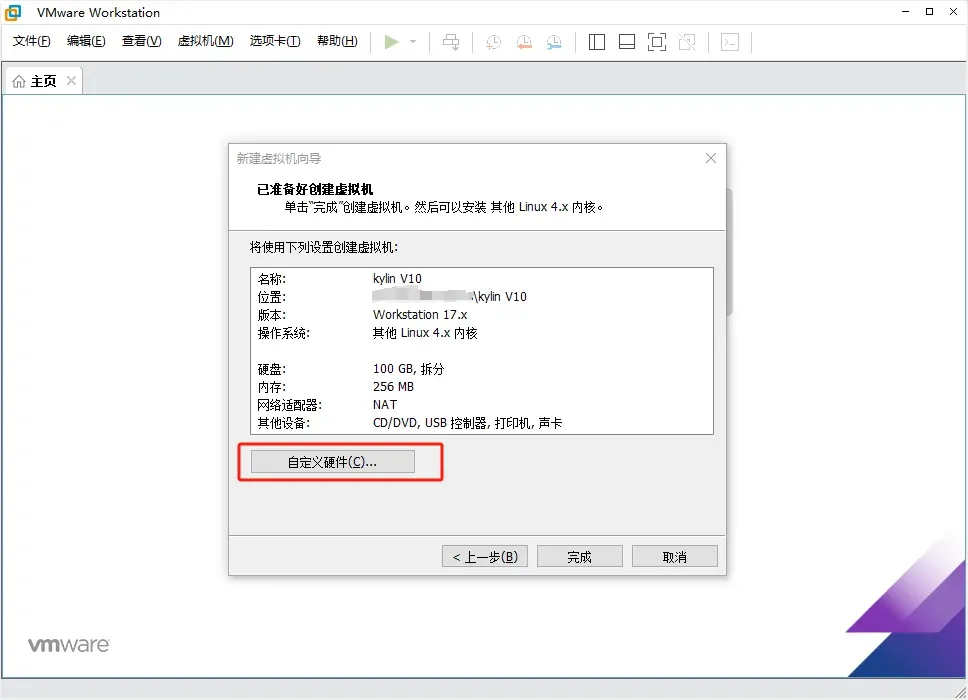
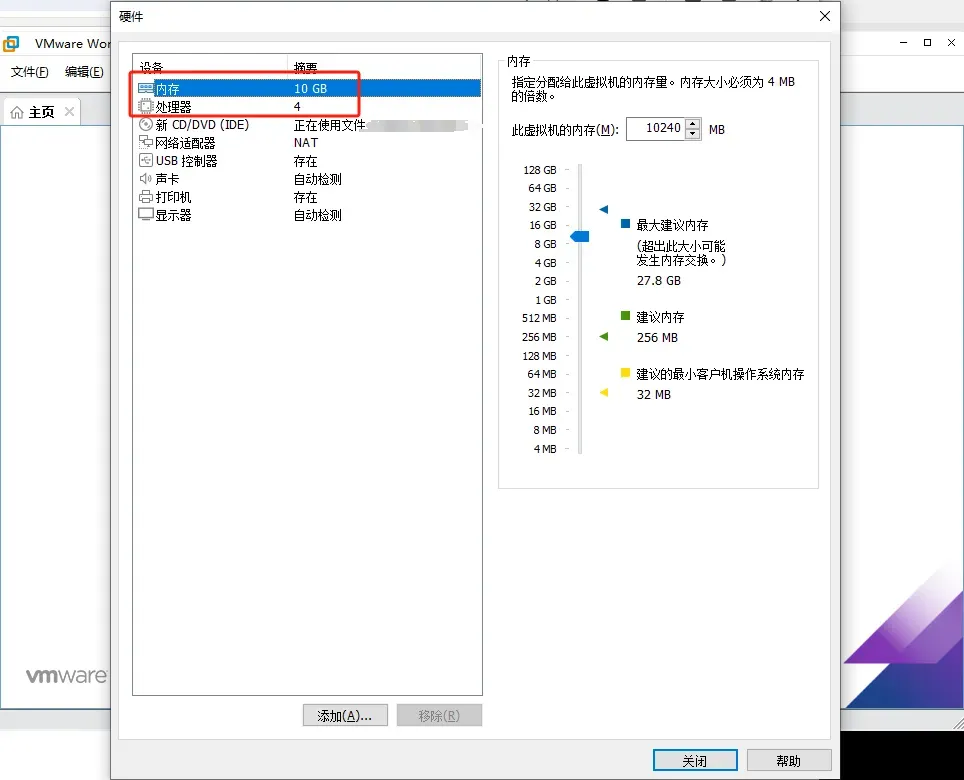
配置 内存 处理器 等
然后点 完成
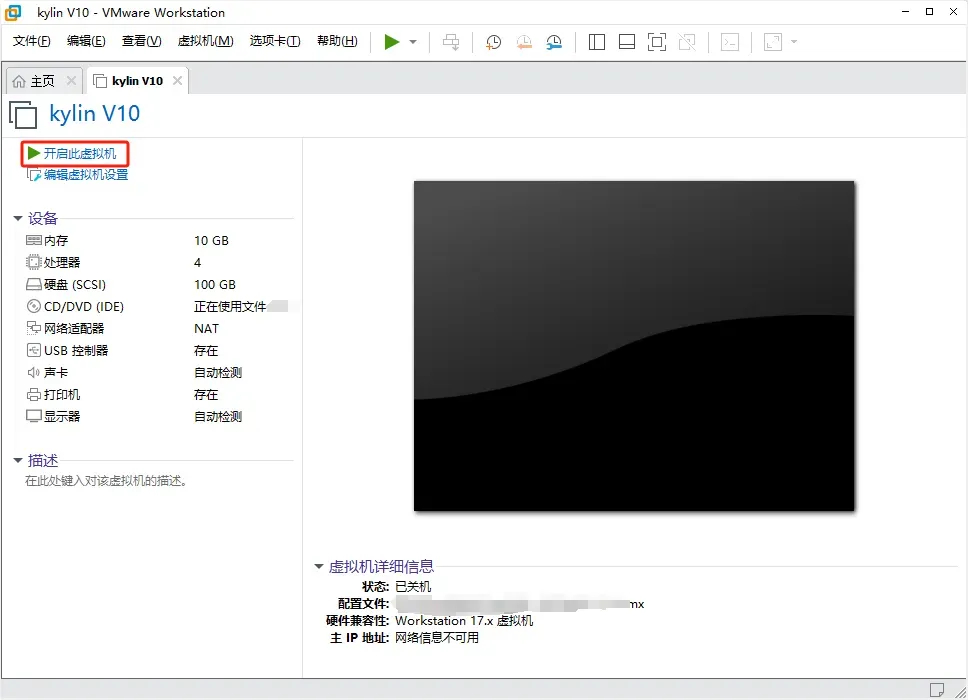
2.2、安装虚拟机
开启虚拟机
选择Install Kylin Linux Aduanced Server V10 然后回车
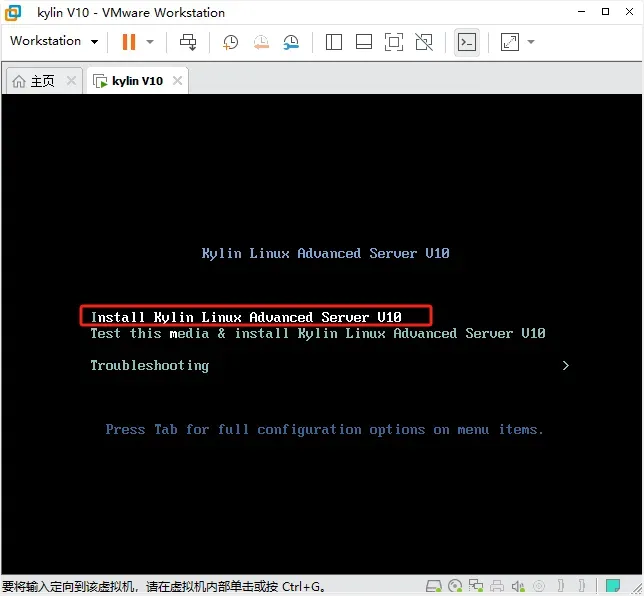
等待进入安装界面
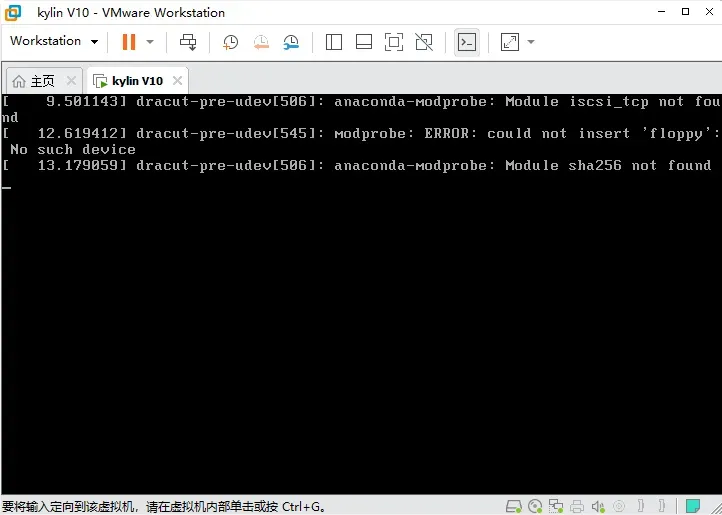
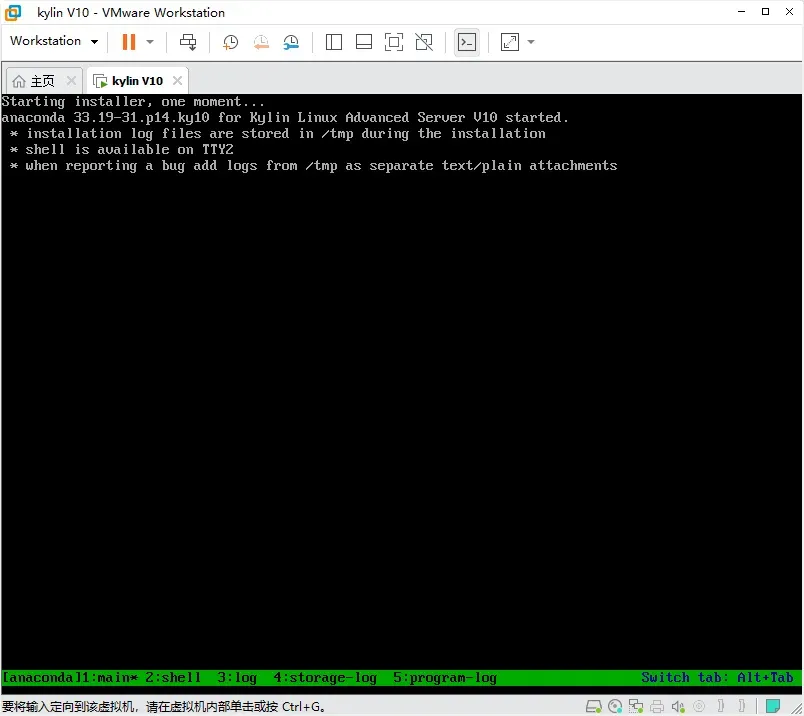
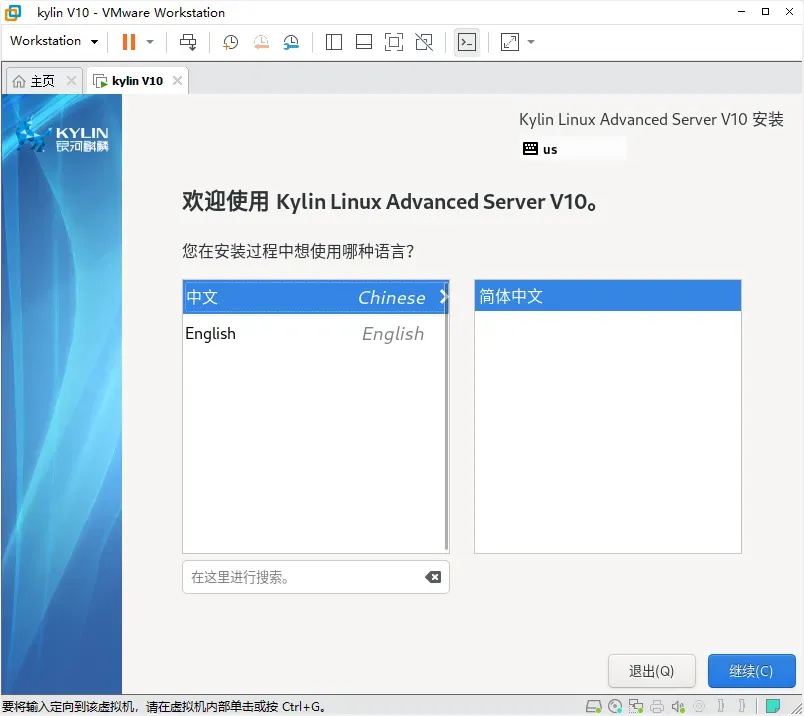
进入安装界面了
选择中文
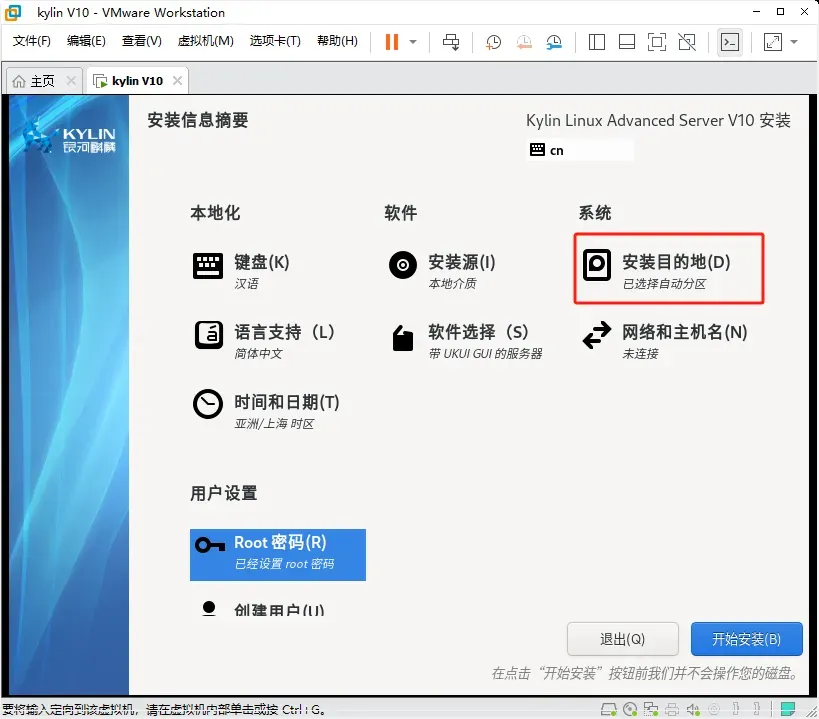
选择安装目的地
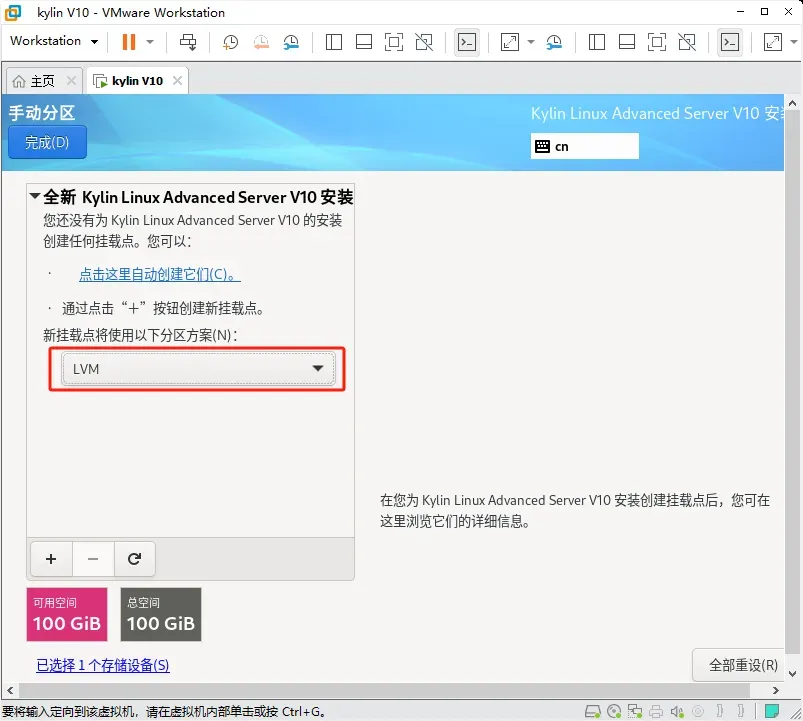
存储配置 选择自定义
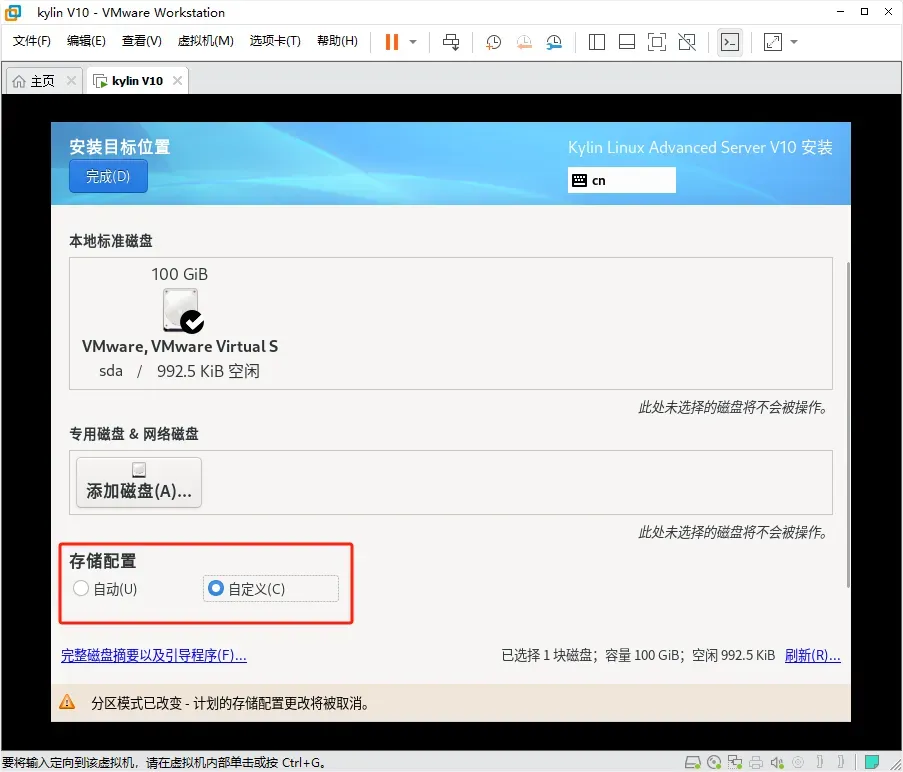
新挂载点将使用以下分区方案(N): 选择LVM
磁盘100G,进行以下分区策略
| 挂载点 | 分区名称 | 分区大小 | 分区文件系统 | 设备类型 |
|---|---|---|---|---|
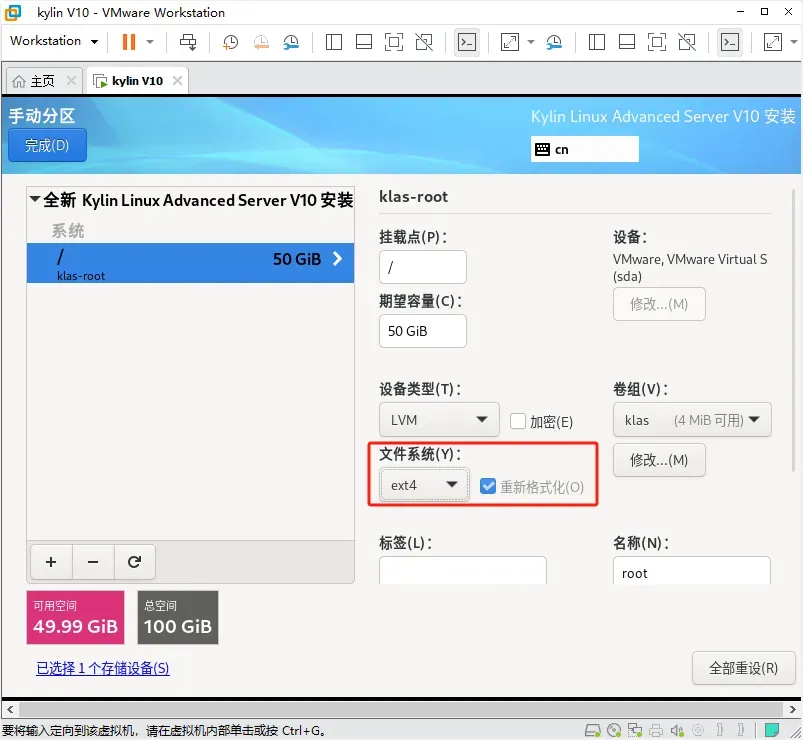
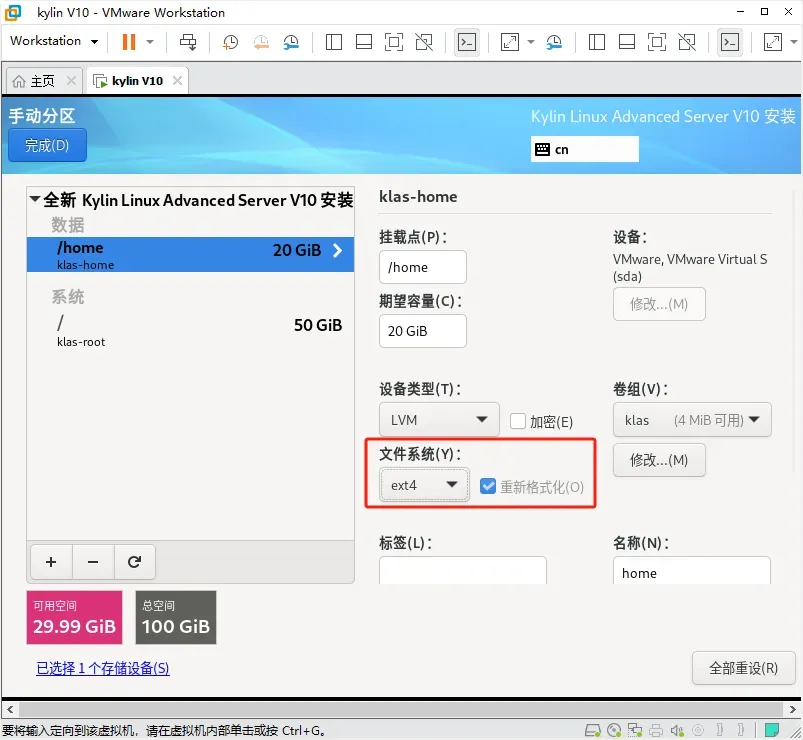
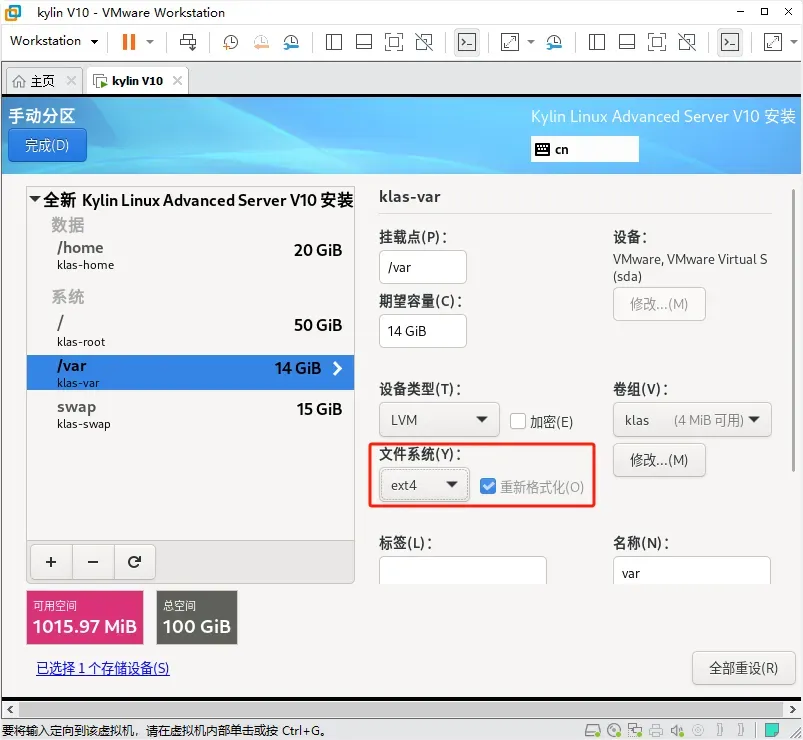
| / | 根分区 | 50G | ext4 | LVM |
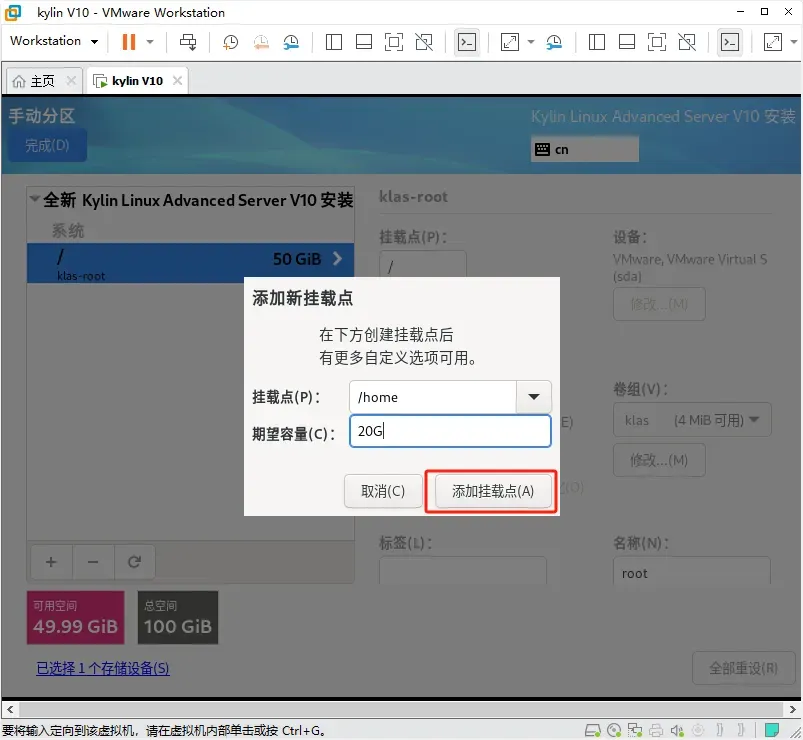
| /home | home分区 | 20G | ext4 | LVM |
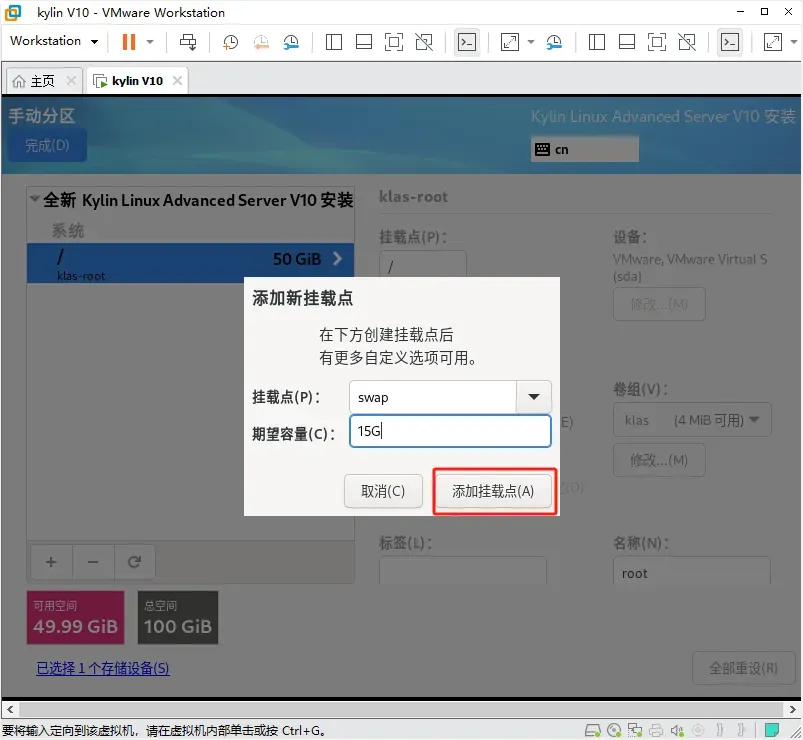
| SWAP | SWAP分区 | 15G | SWAP | LVM |
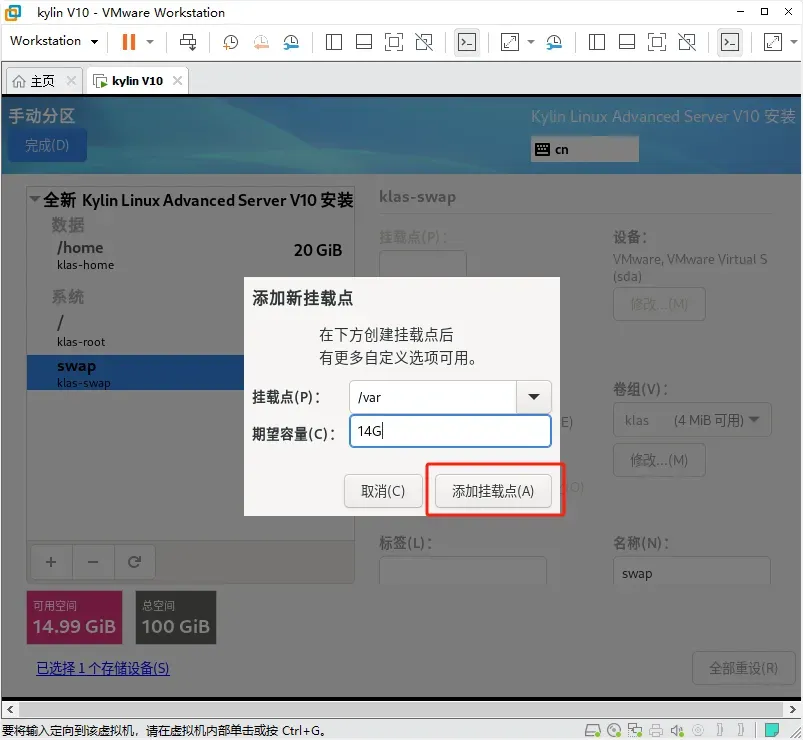
| /var | var分区 | 14G | ext4 | LVM |
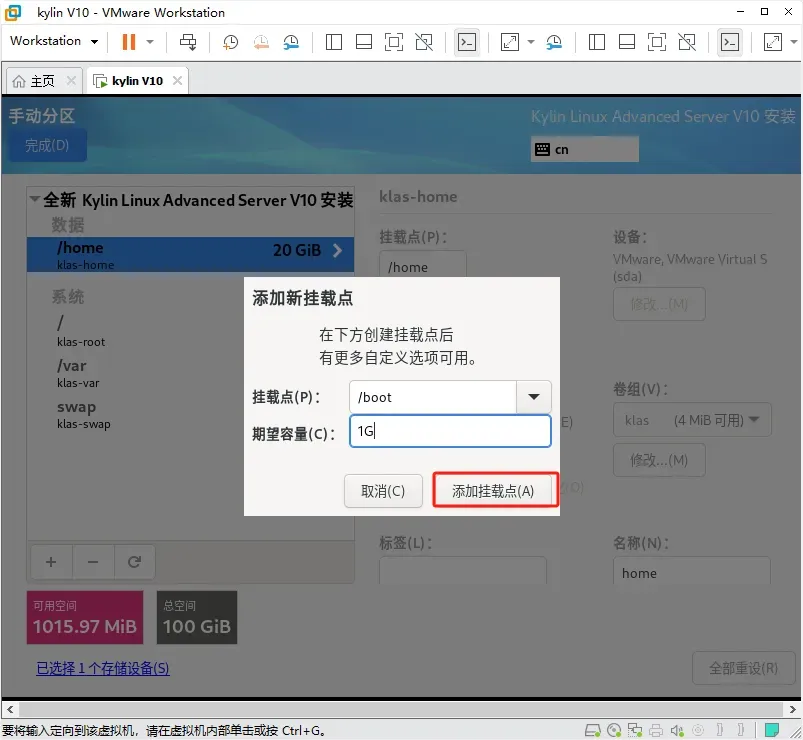
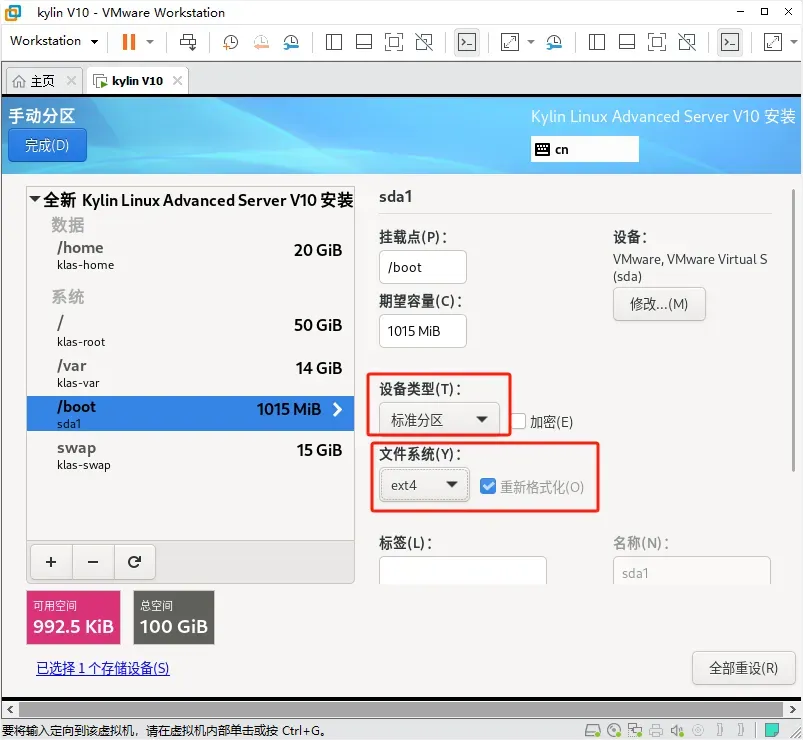
| /boot | boot分区 | 1G | ext4 | Stand Partition |
| biosboot | biosboot分区 | 2M | BIOS Boot | Stand Partition |
点击+ 创建根分区
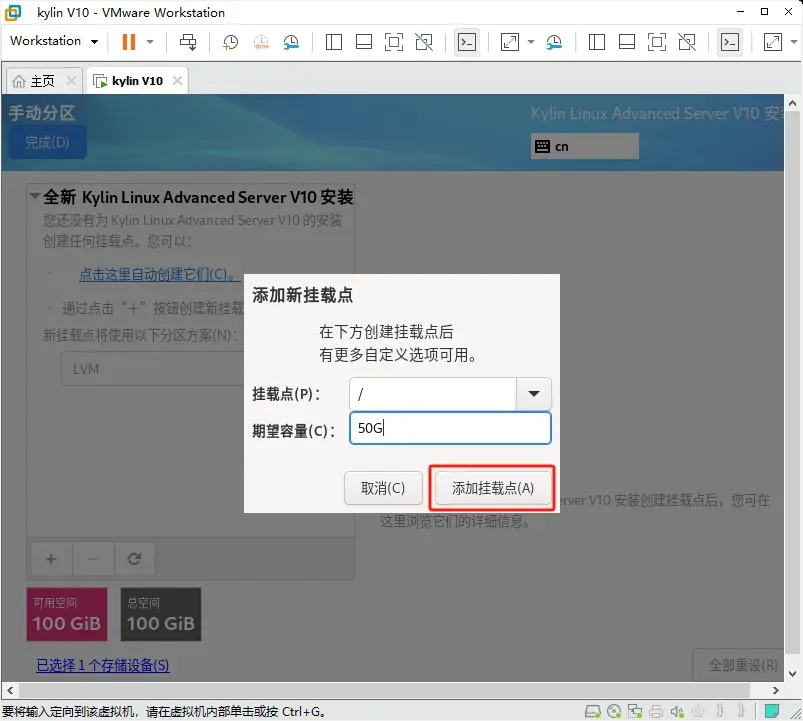
选择文件系统是 EXT4
然后点击 左下角 + 创建 第二个分区 /home

然后点击 左下角 + 创建 第三个分区 SWAP

然后点击 左下角 + 创建 第四个分区 /var
然后点击 左下角 + 创建 第五个分区 /boot
然后点击 左下角 + 创建 第六个分区 biosboot
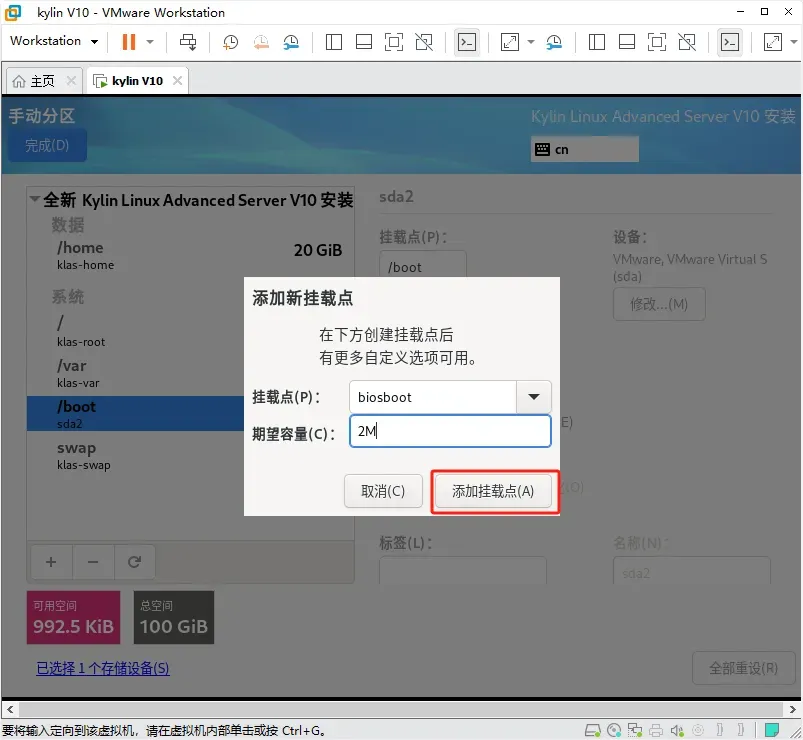
添加biosboot时可能遇到剩余空间不足2M的情况 导致无法添加biosboot分区
解决方法是 先缩小/var分区 预留出来1G
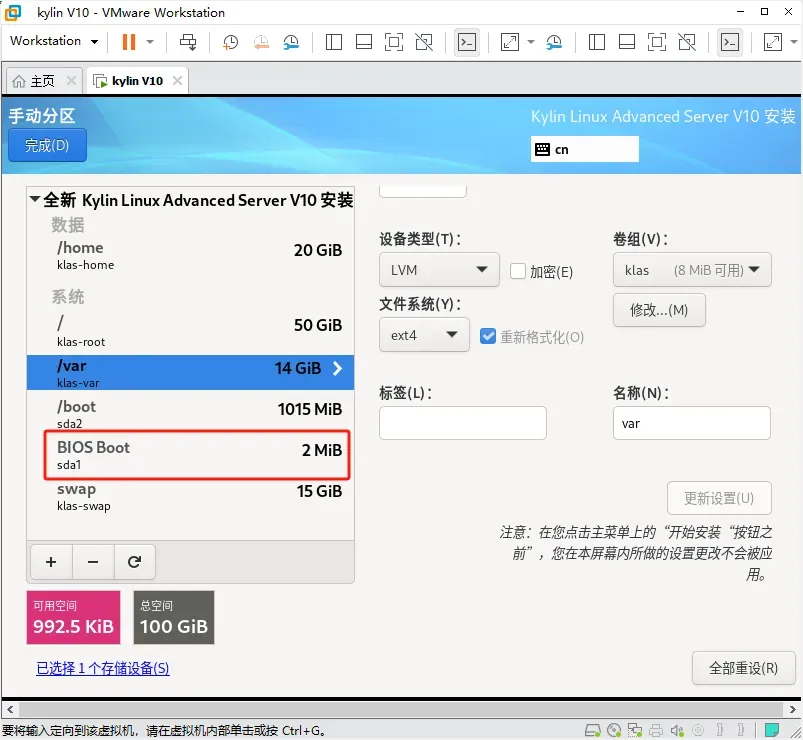
添加完成biosboot后,再把剩余所有空间分配给/var
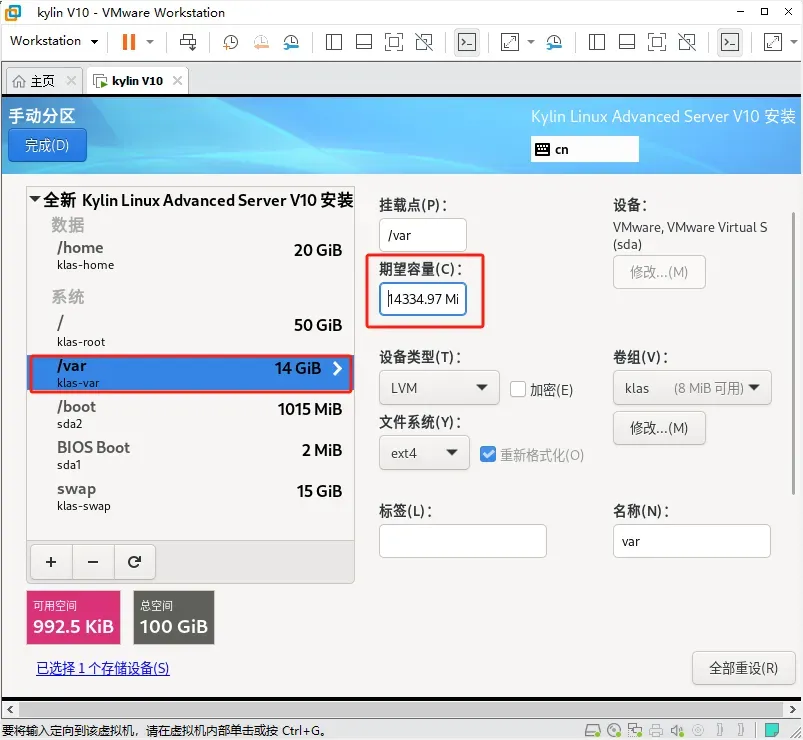
下拉页面 点击更新设置 即可更新/var分区的大小
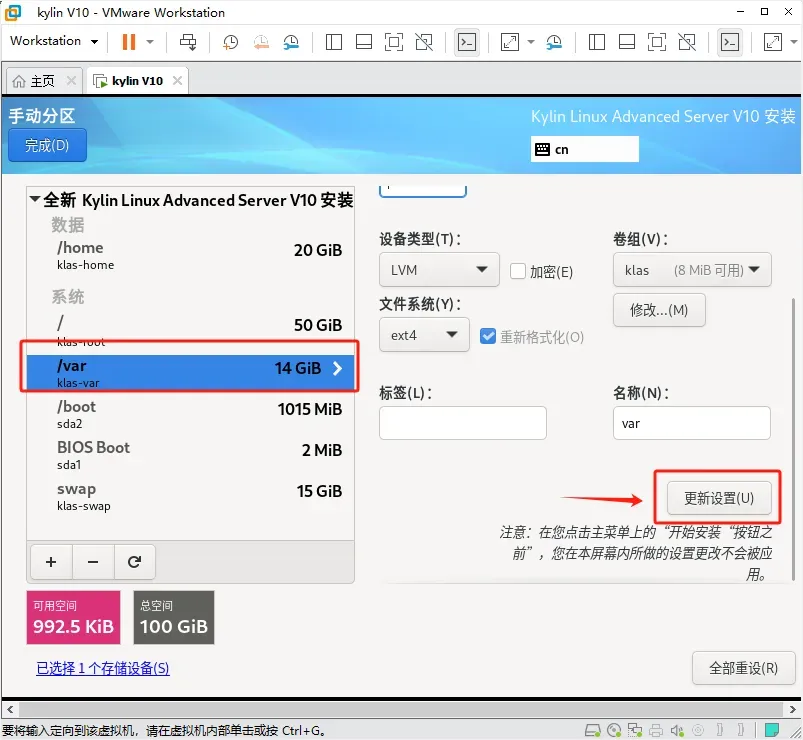
注意页面左下角会显示 当前剩余 可用空间
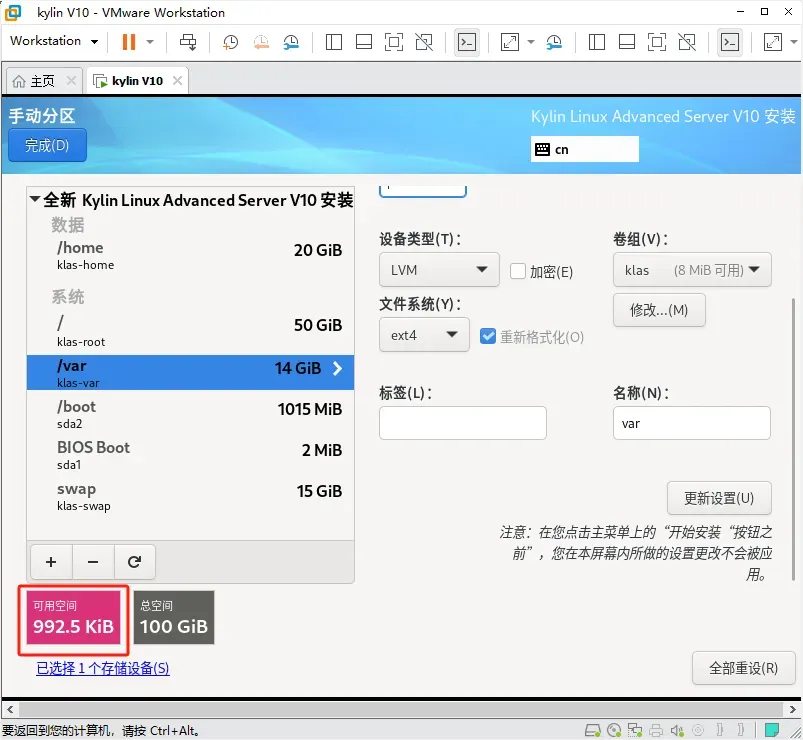
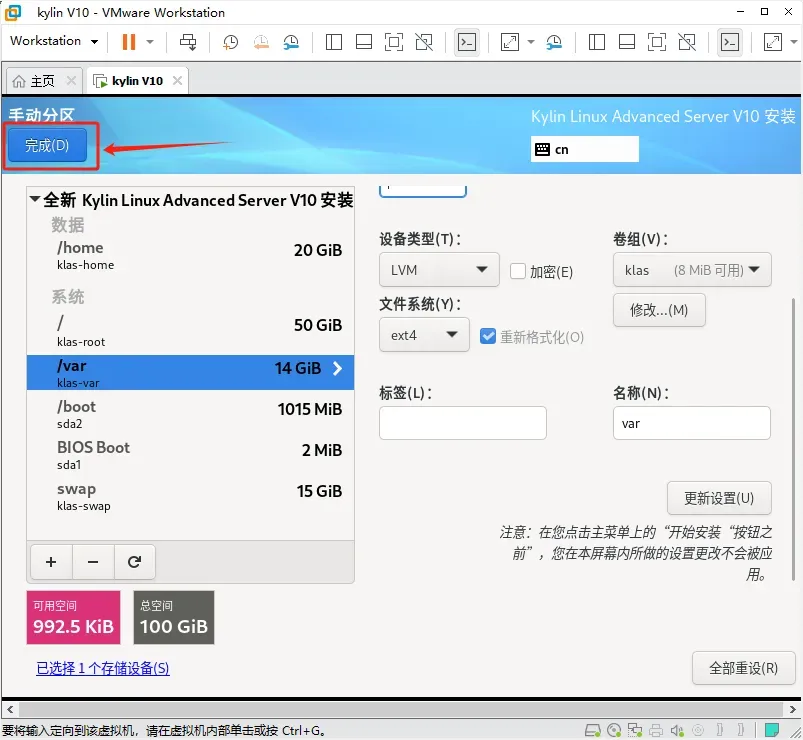
至此 分区创建完成
点击左上角 的 完成

下一步是 设置root账户密码

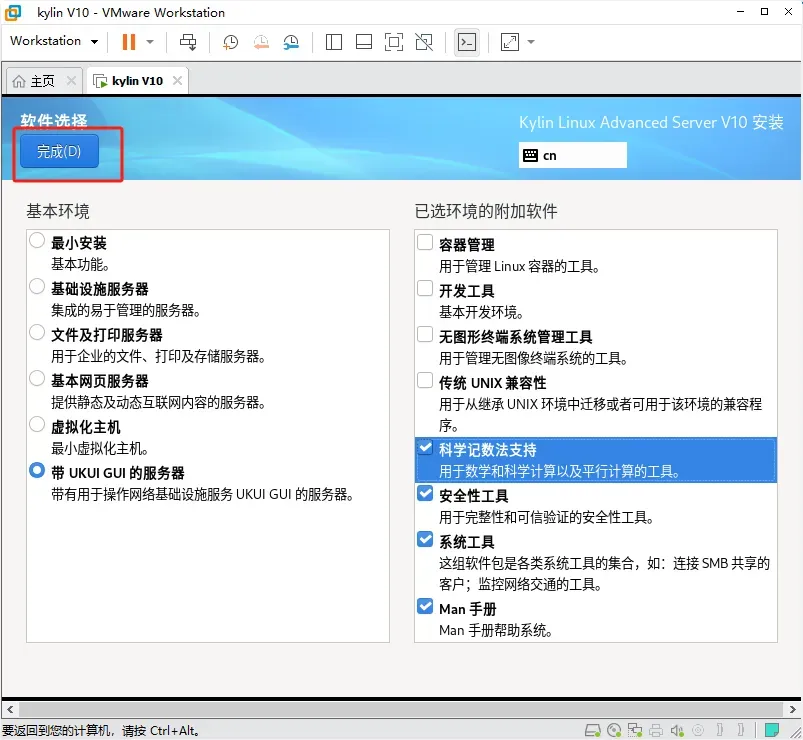
软件选择
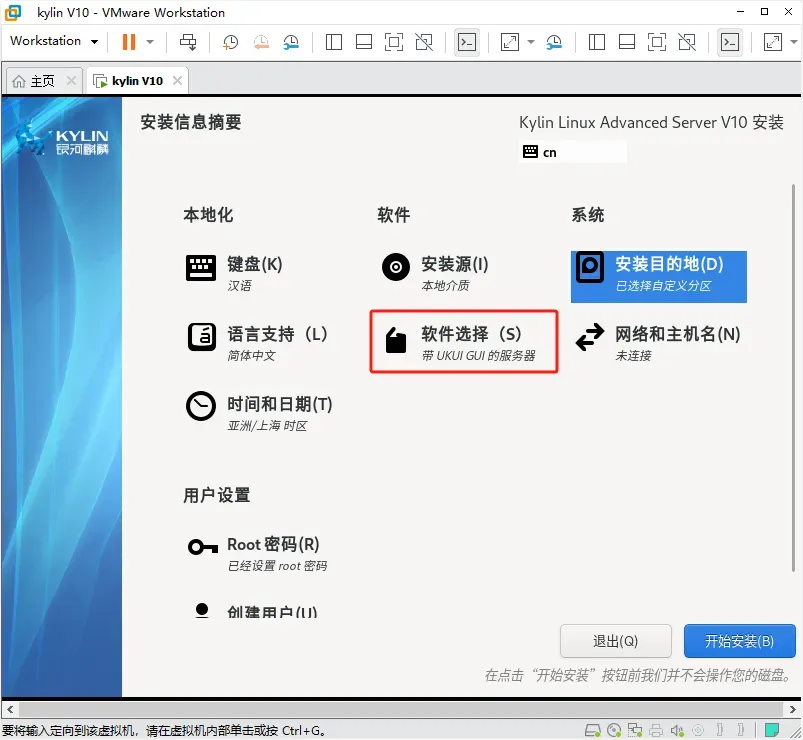
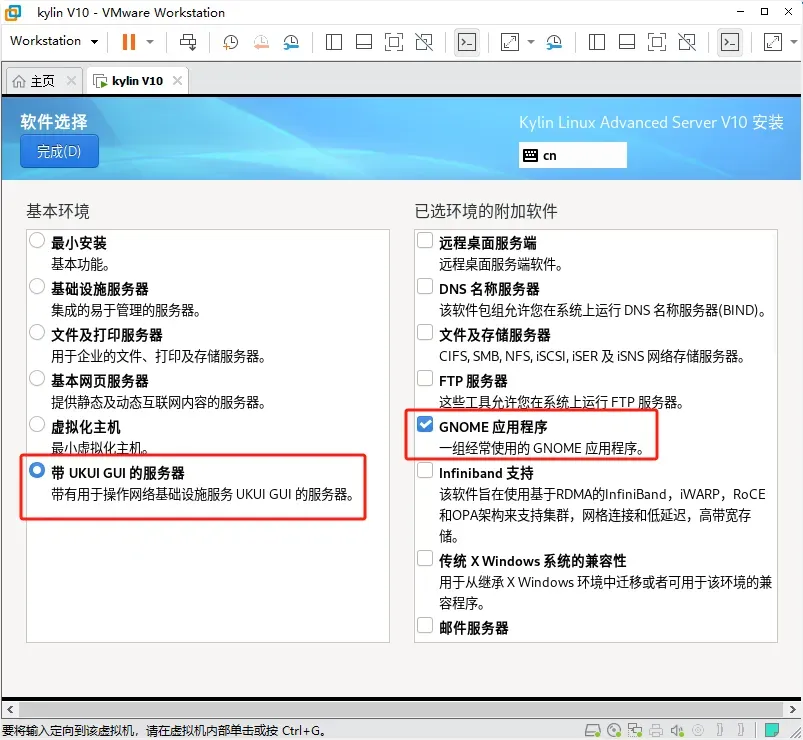
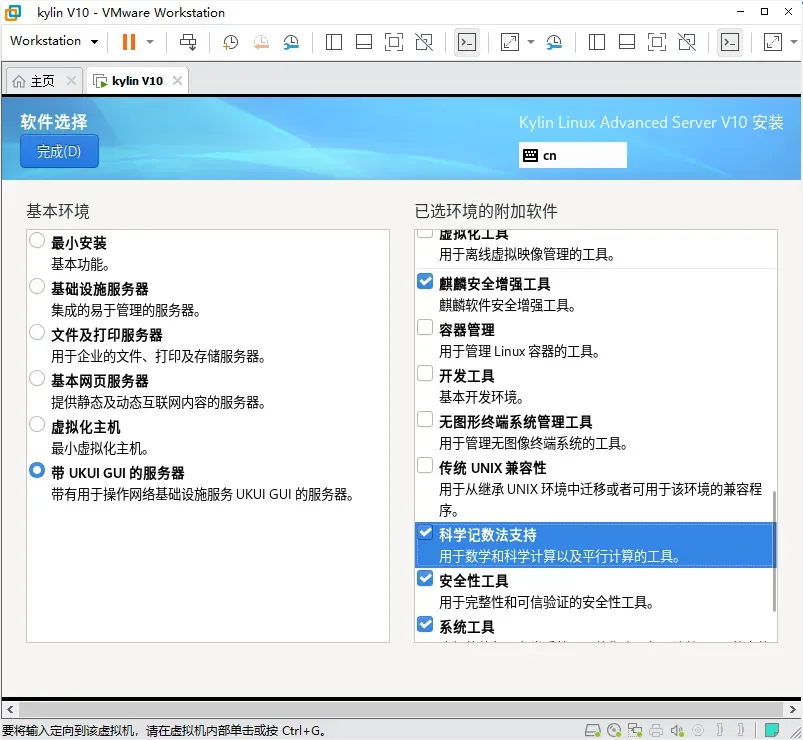
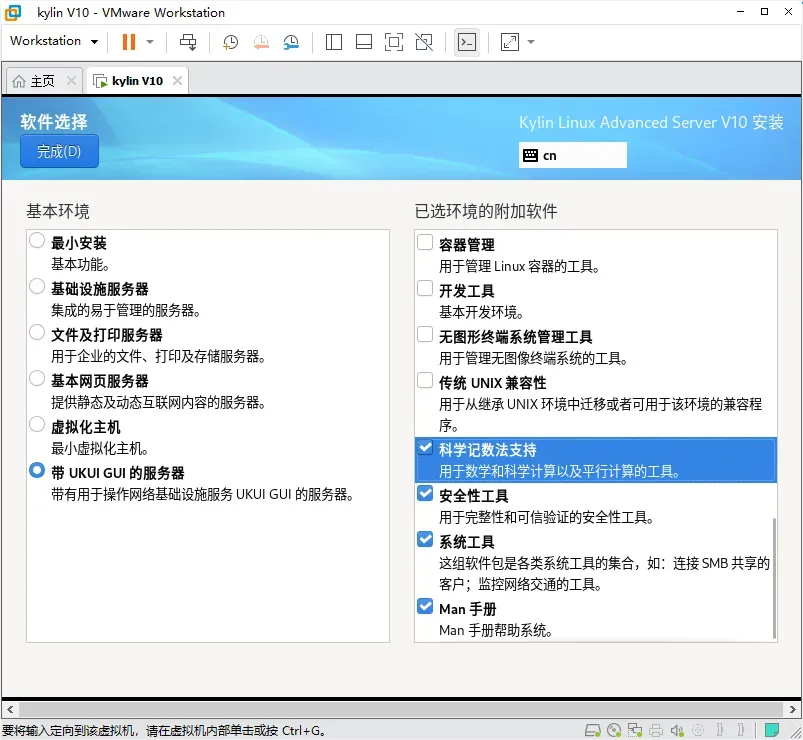
选择组件完成后 然后点击左上角的完成
主机名配置

点击应用后 显示当前主机名是kylin
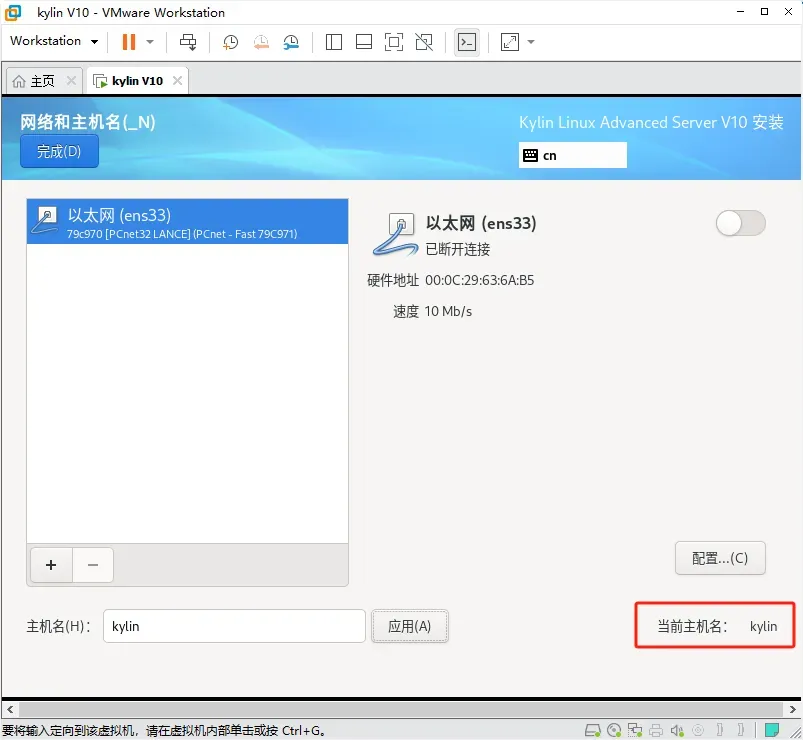
然后点击左上角 完成

最后点击 开始安装
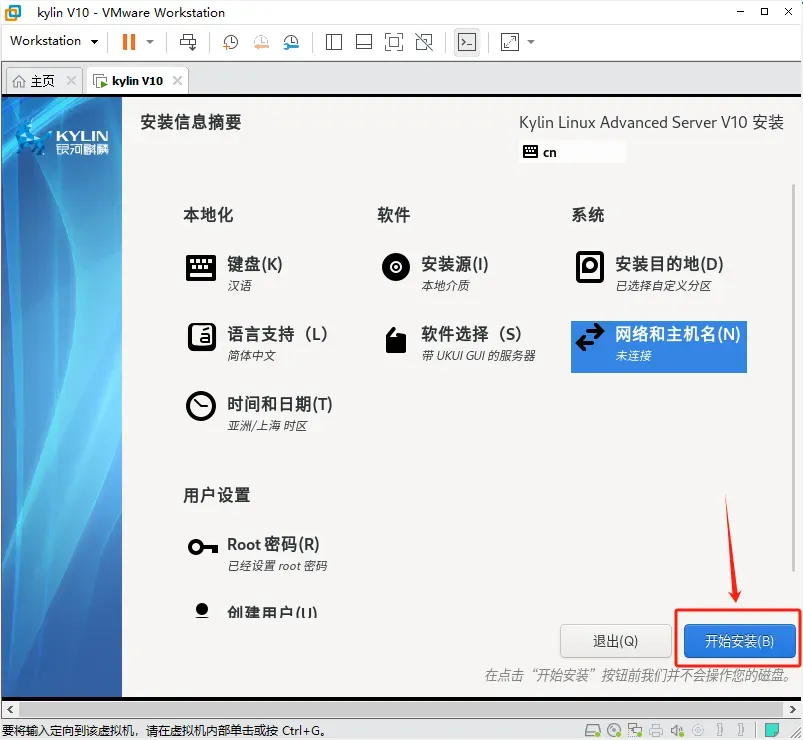

最开始就是创建 我们自定义的分区
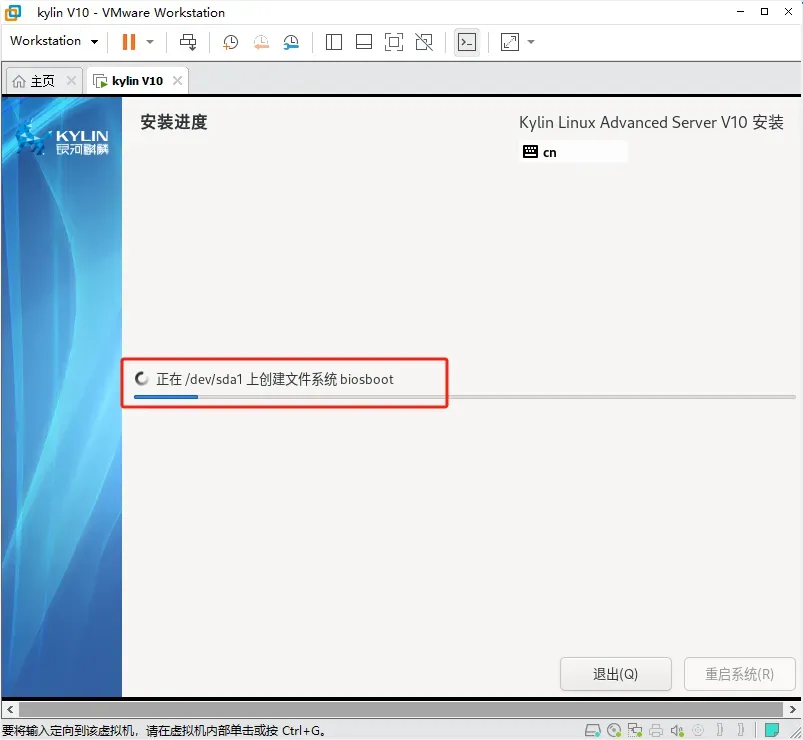
接下来 等待安装完成 不会太久
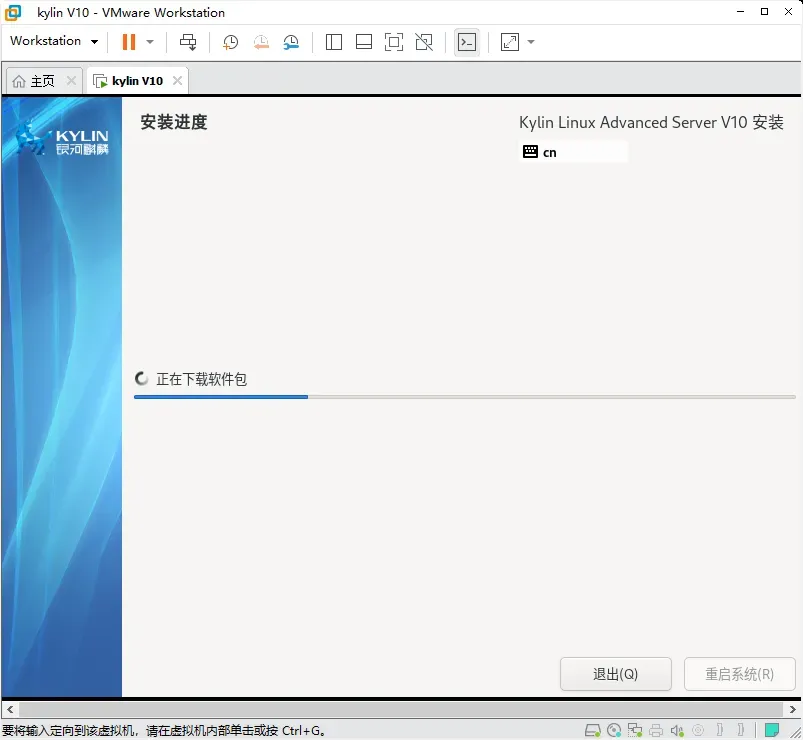
显示安装完成 既是已经安装成功 点击 重启系统

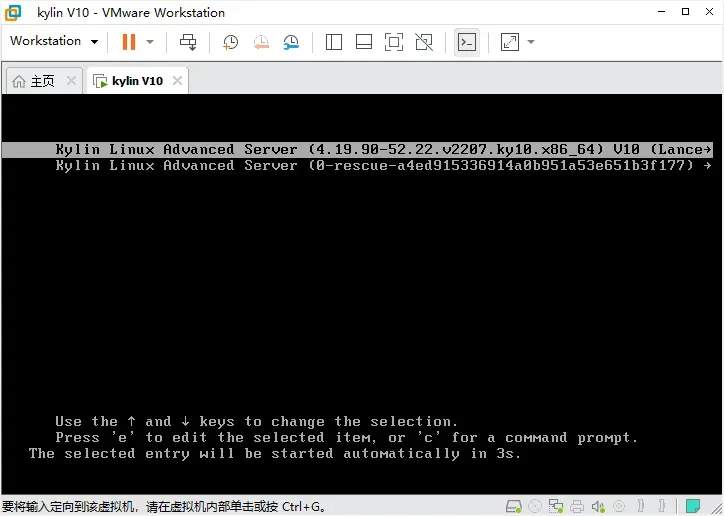
等待系统重启
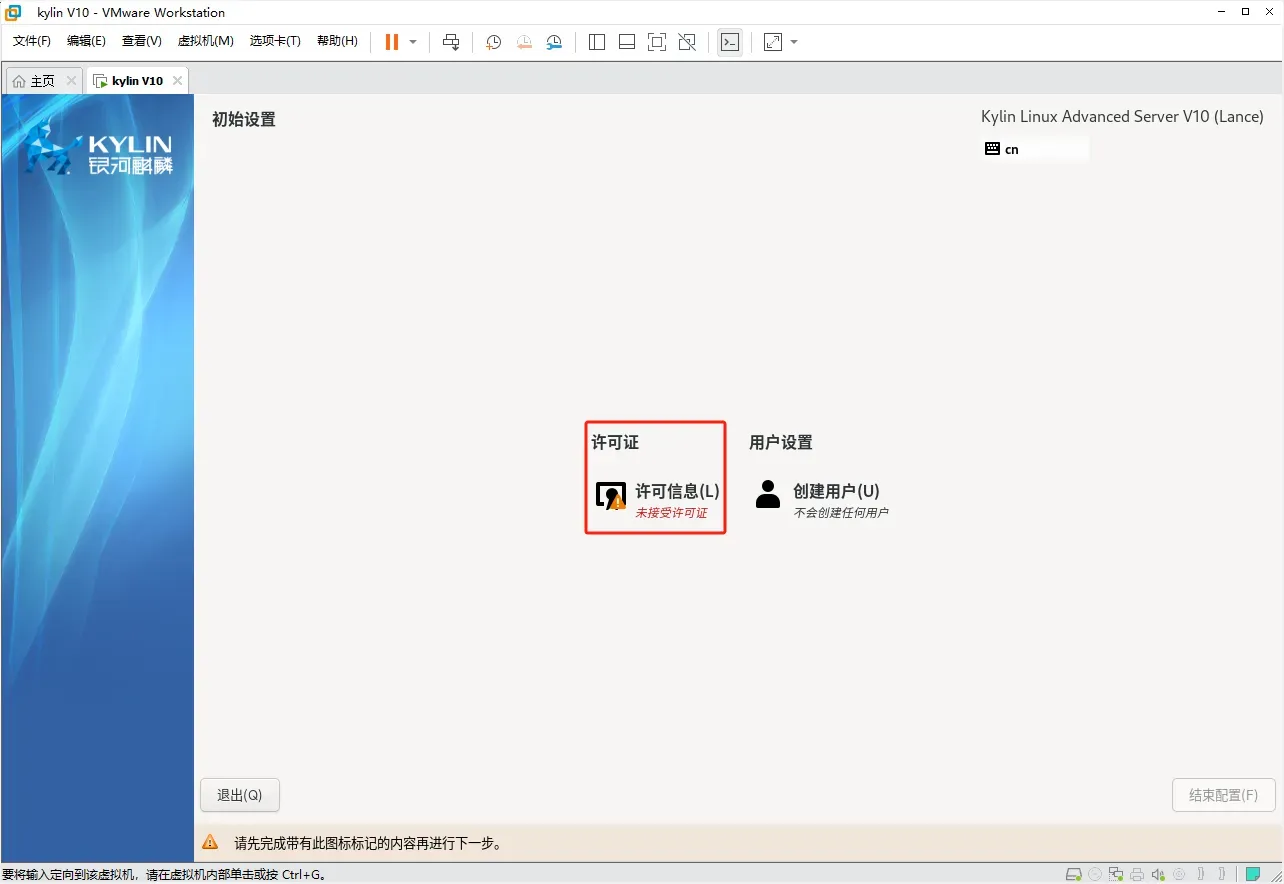
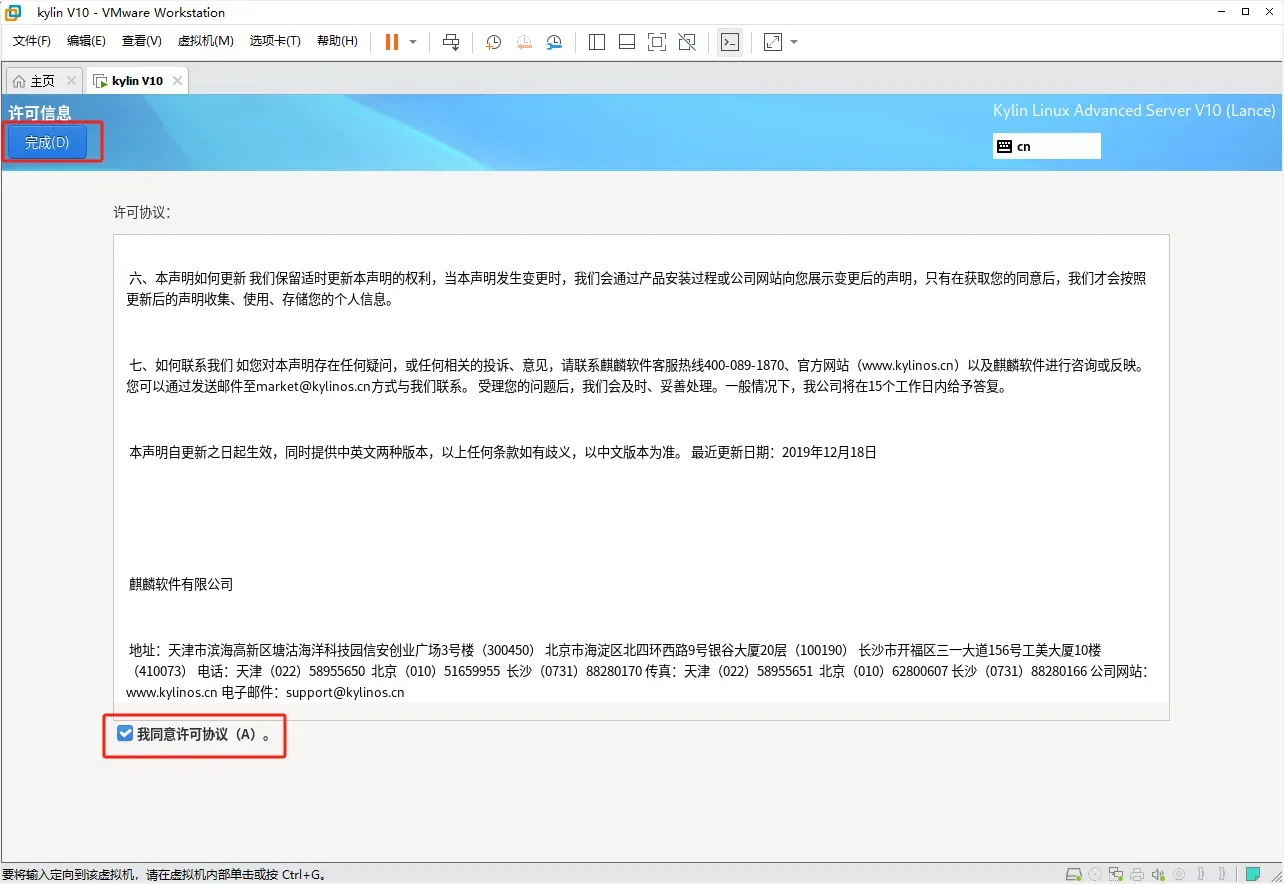
点击 我同意许可协议 (A) 和 左上角 完成
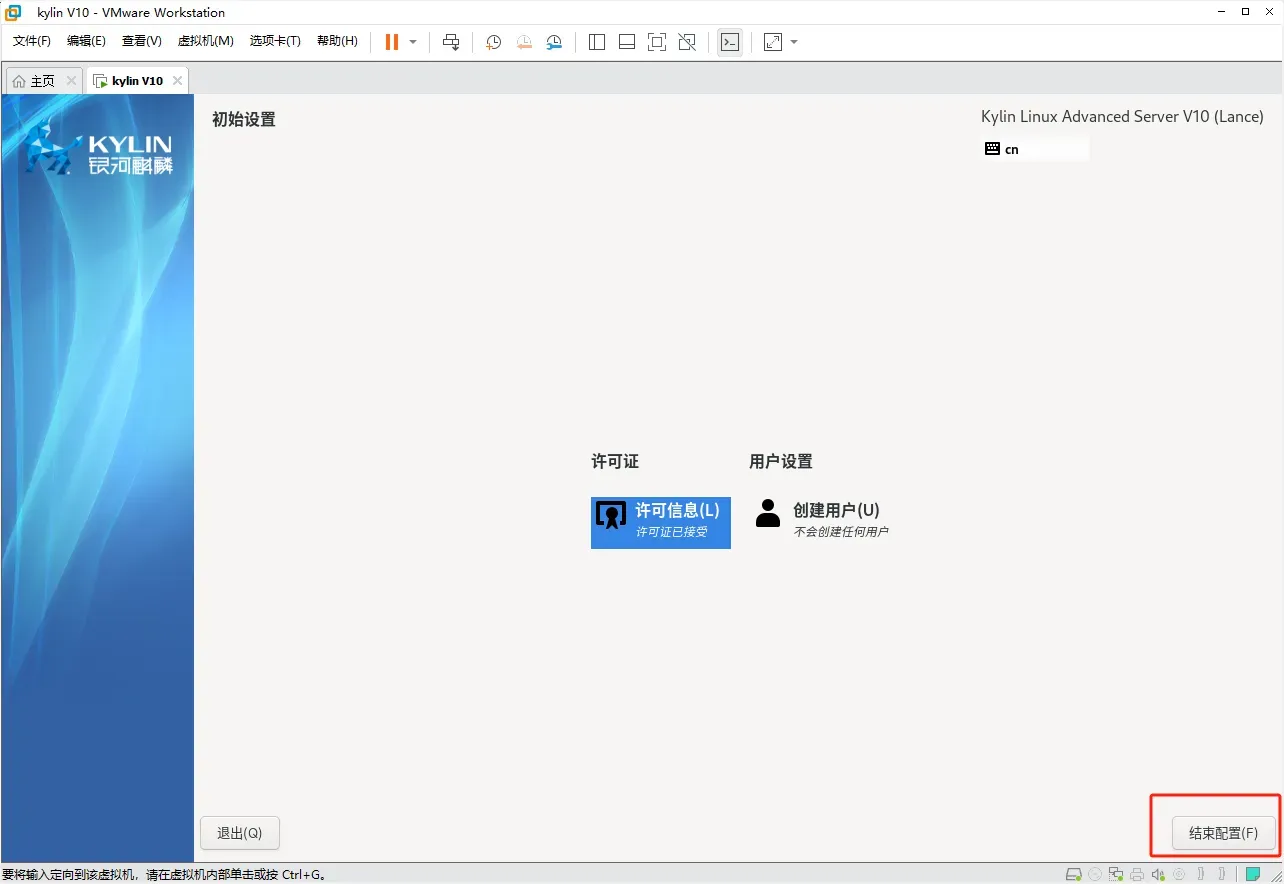
点击 结束配置
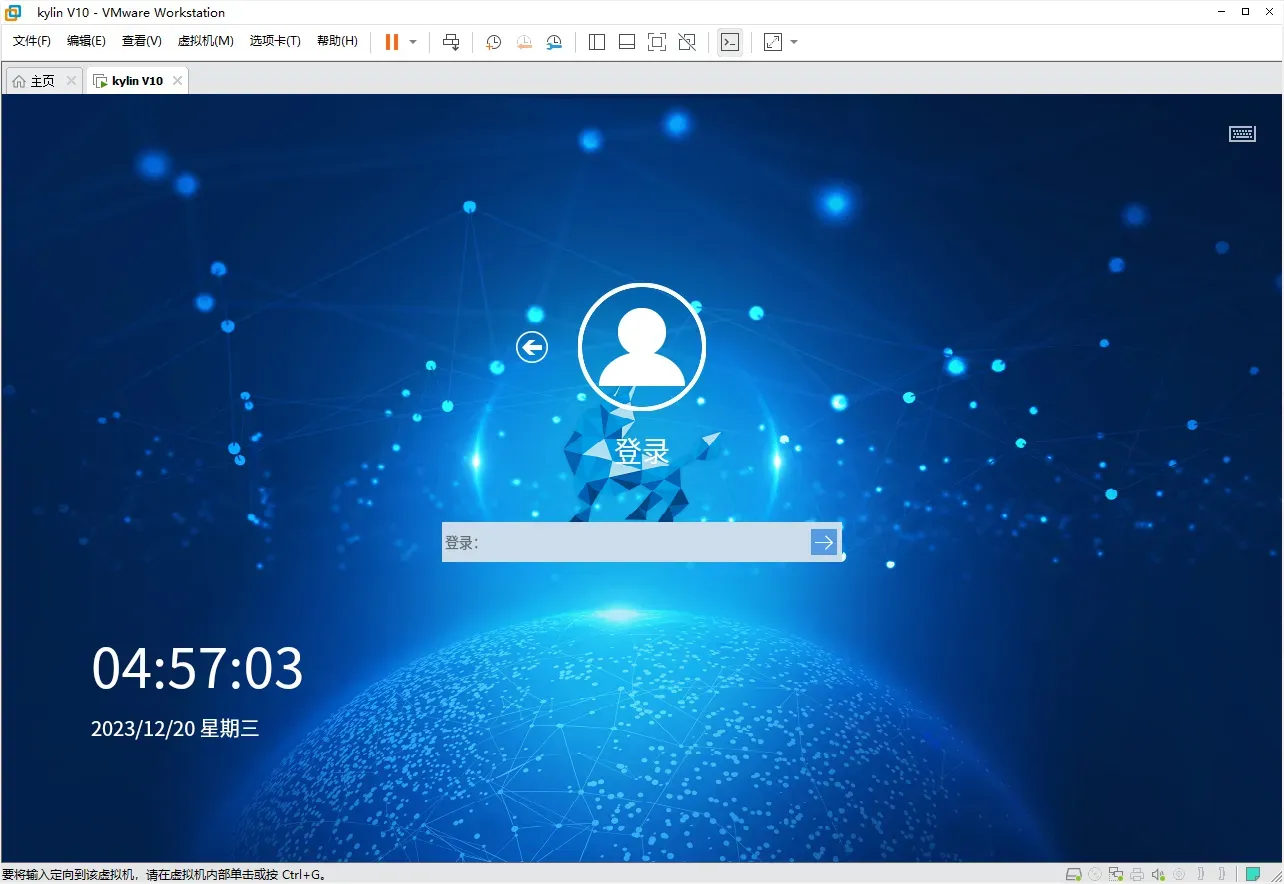
然后进入 登录界面
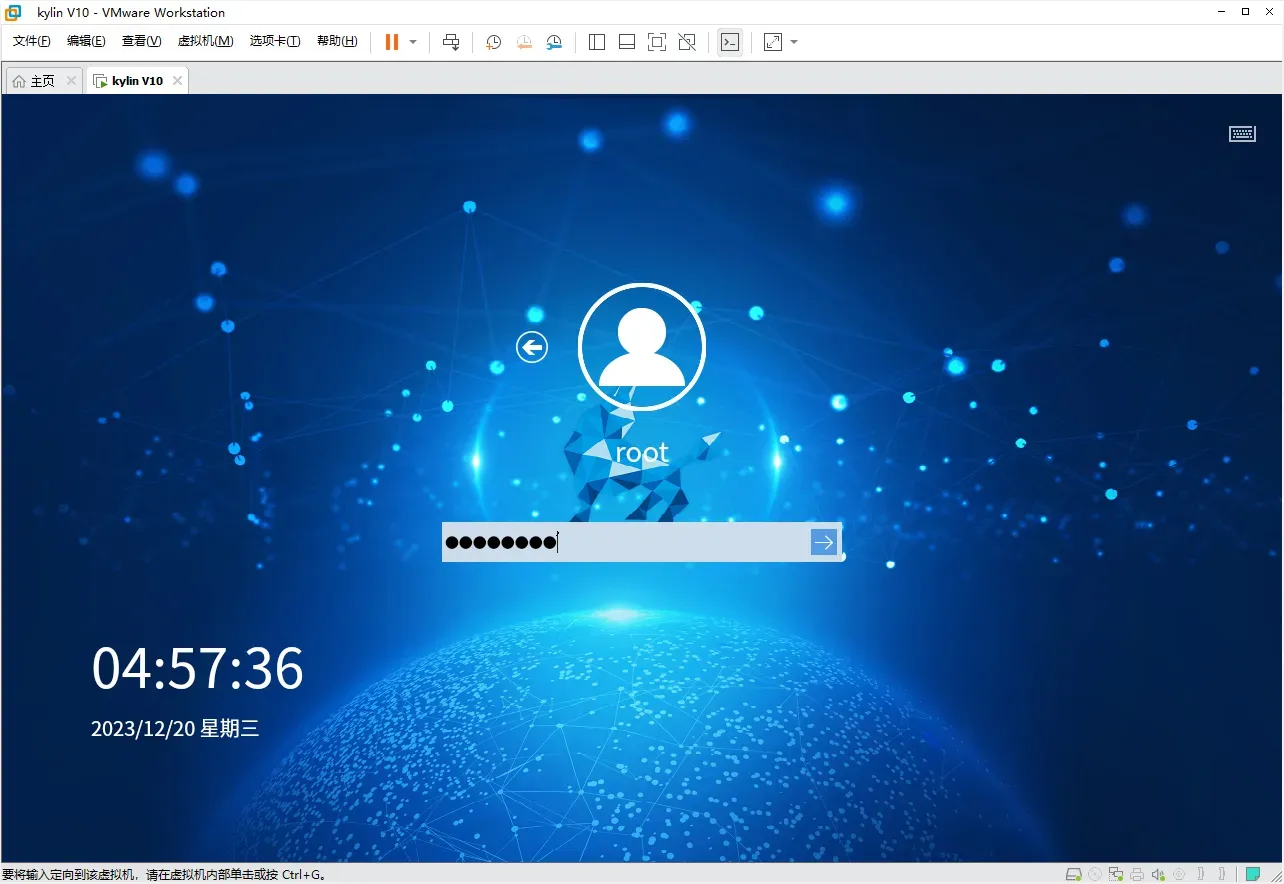
输入 同户名 root 输入密码 进入系统
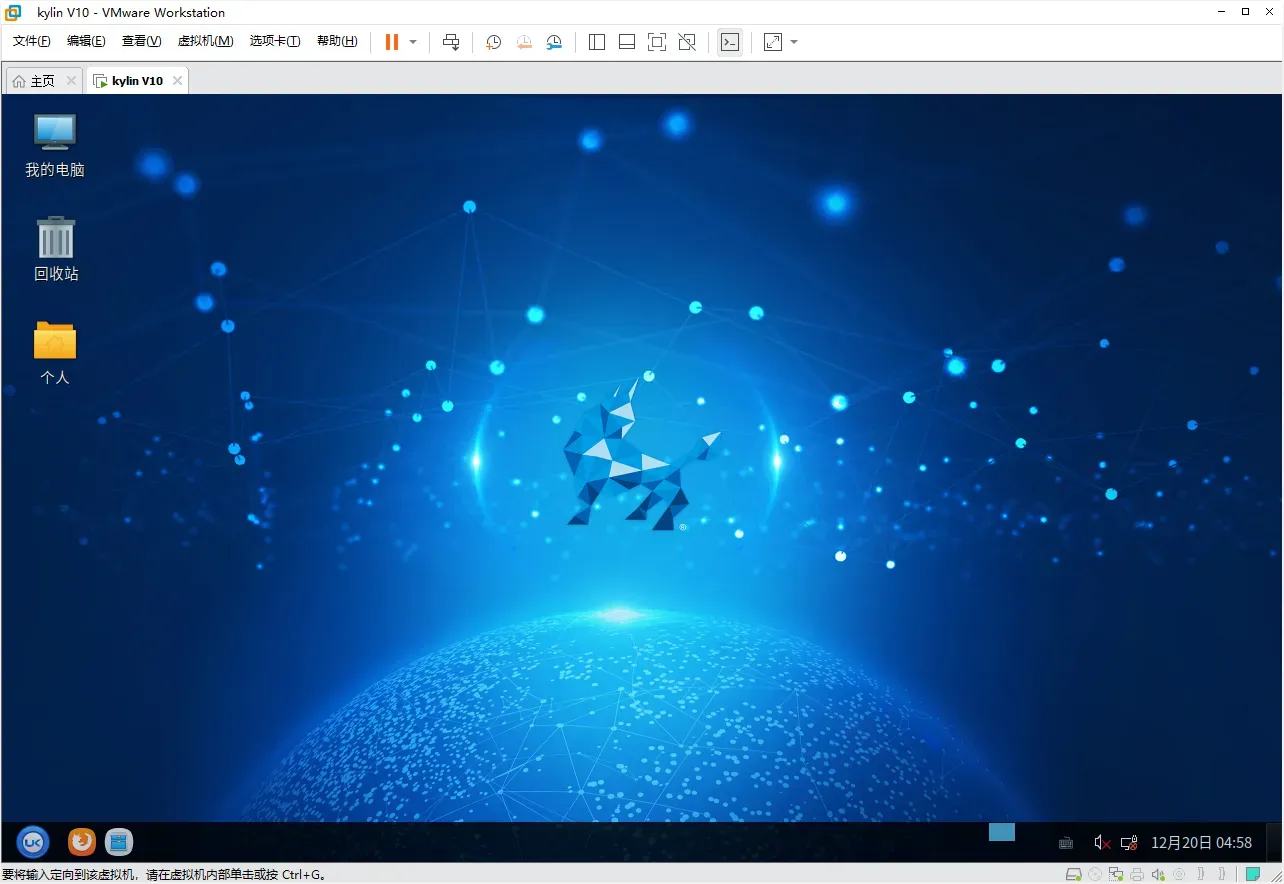
麒麟系统的桌面 泰裤辣
3、配置银河麒麟V10高级服务器操作系统
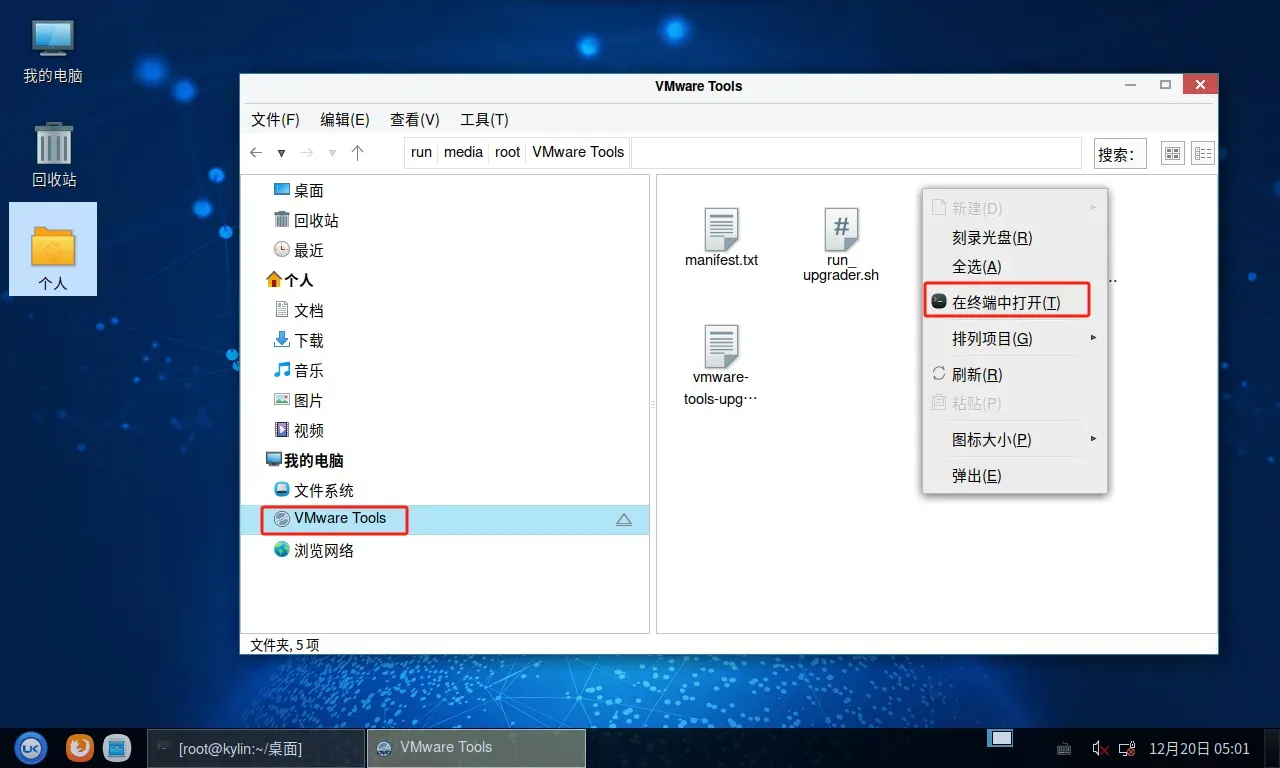
3.1、安装vmware tools
麒麟系统的桌面 泰裤辣
文件管理器 进入VMware Tools 目录
右键 选择 再在终端中打开
cp VMwareTools-10.3.25-20206839.tar.gz /root/
cd /root/
chmod 777 VMwareTools-10.3.25-20206839.tar.gz
tar -zxvf VMwareTools-10.3.25-20206839.tar.gz
cd vmware-tools-distrib/
执行安装命令
./vmware-install.pl
安装过程输出如下
[root@kylin vmware-tools-distrib]# ./vmware-install.pl
Creating a new VMware Tools installer database using the tar4 format.

Installing VMware Tools.

In which directory do you want to install the binary files?
[/usr/bin]

INPUT: [/usr/bin]  default

What is the directory that contains the init directories (rc0.d/ to rc6.d/)?
[/etc/rc.d]

INPUT: [/etc/rc.d]  default

What is the directory that contains the init scripts?
[/etc/rc.d/init.d]

INPUT: [/etc/rc.d/init.d]  default

In which directory do you want to install the daemon files?
[/usr/sbin]

INPUT: [/usr/sbin]  default

In which directory do you want to install the library files?
[/usr/lib/vmware-tools]

INPUT: [/usr/lib/vmware-tools]  default

The path "/usr/lib/vmware-tools" does not exist currently. This program is
going to create it, including needed parent directories. Is this what you want?
[yes]

INPUT: [yes]  default

In which directory do you want to install the documentation files?
[/usr/share/doc/vmware-tools]

INPUT: [/usr/share/doc/vmware-tools]  default

The path "/usr/share/doc/vmware-tools" does not exist currently. This program
is going to create it, including needed parent directories. Is this what you
want? [yes]

INPUT: [yes]  default

The installation of VMware Tools 10.3.25 build-20206839 for Linux completed
successfully. You can decide to remove this software from your system at any
time by invoking the following command: "/usr/bin/vmware-uninstall-tools.pl".

Before running VMware Tools for the first time, you need to configure it by
invoking the following command: "/usr/bin/vmware-config-tools.pl". Do you want
this program to invoke the command for you now? [yes]

INPUT: [yes]  default

Initializing...


Making sure services for VMware Tools are stopped.

正在停止vmware-tools(透过 systemctl):  [  确定  ]


The module vmci has already been installed on this system by another installer
or package and will not be modified by this installer.

The module vsock has already been installed on this system by another installer
or package and will not be modified by this installer.

The module vmxnet3 has already been installed on this system by another
installer or package and will not be modified by this installer.

The module pvscsi has already been installed on this system by another
installer or package and will not be modified by this installer.

The module vmmemctl has already been installed on this system by another
installer or package and will not be modified by this installer.

The VMware Host-Guest Filesystem allows for shared folders between the host OS
and the guest OS in a Fusion or Workstation virtual environment.  Do you wish
to enable this feature? [yes]

INPUT: [yes]  default

The vmxnet driver is no longer supported on kernels 3.3 and greater. Please
upgrade to a newer virtual NIC. (e.g., vmxnet3 or e1000e)

The vmblock enables dragging or copying files between host and guest in a
Fusion or Workstation virtual environment.  Do you wish to enable this feature?
[yes]

INPUT: [yes]  default


Skipping configuring automatic kernel modules as no drivers were installed by
this installer.


Disabling timer-based audio scheduling in pulseaudio.

Do you want to enable Guest Authentication (vgauth)? [yes]

INPUT: [yes]  default


Detected X server version 1.20.8


Distribution provided drivers for Xorg X server are used.

Skipping X configuration because X drivers are not included.


Skipping rebuilding initrd boot image for kernel as no drivers to be included
in boot image were installed by this installer.

The configuration of VMware Tools 10.3.25 build-20206839 for Linux for this
running kernel completed successfully.

You must restart your X session before any mouse or graphics changes take
effect.

To enable advanced X features (e.g., guest resolution fit, drag and drop, and
file and text copy/paste), you will need to do one (or more) of the following:
1. Manually start /usr/bin/vmware-user
2. Log out and log back into your desktop session
3. Restart your X session.

Found VMware Tools CDROM mounted at /run/media/root/VMware Tools. Ejecting
device /dev/sr0 ...
Enjoy,

--the VMware team

[root@kylin vmware-tools-distrib]#
3.2、配置静态IP地址 和 dns
cp /etc/sysconfig/network-scripts/ifcfg-ens33 /etc/sysconfig/network-scripts/ifcfg-ens33.bak
编辑网卡配置文件
vi /etc/sysconfig/network-scripts/ifcfg-ens33
①BOOTPROTO=dhcp 改为 BOOTPROTO=static
ONBOOT=no 改为 ONBOOT=yes
②插入以下内容
IPADDR=192.168.2.152  #静态IP地址
NETMASK=255.255.255.0 #掩码
GATEWAY=192.168.2.2   #网关
DNS1=192.168.2.2      #首选DNS
DNS2=114.114.114.114  #备选DNS
网卡配置文件参考下述改动过程
更改前
TYPE=Ethernet
PROXY_METHOD=none
BROWSER_ONLY=no
BOOTPROTO=dhcp
DEFROUTE=yes
IPV4_FAILURE_FATAL=no
IPV6INIT=yes
IPV6_AUTOCONF=yes
IPV6_DEFROUTE=yes
IPV6_FAILURE_FATAL=no
IPV6_ADDR_GEN_MODE=stable-privacy
NAME=ens33
UUID=25fa4dcd-5fca-47c0-a335-c3acb7b4abed
DEVICE=ens33
ONBOOT=no
更改后
TYPE=Ethernet
PROXY_METHOD=none
BROWSER_ONLY=no
BOOTPROTO=static
DEFROUTE=yes
IPV4_FAILURE_FATAL=no
IPV6INIT=yes
IPV6_AUTOCONF=yes
IPV6_DEFROUTE=yes
IPV6_FAILURE_FATAL=no
IPV6_ADDR_GEN_MODE=stable-privacy
NAME=ens33
UUID=25fa4dcd-5fca-47c0-a335-c3acb7b4abed
DEVICE=ens33
ONBOOT=yes
IPADDR=192.168.2.152
NETMASK=255.255.255.0
GATEWAY=192.168.2.2
DNS1=192.168.2.2
DNS2=114.114.114.114
更改完成后重启网络服务使得更改生效
systemctl restart NetworkManager.service
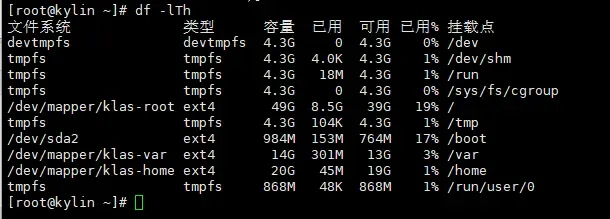
3.3、查看磁盘分区
df -lTh
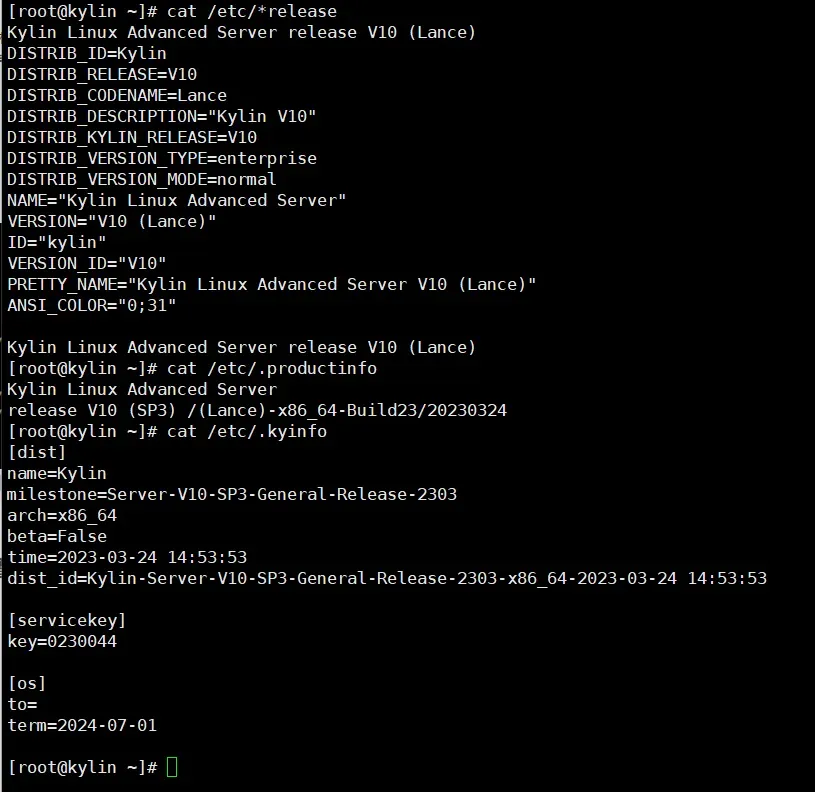
3.4、查看系统版本
cat /etc/*release
cat /etc/.productinfo
cat /etc/.kyinfo
版本是SP3 代码是Lance
版权声明:本文为博主作者:OceanWaves1993原创文章,版权归属原作者,如果侵权,请联系我们删除!
原文链接:https://blog.csdn.net/OceanWaves1993/article/details/135092486