文章目录
- 前言
- 最终效果
- 一、实现步骤
-
- 1.配置page.json中的tabBar属性
- 2.创建自定义tabBar文件
- 3.配置Vuex
- 4.在main.js中引入并挂载store:
- 5.登录页内引入自定义tabbar,根据角色进行登录验证
- 6.在每个导航页中使用自定义的tabbar
前言
在UniApp的开发过程中,为了针对不同角色用户登录后的个性化需求,本文集成了uView-UI框架的TabBar组件。通过动态权限配置机制,能够根据用户的角色信息灵活地调整TabBar的属性,从而实现个性化的TabBar界面展示,以满足不同用户群体的特定需求。
最终效果
用户角色:

售后客服:
![]()
一、实现步骤
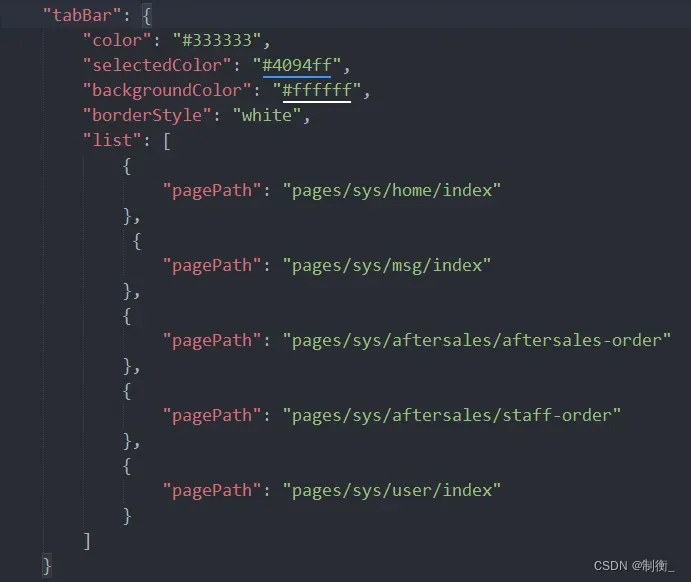
1.配置page.json中的tabBar属性
代码如下:
只需配置pagePath,微信小程序底部导航栏最多只能显示五个。

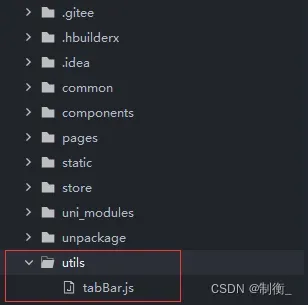
2.创建自定义tabBar文件
位置示例如下:

具体代码如下:
在tabBar.js文件中定义的list数组的顺序决定了tabBar上按钮的显示顺序。
// 普通用户展示的页面
const publicBar = [{
		"pagePath": "/pages/sys/home/index",
		"text": "首页",
		"iconPath": "/static/aidex/tabbar/home_1.png",
		"selectedIconPath": "/static/aidex/tabbar/home_2.png"
	},
	{
		"pagePath": "/pages/sys/msg/index",
		"text": "消息",
		"iconPath": "/static/aidex/tabbar/msg_1.png",
		"selectedIconPath": "/static/aidex/tabbar/msg_2.png"
	},
	{
		"pagePath": "/pages/sys/aftersales/aftersales-order",
		"text": "我的售后",
		"iconPath": "/static/aidex/tabbar/book_1.png",
		"selectedIconPath": "/static/aidex/tabbar/book_2.png"
	},
	{
		"pagePath": "/pages/sys/user/index",
		"text": "我的",
		"iconPath": "/static/aidex/tabbar/my_1.png",
		"selectedIconPath": "/static/aidex/tabbar/my_2.png",
	}
]

// 售后客服展示的页面
const selfBar = [{
		"pagePath": "/pages/sys/home/index",
		"text": "工作台",
		"iconPath": "/static/aidex/tabbar/home_1.png",
		"selectedIconPath": "/static/aidex/tabbar/home_2.png"
	},
	{
		"pagePath": "/pages/sys/msg/index",
		"text": "消息",
		"iconPath": "/static/aidex/tabbar/msg_1.png",
		"selectedIconPath": "/static/aidex/tabbar/msg_2.png"
	},
	{
		"pagePath": "/pages/sys/aftersales/staff-order",
		"text": "售后进度",
		"iconPath": "/static/aidex/tabbar/book_1.png",
		"selectedIconPath": "/static/aidex/tabbar/book_2.png"
	},
	{
		"pagePath": "/pages/sys/user/index",
		"text": "我的",
		"iconPath": "/static/aidex/tabbar/my_1.png",
		"selectedIconPath": "/static/aidex/tabbar/my_2.png",
	}
]

export {
	publicBar,
	selfBar
}
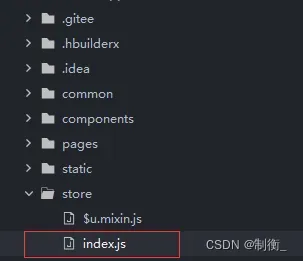
3.配置Vuex
位置示例如下:

具体代码如下:
// 引入Vue和Vuex
import Vue from 'vue'
import Vuex from 'vuex'
Vue.use(Vuex)

// 创建一个新的Vuex store实例
const store = new Vuex.Store({
  state: {
    // 存储动态tabbar的数据
    dynamicTabbar: []
  },
  getters: {},
  actions: {
    changeTabbar({ commit }, payload) {
      // 使用commit方法提交一个mutation,更新state中的dynamicTabbar
      commit('updateTabbar', payload)
    }
  },
  mutations: {
    updateTabbar(state, payload) {
      state.dynamicTabbar = payload
    }
  }
})
export default store
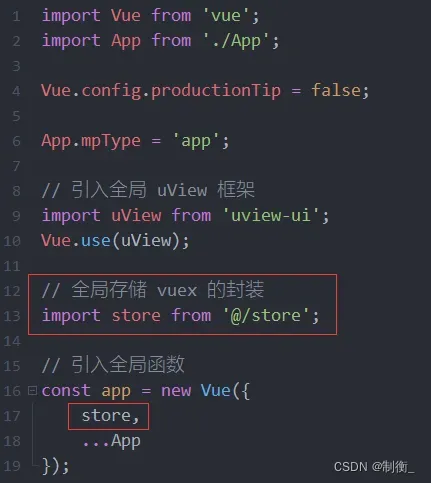
4.在main.js中引入并挂载store:
具体代码如下:

5.登录页内引入自定义tabbar,根据角色进行登录验证

注:根据实际登录业务逻辑修改

6.在每个导航页中使用自定义的tabbar
项目中引入uView-UI的tabbar组件
![]()
具体使用如下:
    <!-- home/index.vue 页面 -->
    <u-tabbar v-model="current" :list="tabBarList" :active-color="activeColor" :inactive-color="inactiveColor"
      :border-top="borderTop" />

  data() {
      return {
         title: '首页', // 导航栏的标题,这会显示在页面的顶部或作为当前视图的标题
		 tabBarList: this.$store.state.dynamicTabbar, // 导航栏的列表项,来源于Vuex状态管理中的dynamicTabbar
         current: 0, // 当前激活的导航项的索引,0表示第一个导航项
         borderTop: true, // 控制是否有顶部边框,true表示有边框
         inactiveColor: '#909399', // 未激活的TabBarItem的颜色
         activeColor: '#5098FF' // 激活的TabBarItem的颜色
      }
  }
版权声明:本文为博主作者:制衡_原创文章,版权归属原作者,如果侵权,请联系我们删除!
原文链接:https://blog.csdn.net/qq_32073593/article/details/136161955
