
前面刚学完mybatis-plus,我们已经基本掌握了更加方便的数据库操作,那么我们也就该做一个web项目练练手了,按理来说,我们该学习学习thymeleaf,thymeleaf是Spring boot推荐使用的模版引擎。但是,现在更加流行的是 SpringBoot+Vue 形式的前后端分离项目!而前后端分离必然少不了数据交互,那么我们今天就试一试吧!
文章目录
-
- Vue项目的创建
- 项目编写
-
- 打开Vue项目
- 启动Vue项目之效果展示
- Vue项目启动失败
- axios的引入
-
- 前端页面StudentView
- 后端接口StudentController
- 跨域问题的引入
- 运行项目
- element-UI的引入
-
- 前端页面PageView
- 后端接口的编写
- 增加登录功能
-
- 前端页面LoginView
- 后端接口LoginController
- 题外话
Vue项目的创建
首先,我默认你已经安装了node.js以及搭建了vue环境(实在不会的同学百度上面的教程可太多了)
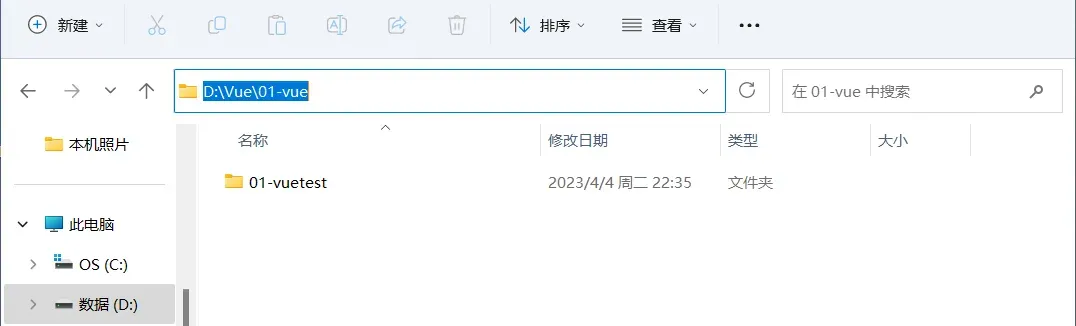
- 新建文件夹作为项目存放路径,在导航栏直接输入
cmd进入doc界面
- 在
doc界面直接输入vue ui,浏览器会自动打开,帮助我们进行图形化界面的创建工作(输入vue ui无反应可以看一下这篇文章)

- 这就是进入浏览器的效果,下面那个盘符在这里不能选择,你要是想改变项目地址,就按我开头说的在相应的目录打开
cmd
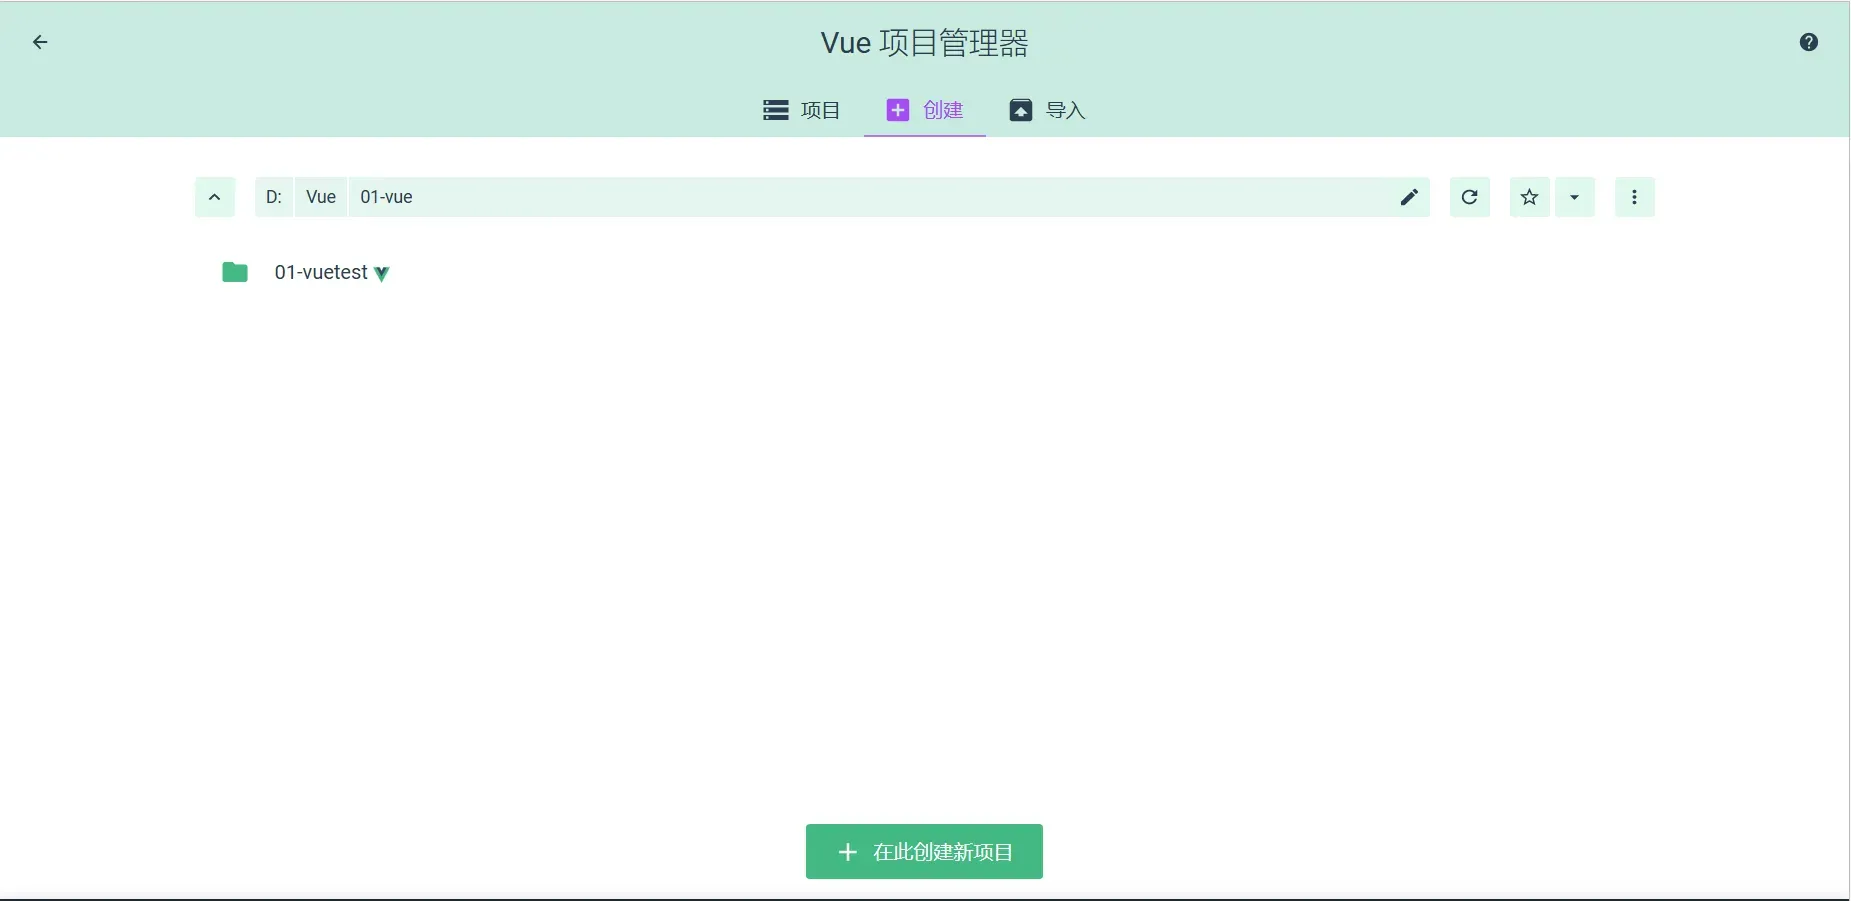
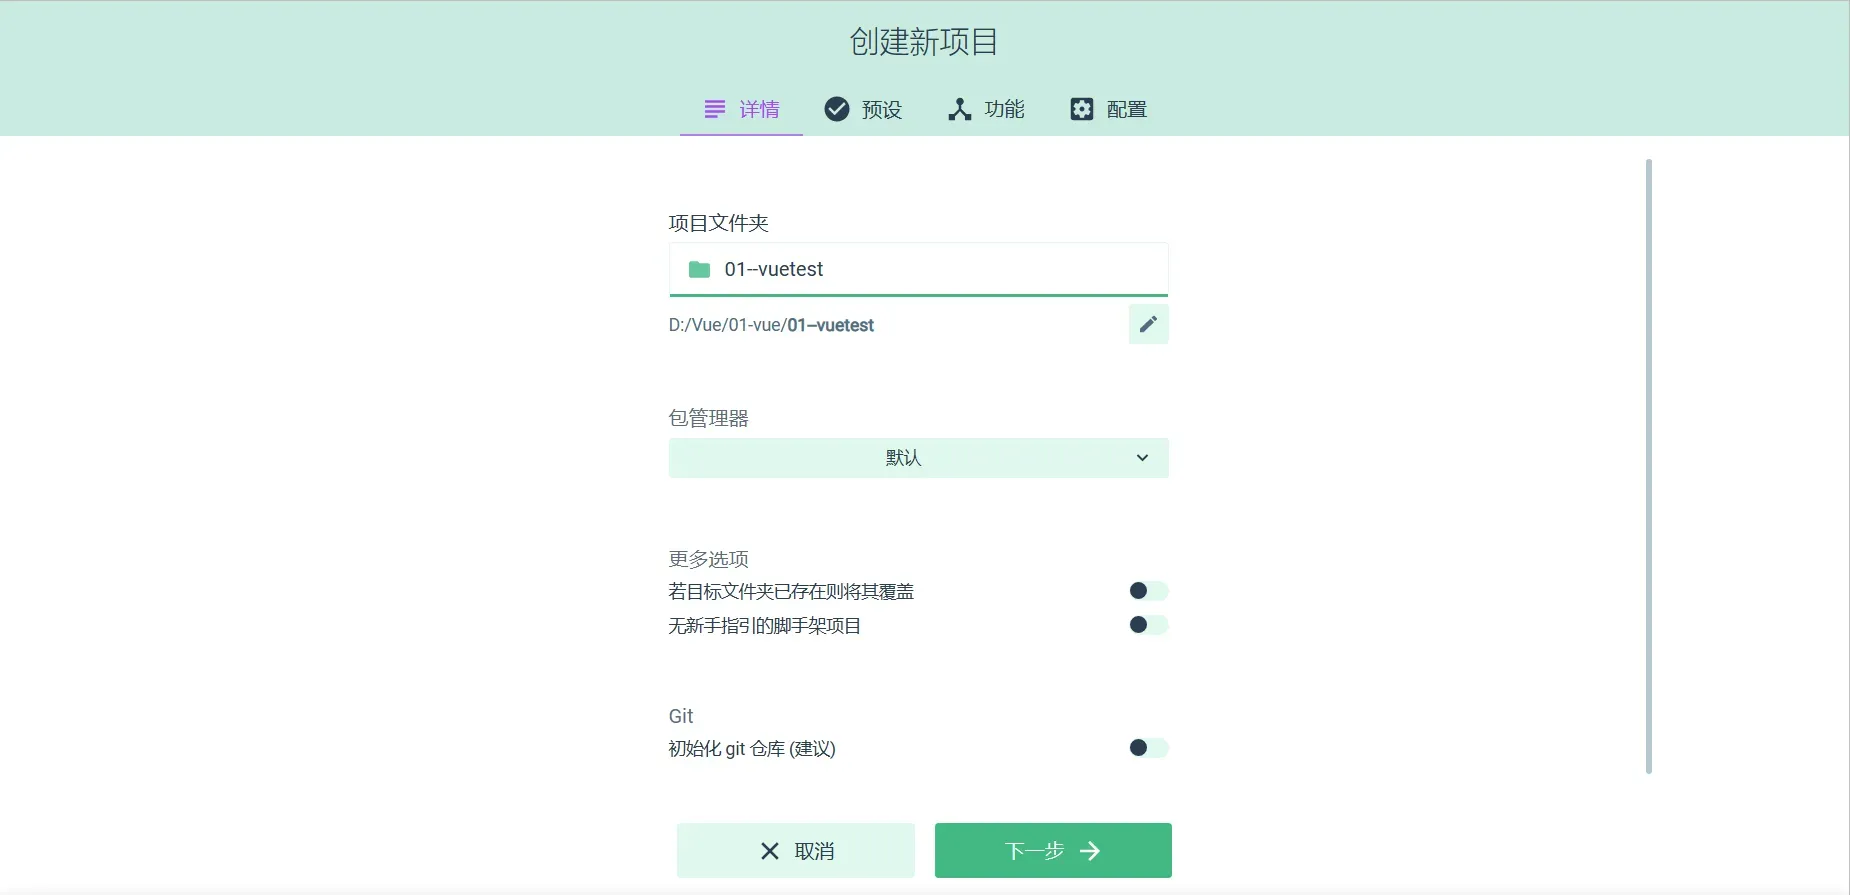
- 点击
在此创建新项目后,来到以下界面,把最下行的初始化git仓库我们可以叉掉,当然你选了也没事
- 我们选择手动创建
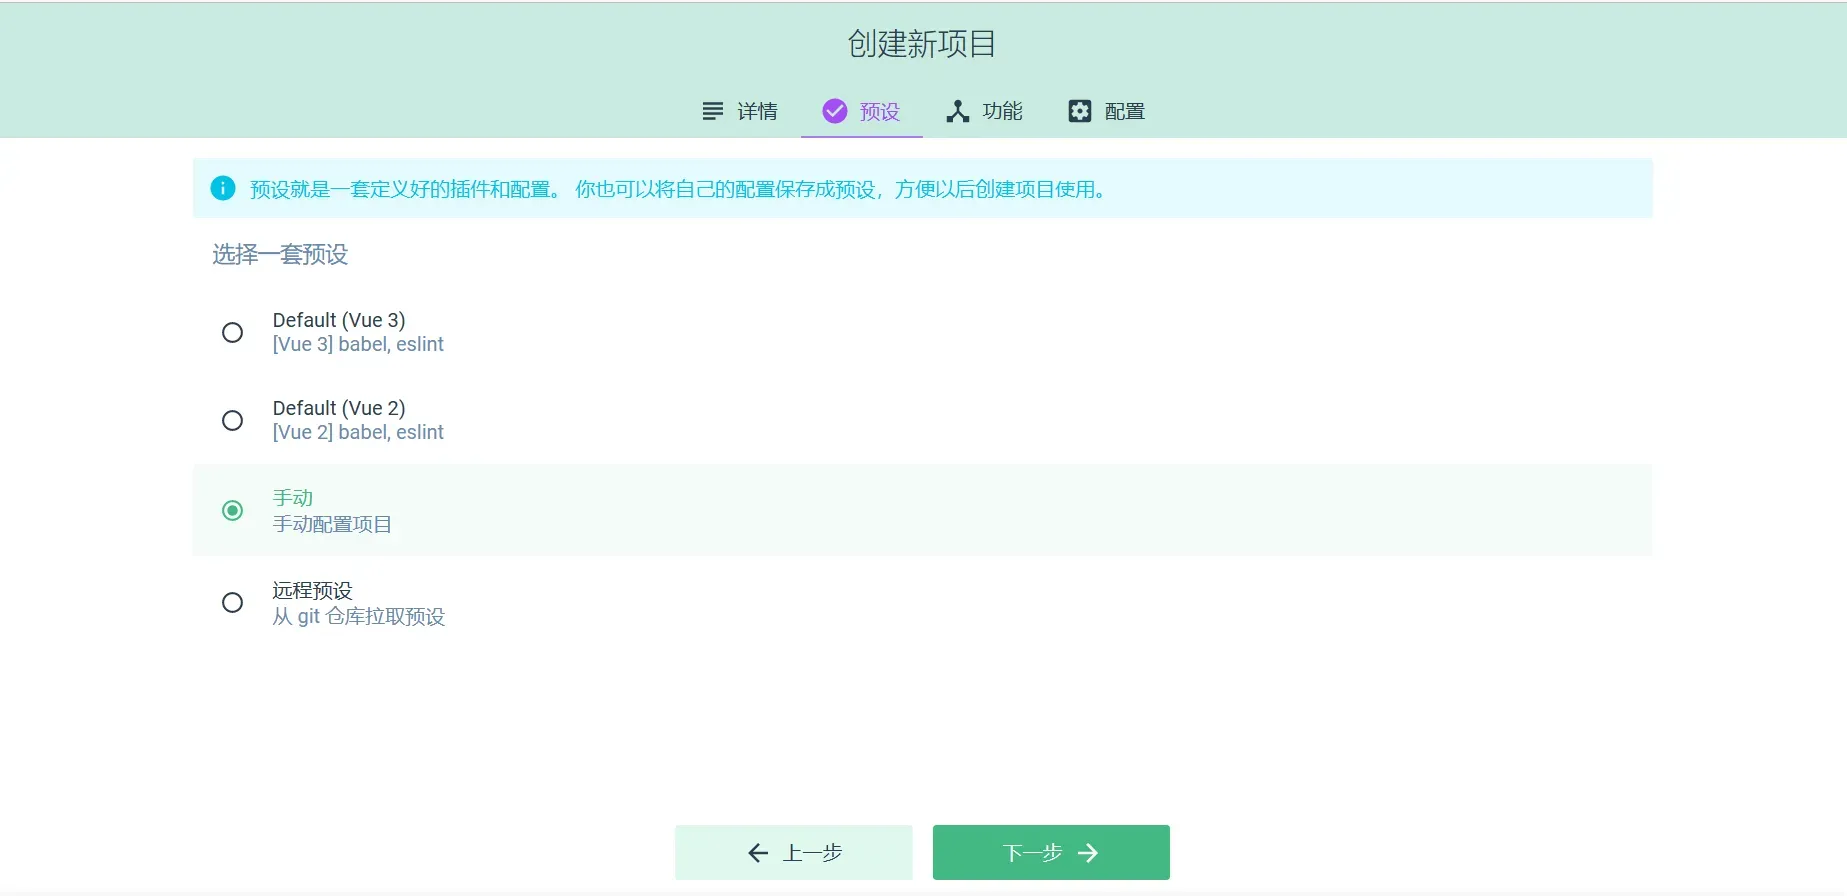
- 按下图选择
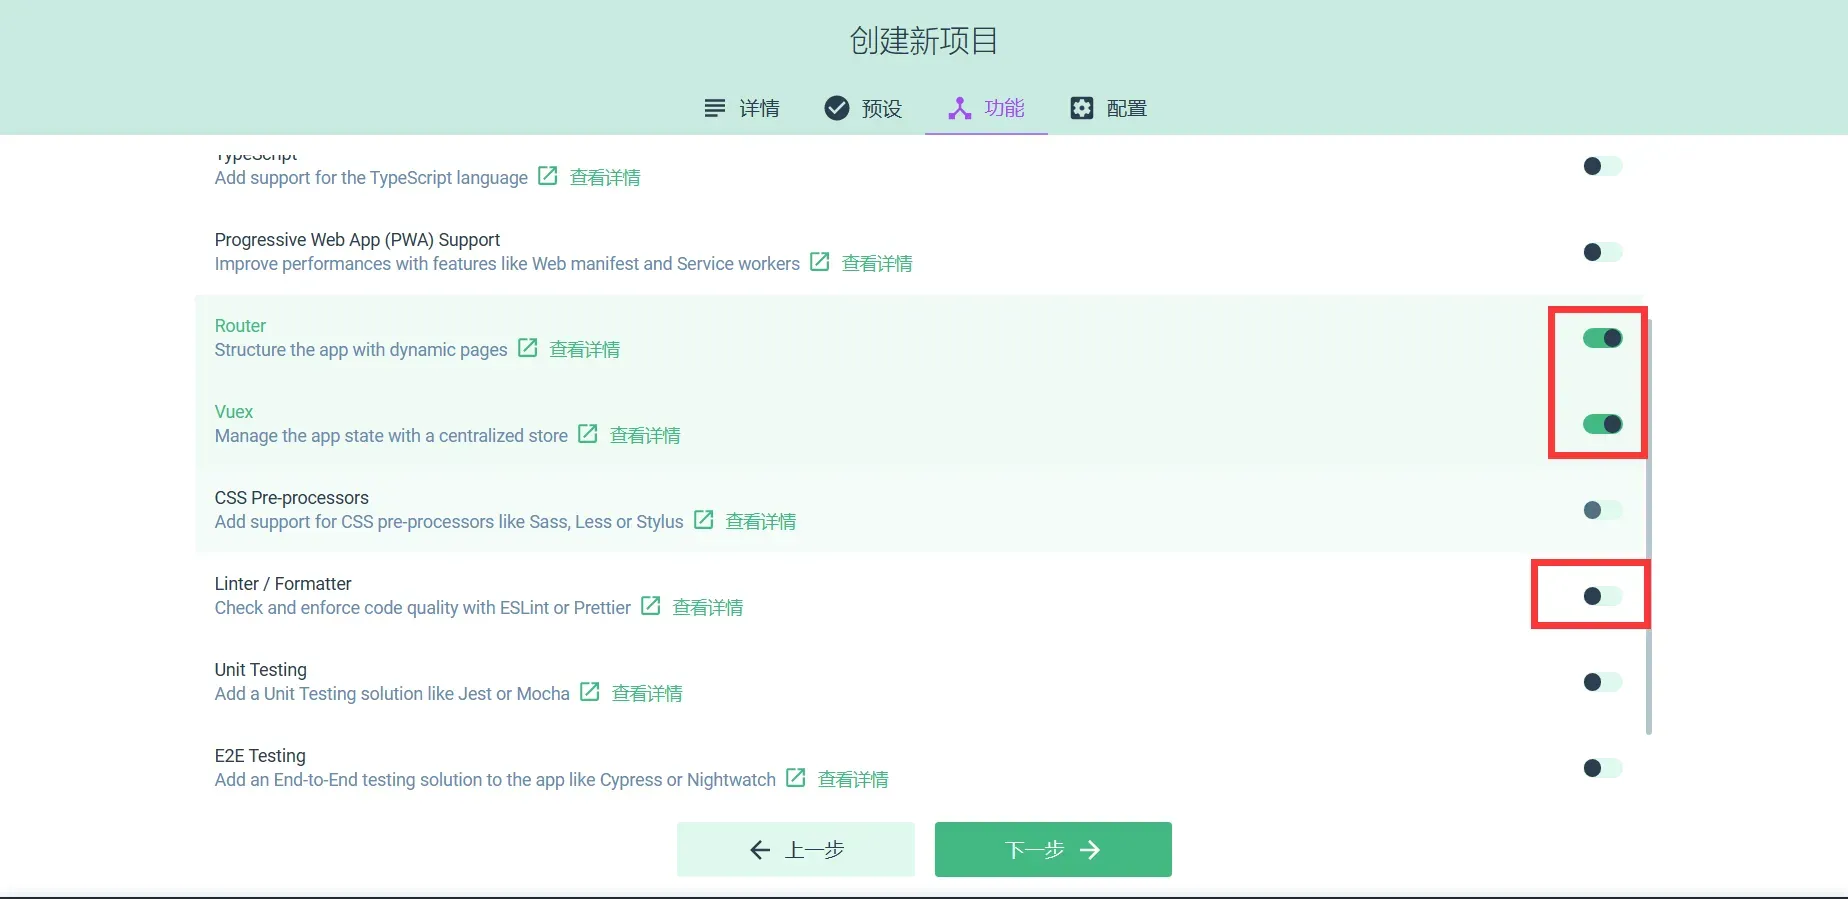
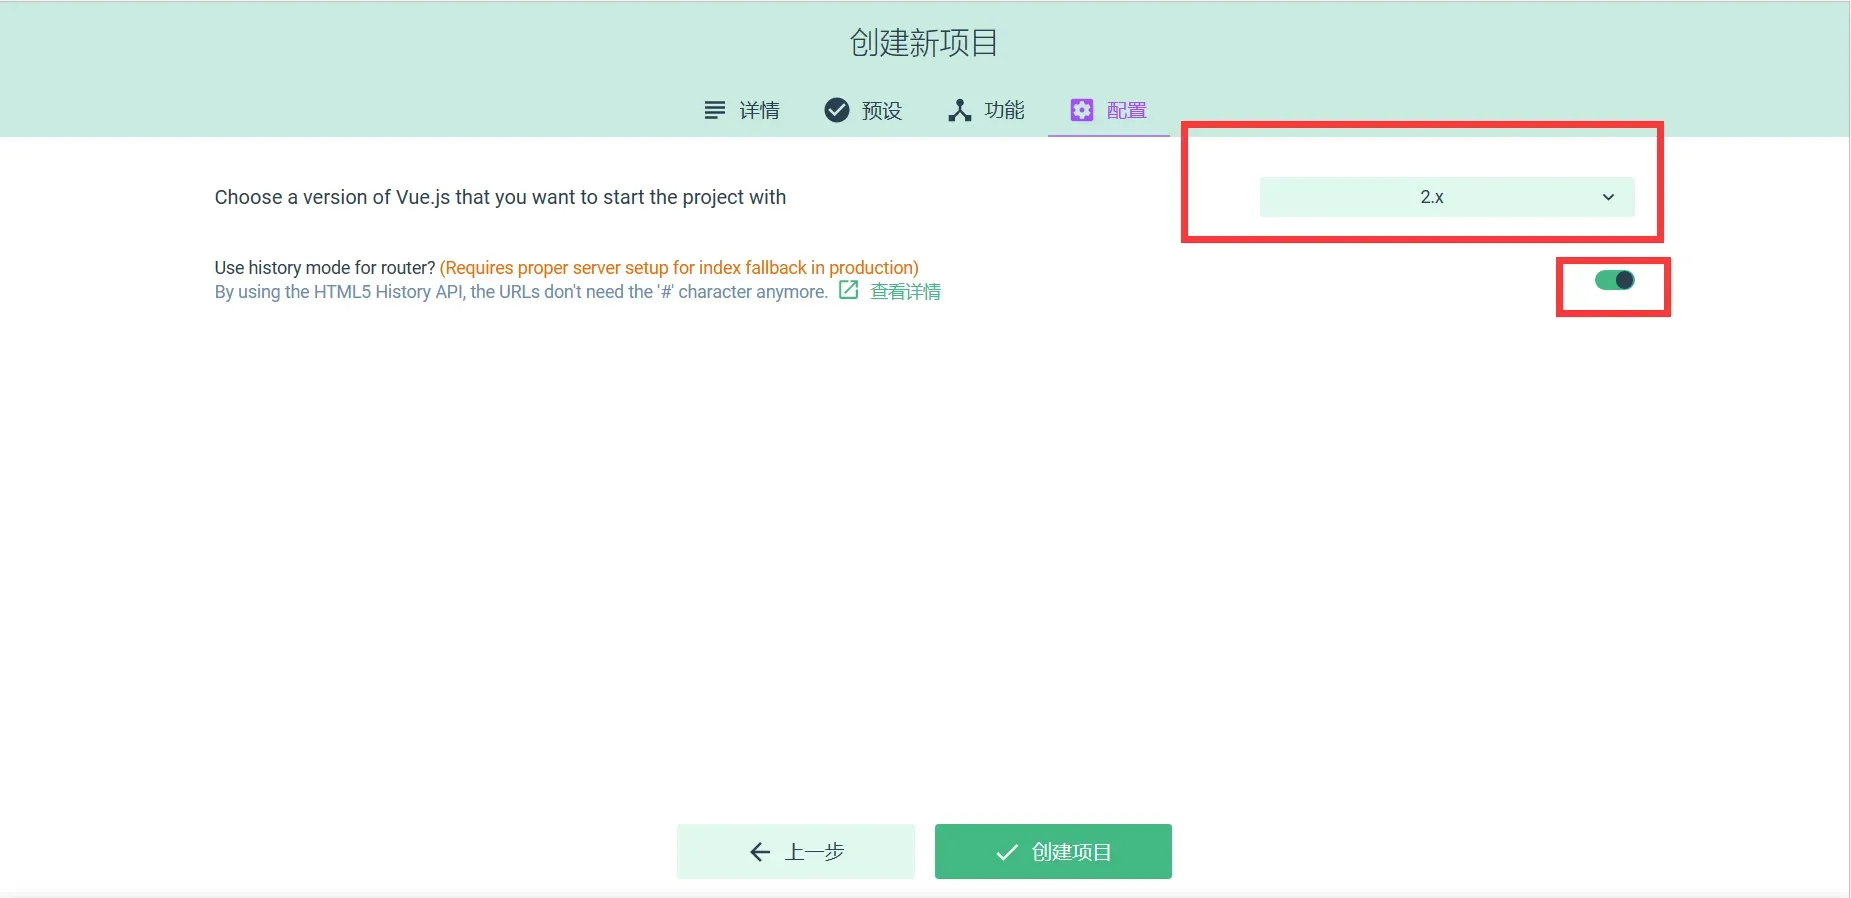
- 这里记得切换一下为
vue2.x版本,不然后面axios可能用不了
- 项目创建完成后直接叉掉就行了,
doc界面按两次ctrl+c就可退出
项目编写
打开Vue项目
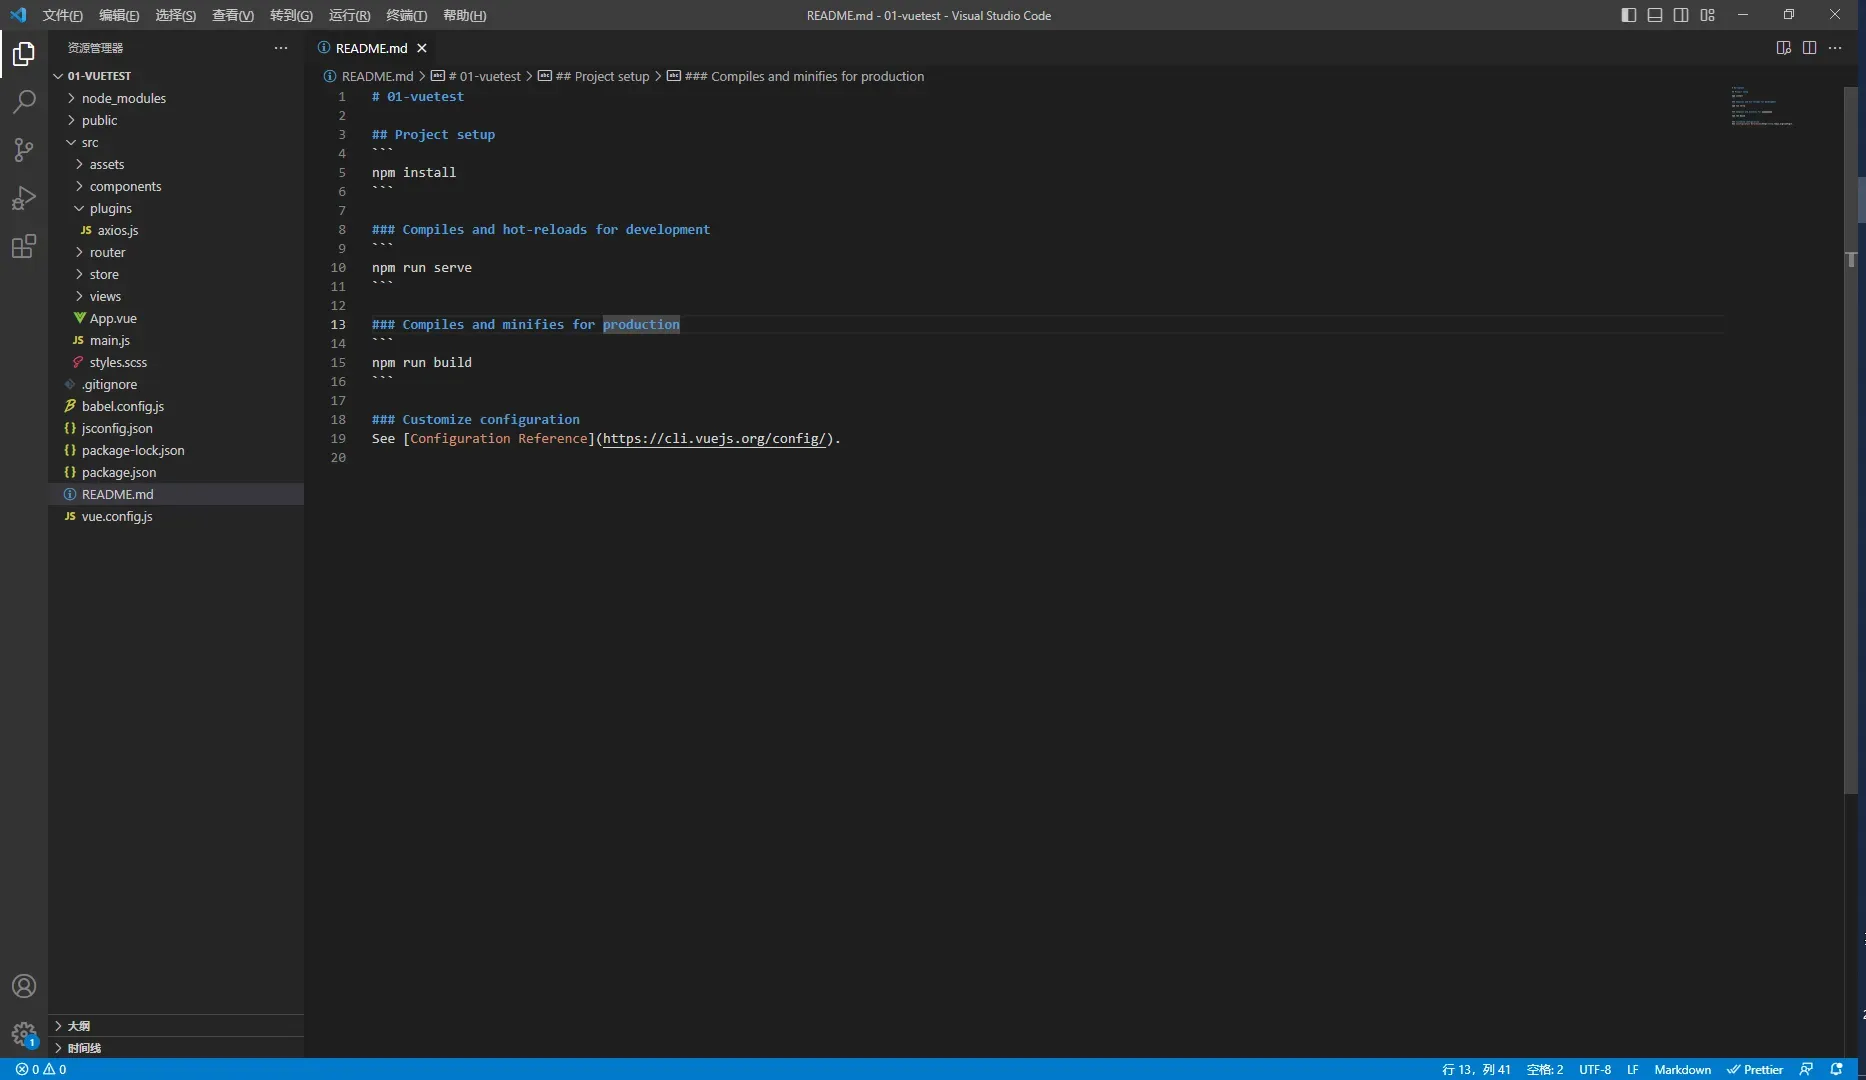
使用Vscode打开文件夹选择我们的项目路径,打开后就是这个样子
或者使用idea选择我们刚刚创建的vue项目路径然后打开,下图就是打开后的样子
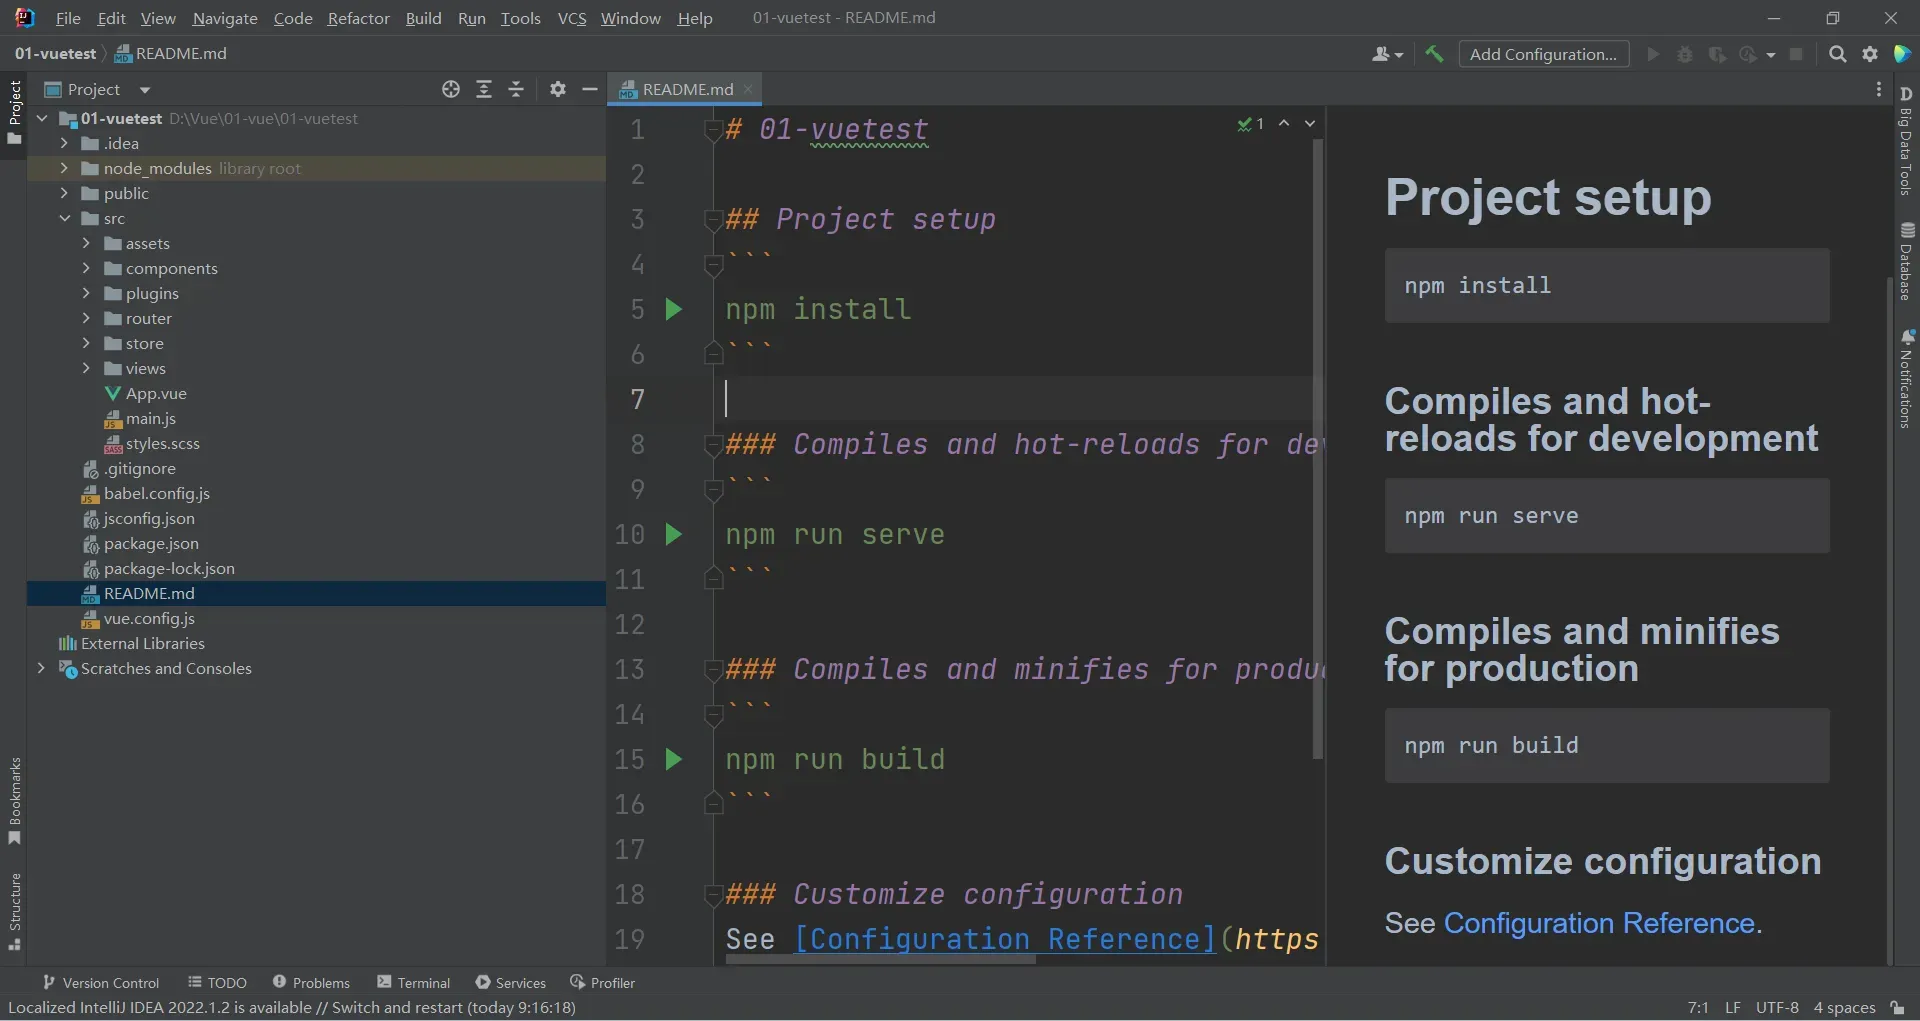
两种方式任意选一种就行,下面提到的前端主要指在Vscode中执行,后端为IDEA中执行
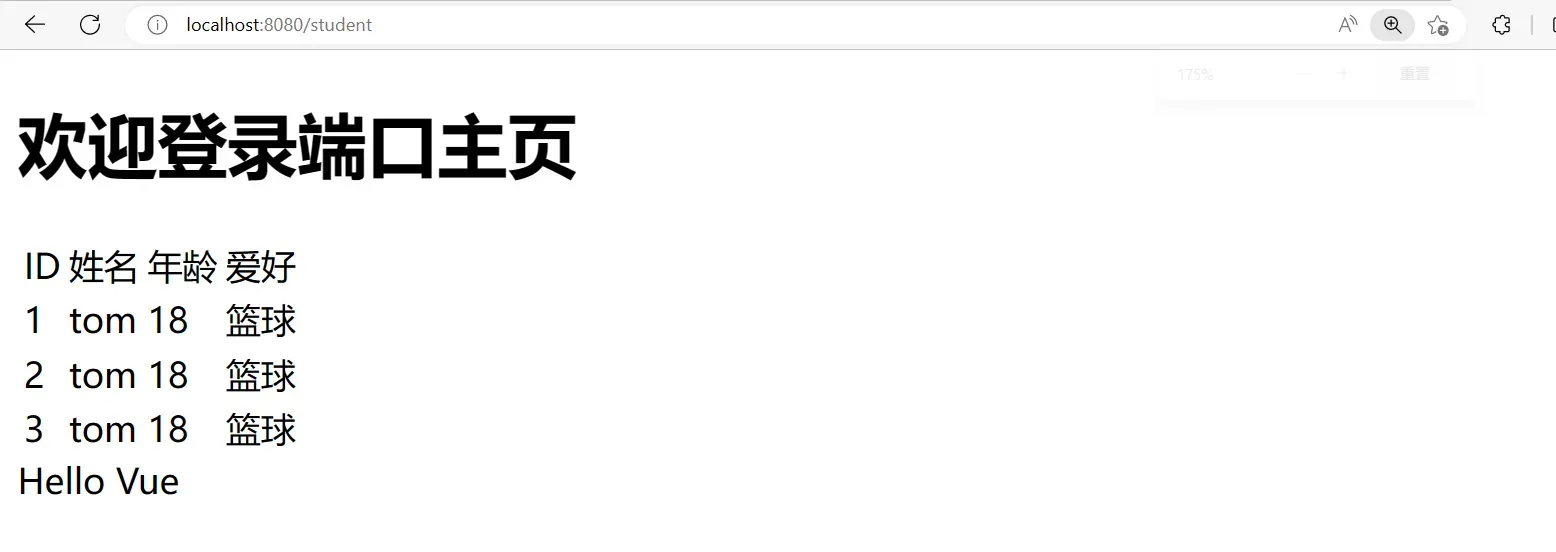
启动Vue项目之效果展示
我们可以在Views下面创建一个StudentView,编写一个表格写一些假数据看看效果
<template>
  <div>
    <table>
      <tr>
        <td>ID</td>
        <td>姓名</td>
        <td>年龄</td>
        <td>爱好</td>
      </tr>
      <tr v-for="item in students">
        <td>{{item.id}}</td>
        <td>{{item.name}}</td>
        <td>{{item.age}}</td>
        <td>{{item.hobby}}</td>
      </tr>
    </table>
    {{msg}}
  </div>
</template>

<script>
export default {
  name: "Student",
  data(){
    return{
      msg:"Hello Vue",
      students:[
          {
            id:"1",
            name:"tom",
            age:18,
            hobby:"篮球"
          },
        {
          id:"2",
          name:"tom",
          age:18,
          hobby:"篮球"
        },
        {
          id:"3",
          name:"tom",
          age:18,
          hobby:"篮球"
        },
      ],
    }
  },
}
</script>

<style scoped>

</style>
接着需要去router包下的index.js的routesl列表中添加路由(请注意每次写了新的xxxView都需要添加路由)
{
    path: '/student',
    name: 'student',
    component: () => import('../views/StudentView')
  }
VScode:在终端(左上角Terminal,新建终端)输入npm run serve启动服务,浏览器输入http://localhost:8080/student
idea:在终端(左下角Terminal)输入npm run serve启动服务,浏览器输入http://localhost:8080/student
展示效果:
Vue项目启动失败
有些童鞋在启动Vue项目的时候可能报错Module not found: Error: Can't resolve 'sass-loader' in 'E:\xxx\xxx\01-vuetest',不用慌,跟着报错信息做,
产生原因:说明项目中没有 sass-loader依赖,由于sass-loader需要node-sass组件,所以我们需要安装的是两个组件
- node-sass
cnpm install sass-loader -D
- sass-loader
cnpm install node-sass -D
使用cnpm前需要配置淘宝镜像
npm install -g cnpm --registry=https://registry.npm.taobao.org
axios的引入
在上面的页面中,我们成功的展示出了/student页面下的student数据,但那是我们手写的假数据,我们如何获得后端发送过来的数据呢,那就需要用到一个很重要的封装库axios,axios是基于 Promise 的 ajax 封装库,也是前端目前最流行的 ajax 请求库。简单地说发送 get、post 请求,是一个轻量级的库,使用时可直接引入
在终端输入:
vue add axios
然后就会发现我们多了一个plugins包,包下多了一个axios.js文件。
前端页面StudentView
现在修改我们的前端代码,利用axios发送get请求:
<template>
  <div>
    <table>
      <tr>
        <td>ID</td>
        <td>姓名</td>
        <td>年龄</td>
        <td>爱好</td>
      </tr>
      <tr v-for="item in students">
        <td>{{item.id}}</td>
        <td>{{item.name}}</td>
        <td>{{item.age}}</td>
        <td>{{item.hobby}}</td>
      </tr>
    </table>
    {{msg}}
  </div>
</template>

<script>
export default {
  name: "Student",
  data(){
    return{
      msg:"Hello Vue",
      students:null,	// 之前这里存放的是假数据列表,现在我们可以直接让他为null
    }
  },
  created() {
    const _this = this  // 这里的this是全局
    axios.get("/select/").then(function (resp){		// 因为我们在main.js文件配置了后端端口的访问地址(下文有讲),所以这里可以直接'/select/'
      _this.students = resp.data  // 这里如果用this指得就是这个匿名函数了
    })
  }
}
</script>

<style scoped>

</style>
后端接口StudentController
现在编写我们的后端,打开我们之前的SpringBoot项目,(我们就拿之前创建过的实体类练手吧,会用到的实体类分别是User和Student,User用来登录,Student用来数据展示)
这里再贴一下两个实体类吧
@Data               // 返回set,get等方法
@NoArgsConstructor  // 无参构造器
@AllArgsConstructor // 全参构造器
public class User {
    private int id;
    private String name;
    private String pwd;

}
@Data
@AllArgsConstructor
@NoArgsConstructor
public class Student {

    private Long id;

    private String name;

    private Integer age;

    private String hobby;

}
来到后端的第一件事情就是去application.yaml更改后端接口
server:
  port: 8081  # 后端修改端口为8081,8080已经被前端占用
现在可以在前端的main.js文件中添加后端端口
// 配置后端端口的访问地址
axios.defaults.baseURL = 'http://localhost:8081';
开始编写后端接口:
StudentMapper:继承BaseMapper,不明白的同学可以看完上篇文章 整合mybatis-plus 及其相关用法
@Repository
public interface StudentMapper extends BaseMapper<Student> {
}
StudentService:
public interface StudentService extends IService<Student> {
}
StudentServiceImpl:
@Service
public class StudentServiceImpl extends ServiceImpl<StudentMapper, Student> implements StudentService {
}
StudentController:
@RestController
public class StudentController {

    @Autowired
    private StudentMapper studentMapper;

    @RequestMapping("/select")
    public List<Student> select(){
        return studentMapper.selectList(null);
    }
}
跨域问题的引入
为什么会有跨境问题:简单来说就是你前端端口是8080,后端是8081,端口不一样就涉及到跨域问题。
前后端都可以解决跨域问题,我们就在后端来解决吧,在SpringBoot项目的config下创建一个配置类:
@Configuration
public class CrosConfig implements WebMvcConfigurer {

    @Override
    public void addCorsMappings(CorsRegistry registry) {
        registry.addMapping("/**")
                .allowedOriginPatterns("*")
                .allowedMethods("GET","HEAD","POST","PUT","DELETE","OPTIONS")
                .maxAge(3000)
                .allowedHeaders("*");
    }
}
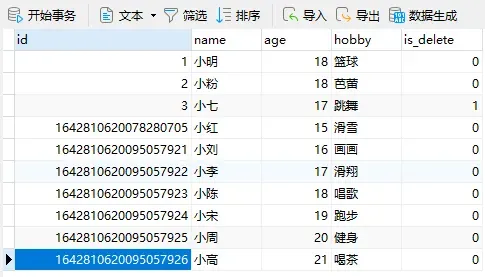
运行开始前先给大家看看数据库信息
运行项目
在前端输入npm run serve
后端在启动类运行我们的SpringBoot项目
浏览器输入localhost:8080/student
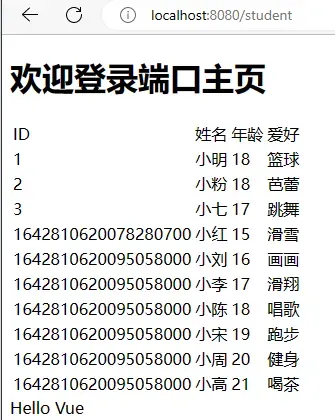
显然,我们的数据交互已经实现,前端成功从后端拿到了我们的数据,测试成功!
element-UI的引入
上面的输出效果是不好看的,那我们就浅浅的介绍一下element-ui吧
停止项目,在终端输入npm i element-ui -S,等待下载…
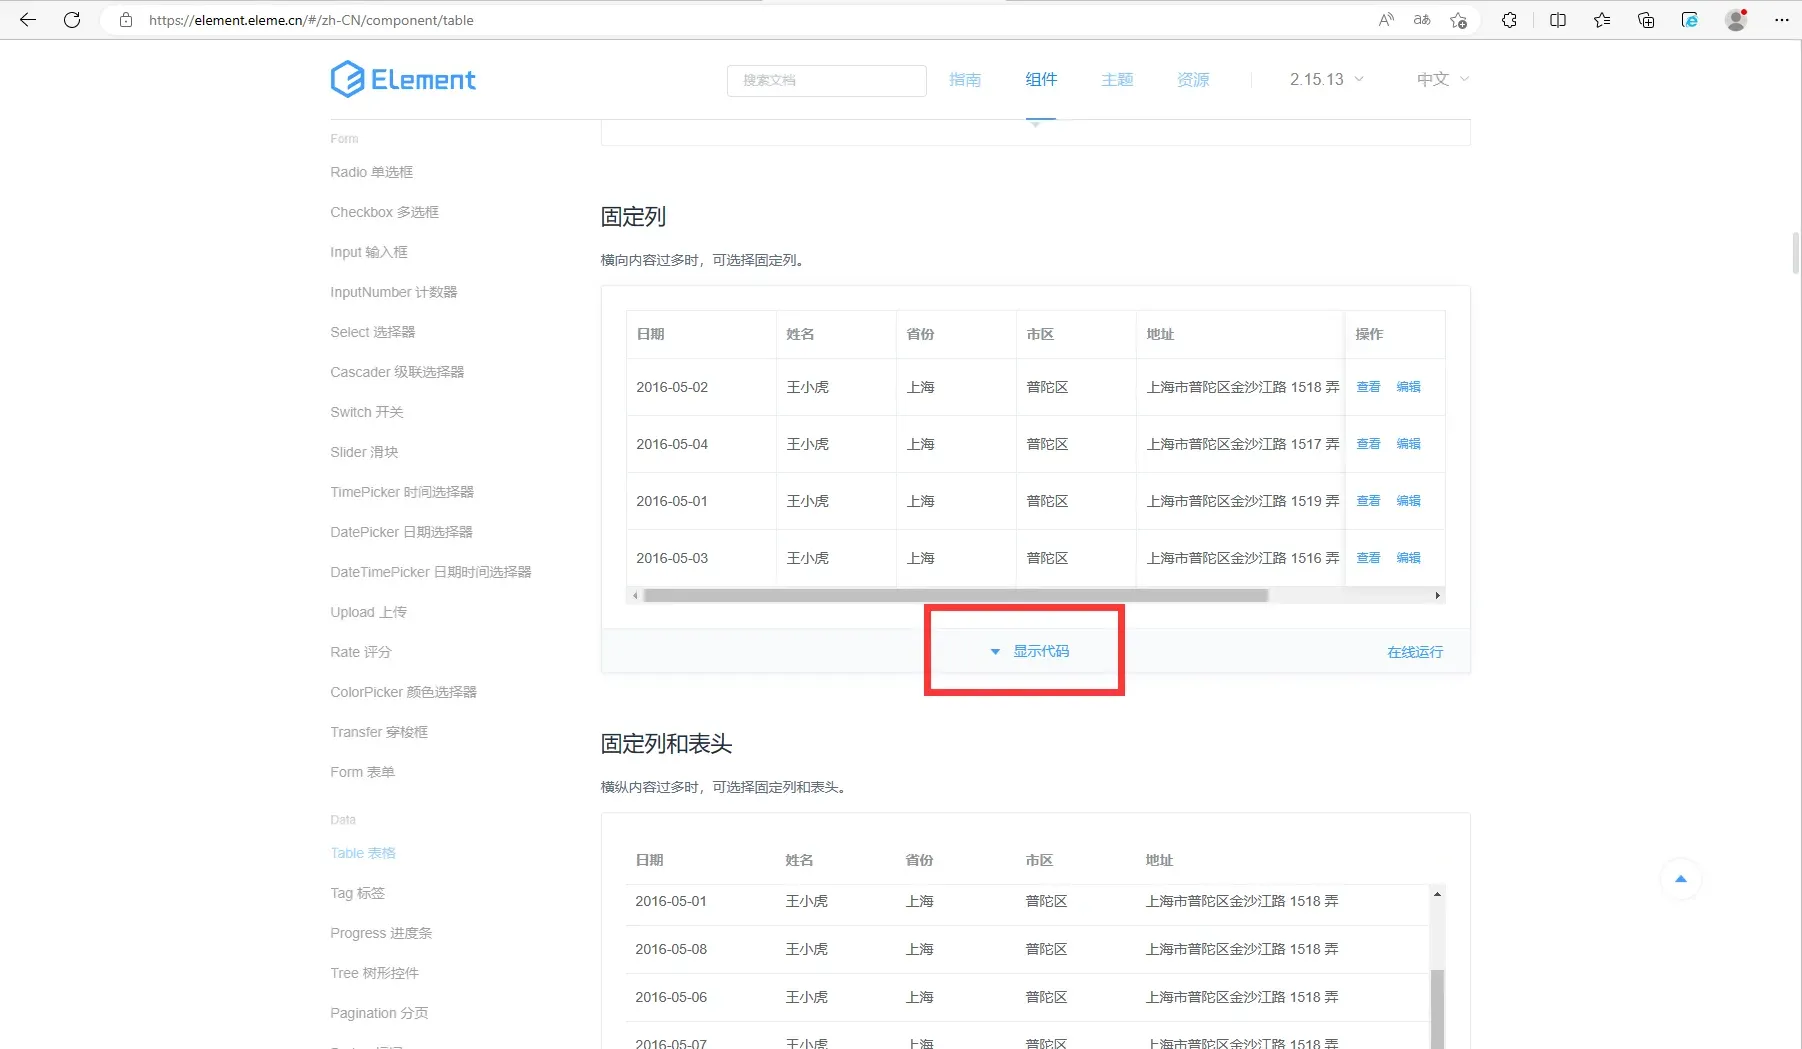
然后我们之间去浏览器找到element中文官网
选择一个自己喜欢的表格,然后把他的代码复制过来
再选择一个好看的分页效果,同样复制他的代码

前端页面PageView
我们在前端的views包下新建一个PageView用来装我们刚刚复制的代码(注意标签中只允许含有一个div标签,所以大家复制的代码都要装在一个div标签里面),然后我们根据自己的数据库信息做一些简单的修改:
<template>
  <div>
    <el-table
        :data="tableData"
        border
        style="width: 100%">
      <el-table-column
          fixed
          prop="id"
          label="学号"
          width="200">
      </el-table-column>
      <el-table-column
          prop="name"
          label="姓名"
          width="150">
      </el-table-column>
      <el-table-column
          prop="age"
          label="年龄"
          width="150">
      </el-table-column>
      <el-table-column
          prop="hobby"
          label="爱好"
          width="150">
      </el-table-column>

      <el-table-column
          fixed="right"
          label="操作"
          width="120">
        <template slot-scope="scope">
          <el-button @click="handleClick(scope.row)" type="text" size="small">查看</el-button>
          <el-button type="text" size="small">编辑</el-button>
        </template>
      </el-table-column>
    </el-table>

    <el-pagination
        background
        layout="prev, pager, next"
        :page-size="5"
        :total="50"
        @current-change="page">>	  <!-- 页面翻页变化  -->
    </el-pagination>

  </div>
</template>

<script>
export default {
  methods: {
    handleClick(row) {
      console.log(row);
    },

    page(currentPage){
      // alert(currentPage)
      const _this = this
      axios.get("/select/"+currentPage+"/5").then(function (resp) {
        // console.log(resp)	// 注意使用console.log(resp)查看控制台我们的数据在哪里哦,比如我的就在data的records下面
        _this.tableData = resp.data.records
        _this.total = resp.data.length
      })
    }

  },
  created() {
    const _this = this
    axios.get("/select/1/5").then(function (resp) {
      // console.log(resp)
      _this.tableData = resp.data.records
      _this.total = resp.data.length
    })
  },

  data() {
    return {
      total:null,
      tableData: null,
    }
  }
}
</script>
仔细的同学应该有所发现,上面的代码中我们不仅用了钩子函数created()还在methods中新增了一个page()方法,没错,他就是来帮助我们实现表格翻页的
后端接口的编写
实现了前端的翻页效果,我们就要去后端修改代码了,我们依旧使用StudentController:
@RestController
public class StudentController {

    @Autowired
    private StudentMapper studentMapper;

    @RequestMapping("/select/{page}/{size}")
    public Page<Student> select(@PathVariable("page") int page,@PathVariable("size") int size){
        Page<Student> pages = new Page<>(page, size);
        return studentMapper.selectPage(pages, null);
    }
}
上面的代码中利用了mybatis-plus的分页插件,不了解同学依旧可以去看我的上一篇博客整合mybatis-plus 及其相关用法
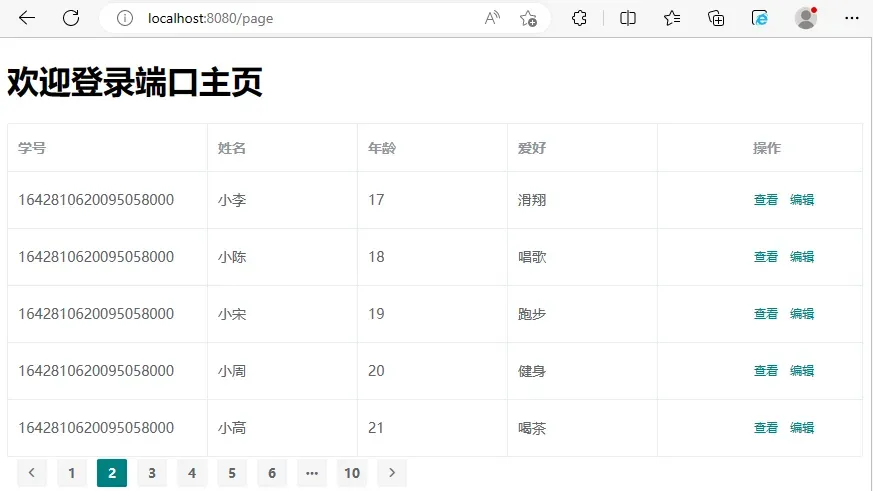
项目启动观看效果:
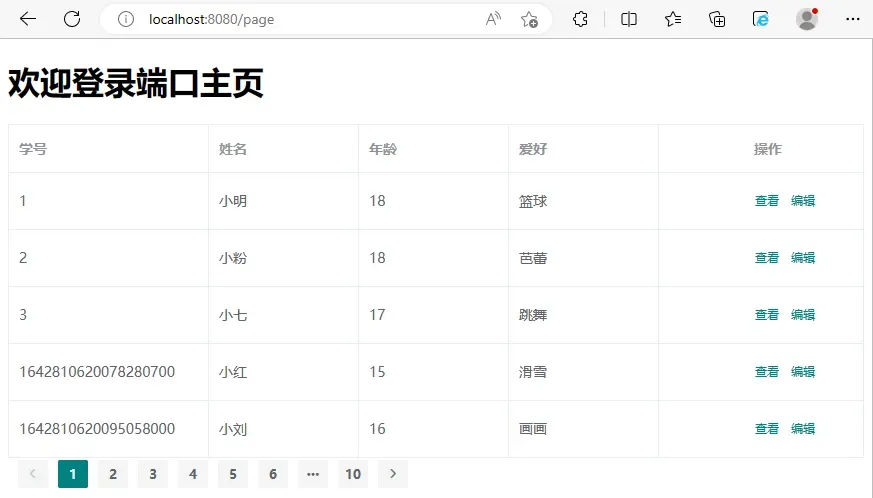
是不是精致了许多,点击下面的标签还能翻页呢
增加登录功能
老规矩,该去网上复制的就去复制,一些简单的界面不需要我们去写
前端页面LoginView
在view包下新增LoginView
<template>
  <div>
    <el-form
      ref="loginForm"
      label-width="80px"
      class="login-box"
    >
      <h3 class="login-title">欢迎登录</h3>
      <el-form-item
        label="账号"
        prop="username"
      >
        <el-input
          type="text"
          placeholder="请输入账号"
          v-model="loginForm.username"
        />
      </el-form-item>
      <el-form-item
        label="密码"
        prop="password"
      >
        <el-input
          type="password"
          placeholder="请输入密码"
          v-model="loginForm.password"
        />
      </el-form-item>
      <el-form-item>
        <el-button
          type="primary"
          v-on:click="login"
        >登录</el-button>
      </el-form-item>
    </el-form>
  </div>
</template>

<script>

import Cookies from "core-js/internals/task";

export default {
  name: 'LoginView',
  data () {
    return {
      loginForm: {
        username: '',
        password: ''
      },
      responseResult: []
    }
  },
  methods: {
    login () {
      const _this = this
      axios
        .post('/login', {
          "name": _this.loginForm.username, // 注意,你后端的User实体类叫name,pwd
          "pwd": _this.loginForm.password   // 这里也就要叫name!pwd!不然后端接口得不到参数!
        })
        .then(successResponse => {
          console.log(successResponse.data)
          if (successResponse.data.code === 200) {	// 后端返回状态码为200则验证成功
            _this.$router.push("/page");			// 登录成功页面跳转到page页面
          } else {
            alert("用户名或密码错误!")
          }
        })
        .catch(function (error) {
          alert("用户名或密码错误!")
        });
    }

  }
}

</script>

<style scoped>
.login-box {
  border: 1px solid #dcdfe6;
  width: 350px;
  margin: 180px auto;
  padding: 35px 35px 15px 35px;
  border-radius: 5px;
  -webkit-border-radius: 5px;
  -moz-border-radius: 5px;
  box-shadow: 0 0 25px #909399;
}

.login-title {
  text-align: center;
  margin: 0 auto 40px auto;
  color: #303133;
}
</style>
后端接口LoginController
@Controller
public class LoginController {

    @Autowired
    private UserService userService;

    @PostMapping("/login")
    @ResponseBody
    public R<User> login(@RequestBody User user) {

        LambdaQueryWrapper<User> queryWrapper = new LambdaQueryWrapper();
        queryWrapper.eq(User::getName, user.getName());
        User userOne = userService.getOne(queryWrapper);

        if(!userOne.getPwd().equals(user.getPwd())){
            return R.error("密码错误");
        }
        return R.success(userOne);
    }
}
R类是我们通用的返回值封装,这里再贴一下
@Data
public class R<T> {

    /** 编码:200成功,0和其它数字为失败*/
    private Integer code;

    /** 信息返回*/
    private String msg;

    /** 信息返回数据*/
    private T data;


    public static <T> R<T> success(T object) {
        R<T> r = new R<T>();
        r.data = object;
        r.code = 200;
        r.msg = CommonConst.SUCCESS_RESULT;
        return r;
    }

    public static <T> R<T> error(String msg) {
        R r = new R();
        r.msg = msg;
        r.code = 0;
        return r;
    }
}
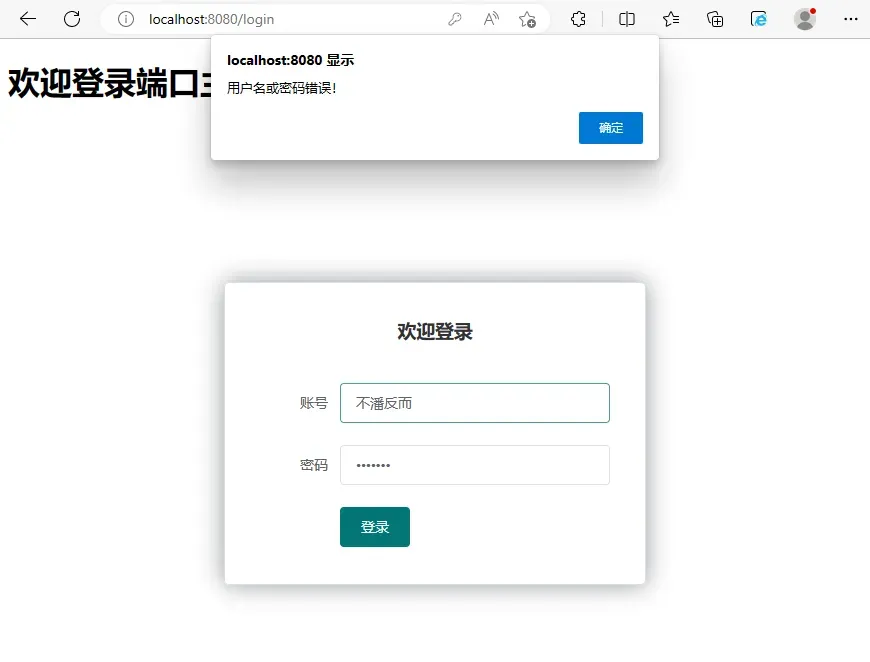
实现效果:
登录成功直接跳转到page页面
登录失败消息提醒
题外话
ajax发送post请求,后台接收数据时候我们要用@RequestParam接收,因为它的Content-Type就是用的表单提交的,对于axios的post请求我们需要用@RequestBody接收,因为它内部处理时候Content-Type指定是application/json类型,所以我们需要注意,这些都是默认情况下,我们ajax原生发请求也可以自己指定头,所以根据情况选择
虽然我们只实现了登录和学生信息展示两个功能,但是你仔细想想是不是分别实现了前端传数据后端接收和后端传数据前端接收
那其他的增删改查就交给大家自己了~
版权声明:本文为博主作者:吧啦吧啦!原创文章,版权归属原作者,如果侵权,请联系我们删除!
原文链接:https://blog.csdn.net/qq_54103767/article/details/130052451