🎉欢迎来到Python专栏~与FPGA、蓝牙模块实现串口通信
- ☆* o(≧▽≦)o *☆嗨~我是小夏与酒🍹
- ✨博客主页:小夏与酒的博客
- 🎈该系列文章专栏:Python学习专栏
- 文章作者技术和水平有限,如果文中出现错误,希望大家能指正🙏
- 📜 欢迎大家关注! ❤️


🎉 目录-与FPGA、蓝牙模块实现串口通信
- 一、效果演示
- 二、说明
- 三、Python串口通信代码
- 四、Python与FPGA实现串口通信
- 五、Python与蓝牙模块实现串口通信

一、效果演示
Python与FPGA串口通信:
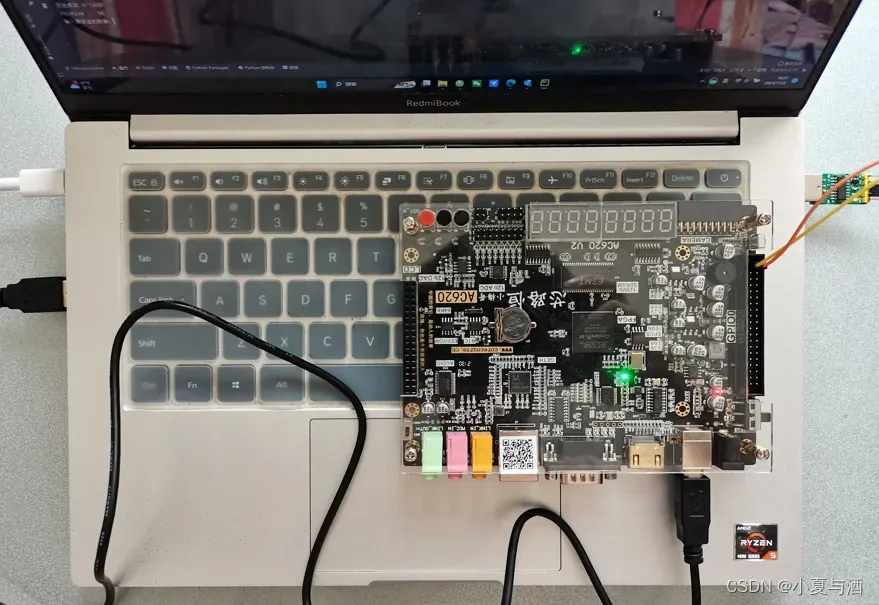
Python与FPGA实现串口通信(USB转TTL)
Python与蓝牙模块串口通信:

二、说明
Python技能树:Python入门技能树。
版本:Python 3.10。
IDE:PyCharm。
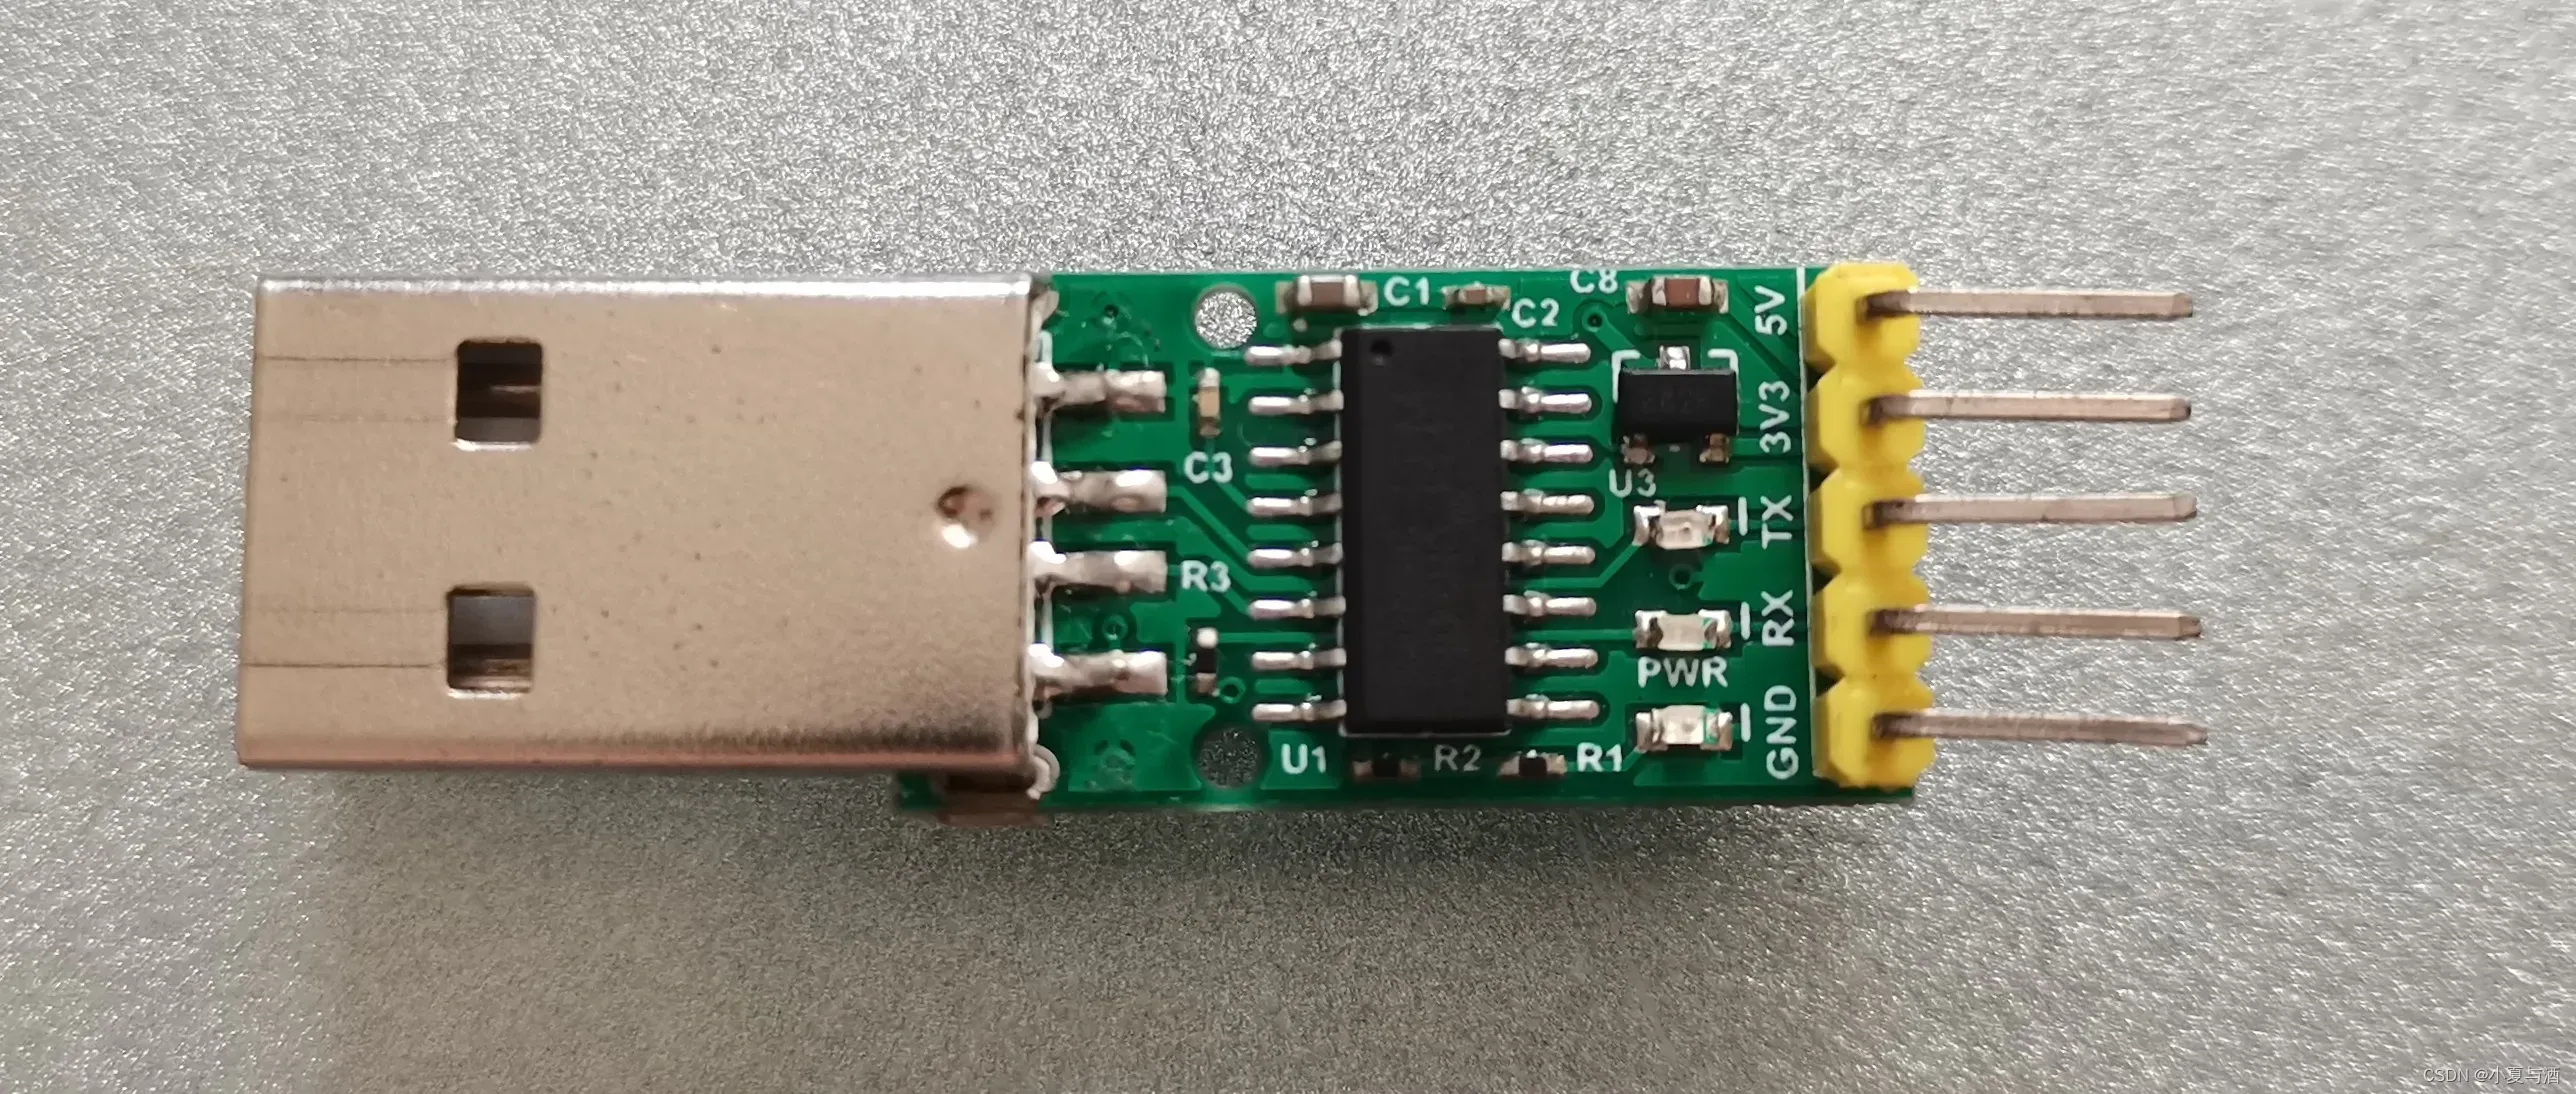
需要使用USB转TTL模块:
三、Python串口通信代码
完整代码:
import serial
from time import sleep

def recv(serial):
    while True:
        data = serial.read_all().hex()
        if data == '':
            continue
        else:
            break
        sleep(0.02)
    return data

def send(send_data):
    send_data_hex = bytes.fromhex(send_data)
    if (serial.isOpen()):
        serial.write(send_data_hex)  # 编码
        print("发送成功", send_data_hex)
    else:
        print("发送失败!")

if __name__ == '__main__':
    serial = serial.Serial('COM3', 9600, timeout=0.5)
    if serial.isOpen() :
        print("open success")
    else :
        print("open failed")

    #这里如果不加上一个while True,程序执行一次就自动跳出了
    while True:
        a = input("输入要发送的数据:")
        send(a)
        sleep(0.5)  # 起到一个延时的效果
        data =recv(serial)
        if data != '' :
            print("receive : ",data)
将代码拆分到不同的文件中,项目文件结构:
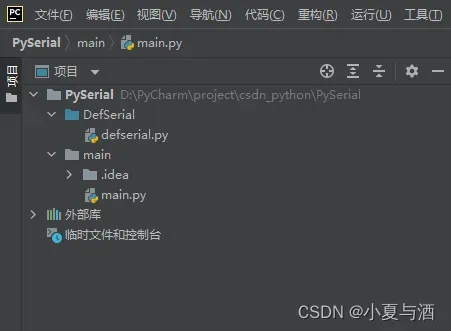
main.py:
import serial
from time import sleep
from DefSerial import defserial

if __name__ == '__main__':
    serial = serial.Serial('COM5', 9600, timeout=0.5)
    if serial.isOpen() :
        print("open success")
    else :
        print("open failed")

    #这里如果不加上一个while True,程序执行一次就自动跳出了
    while True:
        a = input("输入要发送的数据:")
        defserial.send(serial,a)
        sleep(0.5)  # 起到一个延时的效果
        data = defserial.recv(serial)
        if data != '' :
            print("receive : ",data)
defserial.py:
from time import sleep

def recv(serial):
    while True:
        data = serial.read_all().hex()
        if data == '':
            continue
        else:
            break
        sleep(0.02)
    return data

def send(serial,send_data):
    send_data_hex = bytes.fromhex(send_data)
    if (serial.isOpen()):
        serial.write(send_data_hex)  # 编码
        print("发送成功", send_data_hex)
    else:
        print("发送失败!")
✨编写完对应的文件之后,记得设置root路径,不然将无法使用定义的函数!
PyCharm中不同文件之间函数实现调用的设置:【Python】PyCharm中调用另一个文件的函数或类。
四、Python与FPGA实现串口通信
FPGA实现串口通信的参考文章:【FPGA】串口通信讲解-状态机判断数据值。
在这里将各模块代码展示出来:
async_uart_rev.v:
///
//模块介绍:实现异步串口接收功能
///
module async_uart_rev(
	input				rst_n	,//复位信号,低电平有效
	input				clk,//时钟信号,50MHZ
	input				rxd,//串行接收数据
	output	reg	[7:0]	rev_data,//并行数据
	output	reg			rev_dvld //并行数据有效标志
	);

	parameter	baud_num	=5207;//1/9600*1000000000/20
	parameter	IDLE		=4'd0;
	parameter	START_ST    =4'd1;
	parameter	STOP_ST     =4'd2;

	reg	[12:0]baud_cnt;
	reg			baud_cnt_en;
	wire		sample_en;
	reg	[3:0]	sample_num;
	reg			rxd_ff1;
	reg			rxd_ff2;
	reg	[3:0]	curr_st;

	//打两拍操作-第一拍
	always@(posedge clk or negedge rst_n)begin
		if(!rst_n)
			rxd_ff1 <= 1'b0;
		else
			rxd_ff1 <= rxd;
	end
	//打两拍操作-第二拍
	always@(posedge clk or negedge rst_n)begin
		if(!rst_n)
			rxd_ff2 <= 1'b0;
		else
			rxd_ff2 <= rxd_ff1;
	end

	//sample_en判断计数器是否到达计数值
	assign sample_en = (baud_cnt == baud_num[12:1])?1'b1:1'b0;

	//状态机跳转程序
	always@(posedge clk or negedge rst_n)begin
		if(!rst_n)
			curr_st<=IDLE;
		else case(curr_st)
			IDLE:begin
				if(rxd_ff2==0)
					curr_st<=START_ST;
				else
					;
			end
			START_ST:begin
				if(sample_num==8&&sample_en)
					curr_st<=STOP_ST;
				else
					;
			end
			STOP_ST:begin
				if(rxd_ff2==1&&sample_en)
					curr_st<=IDLE;
				else
					;
			end
			default:;
		endcase
	end

	//baud_cnt波特率计数器
	always@(posedge clk or negedge rst_n)begin
		if(!rst_n)
			baud_cnt<=0;
		else if(curr_st==START_ST||curr_st==STOP_ST)begin
			if(baud_cnt==baud_num)
				baud_cnt<=0;
			else
				baud_cnt<=baud_cnt+1;
		end else
			baud_cnt<=0;
	end

	always@(posedge clk or negedge rst_n)begin
		if(!rst_n)
			sample_num<=0;
		else if(sample_en&&sample_num==9)
			sample_num<=0;
		else if(sample_en)
			sample_num<=sample_num+1;
		else
			;
	end

	always@(posedge clk or negedge rst_n)begin
		if(!rst_n)
			rev_data<=0;
		else if(sample_en)
			case(sample_num)
			1:rev_data[0]<=rxd_ff2;
			2:rev_data[1]<=rxd_ff2;
			3:rev_data[2]<=rxd_ff2;
			4:rev_data[3]<=rxd_ff2;
			5:rev_data[4]<=rxd_ff2;
			6:rev_data[5]<=rxd_ff2;
			7:rev_data[6]<=rxd_ff2;
			8:rev_data[7]<=rxd_ff2;
			default:;
		endcase
	end

	always@(posedge clk or negedge rst_n)begin
		if(!rst_n)
			rev_dvld<=0;
		else if(sample_num==9&&sample_en)
			rev_dvld<=1;
		else
			rev_dvld<=0;
	end

endmodule
async_uart_tran.v:
///
//模块介绍:实现异步串口发送功能
///
module async_uart_tran(
	input				rst_n	,//复位信号,低电平有效
	input				clk,//时钟,50MHZ
	input		[7:0]	tran_data,//输入的并行数据
	input				tran_dvld,//输入的并行数据有效标志
	output	reg	txd      //串行输出数据
	);

	parameter	baud_num	=5207;//1/9600*1000000000/20
	parameter	IDLE		=4'd0;
	parameter	DATA_ST    	=4'd1;
	parameter	START_ST    =4'd2;
	parameter	STOP_ST     =4'd3;

	reg	[12:0]	baud_cnt;
	reg			baud_cnt_en;
	reg	[3:0]	sample_num;
	reg	[3:0]	curr_st;

	wire		sample_en;

	assign	sample_en = (baud_cnt==baud_num)?1'b1:1'b0;

	always@(posedge clk or negedge rst_n)begin
		if(!rst_n)
			curr_st<=IDLE;
		else case(curr_st)
			IDLE:begin
				if(tran_dvld==1)
					curr_st<=START_ST;
				else
					;
			end
			START_ST:begin
				if(sample_en==1)
					curr_st<=DATA_ST;
			end
			DATA_ST:begin
				if(sample_en&&sample_num==8)
					curr_st<=STOP_ST;
				else
					;
			end
			STOP_ST:begin
				if(sample_en==1)
					curr_st<=IDLE;
				else
					;
			end
			default:;
		endcase
	end

	always@(posedge clk or negedge rst_n)begin
		if(!rst_n)
			baud_cnt<=0;
		else if(curr_st==START_ST||curr_st==DATA_ST||curr_st==STOP_ST)begin
			if(baud_cnt==baud_num)
				baud_cnt<=0;
			else
				baud_cnt<=baud_cnt+1;
		end else
			baud_cnt<=0;
	end

	always@(posedge clk or negedge rst_n)begin
		if(!rst_n)
			sample_num<=0;
		else if(curr_st==IDLE)
			sample_num<=0;
		else if(sample_en)
			sample_num<=sample_num+1;
		else
			;
	end

	always@(posedge clk or negedge rst_n)begin
		if(!rst_n)
			txd<=1;
		else if(sample_en)
			case(sample_num)
			0:txd<=1'b0;
			1:txd<=tran_data[0];
			2:txd<=tran_data[1];
			3:txd<=tran_data[2];
			4:txd<=tran_data[3];
			5:txd<=tran_data[4];
			6:txd<=tran_data[5];
			7:txd<=tran_data[6];
			8:txd<=tran_data[7];
			9:txd<=1'b1;
			default:txd<=1;
		endcase
	end

endmodule
data.v:
module data(
	input 				clk,
	input 				rst_n,
	input 		[7:0]	rev_data,
	output reg 	[3:0]	led
);

	//定义LED的亮灭
	parameter led_light_all = 8'h11;//全部点亮
	parameter led_close_all = 8'h00;//全部熄灭
	parameter led_light_one = 8'hAA;//点亮led1
	parameter led_close_one = 8'hFF;//关闭led1

	localparam
		IDLE 	 = 4'b0001,
		LIGHTALL = 4'b0010,
		ONELIGHT = 4'b0100,
		ONECLOSE = 4'b1000;

	reg [3:0]curr_st;

	//状态机主程序
	always@(posedge clk or negedge rst_n)begin
		if(!rst_n)
			curr_st <= IDLE;
		else begin
			case(curr_st)
				IDLE:begin
					if(rev_data == led_light_all)
						curr_st <= LIGHTALL;
					else if(rev_data == led_light_one)
						curr_st <= ONELIGHT;
					else
						;
				end
				LIGHTALL:begin
					if(rev_data == led_close_all)
						curr_st <= IDLE;
					else
						;
				end
				ONELIGHT:begin
					if(rev_data == led_close_one)
						curr_st <= ONECLOSE;
					else
						;
				end
				ONECLOSE:curr_st <= IDLE;
			default:curr_st <= IDLE;
			endcase
		end
	end

	always@(posedge clk or negedge rst_n)begin
		if(!rst_n)
			led <= 4'b1111;
		else begin
			case(curr_st)
				IDLE:	 led <= 4'b1111;
				LIGHTALL:led <= 4'b0000;
				ONELIGHT:led <= 4'b1110;
				ONECLOSE:led <= 4'b0000;
			default:led <= led;
			endcase
		end
	end

endmodule
顶层模块:
///
//模块介绍:顶层模块,例化接收和发送模块,控制LED状态
///
module async_uart_top(
	input		clk		,//时钟,50MHZ
	input		rst_n		,//复位信号,低电平有效
	input		rxd		,//串行接收数据
	output	txd		,//串行发送数据
	output	[3:0] led
	);

	wire	[7:0]	rev_data;
	wire			rev_dvld;

	async_uart_rev Uasync_uart_rev(
		.rst_n(rst_n),
		.clk(clk),
		.rxd(rxd),
		.rev_data(rev_data),
		.rev_dvld(rev_dvld)
	);

	async_uart_tran Uasync_uart_tran(
		.rst_n(rst_n),
		.clk(clk),
		.tran_data(rev_data),
		.tran_dvld(rev_dvld),
		.txd(txd)
	);

	data Udata(
		.clk(clk),
		.rst_n(rst_n),
		.rev_data(rev_data),
		.led(led)
	);

endmodule
在硬件部分使用USB转TTL模块,将电脑与FPGA的IO口连接:
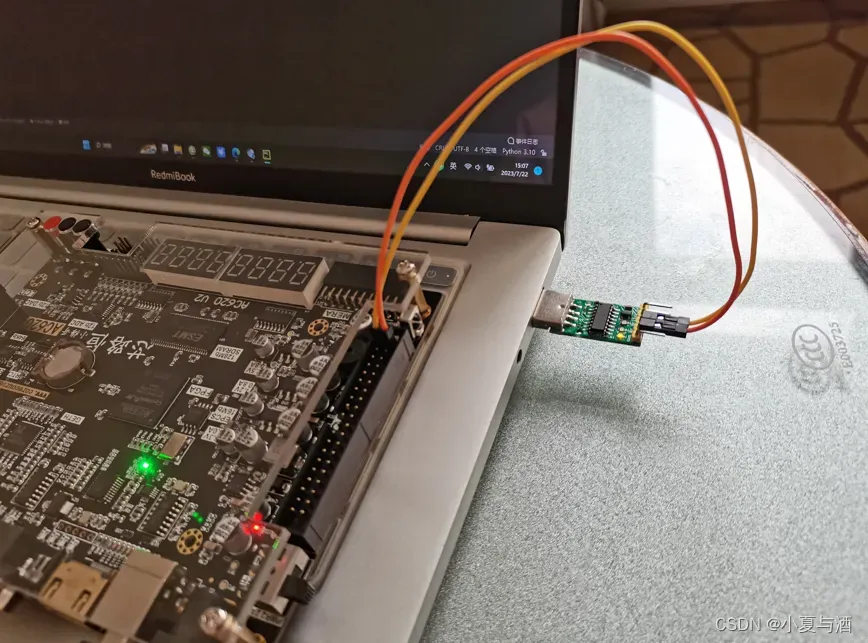
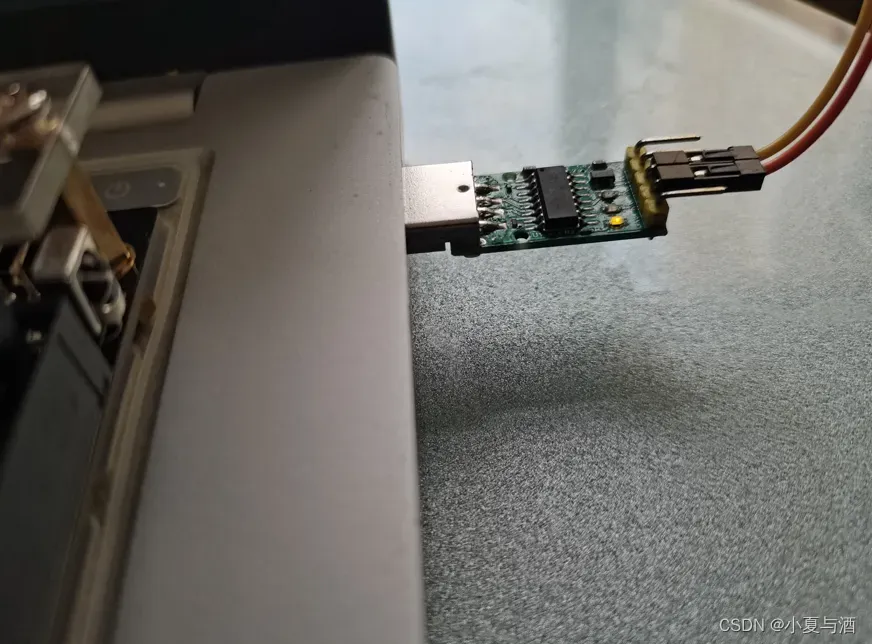
注意,这里我们只需连接rxd和txd就可以,因为FPGA和USB转TTL模块都是独立供电,见下图连接:
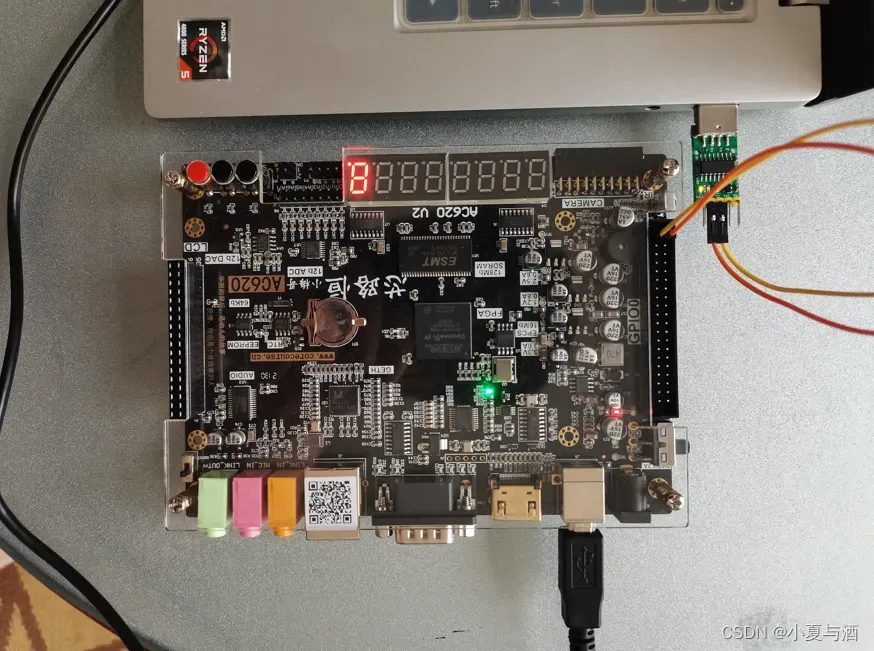
注意看data.v模块内部的代码,按照设定值发送即可控制LED的状态:
//定义LED的亮灭
parameter led_light_all = 8'h11;//全部点亮
parameter led_close_all = 8'h00;//全部熄灭
parameter led_light_one = 8'hAA;//点亮led1
parameter led_close_one = 8'hFF;//关闭led1
五、Python与蓝牙模块实现串口通信
使用USB转TTL模块与蓝牙模块连接:
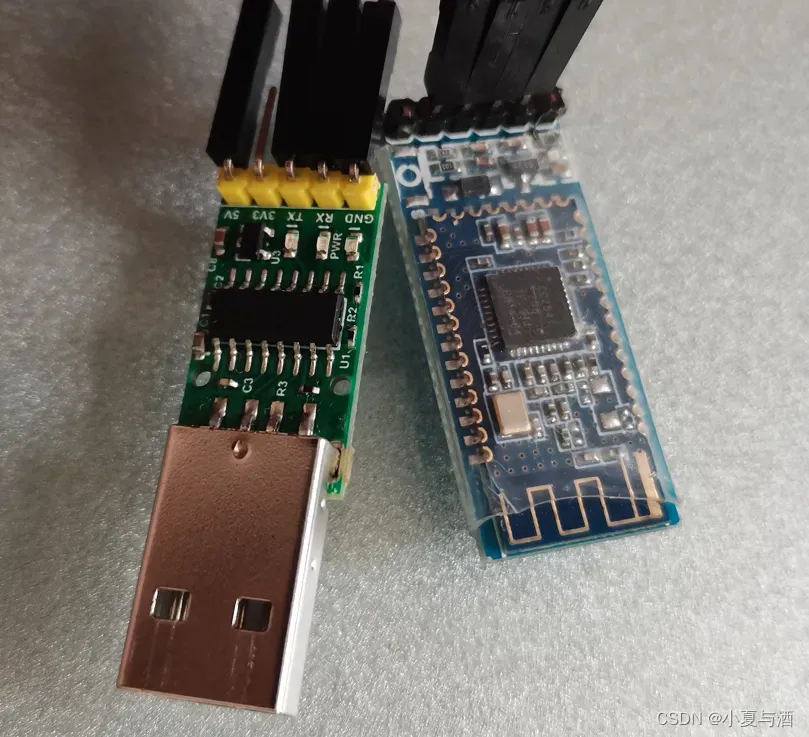
注意连接关系:蓝牙模块的TXD接转接模块的RXD,蓝牙模块的RXD接转接模块的TXD。
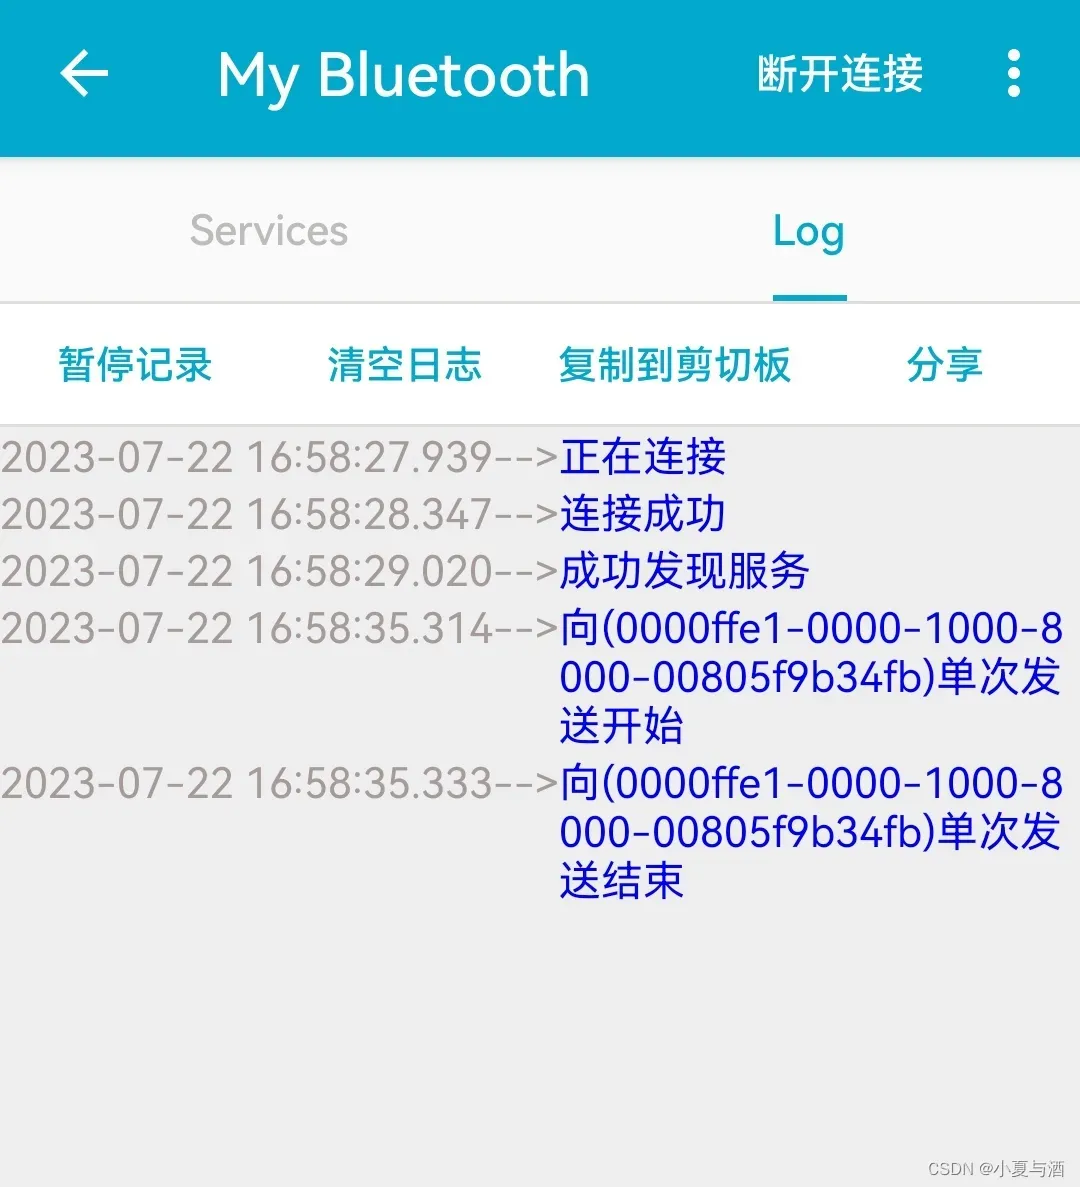
由于我使用的是BLE模块,所以需要下载BLE调试助手。串口通信成功日志:

🧸结尾
- ❤️ 感谢您的支持和鼓励! 😊🙏
- 📜您可能感兴趣的内容:
- 【Python】Python实现串口通信(Python+Stm32)
- 【Verilog HDL】FPGA-testbench基础知识
- 【Arduino TinyGo】【最新】使用Go语言编写Arduino-环境搭建和点亮LED灯
- 【全网首发开源教程】【Labview机器人仿真与控制】Labview与Solidworks多路支配关系-四足爬行机器人仿真与控制

文章出处登录后可见!
已经登录?立即刷新