目录
Mask-RCNN概述
训练自己数据步骤
工具Labelme
标注数据
源码需要改动地方
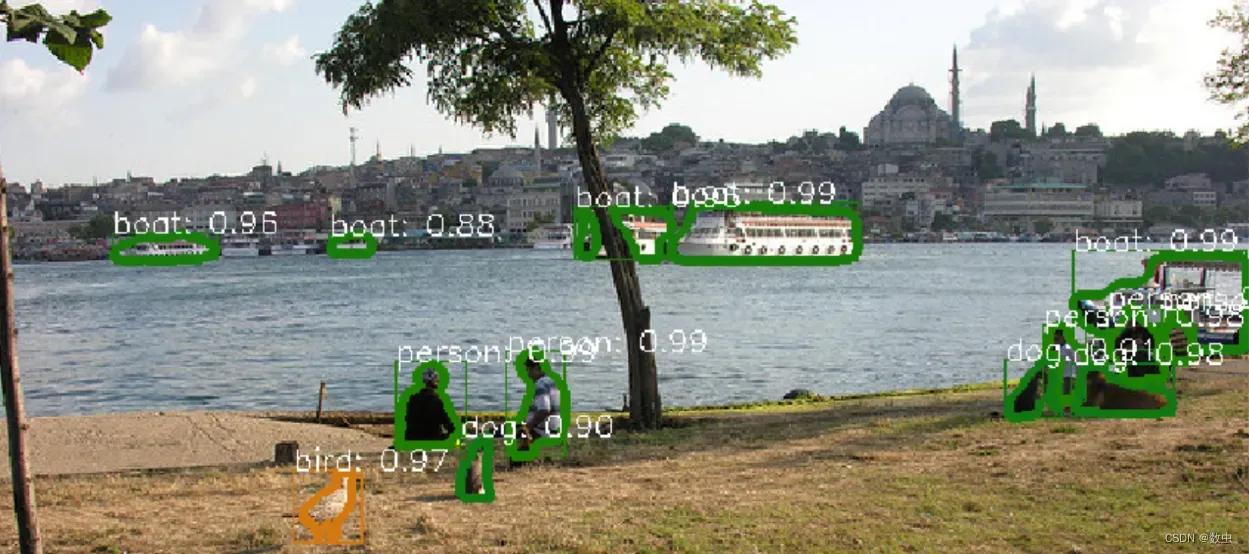
训练之后的测试结果
Mask-RCNN概述
Mask R-CNN是一种广泛应用于目标检测和图像分割任务的深度学习模型,它是由Faster R-CNN(一种快速目标检测模型)和Mask R-CNN(一种实例分割模型)组成的。Mask R-CNN将Faster R-CNN中的RPN和RoI Pooling层替换成了RPN和RoI Align层,以实现像素级的图像分割,能够同时检测出多个对象,并对每个对象进行像素级的分割。
Mask R-CNN的主要思路是在Faster R-CNN的基础上增加一个分支网络,即Mask分支,该分支网络可以对检测出来的物体进行像素级的分割操作,得到每个物体实例的分割掩码。与 Faster R-CNN 相似, Mask R-CNN同样使用RPN产生候选框,在RoIPooling层和ROIAlign层中对候选框中的特征进行提取。在RoIAlign层中,Mask R-CNN通过双线性插值从特征图中提取出精确的特征,然后送入Mask分支中进行像素级别的分割,最终得到每个实例的精确掩码。
Facebook AI Research 开源了 Faster R-CNN 和 Mask R-CNN 的 PyTorch 1.0 实现基准:MaskRCNN-Benchmark。相比 Detectron 和 mmdetection,MaskRCNN-Benchmark 的性能相当,并拥有更快的训练速度和更低的 GPU 内存占用
优势如下:
- PyTorch 1.0:相当或者超越 Detectron 准确率的 RPN、Faster R-CNN、Mask R-CNN 实现;
- 非常快:训练速度是 Detectron 的两倍,是 mmdection 的 1.3 倍;
- 节省内存:在训练过程中使用的 GPU 内存比 mmdetection 少大约 500MB;
- 使用多 GPU 训练和推理;
- 批量化推理:可以在每 GPU 每批量上使用多张图像进行推理;
- 支持 CPU 推理:可以在推理时间内于 CPU 上运行。
- 提供几乎所有参考 Mask R-CNN 和 Faster R-CNN 配置的预训练模型,具有 1x 的 schedule。
基于Mask RCNN开源项目源码地址:https://github.com/facebookresearch/maskrcnn-benchmark
训练自己数据步骤
- 安装Labelme
- 标注数据
- 源码需要改动地方
- 训练之后测试结果
工具Labelme
1、安装labelme工具
pip install labelme
pip install pyqt5
pip install pillow==4.0.0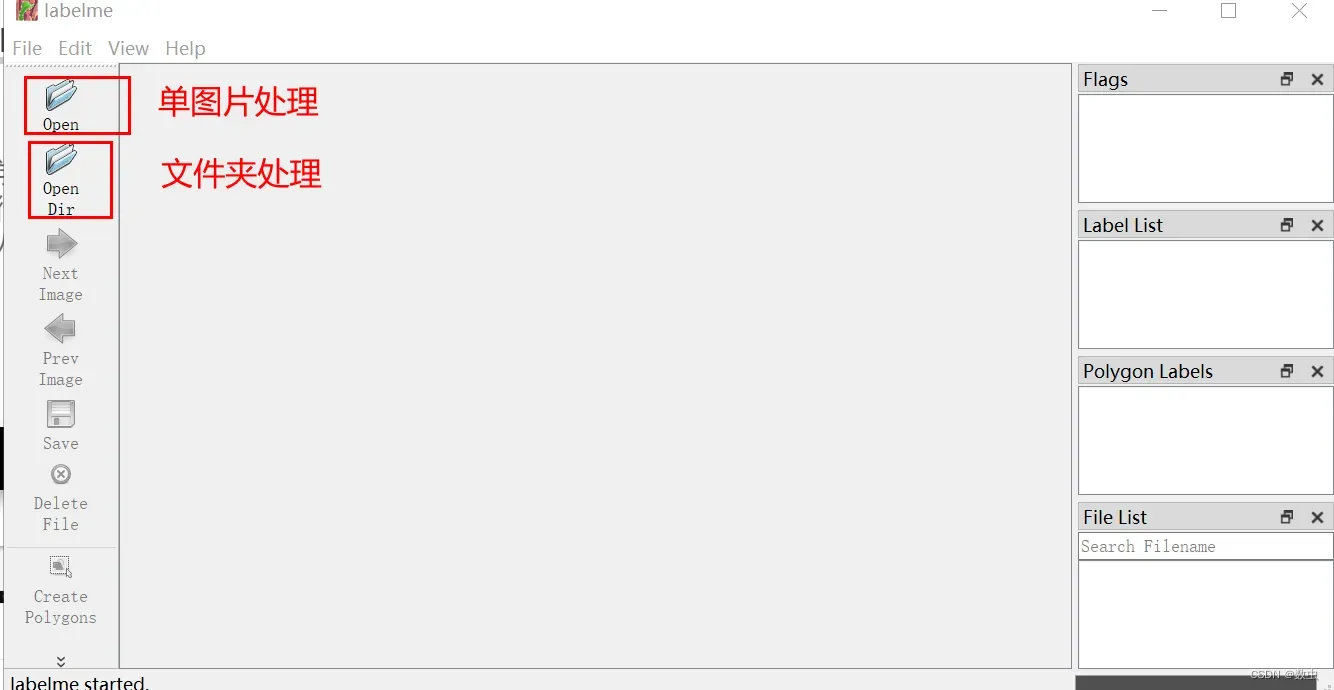
标注数据
1、使用labelme标注得到.json文件,将.json文件和原始图片放在一个文件夹里;
2、批量量转换:将labelme标注数据转换成coco数据集;
- 运行labelmetococo.py文件;
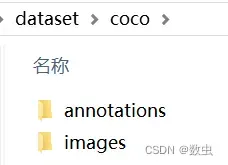
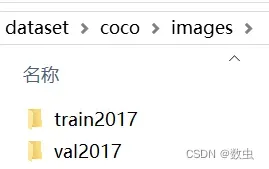
- 在我当前目录的dataset文件夹下,生成coco文件夹;
- coco文件夹下有annotations文件夹和images文件夹;
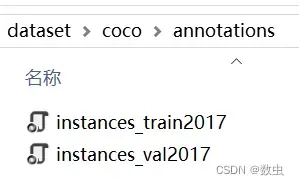
- annotations文件夹存放2个json文件;
- images文件夹存放train (存放:划分的用于训练的图像数据)和val (存放:划分的用于验证的图像数据) 两个文件夹;
下面是labelmetococo.py文件代码:
import os
import json
import numpy as np
import glob
import shutil
import cv2
from sklearn.model_selection import train_test_split

np.random.seed(41)

# 0为背景
classname_to_id = {
    "class1": 1

}
# 注意这里
# 需要从1开始把对应的Label名字写入:这里根据自己的Lable名字修改

class Lableme2CoCo:

    def __init__(self):
        self.images = []
        self.annotations = []
        self.categories = []
        self.img_id = 0
        self.ann_id = 0

    def save_coco_json(self, instance, save_path):
        json.dump(instance, open(save_path, 'w', encoding='utf-8'), ensure_ascii=False, indent=1)  # indent=2 更加美观显示

    # 由json文件构建COCO
    def to_coco(self, json_path_list):
        self._init_categories()
        for json_path in json_path_list:
            obj = self.read_jsonfile(json_path)
            self.images.append(self._image(obj, json_path))
            shapes = obj['shapes']
            for shape in shapes:
                annotation = self._annotation(shape)
                self.annotations.append(annotation)
                self.ann_id += 1
            self.img_id += 1
        instance = {}
        instance['info'] = 'spytensor created'
        instance['license'] = ['license']
        instance['images'] = self.images
        instance['annotations'] = self.annotations
        instance['categories'] = self.categories
        return instance

    # 构建类别
    def _init_categories(self):
        for k, v in classname_to_id.items():
            category = {}
            category['id'] = v
            category['name'] = k
            self.categories.append(category)

    # 构建COCO的image字段
    def _image(self, obj, path):
        image = {}
        from labelme import utils
        img_x = utils.img_b64_to_arr(obj['imageData'])
        h, w = img_x.shape[:-1]
        image['height'] = h
        image['width'] = w
        image['id'] = self.img_id
        image['file_name'] = os.path.basename(path).replace(".json", ".jpg")
        return image

    # 构建COCO的annotation字段
    def _annotation(self, shape):
        # print('shape', shape)
        label = shape['label']
        points = shape['points']
        annotation = {}
        annotation['id'] = self.ann_id
        annotation['image_id'] = self.img_id
        annotation['category_id'] = int(classname_to_id[label])
        annotation['segmentation'] = [np.asarray(points).flatten().tolist()]
        annotation['bbox'] = self._get_box(points)
        annotation['iscrowd'] = 0
        annotation['area'] = 1.0
        return annotation

    # 读取json文件,返回一个json对象
    def read_jsonfile(self, path):
        with open(path, "r", encoding='utf-8') as f:
            return json.load(f)

    # COCO的格式: [x1,y1,w,h] 对应COCO的bbox格式
    def _get_box(self, points):
        min_x = min_y = np.inf
        max_x = max_y = 0
        for x, y in points:
            min_x = min(min_x, x)
            min_y = min(min_y, y)
            max_x = max(max_x, x)
            max_y = max(max_y, y)
        return [min_x, min_y, max_x - min_x, max_y - min_y]


if __name__ == '__main__':

    # 需要把labelme_path修改为自己放images和json文件的路径
    labelme_path = "D:\\maskrcnn-benchmark-main\\dataset\\gps\\"
    # saved_coco_path = "../../../xianjin_data-3/"
    saved_coco_path = "D:\\maskrcnn-benchmark-main\\dataset\\"
    # saved_coco_path = "./"
    # 要把saved_coco_path修改为自己放生成COCO的路径,这里会在我当前COCO的文件夹下建立生成coco文件夹。
    print('reading...')
    # 创建文件
    if not os.path.exists("%scoco/annotations/" % saved_coco_path):
        os.makedirs("%scoco/annotations/" % saved_coco_path)
    if not os.path.exists("%scoco/images/train2017/" % saved_coco_path):
        os.makedirs("%scoco/images/train2017" % saved_coco_path)
    if not os.path.exists("%scoco/images/val2017/" % saved_coco_path):
        os.makedirs("%scoco/images/val2017" % saved_coco_path)
    # 获取images目录下所有的joson文件列表
    print(labelme_path + "\*.json")
    json_list_path = glob.glob(labelme_path + "\*.json")
    # json_list_path = glob.glob(labelme_path + "\*.png")
    print('json_list_path: ', len(json_list_path))
    # 数据划分,这里没有区分val2017和tran2017目录,所有图片都放在images目录下
    train_path, val_path = train_test_split(json_list_path, test_size=0.1, train_size=0.9)
    # 将训练集和验证集的比例是9:1,可以根据自己想要的比例修改。
    print("train_n:", len(train_path), 'val_n:', len(val_path))

    # 把训练集转化为COCO的json格式
    l2c_train = Lableme2CoCo()
    train_instance = l2c_train.to_coco(train_path)
    l2c_train.save_coco_json(train_instance, '%scoco/annotations/instances_train2017.json' % saved_coco_path)
    for file in train_path:
        # 存入png格式图片,原始图片有两种格式.png,.jpg
        # print("这里测试一下file:"+file)
        img_name = file.replace('json', 'png')
        # print("这里测试一下img_name:" + img_name)
        temp_img = cv2.imread(img_name)
        # 图像为空说明为.jpg格式
        if  temp_img is None:
            img_name_jpg = img_name.replace('png', 'jpg')
            temp_img = cv2.imread(img_name_jpg)

        filenames = img_name.split("\\")[-1]
        cv2.imwrite("D:\\maskrcnn-benchmark-main\\dataset\\coco\\images\\train2017/{}".format(filenames), temp_img)
        # print(temp_img) #测试图像读取是否正确


    for file in val_path:
        # shutil.copy(file.replace("json", "jpg"), "%scoco/images/val2017/" % saved_coco_path)

        img_name = file.replace('json', 'png')
        temp_img = cv2.imread(img_name)
        if temp_img is None:
            img_name_jpg = img_name.replace('png', 'jpg')
            temp_img = cv2.imread(img_name_jpg)
        filenames = img_name.split("\\")[-1]
        cv2.imwrite("D:\\maskrcnn-benchmark-main\\dataset\\coco\\images\\val2017/{}".format(filenames), temp_img)


    # 把验证集转化为COCO的json格式
    l2c_val = Lableme2CoCo()
    val_instance = l2c_val.to_coco(val_path)
    l2c_val.save_coco_json(val_instance, '%scoco/annotations/instances_val2017.json' % saved_coco_path)
执行程序,生成的文件夹
源码需要改动地方:
假设你此时位于maskrcnn-benchmark/目录下,datasets的组织结构如下
datasets
-> coco
  -> annotations
    -> instances_train2014.json //训练标签
    -> instances_test2014.json  //验证标签
  -> train2014 //训练图片
  -> val2014  //验证图
为了方便建议仿照上面这样的coco标准命名,但上面的所有名字都不是一定要求这样写的,自己可以合理命名,只要程序中的各个与数据路径有关的地方一一对应上即可。
- 以
maskrcnn-benchmark/configse/2e_mask_rcnn_R_50_FPN_1x.yaml为例下面蓝色圈出来的地方必须修改: - 一个是类别,如果这里面没有类别,与default.py中的一致,那么程序会自动在defaults.py中寻找。
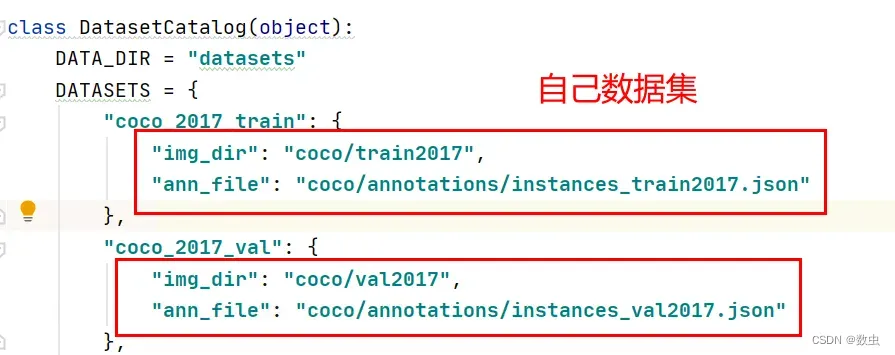
- 特别还有一个是DATASETS,这个是用来指定本次训练所使用的数据集,为了方便我这里没有修改,就借用了coco_2014_train的名字,名字可以随意起,但是在
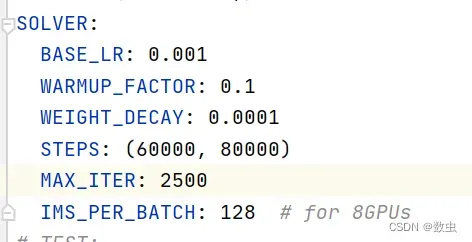
maskrcnn-benchmark/maskrcnn_benchmark/config/paths_catalog.py中需要有对应的数据集的路径描述,且该路径要与datasets/coco/里面的文件对应起来 - BASE_LR,迭代次数,保存间隔根据自己模型需要而定
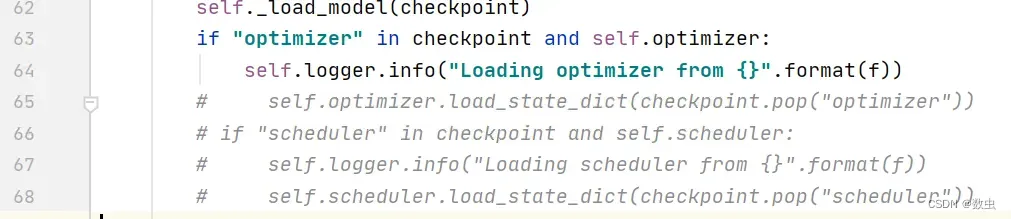
- 修改maskrcnn_benchmark/utils下的checkpoint,需要注释65- 68行(self.optimizer.load_state.. self.scheduler.load_…)
将myconfig下的paths_catalogs文件中的数据集路径改为自己的;
maskrcnn-benchmark/maskrcnn_benchmark/config/defaults.py 这是模型的一个总的默认配置文件,需要作出一定修改
_C.INPUT = CN()
# Size of the smallest side of the image during training
_C.INPUT.MIN_SIZE_TRAIN = (400,)  # (800,)
# Maximum size of the side of the image during training
_C.INPUT.MAX_SIZE_TRAIN = 667
# Size of the smallest side of the image during testing
_C.INPUT.MIN_SIZE_TEST = 400
# Maximum size of the side of the image during testing
_C.INPUT.MAX_SIZE_TEST = 667
#下面的两处修改也需要特别注意!!!必须和自己的类别相对应,如果没有分类,那么就为2
_C.MODEL.ROI_BOX_HEAD.NUM_CLASSES = 2 #类别数量加1
_C.MODEL.RETINANET.NUM_CLASSES = 2 #类别数量加1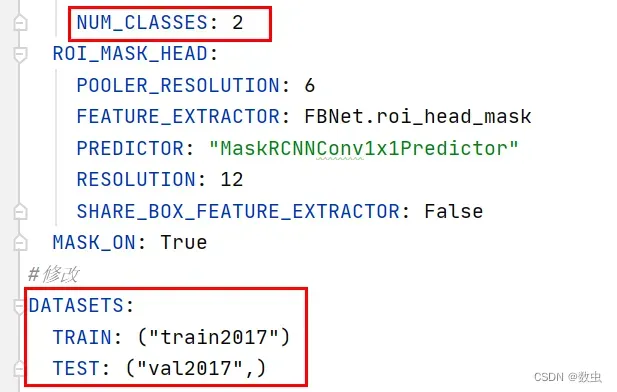
文章出处登录后可见!