Python 和 C++ 混合编程:pybind11 使用
- 1. 目的需求
- 2. pybind 11 简介
- 3. 使用实践:一个简单的实例
- 3.1 开发环境
- 3.2 准备工作
- 3.3 建立工程 test
- 3.4 编译工程 test 库
- 3.5 Python 调用 工程 test 库
- 4. 实线小结
- 4.1 Numpy 接口
- 5. 参考资料
1. 目的需求
我们通常在 Python 上进行算法开发,因为 Python 编程方便,易于快速验证算法。而在验证算法正确后,如果对运行效率有更高要求的话,则会将计算密集的模块使用 C/C++ 重新实现,来达到代码运行效率加速的效果。所以,这就涉及到了 Python 和 C++ 混合编程,而在这方面 pybind11 是一个很流行的库,可以很好的开展 Python 和 C++ 混合编程,并通过 Python 的 import 调用动态链接库(.so/.pyd等)达到本地代码加速。
2. pybind 11 简介
-
代码链接:https://github.com/pybind/pybind11
-
文档链接:https://pybind11.readthedocs.io/en/stable/index.html
pybind11 是一个轻量级的只包含头文件的库,它在Python中公开C++类型,反之亦然,主要用于创建现有C++代码的Python绑定。它的目标和语法类似于David Abrahams的优秀Boost.Python库:通过使用编译时内省推断类型信息,最大限度地减少传统扩展模块中的样板代码。
3. 使用实践:一个简单的实例
3.1 开发环境
-
ubuntu 20.04
-
cmake
-
python 3.9:此处实践中,使用 conda 管理 python 虚拟环境,此处新建 env_test 环境,可参考 Anaconda 的使用;对于非虚拟环境,方法大同小异;
3.2 准备工作
- 安装相关库
conda install pybind11
conda install pytest
- 查看库列表
(env_test) hjw@hjw-pc:~/test$ conda list
# packages in environment at /home/hjw/anaconda3/envs/env_test:
#
# Name                    Version                   Build  Channel
_libgcc_mutex             0.1                        main    https://mirrors.ustc.edu.cn/anaconda/pkgs/main
_openmp_mutex             5.1                       1_gnu    https://mirrors.ustc.edu.cn/anaconda/pkgs/main
attrs                     22.1.0           py39h06a4308_0    https://mirrors.ustc.edu.cn/anaconda/pkgs/main
ca-certificates           2023.01.10           h06a4308_0    https://mirrors.ustc.edu.cn/anaconda/pkgs/main
exceptiongroup            1.0.4            py39h06a4308_0    https://mirrors.ustc.edu.cn/anaconda/pkgs/main
iniconfig                 1.1.1              pyhd3eb1b0_0    https://mirrors.ustc.edu.cn/anaconda/pkgs/main
ld_impl_linux-64          2.38                 h1181459_1    https://mirrors.ustc.edu.cn/anaconda/pkgs/main
libffi                    3.3                  he6710b0_2    https://mirrors.ustc.edu.cn/anaconda/pkgs/main
libgcc-ng                 11.2.0               h1234567_1    https://mirrors.ustc.edu.cn/anaconda/pkgs/main
libgomp                   11.2.0               h1234567_1    https://mirrors.ustc.edu.cn/anaconda/pkgs/main
libstdcxx-ng              11.2.0               h1234567_1    https://mirrors.ustc.edu.cn/anaconda/pkgs/main
ncurses                   6.4                  h6a678d5_0    https://mirrors.ustc.edu.cn/anaconda/pkgs/main
openssl                   1.1.1t               h7f8727e_0    https://mirrors.ustc.edu.cn/anaconda/pkgs/main
packaging                 23.0             py39h06a4308_0    https://mirrors.ustc.edu.cn/anaconda/pkgs/main
pip                       23.0.1           py39h06a4308_0    https://mirrors.ustc.edu.cn/anaconda/pkgs/main
pluggy                    1.0.0            py39h06a4308_1    https://mirrors.ustc.edu.cn/anaconda/pkgs/main
pybind11                  2.10.4           py39hdb19cb5_0    https://mirrors.ustc.edu.cn/anaconda/pkgs/main
pybind11-global           2.10.4           py39hdb19cb5_0    https://mirrors.ustc.edu.cn/anaconda/pkgs/main
pytest                    7.3.1            py39h06a4308_0    https://mirrors.ustc.edu.cn/anaconda/pkgs/main
python                    3.9.0                hdb3f193_2    https://mirrors.ustc.edu.cn/anaconda/pkgs/main
readline                  8.2                  h5eee18b_0    https://mirrors.ustc.edu.cn/anaconda/pkgs/main
setuptools                67.8.0           py39h06a4308_0    https://mirrors.ustc.edu.cn/anaconda/pkgs/main
sqlite                    3.41.2               h5eee18b_0    https://mirrors.ustc.edu.cn/anaconda/pkgs/main
tk                        8.6.12               h1ccaba5_0    https://mirrors.ustc.edu.cn/anaconda/pkgs/main
tomli                     2.0.1            py39h06a4308_0    https://mirrors.ustc.edu.cn/anaconda/pkgs/main
tzdata                    2023c                h04d1e81_0    https://mirrors.ustc.edu.cn/anaconda/pkgs/main
wheel                     0.38.4           py39h06a4308_0    https://mirrors.ustc.edu.cn/anaconda/pkgs/main
xz                        5.4.2                h5eee18b_0    https://mirrors.ustc.edu.cn/anaconda/pkgs/main
zlib                      1.2.13               h5eee18b_0    https://mirrors.ustc.edu.cn/anaconda/pkgs/main
(env_test) hjw@hjw-pc:~/test$
3.3 建立工程 test
- 1、新建工程目录文件夹
mkdir test
- 2、新建 build 文件夹
cd test
mkdir build
- 3、编写 CMakeLists.txt
gedit CMakeLists.txt
CMakeLists.txt 内容如下:
cmake_minimum_required(VERSION 3.1)
project(test)

set(PYTHON_EXECUTABLE /home/hjw/anaconda3/envs/env_test/bin/python)

set(pybind11_DIR "/home/hjw/anaconda3/envs/env_test/lib/python3.9/site-packages/pybind11/share/cmake/pybind11/")
find_package(pybind11 REQUIRED)
# add_subdirectory(pybind11)

pybind11_add_module(test test.cpp)
其中,PYTHON_EXECUTABLE 和 pybind11_DIR 需要根据对应环境,进行修改适配。
- 4、编写 test.cpp
gedit test.cpp
test.cpp 内容如下:
#include <pybind11/pybind11.h>
#include <iostream>

namespace py = pybind11;

int demo(int a, int b)
{
    int result = 0;

    result = a * b;

    std::cout << "result is " << result << std::endl;

    return result;
}

PYBIND11_MODULE(test, m)
{
    // 可选,说明这个模块的作用
    m.doc() = "pybind11 test plugin";
    //def("提供给python调用的方法名", &实际操作的函数, "函数功能说明", 默认参数). 其中函数功能说明为可选
    m.def("demo", &demo, "A function which multiplies two numbers", py::arg("a")=6, py::arg("b")=7);
}
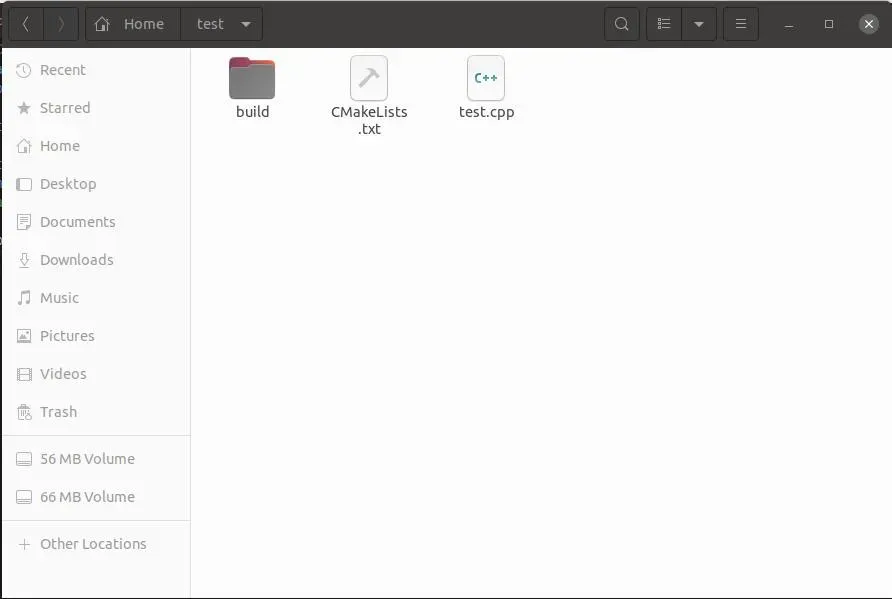
- 5、查看最终目录内容
(env_test) hjw@hjw-pc:~$ mkdir test
(env_test) hjw@hjw-pc:~$ cd test
(env_test) hjw@hjw-pc:~/test$ mkdir build
(env_test) hjw@hjw-pc:~/test$ gedit CMakeLists.txt
(env_test) hjw@hjw-pc:~/test$ gedit test.cpp
(env_test) hjw@hjw-pc:~/test$ ll
total 20
drwxrwxr-x  3 hjw hjw 4096 Jun  7 16:44 ./
drwxr-xr-x 45 hjw hjw 4096 Jun  7 16:44 ../
drwxrwxr-x  2 hjw hjw 4096 Jun  7 16:42 build/
-rw-rw-r--  1 hjw hjw  330 Jun  7 16:43 CMakeLists.txt
-rw-rw-r--  1 hjw hjw  449 Jun  7 16:44 test.cpp
(env_test) hjw@hjw-pc:~/test$
3.4 编译工程 test 库
cd build

cmake ..

make -j4
(env_test) hjw@hjw-pc:~/test$ cd build
(env_test) hjw@hjw-pc:~/test/build$ cmake ..
-- The C compiler identification is GNU 9.4.0
-- The CXX compiler identification is GNU 9.4.0
-- Check for working C compiler: /usr/bin/cc
-- Check for working C compiler: /usr/bin/cc -- works
-- Detecting C compiler ABI info
-- Detecting C compiler ABI info - done
-- Detecting C compile features
-- Detecting C compile features - done
-- Check for working CXX compiler: /usr/bin/c++
-- Check for working CXX compiler: /usr/bin/c++ -- works
-- Detecting CXX compiler ABI info
-- Detecting CXX compiler ABI info - done
-- Detecting CXX compile features
-- Detecting CXX compile features - done
-- Found PythonInterp: /home/hjw/anaconda3/envs/env_test/bin/python (found suitable version "3.9", minimum required is "3.6")
-- Found PythonLibs: /home/hjw/anaconda3/envs/env_test/lib/libpython3.9.so
-- Performing Test HAS_FLTO
-- Performing Test HAS_FLTO - Success
-- Found pybind11: /home/hjw/anaconda3/envs/env_test/lib/python3.9/site-packages/pybind11/include (found version "2.10.4")
-- Configuring done
-- Generating done
-- Build files have been written to: /home/hjw/test/build
(env_test) hjw@hjw-pc:~/test/build$ make -j4
Scanning dependencies of target test
[ 50%] Building CXX object CMakeFiles/test.dir/test.cpp.o
[100%] Linking CXX shared module test.cpython-39-x86_64-linux-gnu.so
[100%] Built target test
(env_test) hjw@hjw-pc:~/test/build$
其中 test.cpython-39-x86_64-linux-gnu.so 即为最终的 test 库 文件
3.5 Python 调用 工程 test 库
- 编写 example.py
(env_test) hjw@hjw-pc:~/test/build$ cd ..
(env_test) hjw@hjw-pc:~/test$ gedit example.py
(env_test) hjw@hjw-pc:~/test$
- example.py 内容如下:
import sys
sys.path.insert(0, '/home/hjw/test/build')
import test

if __name__ == "__main__":
    result = test.demo(3, 4)
    print(result )
- example.py 运行结果如下:
(env_test) hjw@hjw-pc:~/test$ python3 example.py
result is 12
12
(env_test) hjw@hjw-pc:~/test$
4. 实线小结
通过 第3节 的介绍,已经完成了一个 Python 和 C++ 混合编程的小闭环了,下面对于具体 内容,如 Numpy、Eigen 的使用也就只是细节的完善了,可以参考 第5节 参考资料详细了解。
4.1 Numpy 接口
- 1、buffer_info 的定义,py:buffer_info的内容反映了Python缓冲区协议规范
struct buffer_info {
    void *ptr;
    ssize_t itemsize;
    std::string format;
    ssize_t ndim;
    std::vector<ssize_t> shape;
    std::vector<ssize_t> strides;
};
- 2、两个 Numpy 数组相加示例
#include <pybind11/pybind11.h>
#include <pybind11/numpy.h>

namespace py = pybind11;

py::array_t<double> add_arrays(py::array_t<double> input1, py::array_t<double> input2) {
    py::buffer_info buf1 = input1.request(), buf2 = input2.request();

    if (buf1.ndim != 1 || buf2.ndim != 1)
        throw std::runtime_error("Number of dimensions must be one");

    if (buf1.size != buf2.size)
        throw std::runtime_error("Input shapes must match");

    /* No pointer is passed, so NumPy will allocate the buffer */
    auto result = py::array_t<double>(buf1.size);

    py::buffer_info buf3 = result.request();

    double *ptr1 = static_cast<double *>(buf1.ptr);
    double *ptr2 = static_cast<double *>(buf2.ptr);
    double *ptr3 = static_cast<double *>(buf3.ptr);

    for (size_t idx = 0; idx < buf1.shape[0]; idx++)
        ptr3[idx] = ptr1[idx] + ptr2[idx];

    return result;
}

PYBIND11_MODULE(test, m) {
    m.def("add_arrays", &add_arrays, "Add two NumPy arrays");
}
5. 参考资料
1、https://pybind11.readthedocs.io/en/stable/advanced/pycpp/numpy.html
2、https://github.com/tdegeus/pybind11_examples
3、https://blog.csdn.net/qq_28087491/article/details/128305877
4、https://www.cnblogs.com/JiangOil/p/11130670.html
5、https://zhuanlan.zhihu.com/p/383572973
6、https://zhuanlan.zhihu.com/p/192974017
文章出处登录后可见!