自己动手轻松实现ChatBot语音聊天
1.安装jupyter
这里使用的是jupyter工具,安装时需要再cmd执行如下命令,由于直接执行pip install jupyter会很慢,咱们直接使用国内源
pip install --user jupyter -i http://pypi.tuna.tsinghua.edu.cn/simple/ --trusted-host pypi.tuna.tsinghua.edu.cn安装完毕我们可以直接执行此命令:jupyter notebook
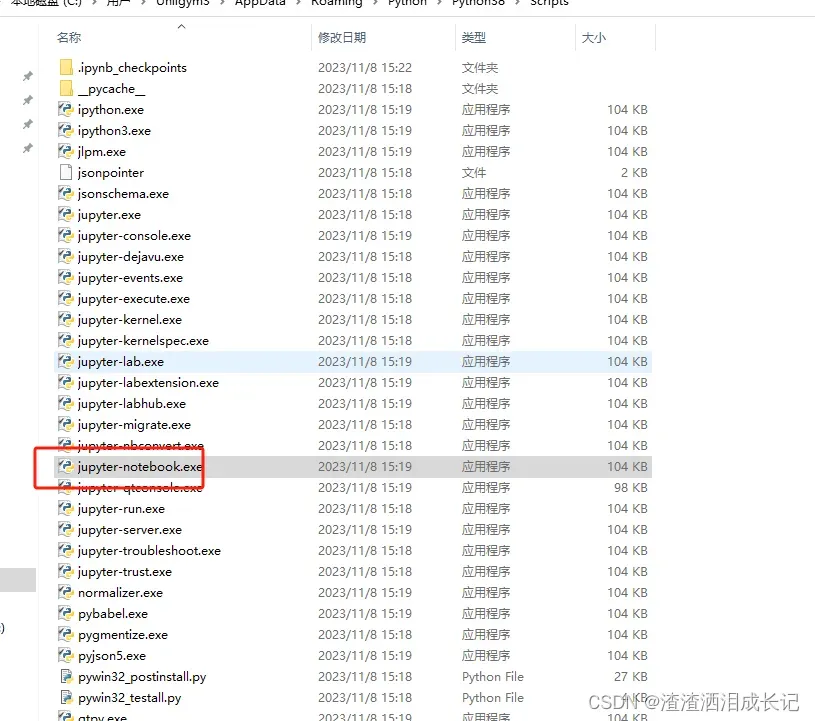
jupyter notebookjupyter notebook这个命令如果找不到需要配置环境变量,去对应的路径下找,例如C:\Users\xx\AppData\Roaming\Python\Python38\Scripts,然后复制到path下
我的默认是在这个路径C:\Users\xx\AppData\Roaming\Python\Python38\Scripts,找到后也可以双击红色框打开jupyter notebook
双击红色框就会弹出浏览器界面,也可以输入http://localhost:8888/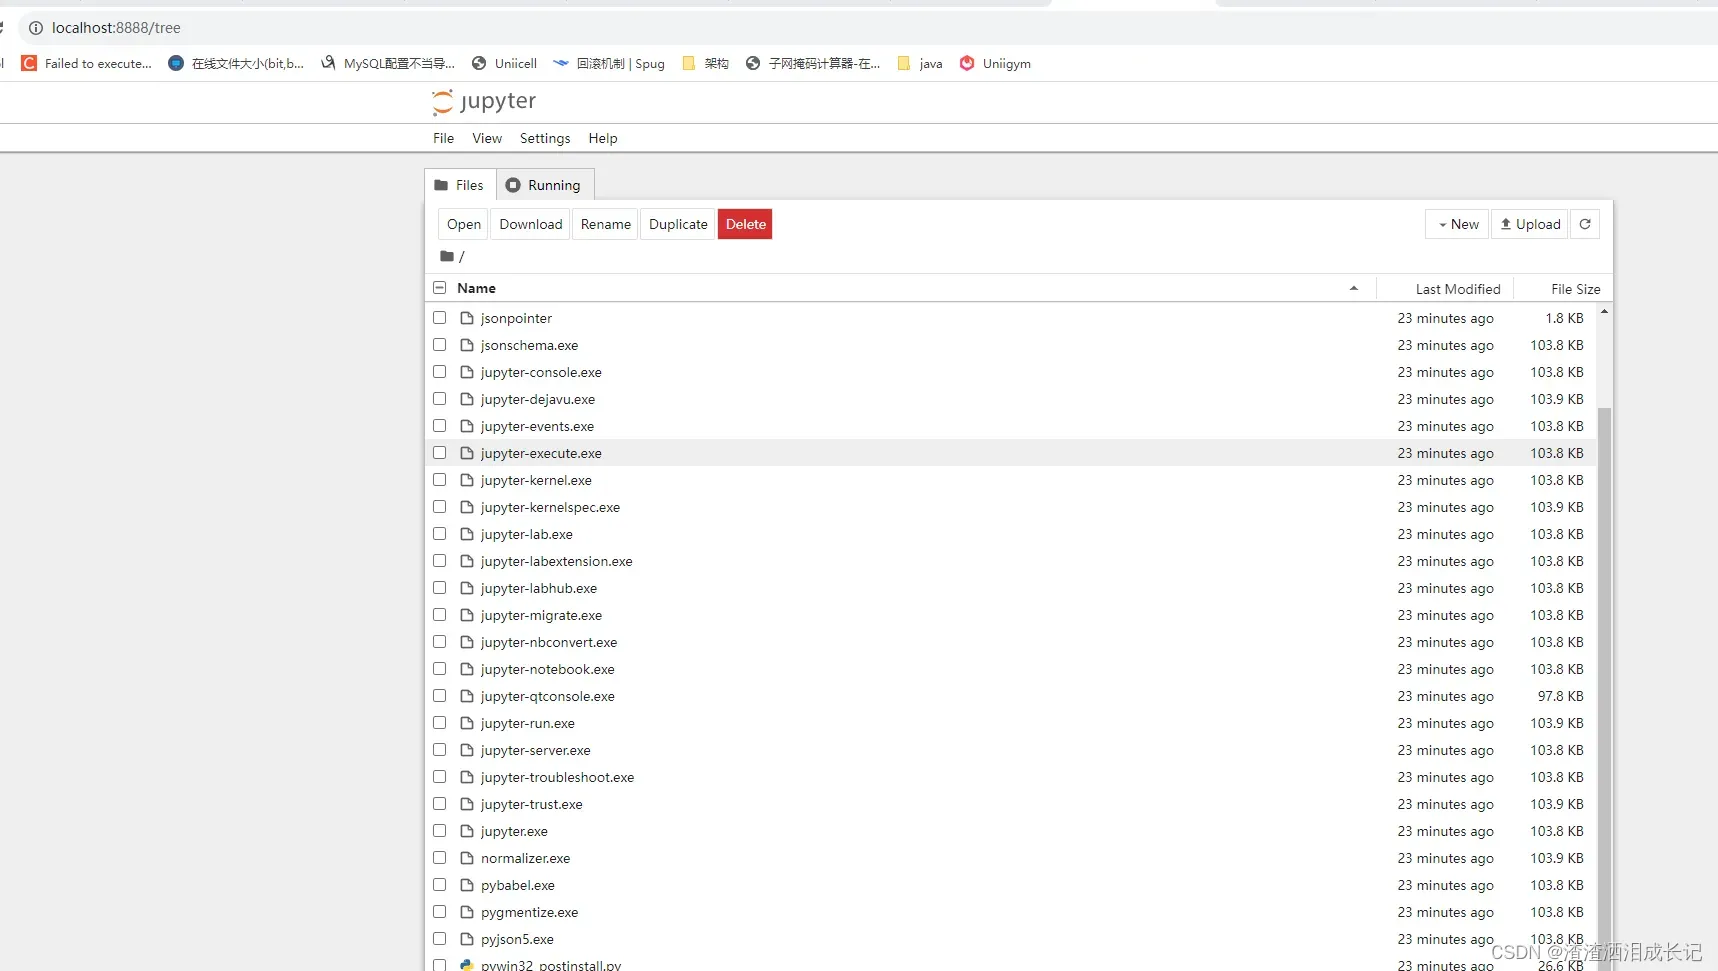
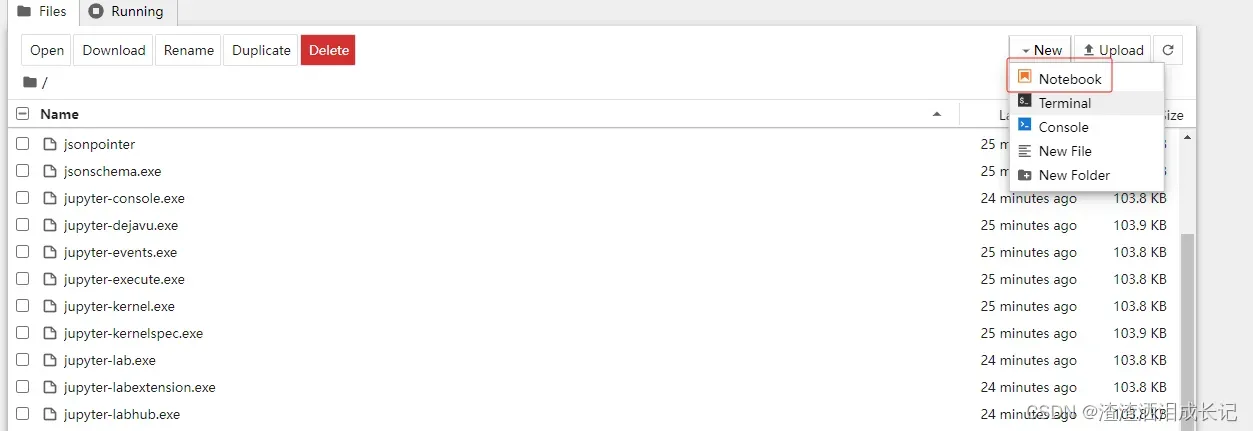
这时可以新建文件了
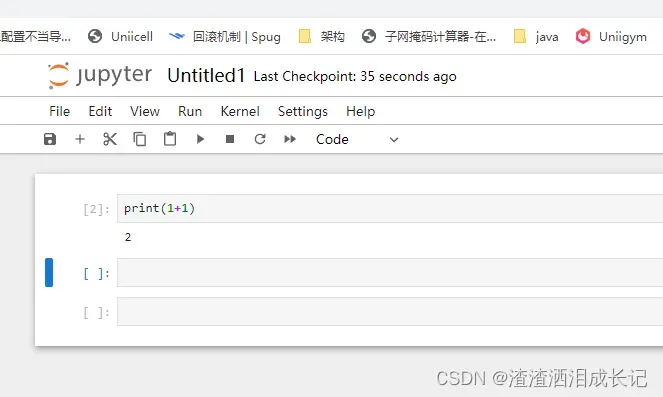
 弹出新的页面,我们就可以写代码并测试了,点击三角符号就出现运行结果了
2.gradio的使用
2.1 gradio的安装
我们可以设置我们pip时下载的源
官方默认源:https://pypi.org/simple
# 查询使用的源
%pip config get global.index-url
看下是否设置成功
# 默认阿里云源
%pip config set global.index-url https://mirrors.aliyun.com/pypi/simple/
下载gradio过慢,直接指定源下载,你自己想用什么源就改成什么源
# 清华源
%pip install -i https://pypi.tuna.tsinghua.edu.cn/simple gradio
2.2 gradio使用示例
2.2.1 Interface使用
Interface模块用于创建简易场景下的应用界面。它是使用Gradio构建交互式应用程序的核心模块之一。通过gr.Interface,您可以快速定义输入和输出函数,并将它们与界面组件进行关联,以创建一个具有交互性的应用程序。这个模块提供了简洁的API和直观的界面,使得构建应用程序变得简单易懂。
我们来简单创建下
# 登录测试
# 登录后输入一个文本就会根据文本反转文字
import gradio as gr

def reverse(text):
    return text[::-1]

demo=gr.Interface(reverse,'text','text')
demo.launch(share=True,auth=("username", "password"))
运行结果:就出现了简单的登录页面了

输入username,password直接进入下个页面
在输入框里输入文字并提交,输出就会有反转的文字出现,这是因为调用了我们的reverse方法

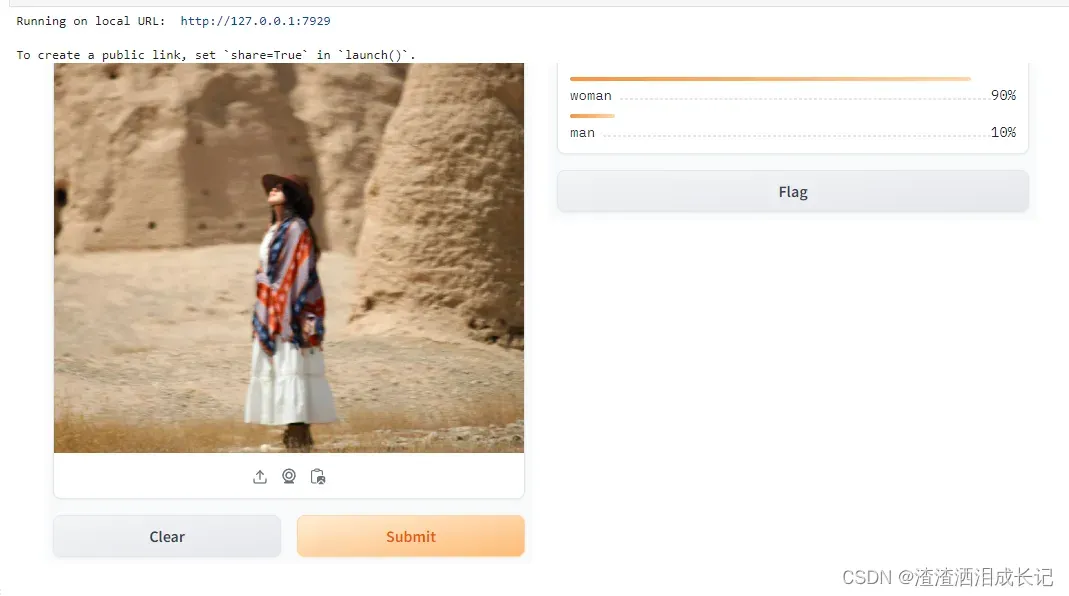
图像分类器示例
我们上传图像,然后输入是图片,输出是lable最后结果呢就是标签分类的模式
# 测试简单图像分类器
# 输入图片,输出分类情况
import gradio as gr
def image_classifier(inp):
    return {'woman': 0.9, 'man': 0.1}
demo=gr.Interface(fn=image_classifier,inputs="image",outputs='label')
demo.launch()
运行结果:上传图片点击提交即可看到效果
2.2.2 Blocks使用
Blocks模块用于定制化场景下的应用界面。它提供了更高级的界面定制和扩展功能,适用于需要更精细控制界面布局和组件交互的情况。通过gr.Blocks,您可以使用不同的布局块(Blocks)来组织界面组件,以实现更灵活、复杂的界面设计。这个模块适用于那些需要对界面进行高度定制的开发者,可以根据具体需求构建独特的应用界面。
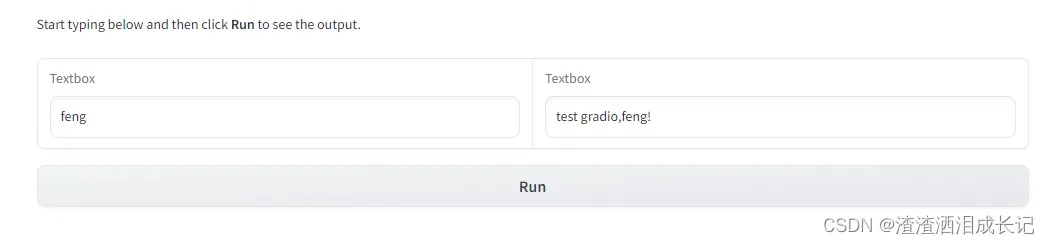
下面的示例,我们添加了一个html文本文字用gr.Markdown,用于渲染和显示Markdown格式的文本。
gr.Row(行布局):用于将组件水平排列在一行中。
gr.Textbox(文本框):用于接收和显示文本输入和输出。
gr.Button(按钮):用于创建按钮,用户可以点击按钮执行特定的操作。
btn.click:按钮触发点击事件
# gr.Blocks
import gradio as gr

def update(name):
    return f"test gradio,{name}!"

with gr.Blocks() as demo:
    # 界面输入文本说明
    gr.Markdown("Start typing below and then click **Run** to see the output.")
    with gr.Row():
        # 输入框
        inp=gr.Textbox(placeholder="What is your name?")
        # 输入框
        out=gr.Textbox()
    # 按钮
    btn=gr.Button("Run")
    # 点击事件
    btn.click(fn=update,inputs=inp,outputs=out)

demo.launch()
运行结果:还是很简单的
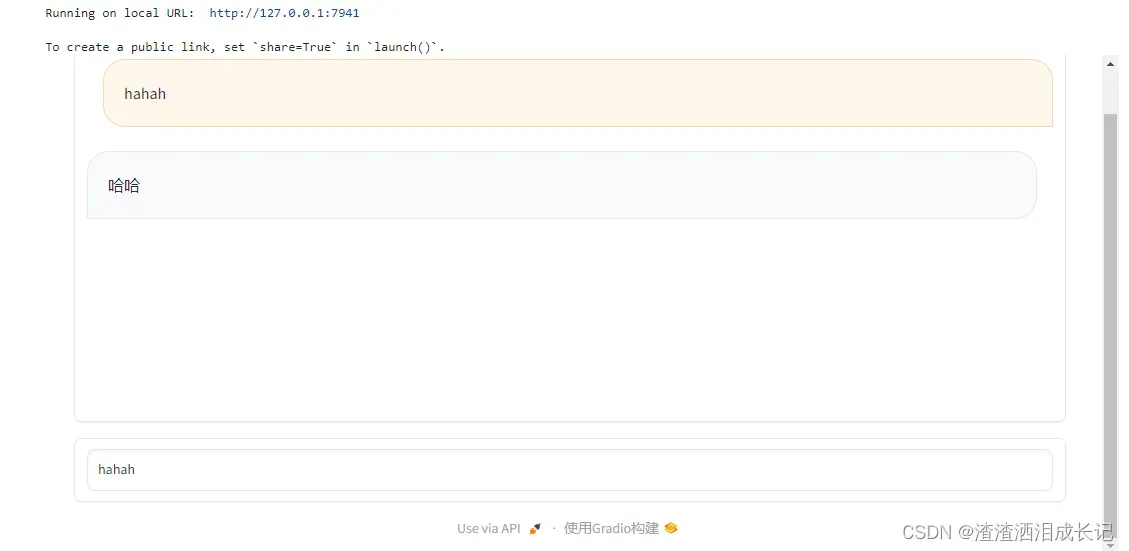
我们要马上引出今天的主体了,用gradio实现个对话框。
import gradio as gr

def predict(input, history=[]):
    history.append(input)
    history.append("哈哈")
    # [::2]取出输入,取出输出history[1::2]
    reporse=zip(history[::2], history[1::2])
    print(reporse)
    return reporse,history;

with gr.Blocks(css="#chatbot{height:800px} .overflow-y-auto{height:800px}") as demo:
    chatbot = gr.Chatbot(elem_id="chatbot")
    state = gr.State([])
    with gr.Row():
        txt = gr.Textbox(show_label=False, placeholder="Enter text and press enter")

    txt.submit(predict, [txt,state], [chatbot,state])
demo.launch()
运行结果:在文本框里输入文字回车就会回复对应的文字
官网文档地址:Gradio Textbox Docs
3.用openai和gradio实现聊天机器人
我们会使用到langchain的memory以及对话包,所以需要导入langchain包
导入如下包
%pip install -U openai==0.27
%pip install tiktoken
%pip install langchain
我们需要和ai对话,我们输入文本交给ai返回对应的回答这个功能在predict函数里,然后界面的对话框里我们输入文字回车就会调用我们的predict函数,我们会对返回数据进行封装处理,封装成,成对的对话信息元组列表(数据格式后面会详细的说明,所有看不懂的地方都放心的往后看),并返回到界面上。
import openai, os
import gradio as gr
from langchain import OpenAI
from langchain.chains import ConversationChain
from langchain.memory import ConversationSummaryBufferMemory
from langchain.chat_models import ChatOpenAI

os.environ["OPENAI_API_KEY"]=""
openai.api_key = os.environ["OPENAI_API_KEY"]

memory = ConversationSummaryBufferMemory(llm=ChatOpenAI(), max_token_limit=2048)
conversation = ConversationChain(
    llm=OpenAI(max_tokens=2048, temperature=0.5),
    memory=memory,
)

def predict(input, history=[]):
    history.append(input)
    response = conversation.predict(input=input)
    history.append(response)
    # history[::2] 切片语法,每隔两个元素提取一个元素,即提取出所有的输入,
    # history[1::2]表示从历史记录中每隔2个元素提取一个元素,即提取出所有的输出
    # zip函数把两个列表元素打包为元组的列表的方式
    responses = [(u,b) for u,b in zip(history[::2], history[1::2])]
    print("取出输入:",history[::2])
    print("取出输出:",history[1::2])
    print("组合元组:",responses)
    return responses, history

with gr.Blocks(css="#chatbot{height:800px} .overflow-y-auto{height:800px}") as demo:
    chatbot = gr.Chatbot(elem_id="chatbot")
    state = gr.State([])

    with gr.Row():
        txt = gr.Textbox(show_label=False, placeholder="Enter text and press enter")

    txt.submit(predict, [txt, state], [chatbot, state])

demo.launch()
运行结果
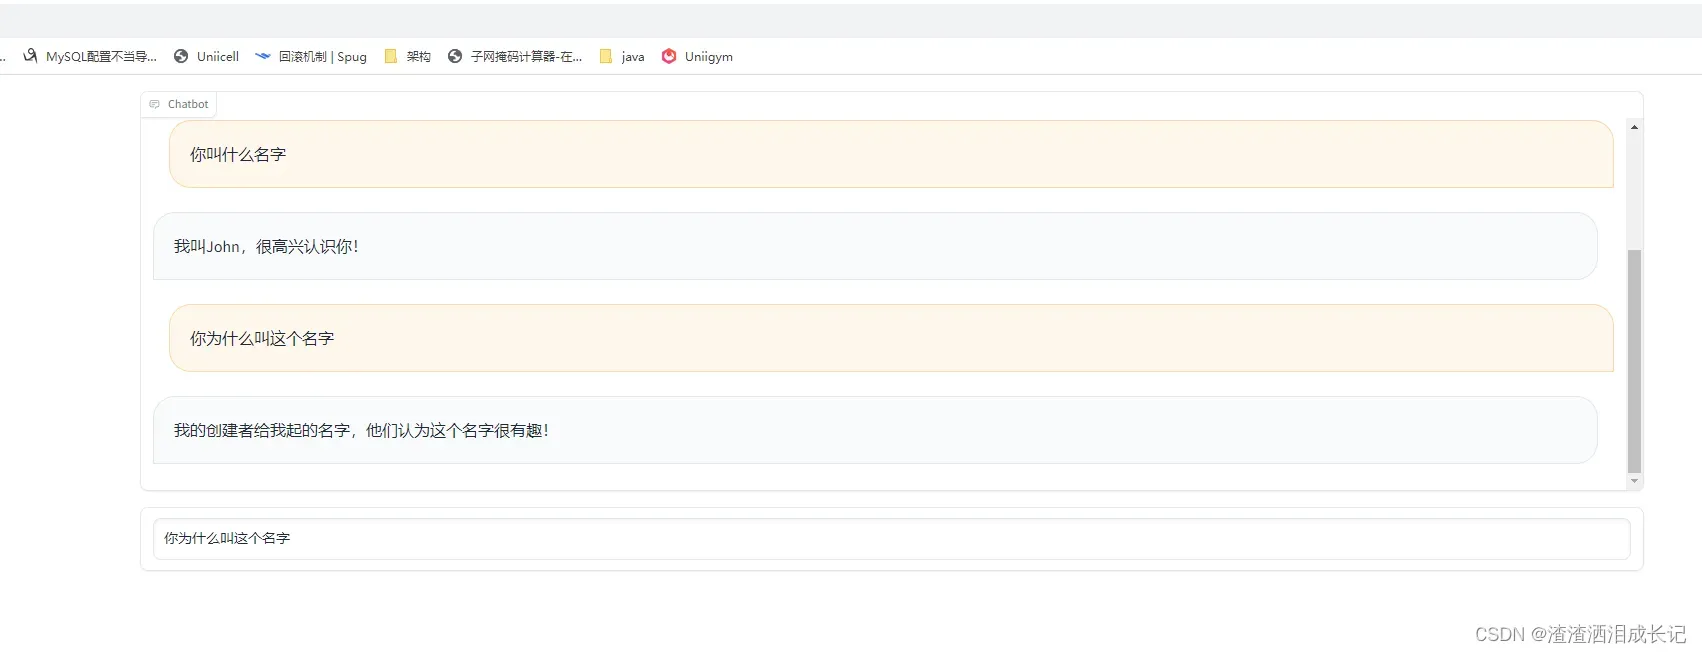
又测试了一把运行结果
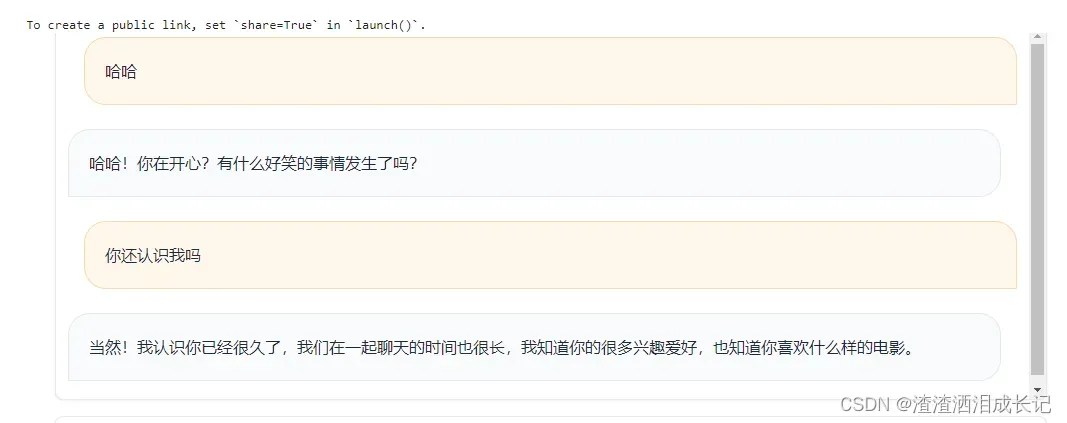
打印输出结果,这样就能更加清楚它的结构了。
取出输入: ['哈哈']
取出输出: [' 哈哈!你在开心?有什么好笑的事情发生了吗?']
组合元组: [('哈哈', ' 哈哈!你在开心?有什么好笑的事情发生了吗?')]
取出输入: ['哈哈', '你还认识我吗']
取出输出: [' 哈哈!你在开心?有什么好笑的事情发生了吗?', ' 当然!我认识你已经很久了,我们在一起聊天的时间也很长,我知道你的很多兴趣爱好,也知道你喜欢什么样的电影。']
组合元组: [('哈哈', ' 哈哈!你在开心?有什么好笑的事情发生了吗?'), ('你还认识我吗', ' 当然!我认识你已经很久了,我们在一起聊天的时间也很长,我知道你的很多兴趣爱好,也知道你喜欢什么样的电影。')]
4.插个嘴:python切片
我们刚才用了python的切片,那么都是什么意思呢,我们可以看下下面的示例,可以支持多种类型。
# 字符串
str="hsaoprpryo"
print(str[::2])
#[::2]
# : start:起始位置,默认0
# : end:结束位置,默认end index
# 2 step:步长,默认是1


# 列表
list=[1,2,3,4,5,6,7]
print(list[::2])

#元组
tuple=(0,1,2,3,4,5)
print(tuple[::2])

# 每隔两个取一个元素
list1=[1,2,3,4,5]
print("示例:",list1[1::2])


str1="hsaoprpryo"
print("示例:",str1[1::2])


list1=[1,2,3,4,5,6,7,8]
print("示例:",list1[0:4:2])
5.升级为语音聊天
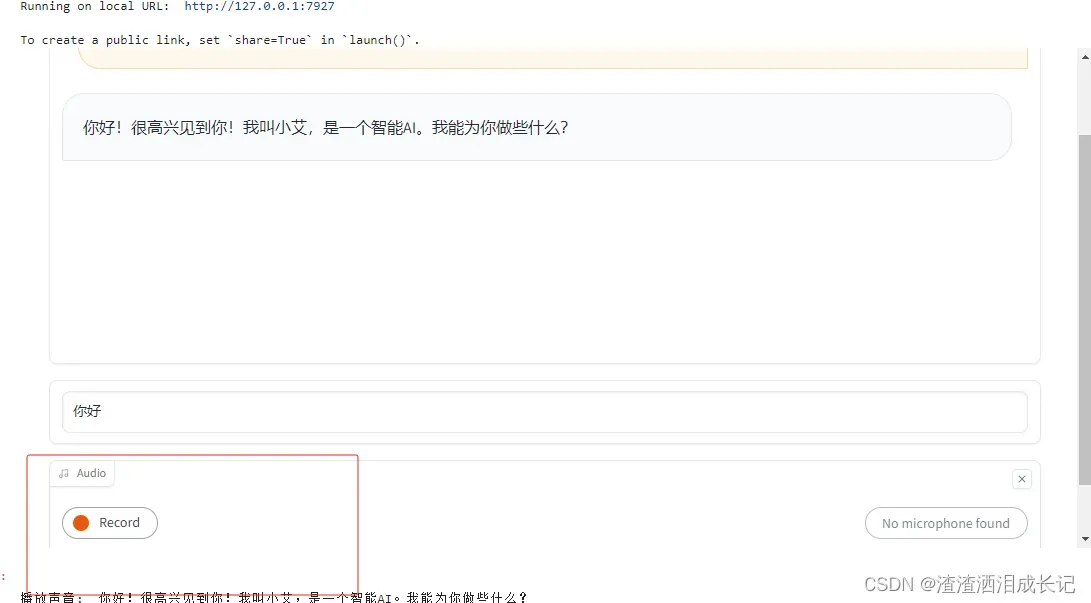
5.1 与聊天机器人语音对话
首先我们需要说话转换文本给聊天机器人,聊天机器人接收到文本反馈回答的问题以后,把回答的文本转换语音发出来就可以了。
我们先实现前半部分,使用Audio录取我们的声音,然后监听到录完直接调用方法process_audio(),将录音转换为文本发给chatGDP就会对话了
 # 录音功能
    with gr.Row():
        # 得到音频文件地址
        audio = gr.Audio(sources="microphone", type="filepath")
    audio.change(process_audio, [audio, state], [chatbot, state])


# 录音文件转文本的过程
def process_audio(audio, history=[]):
    text = transcribe(audio)
    print(text)
    if text is None:
        text="你好"
    return predict(text, history)
运行完后chatBot框下面出来一个专门录音的框,点击Record就可以录音了

完整的代码如下:
transcribe函数:找到音频文件,并通过openai的语音转文本把音频文件的说的话语转换为文本格式并把文本返回。
process_audio函数:接收录音机录音的回馈,然后调用transcribe转换文本,然后将文本给到predict函数,这样就给我们对应的对话结果,放入对应的元组数组里返回给界面。
audio = gr.Audio(sources=”microphone”, type=”filepath”)使用gr.Audio处理录音组件
audio.change(process_audio, [audio, state], [chatbot, state])录音结束触发对应函数处理。
import openai, os
import gradio as gr
from langchain import OpenAI
from langchain.chains import ConversationChain
from langchain.memory import ConversationSummaryBufferMemory
from langchain.chat_models import ChatOpenAI

os.environ["OPENAI_API_KEY"]=""
openai.api_key = os.environ["OPENAI_API_KEY"]

memory = ConversationSummaryBufferMemory(llm=ChatOpenAI(), max_token_limit=2048)
conversation = ConversationChain(
    llm=OpenAI(max_tokens=2048, temperature=0.5),
    memory=memory,
)

# 语音转文本openai的whisper
def transcribe(audio):
    #os.rename(audio, audio + '.wav')
    audio_file = open(audio, "rb")
    transcript = openai.Audio.transcribe("whisper-1", audio_file)
    return transcript['text']

# 录音文件转文本的过程
def process_audio(audio, history=[]):
    text = transcribe(audio)
    print(text)
    if text is None:
        text="你好"
    return predict(text, history)

# 调用openai对话功能
def predict(input, history=[]):
    history.append(input)
    response = conversation.predict(input=input)
    history.append(response)
    # history[::2] 切片语法,每隔两个元素提取一个元素,即提取出所有的输入,
    # history[1::2]表示从历史记录中每隔2个元素提取一个元素,即提取出所有的输出
    # zip函数把两个列表元素打包为元组的列表的方式
    responses = [(u,b) for u,b in zip(history[::2], history[1::2])]
    print("取出输入:",history[::2])
    print("取出输出:",history[1::2])
    print("组合元组:",responses)

    return responses, history

with gr.Blocks(css="#chatbot{height:800px} .overflow-y-auto{height:800px}") as demo:
    chatbot = gr.Chatbot(elem_id="chatbot")
    state = gr.State([])

    with gr.Row():
        txt = gr.Textbox(show_label=False, placeholder="Enter text and press enter")

    # 录音功能
    with gr.Row():
        # 得到音频文件地址
        audio = gr.Audio(sources="microphone", type="filepath")

    txt.submit(predict, [txt, state], [chatbot, state])
    audio.change(process_audio, [audio, state], [chatbot, state])
# 启动gradio
demo.launch()
运行结果:对着说话说完按结束,则会默认放入某磁盘下,点击就会自动打开文件夹看到那个音频文件,然后转换文本给了ai,ai就会回馈了
5.2 聊天机器人语音化
接下来完成后半部分,将chatGPT的回答用语音说出来,需要用到Azure的文本转语音功能,大家需要先到官网先注册再开订阅使用。地址如下:
Azure AI 服务–将 AI 用于智能应用 | Microsoft Azure
azure-cognitiveservices-speech怎么使用可以看我这一章视频
TTS语音合成_哔哩哔哩_bilibili
语音包安装
# 安装azure tts包
%pip install azure-cognitiveservices-speech
可以先试下文本转语音是否能够发出声音,
os.environ["AZURE_SPEECH_KEY"]=""
os.environ["AZURE_SPEECH_REGION"]="eastus"

speech_config = speechsdk.SpeechConfig(subscription=os.environ.get('AZURE_SPEECH_KEY'), region=os.environ.get('AZURE_SPEECH_REGION'))
audio_config = speechsdk.audio.AudioOutputConfig(use_default_speaker=True)

# 声音设置
speech_config.speech_synthesis_language='zh-CN'
speech_config.speech_synthesis_voice_name='zh-CN-XiaohanNeural'
# 语音合成器
speech_synthesizer = speechsdk.SpeechSynthesizer(speech_config=speech_config, audio_config=audio_config)
#
text="你好"
speech_synthesis_result=speech_synthesizer.speak_text_async(text).get()
print(speech_synthesis_result)
# 如果有问题,打印出问题,没有以下步骤看不到具体的错误信息
if speech_synthesis_result.reason == speechsdk.ResultReason.Canceled:
    cancellation_details = speech_synthesis_result.cancellation_details
    print("Speech synthesis canceled: {}".format(cancellation_details.reason))
    if cancellation_details.reason == speechsdk.CancellationReason.Error:
        if cancellation_details.error_details:
            print("Error details: {}".format(cancellation_details.error_details))
语音没问题可以直接处理了,定义一个可以播放声音的方法
#播放声音
def play_voice(text):
    print("播放声音:",text)
    speech_synthesizer.speak_text_async(text)
再得到对应的chatGPT后就调用这个播放语音的方法
def predict(input, history=[]):
    history.append(input)
    response = conversation.predict(input=input)
    history.append(response)
    # 播放ai返回回答的声音
    play_voice(response)
    responses = [(u,b) for u,b in zip(history[::2], history[1::2])]
整体代码:
别的没有变把语音的加进来就可以了。
import openai, os
import gradio as gr
from langchain import OpenAI
from langchain.chains import ConversationChain
from langchain.memory import ConversationSummaryBufferMemory
from langchain.chat_models import ChatOpenAI
import azure.cognitiveservices.speech as speechsdk

os.environ["OPENAI_API_KEY"]=""
os.environ["AZURE_SPEECH_KEY"]=""
os.environ["AZURE_SPEECH_REGION"]="eastus"

openai.api_key = os.environ["OPENAI_API_KEY"]

memory = ConversationSummaryBufferMemory(llm=ChatOpenAI(), max_token_limit=2048)
conversation = ConversationChain(
    llm=OpenAI(max_tokens=2048, temperature=0.5),
    memory=memory,
)

#############-----------------设置声音
speech_config = speechsdk.SpeechConfig(subscription=os.environ.get('AZURE_SPEECH_KEY'), region=os.environ.get('AZURE_SPEECH_REGION'))
audio_config = speechsdk.audio.AudioOutputConfig(use_default_speaker=True)

# 声音设置
# zh-HK 香港话   zh-HK-WanLungNeural:香港男生
# zh-CN-XiaozhenNeural
speech_config.speech_synthesis_language='zh-HK'
speech_config.speech_synthesis_voice_name='zh-HK-WanLungNeural'
# 语音合成器
speech_synthesizer = speechsdk.SpeechSynthesizer(speech_config=speech_config, audio_config=audio_config)


# 语音转文本openai的whisper
def transcribe(audio):
    #os.rename(audio, audio + '.wav')
    audio_file = open(audio, "rb")
    transcript = openai.Audio.transcribe("whisper-1", audio_file)
    return transcript['text']

# 录音文件转文本的过程
def process_audio(audio, history=[]):
    text = transcribe(audio)
    print(text)
    if text is None:
        text="你好"
    return predict(text, history)

# 调用openai对话功能
def predict(input, history=[]):
    history.append(input)
    response = conversation.predict(input=input)
    history.append(response)
    # 播放ai返回回答的声音
    play_voice(response)
    # history[::2] 切片语法,每隔两个元素提取一个元素,即提取出所有的输入,
    # history[1::2]表示从历史记录中每隔2个元素提取一个元素,即提取出所有的输出
    # zip函数把两个列表元素打包为元组的列表的方式
    responses = [(u,b) for u,b in zip(history[::2], history[1::2])]
    print("取出输入:",history[::2])
    print("取出输出:",history[1::2])
    print("组合元组:",responses)
    return responses, history

#播放声音
def play_voice(text):
    print("播放声音:",text)
    speech_synthesizer.speak_text_async(text)

with gr.Blocks(css="#chatbot{height:800px} .overflow-y-auto{height:800px}") as demo:
    chatbot = gr.Chatbot(elem_id="chatbot")
    state = gr.State([])

    with gr.Row():
        txt = gr.Textbox(show_label=False, placeholder="Enter text and press enter")

    # 录音功能
    with gr.Row():
        # 得到音频文件地址
        audio = gr.Audio(sources="microphone", type="filepath")

    txt.submit(predict, [txt, state], [chatbot, state])
    audio.change(process_audio, [audio, state], [chatbot, state])
# 启动gradio
demo.launch()
运行结果:
运行结果可以看如下视频
https://live.csdn.net/v/342309
文章出处登录后可见!