Windows安装GPU版本的pytorch、tensorflow、paddlepaddle
文章目录
写在前面:每次更换显卡或设备都得重新寻找相关教程,网上流传的各种方法也千奇百怪,这次下定决心写一篇安装pytorch、tensorflow、paddlepaddle的完整教程。借鉴了网上已有的教程,由于要在一台电脑上同时安装三种框架,教程会有所不同,主要就是本安装方法的cuda的版本不能太高,但是单独安装一个框架也可参考本教程。
安装anaconda
不言而喻,同时安装三个框架肯定需要anaconda这样的包管理工具来创建三个虚拟环境,防止环境之间的相互冲突。
anaconda的下载地址为:https://www.anaconda.com/products/distribution#windows
安装的方式也很简单,直接下一步就可以。
查看电脑的CUDA支持版本
在NVIDIA的控制面板中点击系统信息中的组件可以查到当前显卡支持的最大CUDA版本。本电脑是RTX3060 12G,当前最大支持的版本是CUDA12.0。

这里,很多教程会让去NVIDIA下载低于该版本号的CUDA及对应的cudnn。但按照这样的安装方式在面对三个不同框架时,无法保证框架所需要的CUDA版本是完全一致的,且我通过尝试,此时根本不需要去NVIDIA官网下载CUDA及cudnn。在conda创建的虚拟环境中去下载CUDA及cudnn就可以使用。
创建虚拟环境
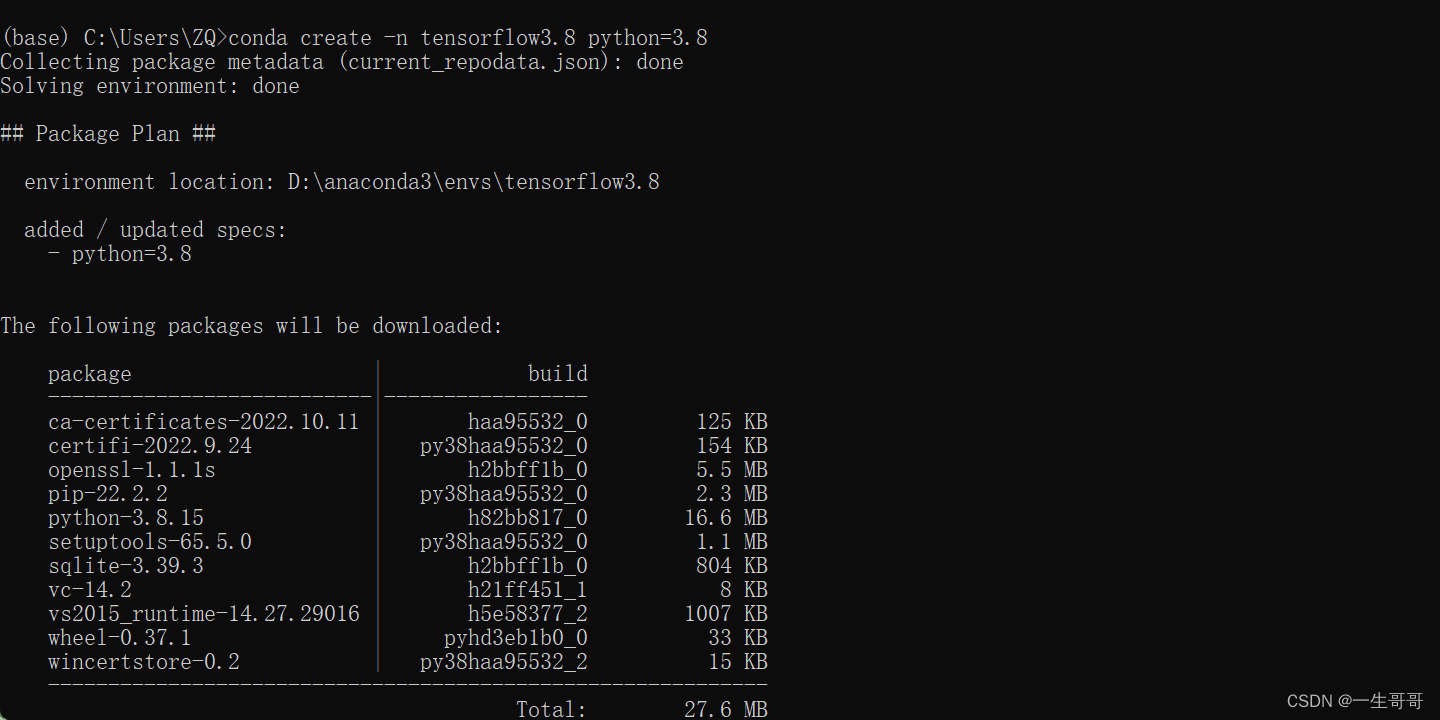
conda创建虚拟环境的命令为:conda create -n 环境名称 python=python版本,例如创建名为py38,版本为3.8版本的虚拟环境:conda create -n py3.8 python=3.8。
当前的框架主要都支持3.6-3.9的python版本,较新一点的版本可能需要>3.7版本。因此,创建3.8版本的python就足以使用。这里分别创建了名称为tensorflow3.8、paddle3.8、torch3.8的三个虚拟环境,版本均为3.8版本。
conda create -n tensorflow3.8 python=3.8
conda create -n paddle3.8 python=3.8
conda create -n torch3.8 python=3.8
安装tensorflow-GPU版本
tensorflow的官网:https://www.tensorflow.org/
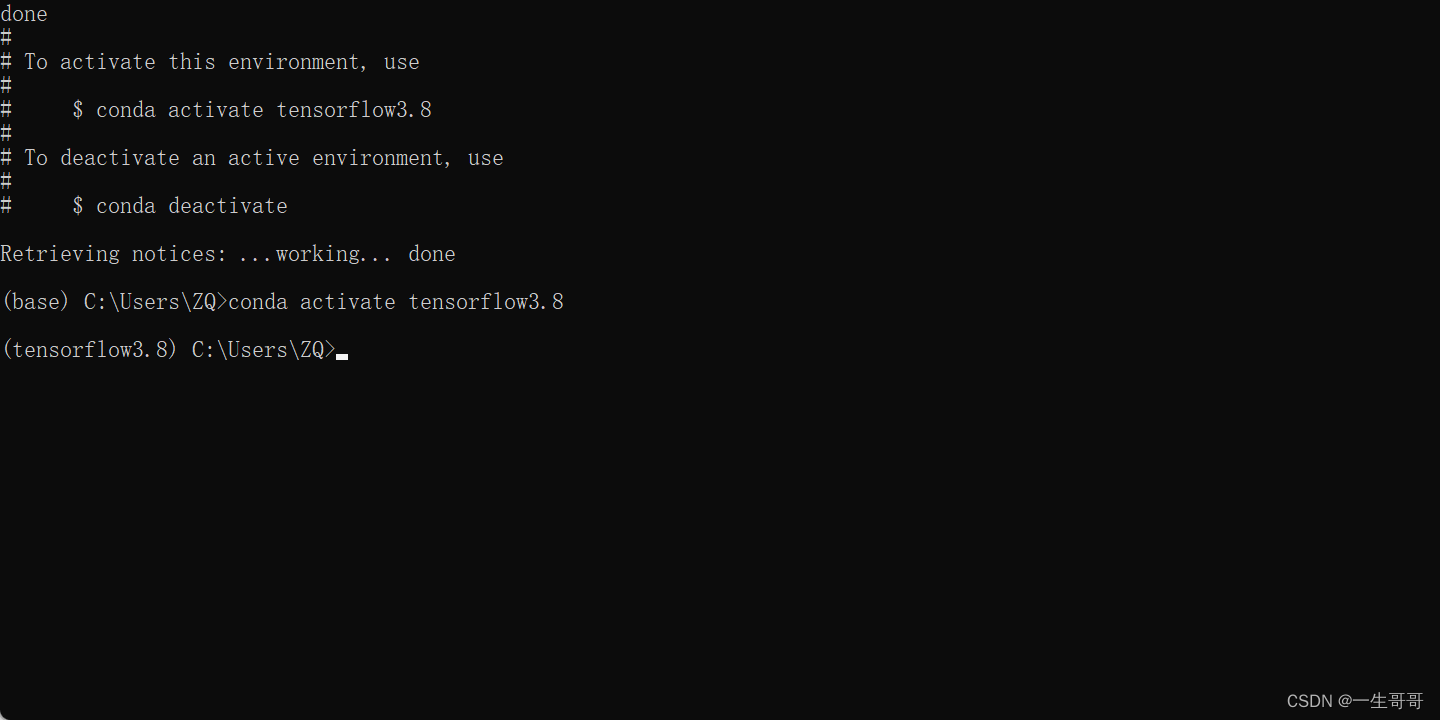
首先需要激活tensorflow的虚拟环境:conda activate tensorflow3.8
tensorflow的安装需要注意版本之间的相互匹配,部分版本的对应如下图:

此时我们可以查询当前conda镜像源下的cuda版本信息。
conda search cuda
查询结果如下:

这里就对应了之前所说的,无需去NVIDIA官网去下载CUDA和cudnn的原因,但是需要注意的是这样的安装方式CUDA当前最高版本只支持到11.3.1,不过已经足够使用。对照上面所列的tensorflow版本来看,我们可以选择11.0和10.1的版本。
接下来我们查看一下当前conda镜像源下的cudnn版本信息。
conda search cudnn
 这样对比之后发现,我们只能安装CUDA为10.1.243版本的,相应的cudnn版本为7.6.5。
conda install cudatoolkit=10.1.243

conda install cudnn=7.6.5

对照官网的版本匹配图,可以发现此时最高可以安装2.3.0版本的tensorflow。
pip install tensorflow-gpu==2.3.0

此时进入python环境来测试tensorflow-gpu版本是否安装成功。
输入python进入编辑环境
输入:
conda activate tensorflow3.8
python
import tensorflow as tf
print(tf.__version__)
print(tf.config.list_physical_devices('GPU'))
exit()#退出python环境
可以获得如下结果:

至此,tensorflow-GPU版本就安装成功了。
安装paddlepaddle-GPU版本
paddlepaddle的官网:https://www.paddlepaddle.org.cn/
paddlepaddle的GPU版本安装与tenforflow非常类似。
首先依然是激活paddle3.8的虚拟环境:
conda activate paddle3.8
通过官网可以看到paddlepaddle-GPU安装CUDA的支持版本:
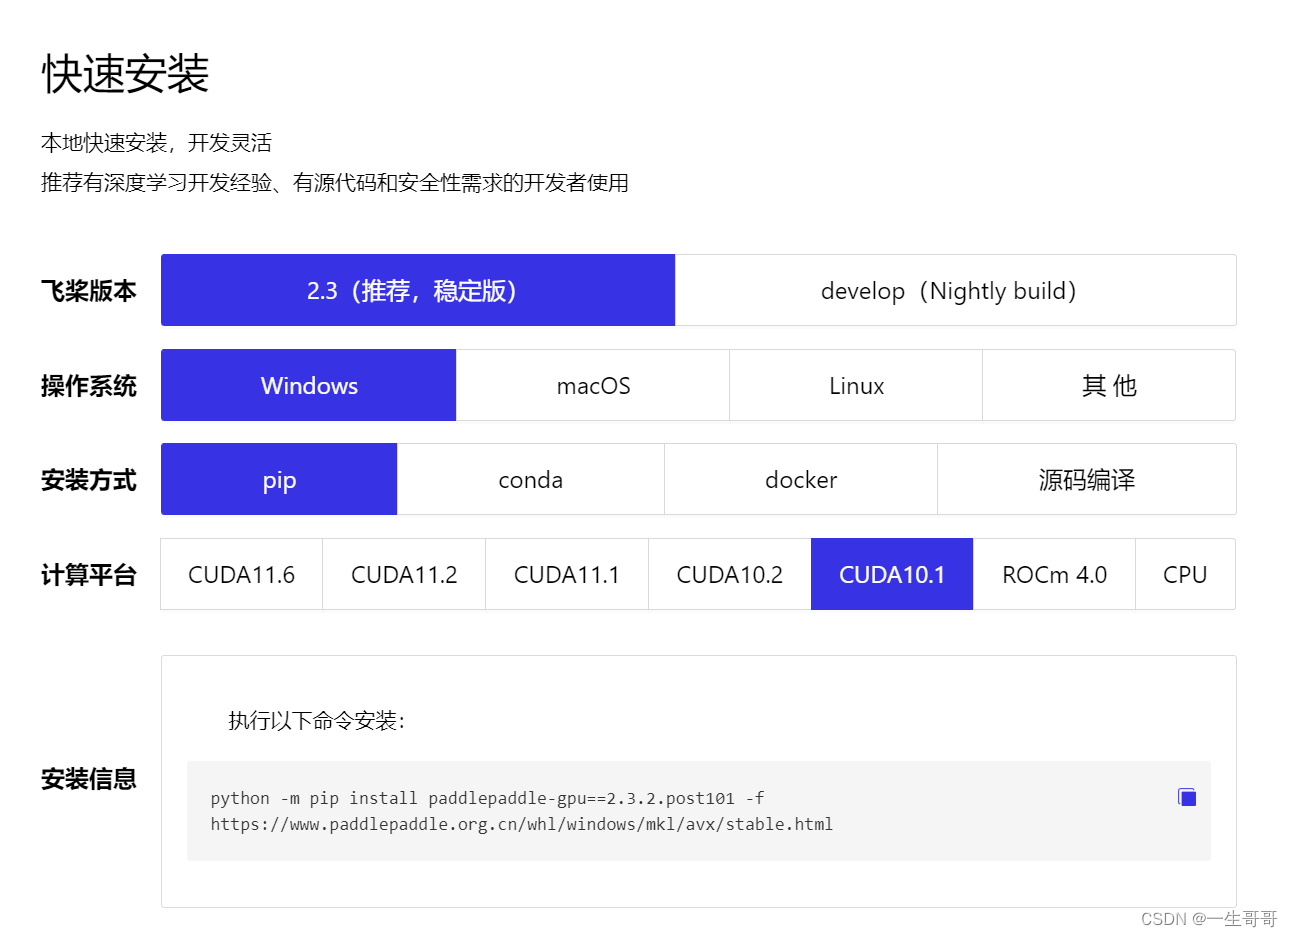
是不是发现了paddlepaddle当前推荐的2.3版本支持的CUDA就包括10.1,那么就简单了。跟tensorflow相似,分别安装CUDA10.1.243版本和cudnn7.6.5版本。
conda install cudatoolkit=10.1.243
conda install cudnn=7.6.5
再按照官网的方式来安装paddlepaddle:
python -m pip install paddlepaddle-gpu==2.3.2.post101 -f https://www.paddlepaddle.org.cn/whl/windows/mkl/avx/stable.html
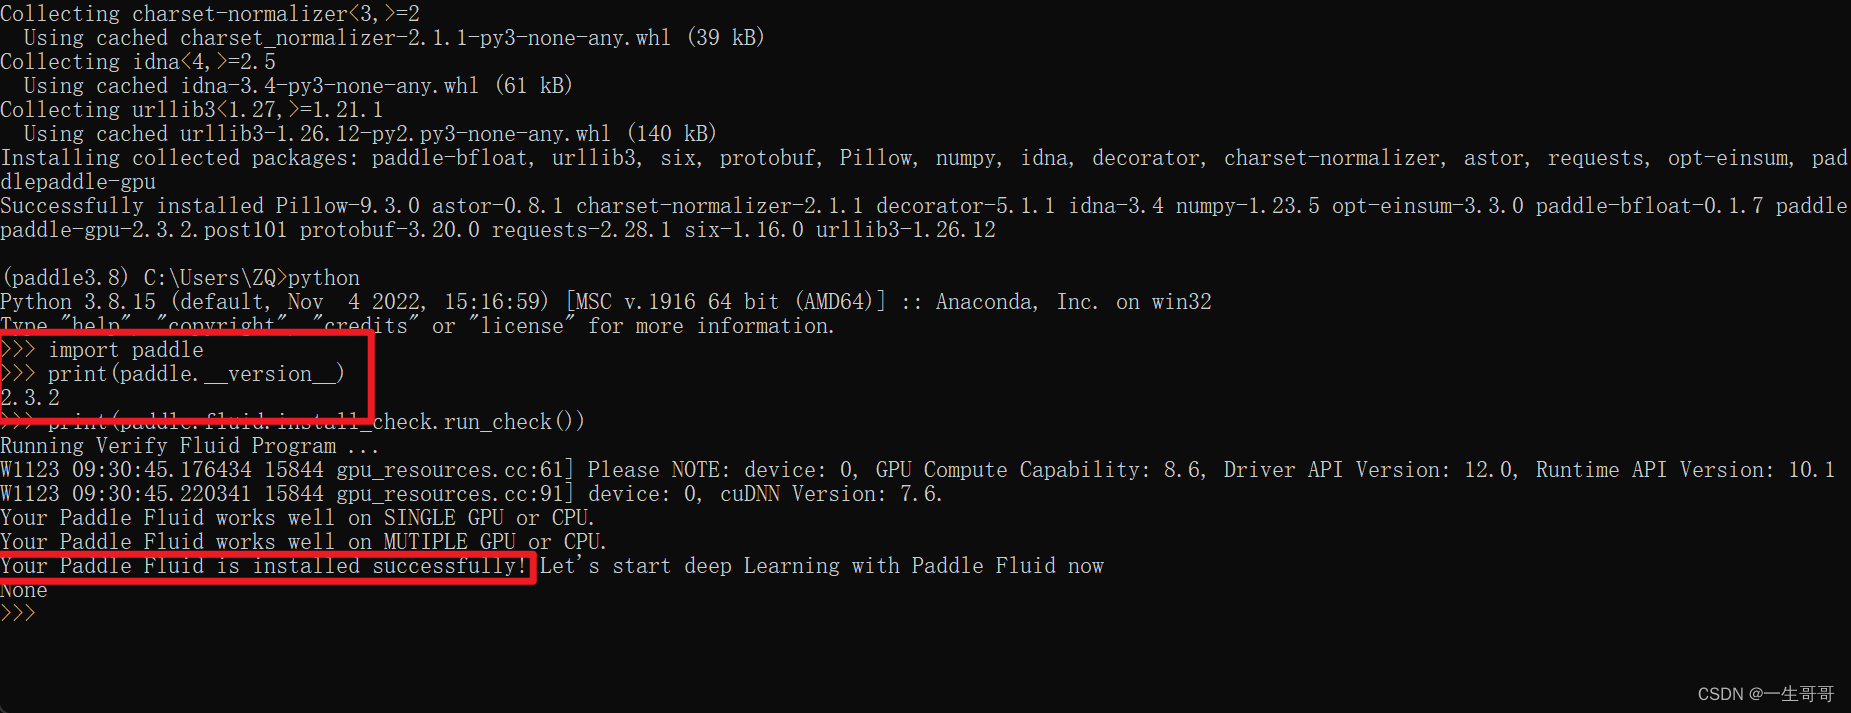
最后,来验证一下paddle-gpu版本是否安装成功:
conda activate paddle3.8
python
import paddle
print(paddle.__version__)
print(paddle.fluid.install_check.run_check())
exit()
看到如下图所示就成功了:
安装pytorch-GPU版本
此时,似乎一切都变得很简单,你可能会想pytorch的安装教程是否可以跟tensorflow和paddlepaddle相似,通过如下方式即可成功:
conda activate torch3.8
conda install cudatoolkit=10.1.243
conda install cudnn=7.6.5
在这个网站可以看到pytorch早期版本的安装方式:https://pytorch.org/get-started/previous-versions/
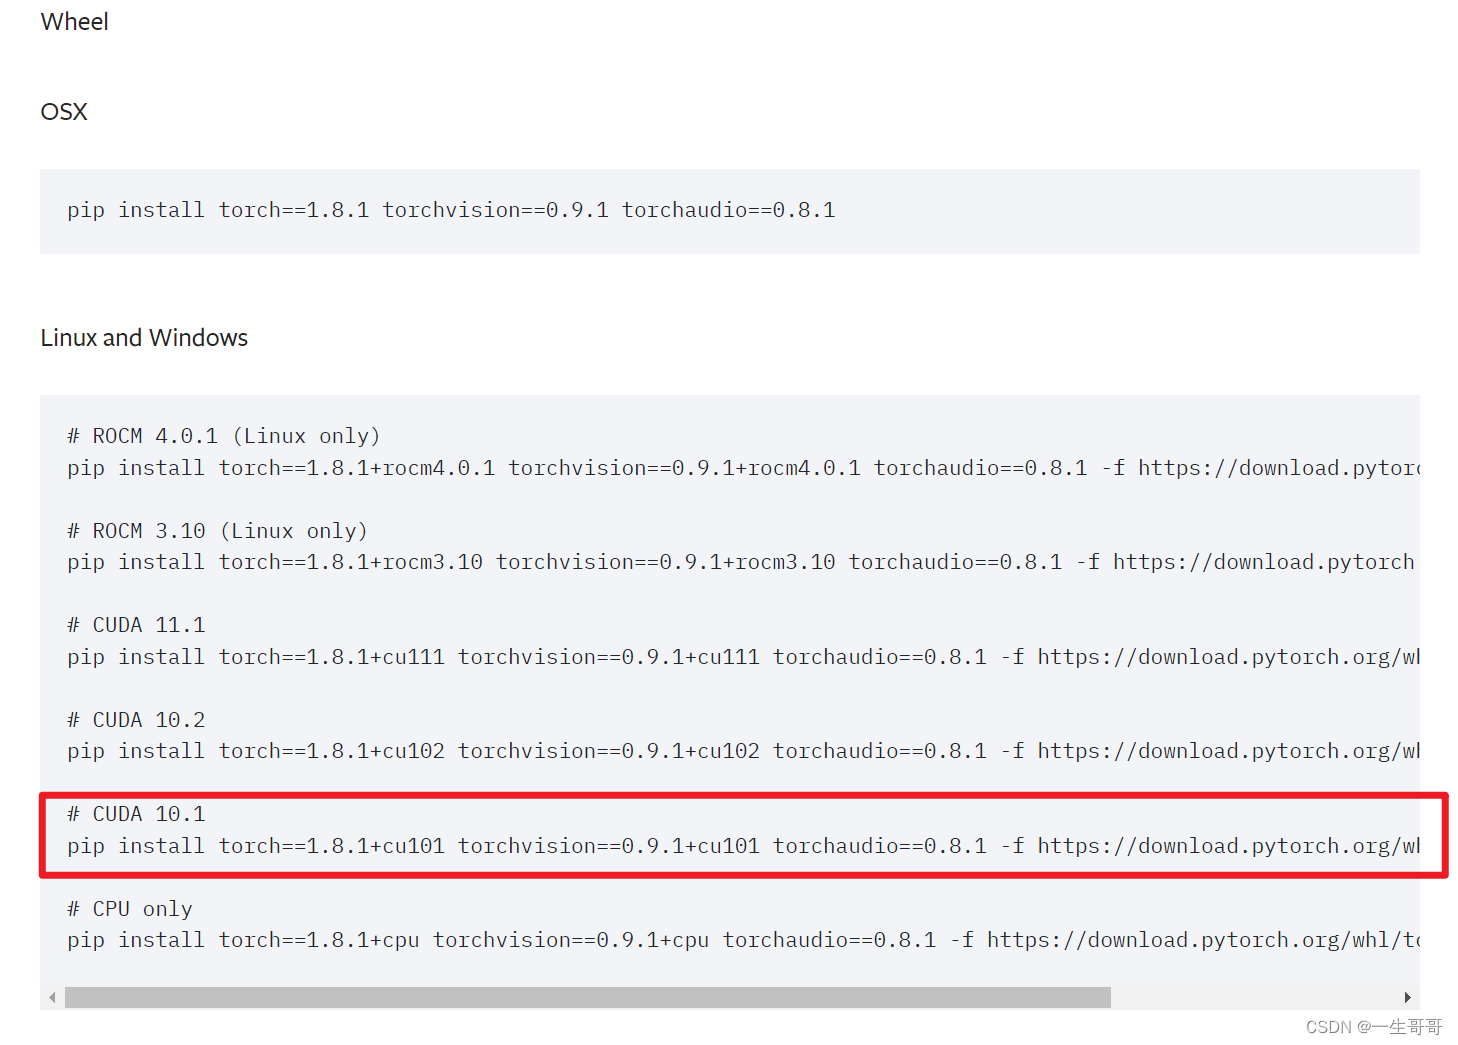
可以发现,支持CUDA10.1版本的pytorch是1.8.1版本。
于是按照之前的套路再安装:
conda activate torch3.8
conda install cudatoolkit=10.1.243
conda install cudnn=7.6.5
pip install torch==1.8.1+cu101 torchvision==0.9.1+cu101 torchaudio==0.8.1 -f https://download.pytorch.org/whl/torch_stable.html
我们来验证一下安装是否成功:
conda activate torch3.8
python
import torch
print(torch.version.cuda)
print(torch.cuda.is_available())
print(torch.cuda.get_device_name())
exit()
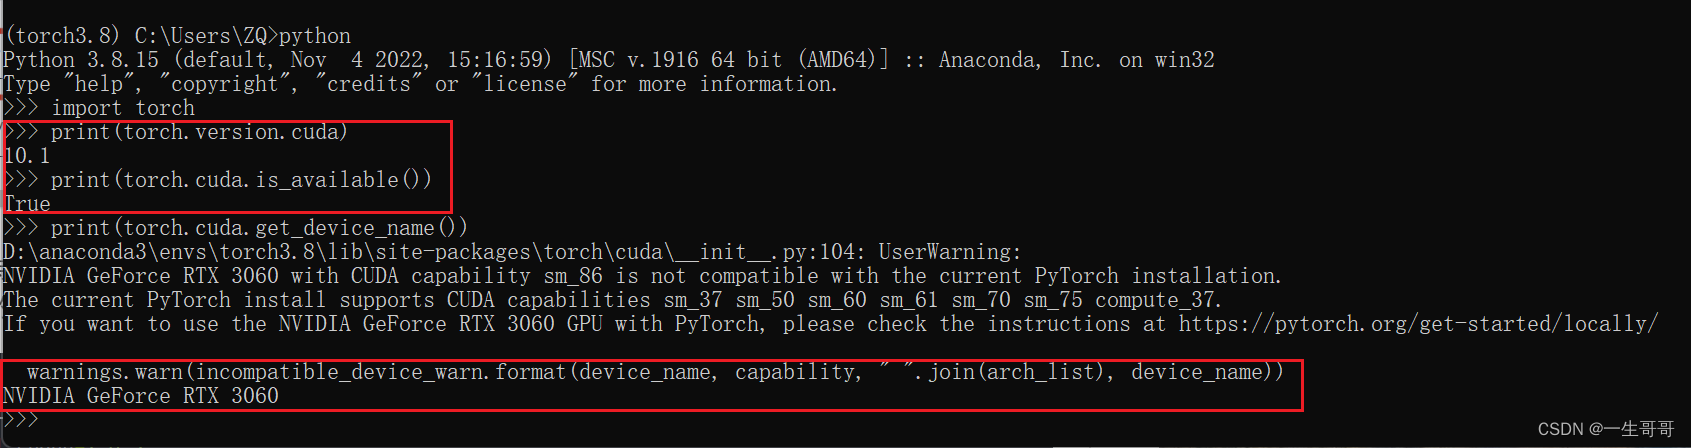 这个结果的意思是安装成功了,但是报了警告错误,原因在于我的显卡是RTX3060显卡,30系列的的显卡暂时不支持CUDA11以下版本!
因此,如果是30系列一下的,可以直接这样安装,30系列以上的就得安装超过CUDA11.0的版本。
回到我们查询CUDA版本的地方:

可以发现供我们选择的有11.0.221,11.3.1。
pytorch与tensorflow不同的是,tensorflow同时限制了cudnn版本,但是pytorch并没有,只要CUDA版本匹配,cudnn其实可以用低版本。
接着我们再查询当前环境的cudnn版本:

最后我们确定了我们使用11.3.1版本的CUDA和8.2.1版本的cudnn。
如果你已经按照10.1版本的CUDA安装了,这个时候可以从anaconda包管理工具中删除,重新创建一个虚拟环境。
接着按照如下代码安装:
conda activate torch3.8
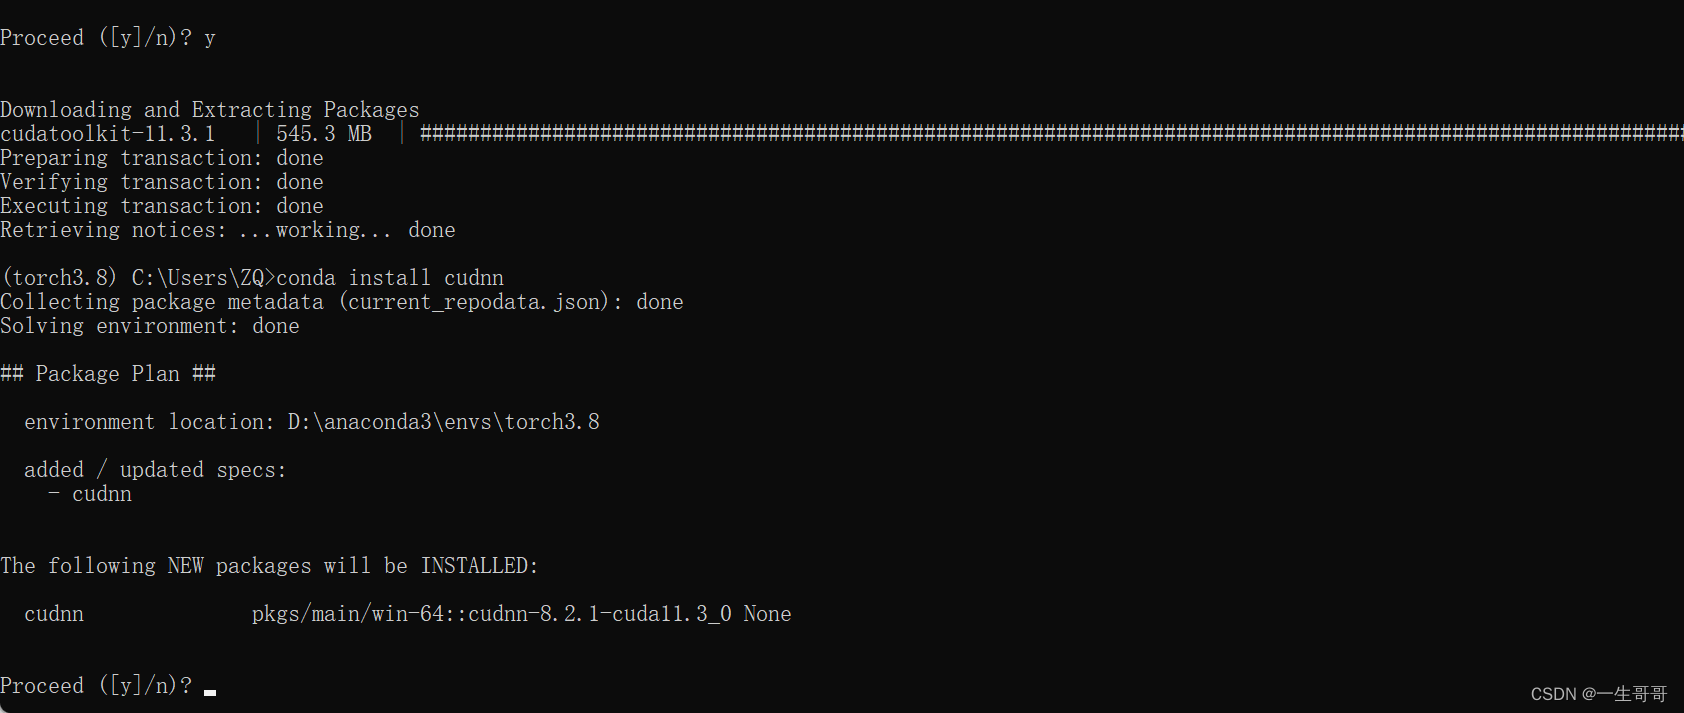
conda install cudatoolkit=11.3.1
conda install cudnn=8.2.1
其实当安装CUDA之后,安装cudnn并不需要制定版本,直接用conda install cudnn会自动安装适配版本。
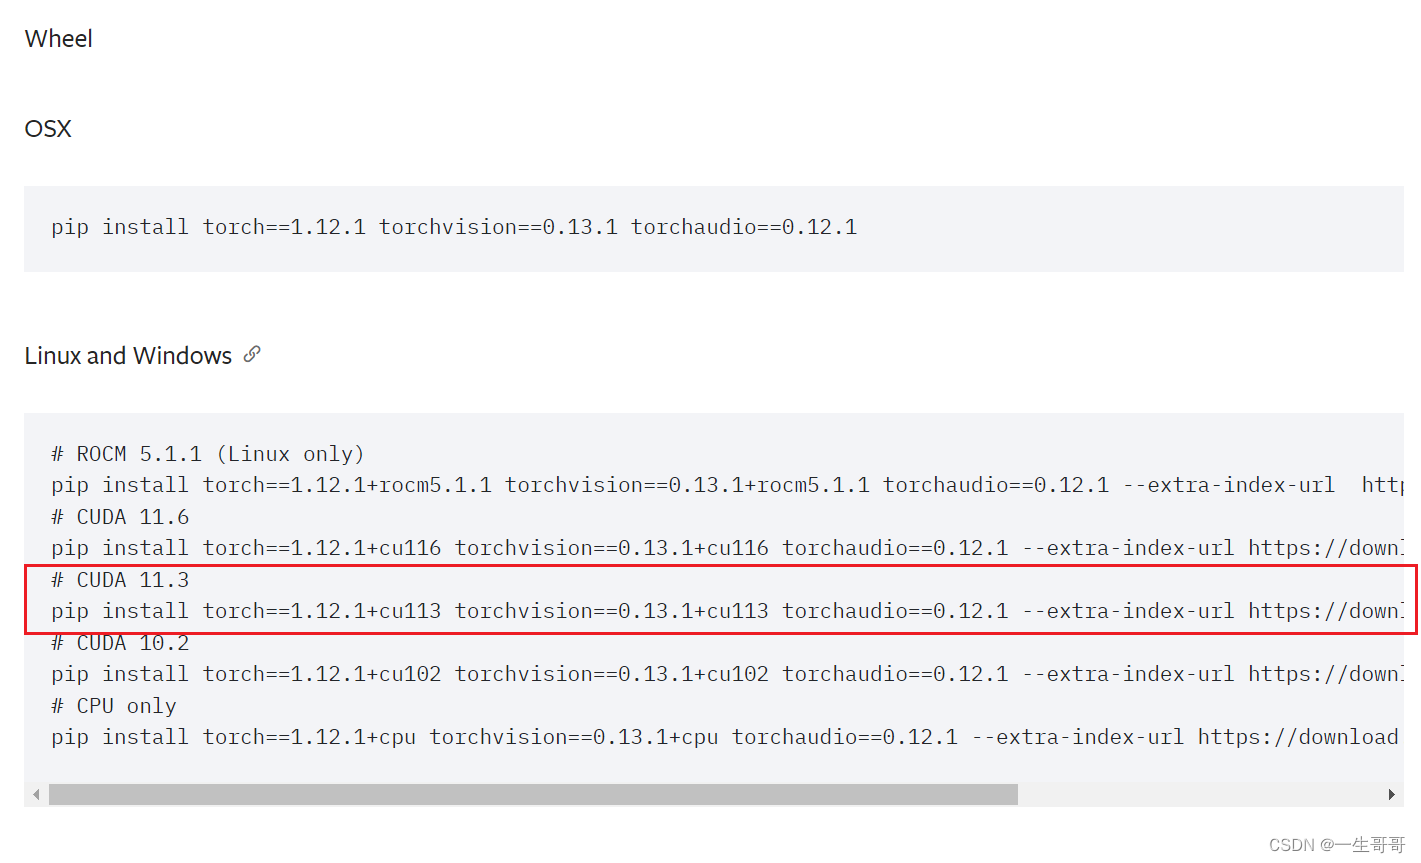
接下来,就是去https://pytorch.org/get-started/previous-versions/寻找11.3版本的CUDA安装pytorch的代码:
pip install torch==1.12.1+cu113 torchvision==0.13.1+cu113 torchaudio==0.12.1 --extra-index-url https://download.pytorch.org/whl/cu113
再次验证一下是否安装成功:
conda activate torch3.8
python
import torch
print(torch.version.cuda)
print(torch.cuda.is_available())
print(torch.cuda.get_device_name())
exit()
出现如图:
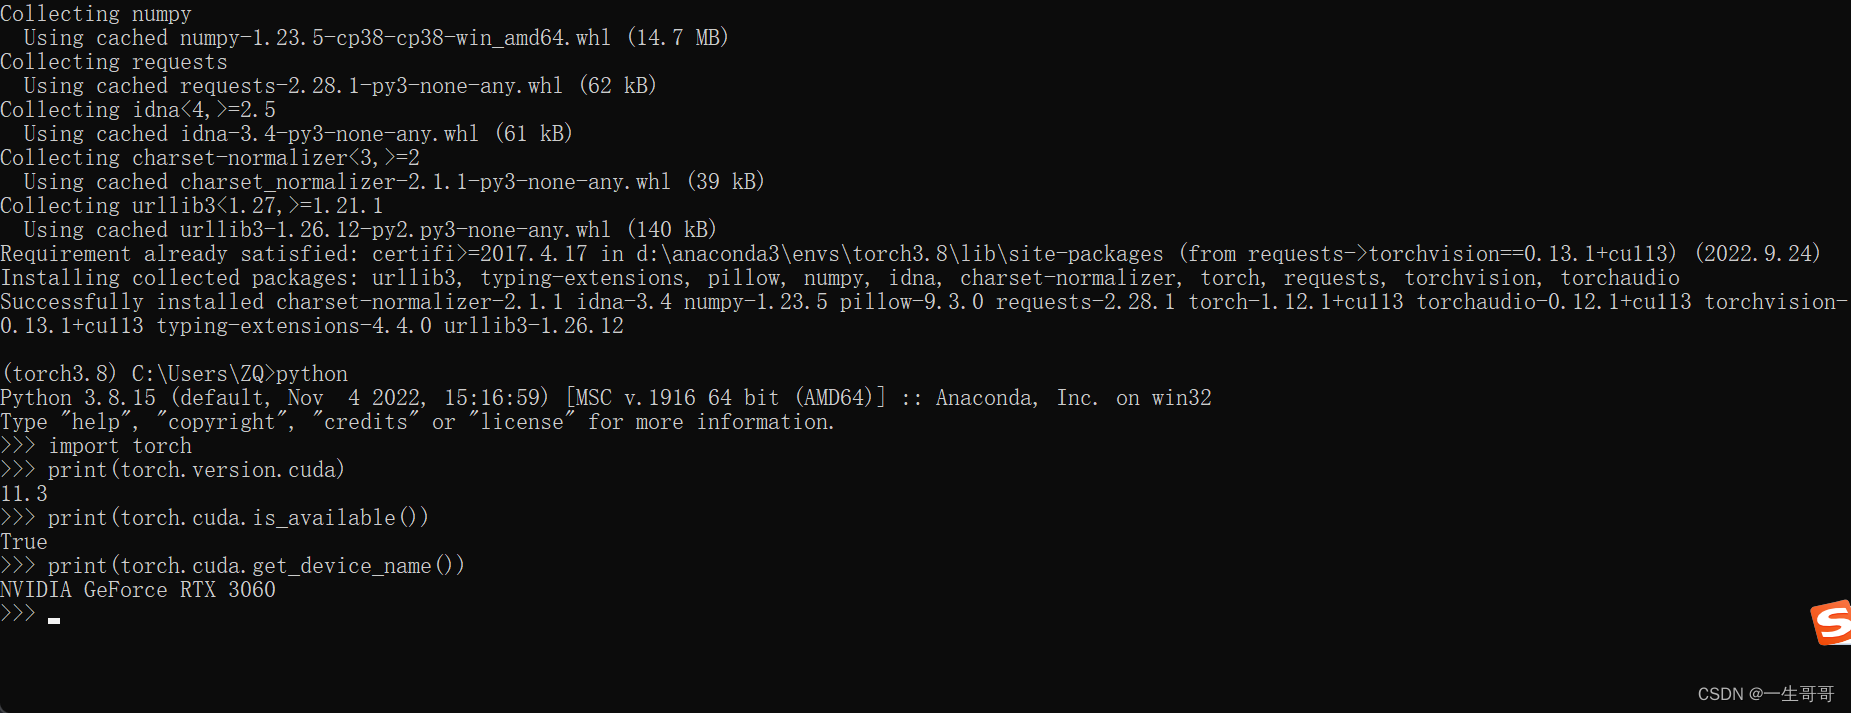
至此,所有的安装均已完成。
最后:汇总一下整体的安装代码:
tensorflow-gpu安装:
#设置Anaconda镜像源为中科大源
conda config --add channels https://mirrors.ustc.edu.cn/anaconda/pkgs/main/
conda config --add channels https://mirrors.ustc.edu.cn/anaconda/pkgs/free/
conda config --add channels https://mirrors.ustc.edu.cn/anaconda/cloud/conda-forge/
conda config --add channels https://mirrors.ustc.edu.cn/anaconda/cloud/msys2/
conda config --add channels https://mirrors.ustc.edu.cn/anaconda/cloud/bioconda/
conda config --add channels https://mirrors.ustc.edu.cn/anaconda/cloud/menpo/
conda config --set show_channel_urls yes
#创建、激活虚拟环境
conda create -n tensorflow3.8 python=3.8
conda activate tensorflow3.8
###安装CUDA工具包、cudnn加速计算库
conda install cudatoolkit=10.1
conda install cudnn=7.6.5
#安装Paddle-GPU库
python -m pip install tensorflow-gpu==2.3.0
#验证Paddle-GPU库是否安装成功
conda activate paddle_gpu
python
import paddle
print(paddle.fluid.install_check.run_check())
exit()
paddlepaddle-gpu安装:
#设置Anaconda镜像源为中科大源
conda config --add channels https://mirrors.ustc.edu.cn/anaconda/pkgs/main/
conda config --add channels https://mirrors.ustc.edu.cn/anaconda/pkgs/free/
conda config --add channels https://mirrors.ustc.edu.cn/anaconda/cloud/conda-forge/
conda config --add channels https://mirrors.ustc.edu.cn/anaconda/cloud/msys2/
conda config --add channels https://mirrors.ustc.edu.cn/anaconda/cloud/bioconda/
conda config --add channels https://mirrors.ustc.edu.cn/anaconda/cloud/menpo/
conda config --set show_channel_urls yes
#创建、激活虚拟环境
conda create -n paddle3.8 python=3.8
conda activate paddle3.8
###安装CUDA工具包、cudnn加速计算库
conda install cudatoolkit=10.1
conda install cudnn=7.6.5
#安装Paddle-GPU库
python -m pip install paddlepaddle-gpu==2.3.2.post101 -f https://www.paddlepaddle.org.cn/whl/windows/mkl/avx/stable.html
#验证Paddle-GPU库是否安装成功
conda activate paddle_gpu
python
import paddle
print(paddle.fluid.install_check.run_check())
exit()
pytorch-gpu安装:
#设置Anaconda镜像源为中科大源
conda config --add channels https://mirrors.ustc.edu.cn/anaconda/pkgs/main/
conda config --add channels https://mirrors.ustc.edu.cn/anaconda/pkgs/free/
conda config --add channels https://mirrors.ustc.edu.cn/anaconda/cloud/conda-forge/
conda config --add channels https://mirrors.ustc.edu.cn/anaconda/cloud/msys2/
conda config --add channels https://mirrors.ustc.edu.cn/anaconda/cloud/bioconda/
conda config --add channels https://mirrors.ustc.edu.cn/anaconda/cloud/menpo/
conda config --set show_channel_urls yes
#创建、激活虚拟环境
conda create -n torch3.8 python=3.8
conda activate torch3.8
#安装CUDA工具包、cudnn加速计算库
conda install cudatoolkit=11.3.1
conda install cudnn=8.2.1
#安装Pytorch-GPU库
pip install torch==1.12.1+cu113 torchvision==0.13.1+cu113 torchaudio==0.12.1 --extra-index-url https://download.pytorch.org/whl/cu113
#验证Pytorch-GPU库是否安装成功
conda activate pytorch_gpu
python
import torch
print(torch.version.cuda)
print(torch.cuda.is_available())
print(torch.cuda.get_device_name())
当然:如果是30系以下的显卡pytorch还可以这样安装:
#设置Anaconda镜像源为中科大源
conda config --add channels https://mirrors.ustc.edu.cn/anaconda/pkgs/main/
conda config --add channels https://mirrors.ustc.edu.cn/anaconda/pkgs/free/
conda config --add channels https://mirrors.ustc.edu.cn/anaconda/cloud/conda-forge/
conda config --add channels https://mirrors.ustc.edu.cn/anaconda/cloud/msys2/
conda config --add channels https://mirrors.ustc.edu.cn/anaconda/cloud/bioconda/
conda config --add channels https://mirrors.ustc.edu.cn/anaconda/cloud/menpo/
conda config --set show_channel_urls yes
#创建、激活虚拟环境
conda create -n torch3.8 python=3.8
conda activate torch3.8
#安装CUDA工具包、cudnn加速计算库
conda install cudatoolkit=10.1
conda install cudnn=7.6.5
#安装Pytorch-GPU库
pip install torch==1.8.1+cu101 torchvision==0.9.1+cu101 torchaudio==0.8.1 -f https://download.pytorch.org/whl/torch_stable.html
#验证Pytorch-GPU库是否安装成功
conda activate pytorch_gpu
python
import torch
print(torch.version.cuda)
print(torch.cuda.is_available())
print(torch.cuda.get_device_name())
完结
文章出处登录后可见!