参考资料:
1. pyabaqus库使用指引(官方):GitHub – haiiliin/pyabaqus: Type hints for Abaqus/Python scripting (The repo has been transferred to https://github.com/haiiliin/abqpy).Type hints for Abaqus/Python scripting (The repo has been transferred to https://github.com/haiiliin/abqpy). – GitHub – haiiliin/pyabaqus: Type hints for Abaqus/Python scripting (The repo has been transferred to https://github.com/haiiliin/abqpy). https://github.com/haiiliin/pyabaqus2. abaqus使用指南:Abaqus 6.14 Documentation
![]() http://wufengyun.com:888/
http://wufengyun.com:888/
3. 注意事项:
1. 安装python3.9及以上版本;我使用的是3.9.2。
2. 安装abaqus;我使用的是abaqus2022。
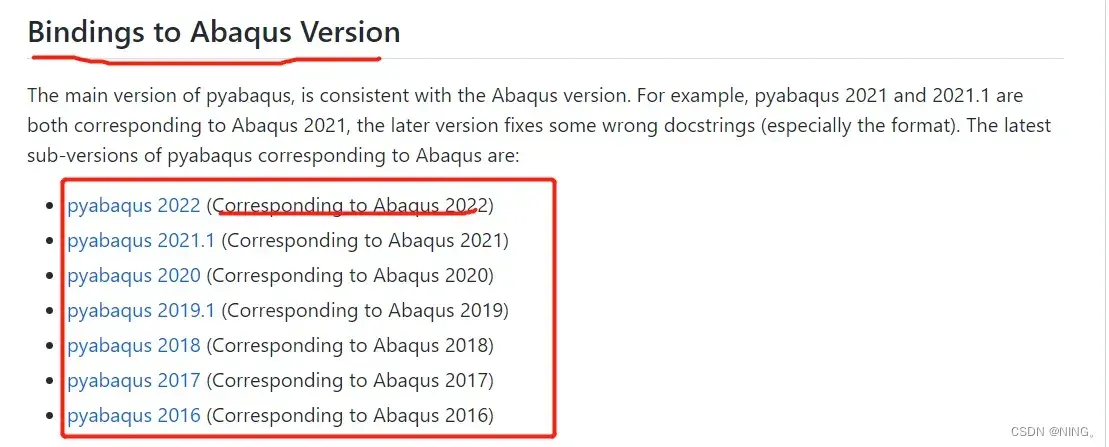
3. 安装pyabaqus库,注意这个库需要与自己的abaqus版本对应;例:我安装的是abaqus2022,那么我需要安装pyabaqus==2022这个版本的库。可以使用两种方式安装库:
①在命令行窗口输入:pip install pyabaqus==2022
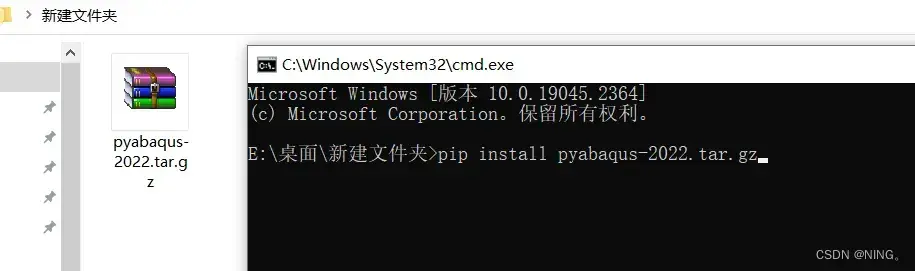
②在参考资料1的github链接里面找到Source code(tar.gz)(或者直接单击这个链接)下载。完了之后,在文件夹显示,命令行方式打开该文件夹,pip install 全部文件名
![]()
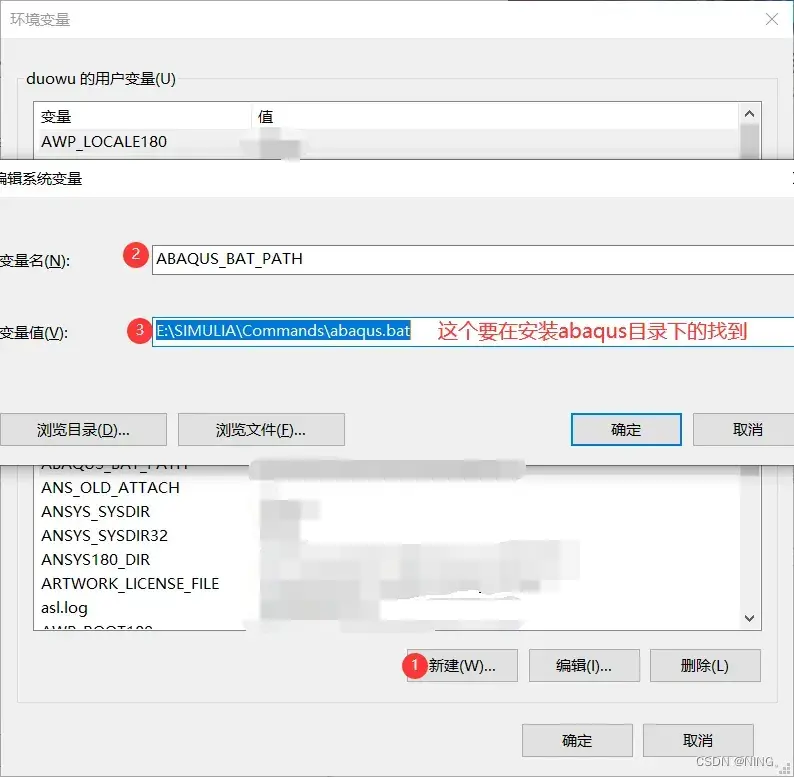
4. 安装完成后,需要设置环境变量。依次点击 右键此电脑-属性-高级系统设置-环境变量-新建系统变量,输入如下:变量值要指向在abaqus安装目录中的abaqus.bat文件。自己找找就好。输入完了,直接一直确定保存就好。
5. 以上完成了,就能在命令行窗口直接调用abaqus的内核进行计算处理了(无需打开abaqus)。调用示例:cmd进入相应的文件夹,使用命令执行如下,前面不变,xuanbiliang.py是文件名,自己可以根据自己的写。
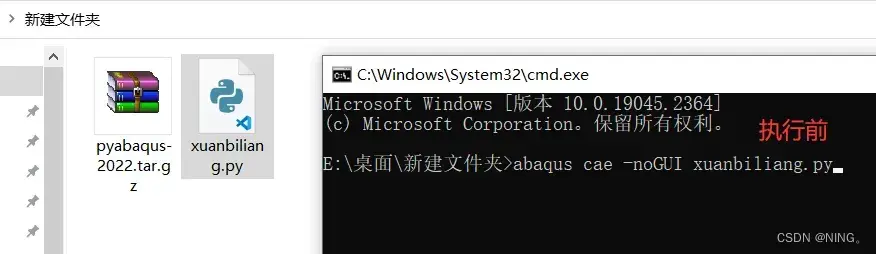
注意文件夹路径,不要含有中文!!!

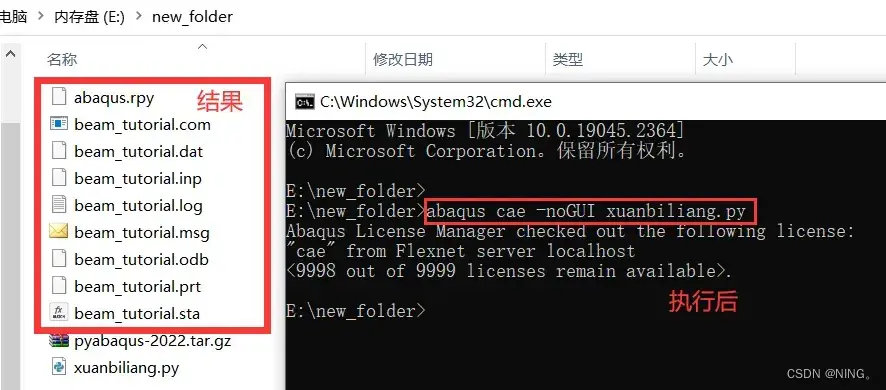
这个odb结果文件可以直接在abaqus中查看,或者继续用python写一些后处理的逻辑,直接输出csv或者txt等文件都是可以的。
悬臂梁测试参考代码如下(来源于参考文件2-Abaqus Scripting User’s Guide-8.1节):
"""
beamExample.py

Reproduce the cantilever beam example from the
Appendix of the Getting Started with
Abaqus: Interactive Edition Manual.
"""

from abaqus import *
from abaqusConstants import *
backwardCompatibility.setValues(includeDeprecated=True,
                                reportDeprecated=False)

# Create a model.

myModel = mdb.Model(name='Beam')

# Create a new viewport in which to display the model
# and the results of the analysis.

myViewport = session.Viewport(name='Cantilever Beam Example',
    origin=(20, 20), width=150, height=120)

#-----------------------------------------------------

import part

# Create a sketch for the base feature.

mySketch = myModel.ConstrainedSketch(name='beamProfile',
    sheetSize=250.)

# Create the rectangle.

mySketch.rectangle(point1=(-100,10), point2=(100,-10))

# Create a three-dimensional, deformable part.

myBeam = myModel.Part(name='Beam', dimensionality=THREE_D,
    type=DEFORMABLE_BODY)

# Create the part's base feature by extruding the sketch
# through a distance of 25.0.

myBeam.BaseSolidExtrude(sketch=mySketch, depth=25.0)

#-----------------------------------------------------

import material

# Create a material.

mySteel = myModel.Material(name='Steel')

# Create the elastic properties: youngsModulus is 209.E3
# and poissonsRatio is 0.3

elasticProperties = (209.E3, 0.3)
mySteel.Elastic(table=(elasticProperties, ) )

#-------------------------------------------------------

import section

# Create the solid section.

mySection = myModel.HomogeneousSolidSection(name='beamSection',
    material='Steel', thickness=1.0)

# Assign the section to the region. The region refers
# to the single cell in this model.

region = (myBeam.cells,)
myBeam.SectionAssignment(region=region,
    sectionName='beamSection')

#-------------------------------------------------------

import assembly

# Create a part instance.

myAssembly = myModel.rootAssembly
myInstance = myAssembly.Instance(name='beamInstance',
    part=myBeam, dependent=OFF)

#-------------------------------------------------------

import step

# Create a step. The time period of the static step is 1.0,
# and the initial incrementation is 0.1; the step is created
# after the initial step.

myModel.StaticStep(name='beamLoad', previous='Initial',
    timePeriod=1.0, initialInc=0.1,
    description='Load the top of the beam.')

#-------------------------------------------------------

import load

# Find the end face using coordinates.

endFaceCenter = (-100,0,12.5)
endFace = myInstance.faces.findAt((endFaceCenter,) )

# Create a boundary condition that encastres one end
# of the beam.

endRegion = (endFace,)
myModel.EncastreBC(name='Fixed',createStepName='beamLoad',
    region=endRegion)

# Find the top face using coordinates.

topFaceCenter = (0,10,12.5)
topFace = myInstance.faces.findAt((topFaceCenter,) )

# Create a pressure load on the top face of the beam.

topSurface = ((topFace, SIDE1), )
myModel.Pressure(name='Pressure', createStepName='beamLoad',
    region=topSurface, magnitude=0.5)

#-------------------------------------------------------

import mesh

# Assign an element type to the part instance.

region = (myInstance.cells,)
elemType = mesh.ElemType(elemCode=C3D8I, elemLibrary=STANDARD)
myAssembly.setElementType(regions=region, elemTypes=(elemType,))

# Seed the part instance.

myAssembly.seedPartInstance(regions=(myInstance,), size=10.0)

# Mesh the part instance.

myAssembly.generateMesh(regions=(myInstance,))

# Display the meshed beam.

myViewport.assemblyDisplay.setValues(mesh=ON)
myViewport.assemblyDisplay.meshOptions.setValues(meshTechnique=ON)
myViewport.setValues(displayedObject=myAssembly)

#-------------------------------------------------------

import job

# Create an analysis job for the model and submit it.

jobName = 'beam_tutorial'
myJob = mdb.Job(name=jobName, model='Beam',
    description='Cantilever beam tutorial')

# Wait for the job to complete.

myJob.submit()
myJob.waitForCompletion()

#-------------------------------------------------------

import visualization

# Open the output database and display a
# default contour plot.

myOdb = visualization.openOdb(path=jobName + '.odb')
myViewport.setValues(displayedObject=myOdb)
myViewport.odbDisplay.display.setValues(plotState=CONTOURS_ON_DEF)

myViewport.odbDisplay.commonOptions.setValues(renderStyle=FILLED)
4. 说说体会:
pyabaqus库不需要在python文件中import,实际执行python文件的方式是在cmd窗口里面用原始dos命令行的方式,用设置的系统变量 abaqus cae -noGUI 文件名.py 的方式执行,全程无需打开abaqus。这个方式实际上是pyabaqus实现了调用abaqus计算内核模块(像这种大型有限元软件的各个模块是独立开发和工作的。),执行abaqus支持的python语法进而计算。所以实际上计算的python文件只需要满足参考文件2里面的相关规范书写,保证能跑通就行。后期也可以想些方法在python执行中job计算完直接输出需要的图和表格。
使用python命令建abaqus模型并后处理输出结果,全程无需打开abaqus,只要有代码就能自动计算。为实时计算结构受力提供了接口可能性。
文章出处登录后可见!