Mat 类是OpenCV中的一个基本数据类型,它是一个n维密集数组类
Mat 类表示一个 n 维密集数值单通道或多通道数组。它可用于存储实数或复值向量和矩阵、灰度或彩色图像、体素体积、向量场、点云、张量、直方图(不过,非常高维的直方图可能更好地存储在 SparseMat 中)。数组M的数据布局由数组M.step[]定义,使得元素的地址,其中
, 计算为:
在二维数组的情况下,上述公式简化为:
请注意,M.step[i] >= M.step[i+1] (实际上,M.step[i] >= M.step[i+1]*M.size[i+1] )。 这意味着 2 维矩阵是逐行存储的,3 维矩阵是逐平面存储的,依此类推。M.step[M.dims-1] 是最小的并且总是等于元素大小 M.elemSize() 。
因此,Mat 中的数据布局与 OpenCV 1.x 中的 CvMat、IplImage 和 CvMatND 类型完全兼容。它还兼容标准工具包和 SDK 中的大多数密集数组类型,例如 Numpy (ndarray)、Win32(独立设备位图),即任何使用步长(或步幅)来计算像素位置的数组。由于这种兼容性,可以为用户分配的数据创建一个 Mat 标头并使用 OpenCV 函数就地处理它。
有许多不同的方法可以创建一个 Mat 对象。下面列出了最流行的选择:
- 使用
create(nrows, ncols, type)方法或类似的Mat(nrows, ncols, type[, fillValue])构造函数。分配了指定大小和类型的新数组。type 与 cvCreateMat 方法中的含义相同。例如,CV_8UC1 表示 8 位单通道数组,CV_32FC2 表示 2 通道(复数)浮点数组,以此类推。
// make a 7x7 complex matrix filled with 1+3j.
Mat M(7,7,CV_32FC2,Scalar(1,3));
// and now turn M to a 100x60 15-channel 8-bit matrix.
// The old content will be deallocated
M.create(100,60,CV_8UC(15));
测试代码
#include <opencv2/highgui.hpp>
#include <opencv2/imgcodecs.hpp>
#include <opencv2/imgproc.hpp>
#include <iostream>

int main()
{
	cv::Mat M(3, 3, CV_32FC2, cv::Scalar(1, 3));
	// M.create(5, 5, CV_8UC(3));

	std::cout << "==默认风格==\n" << cv::format(M, cv::Formatter::FMT_DEFAULT) << std::endl;
	std::cout << "==Python风格==\n" << cv::format(M, cv::Formatter::FMT_PYTHON) << std::endl;
	std::cout << "==Numpy风格==\n" << cv::format(M, cv::Formatter::FMT_NUMPY) << std::endl;
	std::cout << "==C风格==\n" << cv::format(M, cv::Formatter::FMT_C) << std::endl;

	return 0;
}
输出如下
==默认风格==
[1, 3, 1, 3, 1, 3;
 1, 3, 1, 3, 1, 3;
 1, 3, 1, 3, 1, 3]
==Python风格==
[[[1, 3], [1, 3], [1, 3]],
 [[1, 3], [1, 3], [1, 3]],
 [[1, 3], [1, 3], [1, 3]]]
==Numpy风格==
array([[[1, 3], [1, 3], [1, 3]],
       [[1, 3], [1, 3], [1, 3]],
       [[1, 3], [1, 3], [1, 3]]], dtype='float32')
==C风格==
{1, 3, 1, 3, 1, 3,
 1, 3, 1, 3, 1, 3,
 1, 3, 1, 3, 1, 3}
==默认风格==
[  0,   0, 128,  63,   0,   0,  64,  64,   0,   0, 128,  63,   0,   0,  64;
  64,   0,   0, 128,  63,   0,   0,  64,  64,   0,   0, 128,  63,   0,   0;
  64,  64,   0,   0, 128,  63,   0,   0,  64,  64,   0,   0, 128,  63,   0;
   0,  64,  64,   0,   0, 128,  63,   0,   0,  64,  64,   0,   0, 128,  63;
   0,   0,  64,  64,   0,   0, 128,  63,   0,   0,  64,  64, 160,  63,  25]
==Python风格==
[[[  0,   0, 128], [ 63,   0,   0], [ 64,  64,   0], [  0, 128,  63], [  0,   0,  64]],
 [[ 64,   0,   0], [128,  63,   0], [  0,  64,  64], [  0,   0, 128], [ 63,   0,   0]],
 [[ 64,  64,   0], [  0, 128,  63], [  0,   0,  64], [ 64,   0,   0], [128,  63,   0]],
 [[  0,  64,  64], [  0,   0, 128], [ 63,   0,   0], [ 64,  64,   0], [  0, 128,  63]],
 [[  0,   0,  64], [ 64,   0,   0], [128,  63,   0], [  0,  64,  64], [160,  63,  25]]]
==Numpy风格==
array([[[  0,   0, 128], [ 63,   0,   0], [ 64,  64,   0], [  0, 128,  63], [  0,   0,  64]],
       [[ 64,   0,   0], [128,  63,   0], [  0,  64,  64], [  0,   0, 128], [ 63,   0,   0]],
       [[ 64,  64,   0], [  0, 128,  63], [  0,   0,  64], [ 64,   0,   0], [128,  63,   0]],
       [[  0,  64,  64], [  0,   0, 128], [ 63,   0,   0], [ 64,  64,   0], [  0, 128,  63]],
       [[  0,   0,  64], [ 64,   0,   0], [128,  63,   0], [  0,  64,  64], [160,  63,  25]]], dtype='uint8')
==C风格==
{  0,   0, 128,  63,   0,   0,  64,  64,   0,   0, 128,  63,   0,   0,  64,
  64,   0,   0, 128,  63,   0,   0,  64,  64,   0,   0, 128,  63,   0,   0,
  64,  64,   0,   0, 128,  63,   0,   0,  64,  64,   0,   0, 128,  63,   0,
   0,  64,  64,   0,   0, 128,  63,   0,   0,  64,  64,   0,   0, 128,  63,
   0,   0,  64,  64,   0,   0, 128,  63,   0,   0,  64,  64, 160,  63,  25}
由两者输出结果得出,create() 仅在当前数组的形状或类型与指定的不同时分配一个新数组。
- 创建一个多维数组
// create a 100x100x100 8-bit array
int sz[] = {100, 100, 100};
Mat bigCube(3, sz, CV_8U, Scalar::all(0));
它将维度数 =1 传递给 Mat 构造函数,但创建的数组将是二维的,列数设置为 1。因此,Mat::dims 始终 >= 2(当数组为空时也可以为 0)。
- 在右侧可以有数组或表达式的地方使用复制构造函数或赋值运算符(见下文)。如介绍中所述,数组赋值是一个 O(1) 操作,因为它只复制标头并增加引用计数器。Mat::clone() 方法可用于在需要时获取数组的完整(深层)副本。
- 为另一个数组的一部分构造一个标头。它可以是单行、单列、多行、多列、数组中的矩形区域(在代数中称为小区域)或对角线。此类操作也是 O(1),因为新标头引用相同的数据。实际上可以使用此功能修改数组的一部分,例如:
// add the 5-th row, multiplied by 3 to the 3rd row
M.row(3) = M.row(3) + M.row(5)*3;
// now copy the 7-th column to the 1-st column
// M.col(1) = M.col(7); // this will not work
Mat M1 = M.col(1);
M.col(7).copyTo(M1);
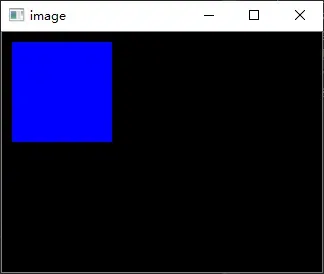
// create a new 320x240 image
Mat img(Size(320,240),CV_8UC3);
// select a ROI
Mat roi(img, Rect(10,10,100,100));
// fill the ROI with (0,255,0) (which is green in RGB space);
// the original 320x240 image will be modified
roi = Scalar(0,255,0);
由于额外的 datastart 和 dataend 成员,可以使用 locateROI() 计算主容器数组中的相对子数组位置:
Mat A = Mat::eye(10, 10, CV_32S);
// extracts A columns, 1 (inclusive) to 3 (exclusive).
Mat B = A(Range::all(), Range(1, 3));
// extracts B rows, 5 (inclusive) to 9 (exclusive).
// that is, C \~ A(Range(5, 9), Range(1, 3))
Mat C = B(Range(5, 9), Range::all());
Size size; Point ofs;
C.locateROI(size, ofs);
// size will be (width=10,height=10) and the ofs will be (x=1, y=5)
与整个矩阵一样,如果您需要深度复制,请使用提取的子矩阵的 clone() 方法。
测试代码
#include <opencv2/highgui.hpp>
#include <opencv2/imgcodecs.hpp>
#include <opencv2/imgproc.hpp>
#include <iostream>

int main()
{
	cv::Mat M(6, 6, CV_8UC3, cv::Scalar(23, 24, 25));

	std::cout << "==默认风格==\n" << cv::format(M, cv::Formatter::FMT_DEFAULT) << std::endl;
	std::cout << "==Python风格==\n" << cv::format(M, cv::Formatter::FMT_PYTHON) << std::endl;
	std::cout << "==Numpy风格==\n" << cv::format(M, cv::Formatter::FMT_NUMPY) << std::endl;
	std::cout << "==C风格==\n" << cv::format(M, cv::Formatter::FMT_C) << std::endl;
	std::cout << std::endl << std::endl << std::endl;

	M.row(3) = M.row(3) + M.row(5) * 3;
	cv::Mat M1;
	M.col(5).copyTo(M1);

	std::cout << "==默认风格==\n" << cv::format(M, cv::Formatter::FMT_DEFAULT) << std::endl;
	std::cout << "==Python风格==\n" << cv::format(M, cv::Formatter::FMT_PYTHON) << std::endl;
	std::cout << "==Numpy风格==\n" << cv::format(M, cv::Formatter::FMT_NUMPY) << std::endl;
	std::cout << "==C风格==\n" << cv::format(M, cv::Formatter::FMT_C) << std::endl;

	std::cout << "==Python风格==\n" << cv::format(M1, cv::Formatter::FMT_PYTHON) << std::endl;
	std::cout << std::endl << std::endl;

	cv::Mat img(cv::Size(320, 240), CV_8UC3);
	cv::Mat roi(img, cv::Rect(10, 10, 100, 100));
	roi = cv::Scalar(255, 0, 0);

	cv::imshow("image", img);
	cv::waitKey(0);

	cv::Mat A = cv::Mat::eye(10, 10, CV_32S);
	cv::Mat B = A(cv::Range::all(), cv::Range(1, 3));
	cv::Mat C = B(cv::Range(5, 9), cv::Range::all());
	cv::Size size; cv::Point ofs;
	C.locateROI(size, ofs);

	std::cout << cv::format(A, cv::Formatter::FMT_PYTHON) << std::endl;
	std::cout << cv::format(B, cv::Formatter::FMT_PYTHON) << std::endl;
	std::cout << cv::format(C, cv::Formatter::FMT_PYTHON) << std::endl;
	std::cout << "size = " << size << ", ofs = " << ofs << std::endl;

	return 0;
}
输出结果
==默认风格==
[ 23,  24,  25,  23,  24,  25,  23,  24,  25,  23,  24,  25,  23,  24,  25,  23,  24,  25;
  23,  24,  25,  23,  24,  25,  23,  24,  25,  23,  24,  25,  23,  24,  25,  23,  24,  25;
  23,  24,  25,  23,  24,  25,  23,  24,  25,  23,  24,  25,  23,  24,  25,  23,  24,  25;
  23,  24,  25,  23,  24,  25,  23,  24,  25,  23,  24,  25,  23,  24,  25,  23,  24,  25;
  23,  24,  25,  23,  24,  25,  23,  24,  25,  23,  24,  25,  23,  24,  25,  23,  24,  25;
  23,  24,  25,  23,  24,  25,  23,  24,  25,  23,  24,  25,  23,  24,  25,  23,  24,  25]
==Python风格==
[[[ 23,  24,  25], [ 23,  24,  25], [ 23,  24,  25], [ 23,  24,  25], [ 23,  24,  25], [ 23,  24,  25]],
 [[ 23,  24,  25], [ 23,  24,  25], [ 23,  24,  25], [ 23,  24,  25], [ 23,  24,  25], [ 23,  24,  25]],
 [[ 23,  24,  25], [ 23,  24,  25], [ 23,  24,  25], [ 23,  24,  25], [ 23,  24,  25], [ 23,  24,  25]],
 [[ 23,  24,  25], [ 23,  24,  25], [ 23,  24,  25], [ 23,  24,  25], [ 23,  24,  25], [ 23,  24,  25]],
 [[ 23,  24,  25], [ 23,  24,  25], [ 23,  24,  25], [ 23,  24,  25], [ 23,  24,  25], [ 23,  24,  25]],
 [[ 23,  24,  25], [ 23,  24,  25], [ 23,  24,  25], [ 23,  24,  25], [ 23,  24,  25], [ 23,  24,  25]]]
==Numpy风格==
array([[[ 23,  24,  25], [ 23,  24,  25], [ 23,  24,  25], [ 23,  24,  25], [ 23,  24,  25], [ 23,  24,  25]],
       [[ 23,  24,  25], [ 23,  24,  25], [ 23,  24,  25], [ 23,  24,  25], [ 23,  24,  25], [ 23,  24,  25]],
       [[ 23,  24,  25], [ 23,  24,  25], [ 23,  24,  25], [ 23,  24,  25], [ 23,  24,  25], [ 23,  24,  25]],
       [[ 23,  24,  25], [ 23,  24,  25], [ 23,  24,  25], [ 23,  24,  25], [ 23,  24,  25], [ 23,  24,  25]],
       [[ 23,  24,  25], [ 23,  24,  25], [ 23,  24,  25], [ 23,  24,  25], [ 23,  24,  25], [ 23,  24,  25]],
       [[ 23,  24,  25], [ 23,  24,  25], [ 23,  24,  25], [ 23,  24,  25], [ 23,  24,  25], [ 23,  24,  25]]], dtype='uint8')
==C风格==
{ 23,  24,  25,  23,  24,  25,  23,  24,  25,  23,  24,  25,  23,  24,  25,  23,  24,  25,
  23,  24,  25,  23,  24,  25,  23,  24,  25,  23,  24,  25,  23,  24,  25,  23,  24,  25,
  23,  24,  25,  23,  24,  25,  23,  24,  25,  23,  24,  25,  23,  24,  25,  23,  24,  25,
  23,  24,  25,  23,  24,  25,  23,  24,  25,  23,  24,  25,  23,  24,  25,  23,  24,  25,
  23,  24,  25,  23,  24,  25,  23,  24,  25,  23,  24,  25,  23,  24,  25,  23,  24,  25,
  23,  24,  25,  23,  24,  25,  23,  24,  25,  23,  24,  25,  23,  24,  25,  23,  24,  25}
==默认风格==
[ 23,  24,  25,  23,  24,  25,  23,  24,  25,  23,  24,  25,  23,  24,  25,  23,  24,  25;
  23,  24,  25,  23,  24,  25,  23,  24,  25,  23,  24,  25,  23,  24,  25,  23,  24,  25;
  23,  24,  25,  23,  24,  25,  23,  24,  25,  23,  24,  25,  23,  24,  25,  23,  24,  25;
  92,  96, 100,  92,  96, 100,  92,  96, 100,  92,  96, 100,  92,  96, 100,  92,  96, 100;
  23,  24,  25,  23,  24,  25,  23,  24,  25,  23,  24,  25,  23,  24,  25,  23,  24,  25;
  23,  24,  25,  23,  24,  25,  23,  24,  25,  23,  24,  25,  23,  24,  25,  23,  24,  25]
==Python风格==
[[[ 23,  24,  25], [ 23,  24,  25], [ 23,  24,  25], [ 23,  24,  25], [ 23,  24,  25], [ 23,  24,  25]],
 [[ 23,  24,  25], [ 23,  24,  25], [ 23,  24,  25], [ 23,  24,  25], [ 23,  24,  25], [ 23,  24,  25]],
 [[ 23,  24,  25], [ 23,  24,  25], [ 23,  24,  25], [ 23,  24,  25], [ 23,  24,  25], [ 23,  24,  25]],
 [[ 92,  96, 100], [ 92,  96, 100], [ 92,  96, 100], [ 92,  96, 100], [ 92,  96, 100], [ 92,  96, 100]],
 [[ 23,  24,  25], [ 23,  24,  25], [ 23,  24,  25], [ 23,  24,  25], [ 23,  24,  25], [ 23,  24,  25]],
 [[ 23,  24,  25], [ 23,  24,  25], [ 23,  24,  25], [ 23,  24,  25], [ 23,  24,  25], [ 23,  24,  25]]]
==Numpy风格==
array([[[ 23,  24,  25], [ 23,  24,  25], [ 23,  24,  25], [ 23,  24,  25], [ 23,  24,  25], [ 23,  24,  25]],
       [[ 23,  24,  25], [ 23,  24,  25], [ 23,  24,  25], [ 23,  24,  25], [ 23,  24,  25], [ 23,  24,  25]],
       [[ 23,  24,  25], [ 23,  24,  25], [ 23,  24,  25], [ 23,  24,  25], [ 23,  24,  25], [ 23,  24,  25]],
       [[ 92,  96, 100], [ 92,  96, 100], [ 92,  96, 100], [ 92,  96, 100], [ 92,  96, 100], [ 92,  96, 100]],
       [[ 23,  24,  25], [ 23,  24,  25], [ 23,  24,  25], [ 23,  24,  25], [ 23,  24,  25], [ 23,  24,  25]],
       [[ 23,  24,  25], [ 23,  24,  25], [ 23,  24,  25], [ 23,  24,  25], [ 23,  24,  25], [ 23,  24,  25]]], dtype='uint8')
==C风格==
{ 23,  24,  25,  23,  24,  25,  23,  24,  25,  23,  24,  25,  23,  24,  25,  23,  24,  25,
  23,  24,  25,  23,  24,  25,  23,  24,  25,  23,  24,  25,  23,  24,  25,  23,  24,  25,
  23,  24,  25,  23,  24,  25,  23,  24,  25,  23,  24,  25,  23,  24,  25,  23,  24,  25,
  92,  96, 100,  92,  96, 100,  92,  96, 100,  92,  96, 100,  92,  96, 100,  92,  96, 100,
  23,  24,  25,  23,  24,  25,  23,  24,  25,  23,  24,  25,  23,  24,  25,  23,  24,  25,
  23,  24,  25,  23,  24,  25,  23,  24,  25,  23,  24,  25,  23,  24,  25,  23,  24,  25}
==Python风格==
[[ 23,  24,  25],
 [ 23,  24,  25],
 [ 23,  24,  25],
 [ 92,  96, 100],
 [ 23,  24,  25],
 [ 23,  24,  25]]
[[1, 0, 0, 0, 0, 0, 0, 0, 0, 0],
 [0, 1, 0, 0, 0, 0, 0, 0, 0, 0],
 [0, 0, 1, 0, 0, 0, 0, 0, 0, 0],
 [0, 0, 0, 1, 0, 0, 0, 0, 0, 0],
 [0, 0, 0, 0, 1, 0, 0, 0, 0, 0],
 [0, 0, 0, 0, 0, 1, 0, 0, 0, 0],
 [0, 0, 0, 0, 0, 0, 1, 0, 0, 0],
 [0, 0, 0, 0, 0, 0, 0, 1, 0, 0],
 [0, 0, 0, 0, 0, 0, 0, 0, 1, 0],
 [0, 0, 0, 0, 0, 0, 0, 0, 0, 1]]
[[0, 0],
 [1, 0],
 [0, 1],
 [0, 0],
 [0, 0],
 [0, 0],
 [0, 0],
 [0, 0],
 [0, 0],
 [0, 0]]
[[0, 0],
 [0, 0],
 [0, 0],
 [0, 0]]
size = [10 x 10], ofs = [1, 5]
- 为用户分配的数据创建一个标头。 执行以下操作可能很有用:
- 使用 OpenCV 处理“外部”数据(例如,当您实现 DirectShow* 过滤器或 gstreamer 的处理模块等时)
void process_video_frame(const unsigned char* pixels,
                         int width, int height, int step)
{
    Mat img(height, width, CV_8UC3, pixels, step);
    GaussianBlur(img, img, Size(7,7), 1.5, 1.5);
}
- 快速初始化小矩阵 / 获得超快速元素访问
double m[3][3] = {{a, b, c}, {d, e, f}, {g, h, i}};
Mat M = Mat(3, 3, CV_64F, m).inv();
这种用户分配数据的部分但非常常见的情况是从 CvMat 和 IplImage 到 Mat 的转换。为此,函数 cv::cvarrToMat 采用指向 CvMat 或 IplImage 的指针以及指示是否复制数据的可选标志。
Ptr<IplImage> iplimg(cvLoadImage(imagename.c_str())); // Ptr<T> is safe ref-counting pointer class
if(!iplimg)
{
    fprintf(stderr, "Can not load image %s\n", imagename.c_str());
    return -1;
}
Mat img = cv::cvarrToMat(iplimg); // cv::Mat replaces the CvMat and IplImage, but it's easy to convert
// between the old and the new data structures (by default, only the header
// is converted, while the data is shared)
// create a double-precision identity matrix and add it to M.
M += Mat::eye(M.rows, M.cols, CV_64F);
- 使用逗号分隔的初始化
// create a 3x3 double-precision identity matrix
Mat M = (Mat_<double>(3,3) << 1, 0, 0, 0, 1, 0, 0, 0, 1);
使用这种方法,您首先使用适当的参数调用 Mat 类的构造函数,然后只需将 << 运算符放在逗号分隔的值后面,这些值可以是常量、变量、表达式等。另外,请注意避免编译错误所需的额外括号。
测试代码
#include <opencv2/highgui.hpp>
#include <opencv2/imgcodecs.hpp>
#include <opencv2/imgproc.hpp>
#include <iostream>

int main()
{
	cv::Mat M(5, 5, CV_64FC3, cv::Scalar(1, 3, 5));
	std::cout << cv::format(M, cv::Formatter::FMT_PYTHON) << std::endl;
	std::cout << std::endl;

	M += cv::Mat::eye(M.rows, M.cols, CV_64FC3);
	std::cout << cv::format(M, cv::Formatter::FMT_PYTHON) << std::endl;
	std::cout << std::endl;

	cv::Mat M1 = (cv::Mat_<double>(3, 3) << 1, 0, 0, 0, 1, 0, 0, 0, 1);
	std::cout << cv::format(M1, cv::Formatter::FMT_PYTHON) << std::endl;

	return 0;
}
输出结果
[[[1, 3, 5], [1, 3, 5], [1, 3, 5], [1, 3, 5], [1, 3, 5]],
 [[1, 3, 5], [1, 3, 5], [1, 3, 5], [1, 3, 5], [1, 3, 5]],
 [[1, 3, 5], [1, 3, 5], [1, 3, 5], [1, 3, 5], [1, 3, 5]],
 [[1, 3, 5], [1, 3, 5], [1, 3, 5], [1, 3, 5], [1, 3, 5]],
 [[1, 3, 5], [1, 3, 5], [1, 3, 5], [1, 3, 5], [1, 3, 5]]]

[[[2, 3, 5], [1, 3, 5], [1, 3, 5], [1, 3, 5], [1, 3, 5]],
 [[1, 3, 5], [2, 3, 5], [1, 3, 5], [1, 3, 5], [1, 3, 5]],
 [[1, 3, 5], [1, 3, 5], [2, 3, 5], [1, 3, 5], [1, 3, 5]],
 [[1, 3, 5], [1, 3, 5], [1, 3, 5], [2, 3, 5], [1, 3, 5]],
 [[1, 3, 5], [1, 3, 5], [1, 3, 5], [1, 3, 5], [2, 3, 5]]]

[[1, 0, 0],
 [0, 1, 0],
 [0, 0, 1]]
创建数组后,它会通过引用计数机制自动进行管理。如果数组头建立在用户分配的数据之上,你应该自己处理数据。 当没有人指向它时,数组数据被释放。如果要在调用数组析构函数之前释放数组头指向的数据,请使用 Mat::release()。
关于数组类的下一个重要知识是元素访问。 本手册已经描述了如何计算每个数组元素的地址。通常,不需要在代码中直接使用公式。 如果知道数组元素类型(可以使用方法 Mat::type() 检索),可以访问二维数组的元素 ,如下所示:
M.at<double>(i,j) += 1.f;
假设 M 是一个双精度浮点数组。 对于不同数量的维度,该方法有几种变体。如果您需要处理二维数组的一整行,最有效的方法是先获取指向该行的指针,然后只需使用普通的 C 运算符 [] :
// compute sum of positive matrix elements
// (assuming that M is a double-precision matrix)
double sum = 0;
for(int i = 0; i < M.rows; i++)
{
    const double* Mi = M.ptr<double>(i);
    for(int j = 0; j < M.cols; j++)
        sum += std::max(Mi[j], 0.);
}
某些操作,例如上面的操作,实际上并不依赖于数组形状。它们只是一个一个地处理一个数组的元素(或来自多个具有相同坐标的数组的元素,例如,数组加法)。这样的操作被称为 element-wise。 检查所有输入/输出数组是否连续是有意义的,即在每行的末尾没有间隙。如果是,则将它们作为长单行处理:
// compute the sum of positive matrix elements, optimized variant
double sum=0;
int cols = M.cols, rows = M.rows;
if(M.isContinuous())
{
    cols *= rows;
    rows = 1;
}
for(int i = 0; i < rows; i++)
{
    const double* Mi = M.ptr<double>(i);
    for(int j = 0; j < cols; j++)
        sum += std::max(Mi[j], 0.);
}
在连续矩阵的情况下,外部循环体只执行一次。 因此,开销较小,这在小矩阵的情况下尤其明显。最后,还有 STL 风格的迭代器,它们足够聪明,可以跳过连续行之间的间隙:
// compute sum of positive matrix elements, iterator-based variant
double sum=0;
MatConstIterator_<double> it = M.begin<double>(), it_end = M.end<double>();
for(; it != it_end; ++it)
    sum += std::max(*it, 0.);
测试代码
#include <opencv2/highgui.hpp>
#include <opencv2/imgcodecs.hpp>
#include <opencv2/imgproc.hpp>
#include <iostream>

int main()
{
	cv::Mat M = (cv::Mat_<double>(3, 3) << -1, 0, 1, 0, 1, -1, 1, -1, 0);

	std::cout << cv::format(M, cv::Formatter::FMT_PYTHON) << std::endl;
	std::cout << std::endl;

	M.at<double>(2, 1) += 1.f;

	std::cout << cv::format(M, cv::Formatter::FMT_PYTHON) << std::endl;

	double sum = 0;
	int cols = M.cols, rows = M.rows;
	if (M.isContinuous())
	{
		cols *= rows;
		rows = 1;
	}
	for (int i = 0; i < rows; i++)
	{
		const double* Mi = M.ptr<double>(i);
		for (int j = 0; j < cols; j++)
			sum += std::max(Mi[j], 0.);
	}
	std::cout << "sum = " << sum << std::endl;

	double sum1 = 0;
	cv::MatConstIterator_<double> it = M.begin<double>(), it_end = M.end<double>();
	for (; it != it_end; ++it)
		sum1 += (std::max)(*it, 0.);
	std::cout << "sum1 = " << sum1 << std::endl;

	return 0;
}
输出结果
[[-1, 0, 1],
 [0, 1, -1],
 [1, -1, 0]]

[[-1, 0, 1],
 [0, 1, -1],
 [1, 0, 0]]
sum = 3
sum1 = 3
文章出处登录后可见!