1.下载crowdhuman数据集,下载链接如下:CrowdHuman Dataset
2.labels文件odgt格式json文件转换成coco数据格式,代码如下:
# corwdhuman->coco
import os
import json
from PIL import Image
def load_file(fpath):#fpath是具体的文件 ,作用:#str to list
    assert os.path.exists(fpath)  #assert() raise-if-not
    with open(fpath,'r') as fid:
        lines = fid.readlines()
    records = [json.loads(line.strip('\n')) for line in lines] #str to list
    return records

def crowdhuman2coco(odgt_path,json_path):#一个输入文件路径,一个输出文件路径
    records = load_file(odgt_path)   #提取odgt文件数据
    #预处理
    json_dict = {"images":[], "annotations": [], "categories": []}#定义一个字典,coco数据集标注格式
    START_B_BOX_ID = 1 #设定框的起始ID
    image_id = 1  #每个image的ID唯一,自己设定start,每次++
    bbox_id = START_B_BOX_ID
    image = {} #定义一个字典,记录image
    annotation = {} #记录annotation
    categories = {}  #进行类别记录
    record_list = len(records)  #获得record的长度,循环遍历所有数据。
    print(record_list)
    #一行一行的处理。
    for i in range(record_list):
        file_name = records[i]['ID']+'.jpg'  #这里是字符串格式  eg.273278,600e5000db6370fb
        #image_id = int(records[i]['ID'].split(",")[0]) 这样会导致id唯一,要自己设定
        im = Image.open("/media/ubuntu/work_space/data-human/crowdhuman/Images/"+file_name)
        #根据文件名,获取图片,这样可以获取到图片的宽高等信息。因为再odgt数据集里,没有宽高的字段信息。
        image = {'file_name': file_name, 'height': im.size[1], 'width': im.size[0],'id':image_id} #im.size[0],im.size[1]分别是宽高
        json_dict['images'].append(image) #这一步完成一行数据到字典images的转换。

        gt_box = records[i]['gtboxes']
        gt_box_len = len(gt_box) #每一个字典gtboxes里,也有好几个记录,分别提取记录。
        for j in range(gt_box_len):
            category = gt_box[j]['tag']
            if category not in categories:  #该类型不在categories,就添加上去
                new_id = len(categories) + 1 #ID递增
                categories[category] = new_id
            category_id = categories[category]  #重新获取它的类别ID
            fbox = gt_box[j]['fbox']  #获得全身框
            #对ignore进行处理,ignore有时在key:extra里,有时在key:head_attr里。属于互斥的。
            ignore = 0 #下面key中都没有ignore时,就设为0,据观察,都存在,只是存在哪个字典里,需要判断一下
            if "ignore" in gt_box[j]['head_attr']:
                ignore = gt_box[j]['head_attr']['ignore']
            if "ignore" in gt_box[j]['extra']:
                ignore = gt_box[j]['extra']['ignore']
            #对字典annotation进行设值。
            annotation = {'area': fbox[2]*fbox[3], 'iscrowd': ignore, 'image_id':  #添加hbox、vbox字段。
                        image_id, 'bbox':fbox, 'hbox':gt_box[j]['hbox'],'vbox':gt_box[j]['vbox'],
                        'category_id': category_id,'id': bbox_id,'ignore': ignore,'segmentation': []}
            #area的值,暂且就是fbox的宽高相乘了,观察里面的数据,发现fbox[2]小、fbox[3]很大,刚好一个全身框的宽很小,高就很大。(猜测),不是的话,再自行修改
            #segmentation怎么处理?博主自己也不知道,找不到对应的数据,这里就暂且不处理。
            #hbox、vbox、ignore是添加上去的,以防有需要。
            json_dict['annotations'].append(annotation)

            bbox_id += 1 #框ID ++
        image_id += 1 #这个image_id的递增操作,注意位置,博主一开始,放上面执行了,后面出了bug,自己可以理一下。
        #annotations的转化结束。
    #下面这一步,对所有数据,只需执行一次,也就是对categories里的类别进行统计。
    for cate, cid in categories.items():
            #dict.items()返回列表list的所有列表项,形如这样的二元组list:[(key,value),(key,value),...]
            cat = {'supercategory': 'none', 'id': cid, 'name': cate}
            json_dict['categories'].append(cat)
    #到此,json_dict的转化全部完成,对于其他的key,
    #因为没有用到(不访问),就不需要给他们空间,也不需要去处理,字典是按key访问的,如果自己需要就自己添加上去就行
    json_fp = open(json_path, 'w')
    json_str = json.dumps(json_dict) #写json文件。
    json_fp.write(json_str)
    json_fp.close()
if __name__ == '__main__':
    json_dict = '/media/ubuntu/work_space/data-human/crowdhuman/train.json'
    odge_path = '/media/ubuntu/work_space/data-human/crowdhuman/annotation_train.odgt'
    crowdhuman2coco(odge_path,json_dict)
3.coco数据格式转换yolo数据
"""
COCO 格式的数据集转化为 YOLO 格式的数据集
--json_path 输入的json文件路径
--save_path 保存的文件夹名字,默认为当前目录下的labels。
"""

import os
import json
from tqdm import tqdm
import argparse

parser = argparse.ArgumentParser()
parser.add_argument('--json_path', default='/media/ubuntu/work_space/data-human/crowdhuman/val.json',type=str, help="input: coco format(json)")
parser.add_argument('--save_path', default='/media/ubuntu/work_space/data-human/crowdhuman/labels/', type=str, help="specify where to save the output dir of labels")
arg = parser.parse_args()

#中心点坐标,长和宽(小数点形式)
def convert(size, box):
    dw = 1. / (size[0])
    dh = 1. / (size[1])
    x = box[0] + box[2] / 2.0
    y = box[1] + box[3] / 2.0
    w = box[2]
    h = box[3]

    x = x * dw
    w = w * dw
    y = y * dh
    h = h * dh
    return (x, y, w, h)

if __name__ == '__main__':
    json_file = arg.json_path # COCO Object Instance 类型的标注
    ana_txt_save_path = arg.save_path  # 保存的路径

    data = json.load(open(json_file, 'r'))
    if not os.path.exists(ana_txt_save_path):
        os.makedirs(ana_txt_save_path)

    id_map = {} # coco数据集的id不连续!根据自己需求顺序自定义输出每个类别的id
    with open(os.path.join(ana_txt_save_path, 'classes.txt'), 'w') as f:
        # 写入classes.txt
        for i, category in enumerate(data['categories']):
            f.write(f"{category['name']}\n")
            id_map[category['id']] = category['id']-1
            print("name={}, id={}".format(category['name'], category['id']))
        print("id_map={}".format(id_map))

    i = 0
    for img in tqdm(data['images']):
        filename = img["file_name"]
        img_width = img["width"]
        img_height = img["height"]
        img_id = img["id"]
        head, tail = os.path.splitext(filename)
        ana_txt_name = head + ".txt"  # 对应的txt名字,与jpg一致
        f_txt = open(os.path.join(ana_txt_save_path, ana_txt_name), 'w')

        for ann in data['annotations']:
            # print("ann_type={}".format(type(ann)))
            if ann == None:
                # print("filename={}".format(filename))
                continue
            else:
                if ann['image_id'] == img_id:
                    # print("i={}".format(i))
                    print("img_id is:",img_id)
                    box = convert((img_width, img_height), ann["bbox"])
                    print('****',id_map[ann["category_id"]])
                    f_txt.write("%s %s %s %s %s\n" % (id_map[ann["category_id"]], box[0], box[1], box[2], box[3]))
        f_txt.close()
        i = i + 1
4.通过步骤3,crowdhuman标签转换成了coco数据集,但是在标签文档中有个classes的txt文档,内容有两个标签:person和mask (person:0,mask:1)
For example txt containing:
0 0.4609375 0.2791666666 0.028125 0.0638888
0 0.5910156 0.6375000000 0.04140625 0.0916666
0 0.9058593 0.4722222222 0.04765625 0.0916666
5.清理yolo的txt标签文件,去掉mask,类别为1的标签去掉,代码如下:
import os
import shutil
import json
from tqdm import tqdm

txt_path = '/media/ubuntu/work_space/data-human/crowdhuman/train_labels/'

txt_list = os.listdir(txt_path)

for i in tqdm(txt_list):
    txt_name = txt_path + i
    lines = [l for l in open(txt_name,"r") if l.find("1",0,1) !=0]
    fd = open(txt_name,"a")
    fd.truncate(0)
    j = 0
    while True:
        if j < len(lines):
            fd.write(lines[j])
            j += 1
        else:
            break
    fd.close()
6.darknet environment preparation
(1) Install darknet environment
(2) modify Makefile
GPU=1
CUDNN=1
OPENCV=1
(3) compile darknet
cd darknet
Make
7.data preparation
(1)generate train.txt file and test.txt
Run the following command in the terminal to generate train.txt
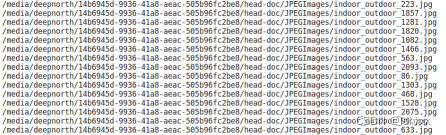
find /media/deepnorth/14b6945d-9936/head-doc/JPEGImages/ -name "*.jpg" > train.txt
train.txt contains the path of each images in the JPEGImages file
text.txt is the same method ,contains the path of each images in the JPEGImages file, as shown below:
8.train file preparation
Create a new folder named yolov7 under the darknet folder, including the following files

(1) Create file obj.data containing (where classes = number of objects), backup is the path where the model is saved :
classes= 1
train = yolov7/train.list
valid = yolov7/test.list
names = yolov7/obj.names
backup = backup/
(2)Create file obj.names with objects names – each in new line
here is:person
(3)Calculating the anchors of a dataset
execute the following command in the darknet directory
./darknet detector calc_anchors yolov7/yolov7.data -num_of_clusters 9 -width 640 -height 640
:可以省略
(4)modify yolov7.cfg
[yolo]
mask = 3,4,5
anchors = 12,16, 19,36, 40,28, 36,75, 76,55, 72,146, 142,110, 192,243, 459,401
classes=1
num=9
change line classes=1 to your number of objects in each of 3 [yolo]-layers
change [filters=255] to filters=(classes + 5)x3 in the 3 [convolutional] before each [yolo] layer
anchors are calculated from step (3)
9.Start training
./darknet detector train yolov7/obj.data yolov7/yolov7.cfg -dont_show -gpus 0,1,2,3
(Optional) Resume training after interruption
./darknet detector train yolov7/obj.data yolov7/yolov7.cfg /backup/yolov3-tiny_1000.weights -gpus 0,1,2,3
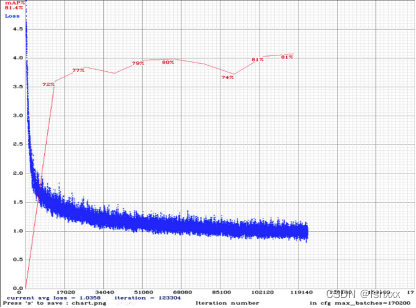
(Optional) drawing of chart of average-Loss and accuracy-mAP (-map flag) during training
./darknet detector train yolov7/obj.data yolov7/yolov7.cfg -dont_show -mjpeg_port 8090 -map
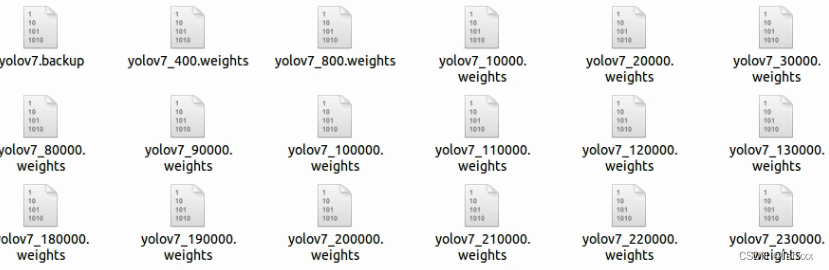
When the training is completed, we will see that many models are saved under the path corresponding to backup, as shown in the following figure.
10.Test
(1)Test image
./darknet detector test yolov7/obj.data yolov7/yolov7.cfg yolov7.weight imgtest.jpg
(2) Test video
./darknet detector demo yolov7/obj.data yolov7/yolov7.cfg yolov7.weight <video file>
(3) Check accuracy mAP@IoU=0.5:
./darknet detector map yolov7/obj.data yolov7/yolov7.cfg yolov7.weight -iou_thresh 0.5
11.Model selection
Method 1: When -map flag is added to the training command line, you will get the following chart. Select the model with the highest map value as the final model.
Method 2: Calculate the map through step5, and then select the model with the highest map as the final model.
文章出处登录后可见!