内容
- 前言
- 0、导入需要的包和基本配置
- 1、timeout(没用到)
- 2、set_logging、init_seeds
- 2.1、set_logging
- 2.2、init_seeds
- 3、get_latest_run
- 4、is_docker、is_colab、is_pip
- 4.1、is_docker
- 4.2、is_colab
- 4.3、is_pip(没用到)
- 5、file_size(没用到)
- 6、colorstr
- 7、check_online
- 8、emojis
- 9、check_git_status
- 10、check_python、check_requirements
- 10.1、check_python
- 10.2、check_requirements
- 11、make_pisible、check_img_size
- 11.1、make_pisible
- 11.2、check_img_size
- 12、check_imshow
- 13、check_file
- 14、check_dataset
- 15、download(没用到)
- 16、clean_str
- 17、one_cycle
- 18、labels_to_class_weights、labels_to_image_weights
- 18.1、labels_to_class_weights
- 18.2、labels_to_image_weights
- 19、coco80_to_coco91_class
- 20、clip_coords
- 21、scale_coords
- 22、xyxy2xywh、xywh2xyxy
- 22.1、xyxy2xywh
- 22.2、xywh2xyxy
- 23、xywhn2xyxy、xyxy2xywhn、xyn2xy
- 23.1、xywhn2xyxy
- 23.2、xyxy2xywhn
- 23.3、xyn2xy
- 24、non_max_suppression
- 25、strip_optimizer
- 26、print_mutation
- 27、apply_classifier
- 28、increment_path
- 29、save_one_box
- 30、resample_segments
- 31、segment2box
- 32、segments2boxes
- 总结
前言
源码:YOLOv5源码.
导航:【YOLOV5-5.x 源码讲解】整体项目文件导航.
注释版全部项目文件已上传至GitHub:yolov5-5.x-annotations.
这个文件是yolov5的通用工具类,写了一些通用的工具函数,用的很广,整个项目哪里都可能用到。这个文件的函数非常多,代码量也很大(上千行了),也都比较重要,希望大家看的时候多点耐心,都能掌握!
0、导入需要的包和基本配置
import contextlib   # python上下文管理器   执行with…as…的时候调用contextlib
import glob         # 仅支持部分通配符的文件搜索模块
import logging      # 日志模块
import math         # 数学公式模块
import os           # 与操作系统进行交互的模块
import platform     # 提供获取操作系统相关信息的模块
import random       # 生成随机数的模块
import re           # 用来匹配字符串(动态、模糊)的模块
import signal       # 信号处理模块
import time         # 时间模块 更底层
import urllib       # 用于操作网页URL, 并对网页的内容进行抓取处理  如urllib.parse: 解析url
from itertools import repeat  # 循环器模块  创建一个迭代器,重复生成object
from multiprocessing.pool import ThreadPool  # 多线程模块 线程池
from pathlib import Path  # Path将str转换为Path对象 使字符串路径易于操作的模块
from subprocess import check_output  # 创建一个子进程再命令行执行..., 最后返回执行结果(文件)

import cv2  # opencv库
import numpy as np   # numpy矩阵处理函数库
import pandas as pd  # pandas矩阵操作模块
import pkg_resources as pkg  # 用于查找, 自省, 激活和使用已安装的Python发行版
import torch    # pytorch框架
import torchvision  # 为pytorch 提供一些辅助工具
import yaml  # yaml配置文件读写模块

from utils.google_utils import gsutil_getsize
from utils.metrics import box_iou, fitness
from utils.torch_utils import init_torch_seeds

# 设置运行相关的一些基本的配置  Settings
# 控制print打印torch.tensor格式设置  tensor精度为5(小数点后5位)  每行字符数为320个  显示方法为long
torch.set_printoptions(linewidth=320, precision=5, profile='long')
# 控制print打印np.array格式设置  精度为5  每行字符数为320个  format short g, %precision=5
np.set_printoptions(linewidth=320, formatter={'float_kind': '{:11.5g}'.format})
# pandas的最大显示行数是10
pd.options.display.max_columns = 10
# 阻止opencv参与多线程(与 Pytorch的 Dataloader不兼容)
cv2.setNumThreads(0)
# 确定最大的线程数 这里被限制在了8
os.environ['NUMEXPR_MAX_THREADS'] = str(min(os.cpu_count(), 8))  # NumExpr max threads
1、timeout(没用到)
这个函数是自定义的timeout超时函数,如果某个程序执行超时,就会触发超时处理函数_timeout_handler 返回超时异常信息。但是这个函数没用到,代码中都是使用库函数自己定义的timeout,没用用这个自定义的timeout函数。所以这个函数可以了解下就行,不过这种超时提示的代码还是有必要学习的。
timeout函数代码:
class timeout(contextlib.ContextDecorator):
    """没用到  代码中都是使用库函数自己定义的timeout 没用用这个自定义的timeout函数
    设置一个超时函数 如果某个程序执行超时  就会触发超时处理函数_timeout_handler 返回超时异常信息
    并没有用到  这里面的timeout都是用python库函数实现的 并不需要自己另外写一个
    使用: with timeout(seconds):  sleep(10)   或者   @timeout(seconds) decorator
    dealing with wandb login-options timeout issues as well as check_github() timeout issues
    """
    def __init__(self, seconds, *, timeout_msg='', suppress_timeout_errors=True):
        self.seconds = int(seconds)   # 限制时间
        self.timeout_message = timeout_msg  # 报错信息
        self.suppress = bool(suppress_timeout_errors)

    def _timeout_handler(self, signum, frame):
        # 超时处理函数 一旦超时 就在seconds后发送超时信息
        raise TimeoutError(self.timeout_message)

    def __enter__(self):
        # signal.signal: 设置信号处理的函数_timeout_handler
        # 执行流进入with中会执行__enter__方法 如果发生超时, 就会触发超时处理函数_timeout_handler 返回超时异常信息
        signal.signal(signal.SIGALRM, self._timeout_handler)  # Set handler for SIGALRM
        # signal.alarm: 设置发送SIGALRM信号的定时器
        signal.alarm(self.seconds)  # start countdown for SIGALRM to be raised

    def __exit__(self, exc_type, exc_val, exc_tb):
        # 执行流离开 with 块时(没有发生超时), 则调用这个上下文管理器的__exit__方法来清理所使用的资源
        signal.alarm(0)  # Cancel SIGALRM if it's scheduled
        if self.suppress and exc_type is TimeoutError:  # Suppress TimeoutError
            return True
2、set_logging、init_seeds
这两个函数是一些初始化操作。set_logging是对日志的设置(format、level)等进行初始化,init_seeds是进行一系列的随机数种子。
2.1、set_logging
该函数是初始化日志的格式、级别等。
def set_logging(rank=-1, verbose=True):
    """广泛使用在train.py、test.py、detect.py等文件的main函数的第一步
    对日志的设置(format、level)等进行初始化
    """
    logging.basicConfig(
        # 设置日志输出的格式和内容  只打印日志信息
        format="%(message)s",
        # 设置日志级别  rank不为-1或0时设置输出级别level为WARN  为-1或0时设置级别为INFO
        level=logging.INFO if (verbose and rank in [-1, 0]) else logging.WARN)
广泛使用在train.py、test.py、detect.py等文件的main函数的第一步:
2.2、init_seeds
这个函数是使用random.random()、np.random.rand()、init_torch_seeds(调用torch_utils.py中的函数)等生成一系列的随机数种子,以保证结果的可复现性。
init_seeds函数代码:
def init_seeds(seed=0):
    """在train函数的一开始调用
    用于设置一系列的随机数种子
    """
    # 设置随机数 针对使用random.random()生成随机数的时候相同
    random.seed(seed)
    # 设置随机数 针对使用np.random.rand()生成随机数的时候相同
    np.random.seed(seed)
    # 为CPU设置种子用于生成随机数的时候相同  并确定训练模式
    init_torch_seeds(seed)
这个函数在train函数的一开始调用: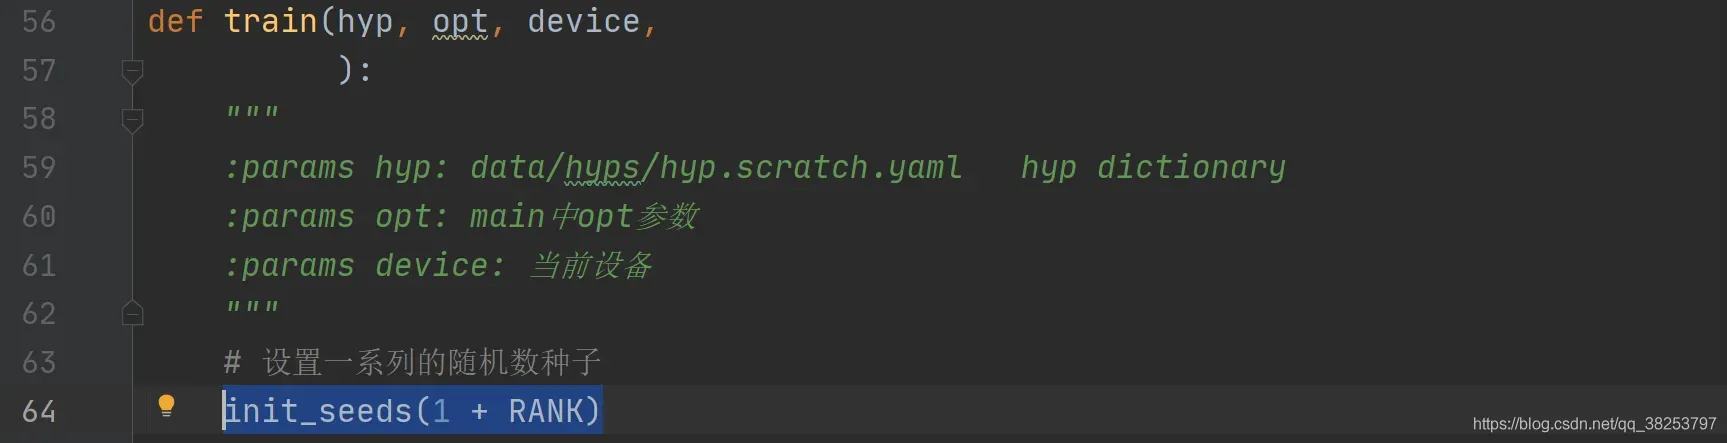
3、get_latest_run
这个函数的作用是查找最近保存的权重文件 last*.pt,用以进行断点续训。
get_latest_run函数代码:
def get_latest_run(search_dir='.'):
    """用在train.py查找最近的pt文件进行断点续训
    用于返回该项目中最近的模型 'last.pt'对应的路径
    :params search_dir: 要搜索的文件的根目录 默认是 '.'  表示搜索该项目中的文件
    """
    # 从Python版本3.5开始, glob模块支持该"**"指令(仅当传递recursive标志时才会解析该指令)
    # glob.glob函数匹配所有的符合条件的文件, 并将其以list的形式返回
    last_list = glob.glob(f'{search_dir}/**/last*.pt', recursive=True)
    # os.path.getctime 返回路径对应文件的创建时间
    # 所以这里是返回路径列表中创建时间最晚(最近的last文件)的路径
    return max(last_list, key=os.path.getctime) if last_list else ''
函数在train.py中被调用: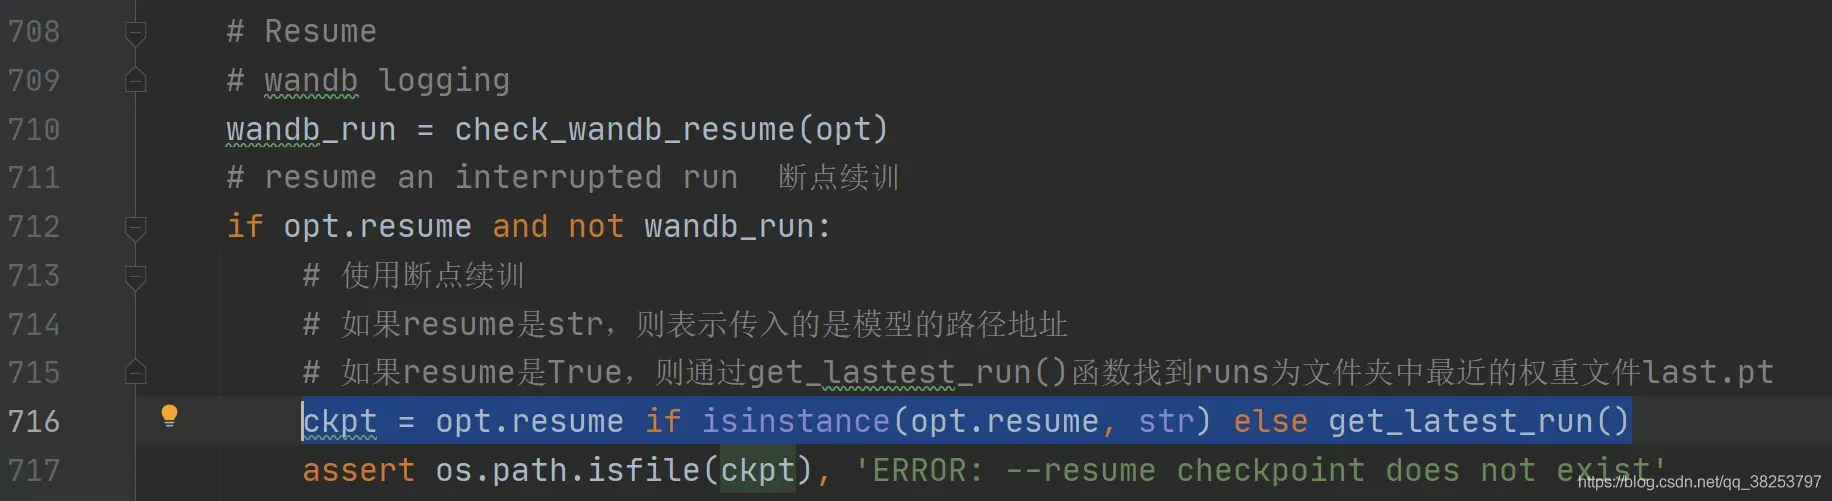
4、is_docker、is_colab、is_pip
下面是三个检测函数,is_docker检测当前环境是否是docker环境,is_colab检查当前环境是否是Google Colab环境,is_pip检测当前文件是否在pip package(site-packages)文件里。前面两个函数在后面的函数都会用到,但是is_pip是没用到的。
4.1、is_docker
这个函数是查询当前环境是否是docker环境,会用到后面的check_git_status和check_imshow等函数中。
is_docker函数代码:
def is_docker():
    """在后面的check_git_status和check_imshow等函数中被调用
    查询当前环境是否是docker环境  Is environment a Docker container?
    """
    return Path('/workspace').exists()  # or Path('/.dockerenv').exists()
4.2、is_colab
这个函数是检查当前环境是否是Google Colab环境,会用到后面的check_imshow函数中。
is_colab函数代码:
def is_colab():
    """用到后面的check_imshow函数中
    检查当前环境是否是Google Colab环境  Is environment a Google Colab instance?
    """
    try:
        import google.colab
        return True
    except Exception as e:
        return False
4.3、is_pip(没用到)
这个函数是检测当前文件是否在pip package(site-packages)文件里,不过这个函数没用到。
is_pip函数代码:
def is_pip():
    """没用到
    当前文件是否在pip package(site-packages)文件里
    Is file in a pip package?
    """
    return 'site-packages' in Path(__file__).absolute().parts
5、file_size(没用到)
这个函数是返回本地文件的大小,功能和之前google_utils.py中的gsutil_getsize函数(返回网站链接对应文件的大小)很像。不过这个函数并没有用到哦,随便看看就好。
file_size函数代码:
def file_size(file):
    """没用到
    返回本地文件的大小(MB)
    :params file: 要查询的文件地址
    """
    # .stat(): 返回文件相关状态  st_size: 返回文件的大小
    return Path(file).stat().st_size / 1e6
6、colorstr
该功能是为输出的开头和结尾添加颜色,使命令行输出显示更美观。
colorstr函数代码:
def colorstr(*input):
    """用到下面的check_git_status、check_requirements等函数  train.py、test.py、detect.py等文件中
    把输出的开头和结尾加上颜色  命令行输出显示会更加好看  如: colorstr('blue', 'hello world')
    Colors a string https://en.wikipedia.org/wiki/ANSI_escape_code
    """
    # 如果输入长度为1, 就是没有选择颜色 则选择默认颜色设置 blue + bold
    # args: 输入的颜色序列 string: 输入的字符串
    *args, string = input if len(input) > 1 else ('blue', 'bold', input[0])
    # 定义一些基础的颜色 和 字体设置
    colors = {'black': '\033[30m',  # basic colors
              'red': '\033[31m',
              'green': '\033[32m',
              'yellow': '\033[33m',
              'blue': '\033[34m',
              'magenta': '\033[35m',
              'cyan': '\033[36m',
              'white': '\033[37m',
              'bright_black': '\033[90m',  # bright colors
              'bright_red': '\033[91m',
              'bright_green': '\033[92m',
              'bright_yellow': '\033[93m',
              'bright_blue': '\033[94m',
              'bright_magenta': '\033[95m',
              'bright_cyan': '\033[96m',
              'bright_white': '\033[97m',
              'end': '\033[0m',  # misc
              'bold': '\033[1m',
              'underline': '\033[4m'}
    # 把输出的开头和结尾加上颜色  命令行输出显示会更加好看
    return ''.join(colors[x] for x in args) + f'{string}' + colors['end']
这个函数会用到下面的check_git_status、check_requirements等函数中,而且还会广泛用在train.py、test.py、detect.py等其他文件中如:


函数效果如下(可以看到输出的开头和结尾的变量使用了其他颜色):
7、check_online
这个函数是检查当前主机是否联网了。会在下面的check_git_status、check_requirements等函数中使用。
check_online函数代码:
def check_online():
    """在下面的check_git_status、check_requirements等函数中使用
    检查当前主机网络连接是否可用
    """
    import socket  # 导入socket模块 可解决基于tcp和ucp协议的网络传输
    try:
        # 连接到一个ip 地址addr("1.1.1.1")的TCP服务上, 端口号port=443 timeout=5 时限5秒 并返回一个新的套接字对象
        socket.create_connection(("1.1.1.1", 443), 5)  # check host accessibility
        # 没发现什么异常, 连接成功, 有网, 就返回True
        return True
    except OSError:
        # 连接异常, 没网, 返回False
        return False
8、emojis
这个函数是忽略掉字符串中无法用ascii编码的内容(比如表情、图像),返回Windows系统可以安全、完整显示的字符串。会在下面的check_git_status、check_requirements等函数中使用。
emojis函数代码:
def emojis(str=''):
    """在下面的check_git_status、check_requirements等函数中使用
    返回Windows系统可以安全、完整显示的字符串
    Return platform-dependent emoji-safe version of string
    """
    # 通过.encode().decode()的组合忽略掉无法用ascii编码的内容(比如表情、图像)
    return str.encode().decode('ascii', 'ignore') if platform.system() == 'Windows' else str
9、check_git_status
这个函数是检查当前的代码版本是否是最新的。如果不是最新的,会提示使用git pull命令进行升级。
功能代码:
def check_git_status(err_msg=', for updates see https://github.com/ultralytics/yolov5'):
    """用在train.py的main函数的一开始部分
    检查当前代码版本是否是最新的   如果不是最新的 会提示使用git pull命令进行升级
    """
    # 彩色显示github单词  github:
    print(colorstr('github: '), end='')
    try:
        # 检查电脑有没有安装git仓库  没有安装直接报异常并输出异常信息
        assert Path('.git').exists(), 'skipping check (not a git repository)'
        # 检查电脑系统有没有安装docker环境变量 没有直接报异常并输出异常信息
        assert not is_docker(), 'skipping check (Docker image)'
        # 检查主机是否联网
        assert check_online(), 'skipping check (offline)'

        # 创建cmd命令
        cmd = 'git fetch && git config --get remote.origin.url'
        # 并创建子进程进行执行cmd命令  返回执行结果  时限5秒
        url = check_output(cmd, shell=True, timeout=5).decode().strip().rstrip('.git')  # git fetch
        branch = check_output('git rev-parse --abbrev-ref HEAD', shell=True).decode().strip()  # checked out
        n = int(check_output(f'git rev-list {branch}..origin/master --count', shell=True))  # commits behind
        # n>0 说明当前版本之后还有commit 因此当前版本不是最新的 s为输出的相关提示
        if n > 0:
            # 如果不是最新  提升字符s: WARNING...
            s = f"⚠️ WARNING: code is out of date by {n} commit{'s' * (n > 1)}. " \
                f"Use 'git pull' to update or 'git clone {url}' to download latest."
        else:
            # 已经是最新
            s = f'up to date with {url} ✅'
        # 输出显示信息(最新/不是最新)   emojis: 忽略掉Windows电脑无法用ascii编码的字符
        print(emojis(s))  # emoji-safe
    except Exception as e:
        # 只要报任何异常 直接输出异常信息
        print(f'{e}{err_msg}')
这个函数只用在train.py的main函数的一开始部分: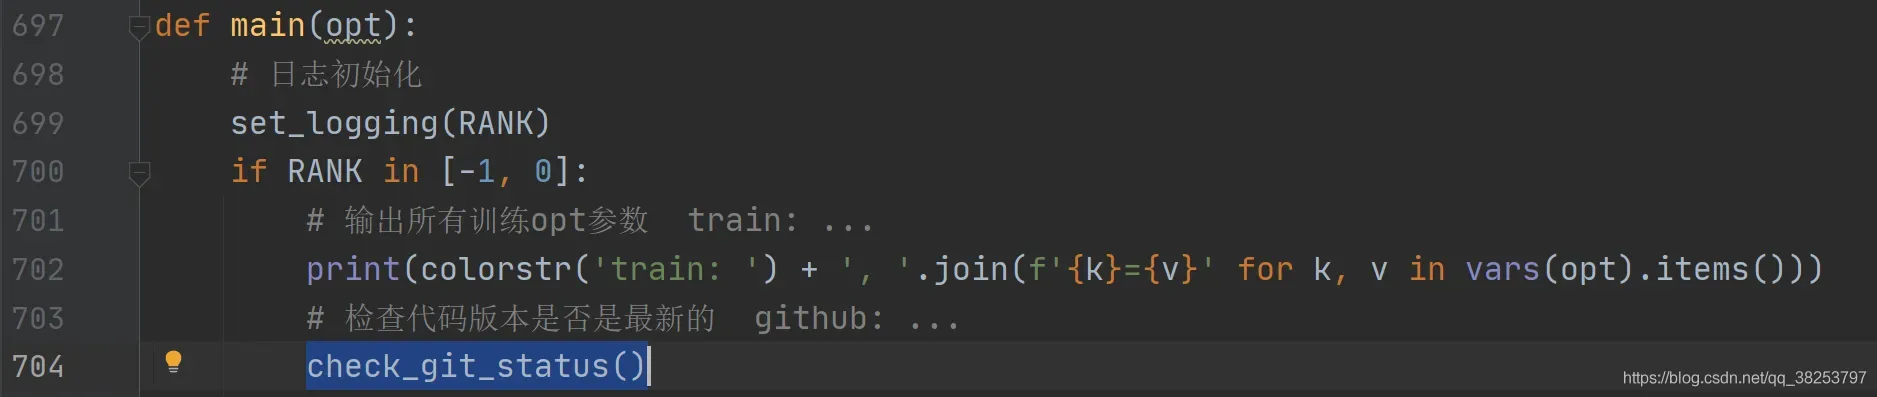
10、check_python、check_requirements
check_python是检查当前的版本号是否满足最小版本号minimum,check_requirements是检查已经安装的包是否满足requirements对应txt文件的要求。check_requirements会调用check_python。
10.1、check_python
这个函数是检查当前的版本号是否满足最小版本号minimum。会在下面的check_requirements函数被调用。
check_python函数代码:
def check_python(minimum='3.6.2', required=True):
    """用在下面的函数check_requirements中
    检查当前的版本号是否满足最小版本号minimum
    Check current python version vs. required python version
    """
    # cuurent: 当前使用的python版本号 如3.8.10
    current = platform.python_version()
    # 对比当前版本号和输出的至少的版本号(python版本一般是向下兼容的)
    # 如果满足返回result=True 反正返回result=False
    # pkg.parse_version(版本号)用于对比两个版本号的大小
    result = pkg.parse_version(current) >= pkg.parse_version(minimum)
    if required:
        # 检查版本号满不满足最小版本号minimum
        assert result, f'Python {minimum} required by YOLOv5, but Python {current} is currently installed'
    return result
10.2、check_requirements
这个函数用于检查已经安装的包是否满足requirements对应txt文件的要求。会调用colorstr、check_python、check_online等函数。
check_requirements函数代码:
def check_requirements(requirements='requirements.txt', exclude=()):
    """用在train.py、test.py、detect.py等文件
    用于检查已经安装的包是否满足requirements对应txt文件的要求
    Check installed dependencies meet requirements (pass *.txt file or list of packages)
    """
    # 红色显示requirements单词  requirements:
    prefix = colorstr('red', 'bold', 'requirements:')
    # 检查当前的python版本符不符合最低版本要求   check python version
    check_python()
    # 解析requirements.txt中的所有包 解析成list 里面存放着一个个的pkg_resources.Requirement类
    # 如: ['matplotlib>=3.2.2', 'numpy>=1.18.5', ……]
    if isinstance(requirements, (str, Path)):  # requirements.txt file
        # 将str字符串requirements转换成路径requirements
        file = Path(requirements)
        if not file.exists():  # requirements.txt文件不存在
            print(f"{prefix} {file.resolve()} not found, check failed.")
            return
        # pkg_resources.parse_requirements:可以解析file中的每一条要求
        # 每一行转换为pkg_resources.Requirement类并进行进一步处理
        # 处理形式为调用每一行对应的name和specifier属性。前者代表需要包的名称,后者代表版本
        # 返回list 每个元素是requirements.txt的一行 如: ['matplotlib>=3.2.2', 'numpy>=1.18.5', ……]
        requirements = [f'{x.name}{x.specifier}' for x in pkg.parse_requirements(file.open()) if x.name not in exclude]
    else:  # list or tuple of packages
        requirements = [x for x in requirements if x not in exclude]

    n = 0  # 统计下面程序更新包的个数 number of packages updates
    # 依次检查环境中安装的包(及每个包对应的依赖包)是否满足requirements中的每一个最低要求安装包
    for r in requirements:
        try:
            # pkg_resources.require(file) 返回对应包所需的所有依赖包 当这些包有哪个未安装或者版本不对的时候就会报错
            pkg.require(r)
        except Exception as e:
            # 没有找到当前包r 或者 当前包r的版本低于最低要求
            # 首先打印信息
            print(f"{prefix} {r} not found and is required by YOLOv5, attempting auto-update...")
            try:
                # 再检查当前主机是否联网
                assert check_online(), f"'pip install {r}' skipped (offline)"
                # 最后创建一个子进程再执行pip指令并返回执行结果
                print(check_output(f"pip install '{r}'", shell=True).decode())
                n += 1  # 更新包的数量加1
            except Exception as e:
                print(f'{prefix} {e}')

    if n:
        # if packages updated 打印一写更新信息
        source = file.resolve() if 'file' in locals() else requirements
        s = f"{prefix} {n} package{'s' * (n > 1)} updated per {source}\n" \
            f"{prefix} ⚠️ {colorstr('bold', 'Restart runtime or rerun command for updates to take effect')}\n"
        print(emojis(s))  # emoji-safe
用在train.py中: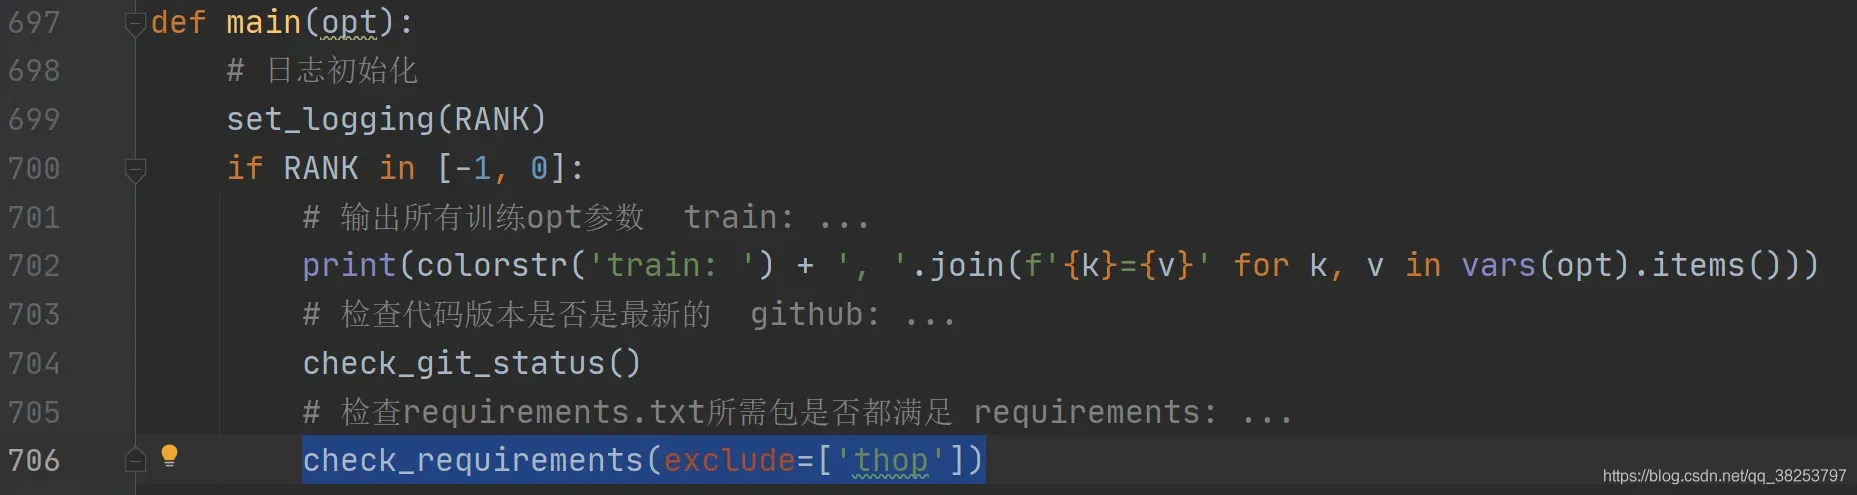
test.py:
11、make_pisible、check_img_size
这两个函数主要是用来约束图像的长款或者feature map的长款,必须是pisor(等于算法的最大下采样率一般是32)的最小倍数。
11.1、make_pisible
这个函数用来取大于等于x且是pisor的最小倍数,保证输入的x(一般是长宽)是算法的最大下采样率的倍数。
def make_pisible(x, pisor):
    """用在下面的make_pisible函数中  yolo.py的parse_model函数和commom.py的AutoShape函数中
    取大于等于x且是pisor的最小倍数
    Returns x evenly pisible by pisor
    """
    # math.ceil 向上取整
    return math.ceil(x / pisor) * pisor
这个函数用在下面的make_pisible函数中及 yolo.py的parse_model函数和commom.py的AutoShape函数中:
11.2、check_img_size
这个函数是为了保证img_size是能被s(32)整除,如果不能就返回大于等于img_size且是s的最小倍数。这个函数本质是通过调用make_pisible函数实现的。
check_img_size函数代码:
def check_img_size(img_size, s=32):
    """这个函数主要用于train.py中和detect.py中  用来检查图片的长宽是否符合规定
    检查img_size是否能被s整除,这里默认s为32  返回大于等于img_size且是s的最小倍数
    Verify img_size is a multiple of stride s
    """
    # 取大于等于x的最小值且该值能被pisor整除
    new_size = make_pisible(img_size, int(s))  # ceil gs-multiple
    if new_size != img_size:
        print('WARNING: --img-size %g must be multiple of max stride %g, updating to %g' % (img_size, s, new_size))
    return new_size
用来保证img的长宽符合规定,一般用在train.py中:
或者detect.py中:
12、check_imshow
这个函数是检查一下前环境是否可以使用opencv.imshow显示图片。
def check_imshow():
    """用在detect.py中  使用webcam的时候调用
    检查当前环境是否可以使用opencv.imshow显示图片
    主要有两点限制: Docker环境 + Google Colab环境
    """
    # Check if environment supports image displays
    try:
        # 检查当前环境是否是一个Docker环境 cv2.imshow()不能再docker环境中使用
        assert not is_docker(), 'cv2.imshow() is disabled in Docker environments'
        # 检查当前环境是否是一个Google Colab环境 cv2.imshow()不能在Google Colab环境中使用
        assert not is_colab(), 'cv2.imshow() is disabled in Google Colab environments'
        # 初始化一张图片检查下opencv是否可用
        cv2.imshow('test', np.zeros((1, 1, 3)))
        cv2.waitKey(1)
        cv2.destroyAllWindows()
        cv2.waitKey(1)
        return True
    except Exception as e:
        print(f'WARNING: Environment does not support cv2.imshow() or PIL Image.show() image displays\n{e}')
        return False
会在detect.py中使用webcam的时候调用: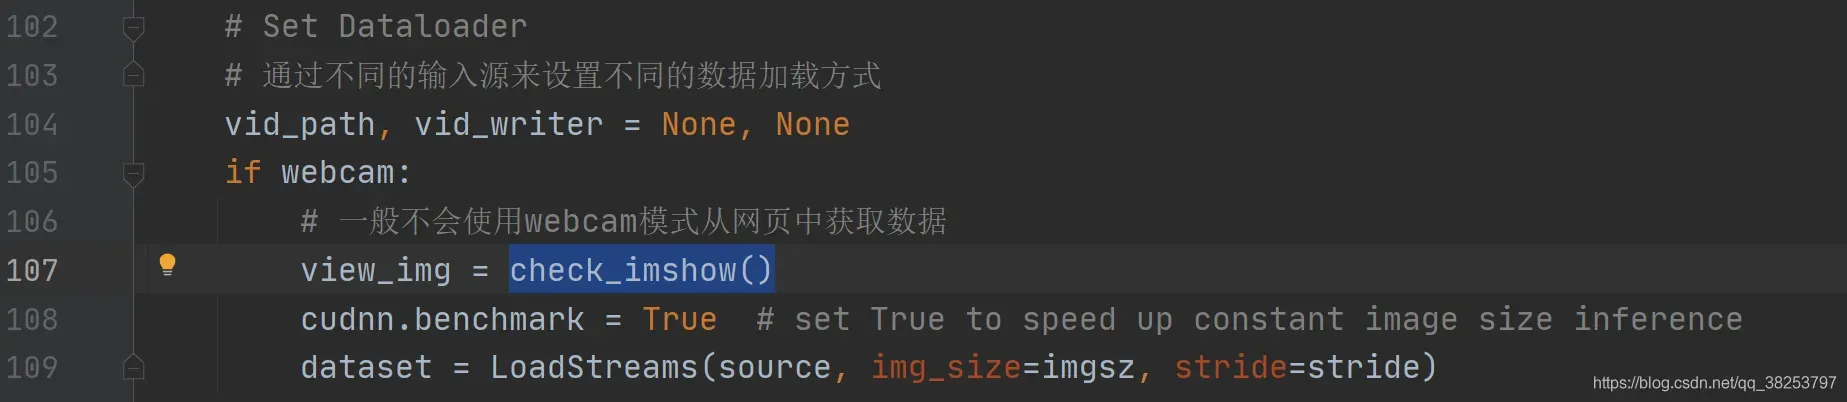
13、check_file
该功能是检查在奔度的相关文件路径中是否可以找到该文件。如果没有找到,则说明文件丢失,返回空;如果传入网络地址,则直接下载文件;否则,它将返回第一个匹配的本地匹配项。文件名。这个功能非常好用并且被广泛使用。
check_file函数代码:
def check_file(file):
    """用在train.py和test.py文件中  检查本地有没有这个文件
    检查相关文件路径能否找到文件 并返回文件名
    Search/download file (if necessary) and return path
    """
    file = str(file)  # convert to str()
    # 如果传进来的是文件或者是’‘, 直接返回文件名str
    if Path(file).is_file() or file == '':  # exists
        return file
    # 如果传进来的以 'http:/' 或者 'https:/' 开头的url地址, 就下载
    elif file.startswith(('http:/', 'https:/')):  # download
        url = str(Path(file)).replace(':/', '://')  # Pathlib turns :// -> :/
        # urllib.parse: 解析url  .unquote: 对url进行解码   file: 要下载的文件名
        # '%2F' to '/', split https://url.com/file.txt?auth
        file = Path(urllib.parse.unquote(file)).name.split('?')[0]
        print(f'Downloading {url} to {file}...')
        # 使用torch.hub.download_url_to_file从url地址上中下载文件名为file的文件
        torch.hub.download_url_to_file(url, file)
        # 检查是否下载成功
        assert Path(file).exists() and Path(file).stat().st_size > 0, f'File download failed: {url}'  # check
        # 返回下载的文件名
        return file
    else:
        # 否则, 传进来的就是当前项目下的一个全局路径 查找匹配的文件名 返回第一个
        # glob.glob: 匹配当前项目下的所有项目 返回所有符合条件的文件files
        files = glob.glob('./**/' + file, recursive=True)  # find file
        assert len(files), f'File not found: {file}'  # assert file was found
        assert len(files) == 1, f"Multiple files match '{file}', specify exact path: {files}"  # assert unique
        # 返回第一个匹配到的文件名
        return files[0]  # return file
在train.py中使用(检查本地data、cfg、hyp等文件是否存在):
在test.py中使用(检查本地data文件是否存在):
14、check_dataset
这个函数是检查本地是否有指定的数据集,没用就从torch库中下载并解压数据集。
check_dataset函数代码:
def check_dataset(data, autodownload=True):
    """用在train.py和detect.py中 检查本地有没有数据集
    检查数据集 如果本地没有则从torch库中下载并解压数据集
    :params data: 是一个解析过的data_dict   len=7
                  例如: ['path'='../datasets/coco128', 'train','val', 'test', 'nc', 'names', 'download']
    :params autodownload: 如果本地没有数据集是否需要直接从torch库中下载数据集  默认True
    """
    # path: WindowPath '..\datasets\coco128'
    path = Path(data.get('path', ''))  # optional 'path' field
    # 如果path不为空 就更新(扩展)train、val和test的路径
    # train: data['train'] -> path / data['train']
    #        'images/train2017' -> '..\\datasets\\coco128\\images\\train2017'
    # val: data['val'] -> path / data['val']
    #        'images/train2017' -> '..\\datasets\\coco128\\images\\train2017'
    if path:
        for k in 'train', 'val', 'test':  #
            if data.get(k):  # prepend path
                data[k] = str(path / data[k]) if isinstance(data[k], str) else [str(path / x) for x in data[k]]

    # train: 训练路径  '..\\datasets\\coco128\\images\\train2017'
    # val: 验证路径    '..\\datasets\\coco128\\images\\train2017'
    # test: 测试路径   None
    # s: 下载地址      'https://github.com/ultralytics/yolov5/releases/download/v1.0/coco128.zip'
    train, val, test, s = [data.get(x) for x in ('train', 'val', 'test', 'download')]
    if val:
        # path.resolve() 该方法将一些的 路径/路径段 解析为绝对路径
        # val: [WindowsPath('E:/yolo_v5/datasets/coco128/images/train2017')]
        val = [Path(x).resolve() for x in (val if isinstance(val, list) else [val])]  # val path
        # 如果val不存在 说明本地不存在数据集
        if not all(x.exists() for x in val):
            print('\nWARNING: Dataset not found, nonexistent paths: %s' % [str(x) for x in val if not x.exists()])
            # 如果下载地址s和下载标记(flag)autodownload不为空, 就直接下载
            if s and autodownload:  # download script
                # 如果下载地址s是http开头就从url中下载数据集
                if s.startswith('http') and s.endswith('.zip'):
                    # f: 得到下载文件的文件名 filename
                    f = Path(s).name
                    print(f'Downloading {s} ...')
                    # 开始下载 利用torch.hub.download_url_to_file函数从s路径中下载文件名为f的文件
                    torch.hub.download_url_to_file(s, f)
                    root = path.parent if 'path' in data else '..'  # unzip directory i.e. '../'
                    Path(root).mkdir(parents=True, exist_ok=True)  # create root
                    # 执行解压命名 将文件f解压到root地址 解压后文件名为f
                    r = os.system(f'unzip -q {f} -d {root} && rm {f}')  # unzip
                # 如果下载地址s是bash开头就使用bash指令下载数据集
                elif s.startswith('bash '):  # bash script
                    print(f'Running {s} ...')
                    # 使用bash命令下载
                    r = os.system(s)
                # 否则下载地址就是一个python脚本 执行python脚本下载数据集
                else:  # python script
                    r = exec(s, {'yaml': data})  # return None
                print('Dataset autodownload %s\n' % ('success' if r in (0, None) else 'failure'))  # print result
            else:
                # 下载地址为空 或者不需要下载 标记(flag)autodownload
                raise Exception('Dataset not found.')
使用在train.py中:
15、download(没用到)
这个函数是将url中的文件下载下来,再解压。但是这个文件并没有在程序中被调用,一般要下载东西都是调用torch.hub.download_url_to_file系统函数和google_utils.py中的attempt_download函数进行下载文件。所以,这个函数随便看看就好。
def download(url, dir='.', unzip=True, delete=True, curl=False, threads=1):
    """没用到
    Multi-threaded file download and unzip function
    :params url: 下载文件的url地址
    :params dir: 下载下来文件保存的目录
    :params unzip: 下载后文件是否需要解压
    :params delete: 解压后原文件(未解压)是否需要删除
    :params curl: 是否使用cmd curl语句下载文件  False就使用torch.hub下载
    :params threads: 下载一个文件需要的线程数
    """
    def download_one(url, dir):
        """
        Download 1 file
        :params url: 文件下载地址  Path(url).name=文件名
        :params dir: 文件保存的目录
        """
        f = dir / Path(url).name  # filename
        # 这个目录下不存在这个文件 就直接下载
        if not f.exists():
            print(f'Downloading {url} to {f}...')
            if curl:  # 使用cmd命令curl下载
                os.system(f"curl -L '{url}' -o '{f}' --retry 9 -C -")  # curl download, retry and resume on fail
            else:     # 使用torch.hub下载
                torch.hub.download_url_to_file(url, f, progress=True)  # torch download
        # 如果需要解压 且下载的文件后缀是 '.zip' 或 '.gz'
        if unzip and f.suffix in ('.zip', '.gz'):
            print(f'Unzipping {f}...')
            if f.suffix == '.zip':
                s = f'unzip -qo {f} -d {dir}'  # unzip -quiet -overwrite
            elif f.suffix == '.gz':
                s = f'tar xfz {f} --directory {f.parent}'  # unzip
            # 解压后是否需要删除未解压的文件
            if delete:  # delete zip file after unzip
                s += f' && rm {f}'
            os.system(s)  # 调用cmd执行s命令

    dir = Path(dir)
    dir.mkdir(parents=True, exist_ok=True)  # make directory
    if threads > 1:  # 使用线程池
        # 定义了一个线程池, 最多创建threads个线程
        pool = ThreadPool(threads)
        # 进程池中的该方法会将 iterable 参数传入的可迭代对象分成 chunksize 份传递给不同的进程来处理。
        pool.imap(lambda x: download_one(*x), zip(url, repeat(dir)))  # multi-threaded
        pool.close()
        pool.join()
    else:
        for u in tuple(url) if isinstance(url, str) else url:
            download_one(u, dir)
16、clean_str
此函数将字符串中的一些奇怪符号“|@#!¡·$€%&()=?¿^*;:,¨´><+”替换为下划线“_”。
clean_str函数代码:
def clean_str(s):
    """在datasets.py中的LoadStreams类中被调用
    字符串s里在pattern中字符替换为下划线_  注意pattern中[]不能省
    Cleans a string by replacing special characters with underscore _
    """
    # re: 用来匹配字符串(动态、模糊)的模块  正则表达式模块
    # pattern: 表示正则中的模式字符串  repl: 就是replacement的字符串  string: 要被处理, 要被替换的那个string字符串
    # 所以这句话执行的是将字符串s里在pattern中的字符串替换为 "_"
    return re.sub(pattern="[|@#!¡·$€%&()=?¿^*;:,¨´><+]", repl="_", string=s)
只用在datasets.py中的LoadStreams类中:

17、one_cycle
这个函数是一种特殊的学习率衰减策略。来自这篇论文:one_cycle. 感兴趣的朋友可以读一读。
def one_cycle(y1=0.0, y2=1.0, steps=100):
    """用在train.py的学习率衰减策略模块
    one_cycle lr  lr先增加, 再减少, 再以更小的斜率减少
    论文: https://arxiv.org/pdf/1803.09820.pdf
    """
    # lambda function for sinusoidal ramp from y1 to y2
    return lambda x: ((1 - math.cos(x * math.pi / steps)) / 2) * (y2 - y1) + y1
在train.py的学习率衰减策略模块中使用: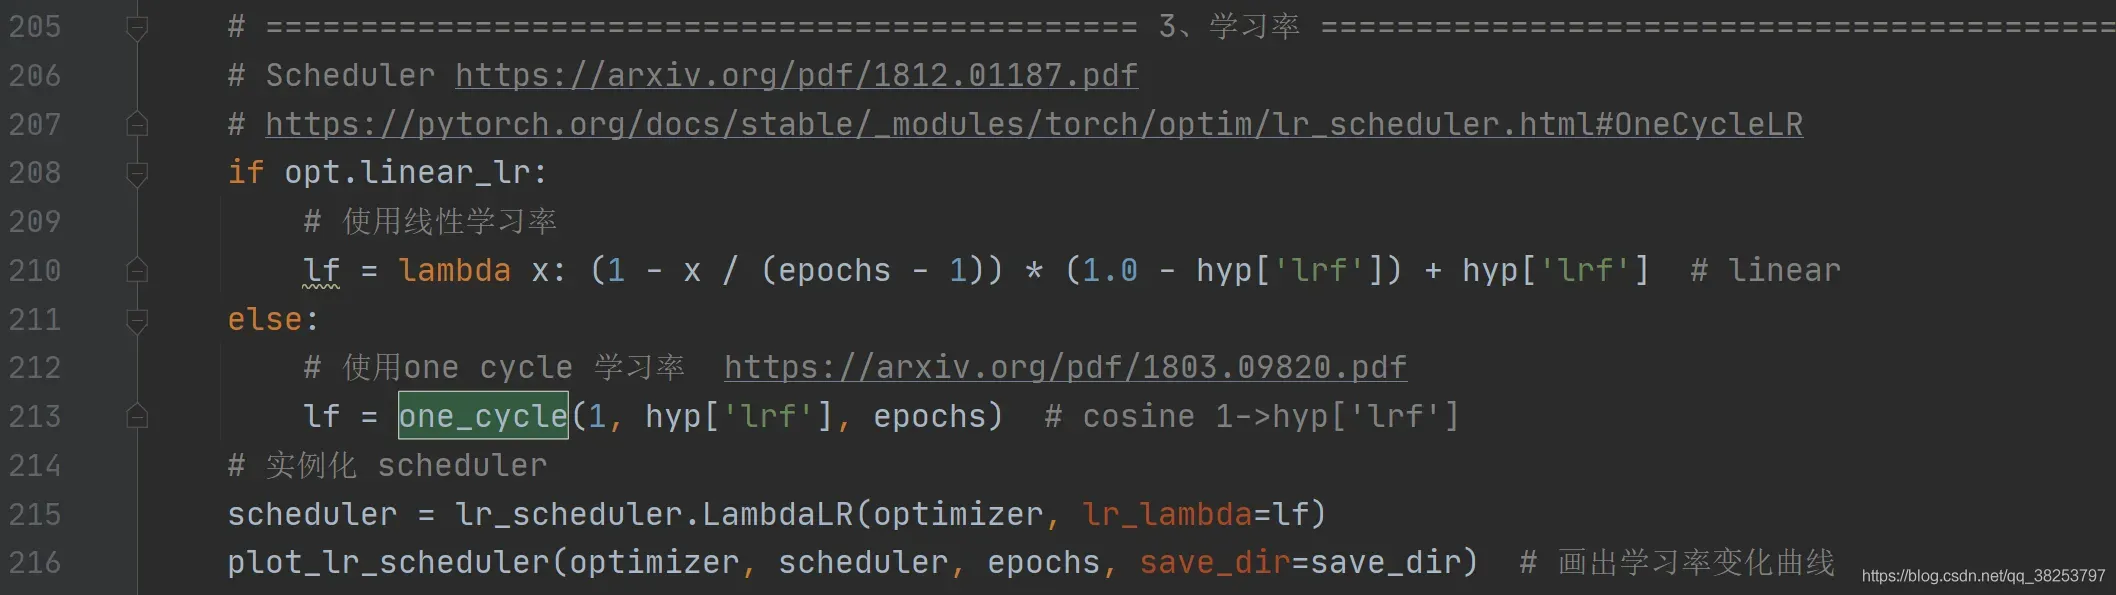
如果是linear_lr的lr变化效果: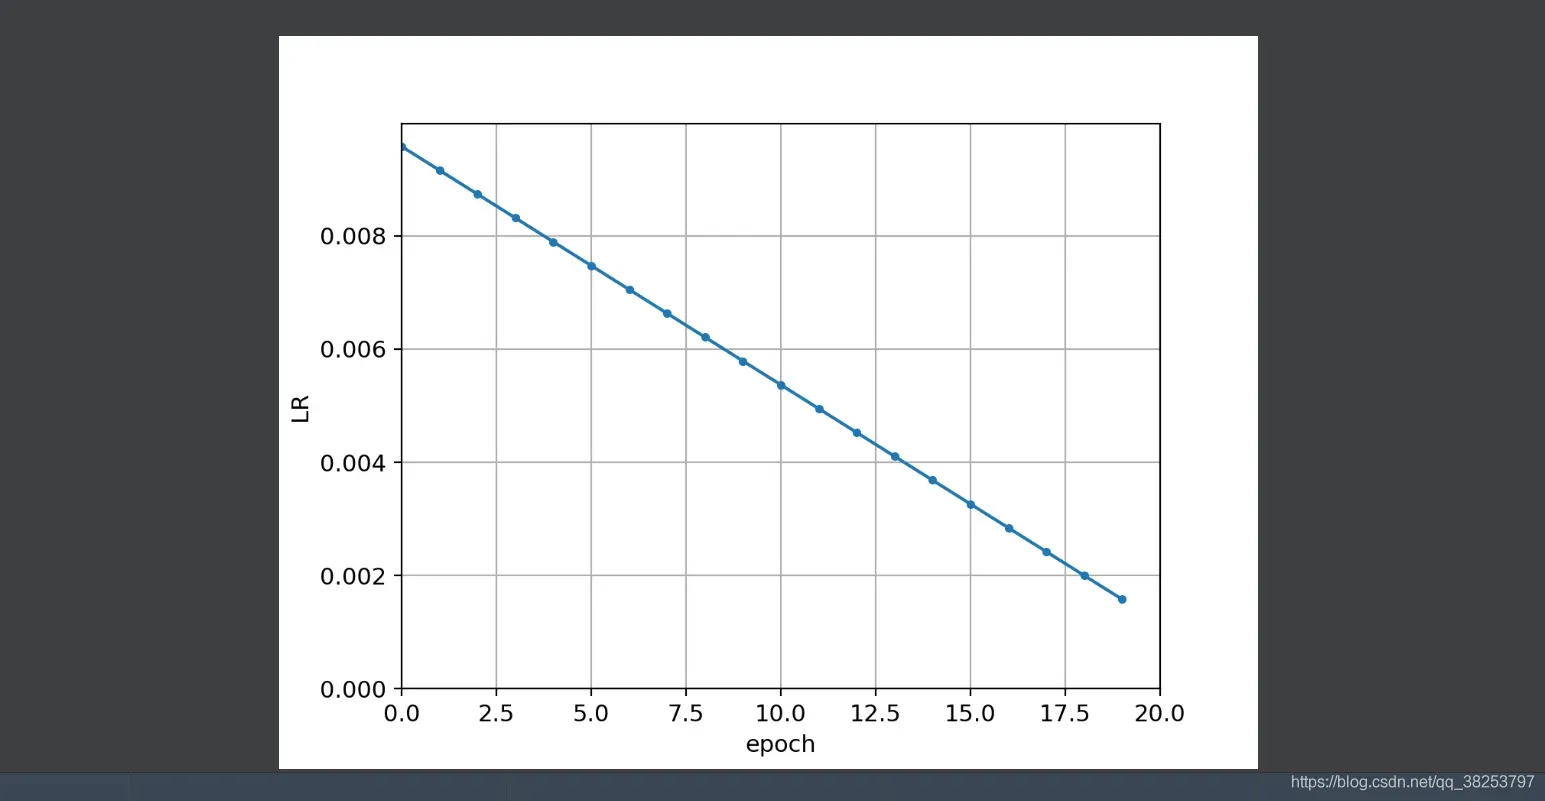
如果是one_cycle的lr变化效果: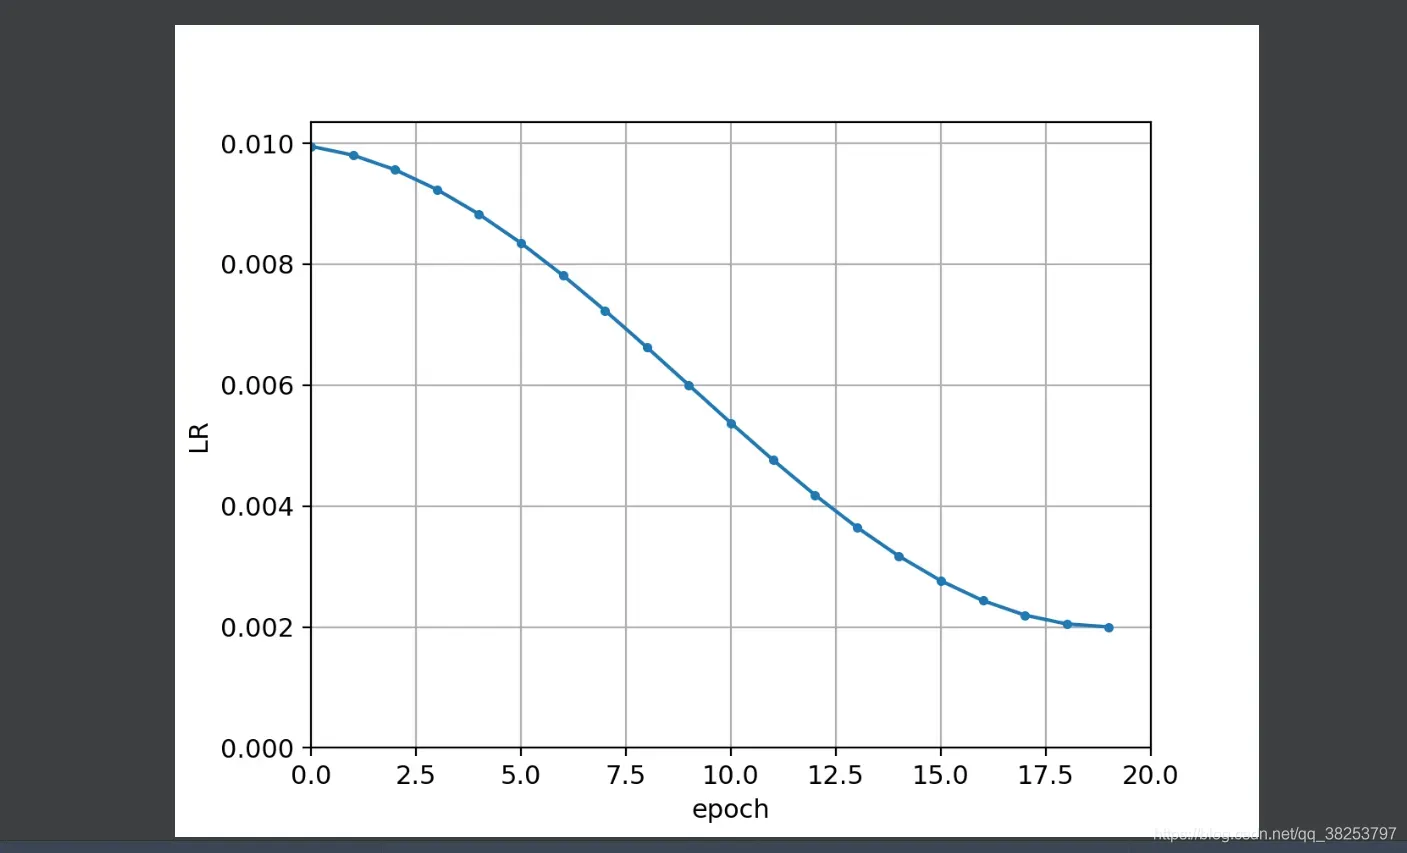
一般使用one_cycle的效果会比较好。
18、labels_to_class_weights、labels_to_image_weights
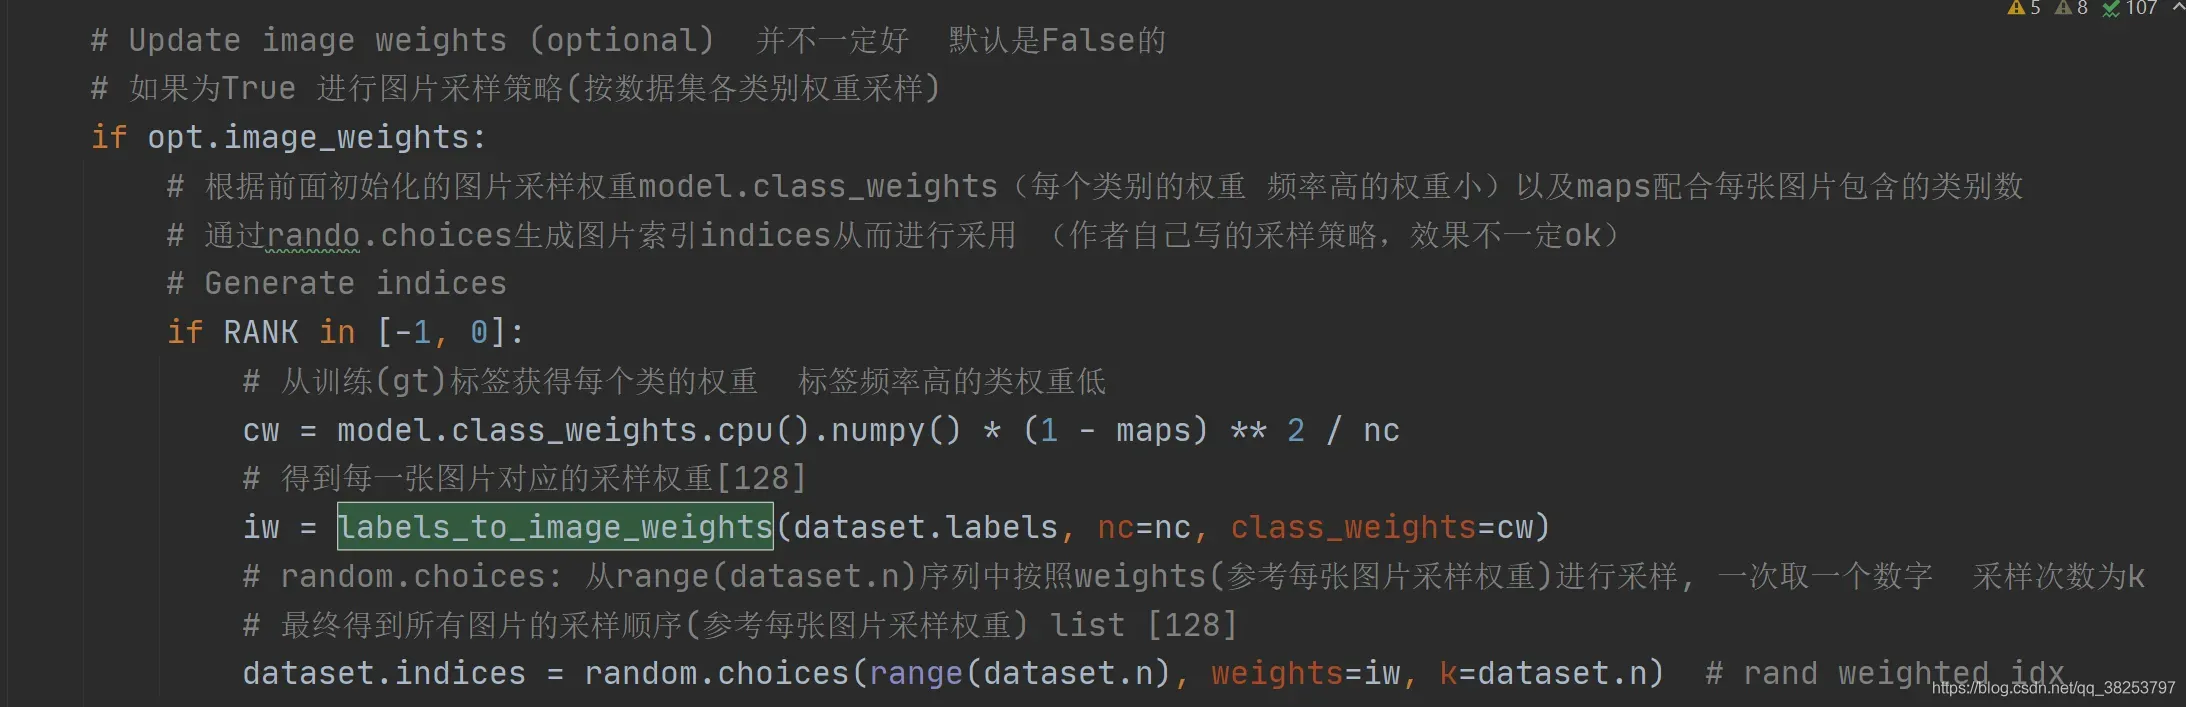
这两个函数是联合使用的。最终的目的是为了在数据集中采样的时候,不使用随机采样,而是使用更加科学的按图片权重进行采样。第一个函数labels_to_class_weights是为了得到数据集中所有类别的权重(频率大的权重小)。第二个函数labels_to_image_weights是利用labels_to_class_weights函数得到的类别权重得到每张图片对应的一个权重。然后利用每张图片的权重在当前batch进行采样,这样的采样方式会更加科学点。
两个函数都只在train.py中使用,且是同时使用的如图:

18.1、labels_to_class_weights
这个函数是从训练(gt)标签获得每个类的权重 ,标签频率高的类权重低。
labels_to_class_weights函数代码:
def labels_to_class_weights(labels, nc=80):
    """用在train.py中  得到每个类别的权重   标签频率高的类权重低
    从训练(gt)标签获得每个类的权重  标签频率高的类权重低
    Get class weights (inverse frequency) from training labels
    :params labels: gt框的所有真实标签labels
    :params nc: 数据集的类别数
    :return torch.from_numpy(weights): 每一个类别根据labels得到的占比(次数越多权重越小) tensor
    """
    if labels[0] is None:  # no labels loaded
        return torch.Tensor()

    labels = np.concatenate(labels, 0)  # labels.shape = (866643, 5) for COCO
    # classes: 所有标签对应的类别labels   labels[:, 0]: 类别   .astype(np.int): 取整
    classes = labels[:, 0].astype(np.int)  # labels = [labels_num, class+xywh]
    # weight: 返回每个类别出现的次数 [1, nc]
    weights = np.bincount(classes, minlength=nc)  # occurrences per class

    # Prepend gridpoint count (for uCE training)
    # gpi = ((320 / 32 * np.array([1, 2, 4])) ** 2 * 3).sum()  # gridpoints per image
    # weights = np.hstack([gpi * len(labels)  - weights.sum() * 9, weights * 9]) ** 0.5  # prepend gridpoints to start

    # 将出现次数为0的类别权重全部取1  replace empty bins with 1
    weights[weights == 0] = 1
    # 其他所有的类别的权重全部取次数的倒数  number of targets per class
    weights = 1 / weights
    # normalize 求出每一类别的占比
    weights /= weights.sum()
    return torch.from_numpy(weights)  # numpy -> tensor
18.2、labels_to_image_weights
这个函数是利用每张图片真实gt框的真实标签labels和上一步labels_to_class_weights得到的每个类别的权重得到数据集中每张图片对应的权重。
labels_to_image_weights函数代码:
def labels_to_image_weights(labels, nc=80, class_weights=np.ones(80)):
    """用在train.py中 利用上面得到的每个类别的权重得到每一张图片的权重  再对图片进行按权重进行采样
    通过每张图片真实gt框的真实标签labels和上一步labels_to_class_weights得到的每个类别的权重进行采样
    Produces image weights based on class_weights and image contents
    :params labels: 每张图片真实gt框的真实标签
    :params nc: 数据集的类别数 默认80
    :params class_weights: [80] 上一步labels_to_class_weights得到的每个类别的权重
    """
    # class_counts: 每个类别出现的次数  [num_labels, nc]  每一行是当前这张图片每个类别出现的次数  num_labels=图片数量=label数量
    class_counts = np.array([np.bincount(x[:, 0].astype(np.int), minlength=nc) for x in labels])
    # [80] -> [1, 80]
    # 整个数据集的每个类别权重[1, 80] *  每张图片的每个类别出现的次数[num_labels, 80] = 得到每一张图片每个类对应的权重[128, 80]
    # 另外注意: 这里不是矩阵相乘, 是元素相乘 [1, 80] 和每一行图片的每个类别出现的次数 [1, 80] 分别按元素相乘
    # 再sum(1): 按行相加  得到最终image_weights: 得到每一张图片对应的采样权重[128]
    image_weights = (class_weights.reshape(1, nc) * class_counts).sum(1)
    # index = random.choices(range(n), weights=image_weights, k=1)  # weight image sample
    return image_weights
19、coco80_to_coco91_class
这个函数是将80个类的coco索引换成91类的coco索引。
coco80_to_coco91_class函数代码:
def coco80_to_coco91_class():
    """用在test.py中   从80类映射到91类的coco索引 取得对应的class id
    将80个类的coco索引换成91类的coco索引
    :return x: 为80类的每一类在91类中的位置
    """
    # converts 80-index (val2014) to 91-index (paper)
    # https://tech.amikelive.com/node-718/what-object-categories-labels-are-in-coco-dataset/
    # a = np.loadtxt('data/coco.names', dtype='str', delimiter='\n')
    # b = np.loadtxt('data/coco_paper.names', dtype='str', delimiter='\n')
    # x1 = [list(a[i] == b).index(True) + 1 for i in range(80)]  # darknet to coco
    # x2 = [list(b[i] == a).index(True) if any(b[i] == a) else None for i in range(91)]  # coco to darknet
    x = [1, 2, 3, 4, 5, 6, 7, 8, 9, 10, 11, 13, 14, 15, 16, 17, 18, 19, 20, 21, 22, 23, 24, 25, 27, 28, 31, 32, 33, 34,
         35, 36, 37, 38, 39, 40, 41, 42, 43, 44, 46, 47, 48, 49, 50, 51, 52, 53, 54, 55, 56, 57, 58, 59, 60, 61, 62, 63,
         64, 65, 67, 70, 72, 73, 74, 75, 76, 77, 78, 79, 80, 81, 82, 84, 85, 86, 87, 88, 89, 90]
    return x
在test.py中定义:
在test.py中调用(从80类映射到91类的coco索引 取得对应的class id):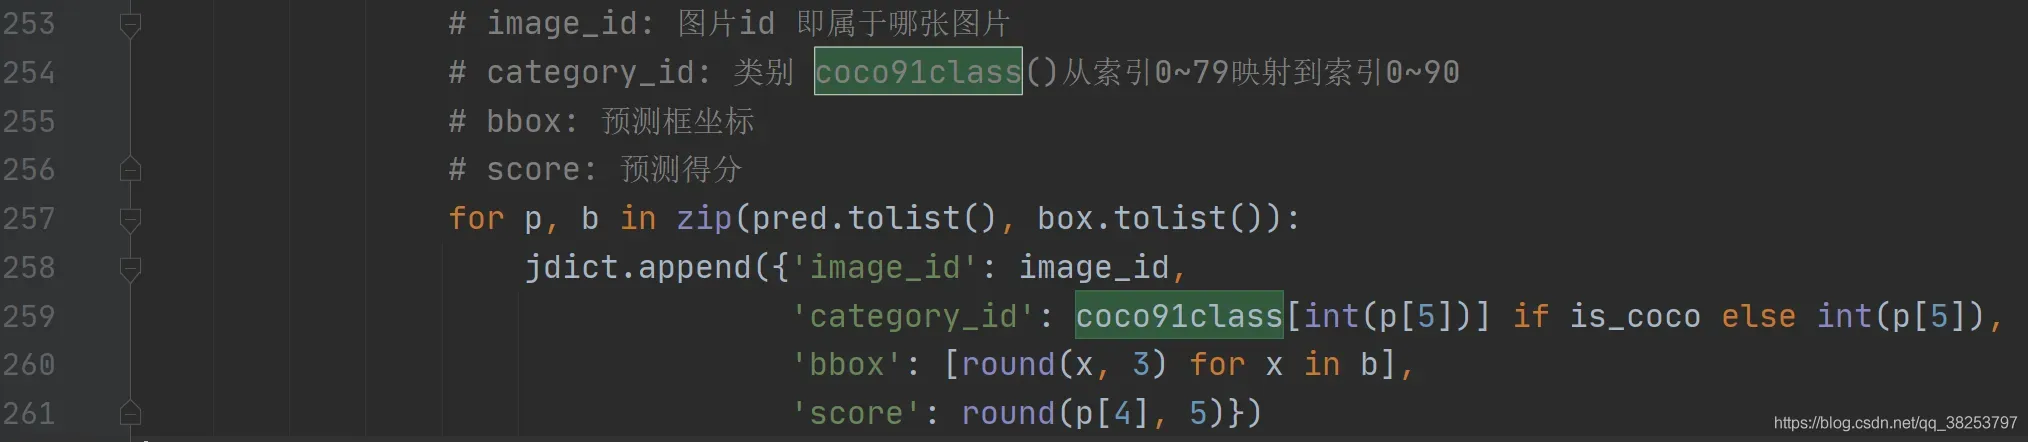
注意: 从这里开始的几个函数都会涉及一些坐标轴xy的操作,记住 x的正坐标是向右,y的正坐标是向下。
20、clip_coords
这个函数的作用是:将boxes的坐标(x1y1x2y2 左上角右下角)限定在图像的尺寸(img_shape hw)内,防止出界。这个函数会用在下面的xyxy2xywhn、save_one_boxd等函数中,很重要,必须掌握。
clip_coords函数代码:
def clip_coords(boxes, img_shape):
    """用在下面的xyxy2xywhn、save_one_boxd等函数中
    将boxes的坐标(x1y1x2y2 左上角右下角)限定在图像的尺寸(img_shape hw)内
    Clip bounding x1y1x2y2 bounding boxes to image shape (height, width)
    """
    if isinstance(boxes, torch.Tensor):
        # .clamp_(min, max): 将取整限定在(min, max)之间, 超出这个范围自动划到边界上
        boxes[:, 0].clamp_(0, img_shape[1])  # x1
        boxes[:, 1].clamp_(0, img_shape[0])  # y1
        boxes[:, 2].clamp_(0, img_shape[1])  # x2
        boxes[:, 3].clamp_(0, img_shape[0])  # y2
    else:  # np.array
        boxes[:, 0].clip(0, img_shape[1], out=boxes[:, 0])  # x1
        boxes[:, 1].clip(0, img_shape[0], out=boxes[:, 1])  # y1
        boxes[:, 2].clip(0, img_shape[1], out=boxes[:, 2])  # x2
        boxes[:, 3].clip(0, img_shape[0], out=boxes[:, 3])  # y2
21、scale_coords
这个函数是将坐标coords(x1y1x2y2)从img1_shape尺寸缩放到img0_shape尺寸。x的正坐标是向右,y的正坐标是向下。这个函数也是很重要的。
scale_coords函数代码:
def scale_coords(img1_shape, coords, img0_shape, ratio_pad=None):
    """用在detect.py和test.py中  将预测坐标从feature map映射回原图
    将坐标coords(x1y1x2y2)从img1_shape缩放到img0_shape尺寸
    Rescale coords (xyxy) from img1_shape to img0_shape
    :params img1_shape: coords相对于的shape大小
    :params coords: 要进行缩放的box坐标信息 x1y1x2y2  左上角 + 右下角
    :params img0_shape: 要将coords缩放到相对的目标shape大小
    :params ratio_pad: 缩放比例gain和pad值   None就先计算gain和pad值再pad+scale  不为空就直接pad+scale
    """
    # ratio_pad为空就先算放缩比例gain和pad值 calculate from img0_shape
    if ratio_pad is None:
        # gain  = old / new  取高宽缩放比例中较小的,之后还可以再pad  如果直接取大的, 裁剪就可能减去目标
        gain = min(img1_shape[0] / img0_shape[0], img1_shape[1] / img0_shape[1])
        # wh padding  wh中有一个为0  主要是pad另一个
        pad = (img1_shape[1] - img0_shape[1] * gain) / 2, (img1_shape[0] - img0_shape[0] * gain) / 2
    else:
        gain = ratio_pad[0][0]  # 指定比例
        pad = ratio_pad[1]  # 指定pad值

    # 因为pad = img1_shape - img0_shape 所以要把尺寸从img1 -> img0 就同样也需要减去pad
    # 如果img1_shape>img0_shape  pad>0   coords从大尺寸缩放到小尺寸 减去pad 符合
    # 如果img1_shape<img0_shape  pad<0   coords从小尺寸缩放到大尺寸 减去pad 符合
    coords[:, [0, 2]] -= pad[0]  # x padding
    coords[:, [1, 3]] -= pad[1]  # y padding
    # 缩放scale
    coords[:, :4] /= gain
    # 防止放缩后的坐标过界 边界处直接剪切
    clip_coords(coords, img0_shape)
    return coords
用在detect.py中将预测坐标映射回原图:
用在test.py中也是将预测坐标映射回原图:
22、xyxy2xywh、xywh2xyxy
这两个函数是两个相反的过程。xyxy2xywh是将预测信息xyxy格式转化为xywh的格式,而xywh2xyxy是将预测信息xywh格式转化为xyxy的格式。这两个函数的代码很重要,一定要掌握。代码还是那句话:x的正坐标是向右,y的正坐标是向下。
22.1、xyxy2xywh
这个函数是将预测信息xyxy格式转化为xywh的格式。
xyxy2xywh函数代码:
def xyxy2xywh(x):
    """"用在detect.py和test.py中   操作最后, 将预测信息从xyxy格式转为xywh格式 再保存
    Convert nx4 boxes from [x1, y1, x2, y2] to [x, y, w, h] where x1y1=top-left, x2y2=bottom-right
    :params x: [n, x1y1x2y2] (x1, y1): 左上角   (x2, y2): 右下角
    :return y: [n, xywh] (x, y): 中心点  wh: 宽高
    """
    y = x.clone() if isinstance(x, torch.Tensor) else np.copy(x)
    y[:, 0] = (x[:, 0] + x[:, 2]) / 2  # x center
    y[:, 1] = (x[:, 1] + x[:, 3]) / 2  # y center
    y[:, 2] = x[:, 2] - x[:, 0]  # width
    y[:, 3] = x[:, 3] - x[:, 1]  # height
    return y
在detect.py中使用:
22.2、xywh2xyxy
这个函数是将预测信息xywh格式转化为xyxy的格式。
xywh2xyxy函数代码:
def xywh2xyxy(x):
    """用在test.py中 操作之前 转为xyxy才可以进行操作
    注意: x的正方向为右面   y的正方向为下面
    Convert nx4 boxes from [x, y, w, h] to [x1, y1, x2, y2] where x1y1=top-left, x2y2=bottom-right
    :params x: [n, xywh] (x, y):
    :return y: [n, x1y1x2y2] (x1, y1): 左上角  (x2, y2): 右下角
    """
    y = x.clone() if isinstance(x, torch.Tensor) else np.copy(x)
    y[:, 0] = x[:, 0] - x[:, 2] / 2  # top left x
    y[:, 1] = x[:, 1] - x[:, 3] / 2  # top left y
    y[:, 2] = x[:, 0] + x[:, 2] / 2  # bottom right x
    y[:, 3] = x[:, 1] + x[:, 3] / 2  # bottom right y
    return y
在test.py中(转换后才能操作):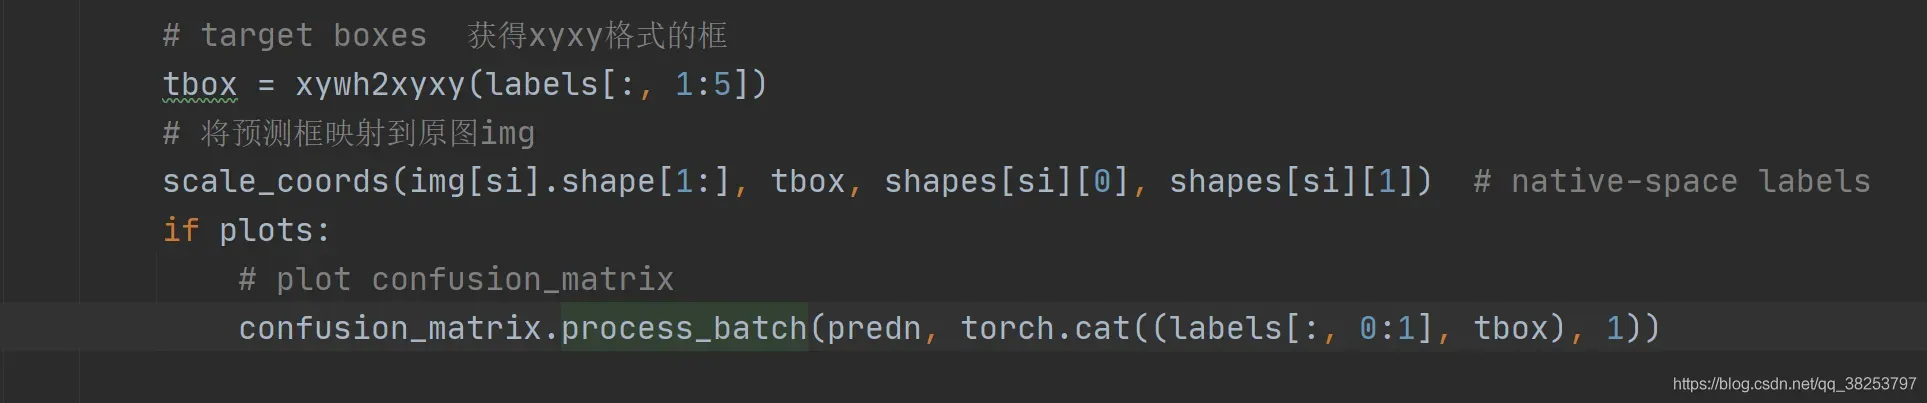
23、xywhn2xyxy、xyxy2xywhn、xyn2xy
这三个函数主要用于datasets.py文件中。主要是对图像进行一些变换操作。xywhn2xyxy是将xywh(normalized) -> x1y1x2y2。xyxy2xywhn是将x1y1x2y2 -> xywh(normalized)。xyn2xy是将xy(normalized) -> xy。这三个函数也是比较重要的,大家必须掌握。
23.1、xywhn2xyxy
这个函数是xywh(normalized) -> x1y1x2y2。
xywhn2xyxy函数代码:
def xywhn2xyxy(x, w=640, h=640, padw=0, padh=0):
    """用在datasets.py的 LoadImagesAndLabels类的__getitem__函数、load_mosaic、load_mosaic9等函数中
    将xywh(normalized) -> x1y1x2y2   (x, y): 中间点  wh: 宽高   (x1, y1): 左上点  (x2, y2): 右下点
    Convert nx4 boxes from [x, y, w, h] normalized to [x1, y1, x2, y2] where xy1=top-left, xy2=bottom-right
    """
    y = x.clone() if isinstance(x, torch.Tensor) else np.copy(x)
    y[:, 0] = w * (x[:, 0] - x[:, 2] / 2) + padw  # top left x
    y[:, 1] = h * (x[:, 1] - x[:, 3] / 2) + padh  # top left y
    y[:, 2] = w * (x[:, 0] + x[:, 2] / 2) + padw  # bottom right x
    y[:, 3] = h * (x[:, 1] + x[:, 3] / 2) + padh  # bottom right y
    return y
在__getitem__函数中被调用:
23.2、xyxy2xywhn
这个函数是将x1y1x2y2 -> xywh(normalized)。
xyxy2xywhn函数代码:
def xyxy2xywhn(x, w=640, h=640, clip=False):
    """用在datasets.py的 LoadImagesAndLabels类的__getitem__函数中
    将 x1y1x2y2 -> xywh(normalized)  (x1, y1): 左上点  (x2, y2): 右下点  (x, y): 中间点  wh: 宽高
    Convert nx4 boxes from [x1, y1, x2, y2] to [x, y, w, h] normalized where xy1=top-left, xy2=bottom-right
    """
    if clip:
        # 是否需要将x的坐标(x1y1x2y2)限定在尺寸(h, w)内
        clip_coords(x, (h, w))  # warning: inplace clip
    y = x.clone() if isinstance(x, torch.Tensor) else np.copy(x)
    y[:, 0] = ((x[:, 0] + x[:, 2]) / 2) / w  # x center
    y[:, 1] = ((x[:, 1] + x[:, 3]) / 2) / h  # y center
    y[:, 2] = (x[:, 2] - x[:, 0]) / w  # width
    y[:, 3] = (x[:, 3] - x[:, 1]) / h  # height
    return y
用在datasets.py的 LoadImagesAndLabels类的__getitem__函数中:
23.3、xyn2xy
这个函数是将xy(normalized) -> xy。
xyn2xy函数代码:
def xyn2xy(x, w=640, h=640, padw=0, padh=0):
    """用在datasets.py的load_mosaic和load_mosaic9函数中
    xy(normalized) -> xy
    Convert normalized segments into pixel segments, shape (n,2)
    """
    y = x.clone() if isinstance(x, torch.Tensor) else np.copy(x)
    y[:, 0] = w * x[:, 0] + padw  # top left x
    y[:, 1] = h * x[:, 1] + padh  # top left y
    return y
在datasets.py的load_mosaic和load_mosaic9函数中使用:
24、non_max_suppression
NMS(非极大值抑制),这个函数相信大家都已经很熟悉了,这是目标检测最基本的操作之一了。可以说这个函数是这篇博客当中最重要的代码也不为过,所以大家一定要掌握这个函数(流程原理+代码)。
还写过一篇nms更详细:nms
non_max_suppression函数代码:
def non_max_suppression(prediction, conf_thres=0.25, iou_thres=0.45, classes=None,
                        agnostic=False, multi_label=True, labels=(), max_det=300, merge=False):
    """
    Runs Non-Maximum Suppression (NMS) on inference results
    Params:
         prediction: [batch, num_anchors(3个yolo预测层), (x+y+w+h+1+num_classes)] = [1, 18900, 25]  3个anchor的预测结果总和
         conf_thres: 先进行一轮筛选,将分数过低的预测框(<conf_thres)删除(分数置0)
         iou_thres: iou阈值, 如果其余预测框与target的iou>iou_thres, 就将那个预测框置0
         classes: 是否nms后只保留特定的类别 默认为None
         agnostic: 进行nms是否也去除不同类别之间的框 默认False
         multi_label: 是否是多标签  nc>1  一般是True
         labels:
         max_det: 每张图片的最大目标个数 默认1000
         merge: use merge-NMS 多个bounding box给它们一个权重进行融合  默认False
    Returns:
         [num_obj, x1y1x2y2+object_conf+cls] = [5, 6]
    """
    # Checks  检查传入的conf_thres和iou_thres两个阈值是否符合范围
    assert 0 <= conf_thres <= 1, f'Invalid Confidence threshold {conf_thres}, valid values are between 0.0 and 1.0'
    assert 0 <= iou_thres <= 1, f'Invalid IoU {iou_thres}, valid values are between 0.0 and 1.0'

    # Settings  设置一些变量
    nc = prediction.shape[2] - 5  # number of classes
    min_wh, max_wh = 2, 4096  # (pixels) 预测物体宽度和高度的大小范围 [min_wh, max_wh]
    max_nms = 30000  # 每个图像最多检测物体的个数  maximum number of boxes into torchvision.ops.nms()
    time_limit = 10.0  # nms执行时间阈值 超过这个时间就退出了 seconds to quit after
    redundant = True  # 是否需要冗余的detections require redundant detections
    multi_label &= nc > 1  # multiple labels per box (adds 0.5ms/img)
    # batch_size个output  存放最终筛选后的预测框结果
    output = [torch.zeros((0, 6), device=prediction.device)] * prediction.shape[0]
    # 定义第二层过滤条件
    xc = prediction[..., 4] > conf_thres  # candidates

    t = time.time()  # 记录当前时刻时间
    for xi, x in enumerate(prediction):  # image index, image inference
        # Apply constraints
        # 第一层过滤 虑除超小anchor标和超大anchor   x=[18900, 25]
        x[((x[..., 2:4] < min_wh) | (x[..., 2:4] > max_wh)).any(1), 4] = 0  # width-height

        # 第二层过滤 根据conf_thres虑除背景目标(obj_conf<conf_thres 0.1的目标 置信度极低的目标)  x=[59, 25]
        x = x[xc[xi]]  # confidence

        # {list: bs} 第一张图片的target[17, 5] 第二张[1, 5] 第三张[7, 5] 第四张[6, 5]
        # Cat apriori labels if autolabelling 自动标注label时调用  一般不用
        # 自动标记在非常高的置信阈值(即 0.90 置信度)下效果最佳,而 mAP 计算依赖于非常低的置信阈值(即 0.001)来正确评估 PR 曲线下的区域。
        # 这个自动标注我觉得应该是一个类似RNN里面的Teacher Forcing的训练机制 就是在训练的时候跟着老师(ground truth)走
        # 但是这样又会造成一个问题: 一直靠老师带的孩子是走不远的 这样的模型因为依赖标签数据,在训练过程中,模型会有较好的效果
        # 但是在测试的时候因为不能得到ground truth的支持, 所以如果目前生成的序列在训练过程中有很大不同, 模型就会变得脆弱。
        # 所以个人认为(个人观点): 应该在下面使用的时候有选择的开启这个trick 比如设置一个概率p随机开启 或者在训练的前n个epoch使用 后面再关闭
        if labels and len(labels[xi]):
            l = labels[xi]
            v = torch.zeros((len(l), nc + 5), device=x.device)
            v[:, :4] = l[:, 1:5]  # box
            v[:, 4] = 1.0  # conf
            v[range(len(l)), l[:, 0].long() + 5] = 1.0  # cls
            x = torch.cat((x, v), 0)

        # 经过前两层过滤后如果该feature map没有目标框了,就结束这轮直接进行下一张图
        if not x.shape[0]:
            continue

        # 计算conf_score
        x[:, 5:] *= x[:, 4:5]  # conf = obj_conf * cls_conf

        # Box (center x, center y, width, height) to (x1, y1, x2, y2) 左上角 右下角   [59, 4]
        box = xywh2xyxy(x[:, :4])

        # Detections matrix nx6 (xyxy, conf, cls)
        if multi_label:
            # 第三轮过滤:针对每个类别score(obj_conf * cls_conf) > conf_thres    [59, 6] -> [51, 6]
            # 这里一个框是有可能有多个物体的,所以要筛选
            # nonzero: 获得矩阵中的非0(True)数据的下标  a.t(): 将a矩阵拆开
            # i: 下标 [43]   j: 类别index [43] 过滤了两个score太低的
            i, j = (x[:, 5:] > conf_thres).nonzero(as_tuple=False).T
            # pred = [43, xyxy+score+class] [43, 6]
            # unsqueeze(1): [43] => [43, 1] add batch dimension
            # box[i]: [43,4] xyxy
            # pred[i, j + 5].unsqueeze(1): [43,1] score  对每个i,取第(j+5)个位置的值(第j个class的值cla_conf)
            # j.float().unsqueeze(1): [43,1] class
            x = torch.cat((box[i], x[i, j + 5, None], j[:, None].float()), 1)
        else:  # best class only
            conf, j = x[:, 5:].max(1, keepdim=True)    # 一个类别直接取分数最大类的即可
            x = torch.cat((box, conf, j.float()), 1)[conf.view(-1) > conf_thres]

        # Filter by class  是否只保留特定的类别  默认None  不执行这里
        if classes is not None:
            x = x[(x[:, 5:6] == torch.tensor(classes, device=x.device)).any(1)]

        # 检测数据是否为有限数 Apply finite constraint  这轮可有可无,一般没什么用 所以这里给他注释了
        # if not torch.isfinite(x).all():
        #     x = x[torch.isfinite(x).all(1)]

        # Check shape
        n = x.shape[0]  # number of boxes
        if not n:  # 如果经过第三轮过滤该feature map没有目标框了,就结束这轮直接进行下一张图
            continue
        elif n > max_nms:  # 如果经过第三轮过滤该feature map还要很多框(>max_nms)   就需要排序
            x = x[x[:, 4].argsort(descending=True)[:max_nms]]  # sort by confidence

        # 第4轮过滤 Batched NMS   [51, 6] -> [5, 6]
        c = x[:, 5:6] * (0 if agnostic else max_wh)  # classes
        # 做个切片 得到boxes和scores   不同类别的box位置信息加上一个很大的数但又不同的数c
        # 这样作非极大抑制的时候不同类别的框就不会掺和到一块了  这是一个作nms挺巧妙的技巧
        boxes, scores = x[:, :4] + c, x[:, 4]  # boxes (offset by class), scores
        # 返回nms过滤后的bounding box(boxes)的索引(降序排列)
        # i=tensor([18, 19, 32, 25, 27])   nms后只剩下5个预测框了
        i = torchvision.ops.nms(boxes, scores, iou_thres)  # NMS

        if i.shape[0] > max_det:  # limit detections
            i = i[:max_det]

        if merge and (1 < n < 3E3):  # Merge NMS (boxes merged using weighted mean)
            # update boxes as boxes(i,4) = weights(i,n) * boxes(n,4)
            iou = box_iou(boxes[i], boxes) > iou_thres  # iou matrix
            weights = iou * scores[None]  # box weights 正比于 iou * scores
            # bounding box合并  其实就是把权重和框相乘再除以权重之和
            x[i, :4] = torch.mm(weights, x[:, :4]).float() / weights.sum(1, keepdim=True)  # merged boxes
            if redundant:
                i = i[iou.sum(1) > 1]  # require redundancy

        output[xi] = x[i]   # 最终输出   [5, 6]

        # 看下时间超没超时  超时没做完的就不做了
        if (time.time() - t) > time_limit:
            print(f'WARNING: NMS time limit {time_limit}s exceeded')
            break  # time limit exceeded

    return output
这个函数一般会用再detect.py或者test.py的模型前向推理结束之后: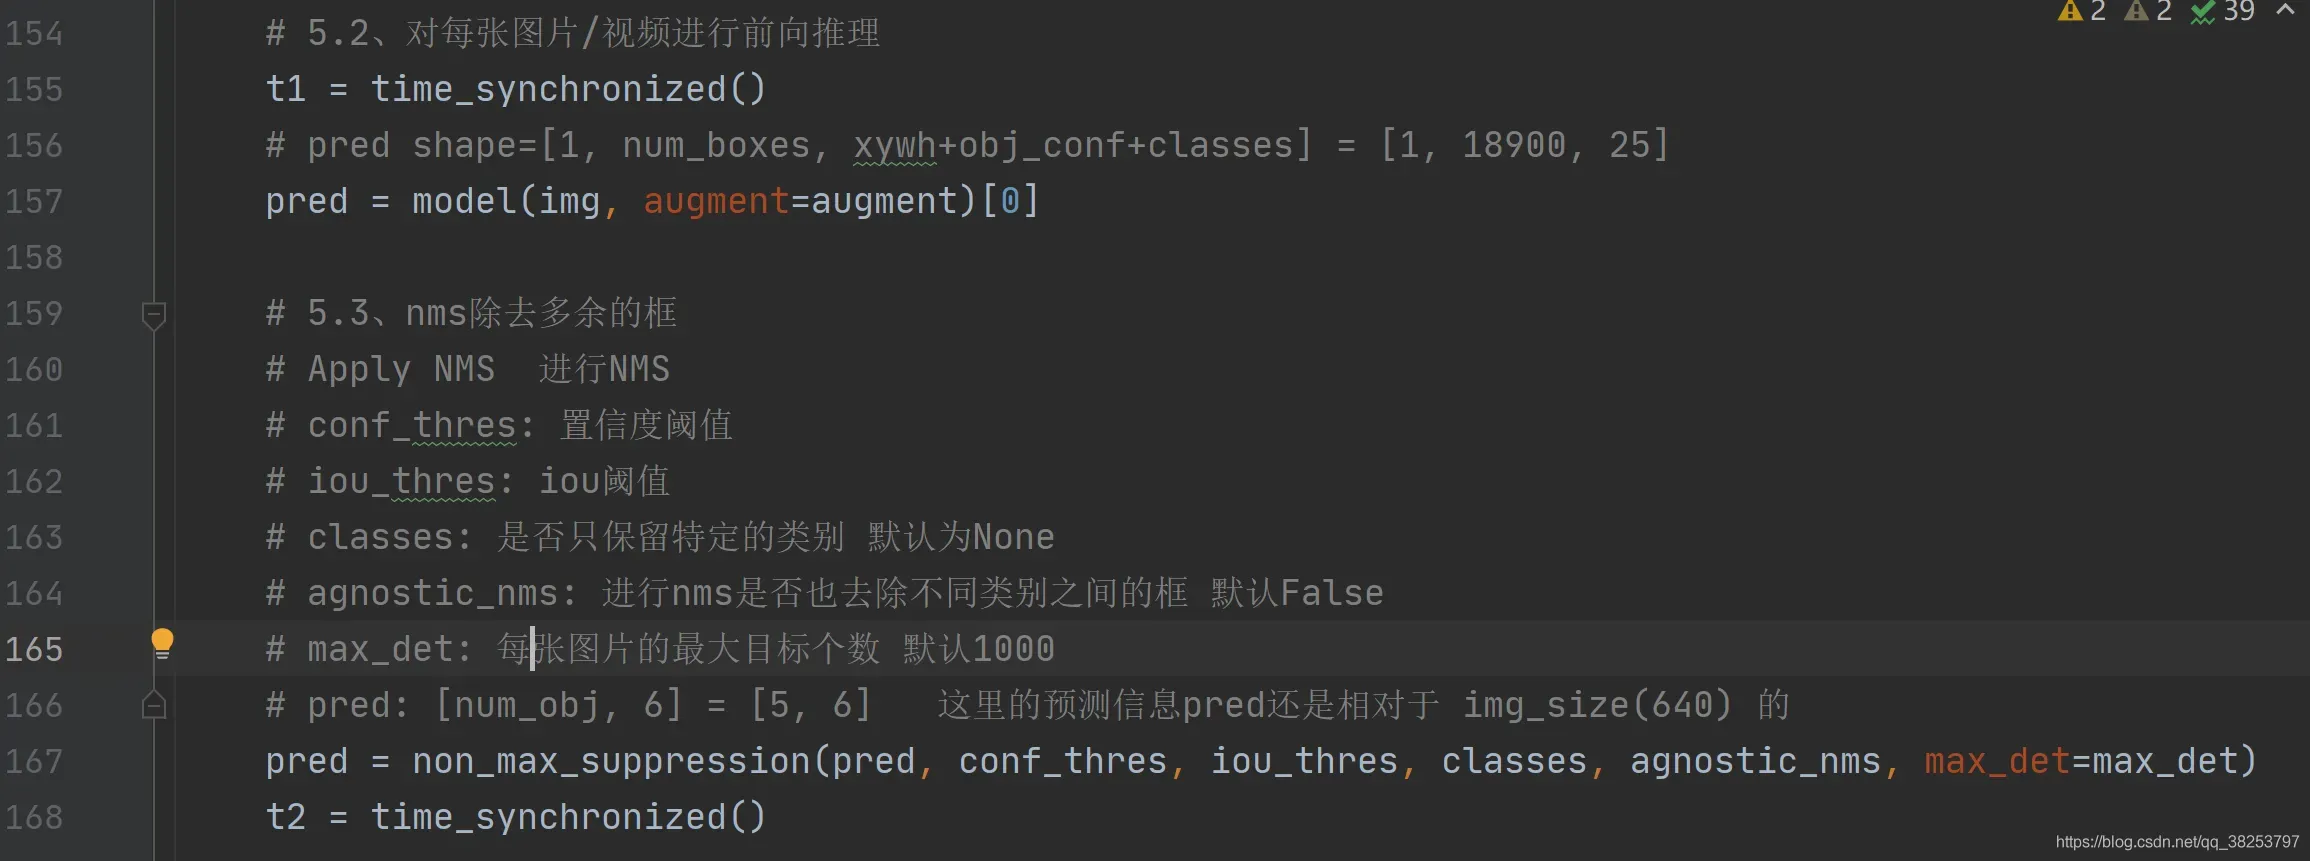
如果还不是很懂这个函数的代码,可以参考下我写的另一篇将yolov3博客,里面也很详细的解释了NMS函数流程和代码:【YOLO-V3-SPP 源码解读】三、预测模块.
25、strip_optimizer
这个函数是在模型训练完后, strip_optimizer函数将optimizer、training_results、updates…从保存的模型文件ckpt中删除。
strip_optimizer函数代码:
def strip_optimizer(f='best.pt', s=''):
    """用在train.py模型训练完后
    将optimizer、training_results、updates...从保存的模型文件f中删除
    Strip optimizer from 'f' to finalize training, optionally save as 's'
    :params f: 传入的原始保存的模型文件
    :params s: 删除optimizer等变量后的模型保存的地址 dir
    """
    # x: 为加载训练的模型
    x = torch.load(f, map_location=torch.device('cpu'))
    # 如果模型是ema replace model with ema
    if x.get('ema'):
        x['model'] = x['ema']
    # 以下模型训练涉及到的若干个指定变量置空
    for k in 'optimizer', 'training_results', 'wandb_id', 'ema', 'updates':  # keys
        x[k] = None
    x['epoch'] = -1  # 模型epoch恢复初始值-1
    x['model'].half()  # to FP16
    for p in x['model'].parameters():
        p.requires_grad = False
    # 保存模型 x -> s/f
    torch.save(x, s or f)
    mb = os.path.getsize(s or f) / 1E6  # filesize
    print(f"Optimizer stripped from {f},{(' saved as %s,' % s) if s else ''} {mb:.1f}MB")
用在train.py模型训练完后:
26、print_mutation
这个函数用来打印进化后的超参结果和results到evolve.txt和hyp_evolved.yaml中。
print_mutation函数代码:
def print_mutation(hyp, results, yaml_file='hyp_evolved.yaml', bucket=''):
    """用在train.py的进化超参结束后
    打印进化后的超参结果和results到evolve.txt和hyp_evolved.yaml中
    Print mutation results to evolve.txt (for use with train.py --evolve)
    :params hyp: 进化后的超参 dict {28对 key:value}
    :params results: tuple(7)   (mp, mr, map50, map50:95, box_loss, obj_loss, cls_loss)
    :params yaml_file: 要保存的进化后的超参文件名  runs\train\evolve\hyp_evolved.yaml
    :params bucket: ''
    """
    # 定义相关变量 并赋值 按指定格式输出
    a = '%10s' * len(hyp) % tuple(hyp.keys())  # str 得到所有超参的key hyperparam keys
    b = '%10.3g' * len(hyp) % tuple(hyp.values())  # str 得到所有超参的value hyperparam values
    c = '%10.4g' * len(results) % results  # c = results str (P, R, mAP@0.5, mAP@0.5:0.95, box_loss, obj_loss, cls_loss)
    print('\n%s\n%s\nEvolved fitness: %s\n' % (a, b, c))

    if bucket:
        url = 'gs://%s/evolve.txt' % bucket
        if gsutil_getsize(url) > (os.path.getsize('evolve.txt') if os.path.exists('evolve.txt') else 0):
            os.system('gsutil cp %s .' % url)  # download evolve.txt if larger than local

    # 将结果c(results)和b(得到所有超参的value)写入evolve.txt中
    with open('evolve.txt', 'a') as f:  # append result
        f.write(c + b + '\n')
    x = np.unique(np.loadtxt('evolve.txt', ndmin=2), axis=0)  # load unique rows
    x = x[np.argsort(-fitness(x))]  # sort
    np.savetxt('evolve.txt', x, '%10.3g')  # save sort by fitness

    # Save yaml  保存yaml配置文件 为'hyp_evolved.yaml'
    for i, k in enumerate(hyp.keys()):  # 将hyp保存到数组hyp[]中
        hyp[k] = float(x[0, i + 7])
    with open(yaml_file, 'w') as f:  # 将hyp写入yaml_file
        results = tuple(x[0, :7])
        c = '%10.4g' * len(results) % results  # results (P, R, mAP@0.5, mAP@0.5:0.95, val_losses x 3)
        f.write('# Hyperparameter Evolution Results\n# Generations: %g\n# Metrics: ' % len(x) + c + '\n\n')
        yaml.safe_dump(hyp, f, sort_keys=False)

    if bucket:  # 如果需要存到谷歌云盘, 就上传  默认是不需要的
        os.system('gsutil cp evolve.txt %s gs://%s' % (yaml_file, bucket))  # upload
用在train.py的进化超参结束后 :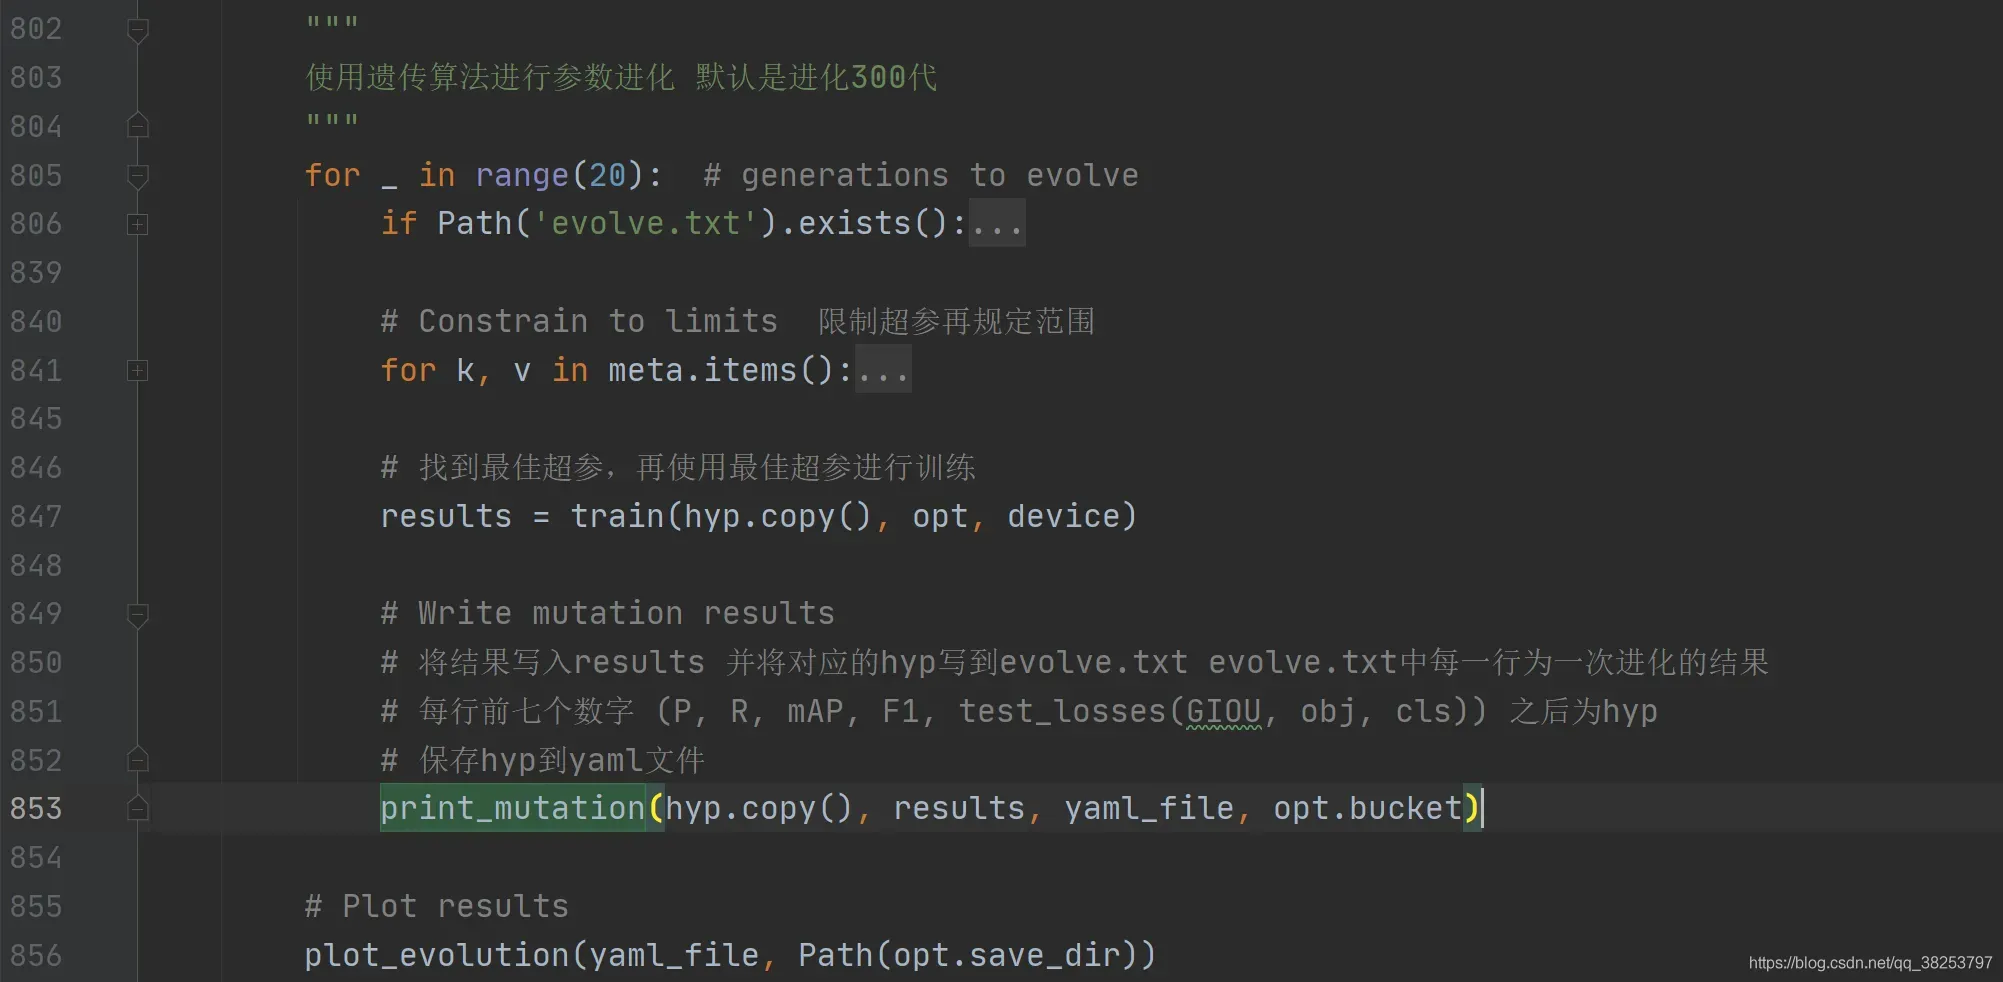
27、apply_classifier
这个函数定义了一个二级分类器来处理yolo的输出,可以将它用在detect.py中。这里写的这个函数只是一个普通的实现,你也可以根据自己的任务改写这个函数。不过这个函数我们几乎不会用它,因为它很容易出错。我们这里就不仔细介绍了,真的很难用到这个函数,随便看下就好。
功能代码:
def apply_classifier(x, model, img, im0):
    """用在detect.py文件的nms后继续对feature map送入model2 进行二次分类
    定义了一个二级分类器来处理yolo的输出  当前实现本质上是一个参考起点,您可以使用它自行实现此项
    比如你有照片与汽车与车牌, 你第一次剪切车牌, 并将其发送到第二阶段分类器, 以检测其中的字符
    Apply a second stage classifier to yolo outputs
    https://github.com/ultralytics/yolov5/issues/2700  这个函数使用起来很容易出错 不是很推荐使用
    https://github.com/ultralytics/yolov5/issues/1472
    :params x: yolo层的输出
    :params model: 分类模型
    :params img: 进行resize + pad之后的图片
    :params im0: 原尺寸的图片
    """
    im0 = [im0] if isinstance(im0, np.ndarray) else im0
    for i, d in enumerate(x):  # per image
        if d is not None and len(d):
            d = d.clone()

            # Reshape and pad cutouts
            b = xyxy2xywh(d[:, :4])  # boxes xyxy -> xywh
            b[:, 2:] = b[:, 2:].max(1)[0].unsqueeze(1)  # rectangle to square
            b[:, 2:] = b[:, 2:] * 1.3 + 30  # pad
            d[:, :4] = xywh2xyxy(b).long()  # xywh -> xyxy

            # Rescale boxes from img_size to im0 size
            scale_coords(img.shape[2:], d[:, :4], im0[i].shape)

            # Classes
            pred_cls1 = d[:, 5].long()  # 在之前的yolo模型预测的类别
            ims = []
            for j, a in enumerate(d):  # per item
                cutout = im0[i][int(a[1]):int(a[3]), int(a[0]):int(a[2])]
                im = cv2.resize(cutout, (224, 224))  # BGR
                # cv2.imwrite('test%i.jpg' % j, cutout)

                im = im[:, :, ::-1].transpose(2, 0, 1)  # BGR to RGB, to 3x416x416
                im = np.ascontiguousarray(im, dtype=np.float32)  # uint8 to float32
                im /= 255.0  # 0 - 255 to 0.0 - 1.0
                ims.append(im)

            # 用model模型进行分类预测
            pred_cls2 = model(torch.Tensor(ims).to(d.device)).argmax(1)  # classifier prediction
            # 保留预测一致的结果
            x[i] = x[i][pred_cls1 == pred_cls2]  # retain matching class detections

    return x
28、increment_path
用于递增路径。比如我输入路径是run/train/exp,但是发现文件夹里面已经有这个文件了,那么就将文件路径扩展围为:runs/train/exp{sep}0, runs/exp{sep}1 etc。
increment_path函数代码:
def increment_path(path, exist_ok=False, sep='', mkdir=False):
    """这是个用处特别广泛的函数 train.py、detect.py、test.py等都会用到
    递增路径 如 run/train/exp --> runs/train/exp{sep}0, runs/exp{sep}1 etc.
    :params path: window path   run/train/exp
    :params exist_ok: False
    :params sep: exp文件名的后缀  默认''
    :params mkdir: 是否在这里创建dir  False
    """
    path = Path(path)  # string/win路径 -> win路径
    # 如果该文件夹已经存在 则将路径run/train/exp修改为 runs/train/exp1
    if path.exists() and not exist_ok:
        # path.suffix 得到路径path的后缀  ''
        suffix = path.suffix
        # .with_suffix 将路径添加一个后缀 ''
        path = path.with_suffix('')
        # 模糊搜索和path\sep相似的路径, 存在一个list列表中 如['runs\\train\\exp', 'runs\\train\\exp1']
        # f开头表示在字符串内支持大括号内的python表达式
        dirs = glob.glob(f"{path}{sep}*")
        # r的作用是去除转义字符       path.stem: 没有后缀的文件名 exp
        # re 模糊查询模块  re.search: 查找dir中有字符串'exp/数字'的d   \d匹配数字
        # matches [None, <re.Match object; span=(11, 15), match='exp1'>]  可以看到返回span(匹配的位置) match(匹配的对象)
        matches = [re.search(rf"%s{sep}(\d+)" % path.stem, d) for d in dirs]
        # i = [1]
        i = [int(m.groups()[0]) for m in matches if m]  # indices
        # 生成需要生成文件的exp后面的数字 n = max(i) + 1 = 2
        n = max(i) + 1 if i else 1  # increment number
        # 返回path runs/train/exp2
        path = Path(f"{path}{sep}{n}{suffix}")  # update path

    # path.suffix文件后缀   path.parent 路径的上级目录  runs/train/exp2
    dir = path if path.suffix == '' else path.parent  # directory
    if not dir.exists() and mkdir:  # mkdir 默认False 先不创建dir
        dir.mkdir(parents=True, exist_ok=True)  # make directory
    return path  # 返回runs/train/exp2
train.py中使用: detect.py中使用:
29、save_one_box
这个函数是用来将预测到的目标从原图中扣出来 剪切好 并保存 会在runs/detect/expn下生成crops文件,将剪切的图片保存在里面。这个函数回调用xyxy2xywh、xywh2xyxy、clip_coords、increment_path等函数。
save_one_box函数代码:
def save_one_box(xyxy, im, file='image.jpg', gain=1.02, pad=10, square=False, BGR=False, save=True):
    """用在detect.py文件中  由opt的save-crop参数控制执不执行
    将预测到的目标从原图中扣出来 剪切好 并保存 会在runs/detect/expn下生成crops文件,将剪切的图片保存在里面
    Save image crop as {file} with crop size multiple {gain} and {pad} pixels. Save and/or return crop
    :params xyxy: 预测到的目标框信息 list 4个tensor x1 y1 x2 y2 左上角 + 右下角
    :params im: 原图片 需要裁剪的框从这个原图上裁剪  nparray  (1080, 810, 3)
    :params file: runs\detect\exp\crops\dog\bus.jpg
    :params gain: 1.02 xyxy缩放因子
    :params pad: xyxy pad一点点边界框 裁剪出来会更好看
    :params square: 是否需要将xyxy放缩成正方形
    :params BGR: 保存的图片是BGR还是RGB
    :params save: 是否要保存剪切的目标框
    """
    xyxy = torch.tensor(xyxy).view(-1, 4)  # list -> Tensor [1, 4] = [x1 y1 x2 y2]
    b = xyxy2xywh(xyxy)  # xyxy to xywh [1, 4] = [x y w h]
    if square:  # 一般不需要rectangle to square
        b[:, 2:] = b[:, 2:].max(1)[0].unsqueeze(1)  # attempt rectangle to square
    # box wh * gain + pad  box*gain再加点pad 裁剪出来框更好看
    b[:, 2:] = b[:, 2:] * gain + pad
    xyxy = xywh2xyxy(b).long()  # xywh -> xyxy
    # 将boxes的坐标(x1y1x2y2 左上角右下角)限定在图像的尺寸(img_shape hw)内
    clip_coords(xyxy, im.shape)
    # crop: 剪切的目标框hw
    crop = im[int(xyxy[0, 1]):int(xyxy[0, 3]), int(xyxy[0, 0]):int(xyxy[0, 2]), ::(1 if BGR else -1)]
    if save:
        # 保存剪切的目标框
        cv2.imwrite(str(increment_path(file, mkdir=True).with_suffix('.jpg')), crop)
    return crop
用于detect.py文件中: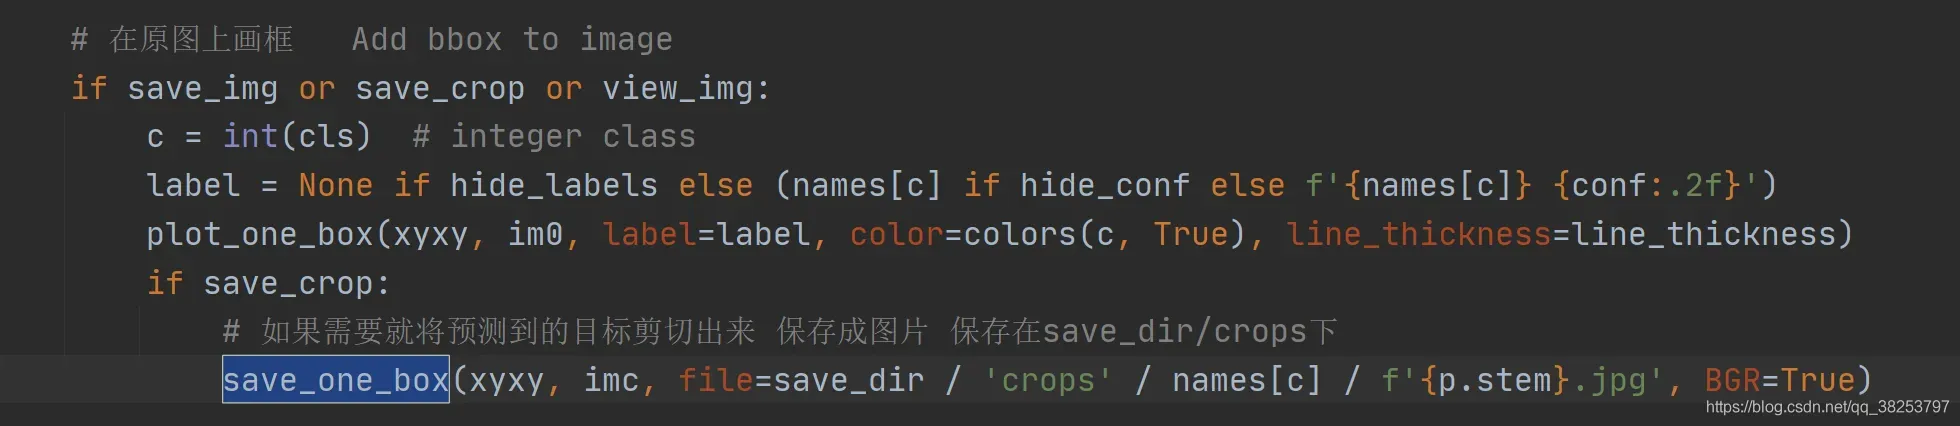
30、resample_segments
这个函数是 对segment重新采样,比如说segment坐标只有100个,通过interp函数将其采样为n个(默认1000)。
resample_segments函数代码:
def resample_segments(segments, n=1000):
    """用在datasets.py文件中的random_perspective函数中
    对segment重新采样,比如说segment坐标只有100个,通过interp函数将其采样为n个(默认1000)
    :params segments: [N, x1x2...]
    :params n: 采样个数
    :return segments: [N, n/2, 2]
    """
    for i, s in enumerate(segments):
        # 0~len(s)-1  取n(1000)个点
        x = np.linspace(0, len(s) - 1, n)
        # 0, 1, 2, ..., len(s)-1
        xp = np.arange(len(s))
        # 对所有的segments都进行重新采样 比如说segment坐标只有100个,通过interp函数将其采样为n个(默认1000)
        segments[i] = np.concatenate([np.interp(x, xp, s[:, i]) for i in range(2)]).reshape(2, -1).T  # segment xy
    # [N, n/2, 2]
    return segments
在datasets.py文件中的random_perspective函数中调用:

31、segment2box
该功能是将多边形标签(不是矩形标签,多边形未知)转换为矩形标签。
segment2box函数代码:
def segment2box(segment, width=640, height=640):
    """用在datasets.py文件中的random_perspective函数中
    将一个多边形标签(不是矩形标签  到底是几边形未知)转化为一个矩形标签
    方法: 对多边形所有的点x1y1 x2y2...  获取其中的(x_min,y_min)和(x_max,y_max) 作为矩形label的左上角和右下角
    Convert 1 segment label to 1 box label, applying inside-image constraint
    :params segment: 一个多边形标签 [n, 2] 传入这个多边形n个顶点的坐标
    :params width: 这个多边形所在图片的宽度
    :params height: 这个多边形所在图片的高度
    :return 矩形标签 [1, x_min+y_min+x_max+y_max]
    """
    # 分别获取当前多边形中所有多边形点的x和y坐标
    x, y = segment.T  # segment xy
    # inside: 筛选条件 xy坐标必须大于等于0 x坐标必须小于等于宽度 y坐标必须小于等于高度
    inside = (x >= 0) & (y >= 0) & (x <= width) & (y <= height)
    # 获取筛选后的所有多边形点的x和y坐标
    x, y, = x[inside], y[inside]
    # 取当前多边形中xy坐标的最大最小值,得到边框的坐标xyxy
    return np.array([x.min(), y.min(), x.max(), y.max()]) if any(x) else np.zeros((1, 4))
在datasets.py文件中的random_perspective函数中调用: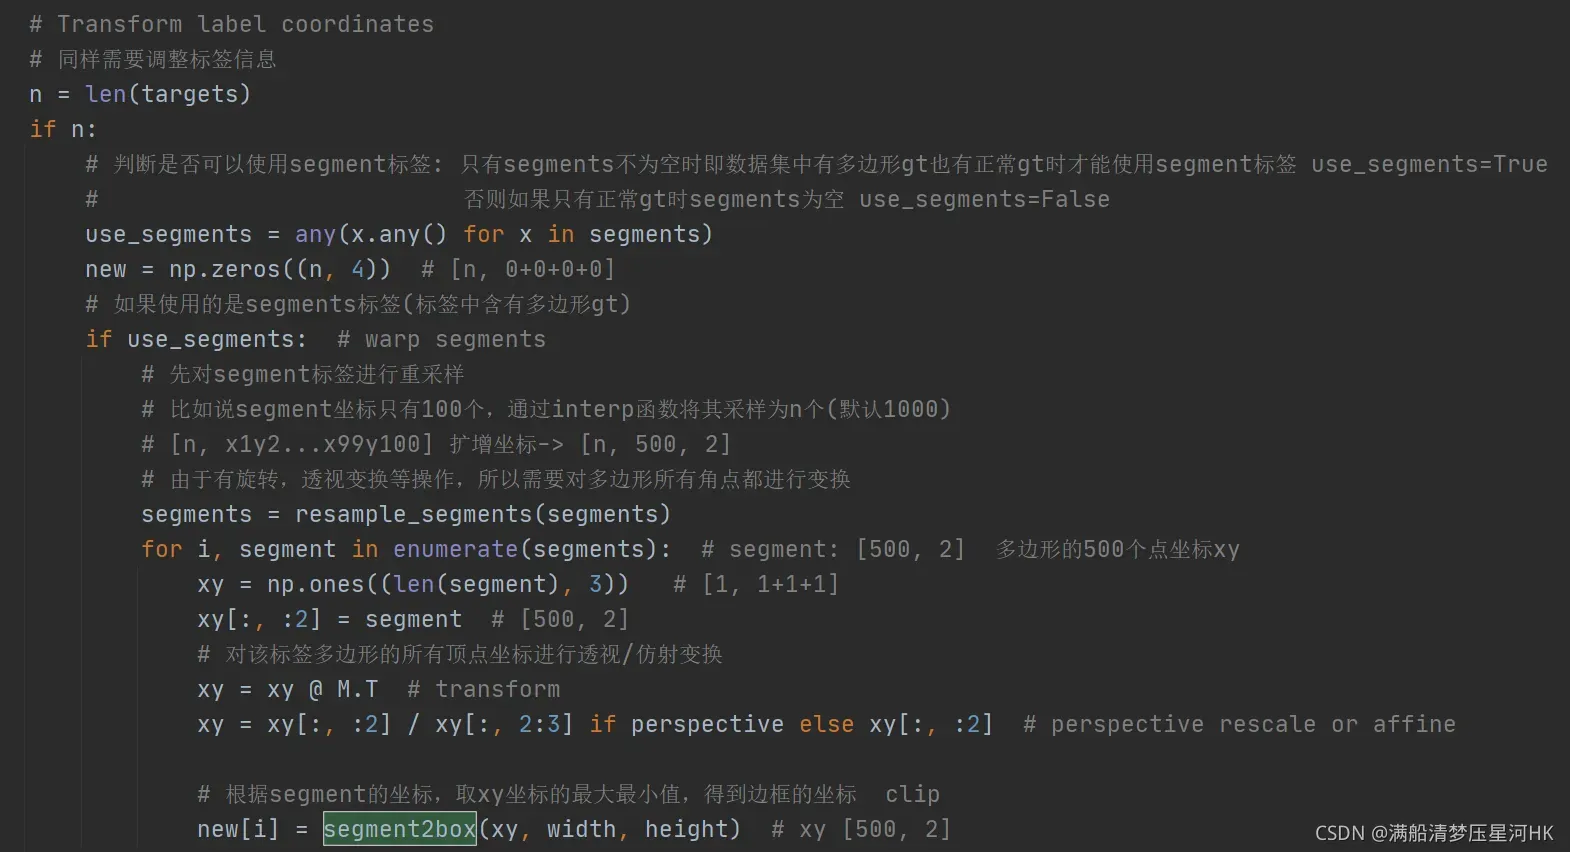
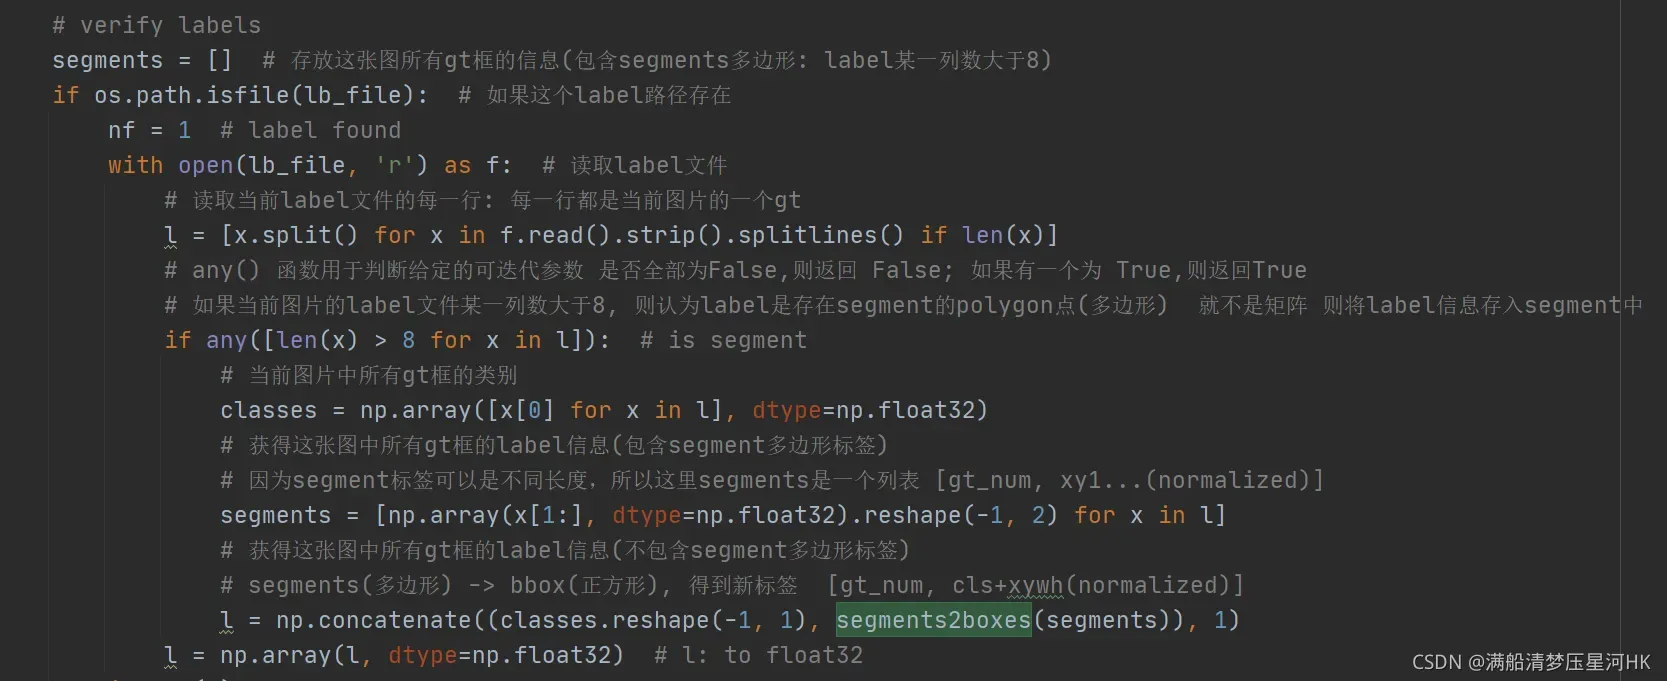
32、segments2boxes
该函数将多个多边形标签(不是矩形标签,最终未知)转换为多个矩形标签。
segments2boxes模块代码:
def segments2boxes(segments):
    """用在datasets.py文件中的verify_image_label函数中
    将多个多边形标签(不是矩形标签  到底是几边形未知)转化为多个矩形标签
    Convert segment labels to box labels, i.e. (cls, xy1, xy2, ...) to (cls, xywh)
    :params segments: [N, cls+x1y1+x2y2 ...]
    :return [N, cls+xywh]
    """
    boxes = []
    for s in segments:
        # 分别获取当前多边形中所有多边形点的x和y坐标
        x, y = s.T
        # 取当前多边形中x和y坐标的最大最小值,得到边框的坐标xyxy
        boxes.append([x.min(), y.min(), x.max(), y.max()])
    # [N, cls+xywh]
    return xyxy2xywh(np.array(boxes))
在datasets.py文件中的verify_image_label函数中调用:
总结
这个文件的代码主要是一些通用的工具功能,会在整个项目的文件中广泛使用,所以比较重要,希望大家能掌握。
比较重要的函数有:set_logging、init_seeds、get_latest_run、colorstr、check_git_status、check_requirements、make_pisible、check_file、check_dataset、one_cycle、labels_to_class_weights、labels_to_image_weights、strip_optimizer、print_mutation、save_one_box、increment_path。
非常重要的有:clip_coords、scale_coords、xyxy2xywh、xywh2xyxy、xywhn2xyxy、xyxy2xywhn、xyn2xy、non_max_suppression。
–2021.08.03 19:55
版权声明:本文为博主满船清梦压星河HK原创文章,版权归属原作者,如果侵权,请联系我们删除!
原文链接:https://blog.csdn.net/qq_38253797/article/details/119348092