一、安装GPU驱动
1.1 购买云服务器
在腾讯云选购一台GPU型的服务器(最好的境外的,境外的服务器后面关于镜像加速的步骤都可以跳过)

购买成功之后腾讯的站内信会发送初始的密码给你,登录成功后会自动帮我们安装相关的驱动,提示整个过程大概需要20分钟,我这里大概5分钟就下完了。
This script will download and install the GPU driver, CUDA, CUDNN library automatically

安装完成之后
// 将CUDA的bin目录添加到PATH环境变量中
echo 'export PATH=/usr/local/cuda/bin${PATH:+:${PATH}}' >> ~/.bashrc
source ~/.bashrc
验证,cuda版本号
[root@VM-0-7-centos local]# nvcc --version
nvcc: NVIDIA (R) Cuda compiler driver
Copyright (c) 2005-2021 NVIDIA Corporation
Built on Mon_Oct_11_21:27:02_PDT_2021
Cuda compilation tools, release 11.4, V11.4.152
Build cuda_11.4.r11.4/compiler.30521435_0
查看GPU版本驱动信息
[root@VM-0-7-centos ~]# nvidia-smi
Sun Jun 25 19:16:16 2023
+-----------------------------------------------------------------------------+
| NVIDIA-SMI 470.82.01    Driver Version: 470.82.01    CUDA Version: 11.4     |
|-------------------------------+----------------------+----------------------+
| GPU  Name        Persistence-M| Bus-Id        Disp.A | Volatile Uncorr. ECC |
| Fan  Temp  Perf  Pwr:Usage/Cap|         Memory-Usage | GPU-Util  Compute M. |
|                               |                      |               MIG M. |
|===============================+======================+======================|
|   0  Tesla T4            On   | 00000000:00:08.0 Off |                    0 |
| N/A   32C    P8    11W /  70W |      0MiB / 15109MiB |      0%      Default |
|                               |                      |                  N/A |
+-------------------------------+----------------------+----------------------+

+-----------------------------------------------------------------------------+
| Processes:                                                                  |
|  GPU   GI   CI        PID   Type   Process name                  GPU Memory |
|        ID   ID                                                   Usage      |
|=============================================================================|
|  No running processes found                                                 |
+-----------------------------------------------------------------------------+
1.2 安装最新驱动
如果后续要训练lora模型(没有这个需求的跳过这步),建议直接重装系统,重装的时候不要勾选后台自动安装GPU驱动 ,我们自己安装能够训练lora模型的GPU驱动版本

驱动下载地址: https://developer.nvidia.com/cuda-downloads
wget https://developer.download.nvidia.com/compute/cuda/12.1.1/local_installers/cuda-repo-rhel7-12-1-local-12.1.1_530.30.02-1.x86_64.rpm
sudo rpm -i cuda-repo-rhel7-12-1-local-12.1.1_530.30.02-1.x86_64.rpm
sudo yum clean all
sudo yum -y install nvidia-driver-latest-dkms
sudo yum -y install cuda
// 将CUDA的bin目录添加到PATH环境变量中
echo 'export PATH=/usr/local/cuda/bin${PATH:+:${PATH}}' >> ~/.bashrc
source ~/.bashrc
安装完之后检查cuda版本号和驱动信息
查看cuda版本信息
[root@VM-0-7-centos ~]# nvcc --version
nvcc: NVIDIA (R) Cuda compiler driver
Copyright (c) 2005-2023 NVIDIA Corporation
Built on Mon_Apr__3_17:16:06_PDT_2023
Cuda compilation tools, release 12.1, V12.1.105
Build cuda_12.1.r12.1/compiler.32688072_0
查看驱动信息
[root@VM-0-7-centos ~]# nvidia-smi
Sun Jun 25 20:39:56 2023
+---------------------------------------------------------------------------------------+
| NVIDIA-SMI 530.30.02              Driver Version: 530.30.02    CUDA Version: 12.1     |
|-----------------------------------------+----------------------+----------------------+
| GPU  Name                  Persistence-M| Bus-Id        Disp.A | Volatile Uncorr. ECC |
| Fan  Temp  Perf            Pwr:Usage/Cap|         Memory-Usage | GPU-Util  Compute M. |
|                                         |                      |               MIG M. |
|=========================================+======================+======================|
|   0  Tesla T4                        Off| 00000000:00:08.0 Off |                    0 |
| N/A   32C    P8                9W /  70W|      2MiB / 15360MiB |      0%      Default |
|                                         |                      |                  N/A |
+-----------------------------------------+----------------------+----------------------+

+---------------------------------------------------------------------------------------+
| Processes:                                                                            |
|  GPU   GI   CI        PID   Type   Process name                            GPU Memory |
|        ID   ID                                                             Usage      |
|=======================================================================================|
|  No running processes found                                                           |
+---------------------------------------------------------------------------------------+
二、安装基础环境
2.1 更新系统软件包
更新系统软件包可以使系统中的软件和应用程序保持最新状态,包括修复已知的漏洞、增强系统性能和稳定性、提供新功能
sudo yum update
2.2 安装依赖库
yum install curl-devel expat-devel gettext-devel openssl-devel zlib-devel asciidoc gcc perl-ExtUtils-MakeMaker epel-release
2.3 安装git2.5.1
git版本太低有些命令会运行失败
[root@VM-16-9-centos ~]# yum remove git
// 获取git安装包
[root@VM-16-9-centos ~]# wget https://www.kernel.org/pub/software/scm/git/git-2.15.1.tar.xz
[root@VM-16-9-centos ~]# tar -vxf git-2.15.1.tar.xz
[root@VM-16-9-centos ~]# cd git-2.15.1/
// 可以先执行make clean
[root@VM-16-9-centos git-2.15.1]# make prefix=/usr/local/git all
[root@VM-16-9-centos git-2.15.1]# make prefix=/usr/local/git install
[root@VM-16-9-centos git-2.15.1]# echo "export PATH=$PATH:/usr/local/git/bin" >> /etc/profile
[root@VM-16-9-centos git-2.15.1]# source /etc/profile

// 查看是否安装成功
[root@VM-16-9-centos git-2.15.1]# git --version
git version 2.15.1
2.4 安装python3.10.6
最好是这个版本的,其他版本有可能出现报错的情况

2.4.1 安装依赖
[root@VM-16-9-centos ~]# yum -y install openssl-devel libffi-devel bzip2-devel
[root@VM-16-9-centos ~]# yum -y groupinstall "Development Tools"
2.4.2 安装openssl
[root@VM-16-9-centos ~]# wget https://www.openssl.org/source/openssl-1.1.1q.tar.gz --no-check-certificate
[root@VM-16-9-centos ~]# tar xf openssl-1.1.1q.tar.gz && cd openssl-1.1.1q
[root@VM-16-9-centos openssl-1.1.1q]# ./config --prefix=/usr/local/openssl-1.1.1
[root@VM-16-9-centos openssl-1.1.1q]# make && make install
2.4.3 安装Python-3.10.6
如果系统中有其他python3的版本先卸载,没有可以跳过这步,可用python3 –version查看
// 使用 yum 命令卸载 Python 3.6.8:
sudo yum remove python36
// 删除 Python 3.6.8 的相关文件和目录:
sudo rm -rf /usr/local/lib/python3.6/
sudo rm -rf /usr/local/bin/python3.6
sudo rm -rf /usr/local/bin/pip3.6
安装3.10.6版本
[root@VM-16-9-centos ~]# wget https://www.python.org/ftp/python/3.10.6/Python-3.10.6.tgz
[root@VM-16-9-centos ~]# tar xzf Python-3.10.6.tgz && cd Python-3.10.6
[root@VM-16-9-centos Python-3.10.6]# ./configure --enable-optimizations --with-openssl=/usr/local/openssl-1.1.1 --with-openssl-rpath=auto
[root@VM-16-9-centos Python-3.10.6]# make altinstall
2.4.4 添加软连接
[root@VM-16-9-centos Python-3.10.6]# cd /usr/bin/
[root@VM-16-9-centos bin]# mv /usr/bin/python /usr/bin/python.bak
[root@VM-16-9-centos bin]# ln -s /usr/local/bin/python3.10 /usr/bin/python3
[root@VM-16-9-centos bin]# ln -s /usr/local/bin/python3.10 /usr/bin/python
[root@VM-16-9-centos bin]# python --version
Python 3.10.6
2.4.5 更改yum的配置
yum的命令使用python2写的,如果不更改yum命令用不了
[root@VM-16-9-centos ~]# vim /usr/bin/yum
把第一行的python改成python2

[root@VM-16-9-centos ~]# vim /usr/libexec/urlgrabber-ext-down
把第一行的python改成python2

三、项目运行
3.1 下载stable-diffusion-webui源码
前面加https://ghproxy.com是为了加速,不然国内服务器很容易下载失败
// 下载源码
git clone https://ghproxy.com/https://github.com/AUTOMATIC1111/stable-diffusion-webui.git
3.2 下载底层模型
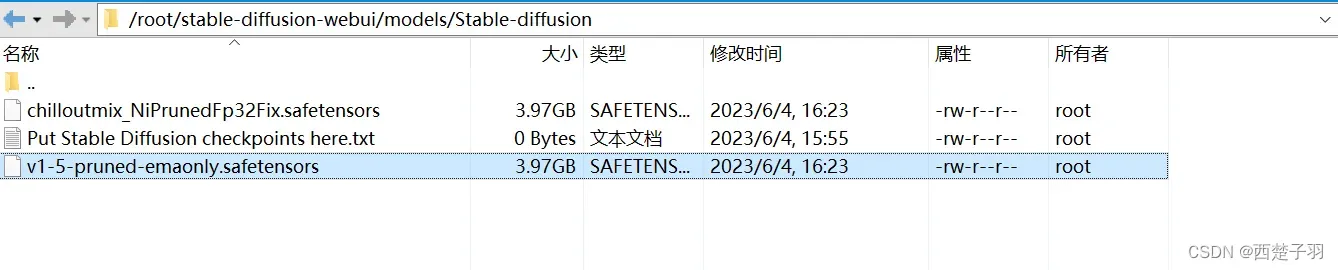
下载默认的 1.5模型,将下载后的文件放到/root/stable-diffusion-webui/models/Stable-diffusion路径下,可以用Xftp传输,服务器在境外的话直接通过wget命令下载
https://huggingface.co/runwayml/stable-diffusion-v1-5/resolve/main/v1-5-pruned-emaonly.safetensors
也可以用chilloutmix_NiPrunedFp32Fix模型,这个模型一般用来画真人模型
wget https://huggingface.co/naonovn/chilloutmix_NiPrunedFp32Fix/resolve/main/chilloutmix_NiPrunedFp32Fix.safetensors
Xftp免费版下载地址
家庭/学校免费
3.3 git镜像加速
境外服务器直接跳过这步,修改stable-diffusion-webui目录下的requirements.txt和requirements_versions.txt文件,将其中的gradio==3.31.0改成3.30.0,我在下载的时候31版本一直下载不了,(亲测服务器在境外的时候可以下载31版本,可以先下载31版本试试看)
gradio==3.30.0
修改stable-diffusion-webui/modules目录下的launch_utils.py文件,在https://github.com前面加上https://ghproxy.com/,不然国内服务器很容易下载失败

3.4 设置管理员运行
修改webui.sh,把can_run_as_root=0改成1,不然root账号无法运行

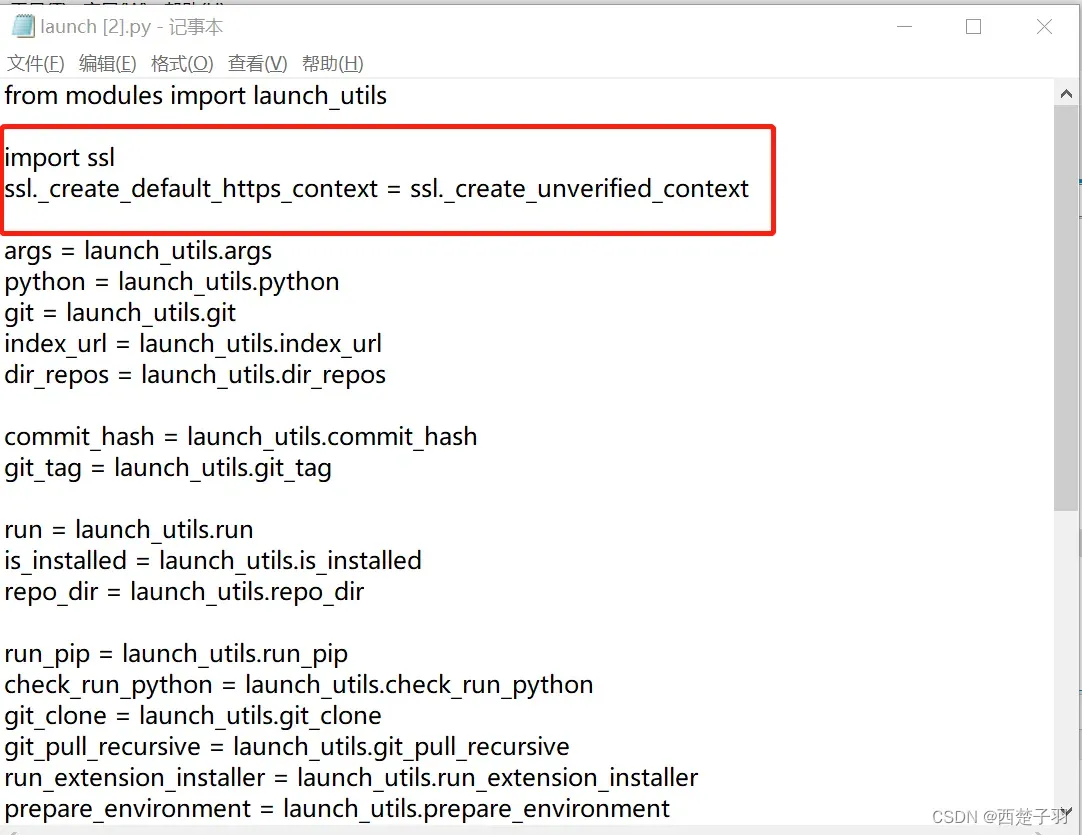
3.5 禁用SSL证书
修改launch.py文件,添加代码禁用SSL证书验证,防止后续生成图片的时候出现证书问题
import ssl
ssl._create_default_https_context = ssl._create_unverified_context
3.6 创建虚拟环境
// 安装TCMalloc 不然后面运行webui.sh时有可能Cannot locate TCMalloc (improves CPU memory usage)
[root@VM-16-9-centos ~]# yum install gperftools
// 创建虚拟环境
[root@VM-16-9-centos ~]# cd stable-diffusion-webui/
// 创建一个名为venv的虚拟环境,后面那个venv为虚拟环境名称
[root@VM-16-9-centos stable-diffusion-webui]# /usr/local/bin/python3.10 -m venv venv
// 进入虚拟环境
[root@VM-16-9-centos stable-diffusion-webui]# source venv/bin/activate
// 修改pip源,境外服务器可以跳过
(venv) [root@VM-16-9-centos stable-diffusion-webui]# pip config set global.index-url https://pypi.tuna.tsinghua.edu.cn/simple
Writing to /root/.config/pip/pip.conf
(venv) [root@VM-16-9-centos stable-diffusion-webui]# pip config set install.trusted-host mirrors.aliyun.com
Writing to /root/.config/pip/pip.conf
3.7 下载项目依赖
在虚拟环境中安装项目所需依赖,这个过程比较慢,慢慢等就行
 // 进入虚拟环境,可以通过deactivate命令退出虚拟环境
[root@VM-16-9-centos stable-diffusion-webui]# source venv/bin/activate
 // 先更新pip不然有可能报错
(venv) [root@VM-16-9-centos stable-diffusion-webui]# pip install --upgrade pip
(venv) [root@VM-16-9-centos stable-diffusion-webui]# pip3.10 install -r requirements.txt -i https://pypi.tuna.tsinghua.edu.cn/simple
(venv) [root@VM-16-9-centos stable-diffusion-webui]# pip3.10 install -r requirements_versions.txt -i https://pypi.tuna.tsinghua.edu.cn/simple
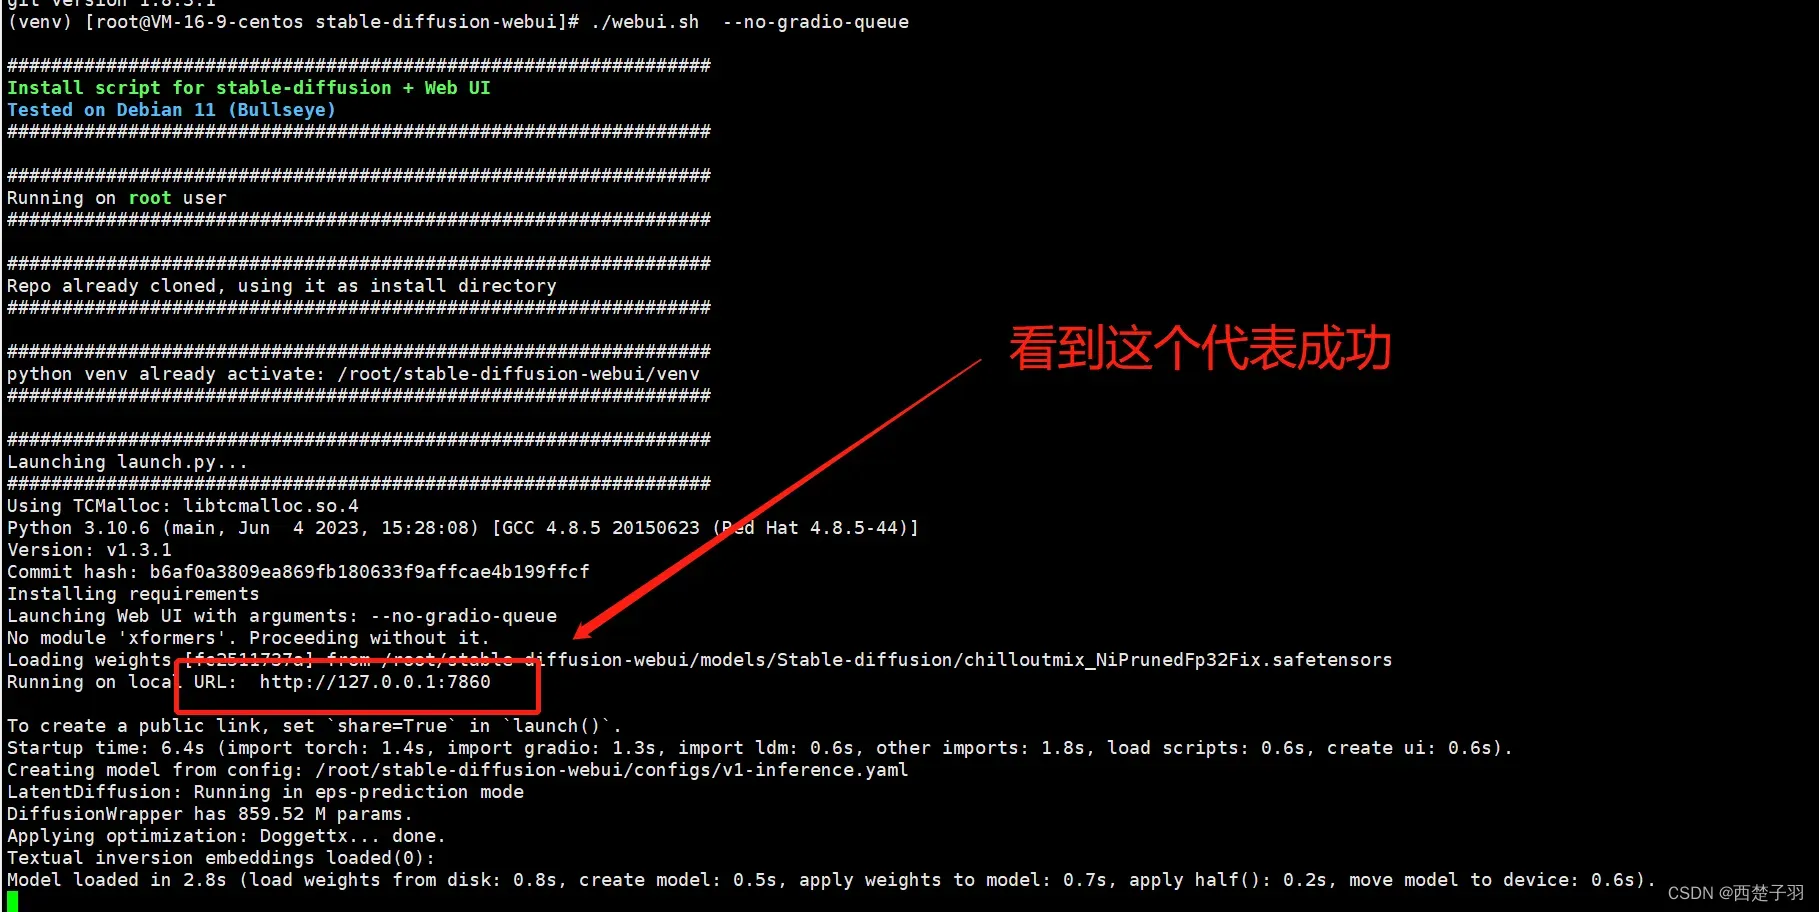
3.8 项目运行
最后下载完之后运行webui.sh就行了,–no-gradio-queue是为了解决在访问页面的时候无法生成图片,提示Something went wrong Connection errored out.错误,–gradio-auth username:password当中的username替换成你设置的账号,password为你登录时的密码
./webui.sh --no-gradio-queue --gradio-auth username:password
如果要在后台运行采用下面的命令运行
nohup ./webui.sh --no-gradio-queue --gradio-auth username:password &
四、配置nginx反向代理
http://127.0.0.1:7860我们是无法直接访问的,这里我们通过nginx的反向代理将请求转发到7860端口,当然你也可以在执行./webui.sh 的时候加上 –share,这样会自动生成公网可以访问的链接
4.1 安装nginx
sudo yum install nginx
4.2 配置 Nginx 代理
在 /etc/nginx/conf.d/ 目录下创建一个新的配置文件,例如 proxy.conf,并将以下内容写入该文件:
server {
    listen       8080;
    server_name  公网IP;

    location / {
        proxy_pass http://127.0.0.1:7860;
        proxy_set_header Host $host;
        proxy_set_header X-Real-IP $remote_addr;
        proxy_set_header X-Forwarded-For $proxy_add_x_forwarded_for;
    }
}
测试配置文件是否正确:
sudo nginx -t
重启 Nginx 服务:
sudo systemctl restart nginx
4.3 公网访问
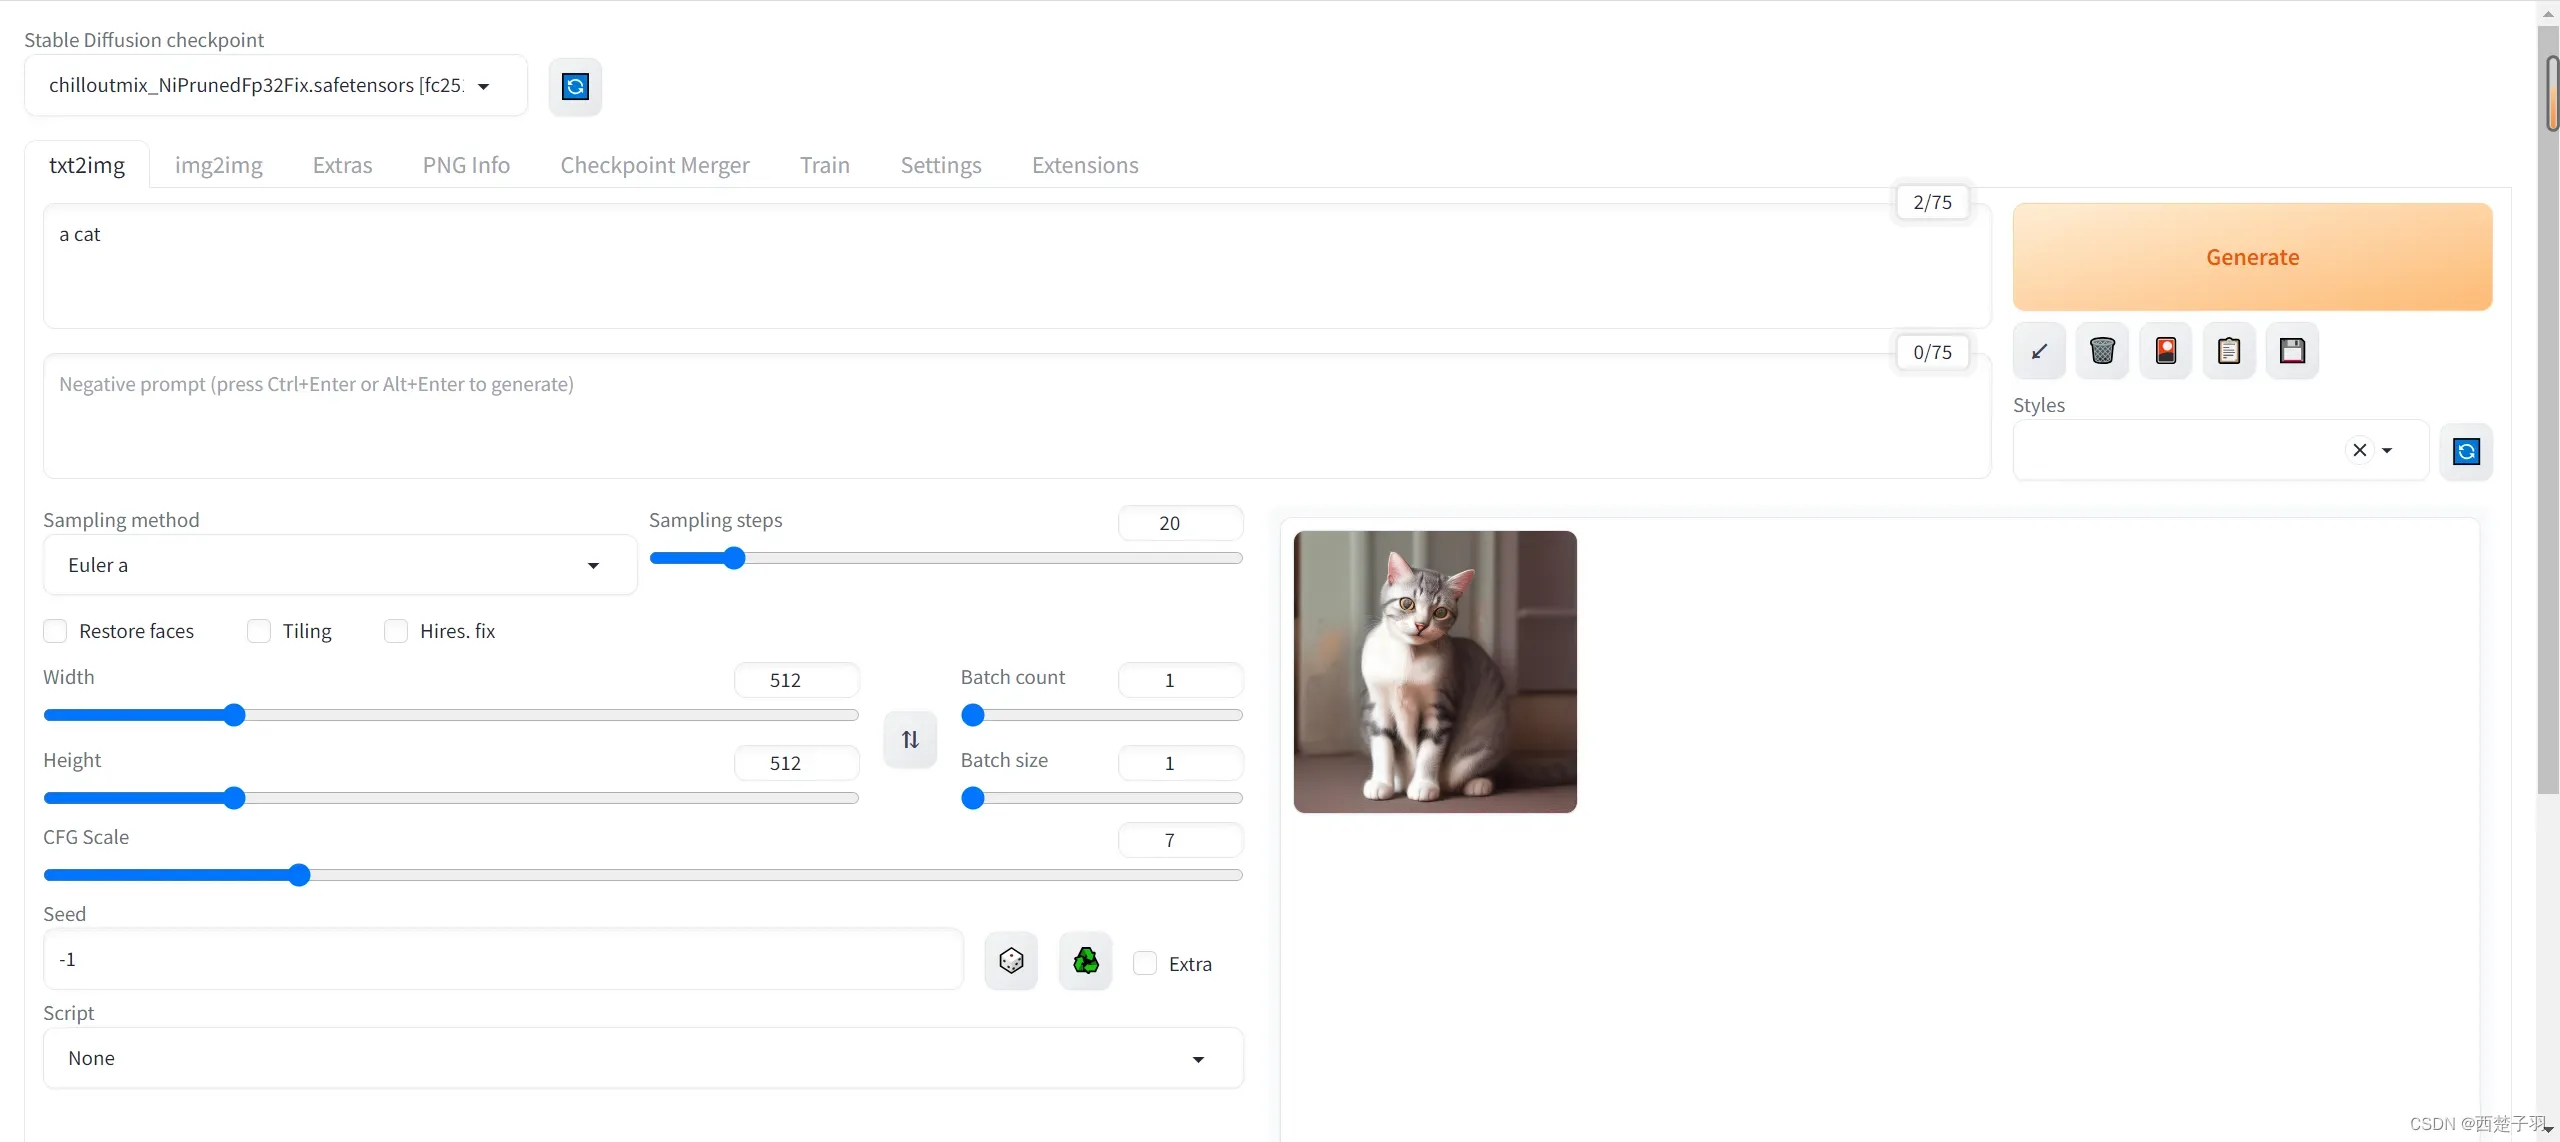
浏览器访问公网Ip:8080开始生成图片吧
五、安装stable diffusion webui插件
5.1 安装汉化插件
中文语言包下载地址
https://github.com/VinsonLaro/stable-diffusion-webui-chinese
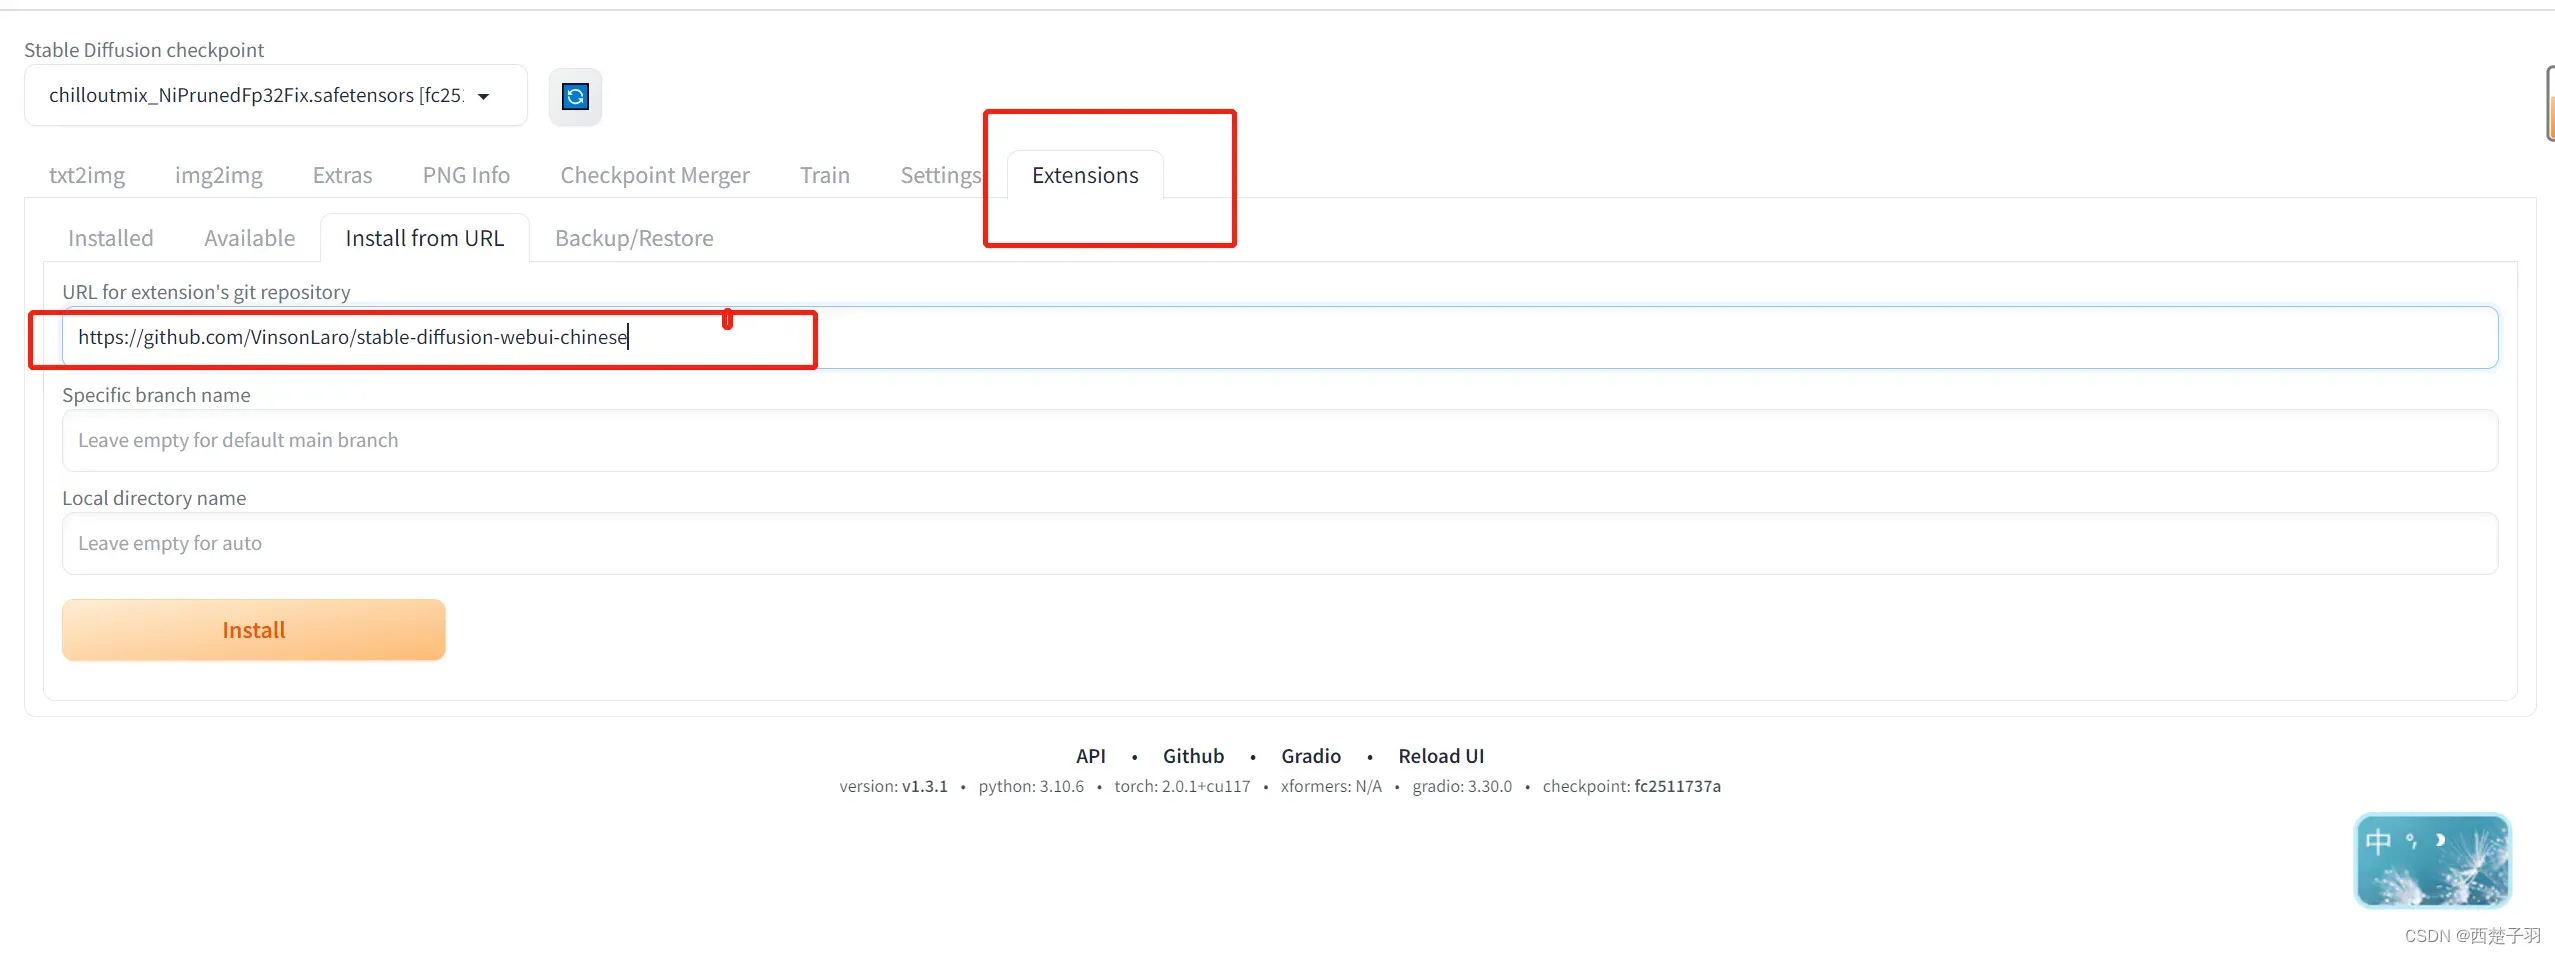
要是安装失败直接进入/root/stable-diffusion-webui/extensions文件夹下手动下载
git clone https://github.com/VinsonLaro/stable-diffusion-webui-chinese
重启界面

设置中文
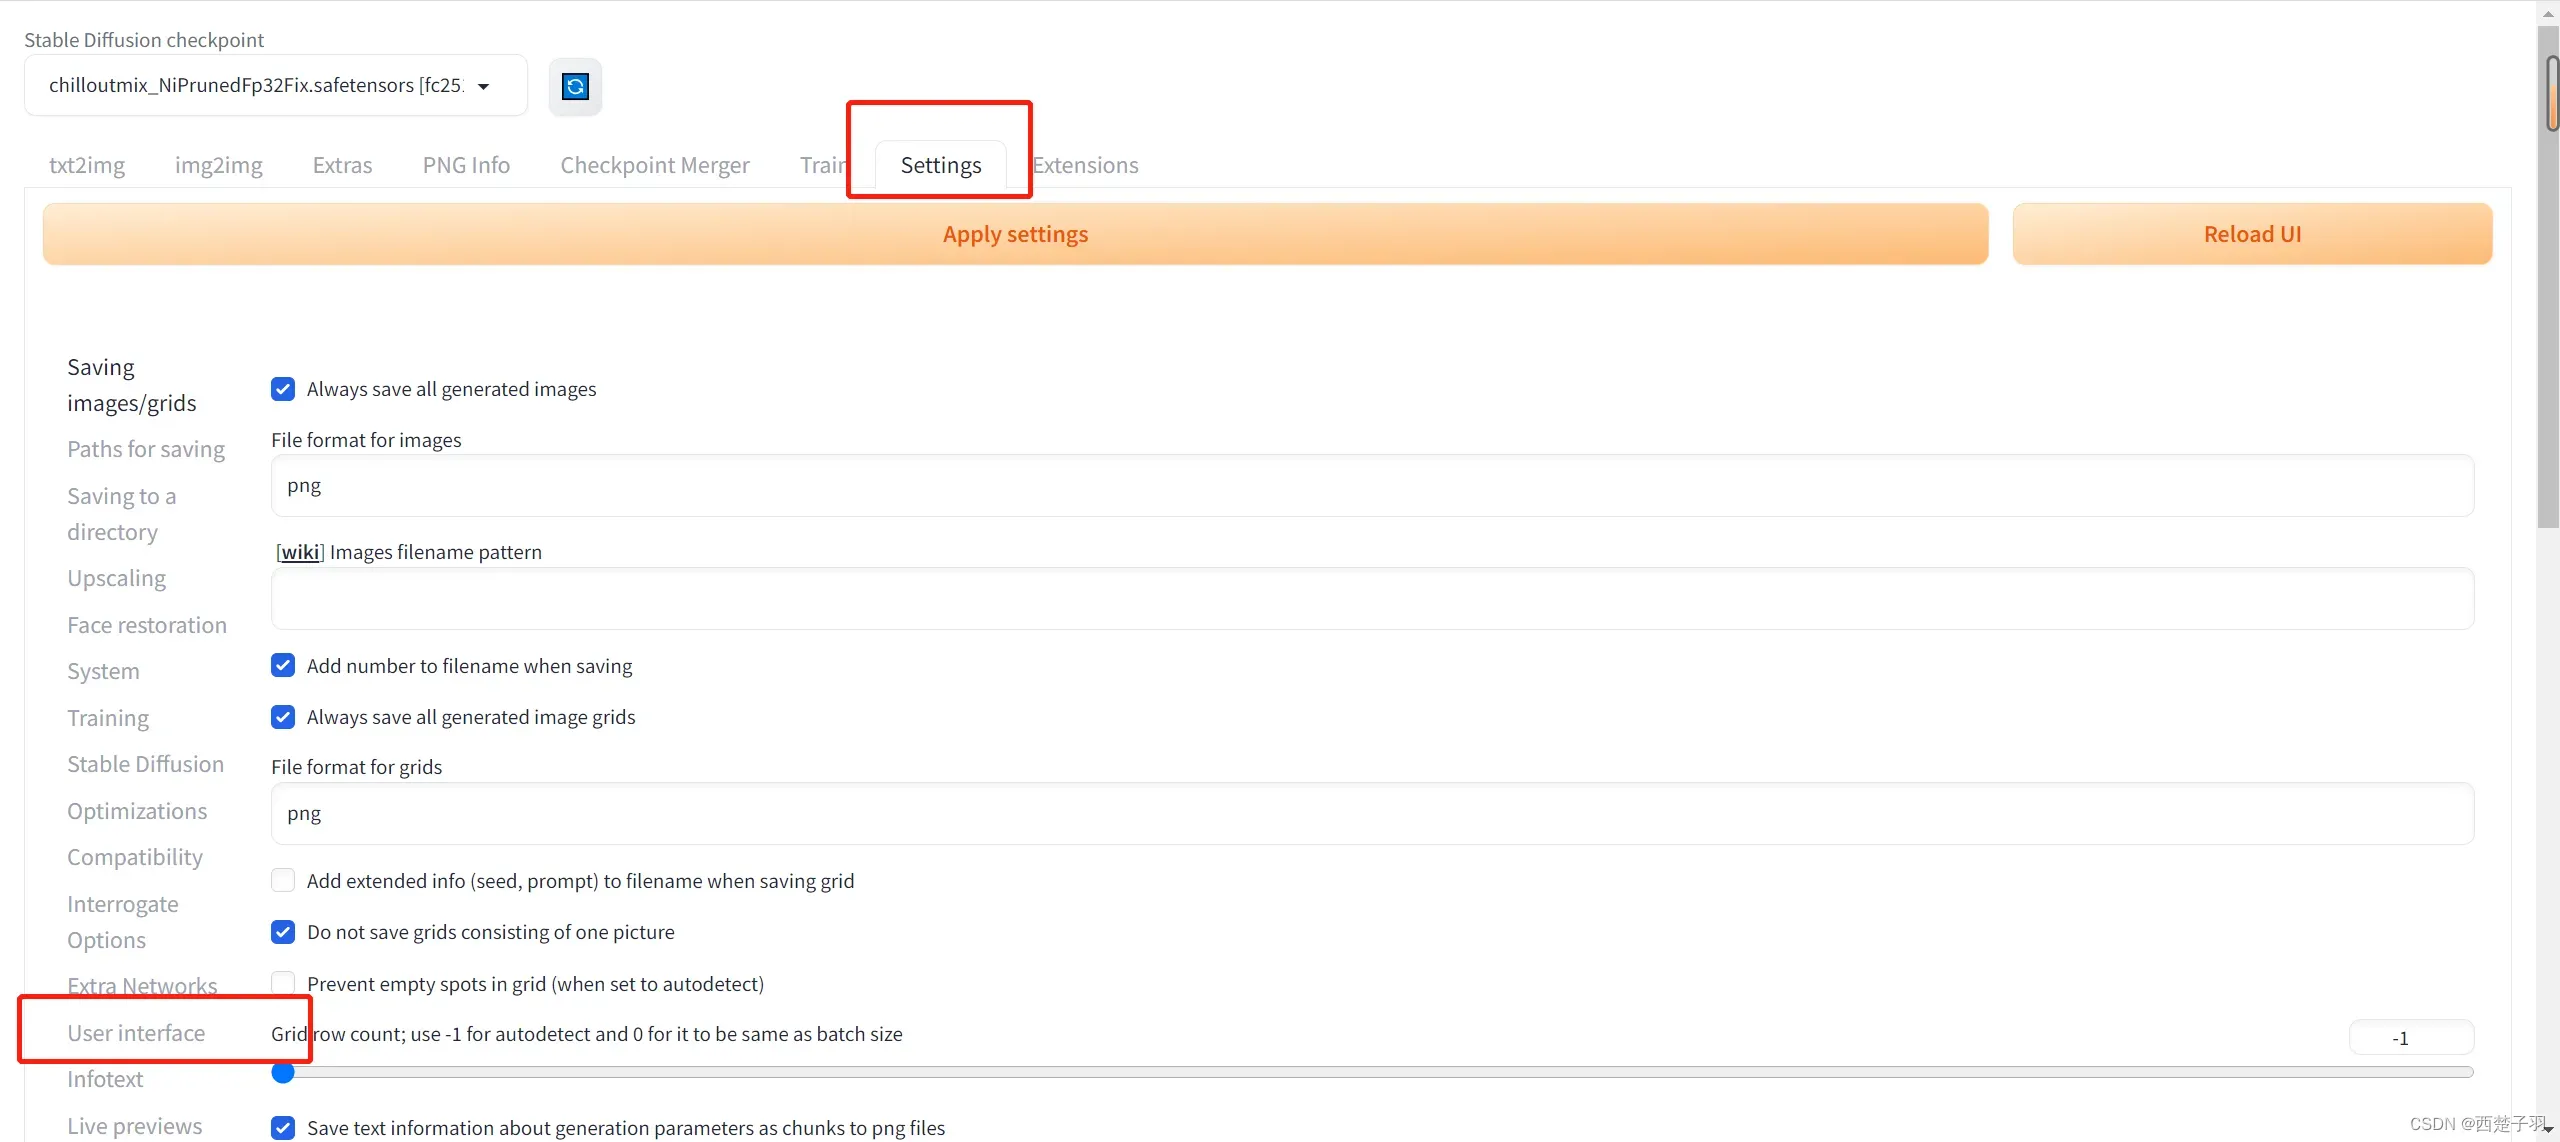


重启UI之后就变成中文了

5.2 安装controlnet
这款插件允许 Web UI 将ControlNet添加到原始 Stable Diffusion 模型中以生成可控图像,插件安装地址
https://github.com/Mikubill/sd-webui-controlnet
下载完之后安装pycairo
sudo yum install cairo cairo-devel
pip install pycairo
六、问题总结
6.1 运行webui.sh文件报错,报错信息如下,这个主要是git版本太低导致的
Using TCMalloc: libtcmalloc.so.4
Python 3.10.6 (main, Jun  4 2023, 15:28:08) [GCC 4.8.5 20150623 (Red Hat 4.8.5-44)]
Version: v1.3.1
Commit hash: b6af0a3809ea869fb180633f9affcae4b199ffcf
Installing clip
Installing open_clip
Cloning Stable Diffusion into /root/stable-diffusion-webui/repositories/stable-diffusion-stability-ai...
Traceback (most recent call last):
  File "/root/stable-diffusion-webui/launch.py", line 38, in <module>
    main()
  File "/root/stable-diffusion-webui/launch.py", line 29, in main
    prepare_environment()
  File "/root/stable-diffusion-webui/modules/launch_utils.py", line 288, in prepare_environment
    git_clone(stable_diffusion_repo, repo_dir('stable-diffusion-stability-ai'), "Stable Diffusion", stable_diffusion_commit_hash)
  File "/root/stable-diffusion-webui/modules/launch_utils.py", line 150, in git_clone
    run(f'"{git}" -C "{dir}" checkout {commithash}', None, "Couldn't checkout {name}'s hash: {commithash}")
  File "/root/stable-diffusion-webui/modules/launch_utils.py", line 101, in run
    raise RuntimeError("\n".join(error_bits))
RuntimeError: Couldn't checkout {name}'s hash: {commithash}.
Command: "git" -C "/root/stable-diffusion-webui/repositories/stable-diffusion-stability-ai" checkout cf1d67a6fd5ea1aa600c4df58e5b47da45f6bdbf
Error code: 129
stderr: Unknown option: -C
usage: git [--version] [--help] [-c name=value]
           [--exec-path[=<path>]] [--html-path] [--man-path] [--info-path]
           [-p|--paginate|--no-pager] [--no-replace-objects] [--bare]
           [--git-dir=<path>] [--work-tree=<path>] [--namespace=<name>]
           <command> [<args>]
解决方案:
进入创建的虚拟环境中利用git –version命令查看git版本,如果是1.几的版本参考前面git安装步骤卸载重新安装git2.5.1
6.2 访问公网地址在生成图片的时候提示以下信息
Downloading: "https://github.com/sczhou/CodeFormer/releases/download/v0.1.0/codeformer.pth" to /root/stable-diffusion-webui/models/Codeformer/codeformer-v0.1.0.pth| 58/58 [02:01<00:00,  3.02s/it]
Unable to load codeformer model.
这个主要是国内服务器访问github太慢导致文件下载失败,境外服务器一般不会有这个问题,我们可以复制这个链接手动下载然后上传到/root/stable-diffusion-webui/models/Codeformer目录下,并重命名为codeformer-v0.1.0.pth
6.3 生成图片的时候碰到ssl证书问题,主要报错信息如下
urllib.error.URLError: <urlopen error [SSL: CERTIFICATE_VERIFY_FAILED] certificate verify failed: unable to get local issuer certificate(_ssl.c:997)>
解决方案:在根目录找到launch.py,添加代码禁用SSL证书验证,这种方法会跳过SSL证书验证,但存在一定的安全风险。
import ssl
ssl._create_default_https_context = ssl._create_unverified_context
6.4 在访问webui页面的时候提示 Something went wrong Connection errored out.错误
解决方案:在运行./webui.sh命令时加上–no-gradio-queue
6.5 如果你的服务器在国外,访问webui页面的时候关掉你的代理上网方式,否则有可能报错

最后分享两个stable diffusion模型的下载网站
- https://huggingface.co/
- https://civitai.com/
分享一个国风3.3模型生成的图片参数
best quality, masterpiece, highres, 1girl,blush,(seductive smile:0.8),star-shaped pupils,china hanfu,hair ornament,necklace, jewelry,Beautiful face,upon_body, tyndall effect,photorealistic, dark studio, rim lighting, two tone lighting,(high detailed skin:1.2), 8k uhd, dslr, soft lighting, high quality, volumetric lighting, candid, Photograph, high resolution, 4k, 8k, Bokeh
Negative prompt: (((simple background))),monochrome ,lowres, bad anatomy, bad hands, text, error, missing fingers, extra digit, fewer digits, cropped, worst quality, low quality, normal quality, jpeg artifacts, signature, watermark, username, blurry, lowres, bad anatomy, bad hands, text, error, extra digit, fewer digits, cropped, worst quality, low quality, normal quality, jpeg artifacts, signature, watermark, username, blurry, ugly,pregnant,vore,duplicate,morbid,mut ilated,tran nsexual, hermaphrodite,long neck,mutated hands,poorly drawn hands,poorly drawn face,mutation,deformed,blurry,bad anatomy,bad proportions,malformed limbs,extra limbs,cloned face,disfigured,gross proportions, (((missing arms))),(((missing legs))), (((extra arms))),(((extra legs))),pubic hair, plump,bad legs,error legs,username,blurry,bad feet
ENSD: 31337, Size: 640x1024, Seed: 3556647833, Model: gf_anylora_gf3.2_anylora1.2, Steps: 30, Sampler: Euler a, CFG scale: 9, Clip skip: 2, Model hash: 4078eb4174, Hires steps: 64, Hires upscale: 2, Hires upscaler: R-ESRGAN 4x+ Anime6B, Denoising strength: 0

文章出处登录后可见!