最近在学习ai共创,在官方网站dreamstdio玩了几次发现需要收费,于是决定部署一个在服务器上。将部署的过程和遇到的问题记录下来供大家参考。
目录
- 1. 工具准备
- 2. 下载代码和模型
- 3. 环境准备
- 4. 运行代码
1. 工具准备
也可以手动安装,如果镜像中安装好了,就不用手动安装了,但是要注意版本!!!
cuda:11.6:https://developer.nvidia.com/cuda-11-6-0-download-archive
miniconda3:https://repo.anaconda.com/miniconda/Miniconda3-py38_4.12.0-Linux-x86_64.sh
python:3.8:安装完conda以后直接conda create -n sdwebui python=3.8
git:linux安装git
更新pip:python -m pip install --upgrade pip
设置pip源:pip config set global.index-url https://pypi.tuna.tsinghua.edu.cn/simple
以上步骤有问题可以直接百度,网上有很多,这里就不一一细讲了。
2. 下载代码和模型
- 下载代码
git clone https://github.com/AUTOMATIC1111/stable-diffusion-webui.git - 下载模型
经过测试目前sd2.0只有以下两种模型可以用 ,其他模型加载都会报错,github上看了issue上大家都有遇到这个问题
768-v-ema.ckpt
这个模型需要生成的图片在768768的时候效果比较好,如果是生成512512的,图片有点拉垮;
# 768-v-ema.ckpt
https://huggingface.co/stabilityai/stable-diffusion-2/resolve/main/768-v-ema.ckpt
# 配置文件(下载以后注意把文件名修改为768-v-ema.yaml)
https://raw.githubusercontent.com/Stability-AI/stablediffusion/main/configs/stable-diffusion/v2-inference-v.yaml
512-base-ema.ckpt
如果显存不够的,比较小的,可以使用这个模型;比较推荐768,效果比512的好;
# 512-base-ema.ckpt
https://huggingface.co/stabilityai/stable-diffusion-2-base/resolve/main/512-base-ema.ckpt
# 配置文件(下载以后注意把文件名修改为512-base-ema.yaml)
https://raw.githubusercontent.com/Stability-AI/stablediffusion/main/configs/stable-diffusion/v2-inference.yaml
3. 环境准备
conda activate sdwebui
cd stable-diffusion-webui
python launch.py
如果能够成功运行那么恭喜你,如果和我一样不能运行的,报错ERROR: Command errored out with exit status 128: git clone -q https://hub.fastgit.org/openai/CLIP.git /tmp/pip-req-build-k8qahgs9 Check the logs for full command output.,这是无法访问github,需要魔法,那就只能手动安装了。以下是手动安装的步骤,已经安装好的可以直接跳到第4步运行。阅读launch.py文件以后,发现他一共做了三件事,安装repositories,安装几个包,安装xformers、GFPGAN、CLIP、open_clip,安装requirements_versions中的包。
- 安装repositories

可以看到一共有五个repositories。
首先进入stable-diffusion-webui目录下。
cd xxx(你的路径)/stable-diffusion-webui
git clone https://github.com/Stability-AI/stablediffusion repositories/stable-diffusion-stability-ai
git clone https://github.com/CompVis/taming-transformers repositories/taming-transformers
git clone https://github.com/crowsonkb/k-diffusion repositories/k-diffusion
git clone https://github.com/sczhou/CodeFormer repositories/CodeFormer
git clone https://github.com/salesforce/BLIP repositories/BLIP
- 安装repositories,安装几个包,安装xformers、GFPGAN、CLIP、open_clip
安装xformer:pip install xformers=0.0.17 -i https://pypi.tuna.tsinghua.edu.cn/simple
安装GFPGAN、CLIP、open_clip需要手动安装。根据链接去github下载相应的包。例如第一个GFPGAN,下载链接。

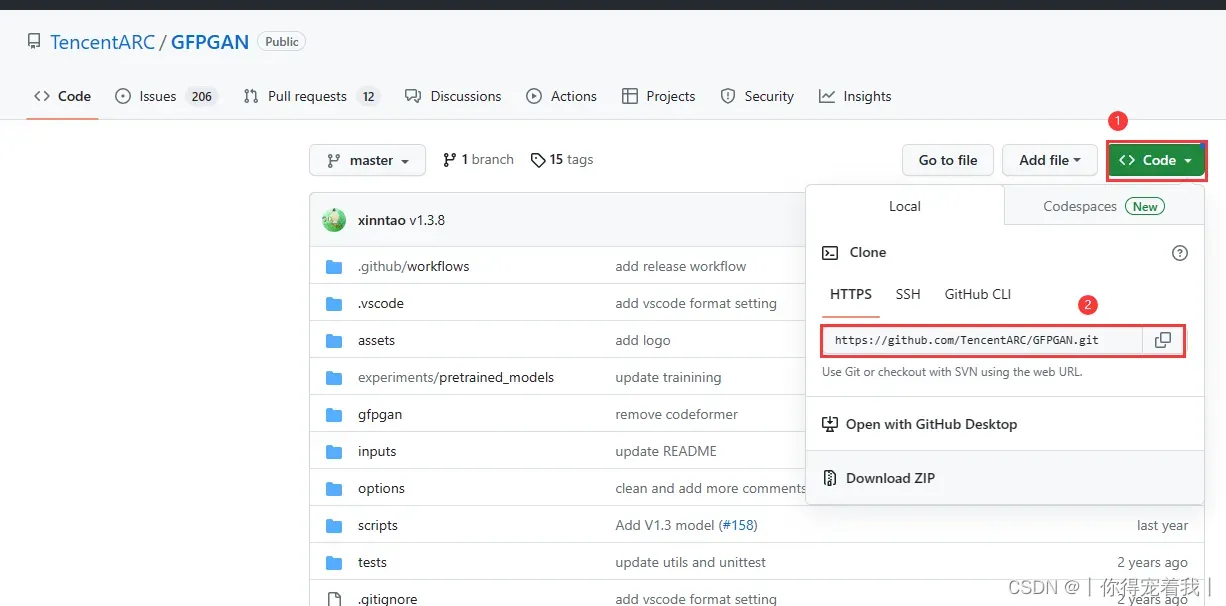
下载以后,进入下载的目录,开始安装包。CLIP、open_clip的安装同理。
cd /xxx(你的下载目录)/GFPGAN-master
pip install .
- 安装requirements_versions中的包
cd xxx(你的路径)/stable-diffusion-webui
pip install -r requirements_versions.txt --prefer-binary
上面的都安装完以后,再运行一次python launch.py,如果缺什么包,直接安装就可以。如果不知道版本可以不带版本自动安装最新版。
pip install safetensors==0.3.1 -i https://pypi.tuna.tsinghua.edu.cn/simple
【报错】如果你遇到了这个问题:
RuntimeError: The NVIDIA driver on your system is too old (found version 10020). Please update your GPU driver by downloading and installing a new version from the URL: http://www.nvidia.com/Download/index.aspx Alternatively, go to: https://pytorch.org to install a PyTorch version that has been compiled with your version of the CUDA driver.
Warning: caught exception ‘The NVIDIA driver on your system is too old (found version 10020). Please update your GPU driver by downloading and installing a new version from the URL: http://www.nvidia.com/Download/index.aspx Alternatively, go to: https://pytorch.org to install a PyTorch version that has been compiled with your version of the CUDA driver.’, memory monitor disabled
【解决】在launch.py文件第13行改为
commandline_args = os.environ.get('COMMANDLINE_ARGS', "--skip-torch-cuda-test")
225行左右按照你需要的cuda版本进行更改,不知道版本的参考https://blog.csdn.net/qq_40877575/article/details/124231007
# torch_command = os.environ.get('TORCH_COMMAND', "pip install torch==2.0.0 torchvision==0.15.1 --extra-index-url https://download.pytorch.org/whl/cu118")
torch_command = os.environ.get('TORCH_COMMAND', "pip install torch==1.12.1+cu102 torchvision==0.13.1+cu102 torchaudio==0.12.1 --extra-index-url https://download.pytorch.org/whl/cu102")
再重新运行launch.py,如果torch的版本没有改过来的话,直接在命令行中运行pip install torch==1.12.1+cu102 torchvision==0.13.1+cu102 torchaudio==0.12.1 --extra-index-url https://download.pytorch.org/whl/cu102
4. 运行代码
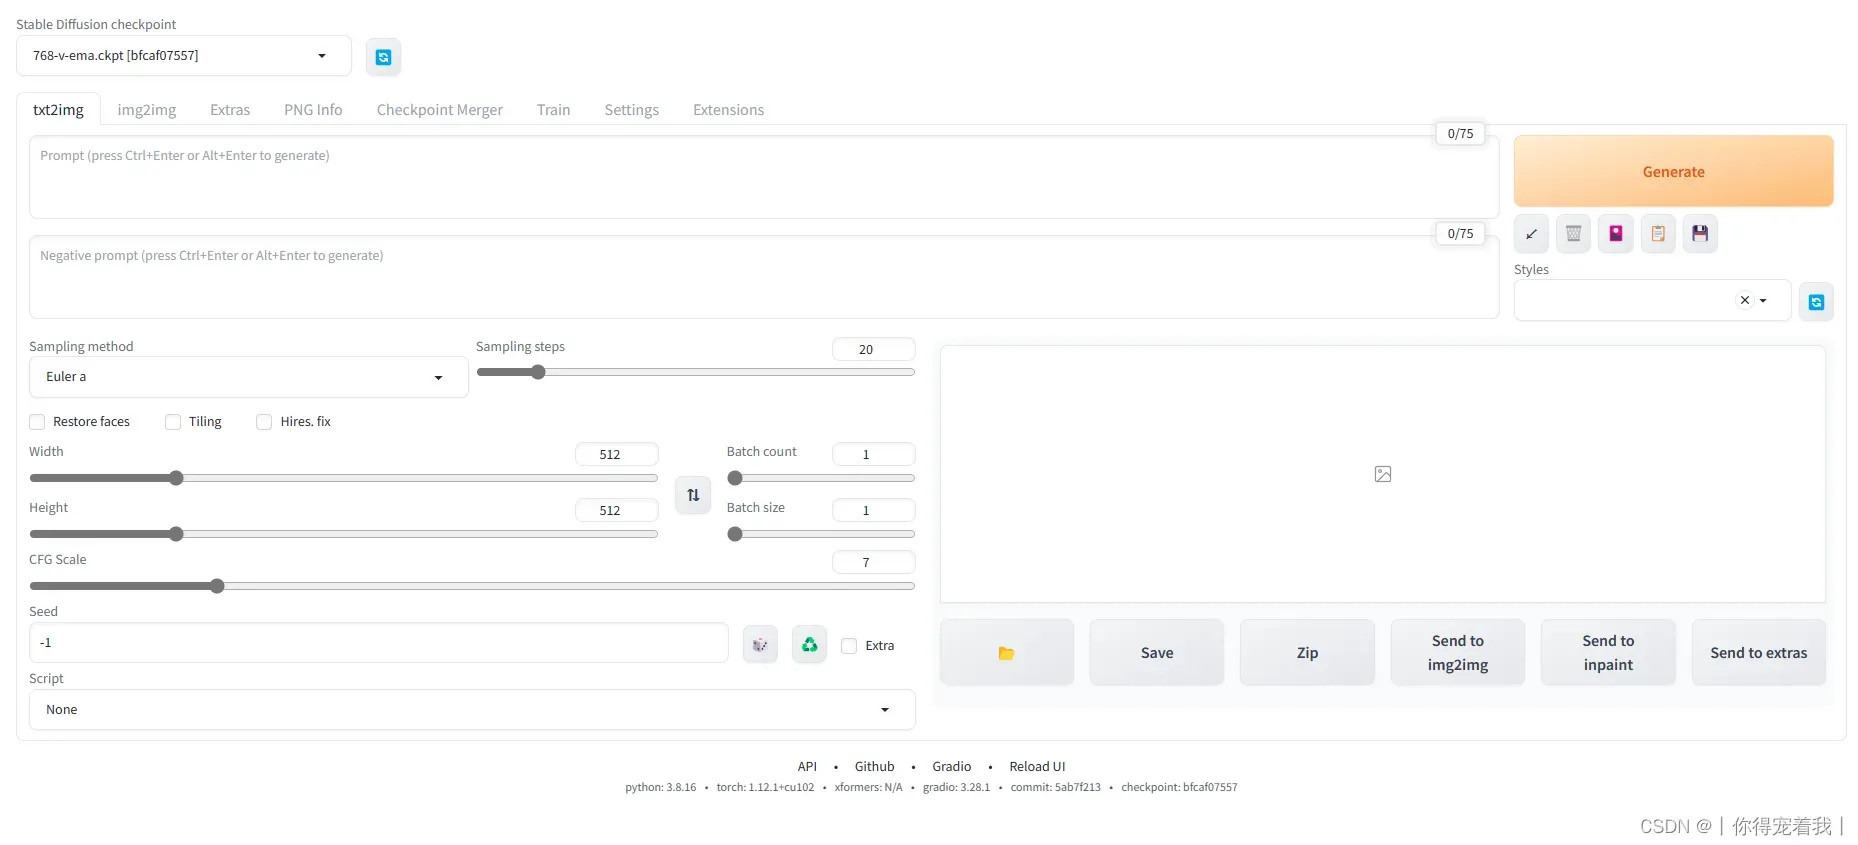
回到stable-diffusion-webui目录运行webui.py。出现下图的网址就是运行成功了。也可能运行完launch.py就会出现链接,因为launch.py调用了webui.py。如果没有出现公网链接,在webui.py中的317行改为share=True。再重新运行webui.py就可以了。

访问公网链接就可以进入页面了,链接72小时有效。运行成功的页面就是这样啦!参数的具体含义可以参考文章stable diffusion手册。讲的比较详细。
后面可能会继续出一篇ControlNet的文章,大家遇到了什么问题可以在评论区留言,说不定有人遇到了和你一样的问题,发出来大家相互探讨。
文章出处登录后可见!