本地部署语音转文字
- 1.whisper
-
- 1.首先安装Chocolatey
- 2.安装
- 3.使用
- 2.SpeechRecognition
-
- 1.环境
- 2.中文包
- 3.格式转化
- 4.运行
- 3.效果
1.whisper
1.首先安装Chocolatey
https://github.com/openai/whisper
以管理员身份运行PowerShell
Set-ExecutionPolicy Bypass -Scope Process -Force; [System.Net.ServicePointManager]::SecurityProtocol = [System.Net.ServicePointManager]::SecurityProtocol -bor 3072; iex ((New-Object System.Net.WebClient).DownloadString('https://chocolatey.org/install.ps1'))
choco -v#查看版本确定安装成功
Set-ExecutionPolicy AllSigned
Set-ExecutionPolicy Bypass -Scope Process -Force; [System.Net.ServicePointManager]::SecurityProtocol = [System.Net.ServicePointManager]::SecurityProtocol -bor 3072; iex ((New-Object System.Net.WebClient).DownloadString('https://community.chocolatey.org/install.ps1'))
2.安装
choco install ffmpeg
pip install setuptools-rust
pip install -U openai-whisper
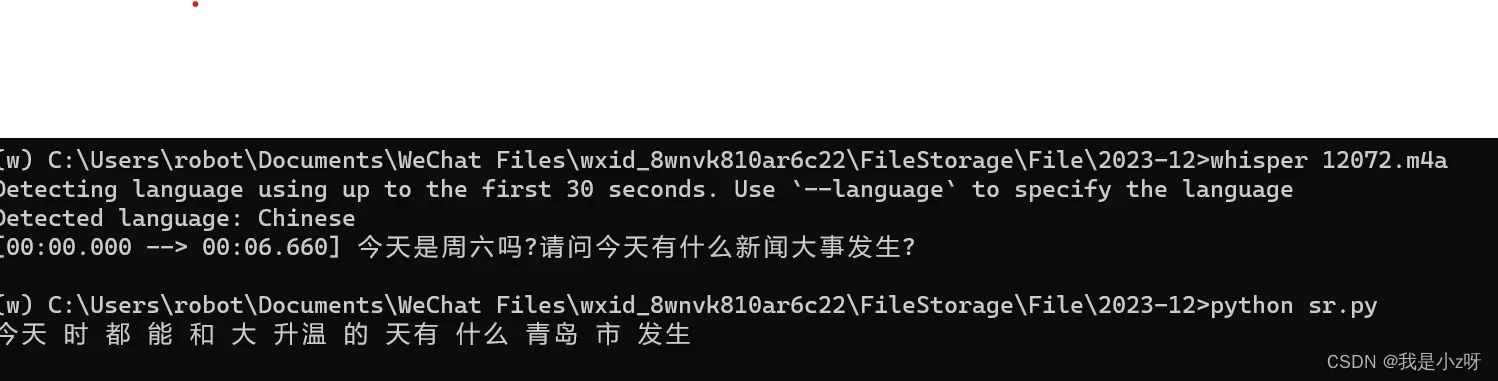
3.使用
whisper 1207.m4a --language Chinese --model medium --device cuda:0
这时会自动下载模型文件到用户的.cache文件夹里面,我的电脑在C:\Users\robot\.cache\whisper。
2.SpeechRecognition
1.环境
pip install SpeechRecognition
pip install -i https://pypi.tuna.tsinghua.edu.cn/simple pocketsphinx
2.中文包
在这个虚拟环境的\site-packages\speech_recognition\pocketsphinx-data目录下添加zh-CN中文包。
3.格式转化
因为这个离线只支持一下三种格式,所以利用ffmpeg将语音转换成wav格式,这个包在装whisper的时候已经装好了,所以直接用:
ffmpeg -i 12072.m4a output.wav
- 1.WAV
2.AIFF/AIFF-C
3.FLAC
4.运行
import speech_recognition as sr
audio_file = 'output.wav'
r = sr.Recognizer()
with sr.AudioFile(audio_file) as source:
    audio = r.record(source)
# 识别音频文件
result = r.recognize_sphinx(audio, language="zh-CN")
print(result)
3.效果
版权声明:本文为博主作者:我是小z呀原创文章,版权归属原作者,如果侵权,请联系我们删除!
原文链接:https://blog.csdn.net/weixin_38226321/article/details/134896744