文章目录
- 整体安装步骤
- windows10安装stable diffusion
-
- 环境要求
- 安装步骤
- 注意事项
- 参考博客
- 其他事项
-
- 安装显卡驱动
- 安装cuda
- 卸载cuda
- 安装对应版本pytorch
- 安装git上的python包
- Q&A
- linux安装stable diffusion
-
- 安装anaconda
- 安装cuda
- git 加速
- 配置虚拟环境
- 挂载oss(optional)
- 端口开放
- 启动服务
- controlnet
- 显卡使用监控
- 插件安装
- 参考文章
- 脚本安装stable diffusion
- stable diffusion教程
-
- models
- tutorial
- prompt reference
整体安装步骤
- GPU环境安装:NVIDIA驱动和cuda(注意版本,建议安装cuda11.7,方便后续使用xformer)
- 配置git环境
- git拉取stable diffusion项目
- 配置python虚拟环境
- 安装GPU版torch
- 安装虚拟环境依赖包:项目本身的requirement及子项目依赖
- 下载模型文件
- 启动stable diffusion
windows10安装stable diffusion
环境要求
- 独立显卡:最低配置4GB显存,基本配置6GB显存,推荐配置8GB显存以上。(显存越大越好。显存越大,可以生成的图片分辨率就越大。)
- 内存:内存16G或者以上。
- 磁盘:至少10GB。
安装步骤
- 安装Python3.10.6
- 安装git
- 下载sd项目:AUTOMATIC1111
- 下载模型文件(例如:stable-diffusion-v1-5)
- Stable Diffusion的官方模型V1.5版本一共提供了两个模型,一个3.97GB,另一个是7.17GB。
- 绘画版|3.97GB模型:推荐正常绘图的人使用,无需训练自己的模型。
- 训练版|7.17GB模型:如果您想以该模型为基础,训练自己的模型。那么下载该模型可以得到更好的效果。
- 运行webui-user.bat脚本
注意事项
- cuda版本与显卡驱动版本适配;
- pytorch的gpu版本与cuda版本对应;
- 脚本中默认会装,就是比较慢,耐心等待就行;
- 自己下载对应版本wheel文件安装(搜索:2.0.1+cu118):https://download.pytorch.org/whl/torch/
- 可能会失败,见issue:https://github.com/AUTOMATIC1111/stable-diffusion-webui/issues/1742
- 提前下载GitHub项目:GFPGAN、CLIP、open_clip,之后需要安装到Python虚拟环境中;
- python setup.py install 可能失败。可以提前cd到对应项目中,使用pip install -r requirements.txt安装依赖包。
- 提前下载GitHub项目:stable-diffusion-stability-ai、taming-transformers、k-diffusion、CodeFormer、BLIP,之后需要cp到项目的repositories路径中;
参考博客
- https://stable-diffusion-art.com/install-windows/
- https://aituts.com/stable-diffusion-on-windows-automatic1111/
其他事项
安装显卡驱动
https://www.volcengine.com/docs/6419/69858
安装cuda
cuda版本与显卡驱动对照表
https://docs.nvidia.com/cuda/cuda-toolkit-release-notes/index.html
要安装的显卡驱动是,所以对应的cuda版本应该是 CUDA 12.0.x 、12.1.x等
安装成功后可以在cmd使用nvcc -V查看cuda版本,使用nsmi
好像需要安装cuda11.8版本?
下载链接:https://developer.nvidia.com/cuda-12-1-0-download-archive?target_os=Windows&target_arch=x86_64&target_version=10&target_type=exe_local
检查环境
python -m torch.utils.collect_env
卸载cuda
cuda 和 cudnn 库的卸载与安装:https://zhuanlan.zhihu.com/p/102966512
安装对应版本pytorch
在以下网址搜索:2.0.1+cu118
https://download.pytorch.org/whl/torch/
其中cu118对应刚刚安装的cuda11.8版本
安装git上的python包
cd path to CLIP
# python setup.py install --user
python setup.py install
Q&A
- stable diffusion报错RuntimeError: “LayerNormKernelImpl” not implem
解决方法:运行命令修改为./webui.sh –precision full –no-half
在webui-user.bat中添加命令行参数:
set COMMANDLINE_ARGS=–skip-torch-cuda-test –precision full –no-half
- AssertionError: extension access disabled because of command line flags
What’s happening is that, since you’re not running on localhost and everyone in the whole wide world can in theory access your Web UI, you need to explicitly enable extensions.
解决方法:adding the –enable-insecure-extension-access flag
linux安装stable diffusion
简单版可查看之前的博客:【AIGC】阿里云ecs部署stable diffusion
安装anaconda
安装Python、wget、git
sudo apt install python3 python3-pip python3-virtualenv wget git
安装前置依赖
sudo apt-get install libgl1-mesa-glx libegl1-mesa libxrandr2 libxrandr2 libxss1 libxcursor1 libxcomposite1 libasound2 libxi6 libxtst6
下载anaconda
wget https://repo.anaconda.com/archive/Anaconda3-2023.03-1-Linux-x86_64.sh
创建Python 3.10.6的虚拟环境
conda create –name sdwebui python=3.10.6
安装cuda
os=ubuntu2004
arch=x86_64
wget https://developer.download.nvidia.com/compute/cuda/repos/ubuntu2004/x86_64/cuda-keyring_1.0-1_all.deb
sudo dpkg -i cuda-keyring_1.0-1_all.deb
sudo apt update
sudo apt install cuda-11-8
git 加速
开启加速
export http_proxy=http://172.181.217.43:12798 && export https_proxy=http://172.181.217.43:12798
关闭加速
unset http_proxy && unset https_proxy
【todo:注意关闭配置】https://blog.csdn.net/zhiboqingyun/article/details/123912058
git clone https://github.com/AUTOMATIC1111/stable-diffusion-webui.git
配置虚拟环境
启动虚拟环境
conda activate sdwebui
如果想要于bash script自动以conda启动虚拟环境,可以把这二行加入至webui-user.sh顶端:
eval “$(conda shell.bash hook)”
conda activate sdwebui
下载模型
wget -nc -P ~/stable-diffusion-webui/models/Stable-diffusion https://huggingface.co/andite/anything-v4.0/resolve/main/anything-v4.5-pruned.safetensors -O anything-v4.5-pruned.safetensors
首次启动
./webui.sh
./webui.sh –xformers –skip-install –enable-insecure-extension-access
挂载oss(optional)
https://help.aliyun.com/document_detail/153892.html?spm=a2c4g.153893.0.0.1d877f1fHkYVYt
端口开放
https://www.bilibili.com/read/cv23060248
启动服务时需要添加 –listen参数
./webui.sh –listen
sed -i ‘s/can_run_as_root=0/can_run_as_root=1/g’ webui.sh &&
./webui.sh –no-download-sd-model –xformers
启动后的一些权限问题
sudo chown -R root stable-diffusion-webui
sudo chgrp -R root stable-diffusion-webui
服务地址:http://xxx.xxx.xxx.xxx:7860/
启动服务
sudo ./webui.sh –listen –skip-install –enable-insecure-extension-access
controlnet
https://github.com/Mikubill/sd-webui-controlnet/issues/1399
Package cairo was not found in the pkg-config search path.
Perhaps you should add the directory containing `cairo.pc’
to the PKG_CONFIG_PATH environment variable
No package ‘cairo’ found
ERROR: Could not build wheels for pycairo, which is required to install pyproject.toml-based projects
sudo apt install libcairo2-dev
I fixed itby this way:
-
run command below on linux
sudo apt install libcairo2-dev -
install svglib package manually or relaunch webui
pip install svglib
显卡使用监控
watch -n 1 nvidia-smi
插件安装
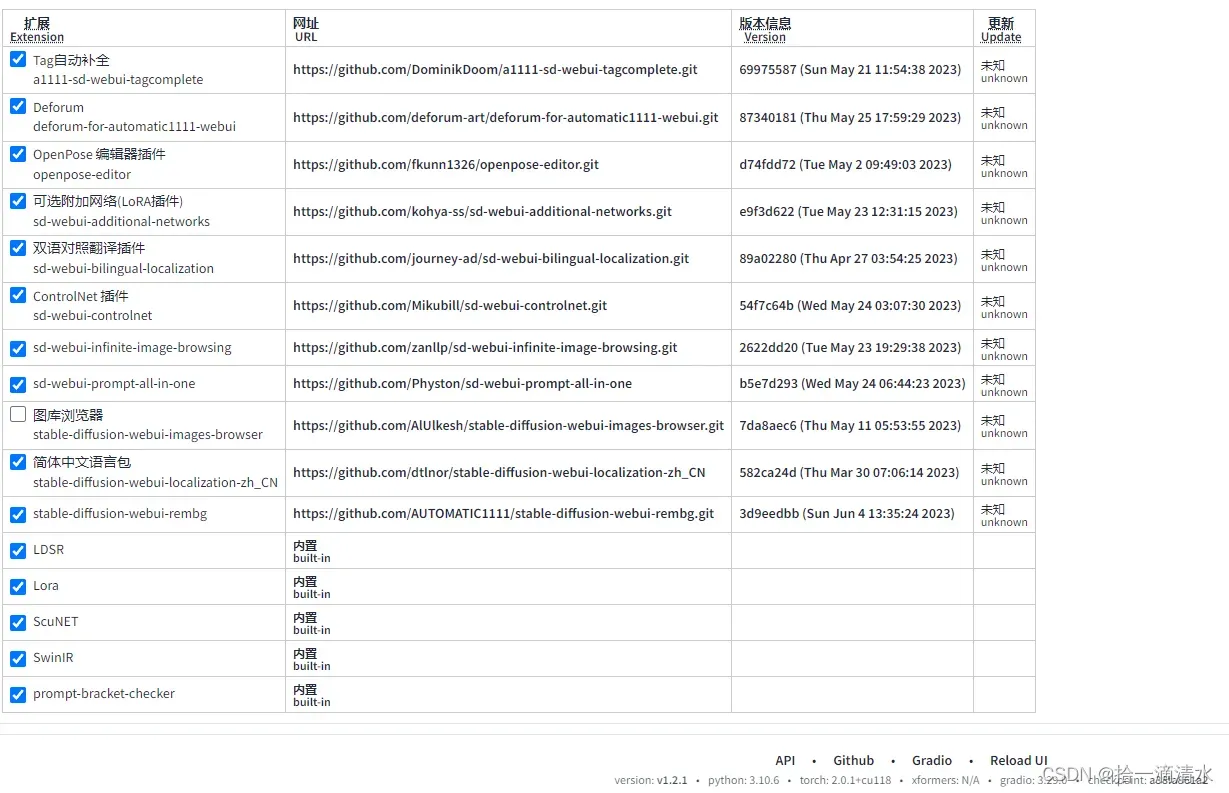
抠图插件安装:https://zhuanlan.zhihu.com/p/632888046
参考文章
查看Linux服务器配置|是否有GPU以及GPU信息:https://blog.csdn.net/qq_41725313/article/details/123784429
安装至Linux:https://ivonblog.com/posts/stable-diffusion-webui-manuals/zh-cn/installation/linux-installation/
安装驱动:https://ivonblog.com/posts/ubuntu-install-nvidia-drivers/
安装驱动(阿里云官方文档):https://help.aliyun.com/document_detail/163824.htm?spm=a2c4g.298150.0.0.1e0b5355t3jXPh#concept-ecy-qrz-wgb
脚本安装stable diffusion
# git配置
git config --global http.postBuffer 524288000
git config --global https.postBuffer 524288000
git config --global core.compression -1
git config --global http.sslVerify "false"

# 拉取stable diffusion
cd ~
git clone https://github.com/AUTOMATIC1111/stable-diffusion-webui.git
cd ~/stable-diffusion-webui
git checkout 89f9faa63388756314e8a1d96cf86bf5e0663045

# 配置python环境
conda create -y --name sdwebui python=3.10.6
source activate sdwebui
python -m venv venv
source venv/bin/activate            # conda activate sdwebui 可能会失败
# source venv/Scripts/activate      # for win10 git bash

# 安装GPU版torch
pip install torch==2.0.0+cu117 torchvision==0.15.0+cu117 --extra-index-url https://download.pytorch.org/whl/cu117
pip install xformers==0.0.17

# python github环境包
mkdir tmp_envs
cd tmp_envs
git config --global http.sslVerify "false"      # 加上,以防断连
git clone https://github.com/TencentARC/GFPGAN.git
cd GFPGAN && git checkout 8d2447a2d918f8eba5a4a01463fd48e45126a379
pip install -r requirements.txt -i https://pypi.tuna.tsinghua.edu.cn/simple
python setup.py install
cd ..

git config --global http.sslVerify "false"
git clone https://github.com/openai/CLIP.git
cd CLIP && git checkout d50d76daa670286dd6cacf3bcd80b5e4823fc8e1
pip install -r requirements.txt -i https://pypi.tuna.tsinghua.edu.cn/simple
python setup.py install
cd ..

git config --global http.sslVerify "false"
git clone https://github.com/mlfoundations/open_clip.git
cd open_clip && git checkout bb6e834e9c70d9c27d0dc3ecedeebeaeb1ffad6b
pip install -r requirements.txt -i https://pypi.tuna.tsinghua.edu.cn/simple
python setup.py install
cd ..


# 下载模型
wget -nc -P ~/stable-diffusion-webui/models/Stable-diffusion https://huggingface.co/andite/anything-v4.0/resolve/main/anything-v4.5-pruned.safetensors -O anything-v4.5-pruned.safetensors

./webui.sh --xformers --skip-install


# 面部修复功能报错
# 下载模型文件:
cd ~/stable-diffusion-webui
wget https://github.com/sczhou/CodeFormer/releases/download/v0.1.0/codeformer.pth
mv codeformer.pth ~/stable-diffusion-webui/models/Codeformer/codeformer-v0.1.0.pt
# 下载权重文件
wget https://github.com/xinntao/facexlib/releases/download/v0.1.0/detection_Resnet50_Final.pth
mv detection_Resnet50_Final.pth ~/stable-diffusion-webui/repositories/CodeFormer/weights/facelib/detection_Resnet50_Final.pth
wget https://github.com/sczhou/CodeFormer/releases/download/v0.1.0/parsing_parsenet.pth
mv parsing_parsenet.pth ~/stable-diffusion-webui/repositories/CodeFormer/weights/facelib/parsing_parsenet.pth
stable diffusion教程
models
stable-diffusion-v1-5: https://huggingface.co/runwayml/stable-diffusion-v1-5/tree/main
The 10 Best Stable Diffusion Models by Popularity (SD Models Explained):https://aituts.com/models/
AI 绘画与作画 stable diffusion webui 常见模型汇总及简介:https://www.tjsky.net/tutorial/583
C站下载模型:https://civitai.com/
hugging face下载:https://huggingface.co/models
ControlNet下载: https://huggingface.co/lllyasviel/ControlNet-v1-1/tree/main
lora模型下载:https://openai.wiki/lora-model-part-1.html
tutorial
AIGC入门教程:Stable Diffusion,万字保姆篇:https://www.woshipm.com/ai/5813208.html
超详细!外婆都能看懂的Stable Diffusion入门教程:https://www.uisdc.com/stable-diffusion-3
How to use Stable Diffusion v2.1 (AUTOMATIC1111 Guide):https://aituts.com/install-stable-diffusion-v2-1/
stable-diffusion-webui使用手册:https://ivonblog.com/posts/stable-diffusion-webui-manuals/zh-cn/installation/windows-installation/
Stable Diffusion 速览: https://www.zhihu.com/question/550101073/answer/2931261853
AI绘画指南 stable diffusion webui (SD webui)如何设置与使用:https://www.tjsky.net/tutorial/488
How to use models(LoRA):https://github.com/civitai/civitai/wiki/How-to-use-models#lora
How to generate realistic people in Stable Diffusion:https://stable-diffusion-art.com/realistic-people/
How to make a video with Stable Diffusion (Deforum):https://stable-diffusion-art.com/deforum/
AI绘画教程:从入门到放弃(xiaobai):https://zhuanlan.zhihu.com/p/607892849
LoRA模型的训练脚本:https://github.com/kohya-ss/sd-scripts
prompt reference
风格提示词:https://lexica.art/
image on playgroundai: https://playgroundai.com/c/landscapes
版权声明:本文为博主作者:拾一滴清水原创文章,版权归属原作者,如果侵权,请联系我们删除!
原文链接:https://blog.csdn.net/weixin_43982238/article/details/137153847