ChatGPT-AI绘图
- Image generation Beta 图片生成
- 前言
- Introduction
- Usage
- Generations
- Edits 编辑
- Variations
- Language-specific tips 特定语言提示
- Python 语言
- Using in-memory image data 使用内存中的图像数据
- Operating on image data 操作图像数据
- Error handling
- Node.js 语言
- Using in-memory image data 使用内存中的图像数据
- Working with TypeScript 使用TypeScript
- Error handling
- 其它资料下载
Image generation Beta 图片生成
Learn how to generate or manipulate images with our DALL·E models
了解如何使用我们的DALL·E模型生成或操作图像
前言
ChatGPT不仅仅是一个强大的自然语言处理模型,其DALL·E模型还可以帮助用户快速生成多种多样的图像。用户可以根据文字快速生成图片,即可自动生成出特定的图片,大大提高了工作效率。对于多媒体行业从业者来说,DALL·E模型强大的图像处理能力,可以帮助用户节省大量时间,让用户更加专注地精心制作自己的作品,从而提高工作效率。
Introduction
The Images API provides three methods for interacting with images:
图像API提供了三种与图像交互的方法:
- Creating images from scratch based on a text prompt
基于文本提示从头开始创建图像 - Creating edits of an existing image based on a new text prompt
基于新文本提示创建现有图像的编辑 - Creating variations of an existing image
创建现有图像的变体
This guide covers the basics of using these three API endpoints with useful code samples. To see them in action, check out our DALL·E preview app.
本指南涵盖了使用这三个API端点的基础知识和有用的代码示例。要查看它们的实际操作,请查看我们的DALL·E预览应用程序。
The Images API is in beta. During this time the API and models will evolve based on your feedback. To ensure all users can prototype comfortably, the default rate limit is 50 images per minute. You can learn more about rate limits in our rate limit guide.
图像API处于beta阶段。在此期间,API和模型将根据您的反馈进行改进。为了确保所有用户都能轻松地进行原型制作,默认速率限制为每分钟50张图像。您可以在我们的费率限制指南中了解有关费率限制的更多信息。
Usage
Generations
The image generations endpoint allows you to create an original image given a text prompt. Generated images can have a size of 256×256, 512×512, or 1024×1024 pixels. Smaller sizes are faster to generate. You can request 1-10 images at a time using the n parameter.
图像生成端点允许您在给出文本提示的情况下创建原始图像。生成的图像可以具有256 x256、512 x512或1024 x1024像素的大小。较小的尺寸生成速度更快。您可以使用n参数一次请求1-10个图像。
python代码如下:
response = openai.Image.create(
  prompt="a white siamese cat",
  n=1,
  size="1024x1024"
)
image_url = response['data'][0]['url']
node.js代码如下:
const response = await openai.createImage({
  prompt: "a white siamese cat",
  n: 1,
  size: "1024x1024",
});
image_url = response.data.data[0].url;
curl 代码如下:
curl https://api.openai.com/v1/images/generations \
  -H "Content-Type: application/json" \
  -H "Authorization: Bearer $OPENAI_API_KEY" \
  -d '{
    "prompt": "a white siamese cat",
    "n": 1,
    "size": "1024x1024"
  }'
The more detailed the description, the more likely you are to get the result that you or your end user want. You can explore the examples in the DALL·E preview app for more prompting inspiration. Here’s a quick example:
描述越详细,就越有可能获得您或最终用户想要的结果。您可以在DALL·E预览应用程序中探索示例,以获得更多提示灵感。这里有一个简单的例子:
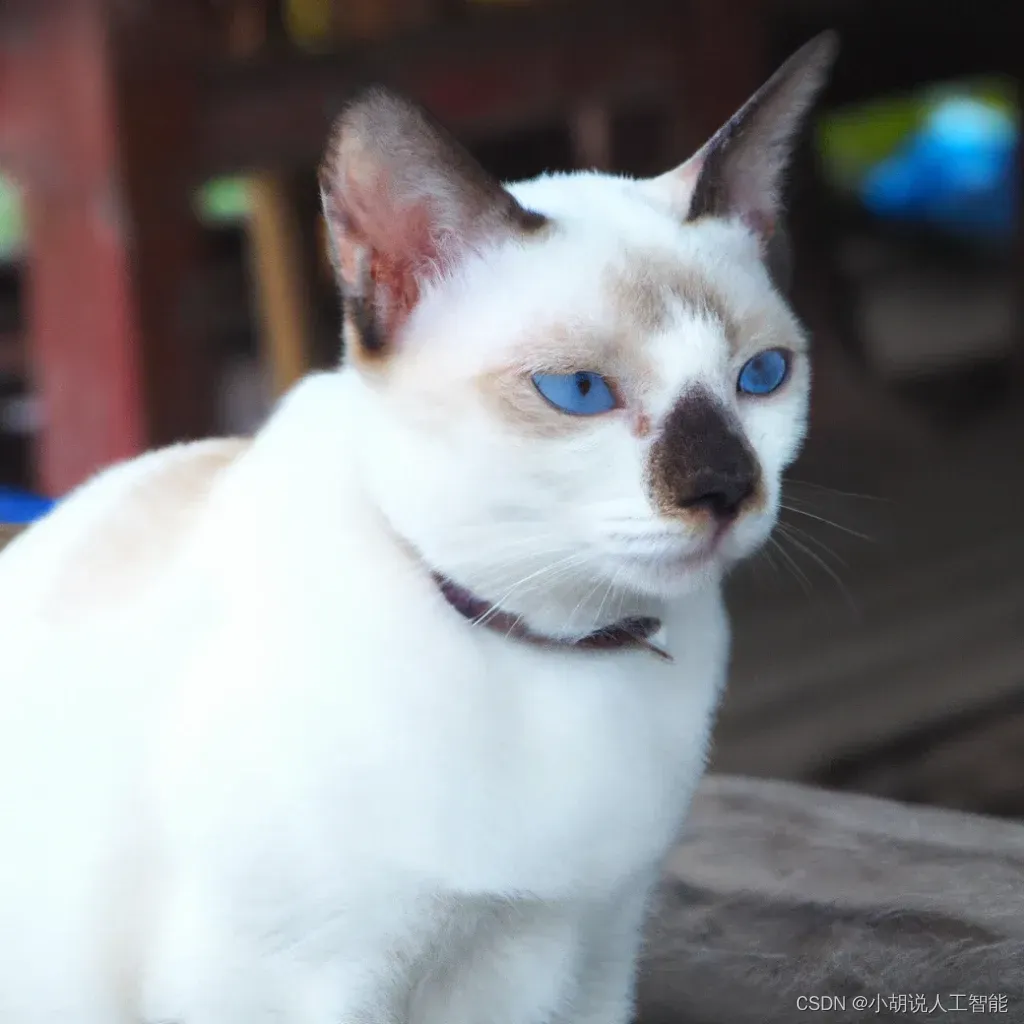
PROMPT 提示
a white siamese cat 白色暹罗猫
GENERATION 产生
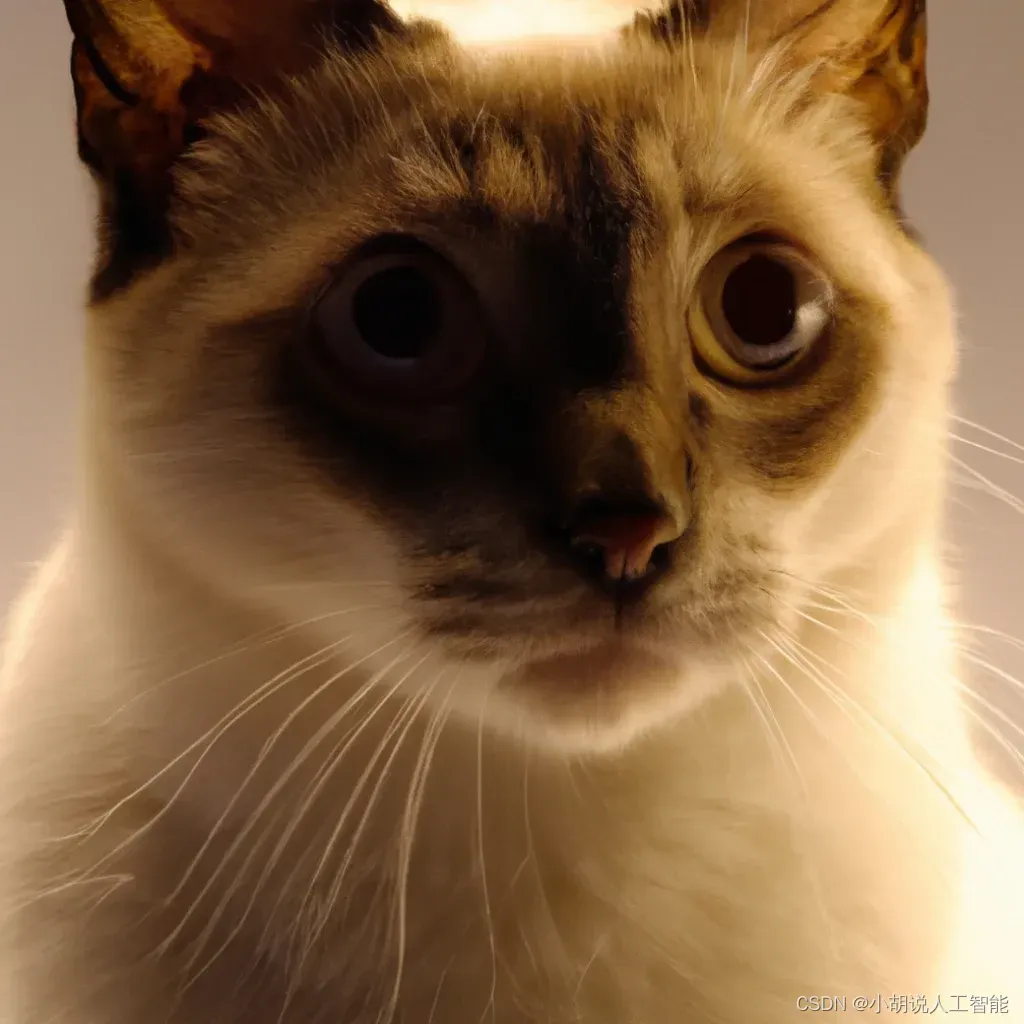
PROMPT 提示
a close up, studio photographic portrait of a white siamese cat that looks curious, backlit ears
一个近距离,工作室摄影肖像的白色暹罗猫,看起来好奇,背光的耳朵
GENERATION 产生
Each image can be returned as either a URL or Base64 data, using the response_format parameter. URLs will expire after an hour.
使用response_format参数,每个图像都可以作为URL或Base64数据返回。URL将在一小时后过期。
Edits 编辑
The image edits endpoint allows you to edit and extend an image by uploading a mask. The transparent areas of the mask indicate where the image should be edited, and the prompt should describe the full new image, not just the erased area. This endpoint can enable experiences like the editor in our DALL·E preview app.
图像编辑端点允许您通过上传遮罩来编辑和扩展图像。蒙版的透明区域指示应该编辑图像的位置,提示应该描述完整的新图像,而不仅仅是擦除的区域。此端点可以实现类似于DALL·E预览应用中的编辑器的体验。
python代码如下:
response = openai.Image.create_edit(
  image=open("sunlit_lounge.png", "rb"),
  mask=open("mask.png", "rb"),
  prompt="A sunlit indoor lounge area with a pool containing a flamingo",
  n=1,
  size="1024x1024"
)
image_url = response['data'][0]['url']
node.js代码如下:
const response = await openai.createImageEdit(
  fs.createReadStream("sunlit_lounge.png"),
  fs.createReadStream("mask.png"),
  "A sunlit indoor lounge area with a pool containing a flamingo",
  1,
  "1024x1024"
);
image_url = response.data.data[0].url;
curl 代码如下:
curl https://api.openai.com/v1/images/edits \
  -H "Authorization: Bearer $OPENAI_API_KEY" \
  -F image="@sunlit_lounge.png" \
  -F mask="@mask.png" \
  -F prompt="A sunlit indoor lounge area with a pool containing a flamingo" \
  -F n=1 \
  -F size="1024x1024"
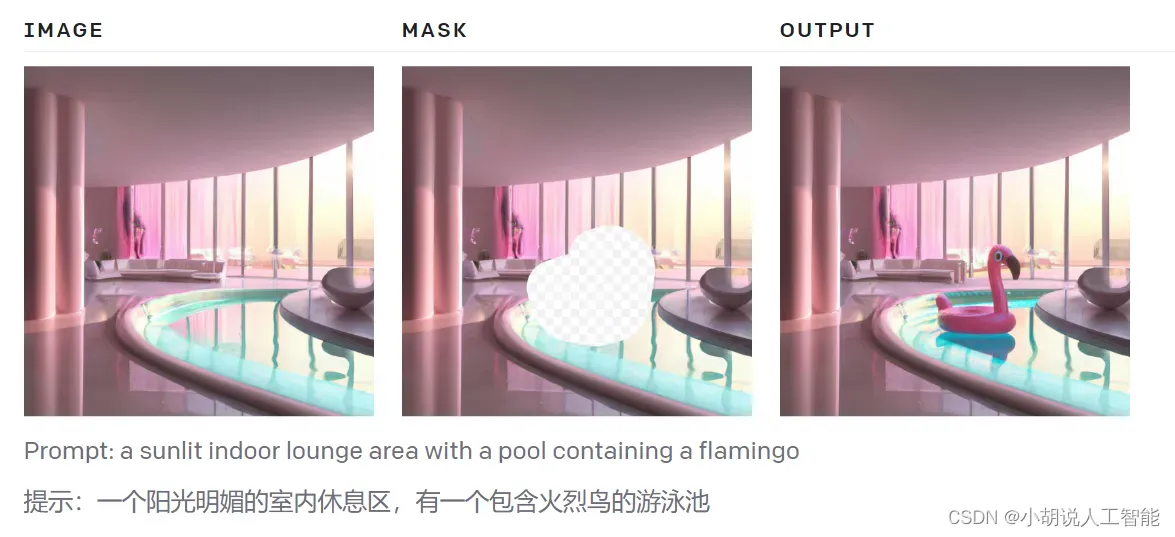
The uploaded image and mask must both be square PNG images less than 4MB in size, and also must have the same dimensions as each other. The non-transparent areas of the mask are not used when generating the output, so they don’t necessarily need to match the original image like the example above.
上传的图像和蒙版必须都是小于4MB的方形PNG图像,并且彼此的尺寸必须相同。生成输出时不使用蒙版的非透明区域,因此它们不一定需要像上面的示例那样匹配原始图像。
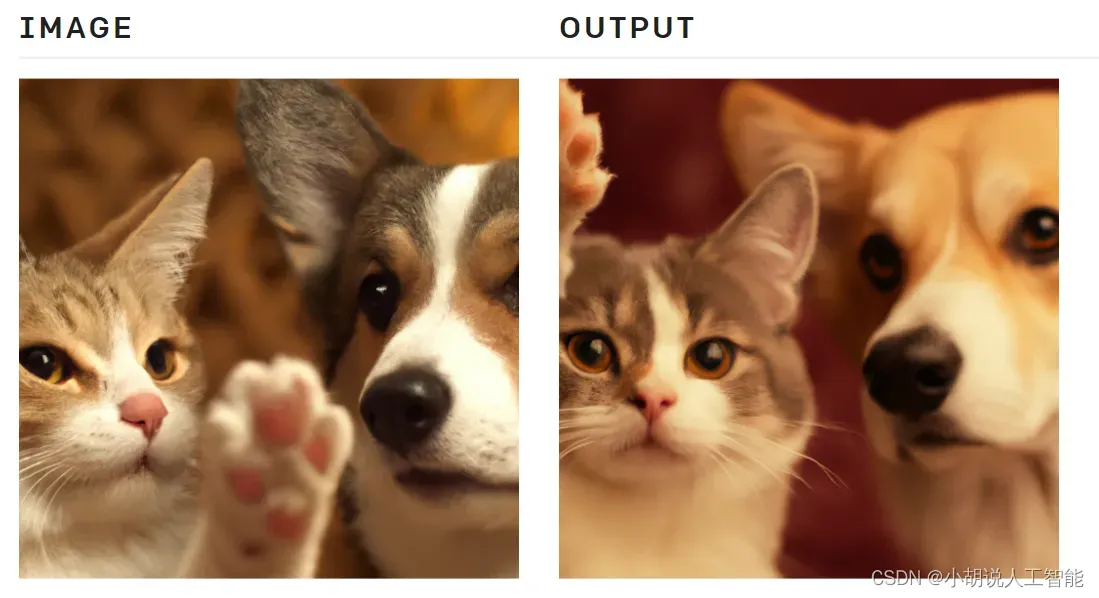
Variations
The image variations endpoint allows you to generate a variation of a given image.
图像变体端点允许您生成给定图像的变体。
python代码如下:
response = openai.Image.create_variation(
  image=open("corgi_and_cat_paw.png", "rb"),
  n=1,
  size="1024x1024"
)
image_url = response['data'][0]['url']
node.js代码如下:
const response = await openai.createImageVariation(
  fs.createReadStream("corgi_and_cat_paw.png"),
  1,
  "1024x1024"
);
image_url = response.data.data[0].url;
curl 代码如下:
curl https://api.openai.com/v1/images/variations \
  -H "Authorization: Bearer $OPENAI_API_KEY" \
  -F image='@corgi_and_cat_paw.png' \
  -F n=1 \
  -F size="1024x1024"
Language-specific tips 特定语言提示
Python 语言
Using in-memory image data 使用内存中的图像数据
The Python examples in the guide above use the open function to read image data from disk. In some cases, you may have your image data in memory instead. Here’s an example API call that uses image data stored in a BytesIO object:
上面的Python示例使用 open 函数从磁盘读取图像数据。在某些情况下,您可能会将图像数据保存在内存中。下面是一个使用存储在 BytesIO 对象中的图像数据的示例API调用:
from io import BytesIO

# This is the BytesIO object that contains your image data
byte_stream: BytesIO = [your image data]
byte_array = byte_stream.getvalue()
response = openai.Image.create_variation(
  image=byte_array,
  n=1,
  size="1024x1024"
)
Operating on image data 操作图像数据
It may be useful to perform operations on images before passing them to the API. Here’s an example that uses PIL to resize an image:
在将图像传递给API之前对图像执行操作可能是有用的。下面是一个使用 PIL 调整图像大小的示例:
from io import BytesIO
from PIL import Image

# Read the image file from disk and resize it
image = Image.open("image.png")
width, height = 256, 256
image = image.resize((width, height))

# Convert the image to a BytesIO object
byte_stream = BytesIO()
image.save(byte_stream, format='PNG')
byte_array = byte_stream.getvalue()

response = openai.Image.create_variation(
  image=byte_array,
  n=1,
  size="1024x1024"
)
Error handling
API requests can potentially return errors due to invalid inputs, rate limits, or other issues. These errors can be handled with a try...except statement, and the error details can be found in e.error:
API请求可能由于无效输入、速率限制或其他问题而返回错误。这些错误可以用 try...except 语句处理,错误细节可以在 e.error 中找到:
try:
  openai.Image.create_variation(
    open("image.png", "rb"),
    n=1,
    size="1024x1024"
  )
  print(response['data'][0]['url'])
except openai.error.OpenAIError as e:
  print(e.http_status)
  print(e.error)
Node.js 语言
Using in-memory image data 使用内存中的图像数据
The Node.js examples in the guide above use the fs module to read image data from disk. In some cases, you may have your image data in memory instead. Here’s an example API call that uses image data stored in a Node.js Buffer object:
上述指南中的Node.js示例使用 fs 模块从磁盘读取图像数据。在某些情况下,您可能会将图像数据保存在内存中。下面是一个使用存储在Node.js Buffer 对象中的图像数据的示例API调用:
// This is the Buffer object that contains your image data 这是包含图像数据的Buffer对象
const buffer = [your image data];
// Set a `name` that ends with .png so that the API knows it's a PNG image 设置一个以.png结尾的“名称”,这样API就知道这是一个PNG图像
buffer.name = "image.png";
const response = await openai.createImageVariation(
  buffer,
  1,
  "1024x1024"
);
Working with TypeScript 使用TypeScript
If you’re using TypeScript, you may encounter some quirks with image file arguments. Here’s an example of working around the type mismatch by explicitly casting the argument:
如果你使用TypeScript,你可能会遇到一些图像文件参数的怪异。下面是一个通过显式转换参数来解决类型不匹配的示例:
// Cast the ReadStream to `any` to appease the TypeScript compiler 将ReadStream转换为' any '以便TypeScript编译器使用
const response = await openai.createImageVariation(
  fs.createReadStream("image.png") as any,
  1,
  "1024x1024"
);
And here’s a similar example for in-memory image data:
下面是内存中图像数据的类似示例:
// This is the Buffer object that contains your image data 这是包含图像数据的Buffer对象
const buffer: Buffer = [your image data];
// Cast the buffer to `any` so that we can set the `name` property 将缓冲区转换为' any ',以便我们可以设置' name '属性
const file: any = buffer;
// Set a `name` that ends with .png so that the API knows it's a PNG image 设置一个以.png结尾的“名称”,这样API就知道这是一个PNG图像
file.name = "image.png";
const response = await openai.createImageVariation(
  file,
  1,
  "1024x1024"
);
Error handling
API requests can potentially return errors due to invalid inputs, rate limits, or other issues. These errors can be handled with a try...catch statement, and the error details can be found in either error.response or error.message:
API请求可能由于无效输入、速率限制或其他问题而返回错误。这些错误可以用 try...catch 语句处理,错误详细信息可以在error.response 或error.message 中找到:
try {
  const response = await openai.createImageVariation(
    fs.createReadStream("image.png"),
    1,
    "1024x1024"
  );
  console.log(response.data.data[0].url);
} catch (error) {
  if (error.response) {
    console.log(error.response.status);
    console.log(error.response.data);
  } else {
    console.log(error.message);
  }
}
其它资料下载
如果大家想继续了解人工智能相关学习路线和知识体系,欢迎大家翻阅我的另外一篇博客《重磅 | 完备的人工智能AI 学习——基础知识学习路线,所有资料免关注免套路直接网盘下载》
这篇博客参考了Github知名开源平台,AI技术平台以及相关领域专家:Datawhale,ApacheCN,AI有道和黄海广博士等约有近100G相关资料,希望能帮助到所有小伙伴们。
文章出处登录后可见!