●项目名称
基于人工智能与边缘计算Aidlux的鸟类检测驱赶系统(可修改为coco 80类目标检测)
●项目简介
本项目在Aidlux上部署鸟类检测驱赶系统,通过视觉技术检测到有鸟类时,会进行提示。并可在源码上修改coco 80类目标检测索引直接检测其他79类目标,可以直接修改、快速移植到自己的项目中。
●预期效果
本项目使用利用安装AidLux的AidLux设备s855实现,可以让任何AidLux使用者快速上手,体验深度学习检测效果,提高开发乐趣。
边缘计算设备的优势主要包括以下几个方面:
节省带宽:边缘计算设备可以在源头处理数据,只传输重要的数据,从而节省带宽。
减少延迟:边缘计算设备可以减少等待时间,提高响应速度。
优化网络性能:边缘计算设备可以帮助企业实时分析和处理数据,从而提高网络性能。
提供本地化服务:边缘计算设备可以提供本地化服务,例如在智能城市、自动驾驶汽车和医疗保健行业中,边缘计算设备可以提供更快速、更准确的服务。
提高安全性:边缘计算设备可以减少数据传输过程中的安全风险,提高安全性。
对于大多数企业来说,coco的80类可支持大部分场景的预研、模拟,本项目将yolov5移植至AidLux,可在源码中直接修改类别,实现80类中任何一类的检测。
对于开发者而言,AI项目中各种算法的数据集准备+模型训练+模型部署依然存在着不小的难度。AidLux的出现,可以将我们的安卓设备以非虚拟的形式变成同时拥有Android和Linux系统环境的边缘计算设备,支持主流AI框架,非常易于部署,还有专门的接口调度算力资源,极大地降低了AI应用落地门槛。
Aidlux简介
Aidlux基于ARM架构的跨生态(Android/鸿蒙+Linux)一站式AIoT应用开发和部署平台

可在安卓手机(软硬件最低配置要求:①Android 系统版本 >= 6,②剩余存储空间 > 650MB (AidLux1.1),③CPU 支持 arm64-v8a 架构)
和其发布的边缘计算设备上运行、开发
下面上源码:
这里用opencv进行视频。我们检测鸟类图片,在coco 80类目标检测中索引为14(从0开始),所以设置sign=14,。如果是行人或者其他,直接修改sign的值为对应索引即可。
相关后处理函数utils.py
import cv2
import numpy as np
coco_class = ['person', 'bicycle', 'car', 'motorcycle', 'airplane', 'bus', 'train', 'truck', 'boat', 'traffic light',
'fire hydrant', 'stop sign', 'parking meter', 'bench', 'bird', 'cat', 'dog', 'horse', 'sheep', 'cow',
'elephant', 'bear', 'zebra', 'giraffe', 'backpack', 'umbrella', 'handbag', 'tie', 'suitcase', 'frisbee',
'skis', 'snowboard', 'sports ball', 'kite', 'baseball bat', 'baseball glove', 'skateboard', 'surfboard',
'tennis racket', 'bottle', 'wine glass', 'cup', 'fork', 'knife', 'spoon', 'bowl', 'banana', 'apple',
'sandwich', 'orange', 'broccoli', 'carrot', 'hot dog', 'pizza', 'donut', 'cake', 'chair', 'couch',
'potted plant', 'bed', 'dining table', 'toilet', 'tv', 'laptop', 'mouse', 'remote', 'keyboard', 'cell phone',
'microwave', 'oven', 'toaster', 'sink', 'refrigerator', 'book', 'clock', 'vase', 'scissors', 'teddy bear',
'hair drier', 'toothbrush']
def xywh2xyxy(x):
'''
Box (center x, center y, width, height) to (x1, y1, x2, y2)
'''
y = np.copy(x)
y[:, 0] = x[:, 0] - x[:, 2] / 2 # top left x
y[:, 1] = x[:, 1] - x[:, 3] / 2 # top left y
y[:, 2] = x[:, 0] + x[:, 2] / 2 # bottom right x
y[:, 3] = x[:, 1] + x[:, 3] / 2 # bottom right y
return y
def xyxy2xywh(box):
'''
Box (left_top x, left_top y, right_bottom x, right_bottom y) to (left_top x, left_top y, width, height)
'''
box[:, 2:] = box[:, 2:] - box[:, :2]
return box
def NMS(dets, thresh):
'''
单类NMS算法
dets.shape = (N, 5), (left_top x, left_top y, right_bottom x, right_bottom y, Scores)
'''
x1 = dets[:,0]
y1 = dets[:,1]
x2 = dets[:,2]
y2 = dets[:,3]
areas = (y2-y1+1) * (x2-x1+1)
scores = dets[:,4]
keep = []
index = scores.argsort()[::-1]
while index.size >0:
i = index[0] # every time the first is the biggst, and add it directly
keep.append(i)
x11 = np.maximum(x1[i], x1[index[1:]]) # calculate the points of overlap
y11 = np.maximum(y1[i], y1[index[1:]])
x22 = np.minimum(x2[i], x2[index[1:]])
y22 = np.minimum(y2[i], y2[index[1:]])
w = np.maximum(0, x22-x11+1) # the weights of overlap
h = np.maximum(0, y22-y11+1) # the height of overlap
overlaps = w*h
ious = overlaps / (areas[i]+areas[index[1:]] - overlaps)
idx = np.where(ious<=thresh)[0]
index = index[idx+1] # because index start from 1
return dets[keep]
def letterbox(img, new_shape=(640, 640), color=(114, 114, 114), auto=True, scaleFill=False, scaleup=True, stride=32):
# Resize and pad image while meeting stride-multiple constraints
shape = img.shape[:2] # current shape [height, width]
if isinstance(new_shape, int):
new_shape = (new_shape, new_shape)
# Scale ratio (new / old)
r = min(new_shape[0] / shape[0], new_shape[1] / shape[1])
if not scaleup: # only scale down, do not scale up (for better test mAP)
r = min(r, 1.0)
# Compute padding
ratio = r, r # width, height ratios
new_unpad = int(round(shape[1] * r)), int(round(shape[0] * r))
dw, dh = new_shape[1] - new_unpad[0], new_shape[0] - new_unpad[1] # wh padding
if auto: # minimum rectangle
dw, dh = np.mod(dw, stride), np.mod(dh, stride) # wh padding
elif scaleFill: # stretch
dw, dh = 0.0, 0.0
new_unpad = (new_shape[1], new_shape[0])
ratio = new_shape[1] / shape[1], new_shape[0] / shape[0] # width, height ratios
dw /= 2 # divide padding into 2 sides
dh /= 2
if shape[::-1] != new_unpad: # resize
img = cv2.resize(img, new_unpad, interpolation=cv2.INTER_LINEAR)
top, bottom = int(round(dh - 0.1)), int(round(dh + 0.1))
left, right = int(round(dw - 0.1)), int(round(dw + 0.1))
img = cv2.copyMakeBorder(img, top, bottom, left, right, cv2.BORDER_CONSTANT, value=color) # add border
return img, ratio, (dw, dh)
def preprocess_img(img, target_shape:tuple=None, div_num=255, means:list=[0.485, 0.456, 0.406], stds:list=[0.229, 0.224, 0.225]):
'''
图像预处理:
target_shape: 目标shape
div_num: 归一化除数
means: len(means)==图像通道数,通道均值, None不进行zscore
stds: len(stds)==图像通道数,通道方差, None不进行zscore
'''
img_processed = np.copy(img)
# resize
if target_shape:
# img_processed = cv2.resize(img_processed, target_shape)
img_processed = letterbox(img_processed, target_shape, stride=None, auto=False)[0]
img_processed = img_processed.astype(np.float32)
img_processed = img_processed/div_num
# z-score
if means is not None and stds is not None:
means = np.array(means).reshape(1, 1, -1)
stds = np.array(stds).reshape(1, 1, -1)
img_processed = (img_processed-means)/stds
# unsqueeze
img_processed = img_processed[None, :]
return img_processed.astype(np.float32)
def convert_shape(shapes:tuple or list, int8=False):
'''
转化为aidlite需要的格式
'''
if isinstance(shapes, tuple):
shapes = [shapes]
out = []
for shape in shapes:
nums = 1 if int8 else 4
for n in shape:
nums *= n
out.append(nums)
return out
def scale_coords(img1_shape, coords, img0_shape, ratio_pad=None):
# Rescale coords (xyxy) from img1_shape to img0_shape
if ratio_pad is None: # calculate from img0_shape
gain = min(img1_shape[0] / img0_shape[0], img1_shape[1] / img0_shape[1]) # gain = old / new
pad = (img1_shape[1] - img0_shape[1] * gain) / 2, (img1_shape[0] - img0_shape[0] * gain) / 2 # wh padding
else:
gain = ratio_pad[0][0]
pad = ratio_pad[1]
coords[:, [0, 2]] -= pad[0] # x padding
coords[:, [1, 3]] -= pad[1] # y padding
coords[:, :4] /= gain
clip_coords(coords, img0_shape)
return coords
def clip_coords(boxes, img_shape):
# Clip bounding xyxy bounding boxes to image shape (height, width)
boxes[:, 0].clip(0, img_shape[1], out=boxes[:, 0]) # x1
boxes[:, 1].clip(0, img_shape[0], out=boxes[:, 1]) # y1
boxes[:, 2].clip(0, img_shape[1], out=boxes[:, 2]) # x2
boxes[:, 3].clip(0, img_shape[0], out=boxes[:, 3]) # y2
def detect_postprocess(prediction, img0shape, img1shape, conf_thres=0.25, iou_thres=0.45):
'''
检测输出后处理
prediction: aidlite模型预测输出
img0shape: 原始图片shape
img1shape: 输入图片shape
conf_thres: 置信度阈值
iou_thres: IOU阈值
return: list[np.ndarray(N, 5)], 对应类别的坐标框信息, xywh、conf
'''
h, w, _ = img1shape
cls_num = prediction.shape[-1] - 5
valid_condidates = prediction[prediction[..., 4] > conf_thres]
valid_condidates[:, 0] *= w
valid_condidates[:, 1] *= h
valid_condidates[:, 2] *= w
valid_condidates[:, 3] *= h
valid_condidates[:, :4] = xywh2xyxy(valid_condidates[:, :4])
valid_condidates = valid_condidates[(valid_condidates[:, 0] > 0) & (valid_condidates[:, 1] > 0) & (valid_condidates[:, 2] > 0) & (valid_condidates[:, 3] > 0)]
box_cls = valid_condidates[:, 5:].argmax(1)
cls_box = []
for i in range(cls_num):
temp_boxes = valid_condidates[box_cls == i]
if(len(temp_boxes) == 0):
cls_box.append([])
continue
temp_boxes = NMS(temp_boxes, iou_thres)
temp_boxes[:, :4] = scale_coords([h, w], temp_boxes[:, :4] , img0shape).round()
temp_boxes[:, :4] = xyxy2xywh(temp_boxes[:, :4])
cls_box.append(temp_boxes[:, :5])
return cls_box
def draw_detect_res(img, all_boxes,sign):
'''
检测结果绘制
'''
flag = False
img = img.astype(np.uint8)
color_step = int(255/len(all_boxes))
for bi in range(len(all_boxes)):
if len(all_boxes[bi]) == 0:
continue
for box in all_boxes[bi]:
x, y, w, h = [int(t) for t in box[:4]]
if bi != sign:
continue
if bi == sign:
flag = True
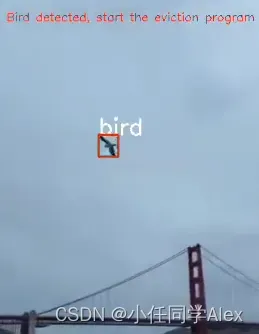
cv2.putText(img, "Bird detected, start the eviction program", (20, 100),cv2.FONT_HERSHEY_SIMPLEX, 0.5, ( 0, 0 ,255), 1)
cv2.putText(img, f'{coco_class[bi]}', (x, y), cv2.FONT_HERSHEY_SIMPLEX, 1, (255, 255, 255), 2)
cv2.rectangle(img, (x,y), (x+w, y+h),(0, bi*color_step, 255-bi*color_step),thickness = 2)
return img,flag
yolov5_video源码:
# aidlux相关
from cvs import *
import aidlite_gpu
from utils import detect_postprocess, preprocess_img, draw_detect_res
import time
import requests
import cv2
# 加载模型
model_path = 'yolov5s-fp16.tflite'
# 定义输入输出shape
in_shape = [1 * 640 * 640 * 3 * 4]
out_shape = [1 * 25200 * 85 * 4, 1 * 3 * 80 * 80 * 85 * 4, 1 * 3 * 40 * 40 * 85 * 4, 1 * 3 * 20 * 20 * 85 * 4]
# 载入模型
aidlite = aidlite_gpu.aidlite()
# 载入yolov5检测模型
aidlite.ANNModel(model_path, in_shape, out_shape, 4, 0)
sign = 14 #stop sign:11 bird:14
cap = cv2.VideoCapture("bird3.mp4")
fps = cap.get(cv2.CAP_PROP_FPS)
width = int(cap.get(cv2.CAP_PROP_FRAME_WIDTH))
height = int(cap.get(cv2.CAP_PROP_FRAME_HEIGHT))
# 创建输出视频文件对象
fourcc = cv2.VideoWriter_fourcc(*'XVID')
out = cv2.VideoWriter('output_video3.mp4', fourcc, fps, (width, height))
while True:
ret , frame = cap.read()
# if not ret:
# break
if frame is None:
break
# 预处理
img = preprocess_img(frame, target_shape=(640, 640), div_num=255, means=None, stds=None)
aidlite.setInput_Float32(img, 640, 640)
# 推理
aidlite.invoke()
pred = aidlite.getOutput_Float32(0)
pred = pred.reshape(1, 25200, 85)[0]
pred = detect_postprocess(pred, frame.shape, [640, 640, 3], conf_thres=0.5, iou_thres=0.45)
res_img, detec_taget = draw_detect_res(frame, pred, sign)
if detec_taget != True :
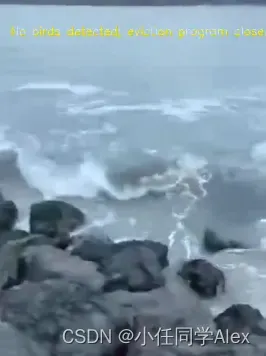
cv2.putText(res_img, "No birds detected, eviction program closed", (20, 100),cv2.FONT_HERSHEY_SIMPLEX, 0.5, (0, 255, 255), 1)
# #保存摄像头视频
out.write(res_img)
cvs.imshow(res_img)
cap.release()
out.release()
# 关闭窗口
cv2.destroyAllWindows()
# if detec_taget:
# print("区域内有鸟出现,请驱逐")
# out.write(res_img)
# cv2.imshow('Result', res_img)
# if cv2.waitKey(1) == ord('q'): # wait for 'q' key press to quit
# break
# cap.release()
# out.release()
# cv2.destroyAllWindows()
●操作流程
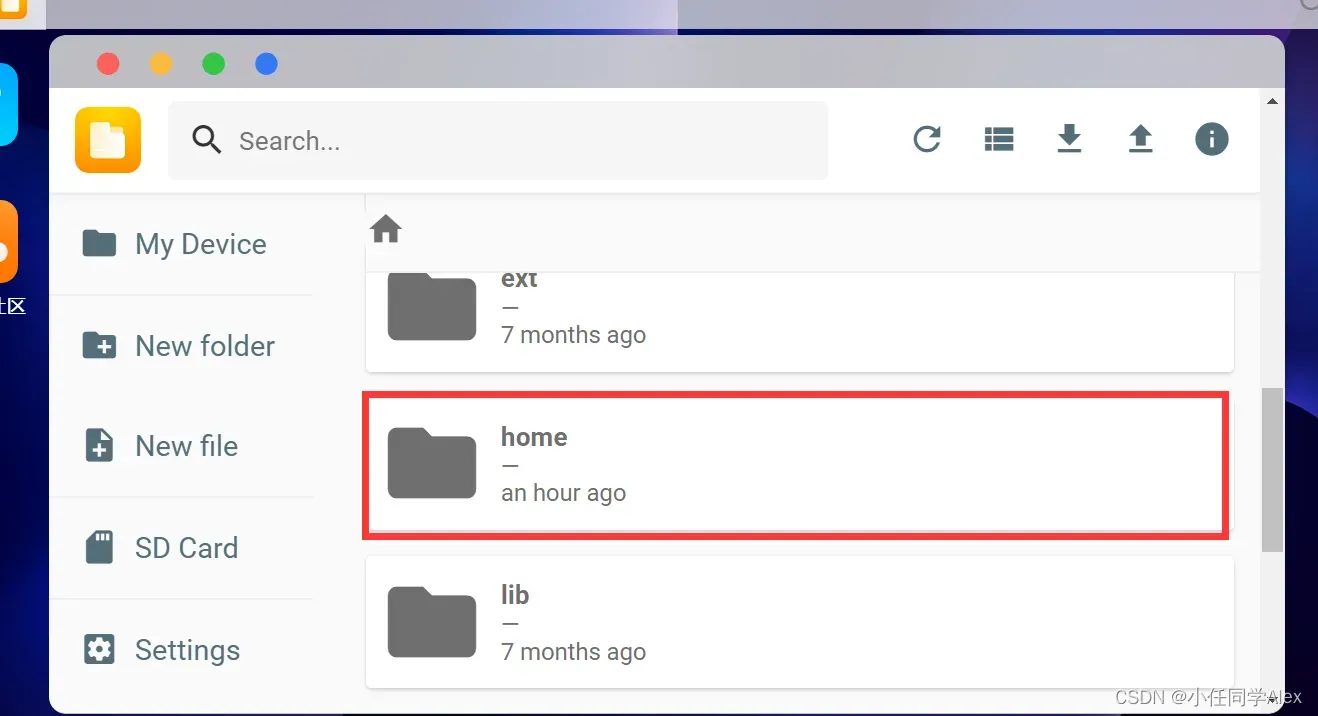
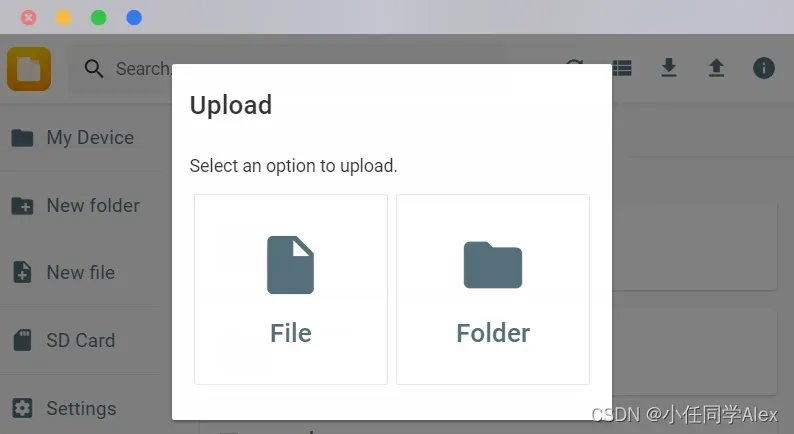
远程链接Aidlux,并找到home文件夹,将包含上述文件的文件夹上传
双击打开yolov5_video.py 并点击Bulid,然后找到Run Now 并点击运行
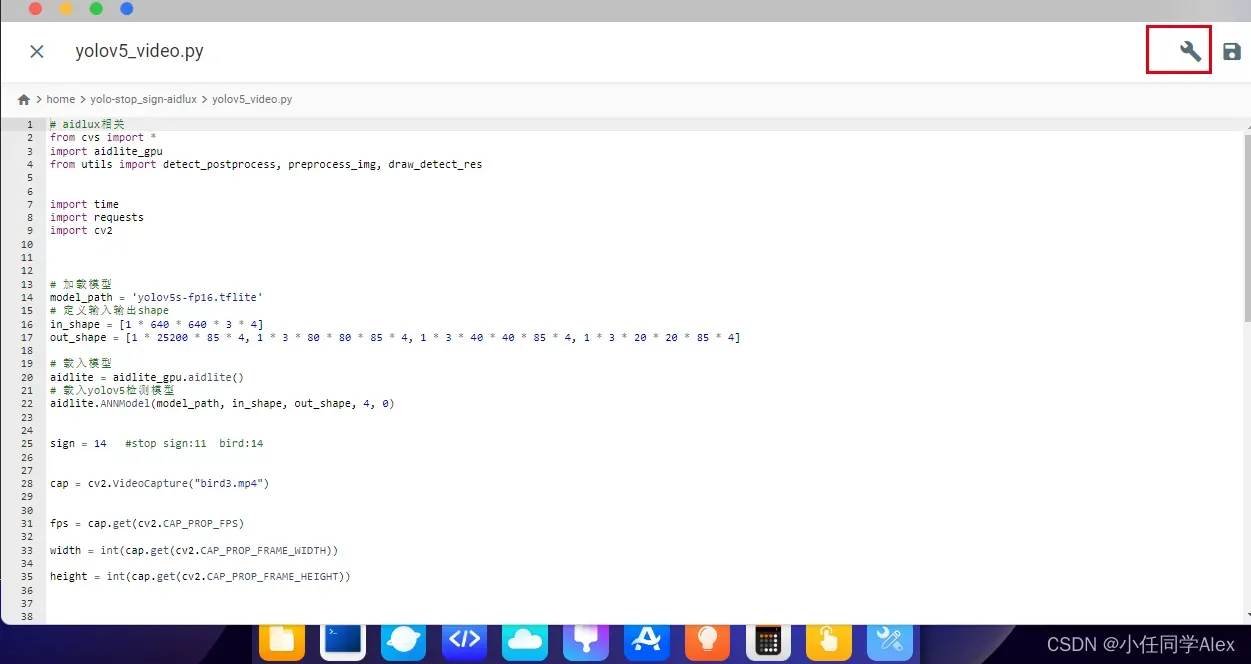
或者在终端里cd到yolov5_video.py所在文件夹,用 python yolov5_video.py运行
检测效果图:
演示视频:
基于人工智能与边缘计算Aidlux的鸟类检测驱赶系统
文章出处登录后可见!