前言
本文为分总结构,有特定需求的可以查阅前部分分结构的对应板块,最后的总结不懂的可以在分板块查阅解释。分板块分别有引用的库、阅读文本、分词并设置停用词、设置png掩膜、字体设置、生成词云图,感谢您点开这篇分享,祝顺利。
目录
前言
一、引用的库
二、阅读文本(让python阅读)
三、分词并设置停用词
四、设置png掩膜
五、字体设置
六、生成词云图
总结
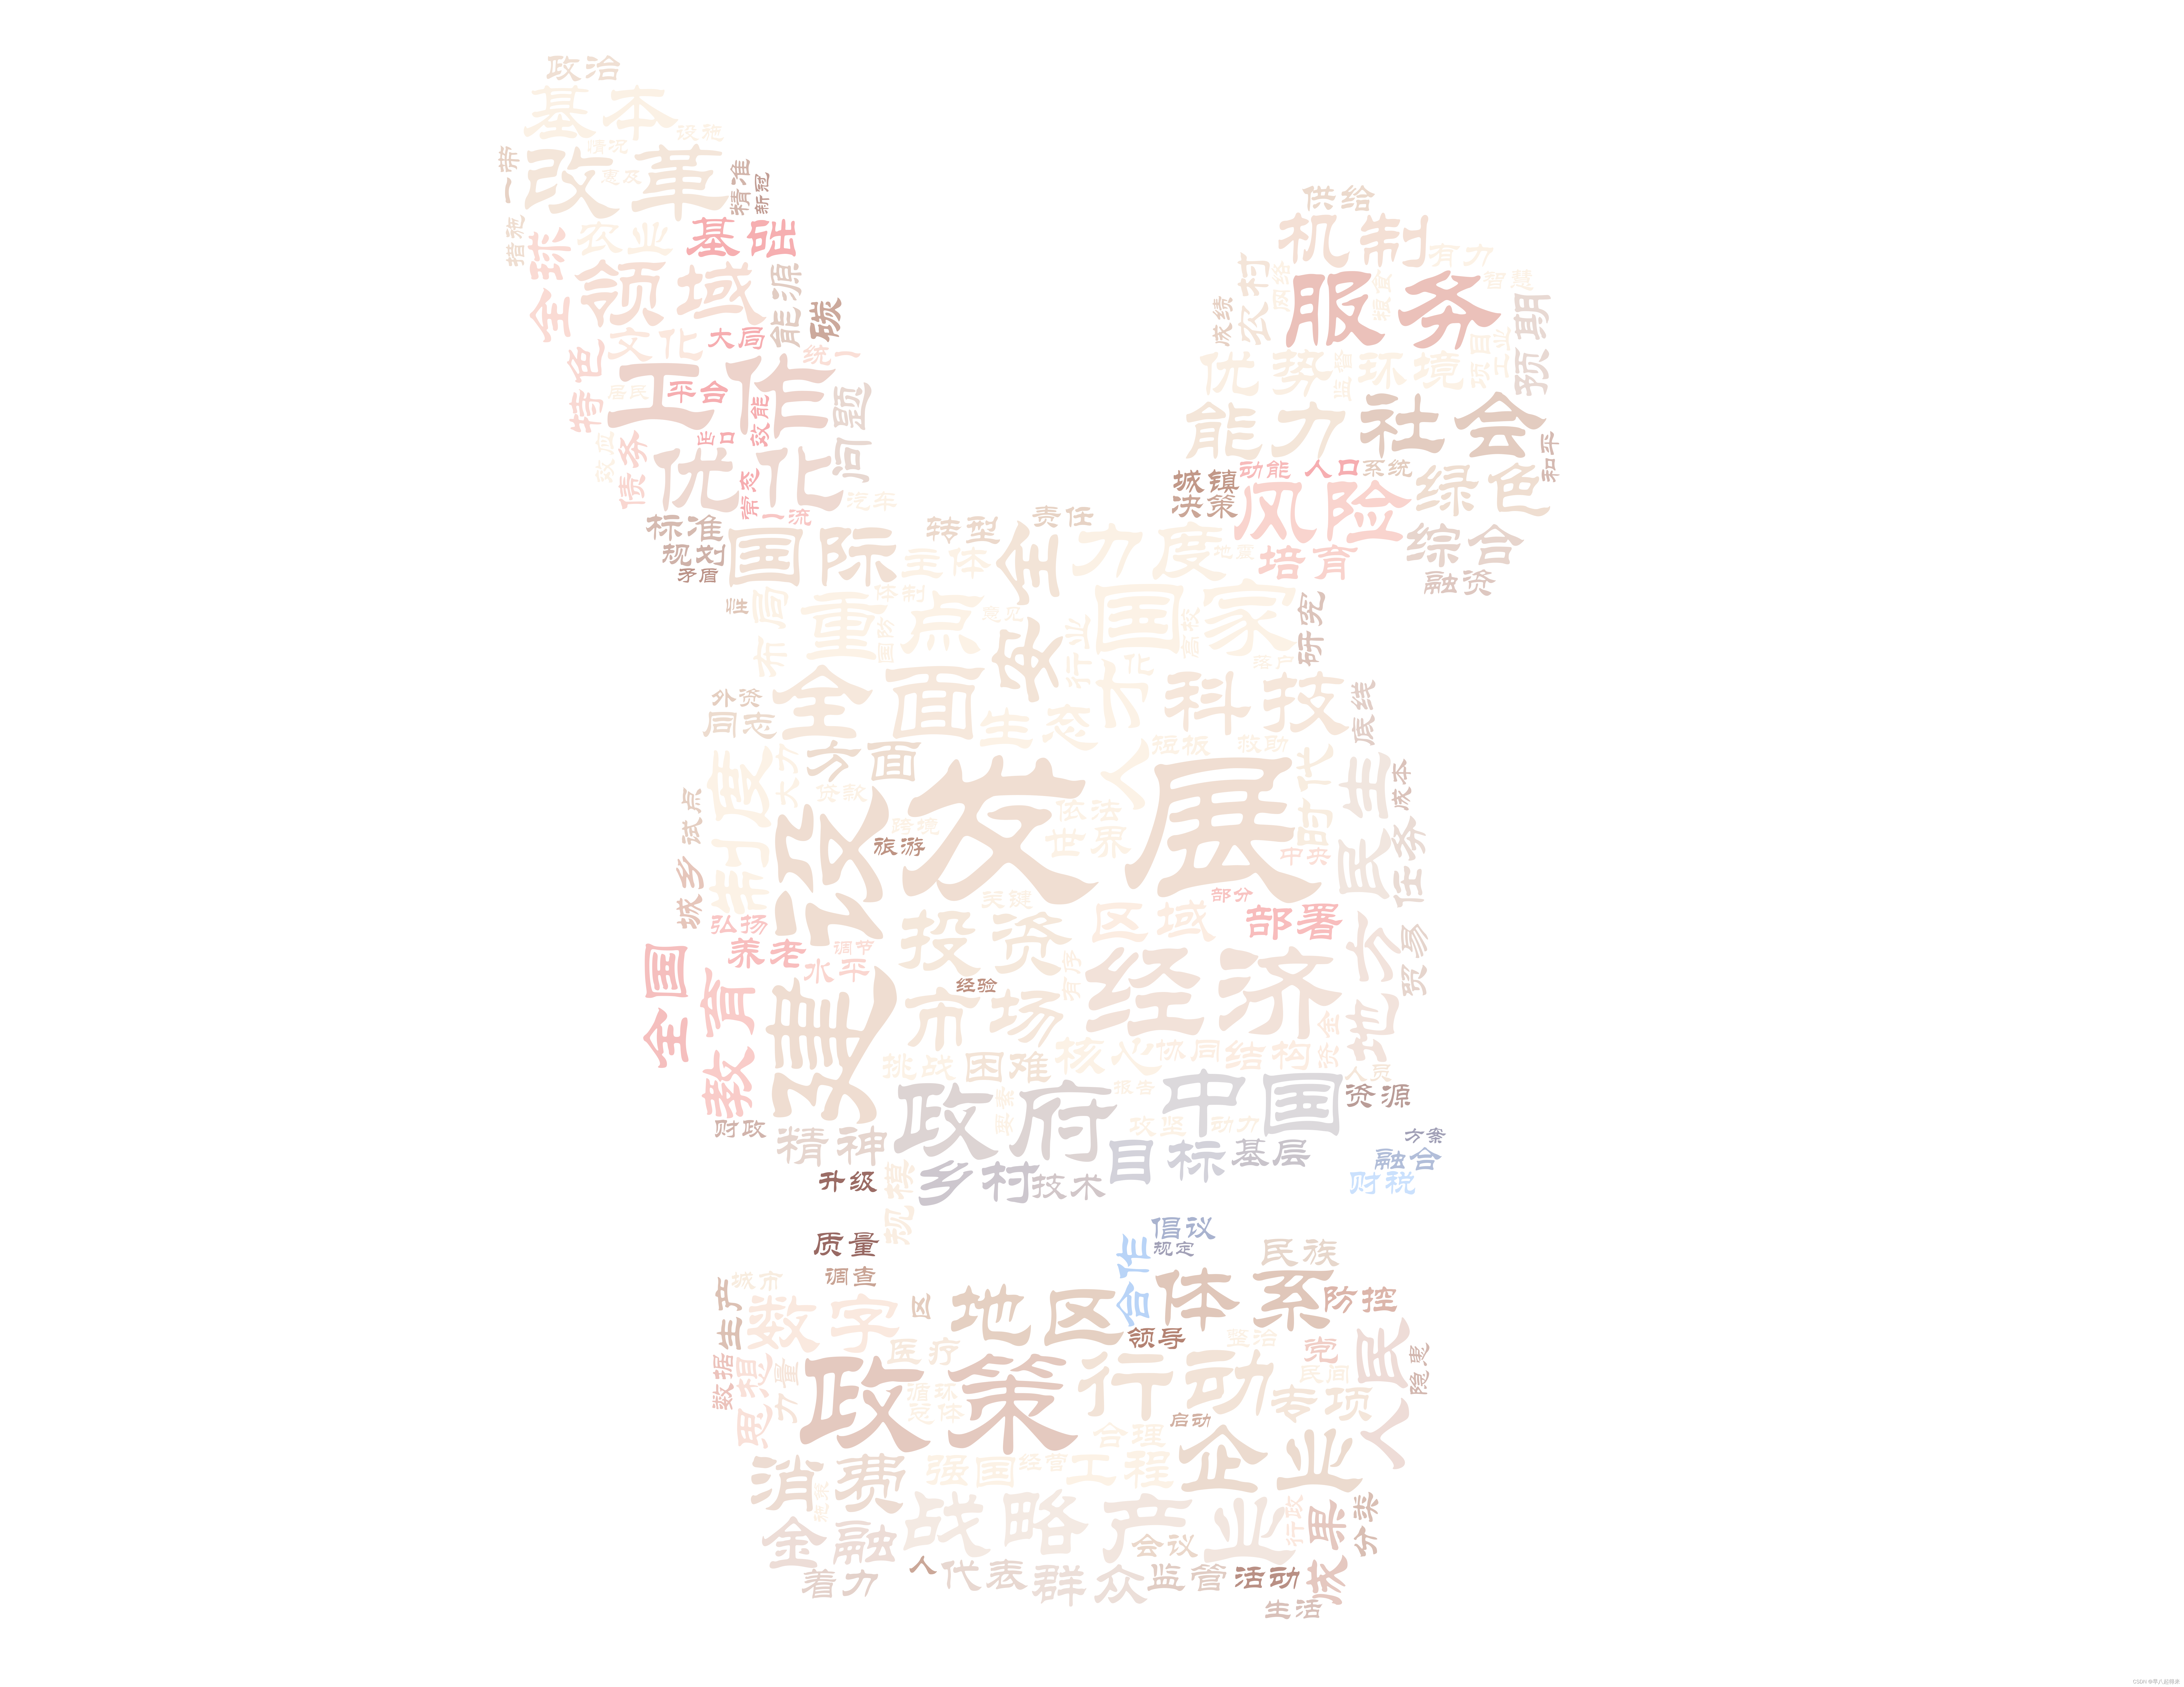
生成示例
一、引用的库
from wordcloud import WordCloud, STOPWORDS
import matplotlib.pyplot as plt
import numpy as np
import jieba.posseg as pseg
from collections import Counter
import PIL.Image as Image
from matplotlib import colors
确保已安装以上的库,不然运行会报错
#安装库可以用清华的镜像网站(可能会更新,可以上官网查询地址)
pip install -i https://pypi.tuna.tsinghua.edu.cn/simple some-package二、阅读文本(让python阅读)
# 阅读文本(这里yourfile.txt,根据文本所在具体位置进行设置)
text = open("yourfile.txt", encoding="utf-8").read()
words = pseg.cut(text)
这里”yourfile.txt”,根据文本所在具体位置进行设置
三、分词并设置停用词
# 按指定长度和词性提取词
report_words = []
for word, flag in words:
    if (len(word) >= 2) and ('n' in flag): #这里设置统计的字数
        report_words.append(word)

# 设置停用词
stopwords = set(STOPWORDS)
stopwords.update(["的", "感谢", "我代表", "以上", "报告", "表示诚挚感谢","战略"])

# 去除停用词
report_words = [word for word in report_words if word not in stopwords]

# 统计高频词汇
result = Counter(report_words).most_common(200) #词的个数

# 建立词汇字典
content = dict(result)
#输出词频统计结果
for i in range(50):
    word,flag=result[i]
    print("{0:<10}{1:>5}".format(word,flag))
len(word)设置的是词长,想要提取两个两个字的就设置2,三个三个字的就设置3(以此类推)
result = Counter(report_words).most_common(200) 这里的200是指统计200个词用于绘制,可以根据需求设置
四、设置png掩膜
#设置png掩膜(yourfile.png根据实际路径进行替换)
background = Image.open("yourfile.png")
mask = np.array(background)
yourfile.png根据实际路径进行替换
如果输出结构还是长方形(正方形),应该是png图片“有问题”,可以尝试以下的处理
1.用p图软件把图片改成纯黑色(可能别的也可以,我没试过)
2.用以下代码把白色背景改为透明
# 如果当前位深是32的话,可以不用写转RGBA模式的这一句,但是写上也没啥问题
# 从RGB(24位)模式转成RGBA(32位)模式
img = Image.open("yourfile.png").convert('RGBA')
W, L = img.size
white_pixel = (0, 0, 0, 0)  # 白色
for h in range(W):
    for i in range(L):
        if img.getpixel((h, i)) == white_pixel:
            img.putpixel((h, i), (255, 255, 255, 0))  # 设置透明
img.save("yourfile_new.png")  # 自己设置保存地址
这里有两个参数需要修改
yourfile.png根据实际路径进行替换,yourfile_new.png(这是修改后图片)根据实际路径进行替换
五、字体设置
# 设置字体样式路径
font_path = r"C:\Windows\Fonts\STLITI.TTF"

# 设置字体大小
max_font_size =200
min_font_size =10

# 建立颜色数组,可更改颜色
color_list = ['#FF274B']
# 调用颜色数组
colormap = colors.ListedColormap(color_list)
字体样式:一般都在这个路径,可以自己根据需求修改或者下载想要的字体
字体大小:最大和最小根据需求更改
字体颜色:可以不要这行代码(默认设置),也可以根据需求设置一种或多种颜色(我这里只设置了一种)
六、生成词云图
# 生成词云
wordcloud = WordCloud(scale=4,                         #输出清晰度
                      font_path=font_path,             #输出路径
                      colormap=colormap,               #字体颜色
                      width=1600,                      #输出图片宽度
                      height=900,                      #输出图片高度
                      background_color='white',        #图片背景颜色
                      stopwords=stopwords,             #停用词
                      mask=mask,                       #掩膜
                      max_font_size=max_font_size,     #最大字体大小
                      min_font_size=min_font_size)     #最小字体大小
wordcloud.generate_from_frequencies(content)

# 使用 matplotlib 显示词云
plt.imshow(wordcloud, interpolation='bilinear')
plt.axis('off')
plt.show()
# 保存词云图
wordcloud.to_file("wordcloud.png")
如果前面参数都是按着我的来设置的话,这里直接复制粘贴就好
总结
from wordcloud import WordCloud, STOPWORDS
import matplotlib.pyplot as plt
import numpy as np
import jieba.posseg as pseg
from collections import Counter
import PIL.Image as Image
from matplotlib import colors

# 阅读文本(这里yourfile.txt,根据文本所在具体位置进行设置)
text = open("yourfile.txt", encoding="utf-8").read()
words = pseg.cut(text)

# 按指定长度和词性提取词
report_words = []
for word, flag in words:
    if (len(word) >= 2) and ('n' in flag): #这里设置统计的字数
        report_words.append(word)

# 统计高频词汇
result = Counter(report_words).most_common(200) #词的个数

# 建立词汇字典
content = dict(result)
#输出词频统计结果
for i in range(50):
    word,flag=result[i]
    print("{0:<10}{1:>5}".format(word,flag))

# 设置停用词
stopwords = set(STOPWORDS)
stopwords.update(["的", "感谢", "我代表", "以上", "报告", "表示诚挚感谢","战略"])

#设置png掩膜(yourfile.png根据实际路径进行替换)
background = Image.open("yourfile.png").convert('RGB')
mask = np.array(background)
'''
# 如果当前位深是32的话,可以不用写转RGBA模式的这一句,但是写上也没啥问题
# 从RGB(24位)模式转成RGBA(32位)模式
img = Image.open("yourfile.png").convert('RGBA')
W, L = img.size
white_pixel = (0, 0, 0, 0)  # 白色
for h in range(W):
    for i in range(L):
        if img.getpixel((h, i)) == white_pixel:
            img.putpixel((h, i), (255, 255, 255, 0))  # 设置透明
img.save("yourfile_new.png")  # 自己设置保存地址
'''
# 设置字体样式路径
font_path = r"C:\Windows\Fonts\STLITI.TTF"

# 设置字体大小
max_font_size =200
min_font_size =10

# 建立颜色数组,可更改颜色
color_list = ['#FF274B']
# 调用颜色数组
colormap = colors.ListedColormap(color_list)

# 生成词云
wordcloud = WordCloud(scale=4,                         #输出清晰度
                      font_path=font_path,             #输出路径
                      colormap=colormap,               #字体颜色
                      width=1600,                      #输出图片宽度
                      height=900,                      #输出图片高度
                      background_color='white',        #图片背景颜色
                      stopwords=stopwords,             #停用词
                      mask=mask,                       #掩膜
                      max_font_size=max_font_size,     #最大字体大小
                      min_font_size=min_font_size)     #最小字体大小
wordcloud.generate_from_frequencies(content)

# 使用 matplotlib 显示词云
plt.imshow(wordcloud, interpolation='bilinear')
plt.axis('off')
plt.show()
# 保存词云图
wordcloud.to_file("wordcloud.png")
生成示例
版权声明:本文为博主作者:早八起得来原创文章,版权归属原作者,如果侵权,请联系我们删除!
原文链接:https://blog.csdn.net/yuan_hou_/article/details/137913248