通过python 调用OpenAI api_key提交问题解答
- ✨可以通过网页版的
jupyter notebook调用,也可以通过spyder窗口等IDE窗口. - 📌如果没有API_KEY,可以使用国内网页版在线调用:
https://chat.forchange.cn/
🌼通过python 调用OpenAI api_key接口,可以避免国内网页不能访问的问题。前提是需要自己已经注册了OpenAI帐号,并且在帐号内申请了api_key才行。
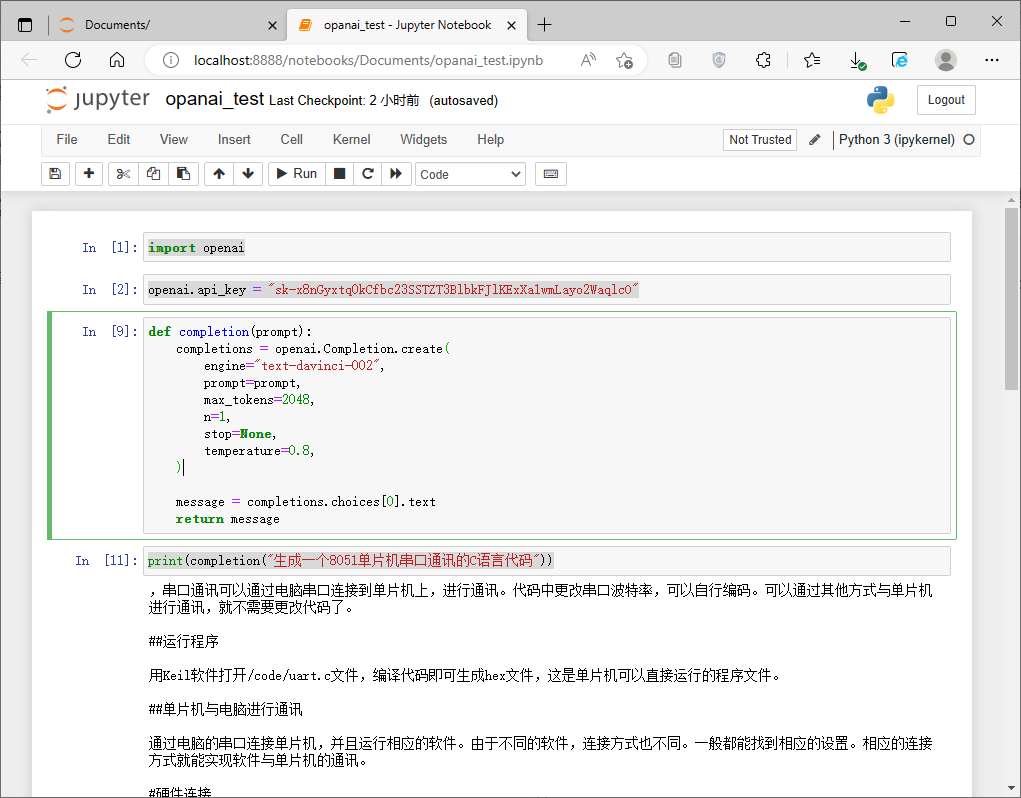
jupyter notebook调用
- engine=“
text-davinci-003”:调用的模型GPT-3 - temperature=
0.8: 设定温度,系数越高,结果唯一性越强。
import openai
openai.api_key = "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"
def completion(prompt):
    completions = openai.Completion.create(
        engine="text-davinci-003",
        prompt=prompt,
        max_tokens=1024,
        n=1,
        stop=None,
        temperature=0.8,
    )

    message = completions.choices[0].text
    return message
print(completion("基于Keil生成一个8051单片机串口通讯的代码"))
- 📍返回的结果:
需要实现的功能

1) 串口中断,当收到第一个字节的时候,接收,直到收到数据完成的标志,保存在数组中。

2) 开启接收中断,接收一个字节,当收到第一个字节的时候,接收,直到收到数据完成的标志,保存在数组中。


#### 代码实现


#include<reg52.h>

#define FOSC 11059200L
#define BAUD 9600
#define T1MS (65536-FOSC/12/BAUD)
#define N1 0x40
#define N2 0x00
#define BUFFER_SIZE 16


sbit LED = P1^1;
sbit rs = P3^6;
sbit rw = P3^7;
sbit en = P3^5;
sbit buzzer = P2^2;

unsigned char code table[]={
  0x30, 0x31, 0x32, 0x33, 0x34, 0x35, 0x36, 0x37, 0x38, 0x39, 0x41, 0x42, 0x43, 0x44, 0x45, 0x46,
  0x30, 0x31, 0x32, 0x33, 0x34, 0x35, 0x36, 0x37, 0x38, 0x39, 0x41, 0x42, 0x43, 0x44, 0x45, 0x46,
  0x30, 0x31, 0x32, 0x33, 0x34, 0x35, 0x36, 0x37, 0x38, 0x39, 0x41, 0x42, 0x43, 0x44, 0x45, 0x46,
  0x30, 0x31, 0x32, 0x33, 0x34, 0x35, 0x36, 0x37, 0x38, 0x39, 0x41, 0x42, 0x43, 0x44, 0x45, 0x46
  };

void delay(int i)
{
    while(i--);
}

void write_com(unsigned char com)
{
    P0 = com;
    rs = 0;
    rw = 0;
    en = 1;
    delay(5);
    en = 0;
}

void write_dat(unsigned char dat)
{
    P0 = dat;
    rs = 1;
    rw = 0;
    en = 1;
    delay(5);
    en = 0;
}

void init()
{
    write_com(0x38);
    write_com(0x01);
    write_com(0x06);
    write_com(0x0c);
    write_com(0x0f);
}

void write_str(unsigned char y, unsigned char x, unsigned char *s)
{
    unsigned char addr;
    if(y == 1)
    addr = 0x80 + x - 1;
    else if(y == 2)
    addr = 0xc0 + x - 1;
    write_com(addr);
    while(*s)
    {
        write_dat(*s);
        s++;
    }
}

void write_cmd(unsigned char y, unsigned char x)
{
    unsigned char addr;
    if(y == 1)
    addr = 0x80 + x - 1;
    else if(y == 2)
    addr = 0xc0 + x - 1;
    write_com(addr);
}


void lcd_pulse()
{
    en=1;
    delay(5);
    en=0;
}


void write_com1(unsigned char command)
{
    rs=0;
    rw=0;
    P0=command;
    lcd_pulse();
}

void write_dat1(unsigned char dat)
{
    rs=1;
    rw=0;
    P0=dat;
    lcd_pulse();
}


void lcd_init()
{
    write_com1(0x38);
    write_com1(0x06);
    write_com1(0x0c);
    write_com1(0x01);
    write_com1(0x80);
}

void write_char(unsigned char c)
{
    write_dat1(c);
}

void write_string(unsigned char *s)
{
    while(*s)
    {
        write_char(*s);
        s++;
    }
}


void timer0_init(void)
{
    TMOD = 0x01;
    TH0=T1MS;TL0=T1MS;
    ET0=1;
    EA=1;
    TR0=1;
}

unsigned char hours;
unsigned char minutes;
unsigned char seconds;
unsigned char t;
unsigned char time_update;
unsigned char count;
unsigned char data[BUFFER_SIZE];
unsigned char *p;
void timer0_interrupt() interrupt 1//模拟中断,每1s中断一次
{
    TH0=T1MS;TL0=T1MS;
    write_cmd(1,1);
    write_char(table[hours/10]);
    write_char(table[hours%10]);
    write_char(':');
    write_char(table[minutes/10]);
    write_char(table[minutes%10]);
    write_char(':');
    write_char(table[seconds/10]);
    write_char(table[seconds%10]);
    seconds++;
    time_update=1;
}

void timer1_init()
{
    TH1=N1;TL1=N2;
    ET1=1;
    EA=1;
    TR1=1;
}


void timer1_interrupt() interrupt 3
{
    TH1=N1;TL1=N2;
    if(seconds==60)
    {
        seconds=0;
        minutes++;
    }
    if(minutes==60)
    {
        minutes=0;
        hours++;
    }
    if(hours==24)
        hours=0;
}

void init_serial()
{
    TMOD=0x20;
    SCON=0x50;
    TL1=N1;TH1=N2;
    ES=1;
    EA=1;
    TR1=1;
    count=0;
    p=data;
}

void serial_interrupt(void)   interrupt 4
{
    if(TI==1)
    {
        TI=0;
        count=0;
        p=data;
    }
    else
    {
        SBUF=0x41+count;
        count++;
        if(count==BUFFER_SIZE)
        {
            count=0;
            p=data;
        }
        else
            p++;
        RI=0;
    }
}


void main()
{
    write_cmd(1,1);
    write_str(2,1,"  TEMPERATURE  ");
    timer1_init();
    timer0_init();
    lcd_init();
    init_serial();
    while(1)
    {
        if(count==BUFFER_SIZE)
        {
            write_cmd(1,1);
            write_str(2,1,"  TEMPERATURE  ");
            write_str(1,9,p);
            write_str(2,9,p+8);
        }
    }
}
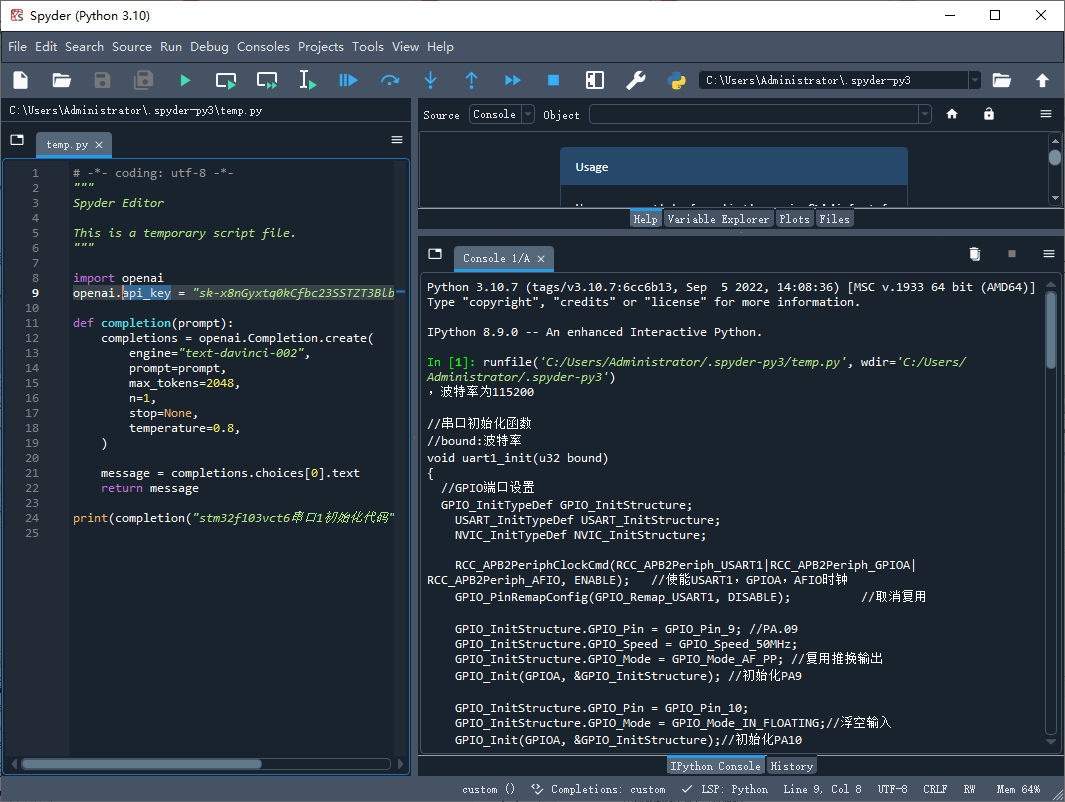
🌻spyder窗口调用
# -*- coding: utf-8 -*-
"""
Spyder Editor

This is a temporary script file.
"""

import openai
openai.api_key = "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"

def completion(prompt):
    completions = openai.Completion.create(
        engine="text-davinci-003",
        prompt=prompt,
        max_tokens=1024,
        n=1,
        stop=None,
        temperature=0.8,
    )

    message = completions.choices[0].text
    return message

print(completion("stm32f103vct6串口1初始化代码"))
- 📜openai调用,提问
stm32f103vct6串口1初始化代码返回数据:
波特率为115200

//串口初始化函数
//bound:波特率
void uart1_init(u32 bound)
{
  //GPIO端口设置
  GPIO_InitTypeDef GPIO_InitStructure;
	USART_InitTypeDef USART_InitStructure;
	NVIC_InitTypeDef NVIC_InitStructure;

	RCC_APB2PeriphClockCmd(RCC_APB2Periph_USART1|RCC_APB2Periph_GPIOA|RCC_APB2Periph_AFIO, ENABLE);	//使能USART1,GPIOA,AFIO时钟
  	GPIO_PinRemapConfig(GPIO_Remap_USART1, DISABLE);          //取消复用

	GPIO_InitStructure.GPIO_Pin = GPIO_Pin_9; //PA.09
	GPIO_InitStructure.GPIO_Speed = GPIO_Speed_50MHz;
	GPIO_InitStructure.GPIO_Mode = GPIO_Mode_AF_PP;	//复用推挽输出
	GPIO_Init(GPIOA, &GPIO_InitStructure); //初始化PA9

	GPIO_InitStructure.GPIO_Pin = GPIO_Pin_10;
	GPIO_InitStructure.GPIO_Mode = GPIO_Mode_IN_FLOATING;//浮空输入
	GPIO_Init(GPIOA, &GPIO_InitStructure);//初始化PA10

  //Usart1 NVIC 配置
  NVIC_InitStructure.NVIC_IRQChannel = USART1_IRQn;//串口1中断通道
	NVIC_InitStructure.NVIC_IRQChannelPreemptionPriority=3 ;//抢占优先级3
	NVIC_InitStructure.NVIC_IRQChannelSubPriority = 3;		//子优先级3
	NVIC_InitStructure.NVIC_IRQChannelCmd = ENABLE;			//IRQ通道使能
	NVIC_Init(&NVIC_InitStructure);	//根据指定的参数初始化VIC寄存器

   //USART 初始化设置

	USART_InitStructure.USART_BaudRate = bound;//串口设置波特率
	USART_InitStructure.USART_WordLength = USART_WordLength_8b;//字长为8位数据格式
	USART_InitStructure.USART_StopBits = USART_StopBits_1;//一个停止位
	USART_InitStructure.USART_Parity = USART_Parity_No;//无奇偶校验位
	USART_InitStructure.USART_HardwareFlowControl = USART_HardwareFlowControl_None;//无硬件数据流控制
	USART_InitStructure.USART_Mode = USART_Mode_Tx|USART_Mode_Rx;	//收发模式
	USART_Init(USART1, &USART_InitStructure); //初始化串口1

	USART_ITConfig(USART1, USART_IT_RXNE, ENABLE);//开启串口接受中断
	USART_Cmd(USART1, ENABLE);                    //使能串口1

}
//串口1中断服务程序
//注意,读取USARTx->SR能避免莫名其妙的错误
void USART1_IRQHandler(void)                	//串口1中断服务程序
{
	u8 Res;
#if SYSTEM_SUPPORT_OS 	//如果使用OS,由于串口接收中断优先级不能设置过高,因此当遇到串口错误时直接调用OS的相应服务
	OSIntEnter();
#endif
	if(USART_GetITStatus(USART1, USART_IT_RXNE) != RESET)  //接收中断(接收到的数据必须是0x0d 0x0a结尾)
	{
#if EN_USART1_RX			//如果使能接收
		Res =USART_ReceiveData(USART1);//(USART1->DR);	//读取接收到的数据
		if((USART_RX_STA&0x8000)==0)//接收未完成
		{
			if(USART_RX_STA&0x4000)//接收到了0x0d
			{
				if(Res!=0x0a)USART_RX_STA=0;//接收错误,重新开始
				else USART_RX_STA|=0x8000;	//接收完成了
			}
			else //还没收到0X0D
			{
				if(Res==0x0d)USART_RX_STA|=0x4000;
				else
				{
					USART_RX_BUF[USART_RX_STA&0X3FFF]=Res ;
					USART_RX_STA++;
					if(USART_RX_STA>(USART_REC_LEN-1))USART_RX_STA=0;//接收数据错误,重新开始接收
				}
			}
		}
    	if(USART_RX_STA&0x8000)//接收完成
    	{
			USART_RX_BUF[USART_RX_STA&0X3FFF]=0;//添加结束符
			memcpy(USART_TX_BUF,USART_RX_BUF,USART_REC_LEN);
			USART_RX_STA=0;//接收状态标记清零
    	}
#endif
	}
	else if(USART_GetITStatus(USART1, USART_IT_TXE) != RESET)  //发送中断
	{
#if EN_USART1_TX			//如果使能了接收
		USART1->DR = Tx1Buffer[Tx1Counter++]; //写DR寄存器数据发送
		if(Tx1Counter == Tx1Count){
			USART1->CR1 &= ~USART_CR1_TXEIE;		//关闭TX发送中断
		}
#endif
	}


print(completion("stm32f103vct6串口1初始化代码"))
,总线资源申请好后,调用这个函数初始化
	return 0;
}


//不使用串口,释放资源
static void __exit uart_exit(void)
{
	//释放设备号
	unregister_chrdev(dev_no,DEV_NAME);

	//释放设备结构体
	cdev_del(&uart_cdev);

	//删除设备类
	device_destroy(uart_class,MKDEV(dev_no,0));

	//释放设备类
	class_destroy(uart_class);

	//释放资源

	//1.释放硬件资源:释放ioremap的空间
	iounmap(va);

	//2.释放设备号
	release_region(0x40011000,0x400);
}

module_init(uart_init);
module_exit(uart_exit);
MODULE_LICENSE("GPL");
🍁以上不管那种方式调用,都需要提前安装好
openai模块
openai模块安装
- openai模块安装命令:
pip install openai

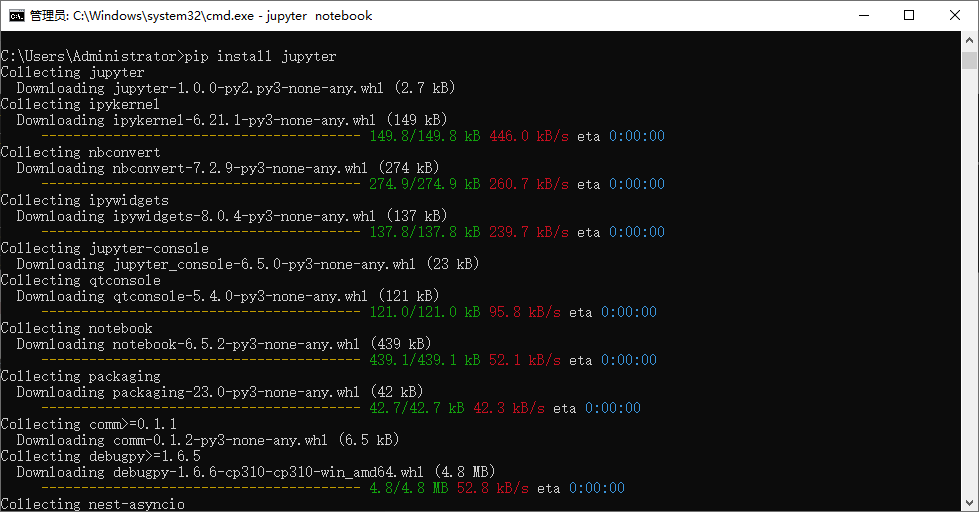
jupyter notebook安装
- 安装指令:
pip install jupyter
- 🚩安装完成后,启动命令:
jupyter notebook
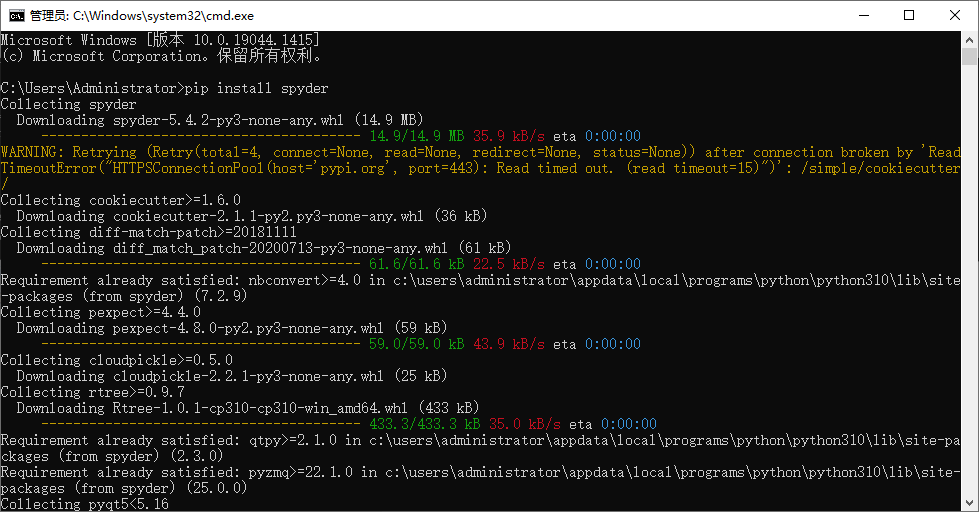
spyder安装
- spyder安装命令:
pip install spyder
- 🚩安装完成后,启动命令:
spyder
文章出处登录后可见!
已经登录?立即刷新