Add Data 的路径:/kaggle/input
git clone 的路径:/kaggle/working
一、Kaggle 账号注册
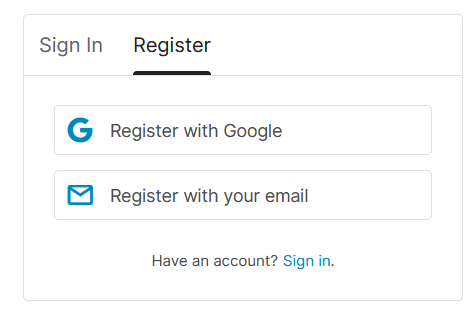
1.进入官网 Kaggle 点击 Register 进行账号注册

2.随便点一个方式注册,本人用的邮箱
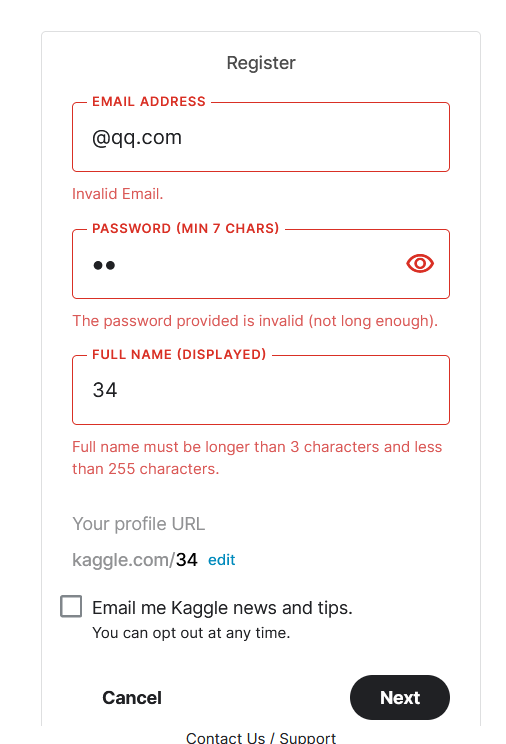
3.点进去填写对应信息进行注册,点击 next 即可
二、Kaggle 创建项目
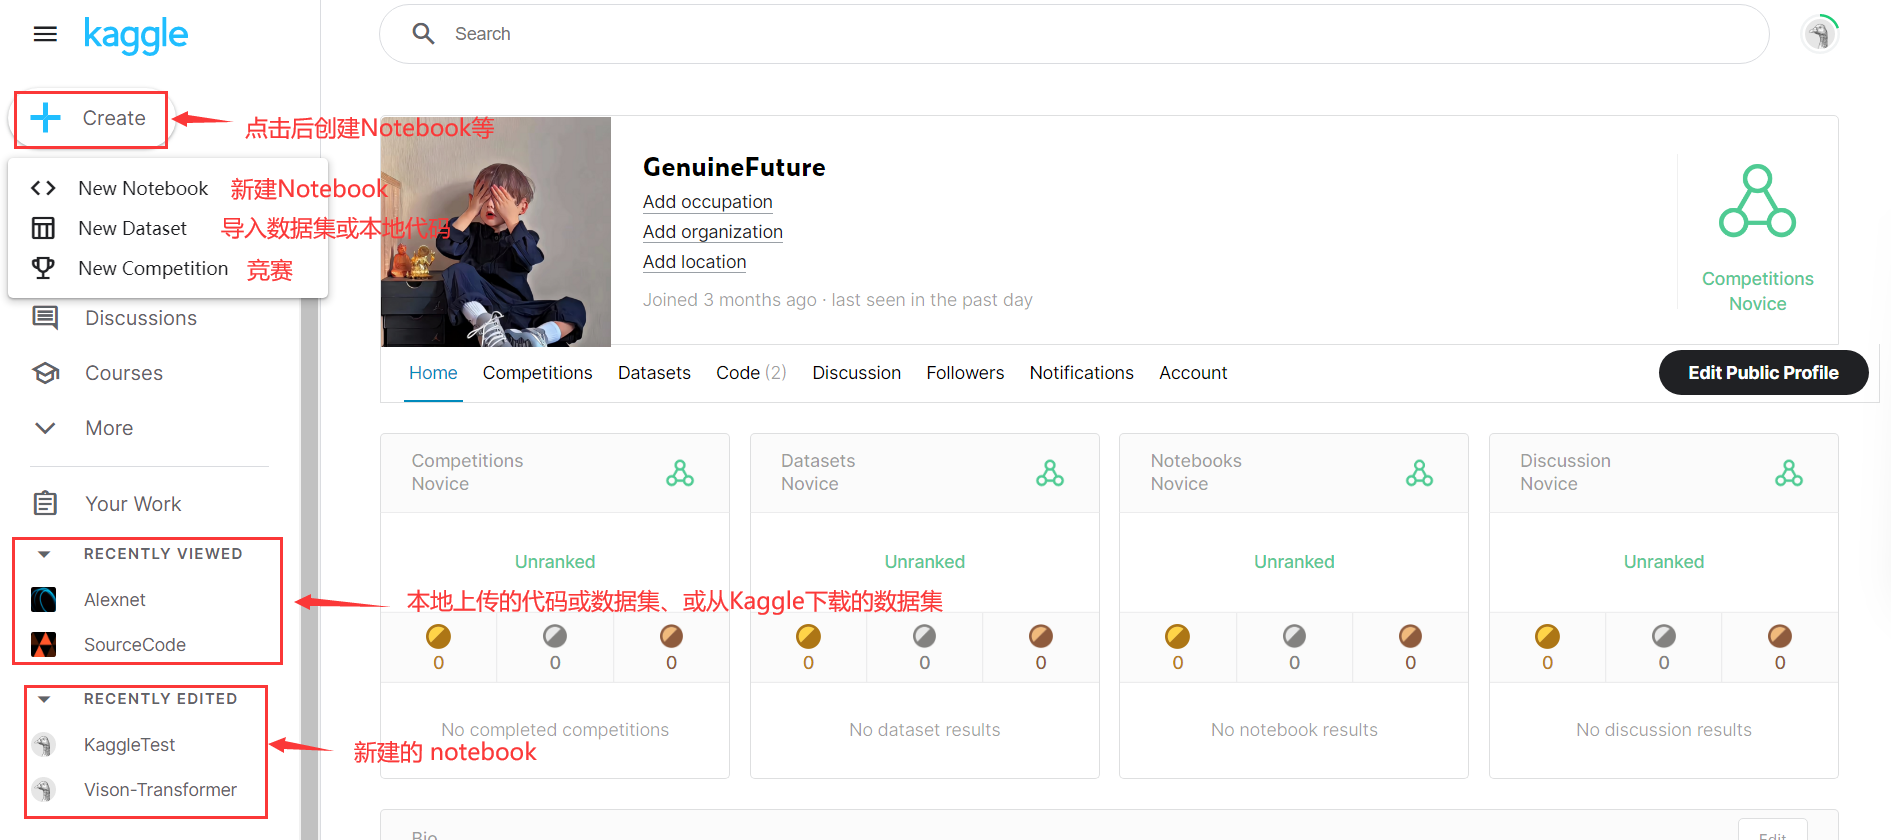
1.如果你看到是这个界面
2.如果你看到的是这个界面
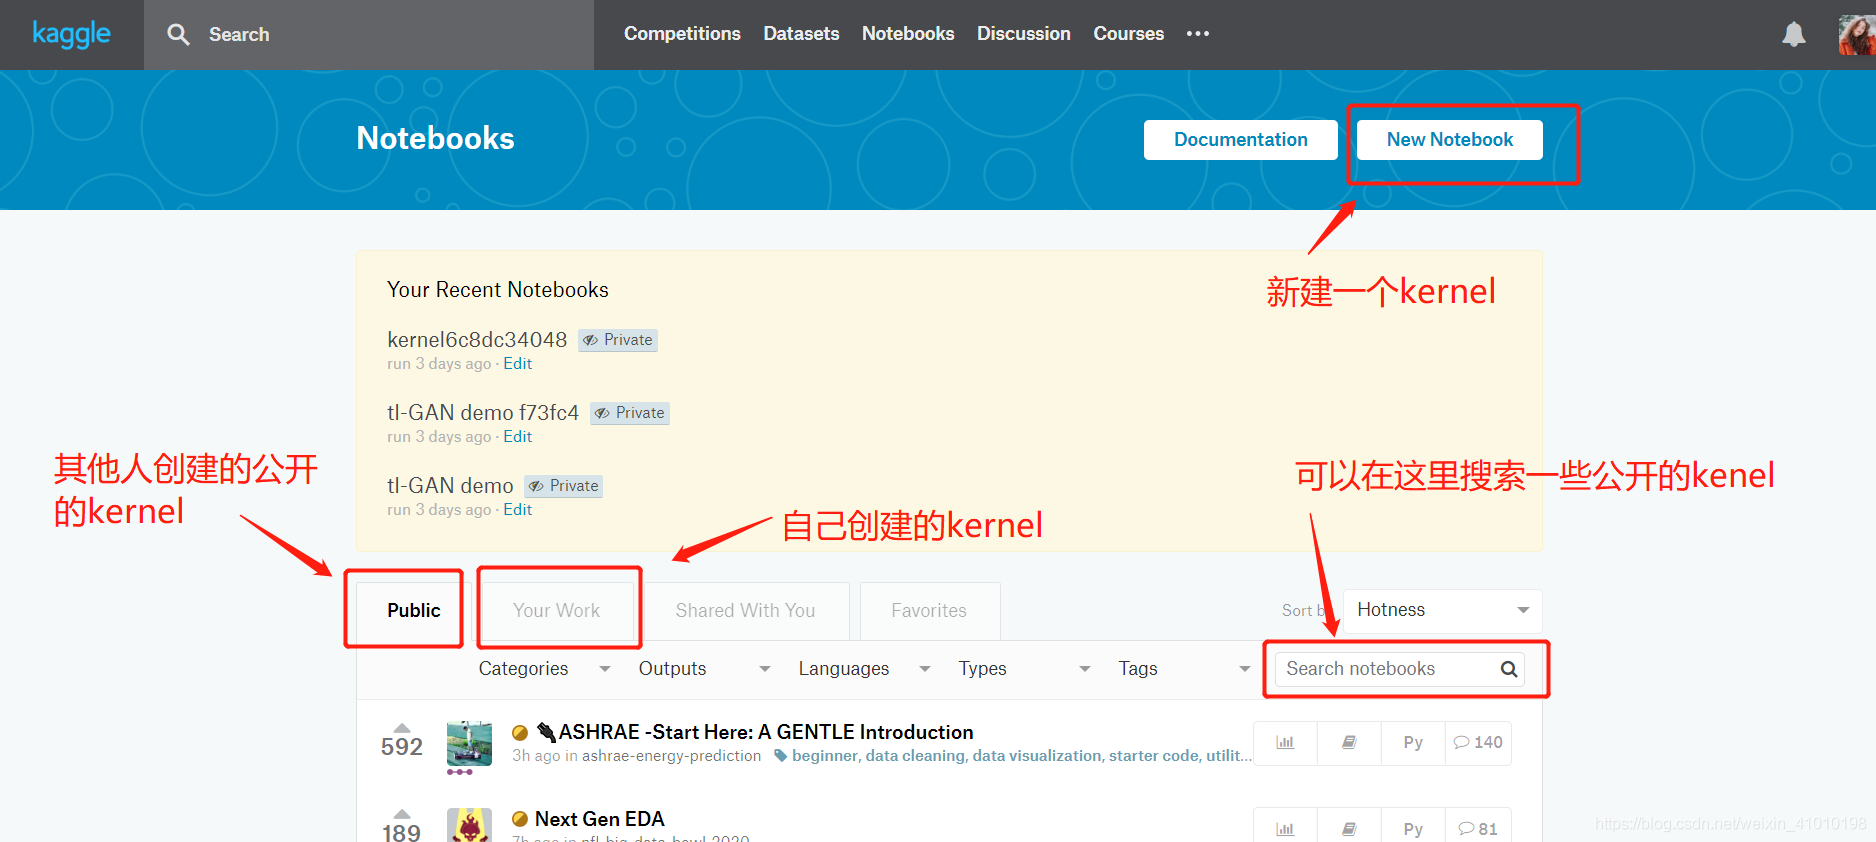
Kaggle 新建 kernel 有两种方式,这个主要是编辑的环境:
Notebook:类似Jupyter notebookScript:类似Pycharm这种编辑环境
编程语言目前只支持 python 和 R 两种
三、新建 Notebook
1.点击 create => New Notebook 新建 Notebook 如下:
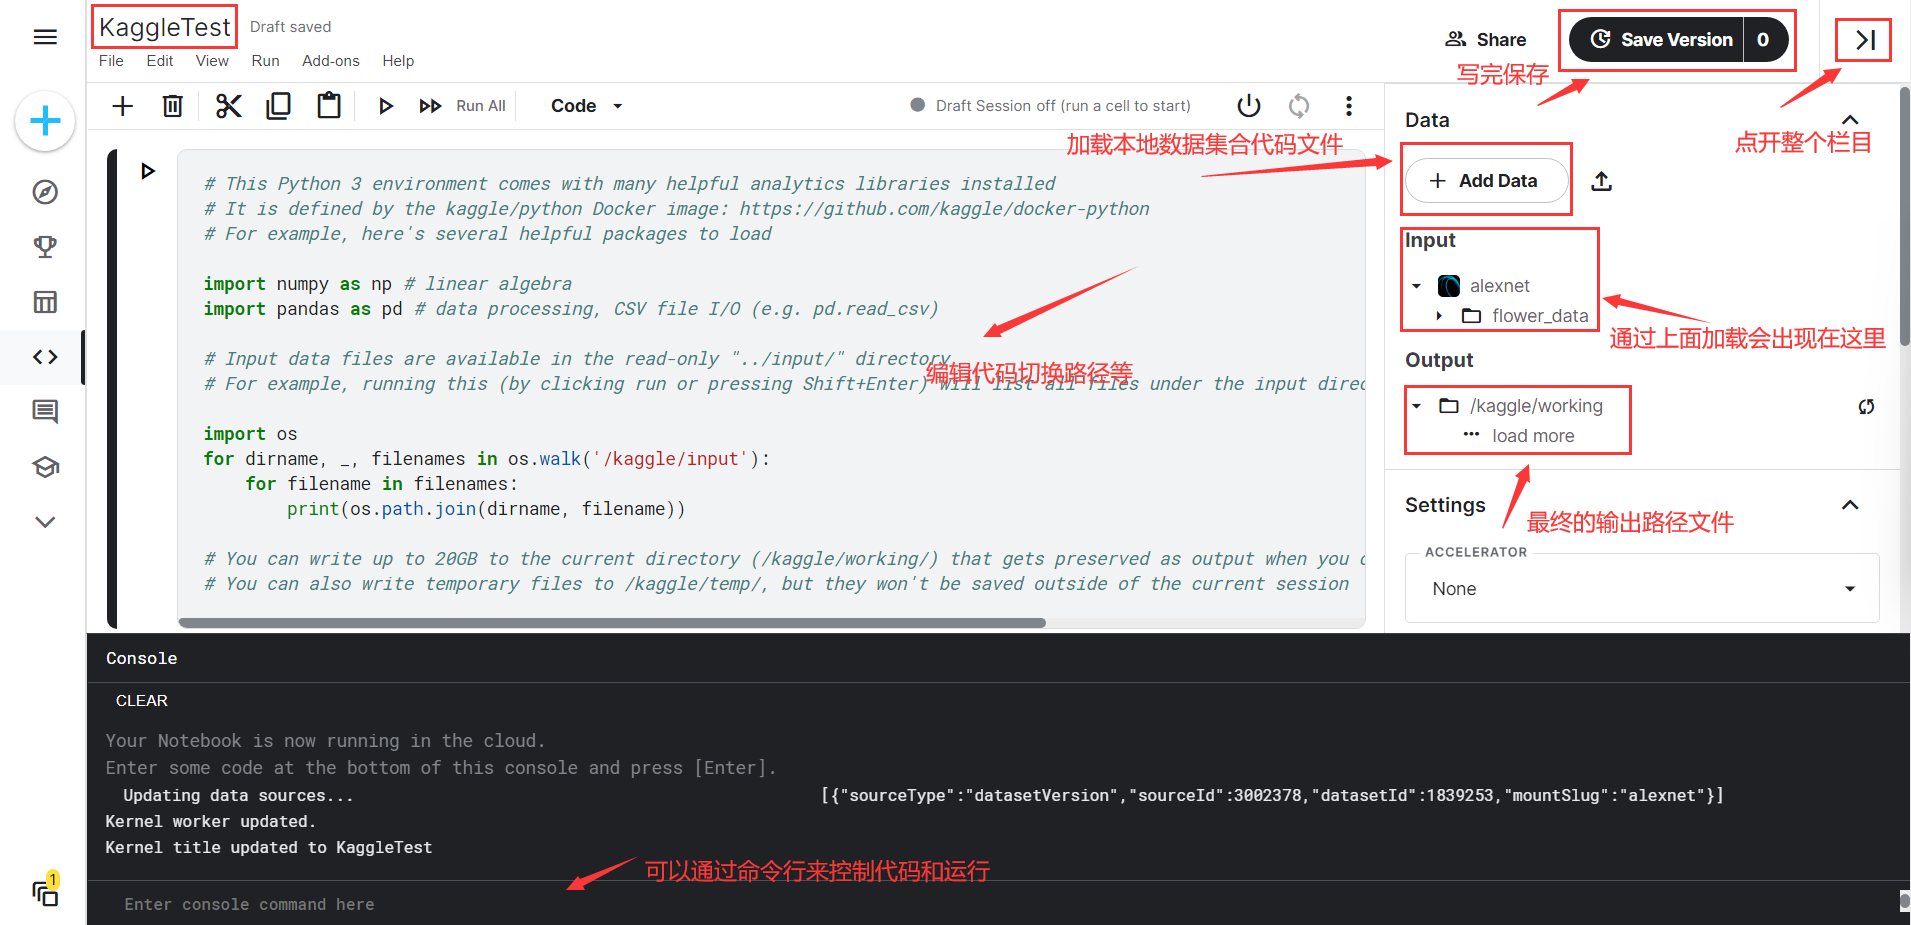
注:命令行可以执行 Linux 命令
四、切换工作路径
当新建 Notebook 后路径均为:/kaggle/working
文件目录结果如下:
input:一般用于存放训练数据的文件夹config:存放配置文件libworking:工作路径,主要是我们创建的代码文件的工作目录- .ipynb_checkpoints
- notebook_source.ipynb
以下列出常用的路径以及文件查看方式:
import os
print(os.listdir("../")) # ['lib', 'input', 'working']
print(os.getcwd())  # 当前文件所在的路径 /kaggle/working
print(os.listdir(os.getcwd()))  # 在 /kaggle/working 文件夹下有两个隐藏文件['.ipynb_checkpoints', '__notebook_source__.ipynb']
print(os.listdir("../../")) #
print(os.listdir("../input"))   # 查看自己导入的文件
print(os.listdir("../../kaggle"))
一、将本地项目上传到 Kaggle 并运行
举例说明:
方式 1:(我没有成功,谢邀)
1.本地有一个 KaggleTest 项目,先将项目进行压缩

2.包含了一个 main.py 和 test.py
- 其中 test.py 文件代码如下:
def first_test() :
    print("Hello, world")
    print("Kaggle, very good!")
3.点击自定义上传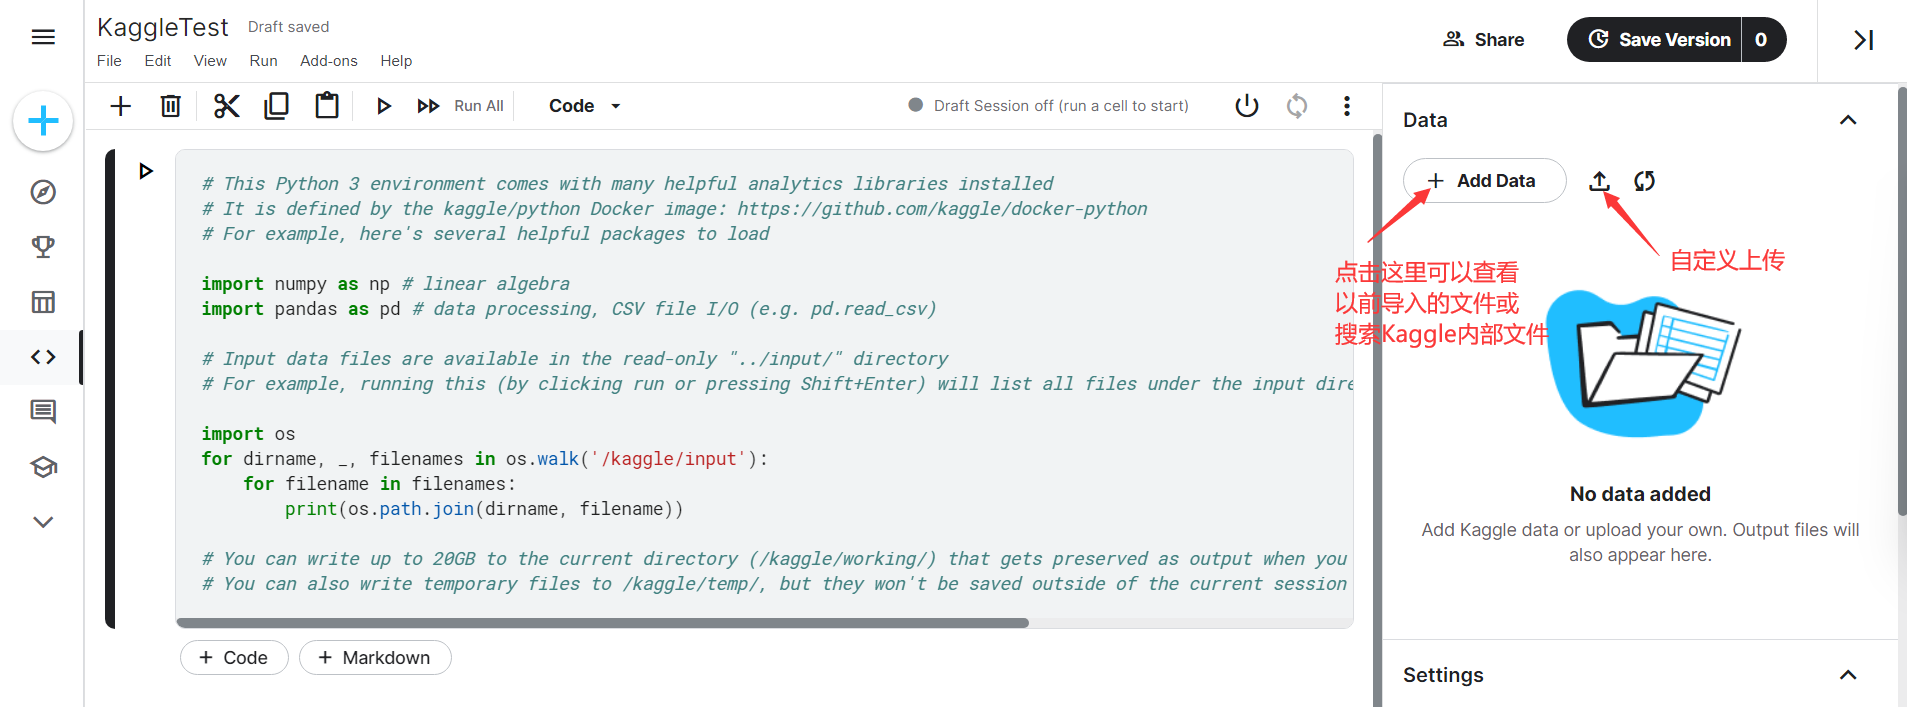
4.点击后显示如下,上传刚刚的压缩包,它会自动解压
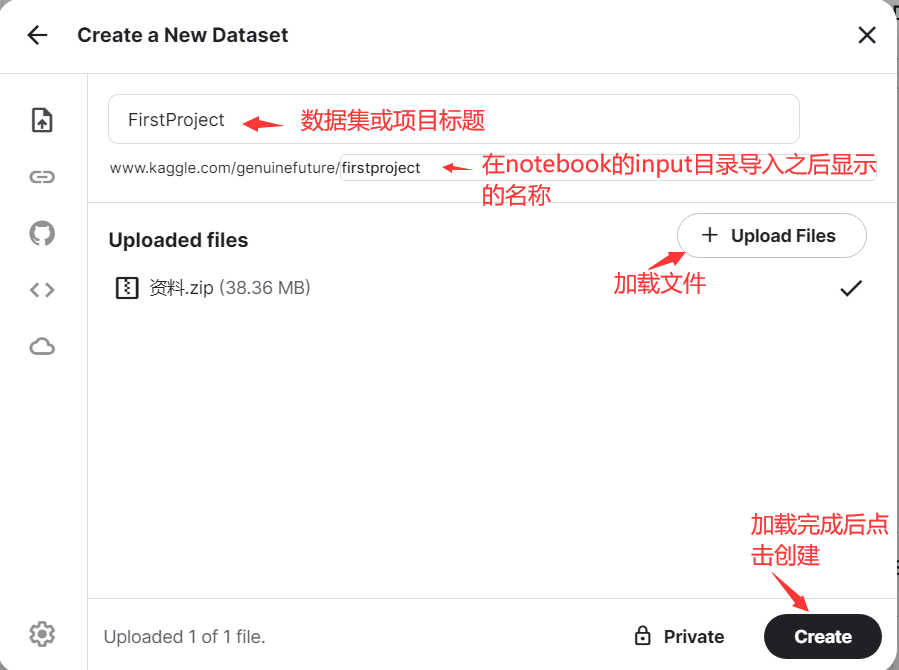
5.如图就能看到加载好的项目啦,当然没有的话可以点击 Add Data,点击或搜索 Your Datasets 会显示你所有导入的项目
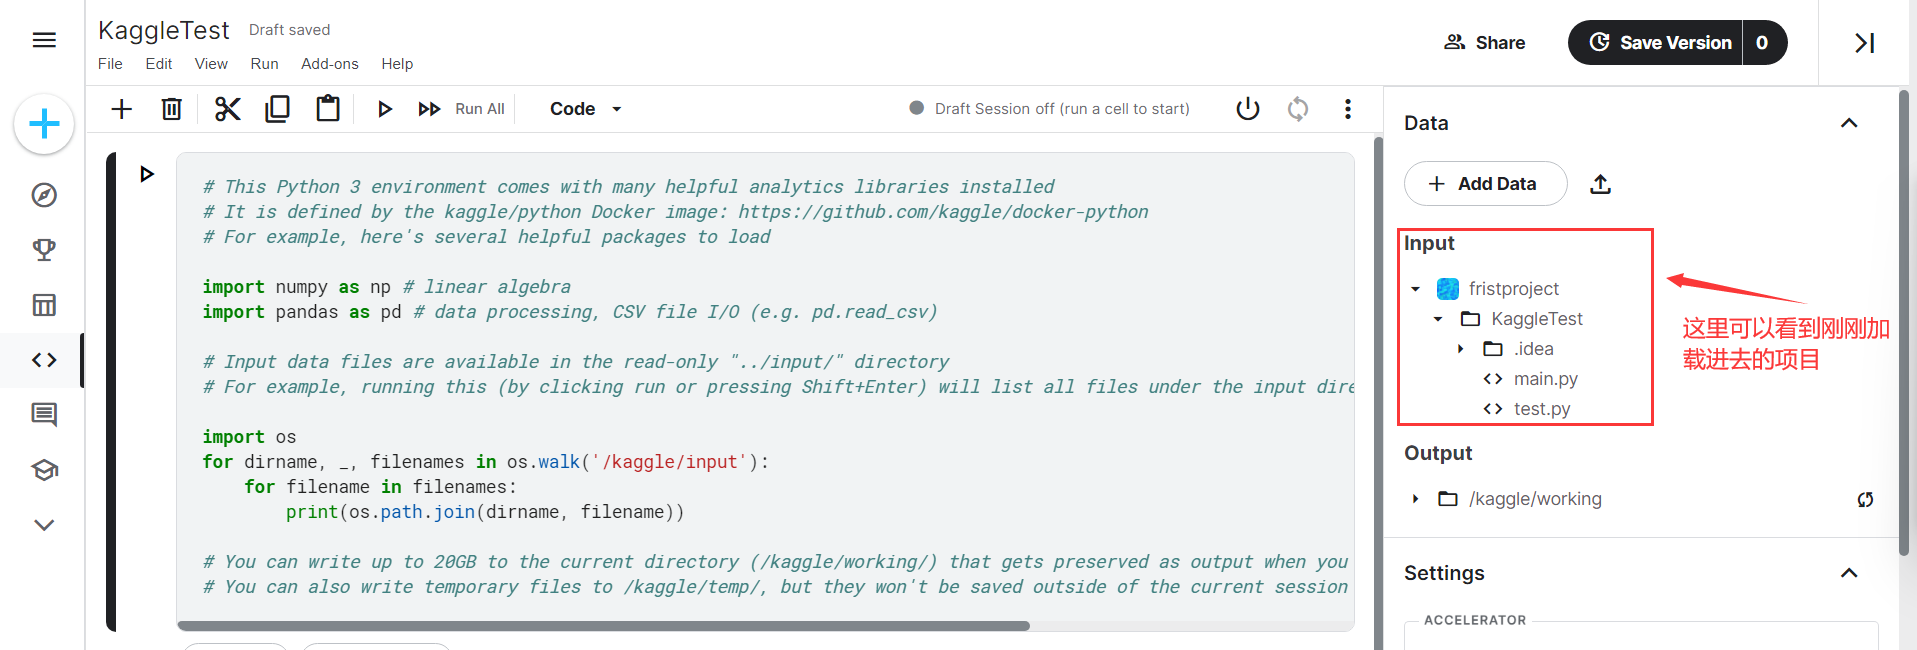
- 1.上传的数据文件都放在了 input 文件夹下
- 2.所有的上传的项目文件只读,无法更改
上传项目后如何正确运行项目
- 最开始新建会出现 Kaggle 自带的代码,运行后可以读取所有文件的路径
# This Python 3 environment comes with many helpful analytics libraries installed
# It is defined by the kaggle/python Docker image: https://github.com/kaggle/docker-python
# For example, here's several helpful packages to load

import numpy as np # linear algebra
import pandas as pd # data processing, CSV file I/O (e.g. pd.read_csv)

# Input data files are available in the read-only "../input/" directory
# For example, running this (by clicking run or pressing Shift+Enter) will list all files under the input directory

import os
for dirname, _, filenames in os.walk('/kaggle/input'):
    for filename in filenames:
        print(os.path.join(dirname, filename))

# You can write up to 20GB to the current directory (/kaggle/working/) that gets preserved as output when you create a version using "Save & Run All"
# You can also write temporary files to /kaggle/temp/, but they won't be saved outside of the current session
1、当前的工作目录是在 kaggle/working 目录下,可以用如下代码查看:

import os
print(os.getcwd())
print(os.listdir(os.getcwd()))
# 结果
"""
/kaggle/working
['__notebook_source__.ipynb', '.virtual_documents']
"""
2、改变当前的工作目录
- 此时我们把当前的工作目录改到了 input 目录下也就是我们上传的项目对应的目录,这样就可以直接使用我们在项目中的 .py 文件啦
""" change working directory """
import os

if os.path.basename(os.getcwd()) == 'working':
    os.chdir('../input/vitcode') //

print('current working directory is {}'.format(os.getcwd()))

print(os.getcwd())
print(os.listdir(os.getcwd()))
方式 2 (一个一个传最为靠谱,别瞎折腾了)
- 将该文件复制到一个 notebook 的 cell 中,然后在该 cell 的顶部添加一行代码:
%%writefile filename.py
-
然后运行这个 cell,这个 cell 中的内容就会被写入到 output 的
filename.py文件。后面就像往常一样了,直接import使用即可。

-
如果想要更改其中内容的话,打开一个空的 cell,输入
%load filename.py然后运行即可载入该文件的内容,改完后用上面的方法重新写入即可。

%load mixmodel.py
- 此方法需要将文件一个一个下载过去比较繁琐
记得最后进行项目保存
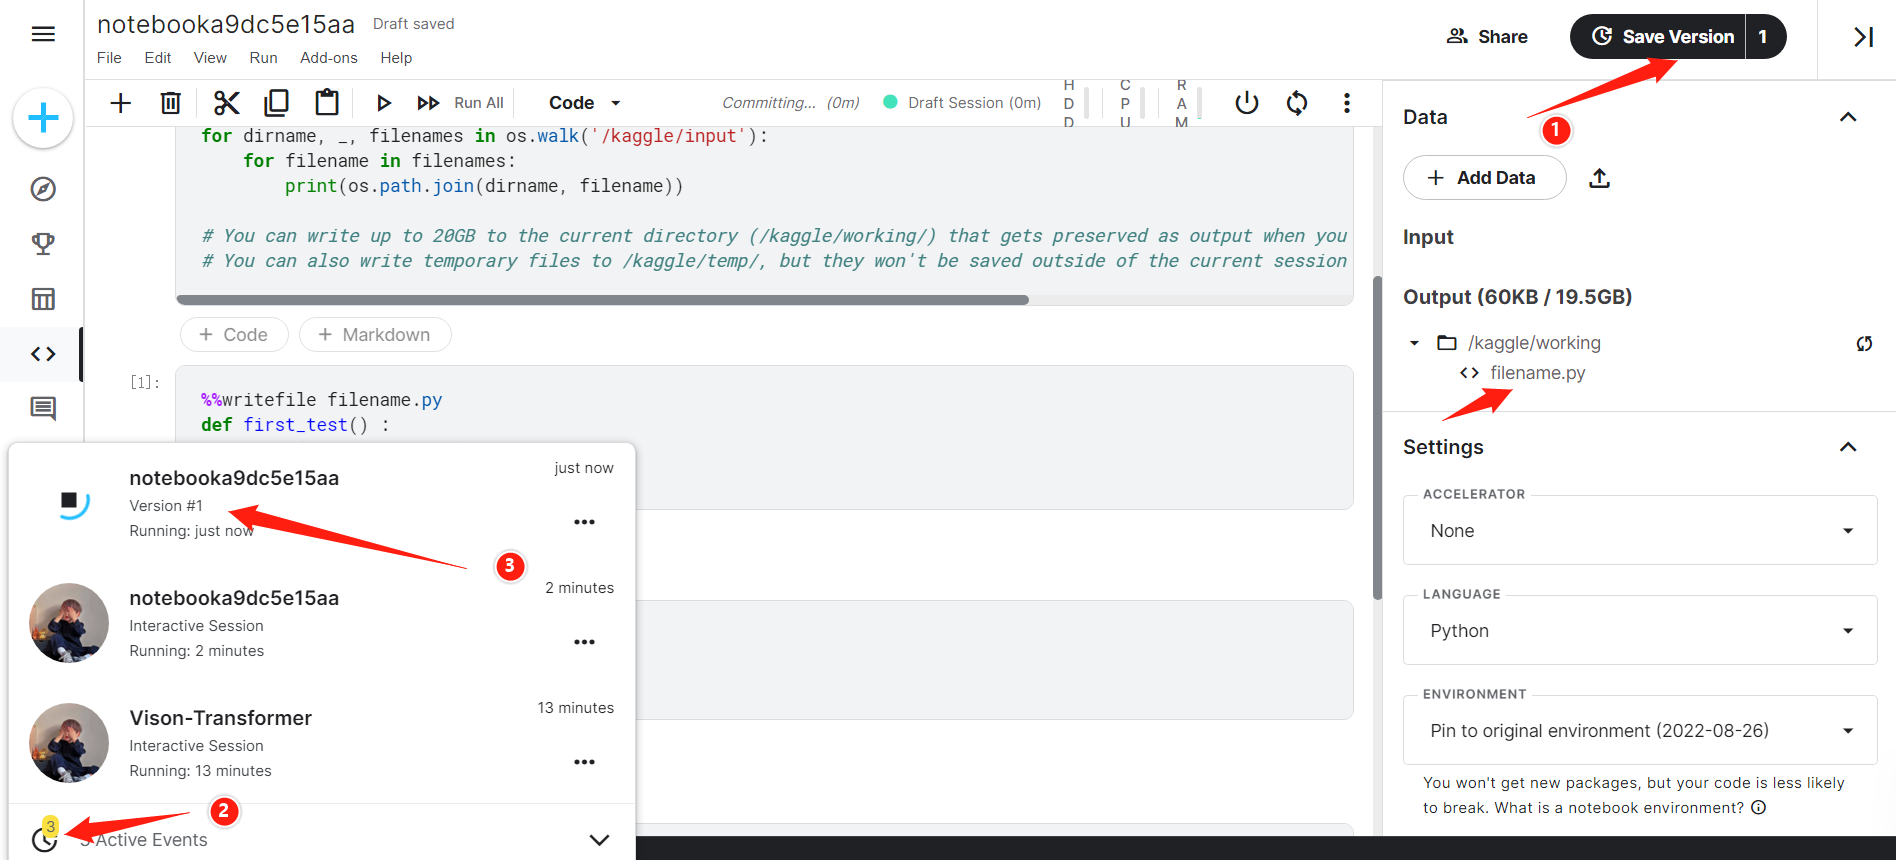
方式 3
方式 1 与 2 的结合
-
首先经过方式 1 上传本地项目,对应的目录在 /kaggle/input 处。由于工作目录为 / kaggle/working,需要将项目移动到工作目录下。
-
导入自定义函数.py文件:点击New Notebook后会创建导入my_functions.py的notebook,于是我们可以使用自定义的函数库,这里主要路径不要写错,我们能够导入进来的.py文件一定是放在working里的文件,所以需要将input里面的文件复制到output的working路径里面。这样就能调用我们的自定义函数了。
-
这个代码只能转移.py文件
# import module we'll need to import our custom module
from shutil import copyfile

# copy our file into the working directory (make sure it has .py suffix)
copyfile(src = "../input/create-function/my_functions.py", dst = "../working/my_functions.py")
- 这个代码可以转移整个项目
import shutil
shutil.copytree(r'../input/vitcode/vision_transformer', r'./visio_transformer')

notebook这种形式不允许 parser = argparse.ArgumentParser() 这种自动参数的形式

文章出处登录后可见!
