| 有定制化需求可私信联系 |
文章目录
简介
目标是开发一个简易机器人,能接收消息并作出回复。
开发条件如下:
- 企业微信超级管理员权限
- 服务器

基本概念
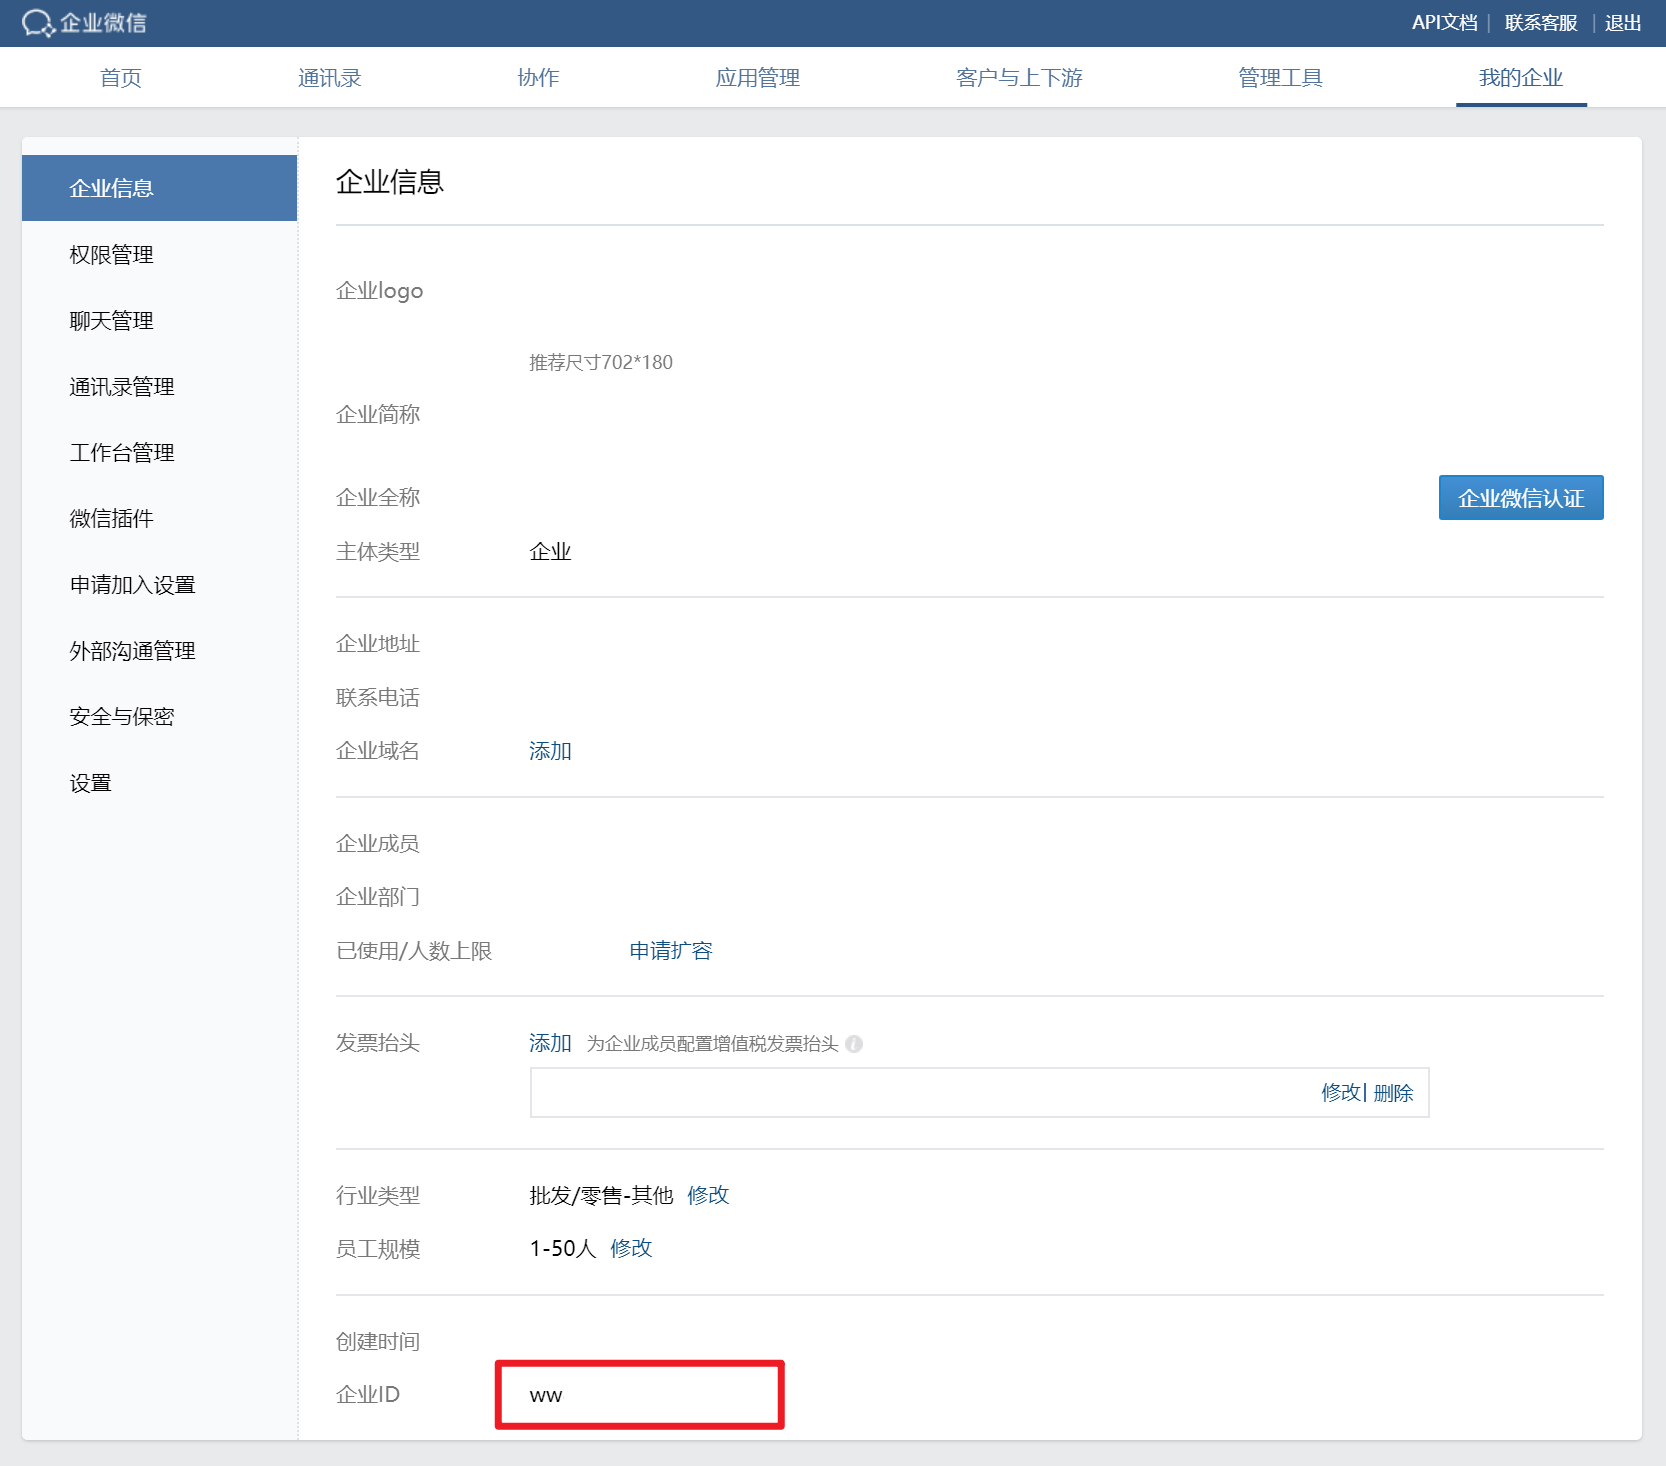
corpid
我的企业 → 企业ID
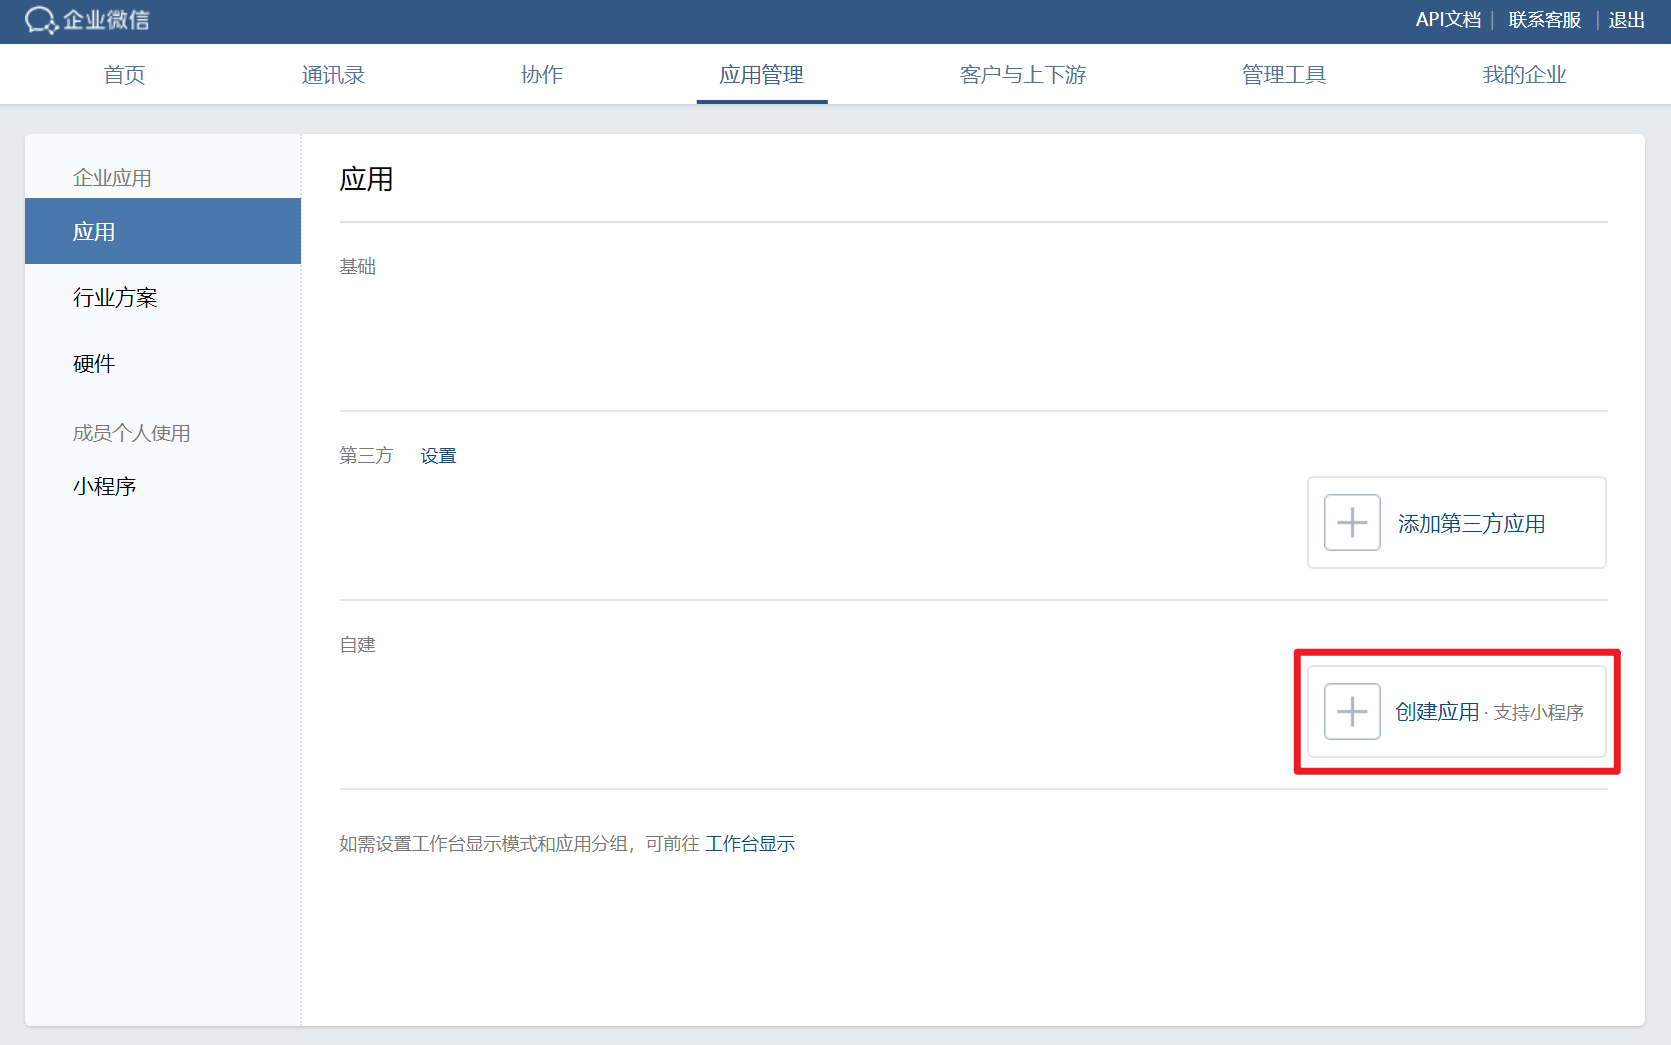
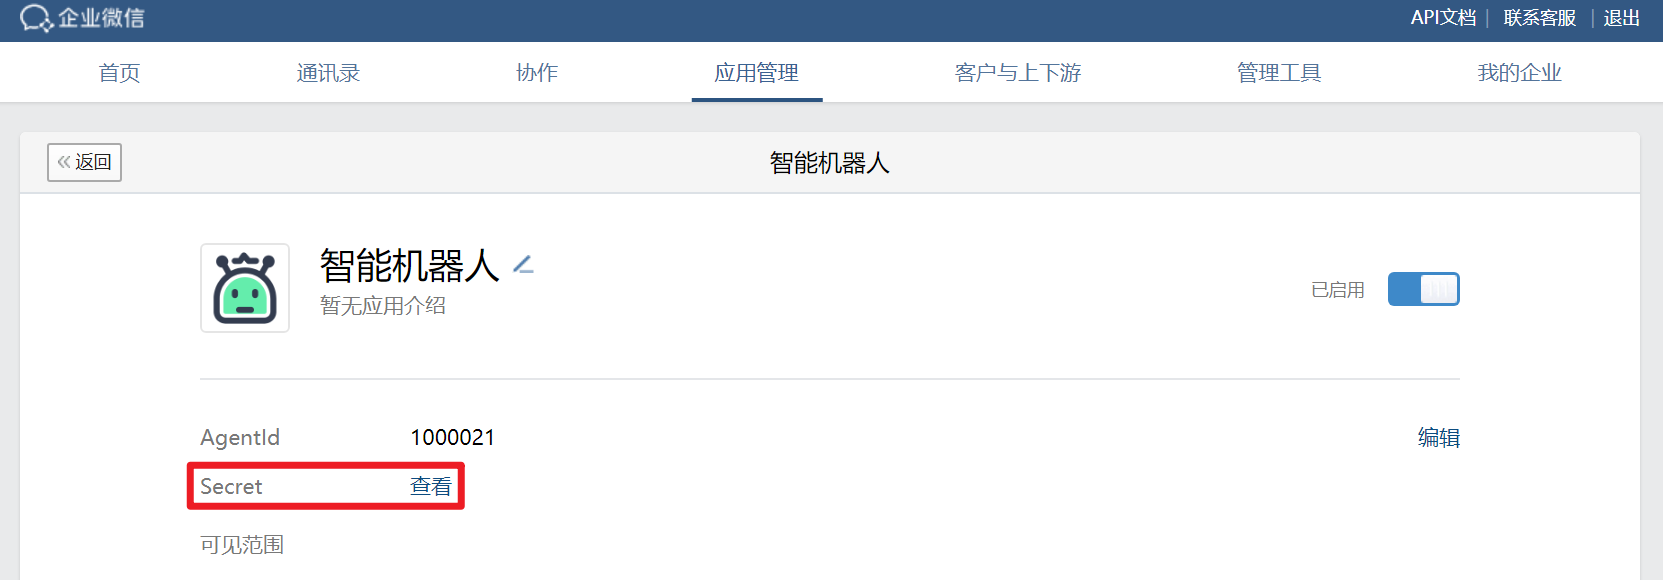
agentid和secret
应用管理 → 创建应用

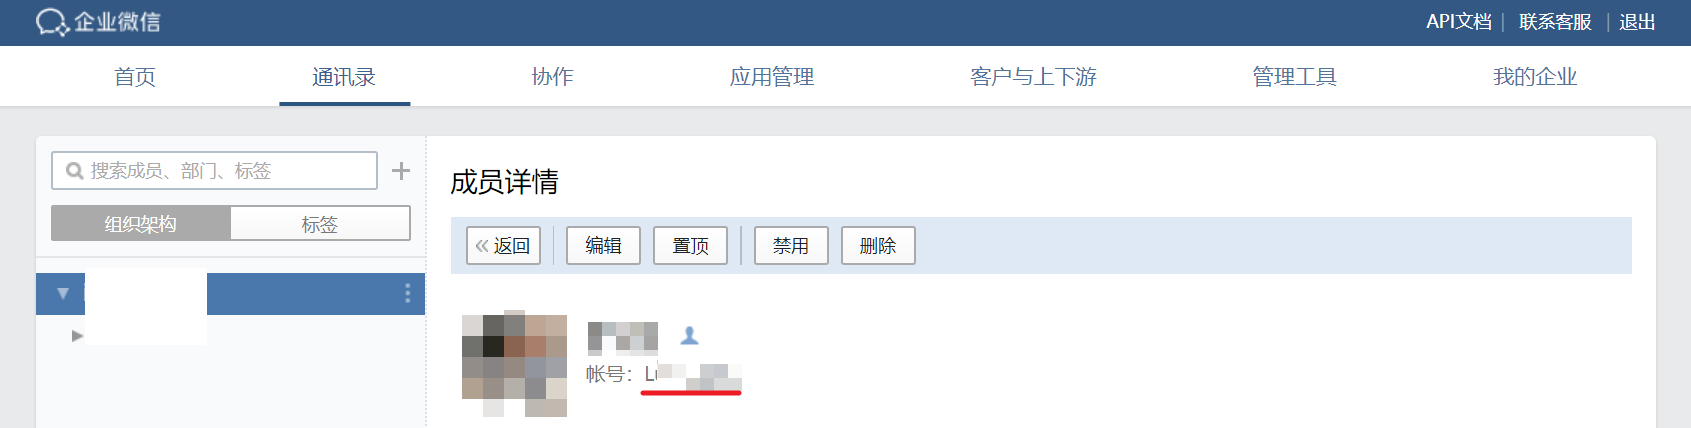
touser
安装
pip install requests
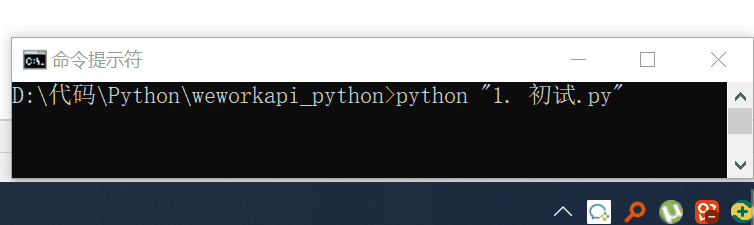
初试
发送消息
import json
import urllib.parse

import requests

corpid = 'wwxxxxxxxxxxxxxxxx'  # 企业ID
agentid = 1000001  # 应用ID
corpsecret = 'pxxxxxxxxxxxxxxxxxxxxxxxxxxxxxxxxxxxxxxxxxx'  # 应用Secret
touser = 'LxxJxxxKxx'  # 接收消息的用户

base = 'https://qyapi.weixin.qq.com'

# 1.请求access_token
access_token_api = urllib.parse.urljoin(base, '/cgi-bin/gettoken')
params = {'corpid': corpid, 'corpsecret': corpsecret}
response = requests.get(url=access_token_api, params=params).json()
access_token = response['access_token']

# 2.发送消息
message_send_api = urllib.parse.urljoin(base, f'/cgi-bin/message/send?access_token={access_token}')
data = {'touser': touser, 'msgtype': 'text', 'agentid': agentid, 'text': {'content': 'Hello World!'}}
response = requests.post(url=message_send_api, data=json.dumps(data)).json()

if response['errcode'] == 0:
    print('发送成功')
else:
    print(response)
获取access_token
access_token 是调用企业微信 API 的凭证
发送应用消息
Python高并发服务部署——Nginx+Gunicorn+gevent+Flask+Supervisor
服务部署具体流程点标题
Linux 系统分两种:
- RedHat 系列:Redhat、Centos、Fedora 等,包管理工具是 yum
- Debian 系列:Debian、Ubuntu 等,包管理工具是 apt-get
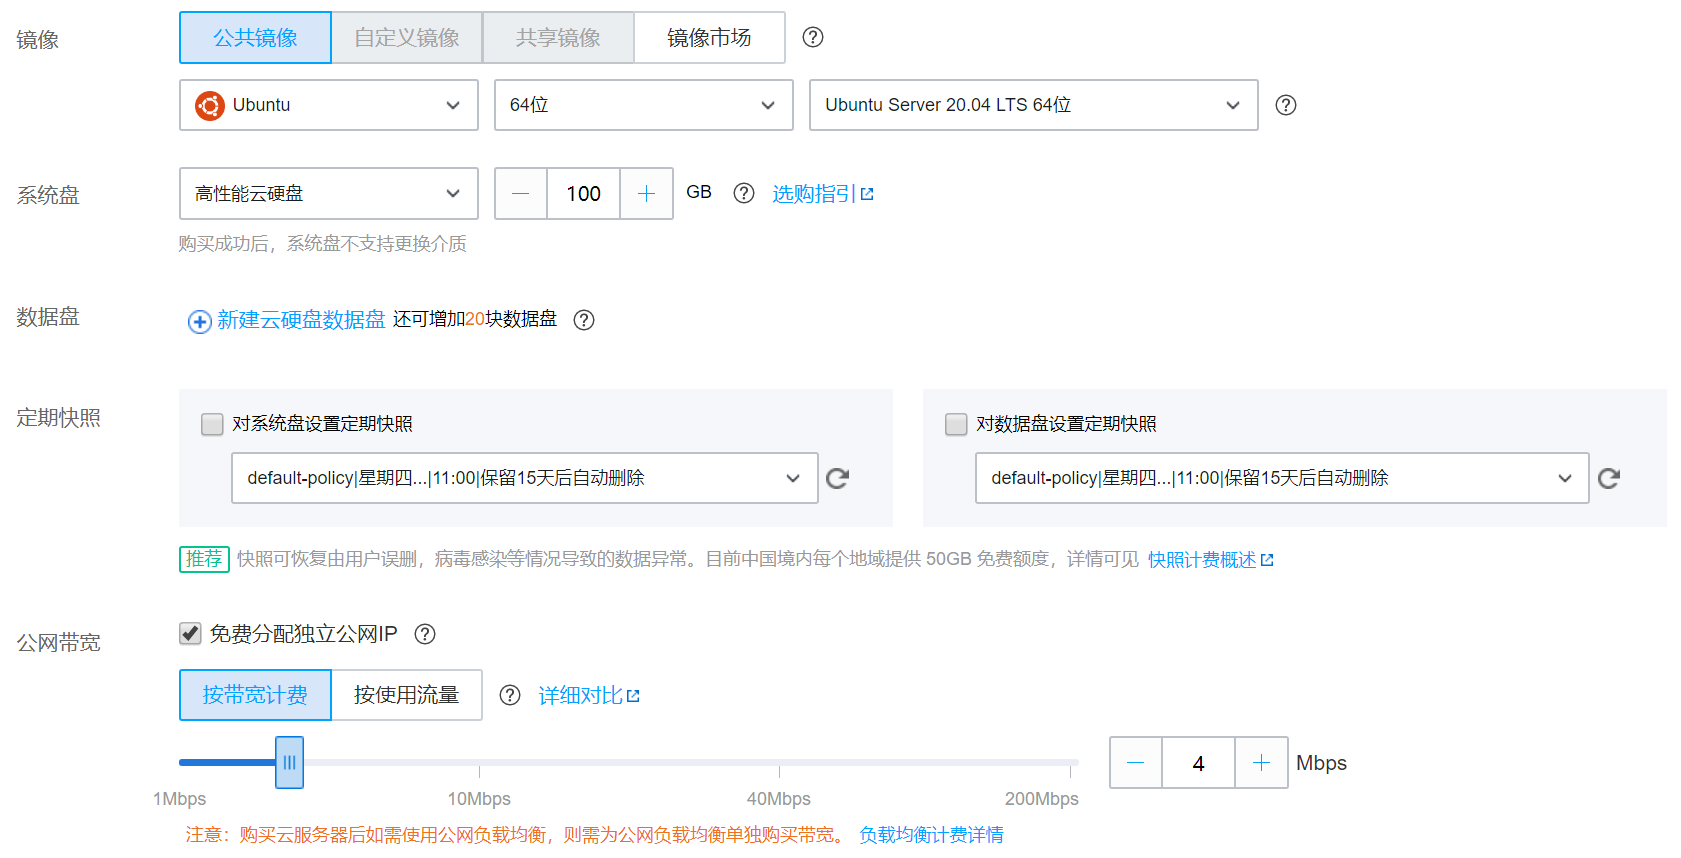
如腾讯云的 Ubuntu 服务器
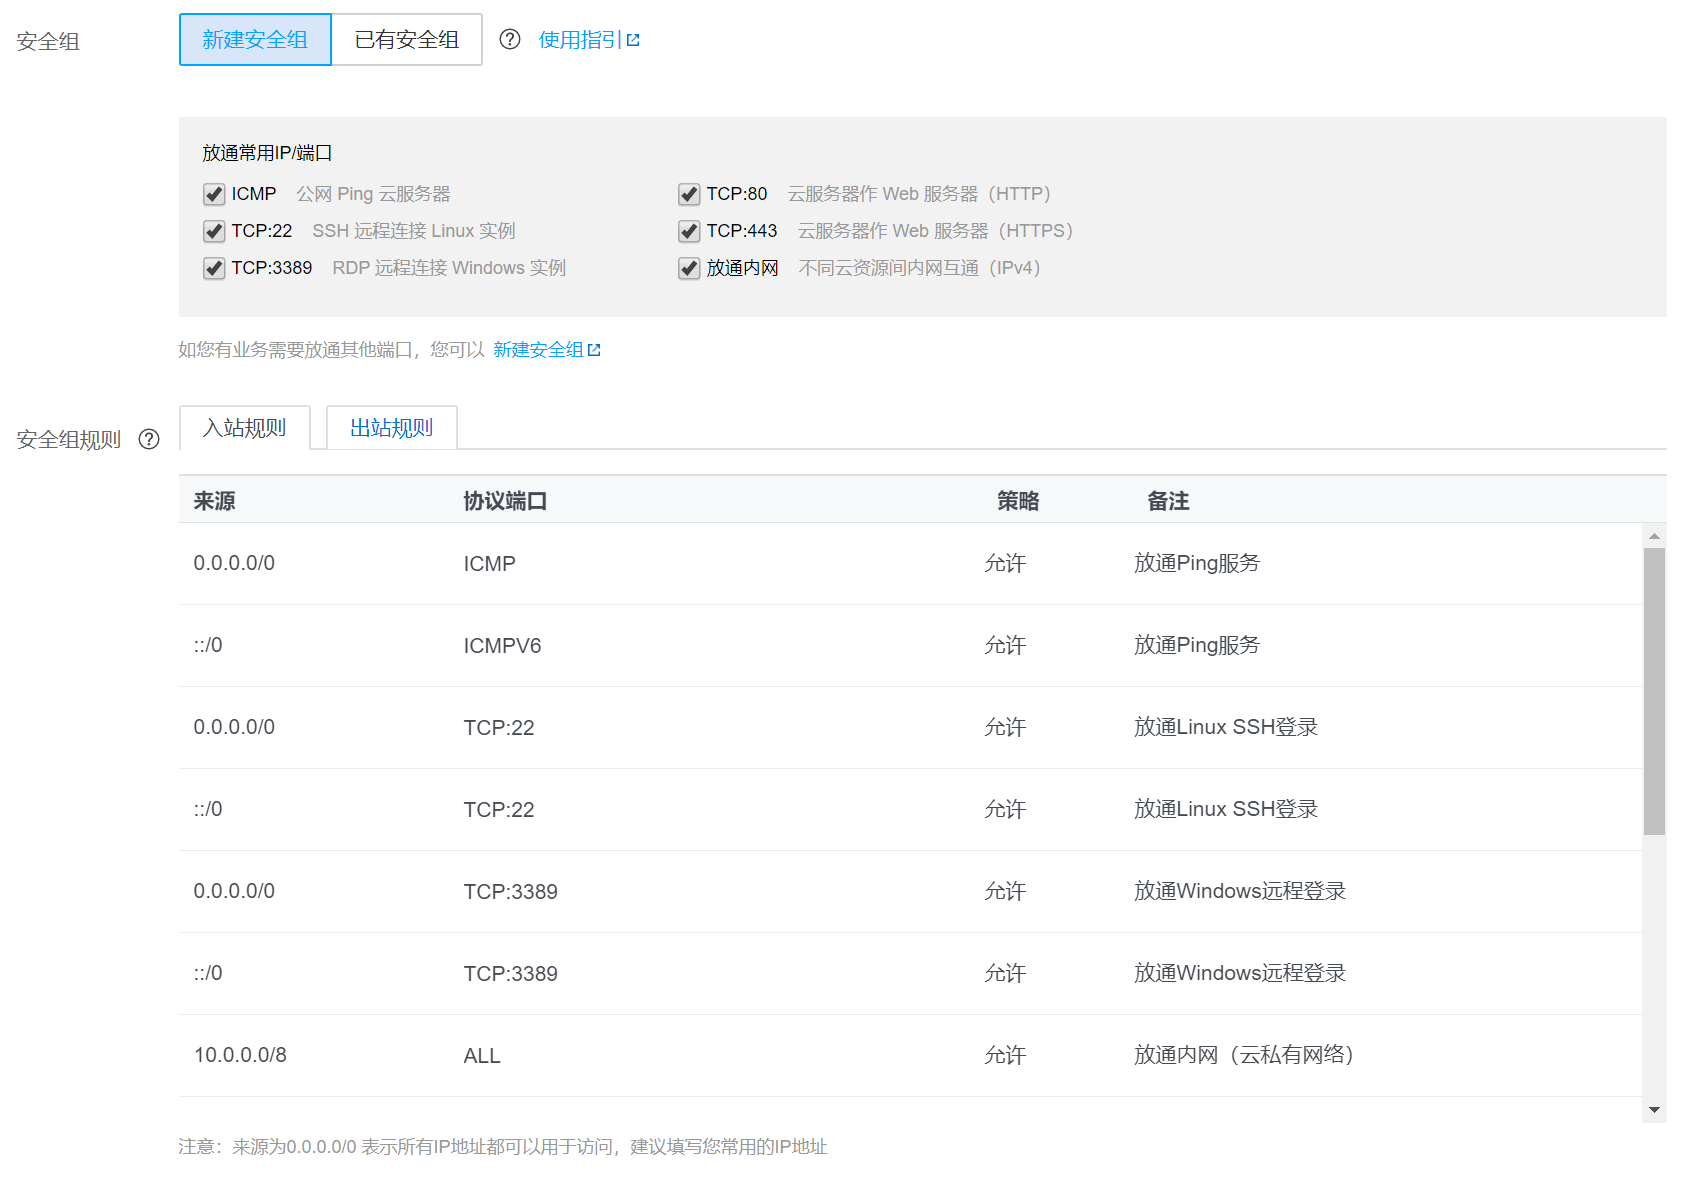
设置安全组
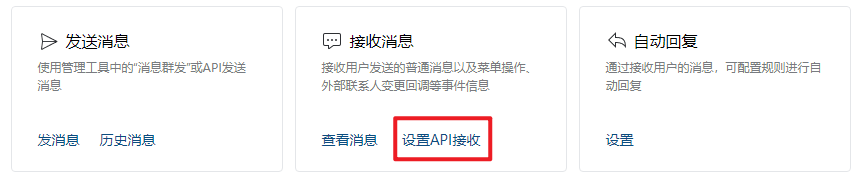
接收消息和事件
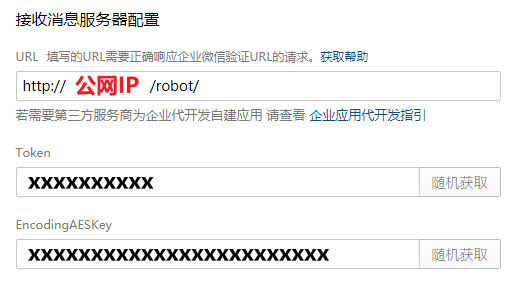
应用管理 → 点击要接收消息的应用 → 接收消息的设置API接收
URL 后面再确定,先随机获取 Token 和 EncodingAESKey
安装
pip install flask
pip install pycryptodome
下载代码
wget https://raw.githubusercontent.com/sbzhu/weworkapi_python/master/callback/WXBizMsgCrypt3.py
wget https://raw.githubusercontent.com/sbzhu/weworkapi_python/master/callback/ierror.py
编辑代码
vim app.py
app.py
import time
import xml.etree.cElementTree as ET

from flask import Flask, request

from WXBizMsgCrypt3 import WXBizMsgCrypt

sToken = 'xxxx'  # 对应上图的Token
sEncodingAESKey = 'xxxx'  # 对应上图的EncodingAESKey
sReceiveId = 'xxxx'  # 对应企业ID,即corpid
wxcpt = WXBizMsgCrypt(sToken, sEncodingAESKey, sReceiveId)

app = Flask(__name__)


@app.route('/robot/', methods=['GET', 'POST'])
def robot():
    msg_signature = request.args.get('msg_signature')  # 企业微信加密签名
    timestamp = request.args.get('timestamp')  # 时间戳
    nonce = request.args.get('nonce')  # 随机数
    echostr = request.args.get('echostr')  # 加密字符串

    # 验证URL有效性
    if request.method == 'GET':
        ret, sReplyEchoStr = wxcpt.VerifyURL(msg_signature, timestamp, nonce, echostr)
        if ret == 0:
            return sReplyEchoStr
        else:
            return 'ERR: VerifyURL ret:' + str(ret)

    # 接收消息
    if request.method == 'POST':
        ret, xml_content = wxcpt.DecryptMsg(request.data, msg_signature, timestamp, nonce)
        if ret == 0:
            root = ET.fromstring(xml_content)
            print(xml_content)
            to_user_name = root.find('ToUserName').text
            from_user_name = root.find('FromUserName').text
            create_time = root.find('CreateTime').text
            msg_type = root.find('MsgType').text
            content = root.find('Content').text
            msg_id = root.find('MsgId').text
            agent_id = root.find('AgentID').text
            print(content)
            # return content

            # 被动回复
            create_time = timestamp = str(int(time.time()))
            content = content.replace('吗', '').replace('?', '!').replace('?', '!')
            sReplyMsg = f'<xml><ToUserName>{to_user_name}</ToUserName><FromUserName>{from_user_name}</FromUserName><CreateTime>{create_time}</CreateTime><MsgType>text</MsgType><Content>{content}</Content><MsgId>{msg_id}</MsgId><AgentID>{agent_id}</AgentID></xml>'
            ret, sEncryptMsg = wxcpt.EncryptMsg(sReplyMsg, nonce, timestamp)
            if ret == 0:
                pass
            else:
                return 'ERR: EncryptMsg ret: ' + str(ret)
            return sEncryptMsg
        else:
            return 'ERR: DecryptMsg ret:' + str(ret)


if __name__ == '__main__':
    app.run()
启动程序
python app.py
Nginx 配置
sudo vim /etc/nginx/sites-available/default
关键内容如下
server {
    location ^~ /robot/ {
        proxy_pass http://127.0.0.1:5000/robot/;
    }
}
重载 Nginx
sudo nginx -s reload
用接口调试工具进行调试:建立连接 → 测试回调模式
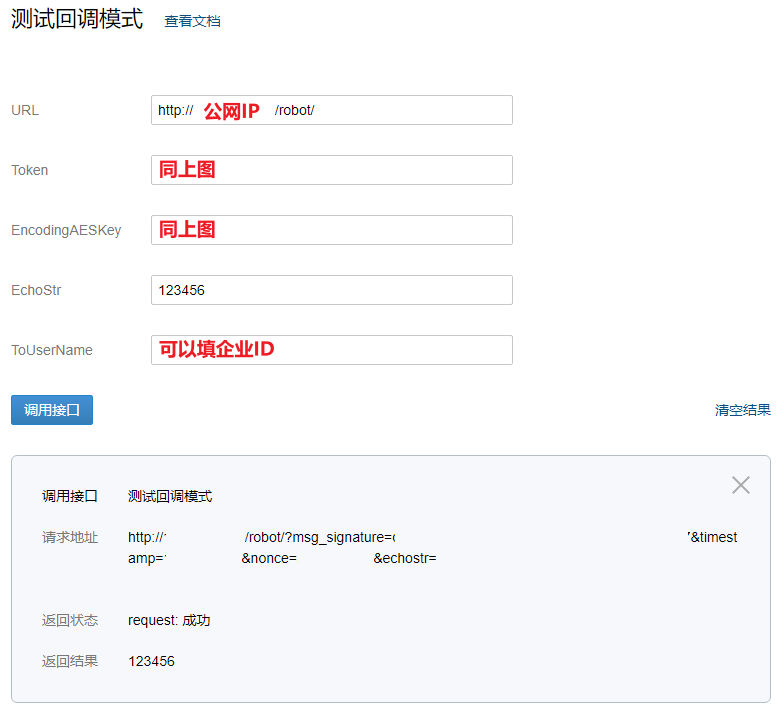
出现成功字样后,上面的“接收消息服务器配置”点保存
效果
参考文献
- 开发前必读 – 企业微信开发者中心
- 获取会话内容 – 企业微信API
- python3-企业微信-会话内容存档-对接Linux_C_SDK-libWeWorkFinanceSdk_C.so
- python对接企业微信_Python对接企业微信会话内容存档功能的实践
- weworkapi_python GitHub
- wework GitHub
- 如何在CentOS中安装apt-get?
- 腾讯云Linux连接ssh失败问题
- Linux安装conda并创建虚拟环境
- uwsgi/uWSGI/WSGI简介
- gunicorn vs uwsgi 性能对比,以flask run为基准
- Flask Web开发教程(十二)生产环境部署,基于gunicorn+nginx+supervisor的方案
- Nginx、Gunicorn在服务器中分别起什么作用?
- Flask教程(十二)项目部署
- 配置默认主页、目录浏览 | Nginx 入门教程
- 基于nginx上传一个简单的Html网页到服务器,并进行访问
- Nginx设置子域名解析
- gevent Documentation
- Url decode UTF-8 in Python
- Python构建企业微信自动消息转发服务端
- 在线 XML 格式化 | 菜鸟工具
- 关于腾讯云服务器上面的Nginx域名配置
文章出处登录后可见!
已经登录?立即刷新