主要为记录自己学习实践mmsegmentation框架的过程,并顺便为一起学习的同学们提供参考,分享一下自己学习到的一些知识和所踩的坑,与大家共勉!
我个人主要是想要使用mmsegmentation框架训练自己的数据集,一开始跟着网上的教程使用了PspNet网络,但是可能由于数据集过小最后达到的效果不尽人意,因此考虑使用更新的、性能更好的SegFormer进行尝试,也是看到了SegFormer在各种数据集上的准确率都相较传统的神经网络有了较大提升,所以比较心动。

SegFormer在ADE20K数据集上的表现
那么让我们现在开始吧(这里默认大家都配置好mmsegmentation了):
首先对自己的数据集进行处理,我比较习惯于处理voc类型的数据集,因此这里主要介绍voc类型数据集的处理结构:
-------ImageSets
-----------Segmentation
----------------train.txt    #训练集图片的文件名
----------------trainval.txt #训练验证集图片的文件名
----------------val.txt      #验证集图片的文件名
-------JPEGImages            #存放训练与测试的所有图片文件
-------SegmentationClass     #存放图像分割结果图
然后是部署我们自己的配置文件,由于mmsegmentation的SegFormer并没有针对voc数据集的配置文件,因此需要我们自己对其进行修改以适配voc类型数据集
一、首先修改mmseg\.mim\configs\_base_\datasets\pascal_voc12.py文件(建议把mmseg文件夹复制到自己的项目文件夹下,以便于修改)
dataset_type = 'PascalVOCDataset'
data_root = 'data/VOCdevkit/VOC2012'  #修改为自己数据集的路径,推荐使用绝对路径
dict(
type='MultiScaleFlipAug',
# img_scale=(2048, 512),
img_scale=(640, 640), #这里的图片大小按照自己数据集的图片进行修改
# img_ratios=[0.5, 0.75, 1.0, 1.25, 1.5, 1.75],
flip=False,
transforms=[
dict(type='Resize', keep_ratio=True),
dict(type='RandomFlip'),
dict(type='Normalize', **img_norm_cfg),
dict(type='ImageToTensor', keys=['img']),
dict(type='Collect', keys=['img']),
])二、然后修改mmseg\datasets\voc.py
主要将类别修改为自己的数据集类别以及想要为分割的各类别显示的颜色
CLASSES = ('sky', 'tree', 'road', 'grass', 'background')  #写你实际的类别名就好了,最后再加上一个background

PALETTE = [[128, 128, 128], [129, 127, 38], [120, 69, 125], [53, 125, 34],
           [0, 11, 123]]  #数量与类别数相对应
三、接着修改_base_\models\segformer.py(没有则创建一个)
# model settings
norm_cfg = dict(type='BN', requires_grad=True)  # 单卡改为BN
find_unused_parameters = True
model = dict(
    type='EncoderDecoder',
    pretrained=True,
    backbone=dict(
        type='MixVisionTransformer',
        in_channels=3,
        embed_dims=32,
        num_stages=4,
        num_layers=[2, 2, 2, 2],
        num_heads=[1, 2, 5, 8],
        patch_sizes=[7, 3, 3, 3],
        sr_ratios=[8, 4, 2, 1],
        out_indices=(0, 1, 2, 3),
        mlp_ratio=4,
        qkv_bias=True,
        drop_rate=0.0,
        attn_drop_rate=0.0,
        drop_path_rate=0.1),
    decode_head=dict(
        type='SegformerHead',
        in_channels=[32, 64, 160, 256],
        in_index=[0, 1, 2, 3],
        channels=256,
        dropout_ratio=0.1,
        num_classes=2,   # 与数据集类别数量相同
        norm_cfg=norm_cfg,
        align_corners=False,
        loss_decode=dict(type='FocalLoss', use_sigmoid=True, loss_weight=1.0)),  # focal loss使用更多
    # model training and testing settings
    train_cfg=dict(),
    test_cfg=dict(mode='whole'))
四、再创建总体配置文件
我这里将该文件拷贝到了项目文件夹中了,包括_base_文件夹,便于路径读取和修改,创建segformer_mit-b5.py总配置文件,然后更改继承的数据集类型:
_base_ = [
    './_base_/models/segformer.py',
    './_base_/datasets/pascal_voc12_aug.py',
    './_base_/default_runtime.py',
    './_base_/schedules/schedule_160k.py'
]

# model settings
norm_cfg = dict(type='BN', requires_grad=True)  # 单卡BN
find_unused_parameters = True
model = dict(
    type='EncoderDecoder',
    pretrained='mit_b5.pth',  # 配置好pth路径
    backbone=dict(
        type='MixVisionTransformer',
        in_channels=3,
        embed_dims=32,
        num_stages=4,
        num_layers=[2, 2, 2, 2],
        num_heads=[1, 2, 5, 8],
        patch_sizes=[7, 3, 3, 3],
        sr_ratios=[8, 4, 2, 1],
        out_indices=(0, 1, 2, 3),
        mlp_ratio=4,
        qkv_bias=True,
        drop_rate=0.0,
        attn_drop_rate=0.0,
        drop_path_rate=0.1),
    decode_head=dict(
        type='SegformerHead',
        in_channels=[32, 64, 160, 256],
        in_index=[0, 1, 2, 3],
        channels=256,
        dropout_ratio=0.1,
        num_classes=2,
        norm_cfg=norm_cfg,
        align_corners=False,
        loss_decode=dict(type='FocalLoss', use_sigmoid=True, loss_weight=1.0)),
    # model training and testing settings
    train_cfg=dict(),
    test_cfg=dict(mode='whole'))

# optimizer
optimizer = dict(_delete_=True, type='AdamW', lr=0.00006, betas=(0.9, 0.999), weight_decay=0.01,
                 paramwise_cfg=dict(custom_keys={'pos_block': dict(decay_mult=0.),
                                                 'norm': dict(decay_mult=0.),
                                                 'head': dict(lr_mult=10.)
                                                 }))

lr_config = dict(_delete_=True, policy='poly',
                 warmup='linear',
                 warmup_iters=1500,
                 warmup_ratio=1e-6,
                 power=1.0, min_lr=0.0, by_epoch=False)

evaluation = dict(interval=16000, metric='mIoU')
五、下载对应的预训练模型
直接上链接:
链接:https://pan.baidu.com/s/1c-d5ghbVyLWqDvylJ24VSw?pwd=2023
提取码:2023
由于SegFormer官方并没有针对voc数据集进行预训练,只能使用ade2k数据集的预训练模型进行训练
六、train文件构建
直接上代码吧,亲测可运行
# Let's take a look at the dataset
import mmcv
import matplotlib.pyplot as plt
import os.path as osp
import numpy as np
from PIL import Image
from mmseg.datasets import build_dataset
from mmseg.models import build_segmentor
from mmseg.apis import train_segmentor
from mmseg.datasets.builder import DATASETS
from mmseg.datasets.custom import CustomDataset
from mmcv import Config
from mmseg.apis import set_random_seed

# convert dataset annotation to semantic segmentation map
data_root = 'test_yinzhang'
img_dir = 'JPEGImages'
ann_dir = 'SegmentationClass'
# define class and plaette for better visualization
classes = ('background','yinzhang')
palette = [[0,0,0],[255, 0, 0]]

for file in mmcv.scandir(osp.join(data_root, ann_dir), suffix='.regions.txt'):
  seg_map = np.loadtxt(osp.join(data_root, ann_dir, file)).astype(np.uint8)
  seg_img = Image.fromarray(seg_map).convert('P')
  seg_img.putpalette(np.array(palette, dtype=np.uint8))
  seg_img.save(osp.join(data_root, ann_dir, file.replace('.regions.txt',
                                                         '.png')))

# Let's take a look at the segmentation map we got
import matplotlib.patches as mpatches

# split train/val set randomly
split_dir = 'ImageSets/Segmentation'
mmcv.mkdir_or_exist(osp.join(data_root, split_dir))
filename_list = [osp.splitext(filename)[0] for filename in mmcv.scandir(
    osp.join(data_root, ann_dir), suffix='.png')]
with open(osp.join(data_root, split_dir, 'train.txt'), 'w') as f:
  # select first 4/5 as train set
  train_length = int(len(filename_list)*4/5)
  f.writelines(line + '\n' for line in filename_list[:train_length])
with open(osp.join(data_root, split_dir, 'val.txt'), 'w') as f:
  # select last 1/5 as train set
  f.writelines(line + '\n' for line in filename_list[train_length:])


@DATASETS.register_module()
class MyDataset(CustomDataset):
  CLASSES = classes
  PALETTE = palette
  def __init__(self, split, **kwargs):
    super().__init__(img_suffix='.jpg', seg_map_suffix='.png',
                     split=split, **kwargs)
    assert osp.exists(self.img_dir) and self.split is not None
cfg = Config.fromfile('segformer_mit-b5.py')

# add CLASSES and PALETTE to checkpoint
cfg.checkpoint_config.meta = dict(CLASSES = classes, PALETTE = palette)
# Since we use only one GPU, BN is used instead of SyncBN
cfg.norm_cfg = dict(type='BN', requires_grad=True)
# cfg.model.backbone.norm_cfg = cfg.norm_cfg
cfg.model.decode_head.norm_cfg = cfg.norm_cfg
# cfg.model.auxiliary_head.norm_cfg = cfg.norm_cfg
# modify num classes of the model in decode/auxiliary head
cfg.model.decode_head.num_classes = 8
# cfg.model.auxiliary_head.num_classes = 8

# Modify dataset type and path
cfg.dataset_type = 'PascalVOCDataset'
cfg.data_root = data_root

cfg.data.samples_per_gpu = 2
cfg.data.workers_per_gpu = 2

cfg.img_norm_cfg = dict(
    mean=[123.675, 116.28, 103.53], std=[58.395, 57.12, 57.375], to_rgb=True)
cfg.crop_size = (512, 512)
cfg.train_pipeline = [
    dict(type='LoadImageFromFile'),
    dict(type='LoadAnnotations'),
    dict(type='Resize', img_scale=(640, 640), ratio_range=(0.5, 2.0)),
    dict(type='RandomCrop', crop_size=cfg.crop_size, cat_max_ratio=0.75),
    dict(type='RandomFlip', prob=0.5),
    dict(type='PhotoMetricDistortion'),
    dict(type='Normalize', **cfg.img_norm_cfg),
    dict(type='Pad', size=cfg.crop_size, pad_val=0, seg_pad_val=255),
    dict(type='DefaultFormatBundle'),
    dict(type='Collect', keys=['img', 'gt_semantic_seg']),
]
cfg.test_pipeline = [
    dict(type='LoadImageFromFile'),
    dict(
        type='MultiScaleFlipAug',
        # img_scale=(2048, 512),
        img_scale=(640, 640),
        # img_ratios=[0.5, 0.75, 1.0, 1.25, 1.5, 1.75],
        flip=False,
        transforms=[
            dict(type='Resize', keep_ratio=True),
            dict(type='RandomFlip'),
            dict(type='Normalize', **cfg.img_norm_cfg),
            dict(type='ImageToTensor', keys=['img']),
            dict(type='Collect', keys=['img']),
        ])
]


cfg.data.train.type = cfg.dataset_type
cfg.data.train.data_root = cfg.data_root
cfg.data.train.img_dir = img_dir
cfg.data.train.ann_dir = ann_dir
cfg.data.train.pipeline = cfg.train_pipeline
cfg.data.train.split = 'ImageSets/Segmentation/train.txt'

cfg.data.val.type = cfg.dataset_type
cfg.data.val.data_root = cfg.data_root
cfg.data.val.img_dir = img_dir
cfg.data.val.ann_dir = ann_dir
cfg.data.val.pipeline = cfg.test_pipeline
cfg.data.val.split = 'ImageSets/Segmentation/val.txt'

cfg.data.test.type = cfg.dataset_type
cfg.data.test.data_root = cfg.data_root
cfg.data.test.img_dir = img_dir
cfg.data.test.ann_dir = ann_dir
cfg.data.test.pipeline = cfg.test_pipeline
cfg.data.test.split = 'ImageSets/Segmentation/val.txt'

# We can still use the pre-trained Mask RCNN model though we do not need to
# use the mask branch
cfg.load_from = 'mit_b5.pth'

# Set up working dir to save files and logs.
cfg.work_dir = './work_dirs/new/tutorial'

cfg.runner.max_iters = 3000
cfg.log_config.interval = 100
cfg.evaluation.interval = 1000
cfg.checkpoint_config.interval = 1000

# Set seed to facitate reproducing the result
cfg.seed = 0
set_random_seed(0, deterministic=False)
cfg.gpu_ids = range(1)

# Let's have a look at the final config used for training
print(f'Config:\n{cfg.pretty_text}')


# Build the dataset
datasets = [build_dataset(cfg.data.train)]

# Build the detector
model = build_segmentor(cfg.model)
# Add an attribute for visualization convenience
model.CLASSES = datasets[0].CLASSES

# Create work_dir
mmcv.mkdir_or_exist(osp.abspath(cfg.work_dir))
if __name__=="__main__":
    train_segmentor(model, datasets, cfg, distributed=False, validate=True,
                    meta=dict())
七、预测代码:
大家可以自己尝试一下
import mmcv
import os.path as osp
from PIL import Image
import matplotlib.pyplot as plt
import matplotlib.patches as mpatches
import numpy as np
from mmseg.datasets.builder import DATASETS
from mmseg.datasets.custom import CustomDataset
from mmcv import Config
from mmseg.apis import set_random_seed
from mmseg.datasets import build_dataset
from mmseg.models import build_segmentor
from mmseg.apis import train_segmentor, inference_segmentor, init_segmentor, show_result_pyplot
import os
import cv2
import warnings


os.environ['KMP_DUPLICATE_LIB_OK'] = 'True'

data_root = 'test_yinzhang'
img_dir = 'JPEGImages'
ann_dir = 'SegmentationClass'
# define class and plaette for better visualization
classes = ('background','yinzhang')
palette = [[0,0,0],[255, 0, 0]]


@DATASETS.register_module()
class StanfordBackgroundDataset(CustomDataset):
    CLASSES = classes
    PALETTE = palette

    def show_result(self,
                    img,
                    result,
                    palette=None,
                    win_name='',
                    show=False,
                    wait_time=0,
                    out_file=None,
                    opacity=0.5):
        img = mmcv.imread(img)
        img = img.copy()
        seg = result[0]
        if palette is None:
            if self.PALETTE is None:
                palette = np.random.randint(
                    0, 255, size=(len(self.CLASSES), 3))
            else:
                palette = self.PALETTE
        palette = np.array(palette)
        assert palette.shape[0] == len(self.CLASSES)
        assert palette.shape[1] == 3
        assert len(palette.shape) == 2
        assert 0 < opacity <= 1.0
        color_seg = np.zeros((seg.shape[0], seg.shape[1], 3), dtype=np.uint8)
        for label, color in enumerate(palette):
            color_seg[seg == label, :] = color
        # convert to BGR
        color_seg = color_seg[..., ::-1]

        img = img * (1 - opacity) + color_seg * opacity
        img = img.astype(np.uint8)
        # if out_file specified, do not show image in window
        if out_file is not None:
            show = False

        if show:
            mmcv.imshow(img, win_name, wait_time)
        if out_file is not None:
            mmcv.imwrite(img, out_file)  # 可在此处进行修改

        if not (show or out_file):
            warnings.warn('show==False and out_file is not specified, only '
                          'result image will be returned')
            return img

    def __init__(self, split, **kwargs):
        super().__init__(img_suffix='.jpg', seg_map_suffix='.png',
                         split=split, **kwargs)
        assert osp.exists(self.img_dir) and self.split is not None


############################################################################################
cfg = Config.fromfile('segformer_mit-b5.pyy')

# Since we use only one GPU, BN is used instead of SyncBN
cfg.norm_cfg = dict(type='BN', requires_grad=True)
# cfg.model.backbone.norm_cfg = cfg.norm_cfg
cfg.model.decode_head.norm_cfg = cfg.norm_cfg
# cfg.model.auxiliary_head.norm_cfg = cfg.norm_cfg
# modify num classes of the model in decode/auxiliary head
cfg.model.decode_head.num_classes = 8
# cfg.model.auxiliary_head.num_classes = 8

# Modify dataset type and path
cfg.dataset_type = 'StanfordBackgroundDataset'
cfg.data_root = data_root

cfg.data.samples_per_gpu = 2
cfg.data.workers_per_gpu = 0

cfg.img_norm_cfg = dict(
    mean=[123.675, 116.28, 103.53], std=[58.395, 57.12, 57.375], to_rgb=True)
cfg.crop_size = (256, 256)
cfg.train_pipeline = [
    dict(type='LoadImageFromFile'),
    dict(type='LoadAnnotations'),
    dict(type='Resize', img_scale=(320, 240), ratio_range=(0.5, 2.0)),
    dict(type='RandomCrop', crop_size=cfg.crop_size, cat_max_ratio=0.75),
    dict(type='RandomFlip', flip_ratio=0.5),
    dict(type='PhotoMetricDistortion'),
    dict(type='Normalize', **cfg.img_norm_cfg),
    dict(type='Pad', size=cfg.crop_size, pad_val=0, seg_pad_val=255),
    dict(type='DefaultFormatBundle'),
    dict(type='Collect', keys=['img', 'gt_semantic_seg']),
]

cfg.test_pipeline = [
    dict(type='LoadImageFromFile'),
    dict(
        type='MultiScaleFlipAug',
        img_scale=(320, 240),
        # img_ratios=[0.5, 0.75, 1.0, 1.25, 1.5, 1.75],
        flip=False,
        transforms=[
            dict(type='Resize', keep_ratio=True),
            dict(type='RandomFlip'),
            dict(type='Normalize', **cfg.img_norm_cfg),
            dict(type='ImageToTensor', keys=['img']),
            dict(type='Collect', keys=['img']),
        ])
]

cfg.data.train.type = cfg.dataset_type
cfg.data.train.data_root = cfg.data_root
cfg.data.train.img_dir = img_dir
cfg.data.train.ann_dir = ann_dir
cfg.data.train.pipeline = cfg.train_pipeline
cfg.data.train.split = 'splits/train.txt'

cfg.data.val.type = cfg.dataset_type
cfg.data.val.data_root = cfg.data_root
cfg.data.val.img_dir = img_dir
cfg.data.val.ann_dir = ann_dir
cfg.data.val.pipeline = cfg.test_pipeline
cfg.data.val.split = 'splits/val.txt'

cfg.data.test.type = cfg.dataset_type
cfg.data.test.data_root = cfg.data_root
cfg.data.test.img_dir = img_dir
cfg.data.test.ann_dir = ann_dir
cfg.data.test.pipeline = cfg.test_pipeline
cfg.data.test.split = 'splits/val.txt'

# We can still use the pre-trained Mask RCNN model though we do not need to
# use the mask branch
cfg.load_from = 'pspnet_r50-d8_512x1024_40k_cityscapes_20200605_003338-2966598c.pth'

# Set up working dir to save files and logs.
cfg.work_dir = './work_dirs'

cfg.runner.max_iters = 200
cfg.log_config.interval = 10
cfg.evaluation.interval = 200
cfg.checkpoint_config.interval = 200

# Set seed to facitate reproducing the result
cfg.seed = 0
set_random_seed(0, deterministic=False)
cfg.gpu_ids = range(1)

# Let's have a look at the final config used for training
print(f'Config:\n{cfg.pretty_text}')

config_file = cfg
checkpoints_file = './work_dirs/tutorial/latest.pth'
model = init_segmentor(config_file, checkpoints_file, device='cuda:0')


img = './input/test2.jpg'
print(img)
'''
show_result(self,
                img,
                result,
                palette=None,
                win_name='',
                show=False,
                wait_time=0,
                out_file=None,
                opacity=0.5)
'''
result = inference_segmentor(model, img)
plt.figure(figsize=(8, 6))
show_result_pyplot(model, img, result, palette)
model.show_result(img, result, show=True)
#result = cv2.cvtColor(result, cv2.COLOR_RGB2BGR)
#result[:, :] = (255,255,255)
#result = img+result
cv2.imwrite('./output/re4.jpg', result[0]*255)
八、训练预测结果
由于我还没在autodl进行大规模训练,就给大家展示一下在自己机子上浅跑的预测结果吧~
原图像
预测结果
后续大规模训练后会继续更新。。。
坑1:libpng warning: iCCP: known incorrect sRGB profile报错
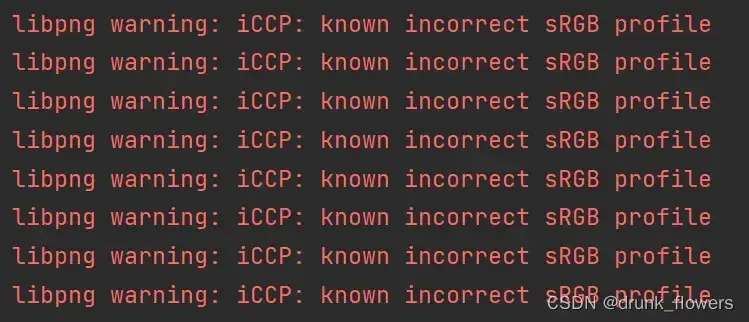
原因是新版的libpng增强了ICC profiles检查,发出警告。此警告可以忽略 ,我在此也没有对其进行操作,可以使用其他方法(如skimage)读取的方式避免该类报错。
坑2:ValueError: expected 4D input (got 3D input)报错
这是一个困扰我许久的问题
通过上网才发现问题所在是因为使用了不正确的BatchNorm函数,快速解决的方法就是不需要在模型的backbone添加 ‘norm_cfg’
未完待续。。。
文章出处登录后可见!