医疗问答机器人项目部署
1. 拉取TensorFlow镜像
从Docker Hub拉取TensorFlow的镜像,在该镜像上进行下面的操作。
# 拉取镜像
$ docker pull tensorflow/tensorflow:1.14.0-py3
# 生成容器
$ docker run -dit --name diagnosis -p 5002:5002 -p 7474:7474 -p 7473:7473 -p 7687:7687 -p 60061:60061 -p 60062:60062 tensorflow/tensorflow:1.14.0-py3
# 进入容器
$ docker exec -it diagnosis bash
5002端口是项目端口;7473、7474和7687三个端口是neo4j的端口;60061和60062是另外两个服务的端口。
查看容器tensorflow的版本和gpu是否可用,进入python终端输入下面的指令,可以看到使用的tensorflow版本是1.14.0。
>>> import tensorflow as tf
>>> tf.__version__
'1.14.0'
>>>tf.test.is_gpu_available()
False
2. 配置系统环境
查看Ubuntu版本,即18.04.2版本。
root@322e47635519:/workspace/Diagnosis-Chatbot# cat /etc/issue
Ubuntu 18.04.2 LTS \n \l
2.1 更换软件源
首先备份原软件源,命令如下。
cp /etc/apt/sources.list /etc/apt/sources.list.bak
因为镜像没有安装vim,故只能通过echo指令更改/etc/apt/sources.list文件内容。
Aliyuan
echo "">/etc/apt/sources.list
echo "deb http://mirrors.aliyun.com/ubuntu/ bionic main restricted universe multiverse">>/etc/apt/sources.list
echo "deb http://mirrors.aliyun.com/ubuntu/ bionic-security main restricted universe multiverse">>/etc/apt/sources.list
echo "deb http://mirrors.aliyun.com/ubuntu/ bionic-updates main restricted universe multiverse">>/etc/apt/sources.list
echo "deb http://mirrors.aliyun.com/ubuntu/ bionic-proposed main restricted universe multiverse">>/etc/apt/sources.list
echo "deb http://mirrors.aliyun.com/ubuntu/ bionic-backports main restricted universe multiverse">>/etc/apt/sources.list
echo "deb-src http://mirrors.aliyun.com/ubuntu/ bionic main restricted universe multiverse">>/etc/apt/sources.list
echo "deb-src http://mirrors.aliyun.com/ubuntu/ bionic-security main restricted universe multiverse">>/etc/apt/sources.list
echo "deb-src http://mirrors.aliyun.com/ubuntu/ bionic-updates main restricted universe multiverse">>/etc/apt/sources.list
echo "deb-src http://mirrors.aliyun.com/ubuntu/ bionic-proposed main restricted universe multiverse">>/etc/apt/sources.list
echo "deb-src http://mirrors.aliyun.com/ubuntu/ bionic-backports main restricted universe multiverse">>/etc/apt/sources.list
更新软件源。
apt-get update
apt-get upgrade
在更换软件源时,我首先使用的是清华源,但是在下载vim时提示说不能下载vim相关的一些依赖。在网上搜索后应该是源的问题,后来我就更换为阿里源了。
2.2 下载vim
修改文件内容需要使用vim,所以要下载。
apt-get install vim -y
下载完成后可以通过下面的指令查看vim的版本。
vim --version
2.3 解决vim中文乱码问题
修改/etc/vim/vimrc的内容,在末尾添加如下内容:
set fileencodings=utf-8,ucs-bom,gb18030,gbk,gb2312,cp936
set termencoding=utf-8
set encoding=utf-8
设置后,文件中的中文就可以正常显示了。
2.4 安装Neo4J图数据库
详细步骤可以看我的另外一篇博客—在Linux系统下安装Neo4j图数据库。
2.5 安装网络工具包
apt-get install inetutils-ping
apt-get install net-tools
3. 运行项目
3.1 拷贝项目到容器中
首先在容器中创建workspace目录,将项目代码放入该目录。
root@322e47635519:/# mkdir workspace
将本地机器上的项目代码文件复制到容器的工作目录下。
$ docker cp "本机上项目的路径" diagnosis:/workspace/
上述命令实现的功能是将项目复制到diagnosis容器中的/workspace/目录下。
3.2 安装项目所需的工具包
首先要升级pip,升级指令如下。
pip install -i https://pypi.tuna.tsinghua.edu.cn/simple --upgrade pip
使用pip指令下载工具包,-i后面使用的清华源,最后是工具包的名称。
pip install -i https://pypi.tuna.tsinghua.edu.cn/simple packageName
在那个容器中,我需要安装的包如下:
# 导入Neo4j数据库
pip install -i https://pypi.tuna.tsinghua.edu.cn/simple py2neo==2021.2.3
pip install -i https://pypi.tuna.tsinghua.edu.cn/simple pandas==1.1.5
pip install -i https://pypi.tuna.tsinghua.edu.cn/simple tqdm==4.62.3
# 启动问答助手服务
pip install -i https://pypi.tuna.tsinghua.edu.cn/simple numpy==1.19.5
pip install -i https://pypi.tuna.tsinghua.edu.cn/simple flask==1.1.4
pip install -i https://pypi.tuna.tsinghua.edu.cn/simple flask_cors==3.0.10
pip install -i https://pypi.tuna.tsinghua.edu.cn/simple scikit-learn==0.24.1
pip install -i https://pypi.tuna.tsinghua.edu.cn/simple requests==2.26.0
# bilstm算法
pip install -i https://pypi.tuna.tsinghua.edu.cn/simple pyahocorasick==1.4.2
pip install -i https://pypi.tuna.tsinghua.edu.cn/simple gevent==1.5.0
# 意图识别
pip install -i https://pypi.tuna.tsinghua.edu.cn/simple bert4keras==0.10.8
# 语音识别
pip install -i https://pypi.tuna.tsinghua.edu.cn/simple huggingface_hub==0.0.6
pip install -i https://pypi.tuna.tsinghua.edu.cn/simple hyperpyyaml==0.0.1
pip install -i https://pypi.tuna.tsinghua.edu.cn/simple joblib==0.14.1
pip install -i https://pypi.tuna.tsinghua.edu.cn/simple pre-commit==2.3.0
pip install -i https://pypi.tuna.tsinghua.edu.cn/simple sentencepiece==0.1.91
pip install -i https://pypi.tuna.tsinghua.edu.cn/simple SoundFile==0.10.2
pip install -i https://pypi.tuna.tsinghua.edu.cn/simple torch==1.8.0
pip install -i https://pypi.tuna.tsinghua.edu.cn/simple torchaudio==0.8.0
启动服务时报错:OSError: sndfile library not found。报错原因是libsndfile缺失,需要安装。安装说明如下。
$ apt-get install libsndfile1
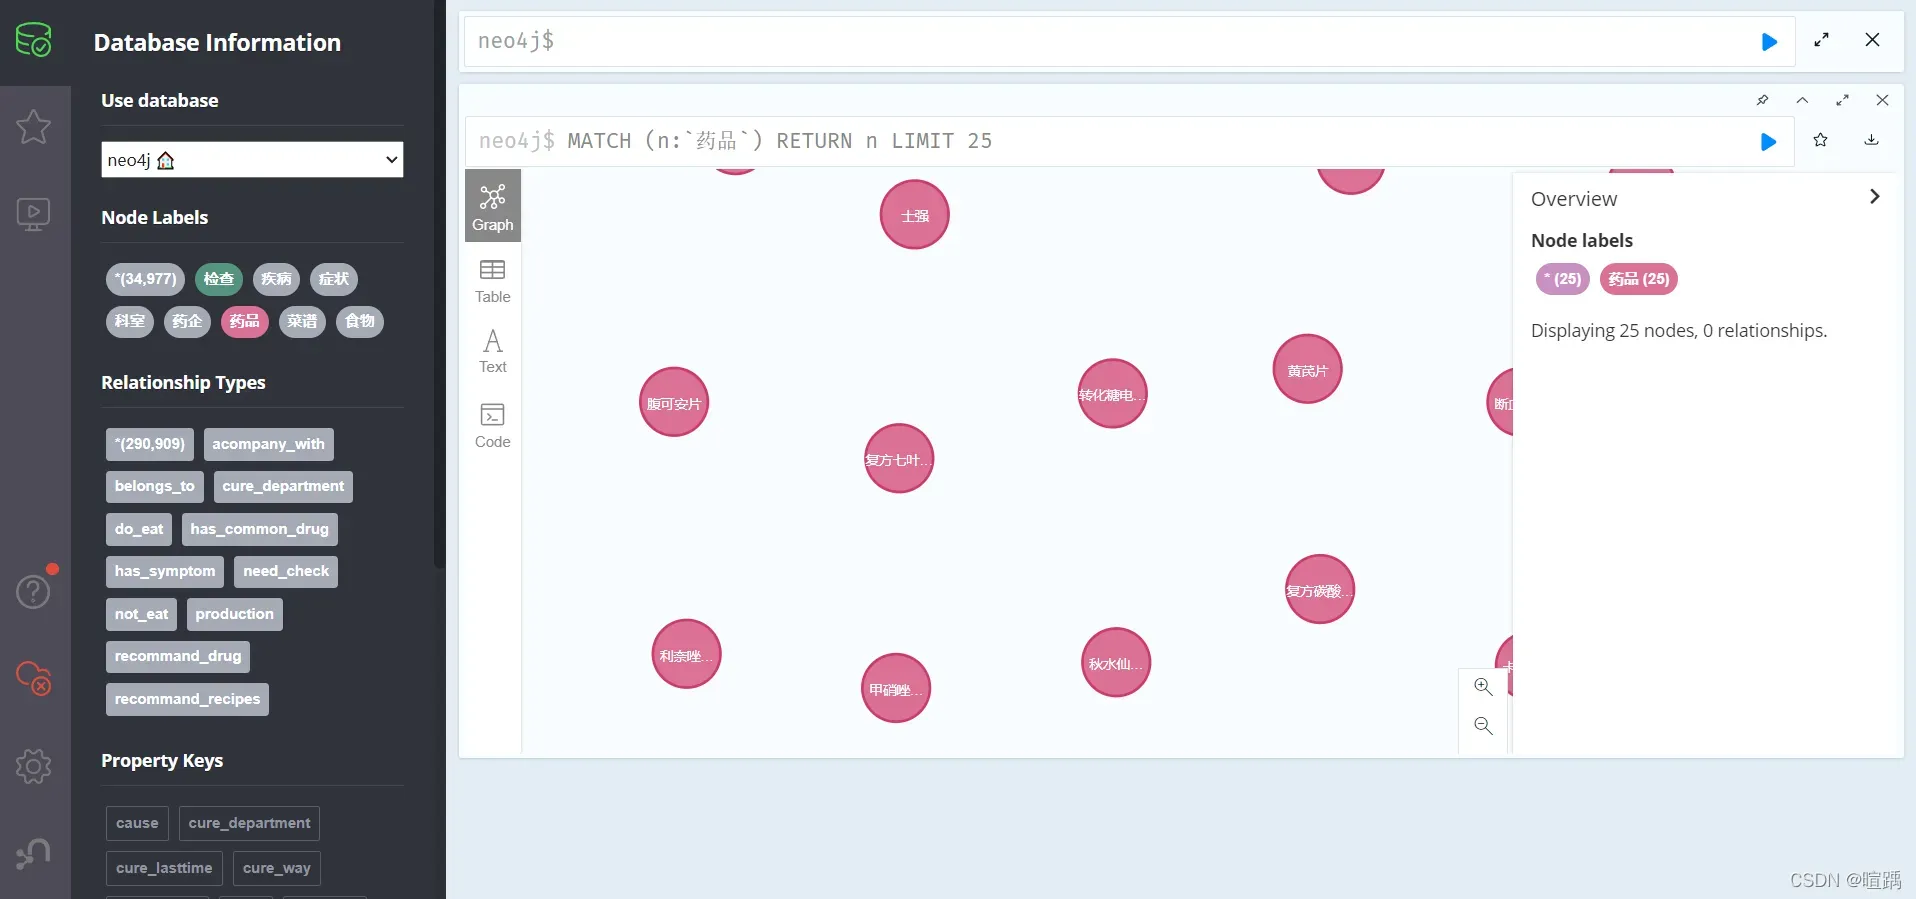
3.3 导入数据
首先打开容器中的Neo4j服务。
neo4j start
在项目中有个build_kg文件夹,进入到该文件夹中,执行build_kg_utils.py程序即可将数据导入Neo4j数据库中。
$ python build_kg_utils.py
此过程可能需要几个小时。
3.4 打开实体抽取服务
在项目根目录中的knowledge_extraction\bilstm下存放着BiLSTM算法的代码,需要启动该服务。
$ python app.py
因为是使用别人写好的算法代码,在启动时提示版本不兼容的问题,原作者使用的是tensorflow1.0版本,在很多地方上写法不一致,故在此记录。
首先需要在app.py中修改如下代码:
| 旧代码 | 新代码 |
|---|---|
| config = tf.ConfigProto() | config = tf.compat.v1.ConfigProto() |
| sess = tf.Session(config=config) | sess = tf.compat.v1.Session(config=config) |
| graph = tf.get_default_graph() | graph = tf.compat.v1.get_default_graph() |
config = tf.ConfigProto() => config = tf.compat.v1.ConfigProto()
sess = tf.Session(config=config) => sess = tf.compat.v1.Session(config=config)
graph = tf.get_default_graph() => graph = tf.compat.v1.get_default_graph()
3.5 打开意图识别服务
使用Bert模型的意图识别算法代码存放在项目根目录nlu\intent_recg_bert下,需要启动服务。
$ python app.py
因为是使用别人写好的算法代码,在启动时提示版本不兼容的问题,原作者使用的是tensorflow1.0版本,在很多地方上写法不一致,故在此记录。
首先需要在app.py中修改如下代码:
| 旧代码 | 新代码 |
|---|---|
| config = tf.ConfigProto() | config = tf.compat.v1.ConfigProto() |
| sess = tf.Session(config=config) | sess = tf.compat.v1.Session(config=config) |
| graph = tf.get_default_graph() | graph = tf.compat.v1.get_default_graph() |
config = tf.ConfigProto() => config = tf.compat.v1.ConfigProto()
sess = tf.Session(config=config) => sess = tf.compat.v1.Session(config=config)
graph = tf.get_default_graph() => graph = tf.compat.v1.get_default_graph()
3.6 打开问答助手服务
在app.py中需要检查主机号和端口号,主机号要写成0.0.0.0不然本机打不开项目,如果端口号要和创建容器时映射的端口一致(这里我设置了5002)。而且要关闭调试模式。
app.run(host='0.0.0.0', port=5002, debug=False, threaded=True)
完成以上操作后,在终端输入以下命令启动项目:
$ python app.py
3.7 效果展示
netstat可以列出所有正在监听的TCP或UDP端口,包括使用端口和套接字状态的服务。
$ netstat -tunlp
Active Internet connections (only servers)
Proto Recv-Q Send-Q Local Address           Foreign Address         State       PID/Program name
tcp        0      0 0.0.0.0:7687            0.0.0.0:*               LISTEN      1241/java
tcp        0      0 0.0.0.0:5002            0.0.0.0:*               LISTEN      1727/python
tcp        0      0 0.0.0.0:7474            0.0.0.0:*               LISTEN      1241/java
tcp        0      0 127.0.0.1:60061         0.0.0.0:*               LISTEN      1753/python
tcp        0      0 127.0.0.1:60062         0.0.0.0:*               LISTEN      1779/python
- -t:显示 TCP 端口
- -u:显示 UDP 端口
- -n:显示数字地址而不是主机名
- -l:仅显示侦听端口
- -p:显示进程的 PID 和名称
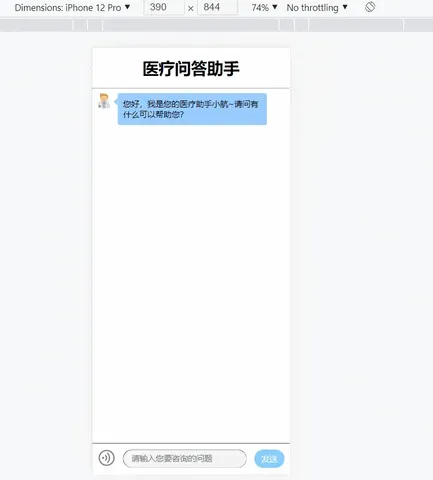
此时在本机浏览器输入localhost:5002即可成功打开项目页面!
4. 搭建项目镜像
现在将项目所在的容器封装成镜像,方便在不同系统上部署。这里我使用了两种方法来构建,分别是Docker commit和Dockerfile来构建项目镜像。
4.1 Docker commit搭建
在Docker中,镜像是多层存储,每一层是在前一层的基础上进行的修改;而容器同样也是多层存储,是在以镜像为基础层,在其基础上加一层作为容器运行时的存储层。
在本项目中,我们基于tensorflow镜像创建了diagnosis容器,并对容器进行了修改。通过docker diff命令可以看到具体的变化。
$ docker diff CONTAINER
docker commit命令可以将容器的存储层保存为镜像。也就是说,在原始镜像的基础上,将容器的存储层叠加起来,形成一个新的镜像。 docker commit的语法格式为:
$ docker commit [选项] <容器ID或容器名> [<仓库名>[:<标签>]]
在这个项目中,我使用以下说明来构建项目映像:
$ docker commit --author "xxxx" --message "Diagnosis Chatbot Project" diagnosis username/image:tag
其中,--author为指定作者,--message为记录本次修改的内容。这类似于git版本控制,但这里也可以省略此信息。请注意,存储库名称必须为小写。
使用docker image ls命令查看我们新创建的图像。
使用docker run命令根据项目镜像生成项目容器。容器已经配置好环境,可以直接在容器中启动服务。
4.2 Dockerfile搭建
后续会计划打算用Dockerfile构建这个项目的镜像。
5. 发布项目镜像
将Docker commit中已经建好的项目镜像推送到远程仓库。说明如下:
$ docker push username/image:tag
文章出处登录后可见!