一、基础知识
图像去模糊是一个经典的图像复原任务。造成图像模糊的原因有很多,可以主要分为三大类
- 离焦模糊:场景中的物体处于成像景深范围之外而变得模糊。离焦模糊的去除一般对应着景深的扩展技术。
- 像差模糊:镜头加工和制造的缺陷造成了物方的一个点在成像平面形成了一个弥散斑
- 运动模糊:成像过程中相机运动或者场景变化所造成的不同空间位置信息的混叠
而最常见的图像去模糊技术一般都是针对运动模糊的去除,因为运动模糊往往是拍摄者不想引入拍摄图像的。我们本次就简单介绍一下图像运动模糊的形成和去除。
图像运动模糊是由于成像过程中相机运动或者场景变化所造成的不同空间位置信息的混叠。拍摄图像时往往需要一定的曝光时间,如果在这一段曝光时间内投射到传感器上的画面运动超过单个像素尺寸,那么模糊就会出现。曝光时间越长,图像中的模糊往往就剧烈。场景点的运动轨迹累计形成的图像即为模糊核,其记录着在曝光时间内,当前场景点在图像上的能量分布和影响范围。
在网络模型方面,许多其他图像复原任务如降噪、超分辨等以及高层视觉任务中的网络结构都被借鉴过来。许多传统去模糊的方法也被借鉴到去模糊网络中,比如传统去模糊中使用金字塔结构从小尺度到大尺度地迭代去模糊,而多尺度递归的网络结构(如SRN)也被应用到去模糊任务中并取得了不错的效果。借助于网络模型,去模糊方法可以打破传统卷积模型的限制,使得去模糊算法可以同时应对相机运动造成的全局非均匀模糊和场景中物体运动造成的局部模糊。同时基于学习的方法缩短了运行时间,随着终端算力的提升,使得去模糊方法的落地变成了可能。
二、问题分析
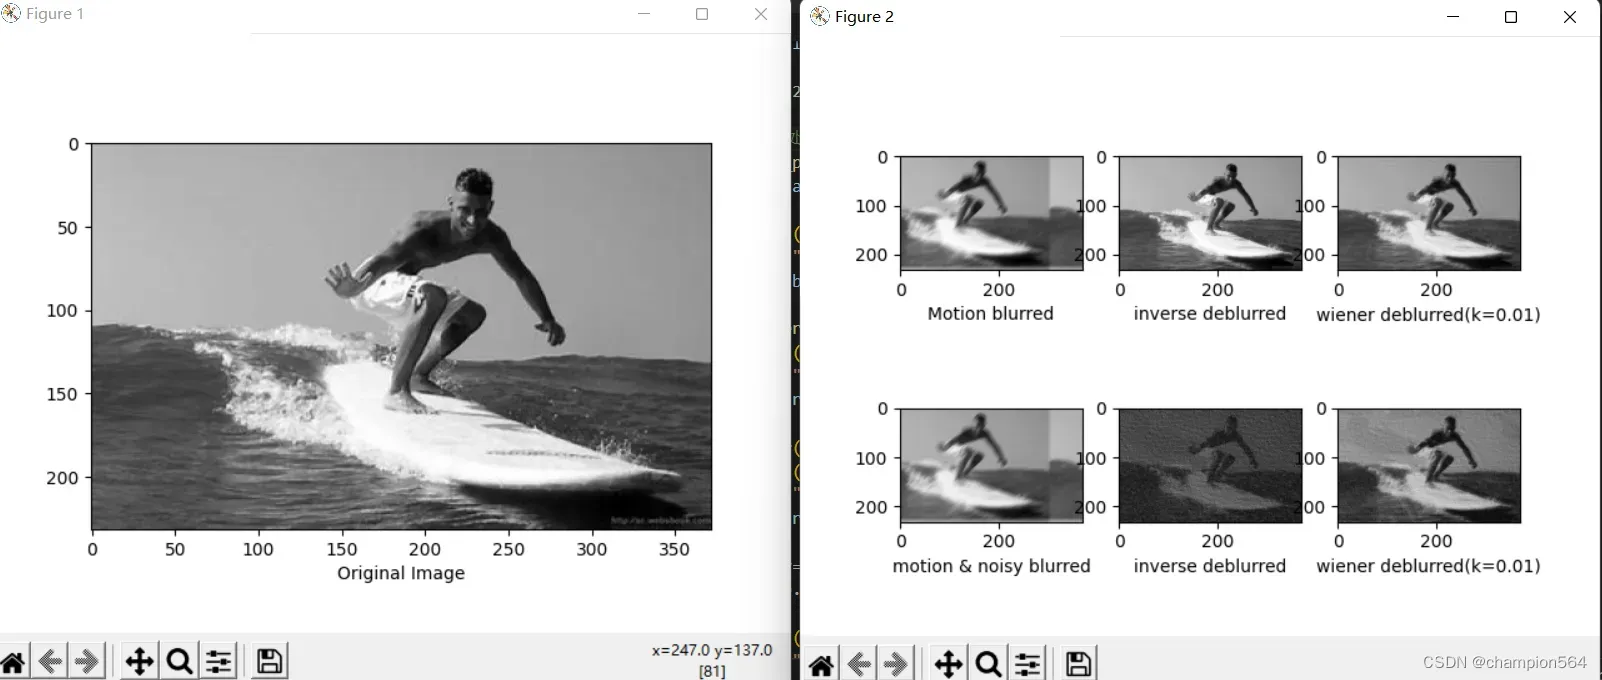
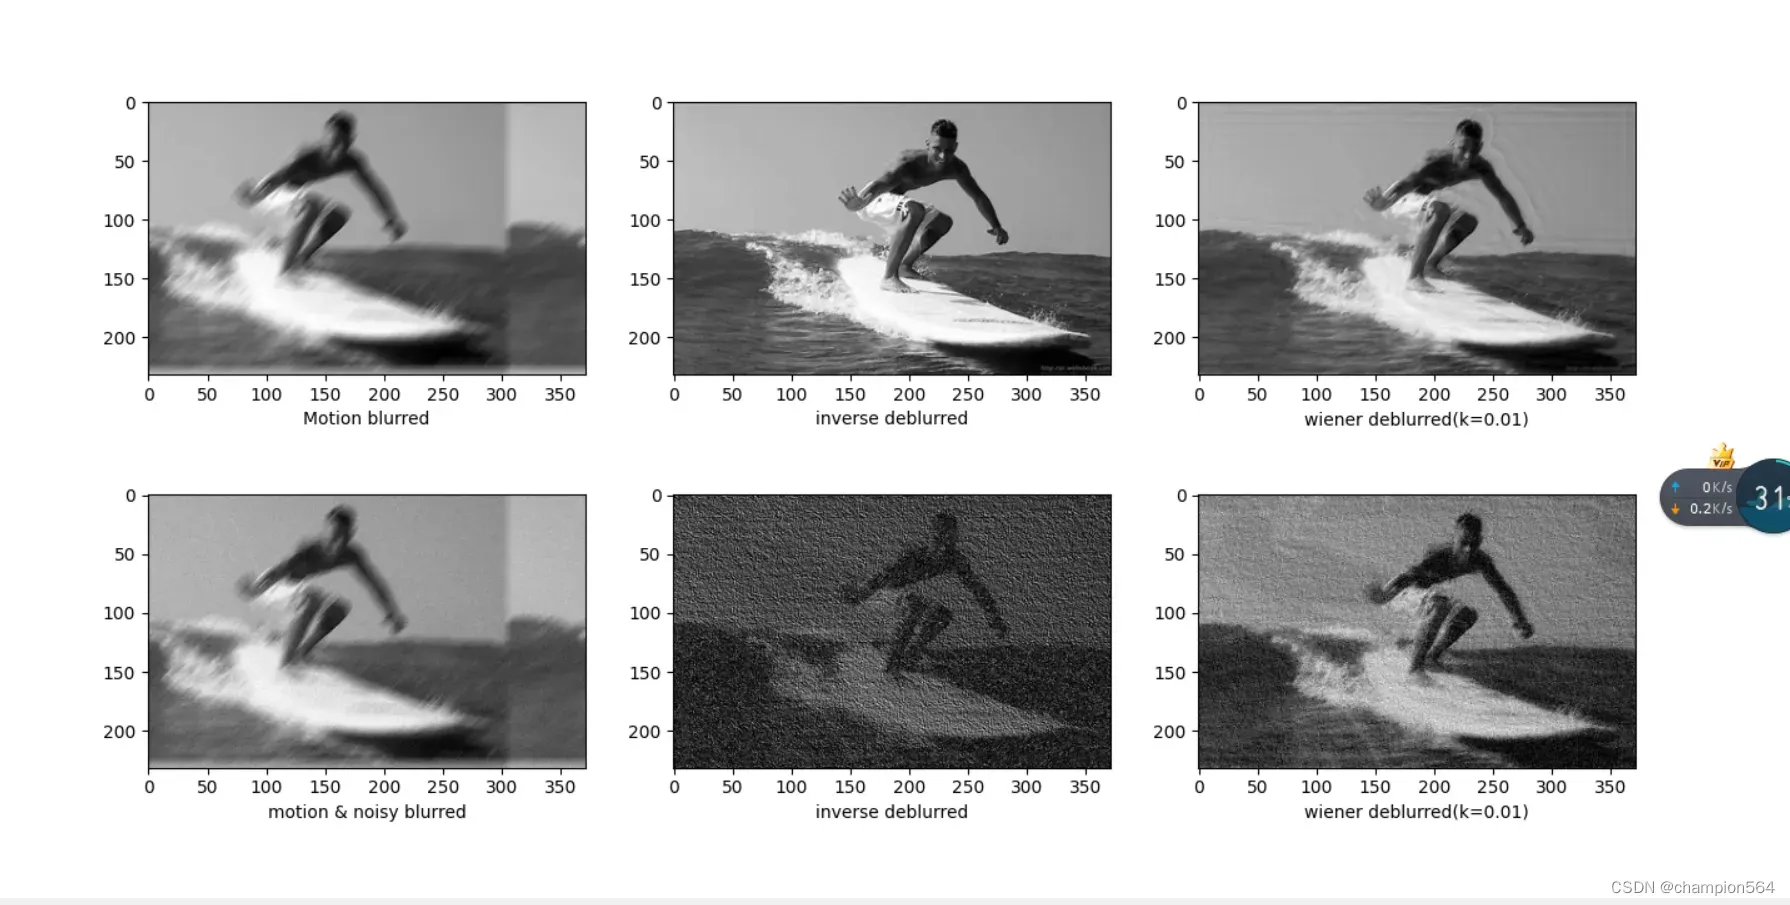
模拟现实条件中各种失真导致的图像模糊,同时加入噪声,模拟真实情况,用滤波器(逆滤波、维纳滤波)去处理图片。
三、效果图
四、代码
import matplotlib.pyplot as graph
import numpy as np
from numpy import fft
import math
import cv2
# 仿真运动模糊
def motion_process(image_size,motion_angle):
PSF = np.zeros(image_size)
print(image_size)
center_position=(image_size[0]-1)/2
print(center_position)
slope_tan=math.tan(motion_angle*math.pi/180)
slope_cot=1/slope_tan
if slope_tan<=1:
for i in range(15):
offset=round(i*slope_tan) #((center_position-i)*slope_tan)
PSF[int(center_position+offset),int(center_position-offset)]=1
return PSF / PSF.sum() #对点扩散函数进行归一化亮度
else:
for i in range(15):
offset=round(i*slope_cot)
PSF[int(center_position-offset),int(center_position+offset)]=1
return PSF / PSF.sum()
#对图片进行运动模糊
def make_blurred(input, PSF, eps):
input_fft = fft.fft2(input)# 进行二维数组的傅里叶变换
PSF_fft = fft.fft2(PSF)+ eps
blurred = fft.ifft2(input_fft * PSF_fft)
blurred = np.abs(fft.fftshift(blurred))
return blurred
def inverse(input, PSF, eps): # 逆滤波
input_fft = fft.fft2(input)
PSF_fft = fft.fft2(PSF) + eps #噪声功率,这是已知的,考虑epsilon
result = fft.ifft2(input_fft / PSF_fft) #计算F(u,v)的傅里叶反变换
result = np.abs(fft.fftshift(result))
return result
def wiener(input,PSF,eps,K=0.01): #维纳滤波,K=0.01
input_fft=fft.fft2(input)
PSF_fft=fft.fft2(PSF) +eps
PSF_fft_1=np.conj(PSF_fft) /(np.abs(PSF_fft)**2 + K)
result=fft.ifft2(input_fft * PSF_fft_1)
result=np.abs(fft.fftshift(result))
return result
image = cv2.imread('C:/Users/admin/Desktop/OIP-C.jpg')
image = cv2.cvtColor(image,cv2.COLOR_BGR2GRAY)
img_h=image.shape[0]
img_w=image.shape[1]
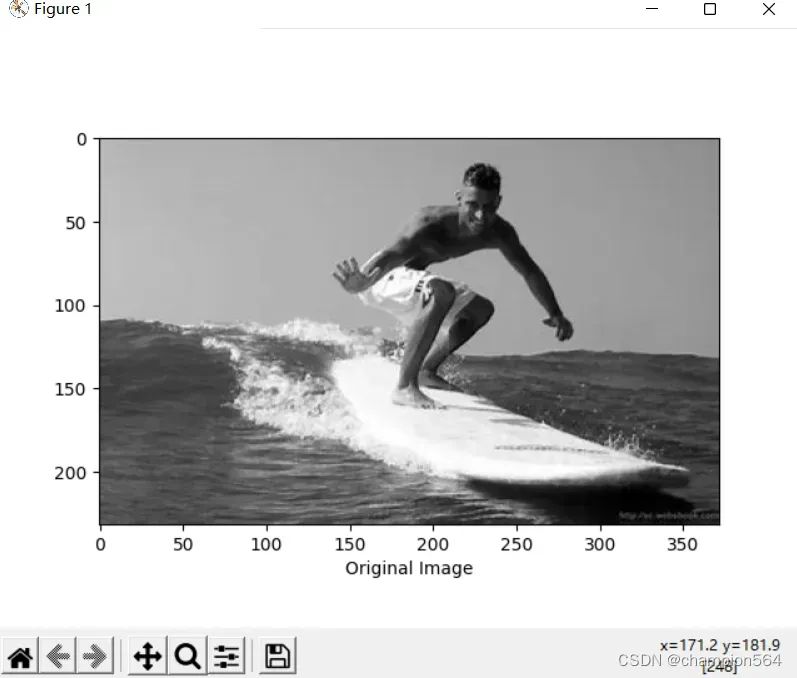
graph.figure(1)
graph.xlabel("Original Image")
graph.gray()
graph.imshow(image) #显示原图像
graph.figure(2)
graph.gray()
#进行运动模糊处理
PSF = motion_process((img_h,img_w), 60)
blurred = np.abs(make_blurred(image, PSF, 1e-3))
graph.subplot(231)
graph.xlabel("Motion blurred")
graph.imshow(blurred)
result = inverse(blurred, PSF, 1e-3) #逆滤波
graph.subplot(232)
graph.xlabel("inverse deblurred")
graph.imshow(result)
result=wiener(blurred,PSF,1e-3) #维纳滤波
graph.subplot(233)
graph.xlabel("wiener deblurred(k=0.01)")
graph.imshow(result)
blurred_noisy=blurred + 0.1 * blurred.std() * \
np.random.standard_normal(blurred.shape) #添加噪声,standard_normal产生随机的函数
graph.subplot(234)
graph.xlabel("motion & noisy blurred")
graph.imshow(blurred_noisy) #显示添加噪声且运动模糊的图像
result = inverse(blurred_noisy, PSF, 0.1+1e-3) #对添加噪声的图像进行逆滤波
graph.subplot(235)
graph.xlabel("inverse deblurred")
graph.imshow(result)
result=wiener(blurred_noisy,PSF,0.1+1e-3) #对添加噪声的图像进行维纳滤波
graph.subplot(236)
graph.xlabel("wiener deblurred(k=0.01)")
graph.imshow(result)
graph.show()
文章出处登录后可见!
已经登录?立即刷新