我使用的代码和训练步骤来自:http://t.csdn.cn/ia1x4
因为是三个月前刚接触yolov5时训练的,那时候是真的不太熟悉yolov5,所以当时记录得很乱,但现在空闲下来整理的时候又不记得了,所以只能先这样了…
3.2运行指令进行训练:
python train.py --data data/XYB.yaml --cfg xyb_m.yaml --batch-size 64
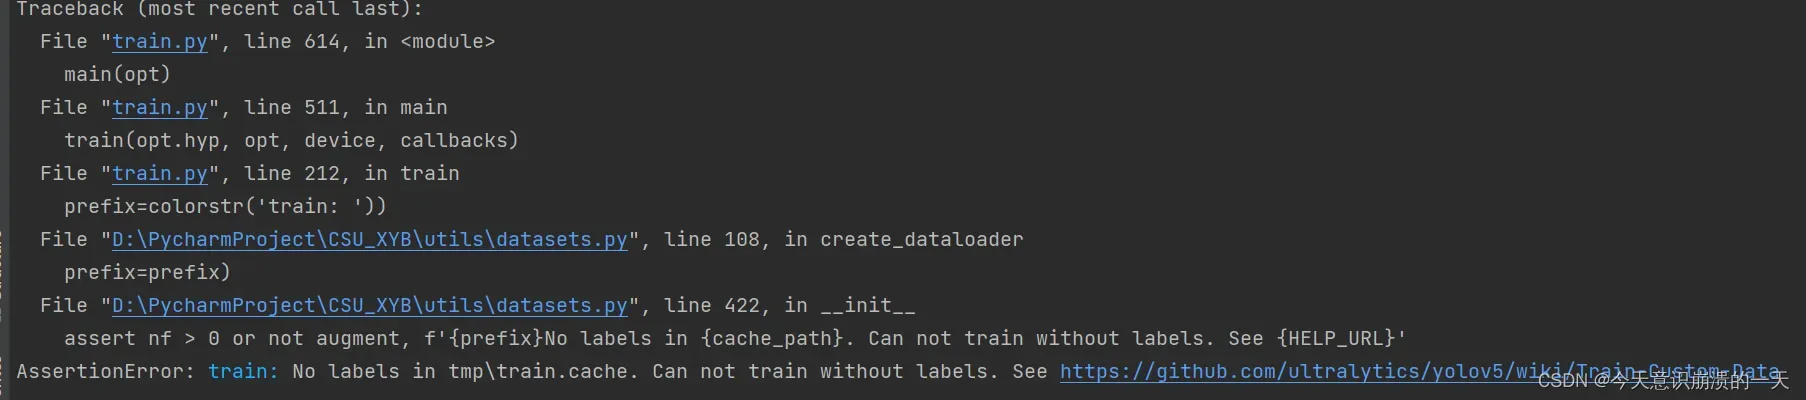
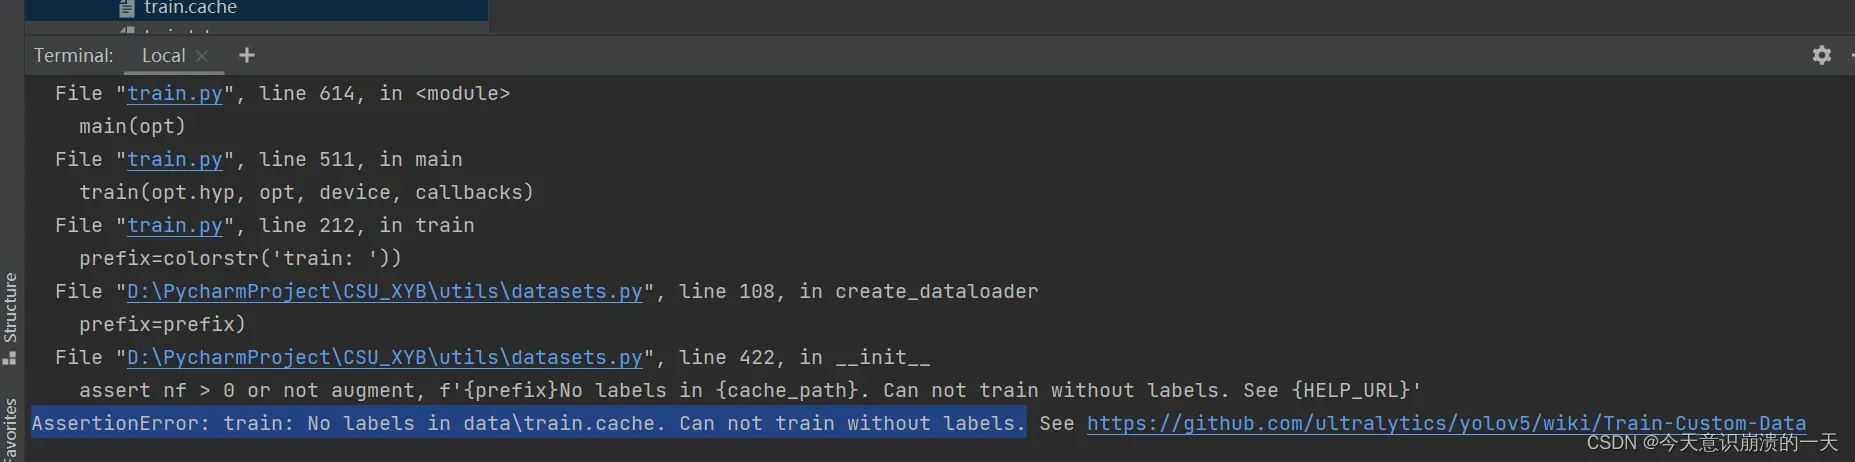
3.2.1问题:AssertionError: train: No labels in tmp\train.cache. Can not train without labels.
See https://github.com/ultralytics/yolov5/wiki/Train-Custom-Data
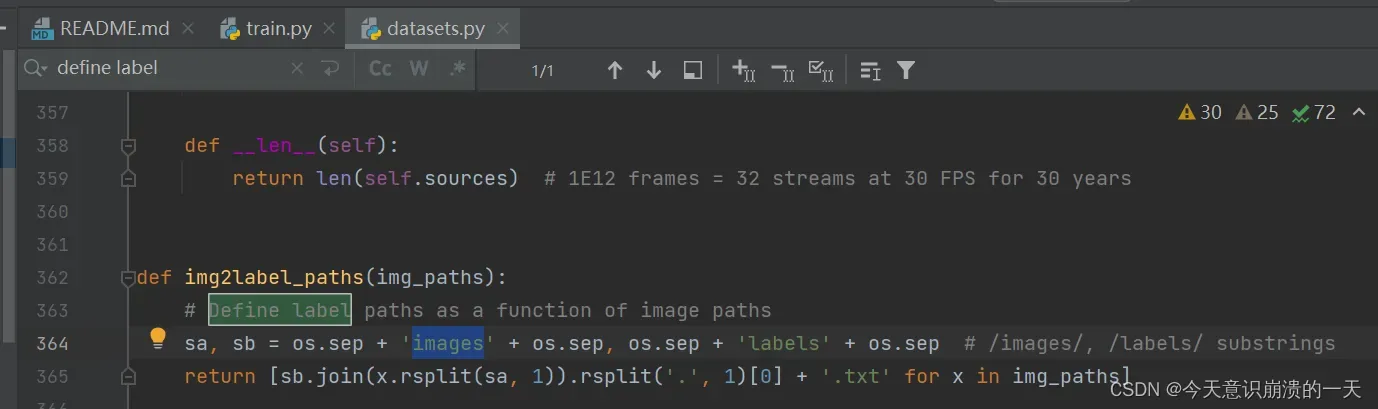
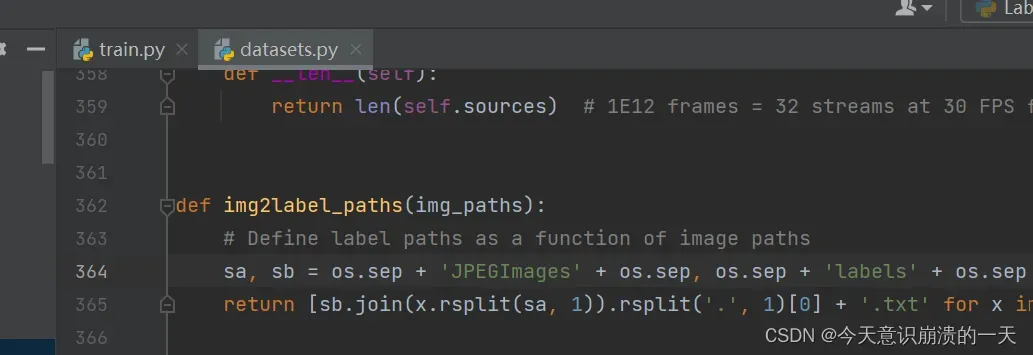
打开dataset.py文件,使用快捷键Ctrl+F使用搜索框搜索define label,按照正常的VOC标注之后图片应该时保存在JPEGImages文件夹下的,但是根据源码则是读取的images里的图片,因此需要将images改为JPEGImages,这样就能正常读取了。(其实这里包括后面一大段都是无用尝试,可以跳过)
3.3换个教程:
按照这个顺序:
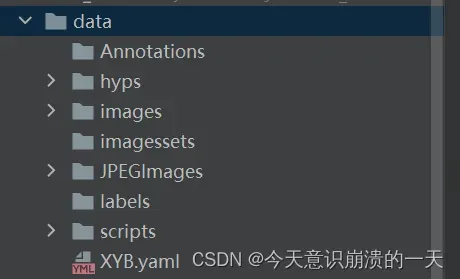
新建Annotations(存放voc格式的xml)
新建JPEGImages(存放训练的图片)
新建ImageSets ,labels (这两个文件为空)
将JPEGImages的图片复制到images中
3.3.1 在工程的根目录下添加makeTxt.py文件,并执行
import os
import random

trainval_percent = 0.8
train_percent = 0.75
xmlfilepath = 'data/Annotations'
txtsavepath = 'data/imagessets'
total_xml = os.listdir(xmlfilepath)

num = len(total_xml)
list = range(num)
tv = int(num * trainval_percent)
tr = int(tv * train_percent)
trainval = random.sample(list, tv)
train = random.sample(trainval, tr)

ftrainval = open('data/imagessets/trainval.txt', 'w')
ftest = open('data/imagessets/test.txt', 'w')
ftrain = open('data/imagessets/train.txt', 'w')
fval = open('data/imagessets/val.txt', 'w')

for i in list:
    name = total_xml[i][:-4] + '\n'
    if i in trainval:
        ftrainval.write(name)
        if i in train:
            ftest.write(name)
        else:
            fval.write(name)
    else:
        ftrain.write(name)

ftrainval.close()
ftrain.close()
fval.close()
ftest.close()
train.txt 是用来训练的图片文件的文件名列表 (训练集)
val.txt是用来验证的图片文件的文件名列表 (验证集)
trianval.txt是用来训练和验证的图片文件的文件名列表
test.txt 是用来测试的图片文件的文件名列表 (测试集)
trainval其实包括train+val两个集合。 从整个图片集来看,分成test集(占比0.2)和trainval(占比0.8),其中trainval集又分成train集(占比0.75)和val集(占比0.25)。总的下来三个集合,train集(0.8×0.75=0.6),val集(0.8×0.25=0.2), test集(0.2); 所以train :val : test = 6 : 2 : 2.
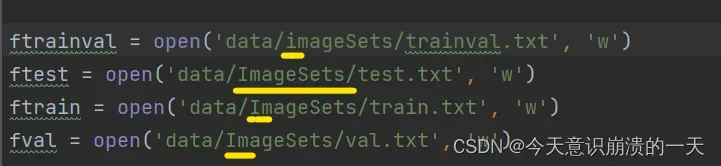
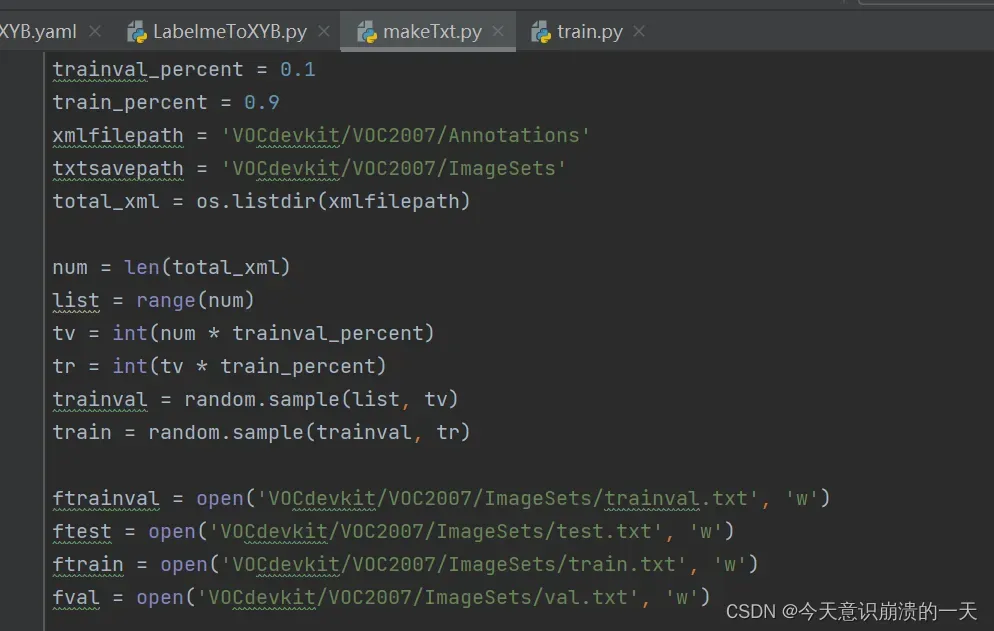
3.3.2问题:FileNotFoundError: [Errno 2] No such file or directory: ‘data/ImageSets/trainval.txt’
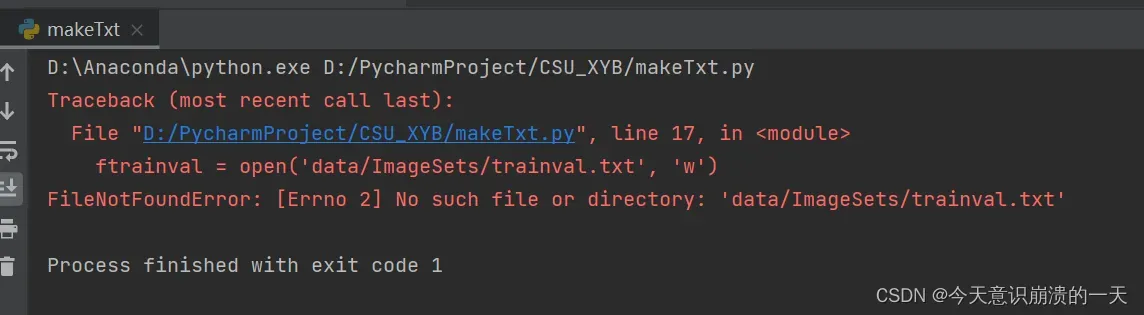
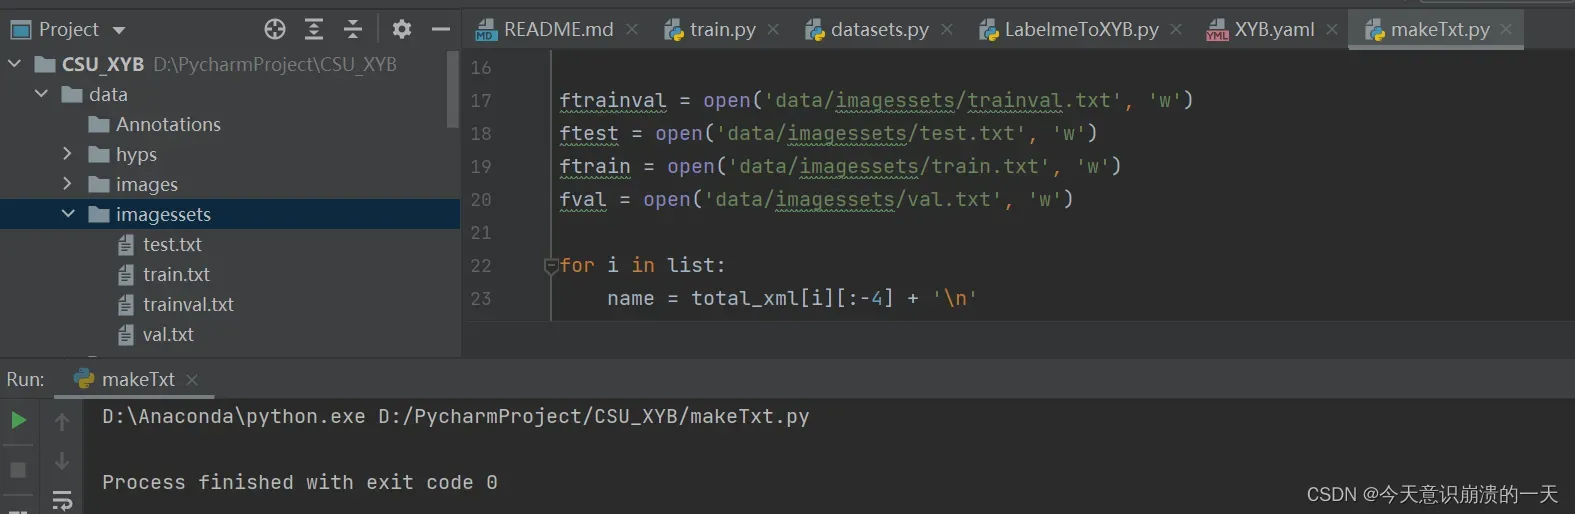
路径出问题,如图中位置,改成自己的位置:
成功生成上面四个文件:
3.3.3 在工程根目录下新建voc_label.py,并执行(注意!!!里面的标签名要改成自己训练标签,否则labels里面的txt文件为空)(这个步骤后面废弃了)
import xml.etree.ElementTree as ET
import pickle
import os
from os import listdir, getcwd
from os.path import join

sets = ['train', 'test', 'val']
################################这里修改为自己的标签名###############
classes = ['leaf', 'fruit']


def convert(size, box):
    dw = 1. / size[0]
    dh = 1. / size[1]
    x = (box[0] + box[1]) / 2.0
    y = (box[2] + box[3]) / 2.0
    w = box[1] - box[0]
    h = box[3] - box[2]
    x = x * dw
    w = w * dw
    y = y * dh
    h = h * dh
    return (x, y, w, h)


def convert_annotation(image_id):
    in_file = open('data/Annotations/%s.xml' % (image_id))
    out_file = open('data/labels/%s.txt' % (image_id), 'w')
    tree = ET.parse(in_file)
    root = tree.getroot()
    size = root.find('size')
    w = int(size.find('width').text)
    h = int(size.find('height').text)

    for obj in root.iter('object'):
        difficult = obj.find('difficult').text
        cls = obj.find('name').text
        if cls not in classes or int(difficult) == 1:
            continue
        cls_id = classes.index(cls)
        xmlbox = obj.find('bndbox')
        b = (float(xmlbox.find('xmin').text), float(xmlbox.find('xmax').text), float(xmlbox.find('ymin').text),
             float(xmlbox.find('ymax').text))
        bb = convert((w, h), b)
        out_file.write(str(cls_id) + " " + " ".join([str(a) for a in bb]) + '\n')


wd = getcwd()
print(wd)
for image_set in sets:
    if not os.path.exists('data/labels/'):
        os.makedirs('data/labels/')
    image_ids = open('data/imagessets/%s.txt' % (image_set)).read().strip().split()
    list_file = open('data/%s.txt' % (image_set), 'w')
    for image_id in image_ids:
        list_file.write('data/images/%s.jpg\n' % (image_id))
        convert_annotation(image_id)
    list_file.close()
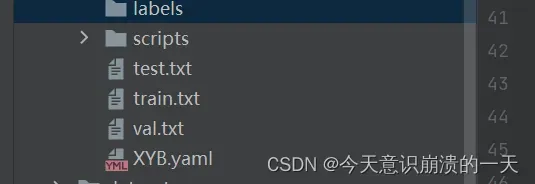
得到labels的具体内容以及data目录下的train.txt,test.txt,val.txt
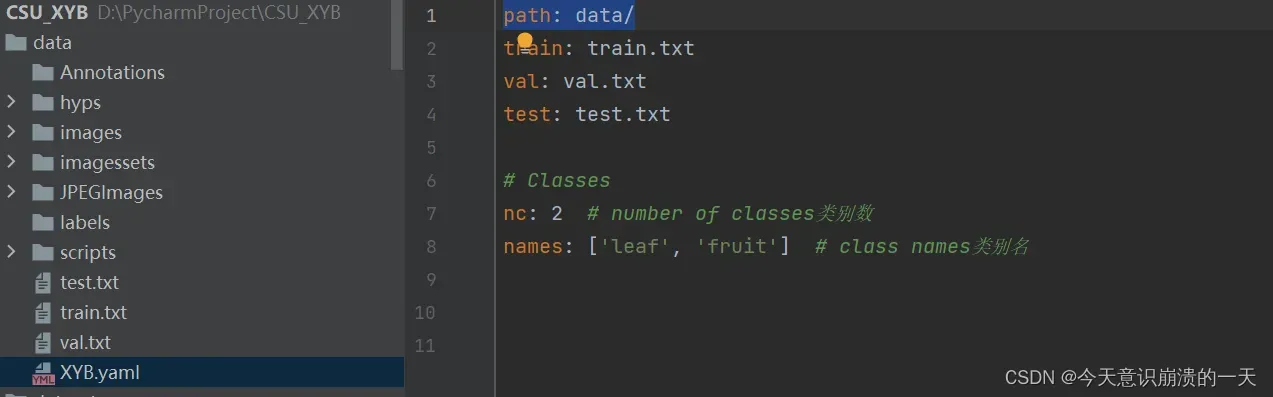
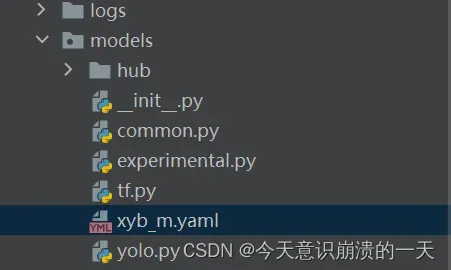
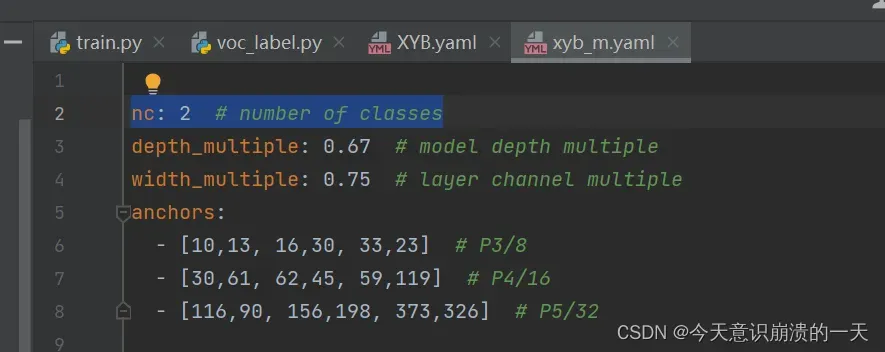
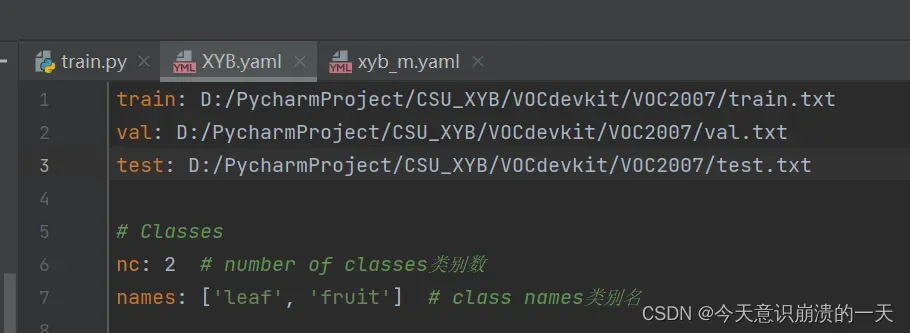
3.3.4 创建自己yaml文件,在data目录下:
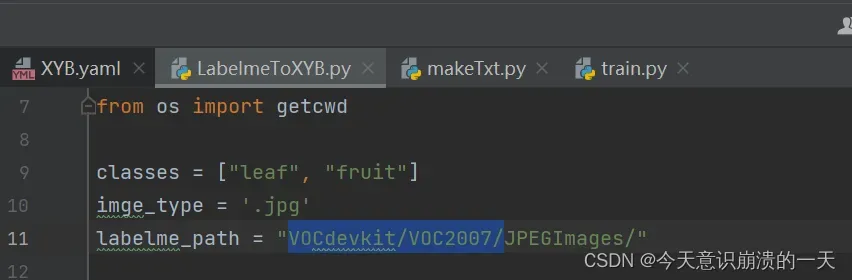
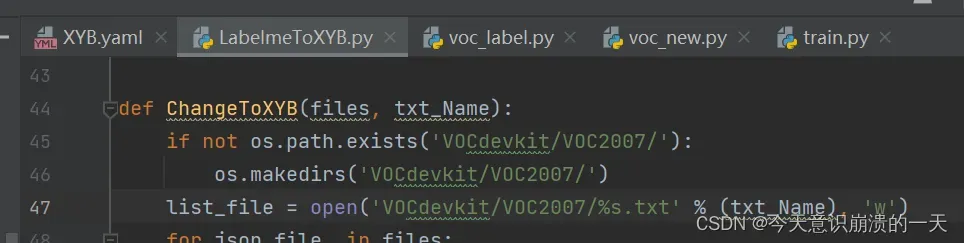
修改LabelmeToXYB.py的参数:
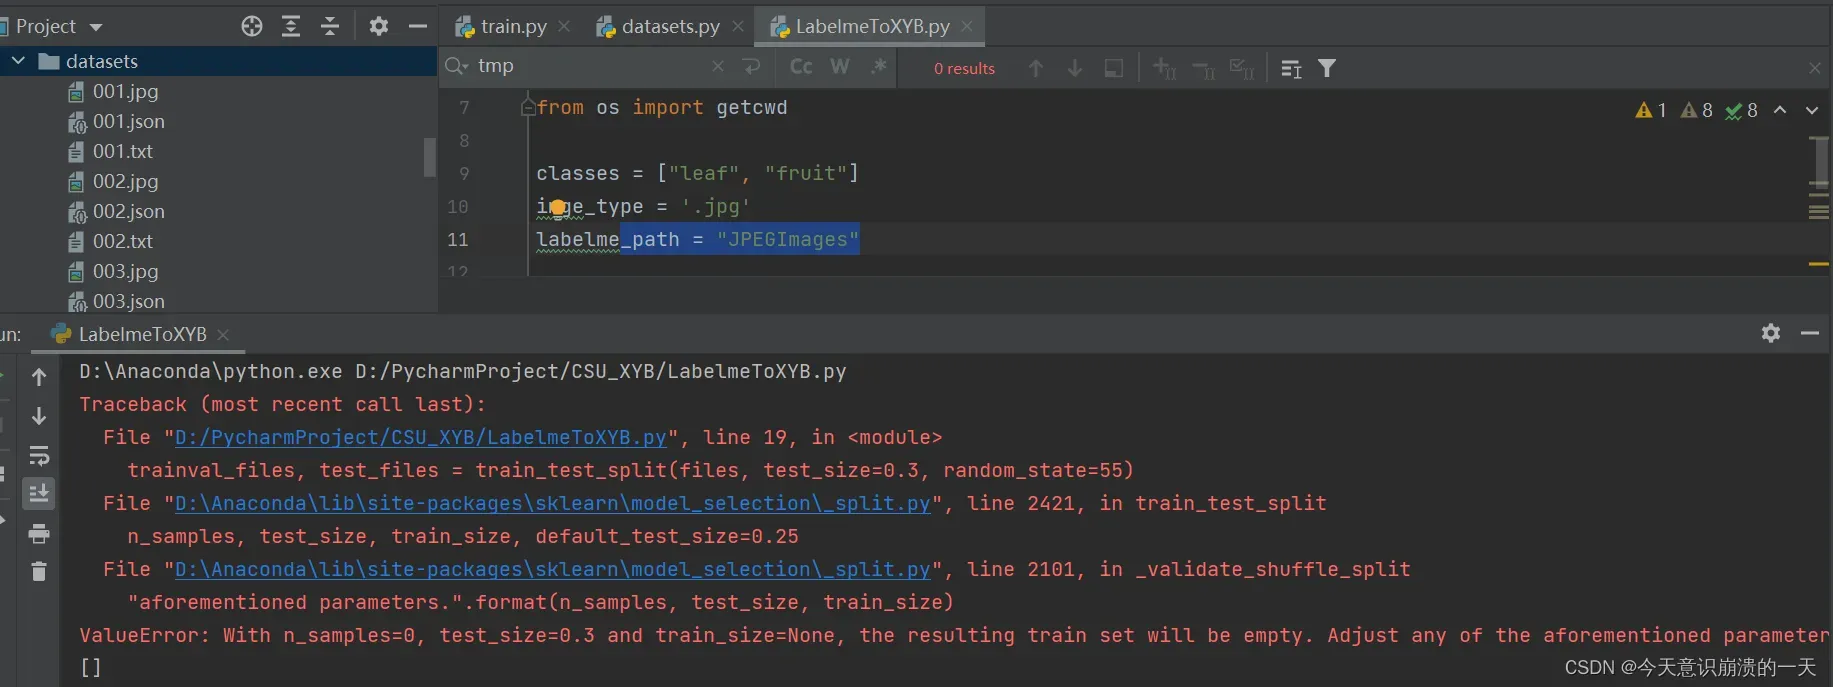
3.3.5 问题:ValueError: With n_samples=0, test_size=0.3 and train_size=None, the resulting train set will be empty. Adjust any of the aforementioned parameters.
主要原因还是路径问题
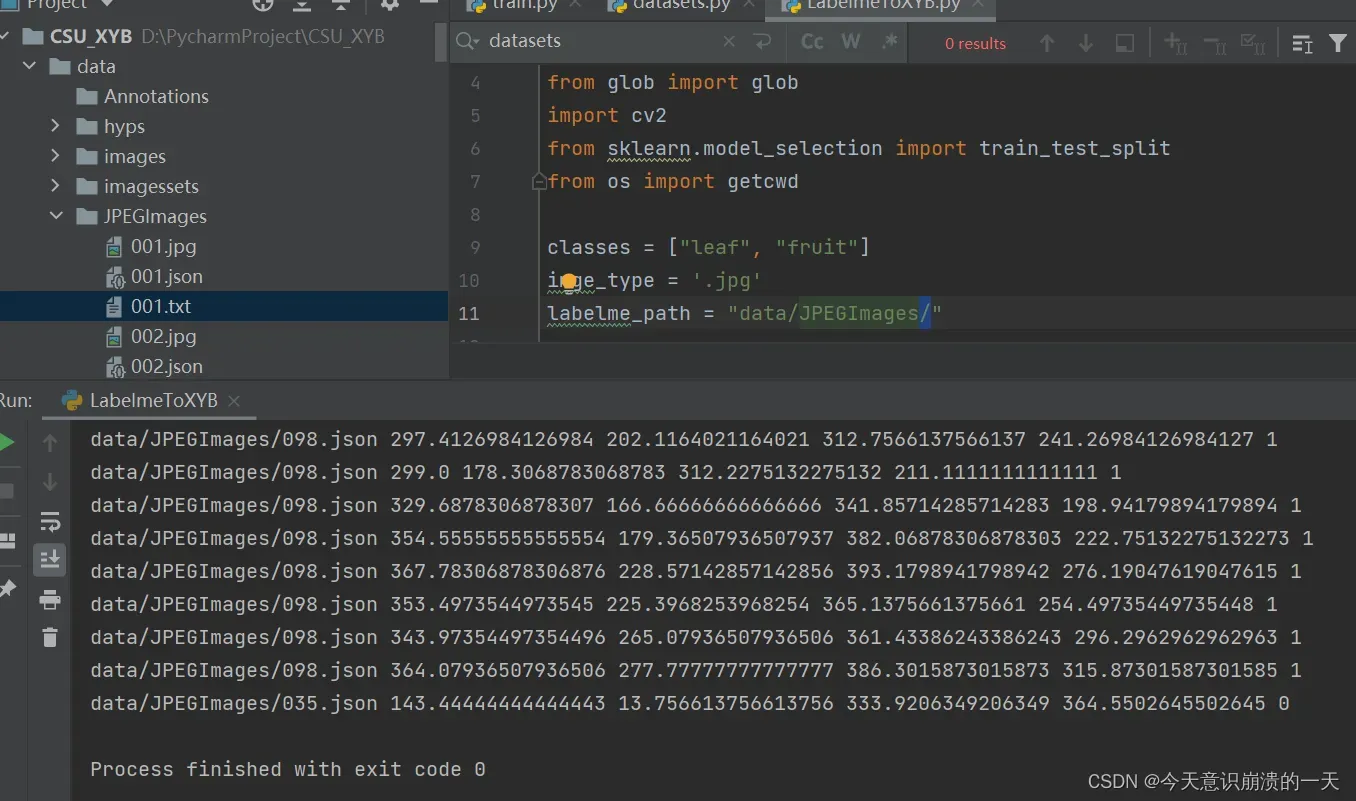
如上图标注处,最后那个斜杠不能少,运行成功后出现各图片带着坐标数据的txt文件(标注好的)
原文链接:https://blog.csdn.net/zzzbeauty/article/details/120263188
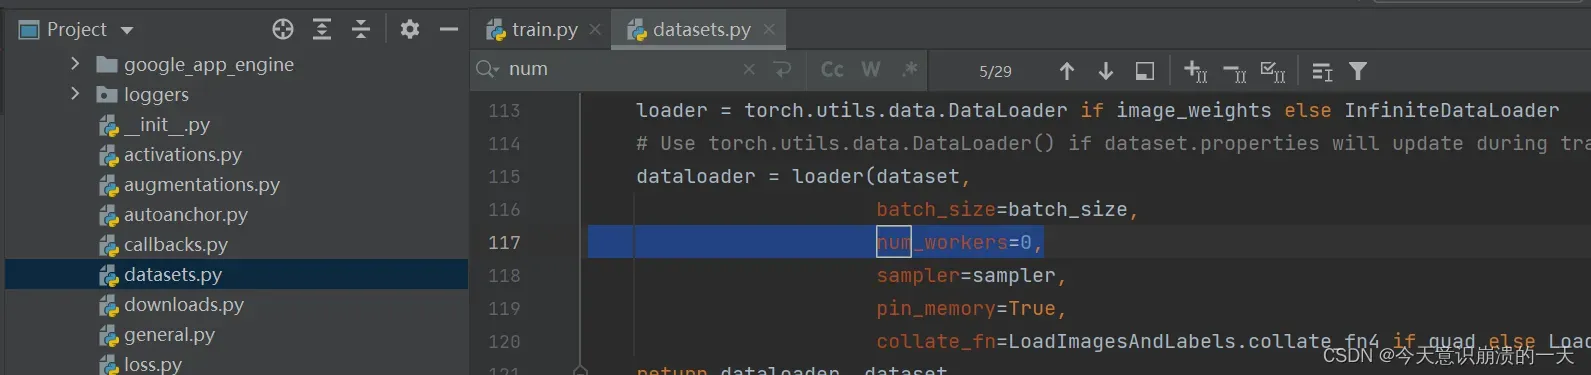
datasets也改了
3.3.6 继续训练
还是失败,但是比昨天的问题好了很多,没有出现“页面太小无法加载”“网络加载失败”(虚拟内存不够)等字句。
改一些小细节:
类别改一下:
由于在制作VOC数据集时,未生成标注文件(xml),直接生成了labels,格式如下:

先需将其转换为xml文件,格式如下,用于模型训练。
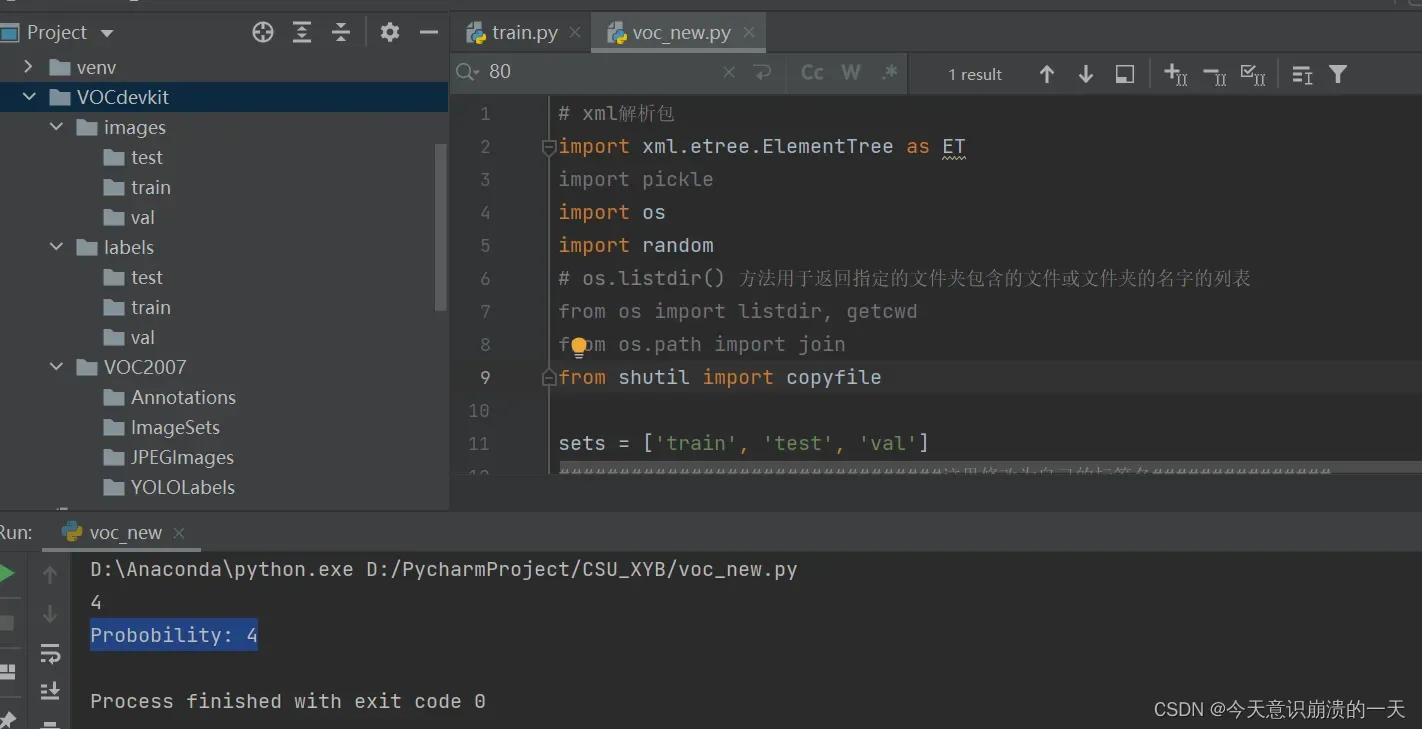
3.3.7 数据集转换方式代码(真正解决3.2.1)
顺便将data里的图片等数据挪到代码新创建的文件夹VOCdevkit的子目录中(原文链接找不到了):
# xml解析包
import xml.etree.ElementTree as ET
import pickle
import os
import random
# os.listdir() 方法用于返回指定的文件夹包含的文件或文件夹的名字的列表
from os import listdir, getcwd
from os.path import join
from shutil import copyfile

sets = ['train', 'test', 'val']
#这里修改为自己的标签名
classes = ['leaf', 'fruit']

def clear_hidden_files(path):
    dir_list = os.listdir(path)
    for i in dir_list:
        abspath = os.path.join(os.path.abspath(path), i)
        if os.path.isfile(abspath):
            if i.startswith("._"):
                os.remove(abspath)
        else:
            clear_hidden_files(abspath)

# 进行归一化操作
def convert(size, box):
    # size:(原图w,原图h) , box:(xmin,xmax,ymin,ymax)
    dw = 1. / size[0]
    dh = 1. / size[1]

    x = (box[0] + box[1]) / 2.0   # 物体在图中的中心点x坐标
    y = (box[2] + box[3]) / 2.0   # 物体在图中的中心点y坐标

    w = box[1] - box[0]   # 物体实际像素宽度
    h = box[3] - box[2]   # 物体实际像素高度

    x = x * dw   # 物体中心点x的坐标比(相当于 x/原图w)
    w = w * dw   # 物体宽度的宽度比(相当于 w/原图w)
    y = y * dh   # 物体中心点y的坐标比(相当于 y/原图h)
    h = h * dh   # 物体宽度的宽度比(相当于 h/原图h)
    return (x, y, w, h)  # 返回 相对于原图的物体中心点的x坐标比,y坐标比,宽度比,高度比,取值范围[0-1]
    # year ='2012', 对应图片的id(文件名)

def convert_annotation(image_id):
    in_file = open('VOCdevkit/VOC2007/Annotations/%s.xml' % image_id, encoding='UTF-8')
    out_file = open('VOCdevkit/VOC2007/YOLOLabels/%s.txt' % image_id, 'w', encoding='UTF-8')
    tree = ET.parse(in_file)
    root = tree.getroot()
    size = root.find('size')
    w = int(size.find('width').text)
    h = int(size.find('height').text)

    for obj in root.iter('object'):
        if obj.find('difficult'):
            difficult = int(obj.find('difficult').text)
        else:
            difficult = 0
        cls = obj.find('name').text
        if cls not in classes or int(difficult) == 1:
            continue
        cls_id = classes.index(cls)
        xmlbox = obj.find('bndbox')
        b = (float(xmlbox.find('xmin').text), float(xmlbox.find('xmax').text), float(xmlbox.find('ymin').text),
             float(xmlbox.find('ymax').text))
        bb = convert((w, h), b)
        out_file.write(str(cls_id) + " " + " ".join([str(a) for a in bb]) + '\n')
    in_file.close()
    out_file.close()


wd = os.getcwd()
wd = os.getcwd()
data_base_dir = os.path.join(wd, "VOCdevkit/")
if not os.path.isdir(data_base_dir):
    os.mkdir(data_base_dir)

work_sapce_dir = os.path.join(data_base_dir, "VOC2007/")
if not os.path.isdir(work_sapce_dir):
    os.mkdir(work_sapce_dir)

annotation_dir = os.path.join(work_sapce_dir, "Annotations/")
if not os.path.isdir(annotation_dir):
    os.mkdir(annotation_dir)
clear_hidden_files(annotation_dir)

imageset_dir = os.path.join(work_sapce_dir, "ImageSets/")
if not os.path.isdir(imageset_dir):
    os.mkdir(imageset_dir)
clear_hidden_files(imageset_dir)

image_dir = os.path.join(work_sapce_dir, "JPEGImages/")
if not os.path.isdir(image_dir):
    os.mkdir(image_dir)
clear_hidden_files(image_dir)

yolo_labels_dir = os.path.join(work_sapce_dir, "YOLOLabels/")
# 如果没有voc数据集转为 yolov5数据集文件夹,则自动创建
if not os.path.isdir(yolo_labels_dir):
    os.mkdir(yolo_labels_dir)
clear_hidden_files(yolo_labels_dir)
# 在VOCdevkit文件夹中创建 images文件夹
yolov5_images_dir = os.path.join(data_base_dir, "images/")
if not os.path.isdir(yolov5_images_dir):
    os.mkdir(yolov5_images_dir)
clear_hidden_files(yolov5_images_dir)
# 在VOCdevkit文件夹中创建 images文件夹
yolov5_labels_dir = os.path.join(data_base_dir, "labels/")
if not os.path.isdir(yolov5_labels_dir):
    os.mkdir(yolov5_labels_dir)
clear_hidden_files(yolov5_labels_dir)

# 在 images文件中创建 train val test文件夹
yolov5_images_train_dir = os.path.join(yolov5_images_dir, "train/")
if not os.path.isdir(yolov5_images_train_dir):
    os.mkdir(yolov5_images_train_dir)
clear_hidden_files(yolov5_images_train_dir)

yolov5_images_val_dir = os.path.join(yolov5_images_dir, "val/")
if not os.path.isdir(yolov5_images_val_dir):
    os.mkdir(yolov5_images_val_dir)
clear_hidden_files(yolov5_images_val_dir)

yolov5_images_test_dir = os.path.join(yolov5_images_dir, "test/")
if not os.path.isdir(yolov5_images_test_dir):
    os.mkdir(yolov5_images_test_dir)
clear_hidden_files(yolov5_images_test_dir)

# 在 labels文件夹中创建 train val test文件夹
yolov5_labels_train_dir = os.path.join(yolov5_labels_dir, "train/")
if not os.path.isdir(yolov5_labels_train_dir):
    os.mkdir(yolov5_labels_train_dir)
clear_hidden_files(yolov5_labels_train_dir)

yolov5_labels_val_dir = os.path.join(yolov5_labels_dir, "val/")
if not os.path.isdir(yolov5_labels_val_dir):
    os.mkdir(yolov5_labels_val_dir)
clear_hidden_files(yolov5_labels_val_dir)

yolov5_labels_test_dir = os.path.join(yolov5_labels_dir, "test/")
if not os.path.isdir(yolov5_labels_test_dir):
    os.mkdir(yolov5_labels_test_dir)
clear_hidden_files(yolov5_labels_test_dir)
# 在yolov5-5.0下创建 yolov5_traintxt yolov5_val yolov5_test文件
train_file = open(os.path.join(wd, "yolov5_train.txt"), 'w')
val_file = open(os.path.join(wd, "yolov5_val.txt"), 'w')
test_file = open(os.path.join(wd, "yolov5_test.txt"), 'w')
train_file.close()
val_file.close()
test_file.close()

train_file = open(os.path.join(wd, "yolov5_train.txt"), 'a')
val_file = open(os.path.join(wd, "yolov5_val.txt"), 'a')
test_file = open(os.path.join(wd, "yolov5_test.txt"), 'a')

# image_dir=‘VOCdevkit/VOC2007/JPEGImages’
list_imgs = os.listdir(image_dir)  # list image files
probo = random.randint(1, 100)
print(probo)
print("Probobility: %d" % probo)
for i in range(0, len(list_imgs)):
    # path = ‘VOCdevkit/VOC2007/JPEGImages/xxxxxxx.jpg’
    path = os.path.join(image_dir, list_imgs[i])
    if os.path.isfile(path):
        # E:\tuchengfeng\yolov5-5.0\VOCdevkit/VOC2007/JPEGImages/000001.jpg
        image_path = image_dir + list_imgs[i]
        # voc_path = 'xxxxxxx.jpg'
        voc_path = list_imgs[i]
        (nameWithoutExtention, extention) = os.path.splitext(os.path.basename(image_path))
        (voc_nameWithoutExtention, voc_extention) = os.path.splitext(os.path.basename(voc_path))
        annotation_name = nameWithoutExtention + '.xml'
        # annotation_path=E:\tuchengfeng\yolov5-5.0\VOCdevkit\VOC2007\Annotations\000001.xml
        annotation_path = os.path.join(annotation_dir, annotation_name)
        label_name = nameWithoutExtention + '.txt'
        label_path = os.path.join(yolo_labels_dir, label_name)
    # probo = random.randint(1, 100)
    print(nameWithoutExtention) # 000001
    print(voc_path) # 000001.jpg
    print(image_path)   # E:\tuchengfeng\yolov5-5.0\VOCdevkit/VOC2007/JPEGImages/000001.jpg
    print(path) # E:\tuchengfeng\yolov5-5.0\VOCdevkit/VOC2007/JPEGImages/000001.jpg
    print(label_name)   # 000001.txt
    print(label_path)   # E:\tuchengfeng\yolov5-5.0\VOCdevkit/VOC2007/YOLOLabels/000001.txt

    image_ids_train = open(os.path.join(imageset_dir, 'Main/train.txt')).read().strip().split()
    image_ids_val = open(os.path.join(imageset_dir, 'Main/val.txt')).read().strip().split()
    if nameWithoutExtention in image_ids_train:
        train_file.write(image_path + '\n')
        convert_annotation(nameWithoutExtention)  # convert label
        # yolov5_images_train_dir=E:\tuchengfeng\yolov5-5.0\VOCdevkit\labels\train
        copyfile(image_path, yolov5_images_train_dir + voc_path)  #
        copyfile(label_path, yolov5_labels_train_dir + label_name)
    elif nameWithoutExtention in image_ids_val:
        val_file.write(image_path + '\n')
        convert_annotation(nameWithoutExtention)  # convert label
        copyfile(image_path, yolov5_images_val_dir + voc_path)
        copyfile(label_path, yolov5_labels_val_dir + label_name)
    else:
        test_file.write(image_path + '\n')
        convert_annotation(nameWithoutExtention)  # convert label
        copyfile(image_path, yolov5_images_test_dir + voc_path)
        copyfile(label_path, yolov5_labels_test_dir + label_name)

train_file.close()
val_file.close()
test_file.close()
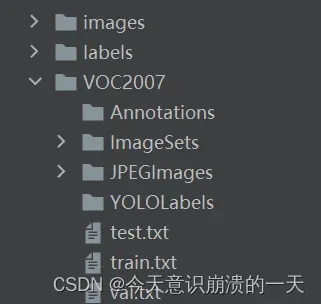
得到两个文件夹:images和labels,分别存放着图像数据和标注信息,且两个文件夹中都含有:train和val两个文件夹,训练时,修改yaml文件就可以使用images下train和val的路径,再修改makeTxt.py和LabelmeToXYB.py的路径。
3.3.8 训练后,新问题:
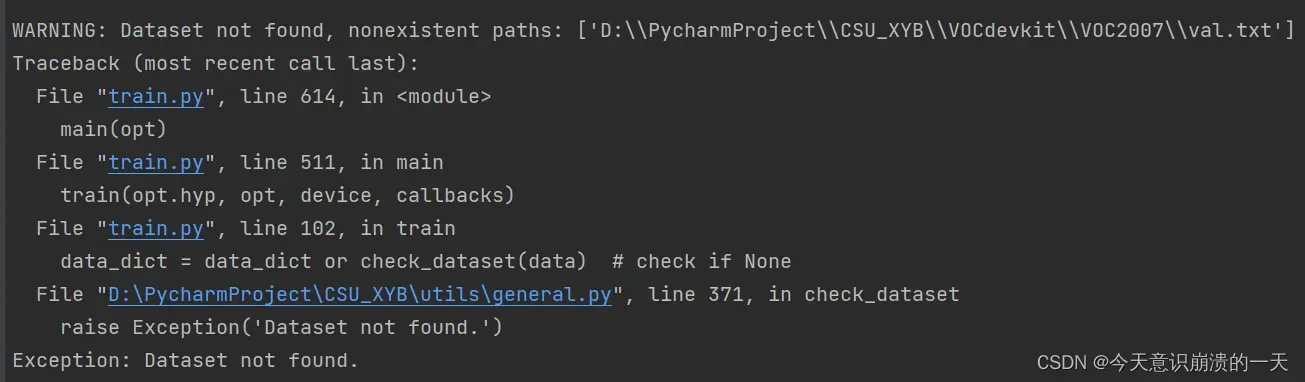
又败了,回到原点

弹出这个界面了,但还是败了,不过换了个问题:


3.3.9问题:RuntimeError: [enforce fail at …\c10\core\CPUAllocator.cpp:76] data. DefaultCPUAllocator: not enough memory: you tried to allocate 51609600 bytes.
跑一些比较大的模型的时候,Pycharm经常会报这样的错误,可以设置一下Pycharm默认的最大内存:
在Pycharm按下快捷键:Ctrl+Shift+A
然后输入:VM options
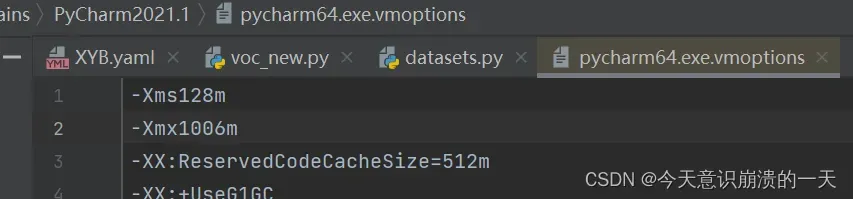
改变-Xmx (这里是Pycharm默认的最大值)
改变后重启Pycharm
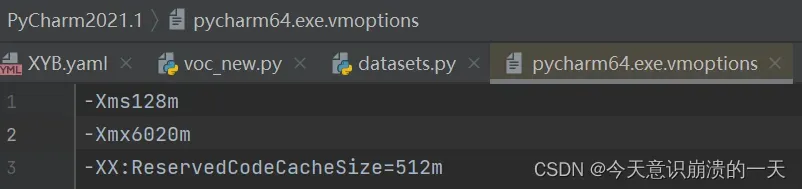
再次训练:python train.py –data data/XYB.yaml –cfg xyb_m.yaml –batch-size 64
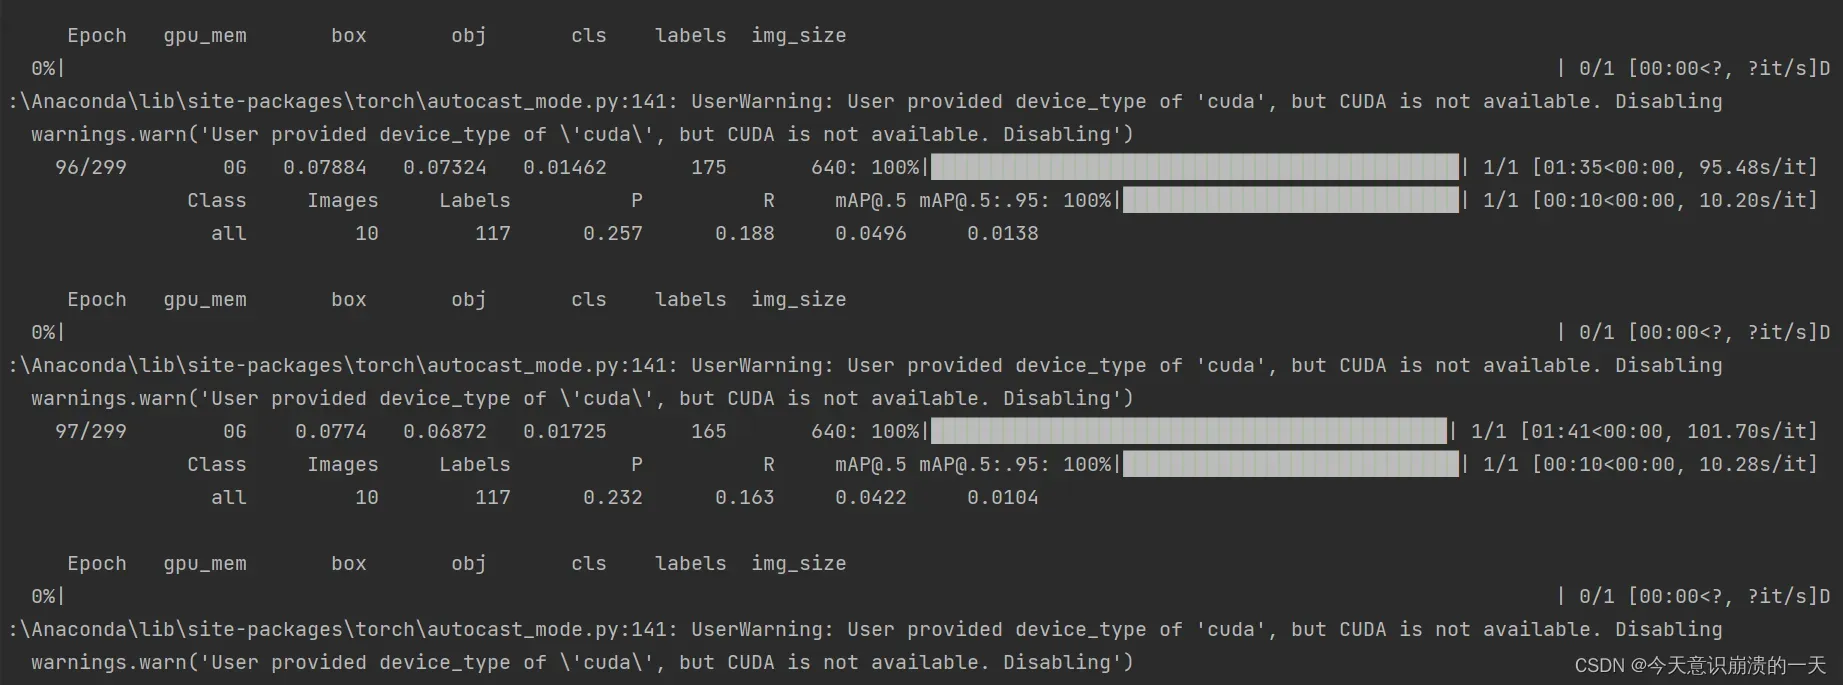
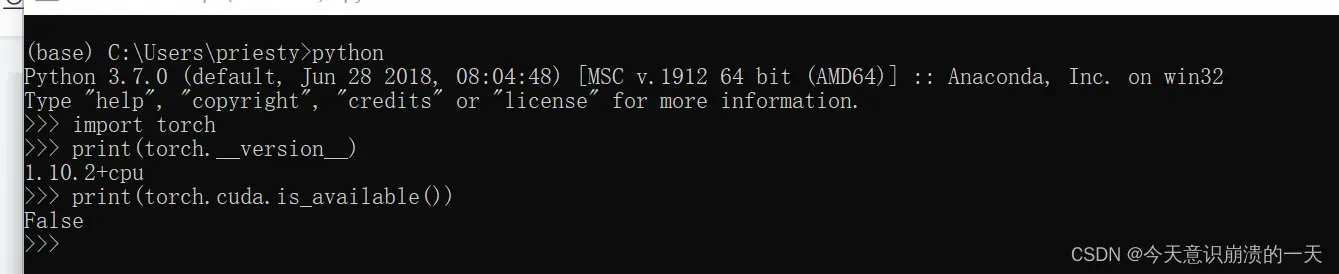
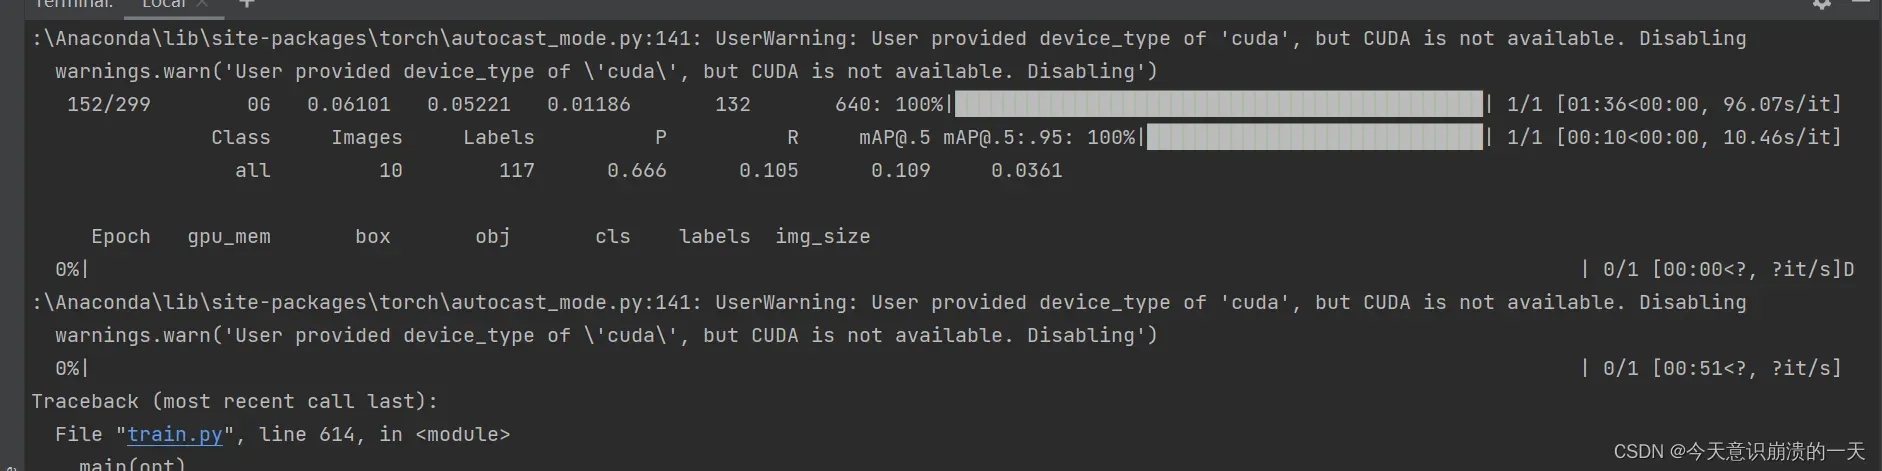
3.3.10 User provided device_type of ‘cuda’, but CUDA is not available. Disabling warnings.warn(‘User provided device_type of ‘cuda’, but CUDA is not available. Disabling’)
检查当前版本下pytorch和cuda版本是否兼容:
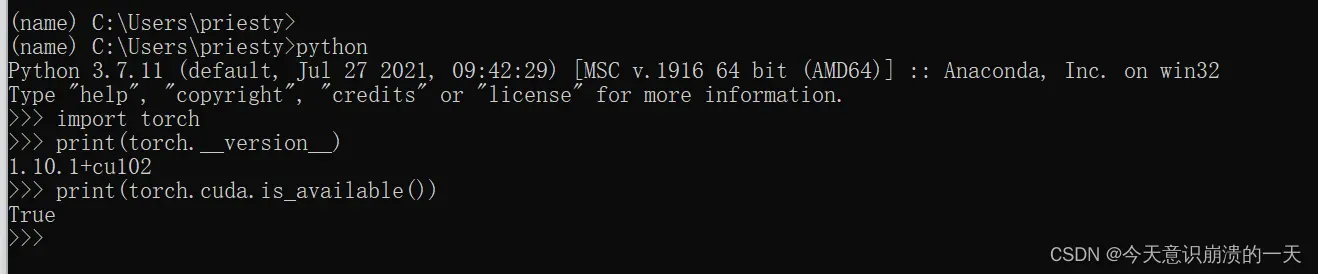
输入python,运行python
输入
import torch
print(torch.__version__)
print(torch.cuda.is_available())
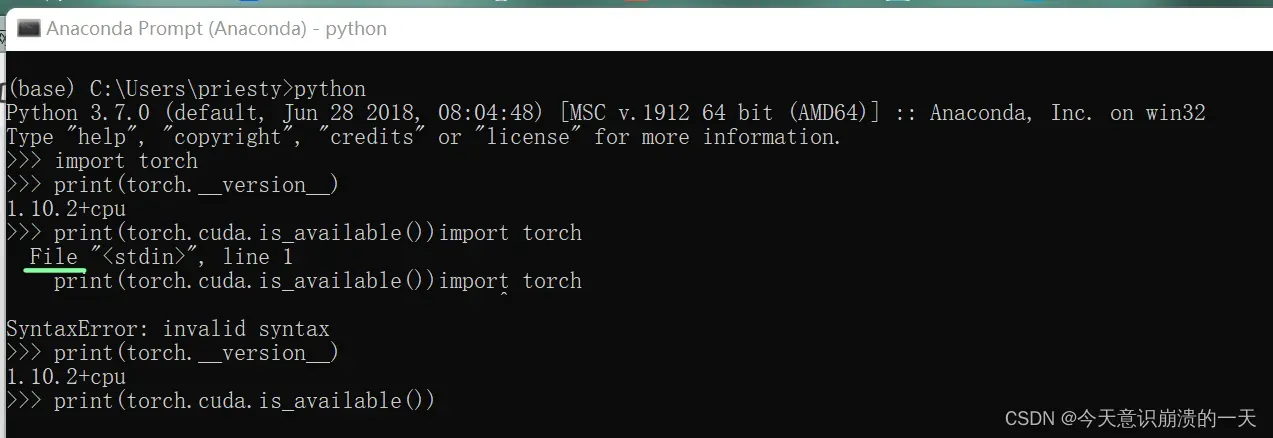
最终输出为false表示pytorch和cuda版本不兼容不兼容
原文链接:https://blog.csdn.net/weixin_50813961/article/details/122587255
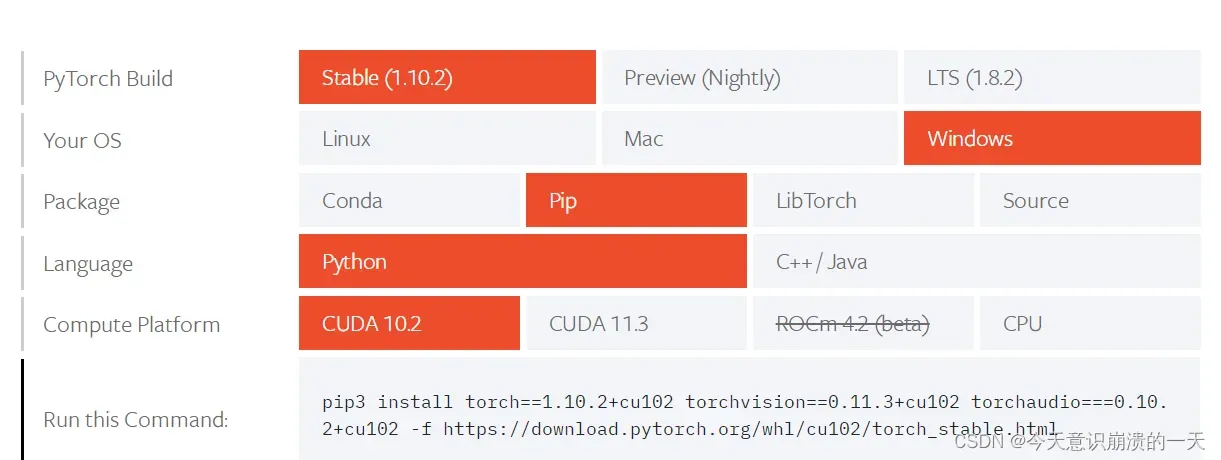
打开pytorch官网:https://pytorch.org/get-started/locally/
按照自己电脑的配置选择,我是cuda10.2,windows电脑,安装的anaconda按下图选择
打开Anaconda Prompt,激活对应的环境
查看当前环境:onda info --envs
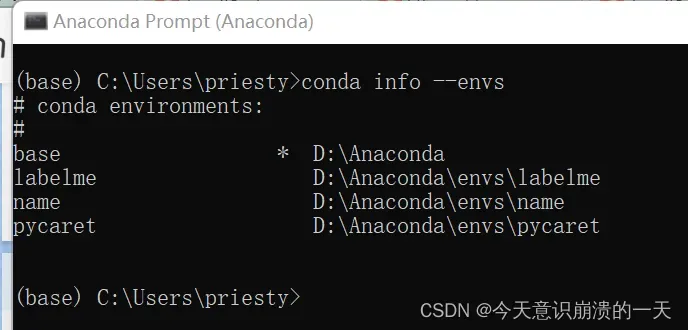
环境名:name
激活:activate name

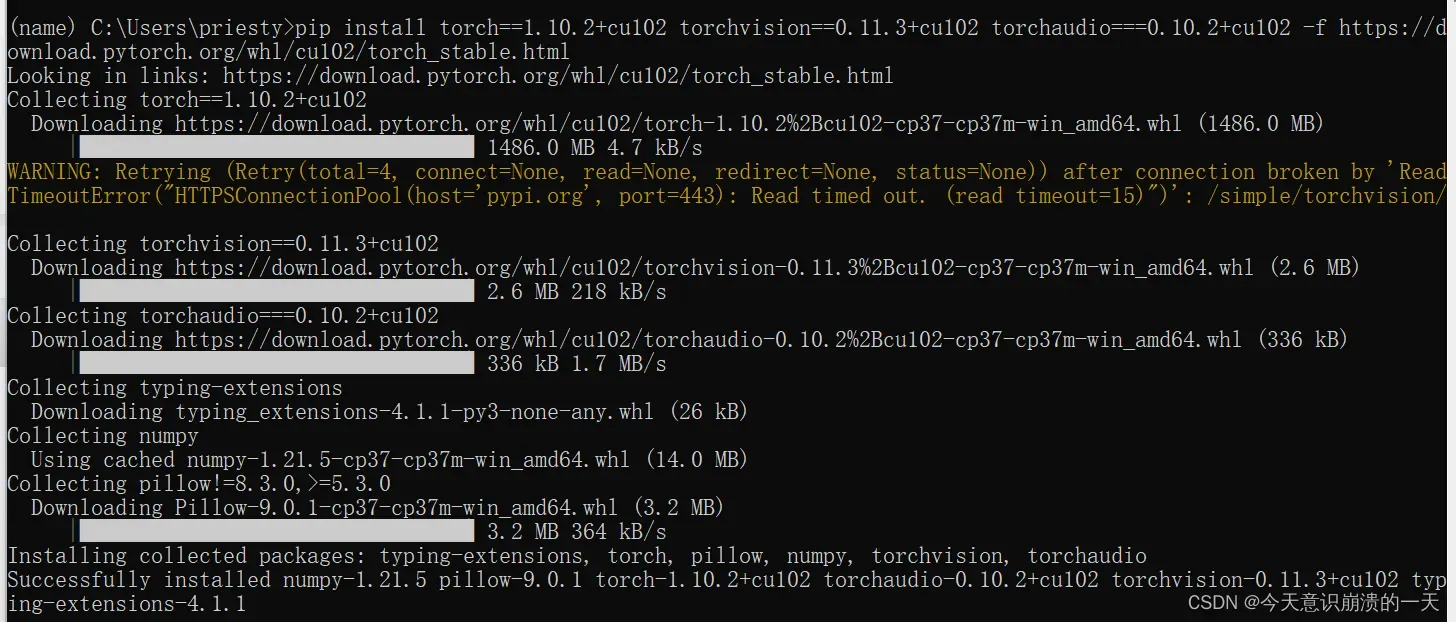
将pytorch官网给出的命令复制上,pip3改为pip(根据自己的pip版本)
pip install torch==1.10.2+cu102 torchvision==0.11.3+cu102 torchaudio===0.10.2+cu102 -f https://download.pytorch.org/whl/cu102/torch_stable.html
NVIDIA太久不更新了

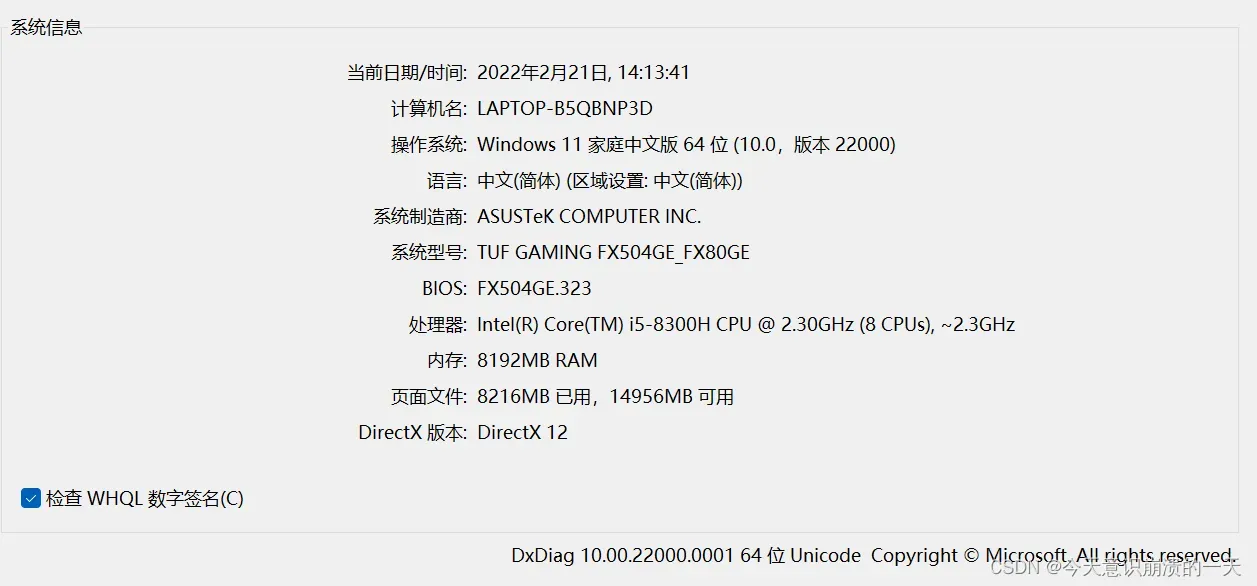
Ctrl+r,输入dxdiag,弹出:
3.3.11 更新cuda-gpu
更新步骤原文链接:https://www.cnblogs.com/ziyu-trip/p/12663978.html
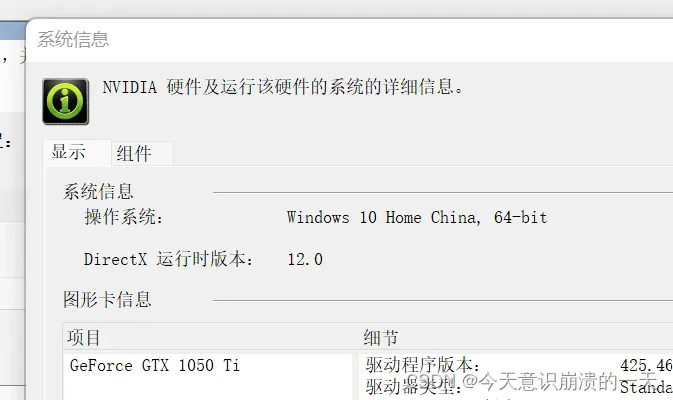
进入cuda-gpu匹配页面: http://developer.nvidia.com/cuda-gpus,点击自己电脑的gpu型号(如图GeForce),在其下方会显示GPU列表
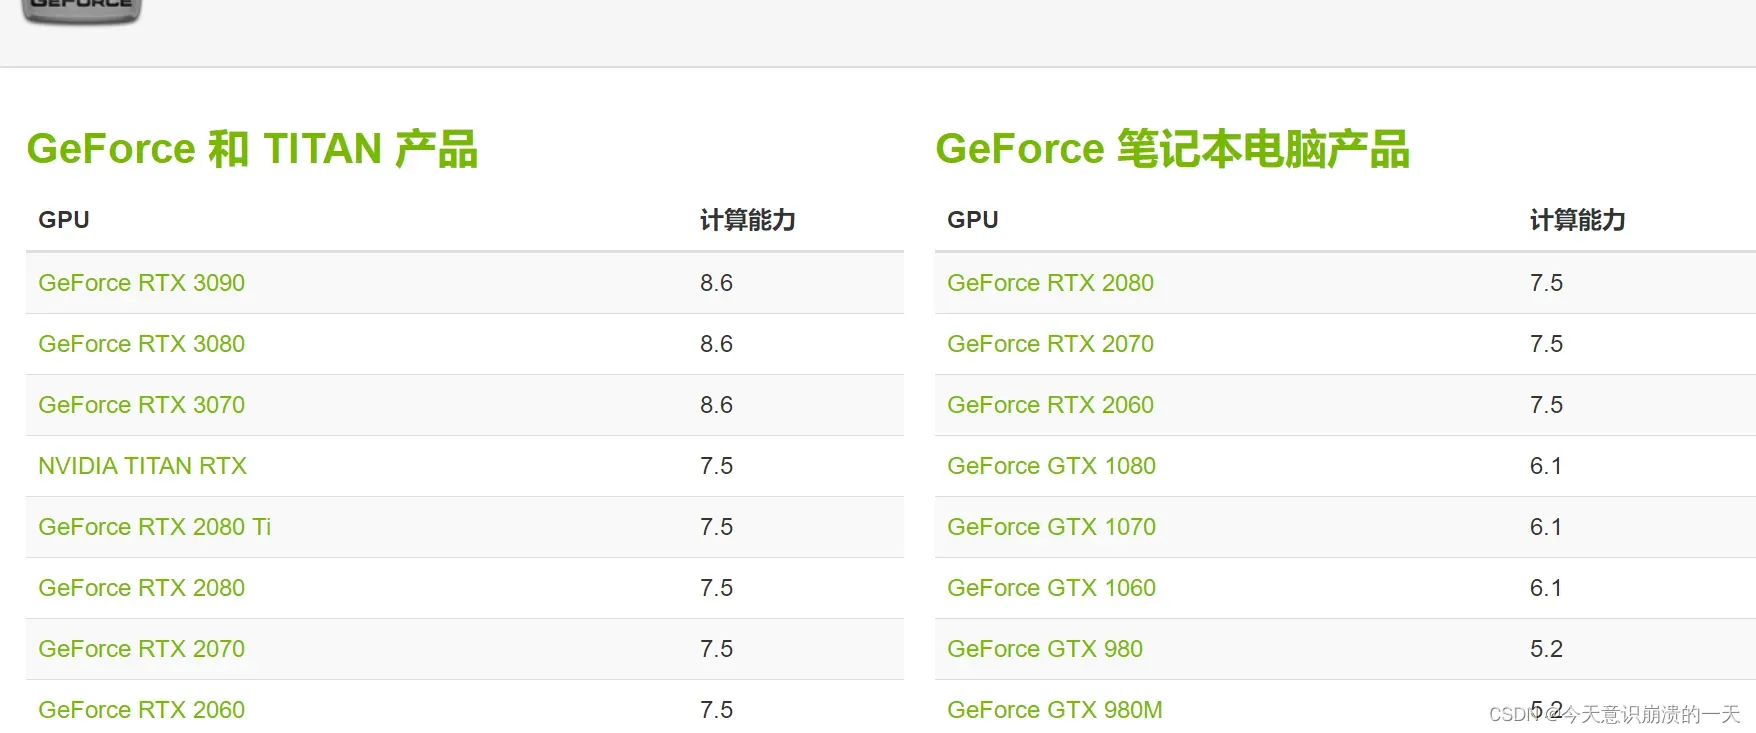
NVIDIA GeForce GTX1050ti显卡驱动支持型号:

选择了1080,点击1080,进入到该显卡的详细页面,在页面最下边的Support一栏下有一个“Drivers”链接,点击它进入到下一页面

安装了GeForce_Experience,
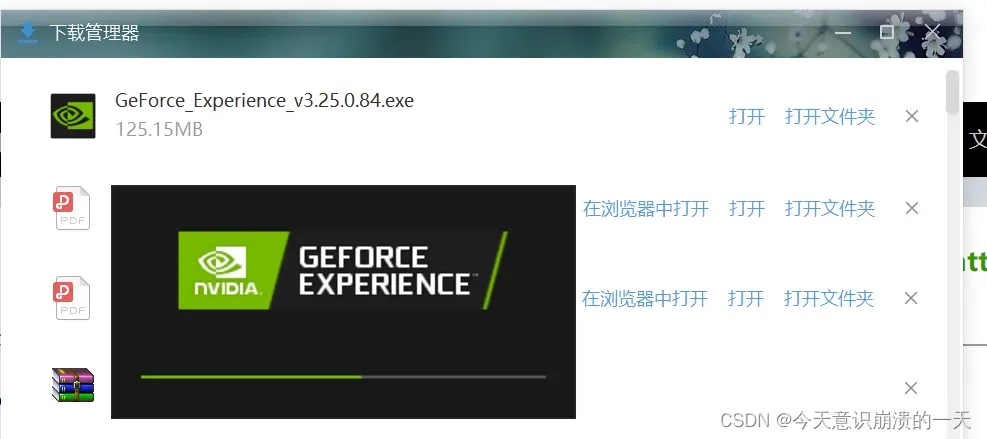
登录后自动弹出更新:

完事。
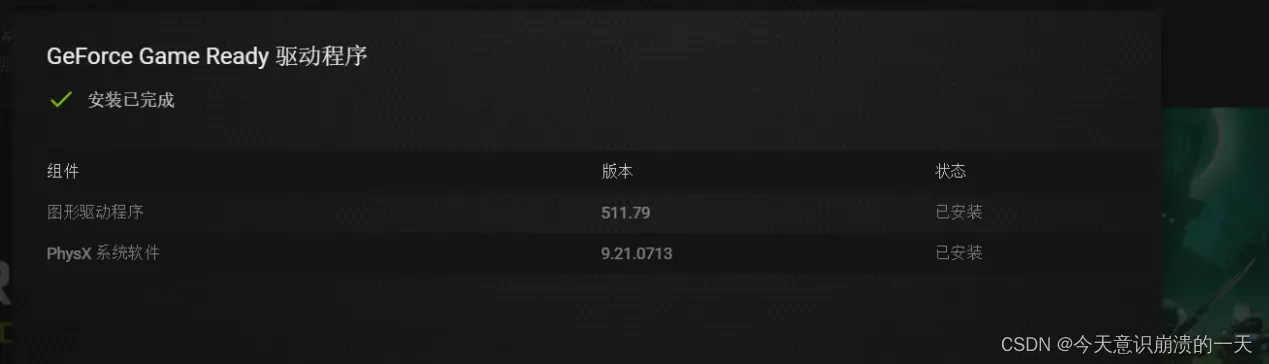
还是不兼容,不过不显示版本老旧了
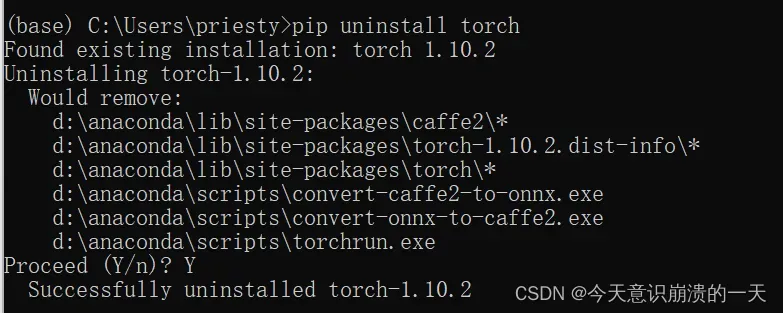
3.3.12 降pytorch版本
降版本原文链接:https://ptorch.com/news/37.html
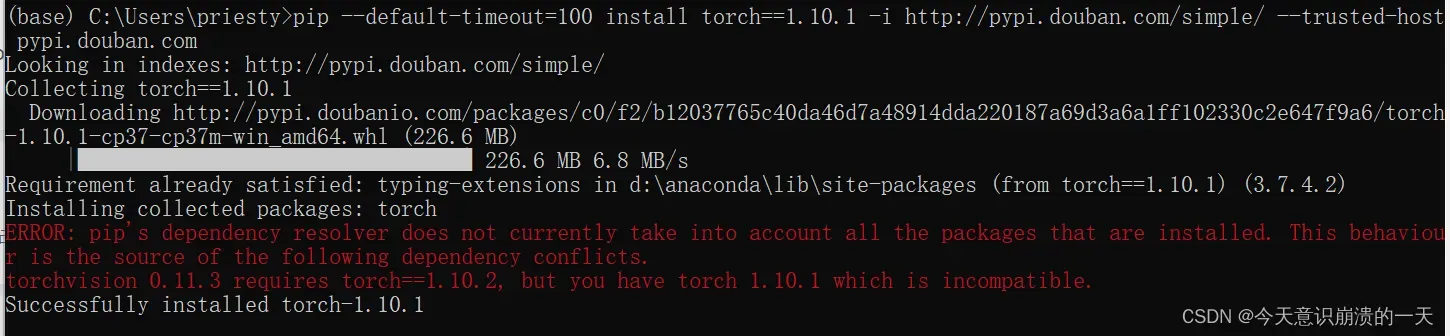
先卸载:pip uninstall torch
pip --default-timeout=100 install torch==1.10.1 -i http://pypi.douban.com/simple/ --trusted-host pypi.douban.com
3.3.11 torch和torchvision的版本对应关系:
原文链接:https://blog.csdn.net/weixin_43596913/article/details/122841832
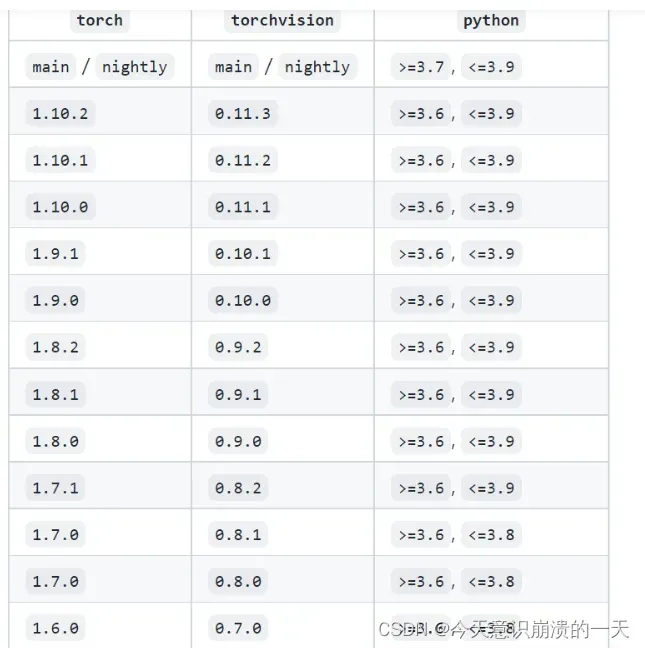
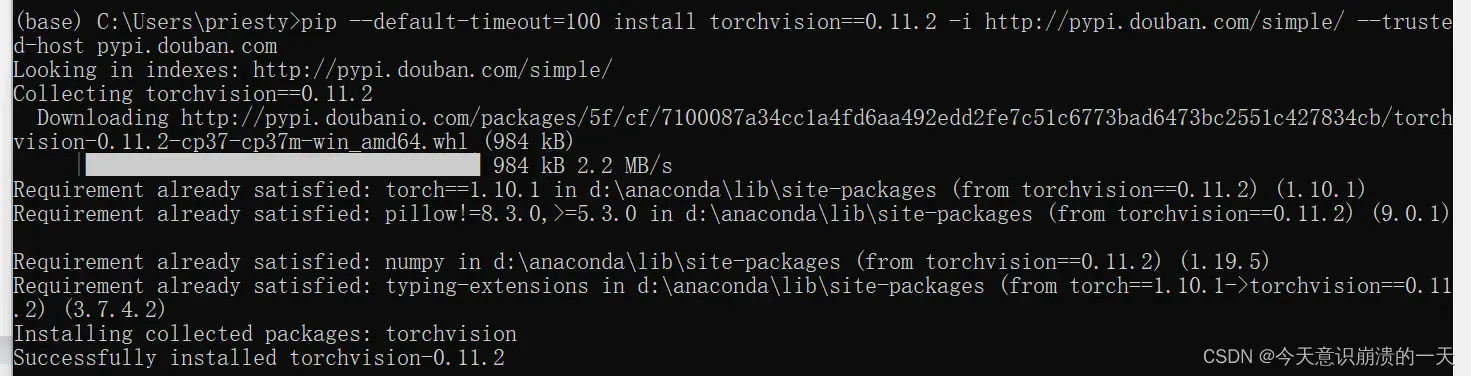
卸载:pip uninstall torchvision
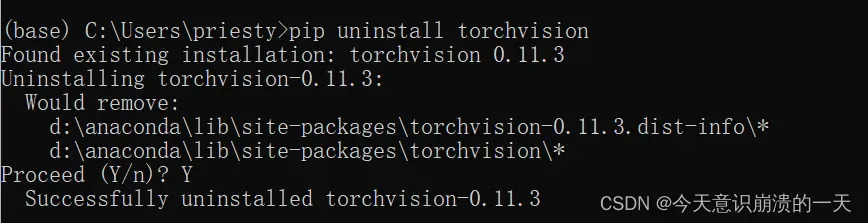
pip --default-timeout=100 install torchvision==0.11.2 -i http://pypi.douban.com/simple/ --trusted-host pypi.douban.com
activate name进入环境后:
pip install torch==1.10.1+cu102 torchvision==0.11.2+cu102 torchaudio===0.10.1+cu102 -f https://download.pytorch.org/whl/cu102/torch_stable.html
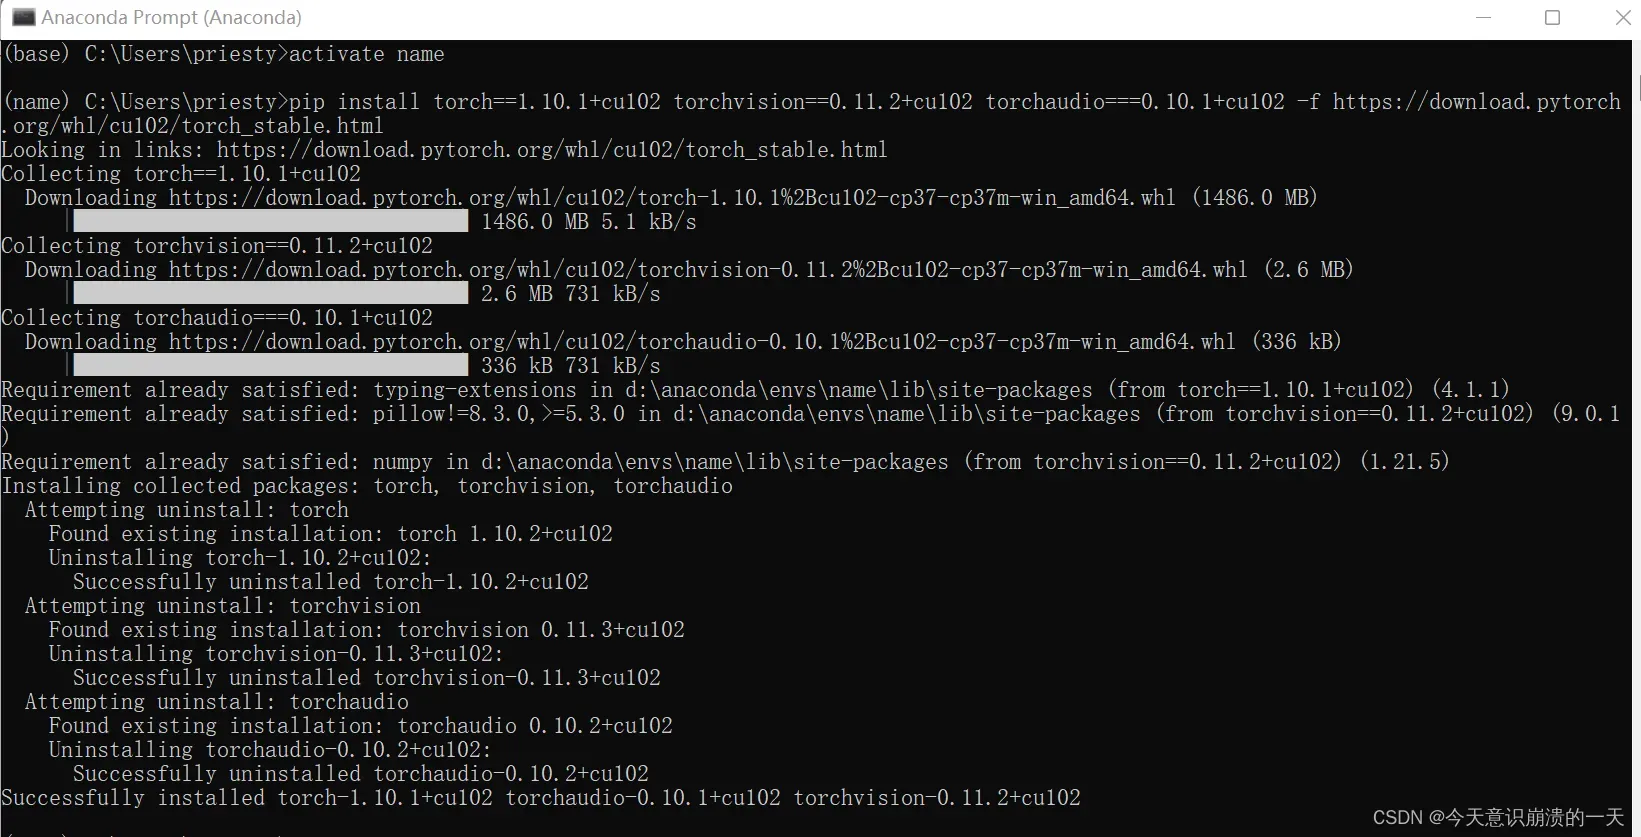
安装成功显示True,torch为cuda加速版本
3.3.12 batchsize
(1)batchsize:批大小。在深度学习中,一般采用SGD训练,即每次训练在训练集中取batchsize个样本训练;
(2)iteration:1个iteration等于使用batchsize个样本训练一次;
(3)epoch:1个epoch等于使用训练集中的全部样本训练一次;
举个例子,训练集有1000个样本,batchsize=10,那么:
训练完整个样本集需要:
100次iteration,1次epoch。
原文链接:https://blog.csdn.net/zqx951102/article/details/88918948
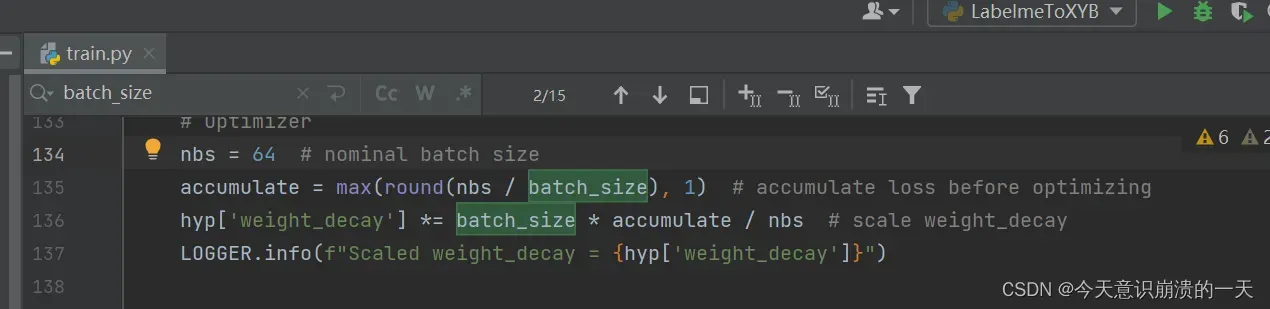
batch_size的大小,一般设置为1,2,4,8,16
调整为32试试:
python train.py --data data/XYB.yaml --cfg xyb_m.yaml --batch-size 32
训练到一半,又败了
用自己的电脑跑还是太勉强了,还是需要服务器。
顺带一提,如果更新了cuda还是显示没用到,那应该是用的环境不对,我在两个月后才发现我训练用的环境是base环境,但我装的cuda是在name环境,所以一直没用到,后面是把cuda装到了base环境里才终于成功了。
文章出处登录后可见!