定义
可以理解成在图像上做的聚类问题。超像素的做法是将感知上相似的像素组在一起,称为一个超像素,以此来提供图像数据的紧凑表示。然后在后续的处理,处理单位就变成了超像素,而不是我们常用的像素。
一般超像素的结果可以为下游任务提供帮助,比如说语义分割、对象检测等。
SLIC
Simple Linear Iterative Clustering,简单的线性迭代聚类
论文:2011-PAMI-SLIC Superpixels Compared to State-of-the-art Superpixel Methods
前提:这个算法实在CIELAB这个颜色空间上做的,即每个pixel的值用来表示,其中
表示亮度(取值范围0-100,数值越大越亮);
表示红色到绿色之间的色域(负值表示绿色,正值表示红色);
表示黄色和蓝色之间的色域(负值表示蓝色,正值表示黄色)。
符号表示:
假设一张图片有N个像素,需要我们人为去设定的超参数有且仅有一个,就是超像素的个数k。
那么,每个超像素的平均面积是,每个超像素中心的平均间隔是
算法实现:
关于初始化:
- 初始化各个超像素中心的位置。比如一张图片的大小为
,将其均分成
个grid,然后设置每个grid的中心为一个超像素的中心。
- 微调这些超像素的中心,在以它们为中心的
邻域里进行计算,将超像素中心更换成其中梯度值最小的。这样做的目的是为了防止超像素中心落在边缘/噪点上。
- 标签
表示像素i属于哪一个superpixel,距离
表示像素i与其所属的superpixel的中心的距离。初始化每一个像素i的
,
进行下面迭代直到收敛,收敛的前提是误差满足一定要求:
对于每个聚类中心
:
对于以其为中心的
邻域内的每个像素i:
计算
如果
,那么更新
,
。
[这表明将i分到以
重新计算聚类中心
关于点与点之间距离D的定义:
由两个距离加权而得,分别是颜色域
之间的距离和空间域
之间的距离。
颜色域距离:
空间域距离:
距离D的计算:
,其中
指的是maximum spatial distance,超像素中包含的平均像素个数,即为S;
指的是maximum color distance,在实际应用中通常用一个人为设定的常数m来表示即可。
那么,上式可以被重写成
我们实际生活中用的距离公式与上式等价
m越大,距离D受空间域距离影响越大,产生的超像素将更紧凑;m越小,距离D受颜色域影响越大,产生的超像素将更加紧密地附着在图像边界(edge)上。
代码实现
 https://github.com/aleenaniklaus/SLIC_superpixels
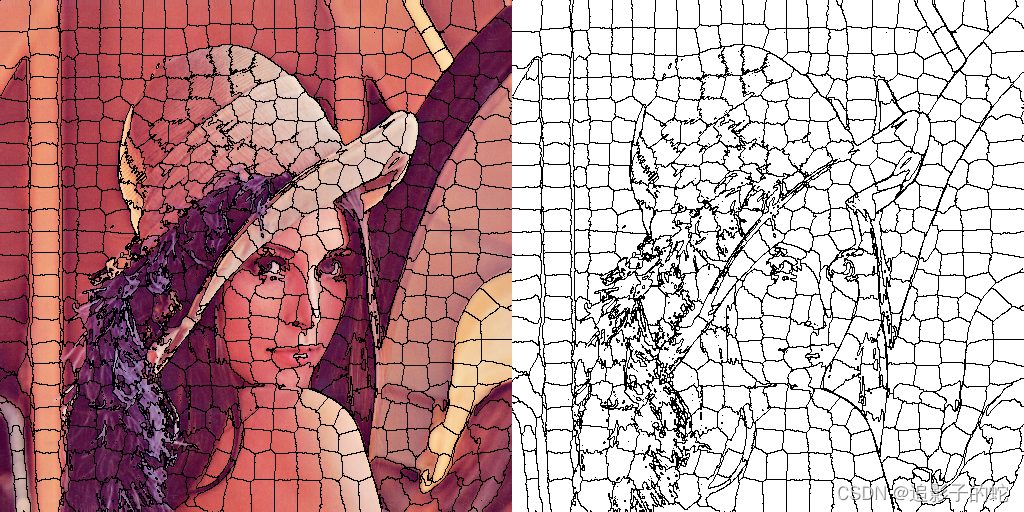
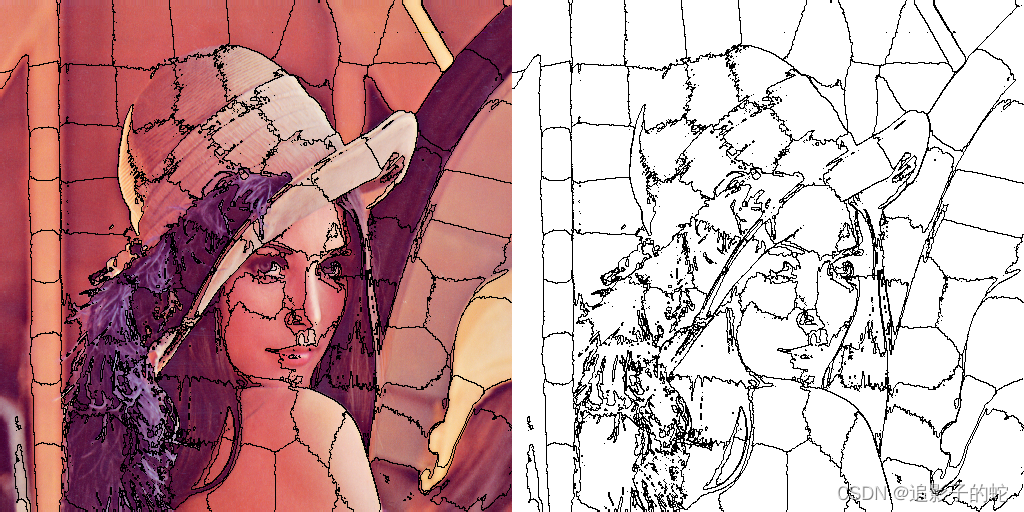
稍微修改了一下代码细节,让大家能更加直观地看到超像素分割和原图信息的对应关系。另外,我们还能从超像素图导出一张超像素掩码(superpixel mask),也就是将超像素的边缘设置成0,超像素内部设置为1的mask。这个掩码能在一定程度上反映图片的结构信息。
import numpy
import cv2
import tqdm
import argparse

# 将原作者的sys转换成params
parser = argparse.ArgumentParser(description='SLIC-python')
parser.add_argument('--img_path', default='lena.png', type=str, help="单张图片的路径")
parser.add_argument('--k', default=500, type=int, help="超像素个数")
parser.add_argument('--SLIC_ITERATIONS', default=4, type=int, help="SLIC计算过程中的迭代次数")
parser.add_argument('--m', default=40, type=int, help="权衡颜色和位置对距离影响的权重参数")
args = parser.parse_args()


def generate_pixels():
    indnp = numpy.mgrid[0:SLIC_height, 0:SLIC_width].swapaxes(0, 2).swapaxes(0, 1)
    # 迭代SLIC_ITERATIONS次
    for i in tqdm.tqdm(range(SLIC_ITERATIONS)):
        SLIC_distances = 1 * numpy.ones(img.shape[:2])
        # 按次序取出聚类中心SLIC_centers[j]
        for j in range(SLIC_centers.shape[0]):
            # 框出该聚类中心的搜索范围
            x_low, x_high = int(SLIC_centers[j][3] - step), int(SLIC_centers[j][3] + step)
            y_low, y_high = int(SLIC_centers[j][4] - step), int(SLIC_centers[j][4] + step)

            # 防止搜索范围超出图像边界[保证搜索范围有效性]
            if x_low <= 0:
                x_low = 0
            if x_high > SLIC_width:
                x_high = SLIC_width
            if y_low <= 0:
                y_low = 0
            if y_high > SLIC_height:
                y_high = SLIC_height

            # cropimg是该聚类中心对应的2S\times2S内的有效邻域
            cropimg = SLIC_labimg[y_low: y_high, x_low: x_high]
            # 挨个像素算出颜色差
            color_diff = cropimg - SLIC_labimg[int(SLIC_centers[j][4]), int(SLIC_centers[j][3])]
            # 算出颜色距离
            color_distance = numpy.sqrt(numpy.sum(numpy.square(color_diff), axis=2))

            yy, xx = numpy.ogrid[y_low: y_high, x_low: x_high]
            # 算出空间距离
            pixdist = ((yy - SLIC_centers[j][4]) ** 2 + (xx - SLIC_centers[j][3]) ** 2) ** 0.5

            # 运用论文中的(2)式计算邻域内pixel与该邻域中心的聚类中心的距离(加权求和)
            # SLIC_m is "m" in the paper, (m/S)*dxy
            dist = ((color_distance / SLIC_m) ** 2 + (pixdist / step) ** 2) ** 0.5

            # 更新距离,更新了距离的pixel也更新聚类中心为SLIC_centers[j]
            distance_crop = SLIC_distances[y_low: y_high, x_low: x_high]
            idx = dist < distance_crop
            distance_crop[idx] = dist[idx]
            SLIC_distances[y_low: y_high, x_low: x_high] = distance_crop
            SLIC_clusters[y_low: y_high, x_low: x_high][idx] = j

        for k in range(len(SLIC_centers)):
            # 对于第k个聚类,找到聚类中心为SLIC_centers[k]的pixel
            idx = (SLIC_clusters == k)
            # 分别取出他们的颜色和位置索引
            colornp = SLIC_labimg[idx]
            distnp = indnp[idx]

            # 重新计算聚类中心的颜色和位置坐标(这个聚类中心和k-means中的一样,不一定是已有的点)
            SLIC_centers[k][0:3] = numpy.sum(colornp, axis=0)
            sumy, sumx = numpy.sum(distnp, axis=0)
            SLIC_centers[k][3:] = sumx, sumy
            ### 注:numpy.sum(idx)是该聚类pixel数目
            SLIC_centers[k] /= numpy.sum(idx)


# At the end of the process, some stray labels may remain meaning some pixels
# may end up having the same label as a larger pixel but not be connected to it
# In the SLIC paper, it notes that these cases are rare, however this
# implementation seems to have a lot of strays depending on the inputs given

def create_connectivity():
    """
        按照论文的说法,总有那么些点和它对应的超像素是分离的(比较零散的碎点)
        运用connected components algorithm来将这些零散的点分配给最近的聚类中心
    """
    label = 0
    adj_label = 0
    lims = int(SLIC_width * SLIC_height / SLIC_centers.shape[0])

    new_clusters = -1 * numpy.ones(img.shape[:2]).astype(numpy.int64)
    elements = []
    for i in range(SLIC_width):
        for j in range(SLIC_height):
            if new_clusters[j, i] == -1:
                elements = []
                elements.append((j, i))
                for dx, dy in [(-1, 0), (0, -1), (1, 0), (0, 1)]:
                    x = elements[0][1] + dx
                    y = elements[0][0] + dy
                    if (x >= 0 and x < SLIC_width and
                            y >= 0 and y < SLIC_height and
                            new_clusters[y, x] >= 0):
                        adj_label = new_clusters[y, x]
                    # end
                # end
            # end

            count = 1
            counter = 0
            while counter < count:
                for dx, dy in [(-1, 0), (0, -1), (1, 0), (0, 1)]:
                    x = elements[counter][1] + dx
                    y = elements[counter][0] + dy

                    if (x >= 0 and x < SLIC_width and y >= 0 and y < SLIC_height):
                        if new_clusters[y, x] == -1 and SLIC_clusters[j, i] == SLIC_clusters[y, x]:
                            elements.append((y, x))
                            new_clusters[y, x] = label
                            count += 1
                        # end
                    # end
                # end

                counter += 1
            # end
            if (count <= lims >> 2):
                for counter in range(count):
                    new_clusters[elements[counter]] = adj_label
                # end

                label -= 1
            # end

            label += 1
        # end
    # end

    SLIC_new_clusters = new_clusters


# end

def display_contours(color):
    is_taken = numpy.zeros(img.shape[:2], numpy.bool)  # 标志哪些点是聚类与聚类之间的edge
    contours = []

    for i in range(SLIC_width):
        for j in range(SLIC_height):
            nr_p = 0
            for dx, dy in [(-1, 0), (-1, -1), (0, -1), (1, -1), (1, 0), (1, 1), (0, 1), (-1, 1)]:
                x = i + dx
                y = j + dy
                if x >= 0 and x < SLIC_width and y >= 0 and y < SLIC_height:
                    if is_taken[y, x] == False and SLIC_clusters[j, i] != SLIC_clusters[y, x]:
                        nr_p += 1
                    # end
                # end
            # end

            if nr_p >= 2:
                is_taken[j, i] = True
                contours.append([j, i])

    # 将这些edge-pixel全用黑色来表示
    for i in range(len(contours)):
        img[contours[i][0], contours[i][1]] = color
        mask[contours[i][0], contours[i][1]] = color
    # end


# end

def find_local_minimum(center):
    """
        微调
        在3\times3领域内找梯度最小的点作为初始聚类中心
    """
    min_grad = 1
    loc_min = center
    for i in range(center[0] - 1, center[0] + 2):
        for j in range(center[1] - 1, center[1] + 2):
            c1 = SLIC_labimg[j + 1, i]
            c2 = SLIC_labimg[j, i + 1]
            c3 = SLIC_labimg[j, i]
            if ((c1[0] - c3[0]) ** 2) ** 0.5 + ((c2[0] - c3[0]) ** 2) ** 0.5 < min_grad:
                min_grad = abs(c1[0] - c3[0]) + abs(c2[0] - c3[0])
                loc_min = [i, j]
    return loc_min


def calculate_centers():
    """
        按照grid_cell初始化聚类中心
    """
    centers = []
    for i in range(step, SLIC_width - int(step / 2), step):
        for j in range(step, SLIC_height - int(step / 2), step):
            nc = find_local_minimum(center=(i, j))  # 微调
            color = SLIC_labimg[nc[1], nc[0]]
            center = [color[0], color[1], color[2], nc[0], nc[1]]  # LAB+XY
            centers.append(center)
    return centers  # 储存聚类中心的信息


# 样例命令是slic.py Lenna.png 1000 40
# sys.argv[1]是放图片路径
# sys.argv[2]这个参数指示划分的superpixel的个数
# sys.argv[3]这个参数是论文中的m与论文中的m对应,是计算点与点间的距离时用于衡量颜色距离和空间距离所占权重的重要参数

# global variables
img = cv2.imread(args.img_path)
mask = 255 * numpy.ones(img.shape).astype('uint8')
step = int((img.shape[0] * img.shape[1] / args.k) ** 0.5)  # 每个superpixel中心之间的平均距离
SLIC_m = args.m
SLIC_ITERATIONS = args.SLIC_ITERATIONS  # 迭代次数
SLIC_height, SLIC_width = img.shape[:2]
SLIC_labimg = cv2.cvtColor(img, cv2.COLOR_BGR2LAB).astype(numpy.float64)  # BGR转LAB

# 初始化距离和每个点所属聚类中心
SLIC_distances = 1 * numpy.ones(img.shape[:2])
SLIC_clusters = -1 * SLIC_distances  ### 我们应该是依靠这个搞出mask ###

# 聚类中心初始化
SLIC_center_counts = numpy.zeros(len(calculate_centers()))
SLIC_centers = numpy.array(calculate_centers())

# main
generate_pixels()  # 迭代SLIC_ITERATIONS次,聚好各组点,算出他们的聚类中心位置和类颜色
create_connectivity()  # 后处理,对一些比较零散的点重新分配给邻近的聚类
calculate_centers()
display_contours([0.0, 0.0, 0.0])
img2 = numpy.hstack((img, mask))
cv2.imwrite(args.img_path.replace(".png","_{}_SLIC.png".format(args.k)), img2)
结果展示
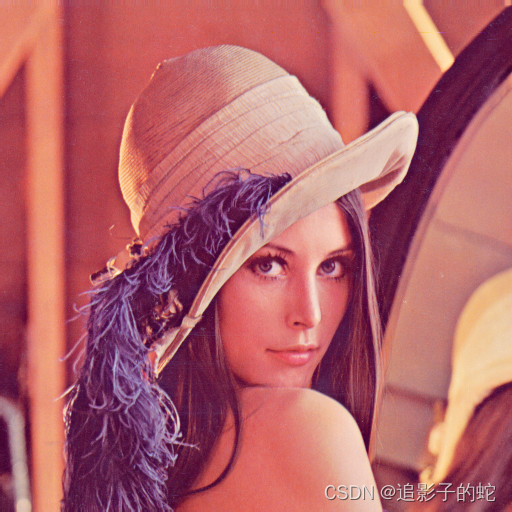
我们用非常经典的lena图片来做展示:
设置超像素为500:
设置超像素为100:
深度学习学超像素的方法我后续再补充上来
文章出处登录后可见!