AMD显卡 Ubuntu 部署Stable DIffusion WebUI基于Pytorch2.0.0 Rocm5.4.2
- 系统环境
- AMD显卡驱动
- 镜像源 更新
- Clash安装
- 显卡ROCM环境
- 安装ROCM
- 检验安装ROCM
- 安装Miopen
- Stable-Diffusion-WebUI
- 下载Stable-Diffusion-WebUI
- 启动stable-diffusion-webui
- 其他
- 显卡监控
- 查看pytorch版本:
- 查看cuda是否可用
- 启动命令参数
系统环境
Ubuntu 20.04.6 LTS
Python系统自带3.8版本(虽然官方要求3.10.6,但是我3.8运行没发现问题)
显卡RX6500XT 4G Navi24核心
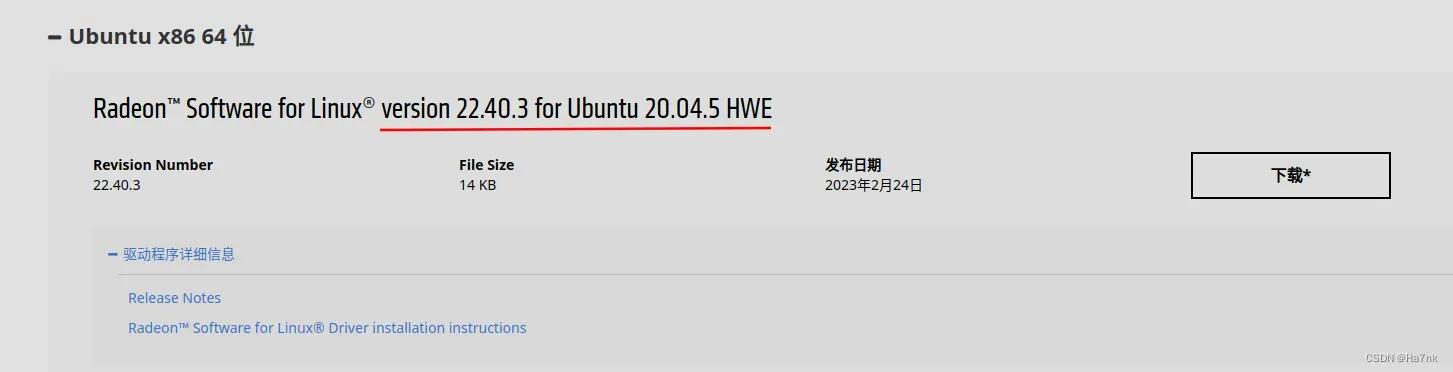
AMD显卡驱动
官网下载安装
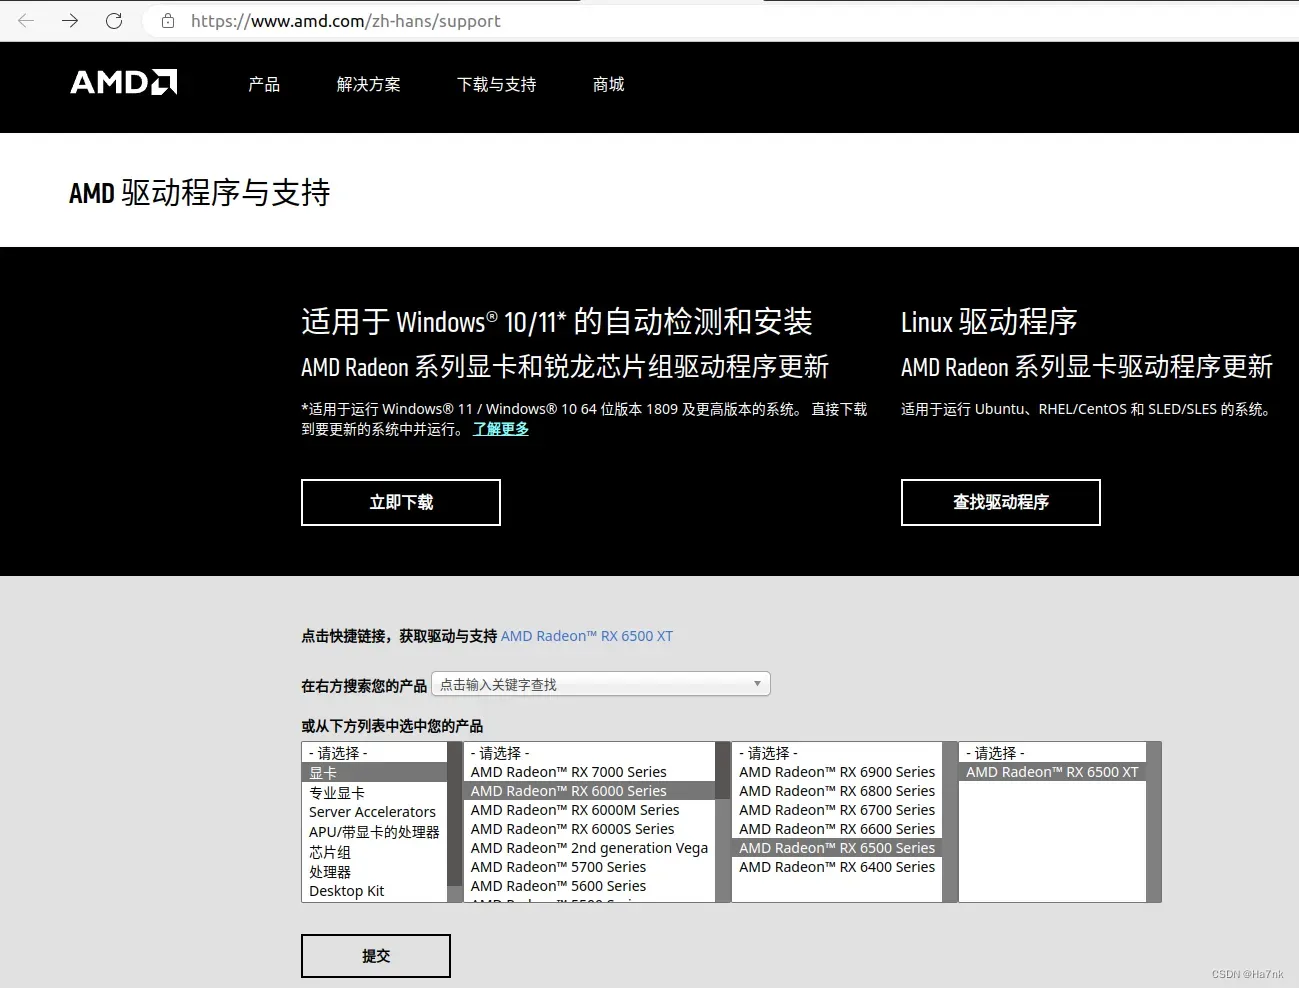
 在下载好的驱动文件目录,执行安装命令
sudo apt install ./amdgpu-install_5.4.50403-1_all.deb
镜像源 更新
先将源列表文件sources.list备份
sudo cp /etc/apt/sources.list /etc/apt/sources.list.bak
打开sources.list文件
sudo gedit /etc/apt/sources.list
替换为国内镜像源,保存 这里我用阿里云的镜像源 https://developer.aliyun.com/mirror/ubuntu
#ubuntu 20.04(focal)
deb https://mirrors.aliyun.com/ubuntu/ focal main restricted universe multiverse
deb-src https://mirrors.aliyun.com/ubuntu/ focal main restricted universe multiverse
deb https://mirrors.aliyun.com/ubuntu/ focal-security main restricted universe multiverse
deb-src https://mirrors.aliyun.com/ubuntu/ focal-security main restricted universe multiverse
deb https://mirrors.aliyun.com/ubuntu/ focal-updates main restricted universe multiverse
deb-src https://mirrors.aliyun.com/ubuntu/ focal-updates main restricted universe multiverse
deb https://mirrors.aliyun.com/ubuntu/ focal-backports main restricted universe multiverse
deb-src https://mirrors.aliyun.com/ubuntu/ focal-backports main restricted universe multiverse
deb http://mirrors.aliyun.com/ubuntu/ focal universe main restricted multiverse
deb-src http://mirrors.aliyun.com/ubuntu/ focal universe main restricted multiverse
更新
sudo apt-get update
sudo apt-get upgrade
Clash安装
防止获取某些软件包时连接超时,下载速度也快些,后面遇到下载失败情况可以尝试开启全局代理
显卡ROCM环境
安装ROCM
    sudo amdgpu-install --no-dkms
    sudo apt install rocm-dev
将用户添加进组,重启
ls -l /dev/dri/render*
sudo usermod -a -G render $LOGNAME
sudo usermod -a -G video $LOGNAME
sudo reboot
检验安装ROCM
运行下面的指令,报错说明安装失败
rocm-smi
/opt/rocm/bin/rocminfo
/opt/rocm/opencl/bin/clinfo
安装Miopen
A卡有两种安装方式,miopen-hip或miopen-opencl,我这里选择hip
sudo apt-get install miopen-hip
下载miopen内核,适用于gfx1030(RX6800)的a卡,Rocm4.5.2目前确定支持gfx1030,其他6000系型号不一定支持,我的显卡是gfx1034(RX6500XT),可以伪装成gfx1030去跑。
sudo apt-get install miopenkernels-gfx1030-36kdb
Stable-Diffusion-WebUI
下载Stable-Diffusion-WebUI
git clone https://github.com/AUTOMATIC1111/stable-diffusion-webui
到下载好的stable-diffusion-webui文件夹里找到launch.py文件,编辑文件找到这一行
 这是有CUDA核心的N卡安装Pytorch1.13.1的指令,A卡要改成安装Pytorch2.0.0 Rocm4.5.2版本的指令,打开Pytorch官网
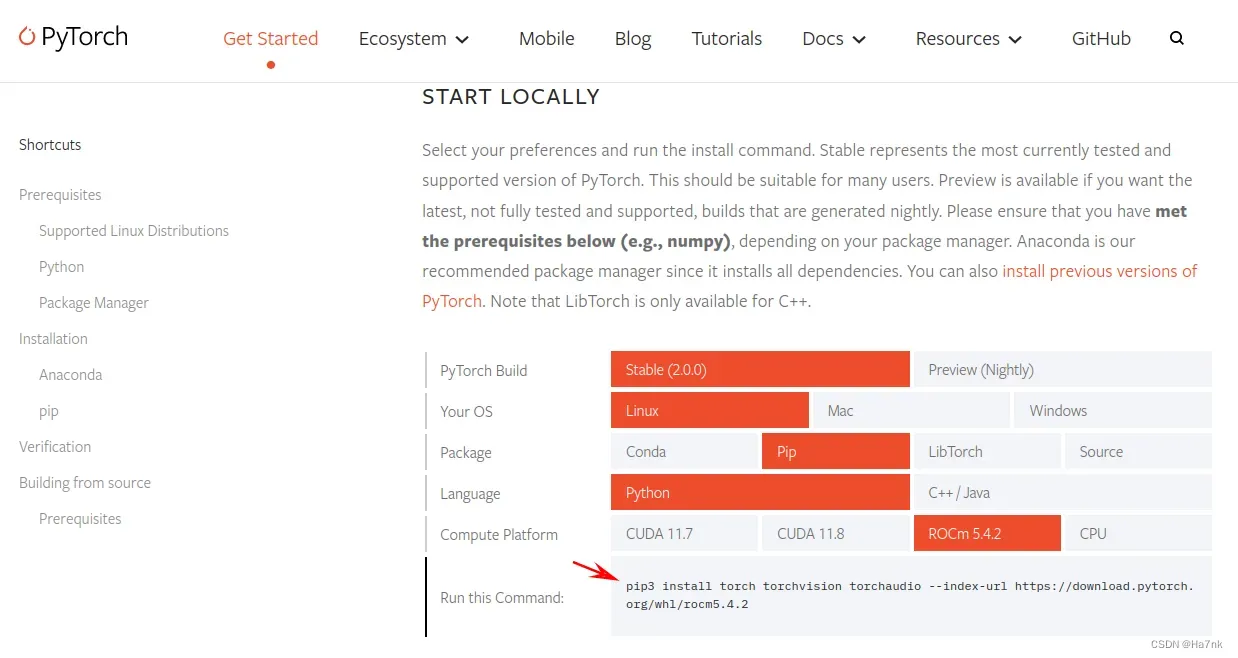 用官网这段命令替换原来的命令,保存退出文件,启动table-diffusion-webui的时候会自动下载Pytorch2.0.0

启动stable-diffusion-webui
还是在stable-diffusion-webui目录下,执行启动命令
HSA_OVERRIDE_GFX_VERSION=10.3.0 python3 launch.py
如果出现报错:
    Installing torch and torchvision
    Argument expected for the -m option
    usage: /usr/local/bin/python 【option】 ... 【-c cmd | -m mod | file | -】 【arg】 ...
    Try `python -h' for more information.
    Traceback (most recent call last):
    File "/home/ailfreedom/stable-diffusion-webui/launch.py", line 351, in <module>
    prepare_environment()
    File "/home/ailfreedom/stable-diffusion-webui/launch.py", line 253, in prepare_environment
    run(f'"{python}" -m {torch_command}', "Installing torch and torchvision", "Couldn't install torch", live=True)
    File "/home/ailfreedom/stable-diffusion-webui/launch.py", line 81, in run
    raise RuntimeError(f"""{errdesc or 'Error running command'}.
    RuntimeError: Couldn't install torch.
    Command: "/usr/local/bin/python" -m
    Error code: 2
就尝试执行手动安装:
    python3 -m pip install torch torchvision torchaudio --index-url https://download.pytorch.org/whl/rocm5.4.2
如果出现报错:
ValueError: Unknown scheme for proxy URL URL('socks://127.0.0.1:7890/')
说明代理或端口出错,执行解除所有代理命令:
unset all_proxy; unset ALL_PROXY
如果出现报错:
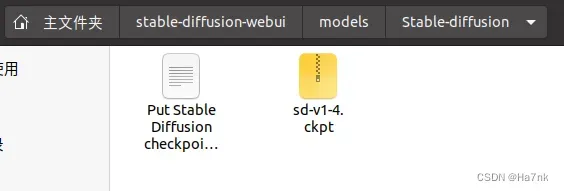
No checkpoints found. When searching for checkpoints, looked at:
- file /home/hys/stable-diffusion-webui/model.ckpt
- directory /home/hys/stable-diffusion-webui/models/Stable-diffusion
Can't run without a checkpoint. Find and place a .ckpt or .safetensors file into any of those locations. The program will exit.
说明加载不到模型文件,
在huggingface.co或civitai.com网站下载模型,比如我下载stable-diffusion-v1-4的模型文件,放到stable-diffusion-webui/models/Stable-diffusion文件夹下,就可以加载了

显示URL http://127.0.0.1:7860说明启动成功

其他
显卡监控
#显卡监控
watch -n 1 rocm-smi
(1表示每隔1秒刷新)
#如果想显示更详细的信息,安装AMD的radeontop监控软件
sudo apt install mesa-utils radeontop
sudo radeontop
查看pytorch版本:
python3
import torch
torch.__version__
#返回'2.0.0+rocm5.4.2'即AMD显卡用的ROCM版本,如果是N卡版本返回应该像'2.0.0+cu117'
查看cuda是否可用
python3
import torch
torch.cuda.is_available()
#True即可用,False不可用
启动命令参数
启动命令后面可以带参数,常用参数
(完整参数含义可以在官网查询:https://github.com/AUTOMATIC1111/stable-diffusion-webui/wiki/Command-Line-Arguments-and-Settings)
--precision full #启用全精度浮点运算
--no-half #启用半精度浮点运算
--medvram #6G/8G显存爆显存的话加上这个
--lowvram #4G显存爆显存的话加上这个
--always-batch-cond-uncond #禁用批量生成图片
--xformers #优化显存占用的插件,需额外安装
HSA_OVERRIDE_GFX_VERSION=10.3.0 python3 launch.py --lowvram --always-batch-cond-uncond
文章出处登录后可见!